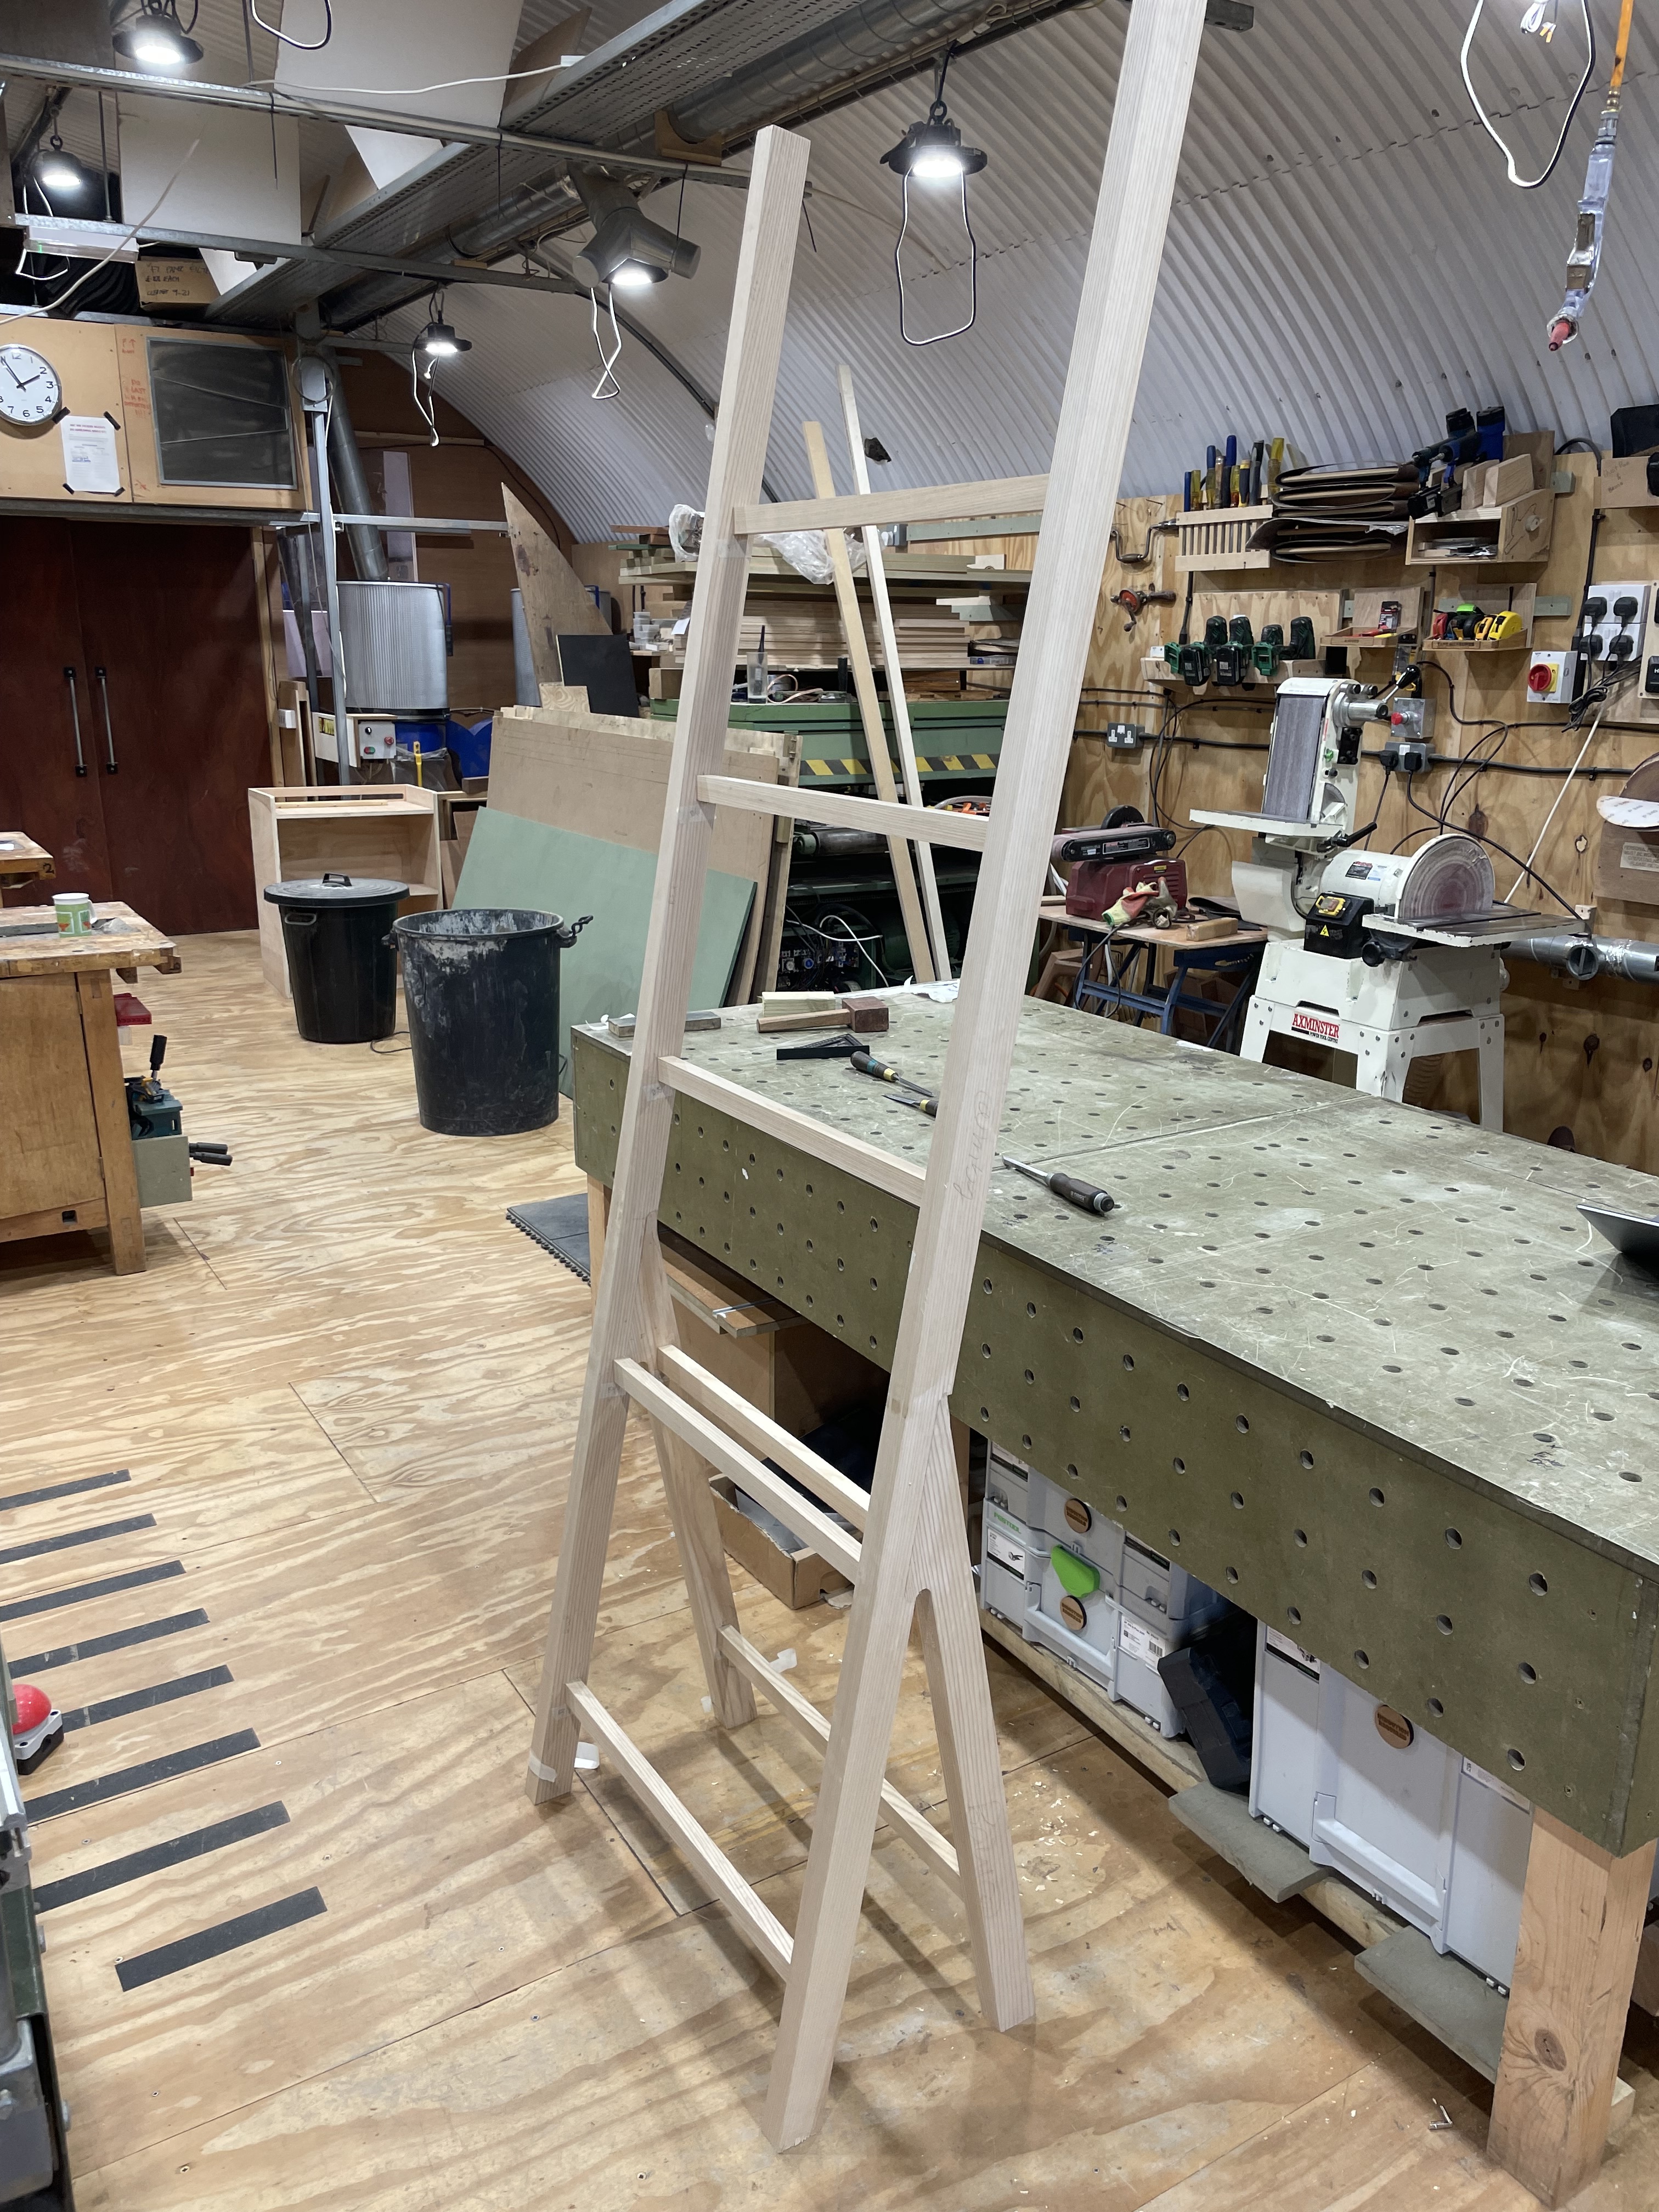
You’ve seen the hit movie Shelf. Now prepare yourself for highly anticipated hit sequel Shelf: Part 2:


Challenges to overcome for this build
- Things not being at 90° angles
- Using the big CNC for the leg rather than a template as I’d normally do
- CNC going out of order for a couple days, so using a template anyways
- Things having to be as exact as possible - no real good way to reference straightness of the glue-up
- I did my calculation wrong, and ended up not buying enough wood. I ended up having to do multiple panel glue-ups with leftover scraps I had from past projects to reconstitute boards big enough to make the shelves out of
- See the Mistakes section at the end
Design
click/tap to expand
There’s a space in our flat near a bay window that’s been yearning for more shelving. One of the ideas we’d been floating around was to make a ladder shelf, but I’d been put off as I don’t want to make holes in the wall (we rent).
On a trip to Harrods, we walked through the furniture section for inspiration. There we saw some interesting pieces from a Poltrona Frau collection:


I liked the upside-down Y shape, as well as the idea of doing a ladder shelf with a little leg to have a stable base and not require pinning to the wall. Other design goals were to make the shelf stylistically similar to side table and bookshelf, incorporating things I’ve learned since then.
I iterated on my design in Fusion. As I mentioned in my post for the coffee table, designing with parametric CAD is what I’m doing with all of my woodworking projects going forward. I have the ability to easily think through the process of making everything, visualize the piece, and rapidly iterate the fine tuning of dimensions.
I ended designing two versions - a Y like the one I saw at Harrods, and a λ shaped one. The Y is more of a room divider, λ would go well against a wall and be more visually interesting for the space. Maybe one day I’ll have a room large enough that needs dividing, but today is not that day. I wanted to do a heavy roundovers over the frame, but with the angled vertical legs, this led to a problem with the thickness of shelf horizontal support I could fit in. After playing around with it, I reduced the roundover on the inner corner, which allowed me to offset the mortices for the horizontal beams and make them about an inch wide, enough to support the shelves.


When thinking through general designs, I considered need for disassembly, but realized the final dimensions would be narrow enough to fit through a door. This would be facilitated by making the shelves removable to make it easier to move and repair. Making the shelves removable would help with wood movement on the bottom two shelves as well.
Milling
click/tap to expand
After running the shelves through the planer, I realized they were becoming trapezoids. The planer blades had been set a bit out, so spent a while re-installing the blades and aligning everything:

As there was some cupping in the boards that would become the long outside supports, I ripped into lengths to reduce wood loss during milling.

Since they were longer than 1.5 meters, I moved the benches and added shims to level them to the height of the in- and out-feed tables to extend the bed. Shimming them to the exact right height did actually make a difference!


I used a long string held taught to identify any major bowing in the boards.

Also just put them on top of each other to find any bowing. There did end up being about 1-3mm of bow over their entire length. I learned from making the last bookshelf to not worry about this. I could get them to lie flush against each other with the pressure of one finger, so made the call to stop planing, but to make sure to assemble with the concave sides facing each other; the horizontal supports would hold them parallel. It would be hard to completely eliminate the bowing without losing too much more thickness anyways.

Assembling the legs
click/tap to expand
And here’s my forray into the realm of not 90 degrees. This is cutting the ends of the long supports that will sit on the floor, making sure to use the digital protractor to get the angle exact:

Chiseling off the burrs to get a good reading on my measurement after the cut:

Validating it landed where I wanted it:

I did the short legs and mortices on the big CNC. Thank you @Federico for your help getting this secured right!! As I didn’t have much board to work with, it wasn’t wide enough to safely secure and use cut out tabs. Instead, I cut the outside profile about 1cm, then finished cutting it out on the router table with a trim bit. The rounded corners go through a lot of different grain orientations, so had a bit of kickback and tearout on one of the corners. Because my hands were nowhere near the bit, I was safe, and I ended up getting lucky as the corner that tore out was getting rounded over anyways. After cutting these out, I went over the cut surfaces with a hand plane to smooth it out. As the surface is curved towards the ends, I couldn’t get everywhere with the plane.

The next day I came in to cut the corresponding shape out of the long supports, but the CNC was undergoing maintenance. Instead, I cut a template out of a piece of scrap acrylic and did it on the router. Here’s a few photos of this in progress. Notice the tabs and notches on the template to help with alignment. Attaching the templates:

After the first pass:

Some more photos of removing the material:


Fitting the pieces together:

Marking for a domino:

Dry fitting everything, practicing my glue up, and measuring for squareness:

Actually doing the glue part:

For this part of the process, there are a few things that I would do differently. Next time I’ll use a newer bit when CNCing, had some chatter and not the smoothest finish. Would also find a way to secure the piece to be able to cut out tabs without cutting into the clamps/screws - this probably just means using a wider board. I also should’ve done a more thorough kerf test to get the CNC and template cut perfect. It looks like one was slightly out, and that left me with a small gap.

Marking and cutting mortices
click/tap to expand
Aligned both legs to each other, and used a chisel to mark the height of each mortice. By doing them together rather than seperately, I only had to make one measurement, which leaves less room for error. This is planning it out, notice the diagram I drew, and the acrylic template in the top right:

Photo of the mark (lower-middle of the photo):

Using the router to cut the mortices. Notice one of the completed ones above the right handle:

Using a morticing chisel to clear away the rest of the material, using the template as a guide:

Labeling the joints. Very important for organization!

Making the horizontal beams
click/tap to expand
Pretty straightforward. Milled the 7 beams to identical size (two ended up being 1mm thinner, those went on the bottom and ended up not being an issue). Preparing the table saw to cut each beam to the exact same length. Squaring the crosscut fence:

Cutting one end square:

Setting up the stop block to cut all to identical size:

Don’t have a picture of cutting the tenons, but did it in the exact same way I did for the coffee table.
Drilling the holes for the bolts holding on the shelves. The hole placement is arbitrary, but I wanted them to be identical for each beam. I didn’t actually use a ruler to mark these out. Instead, I used stop blocks. Flip the piece around, and the hole is in the same place. To make bolt holes, I started with the larger diameter bit, drilled my holes to a set depth, then switched to a smaller diameter bit and drilled all the way through.

Dry fitting everything:
At this point, I knew I wanted the top of the shelf to lie flat against the wall, but hadn’t entirely resolved how to terminate the top of the beam. My partner recommended to chop the top of parallel to the ground, similar to my bookshelf:

Here’s the marking out of the cuts:

To cut two identical, square, shallow cuts required a tapering jig on the sliding beam of the table saw. Notice the domino in the end of the MDF piece, which acts as a stop block, and the use of clamps to hold everything in place:


Making the second cut (the top of the shelves). I have a picture of the stop block I used for the miter saw, but not of the cut itself:

The Shelves
click/tap to expand
I didn’t buy enough wood for the shelves, and screwed up the milling for the shelf boards I did get. I ended up using up all of my leftovers from prior projects, re-milling, gluing the boards together, then re-re-milling to get to the thicknesses I required. Having gone through thecutting board and desk projects were really helpful for this
Dominoing up the panels for the bottom shelf for alignment:

Final glue-up for the top shelf. This is actually 7 pieces!

Rather than measure to a specific measured length, I used one of the horizontal beams to set the stop block to trim these all to the same, proper size. I tapped the stop block a hair in after setting it - otherwise the shelves would be too tight to slide in.


Here’s the setup for rounding over the edges:

Photo of the almost finalized shelves. Notice the different end-grain profiles and the gap on the second shelf from the bottom. I glued that panel up so that gap gets hidden by the joint between the two legs.

Wrapping up the legs
click/tap to expand
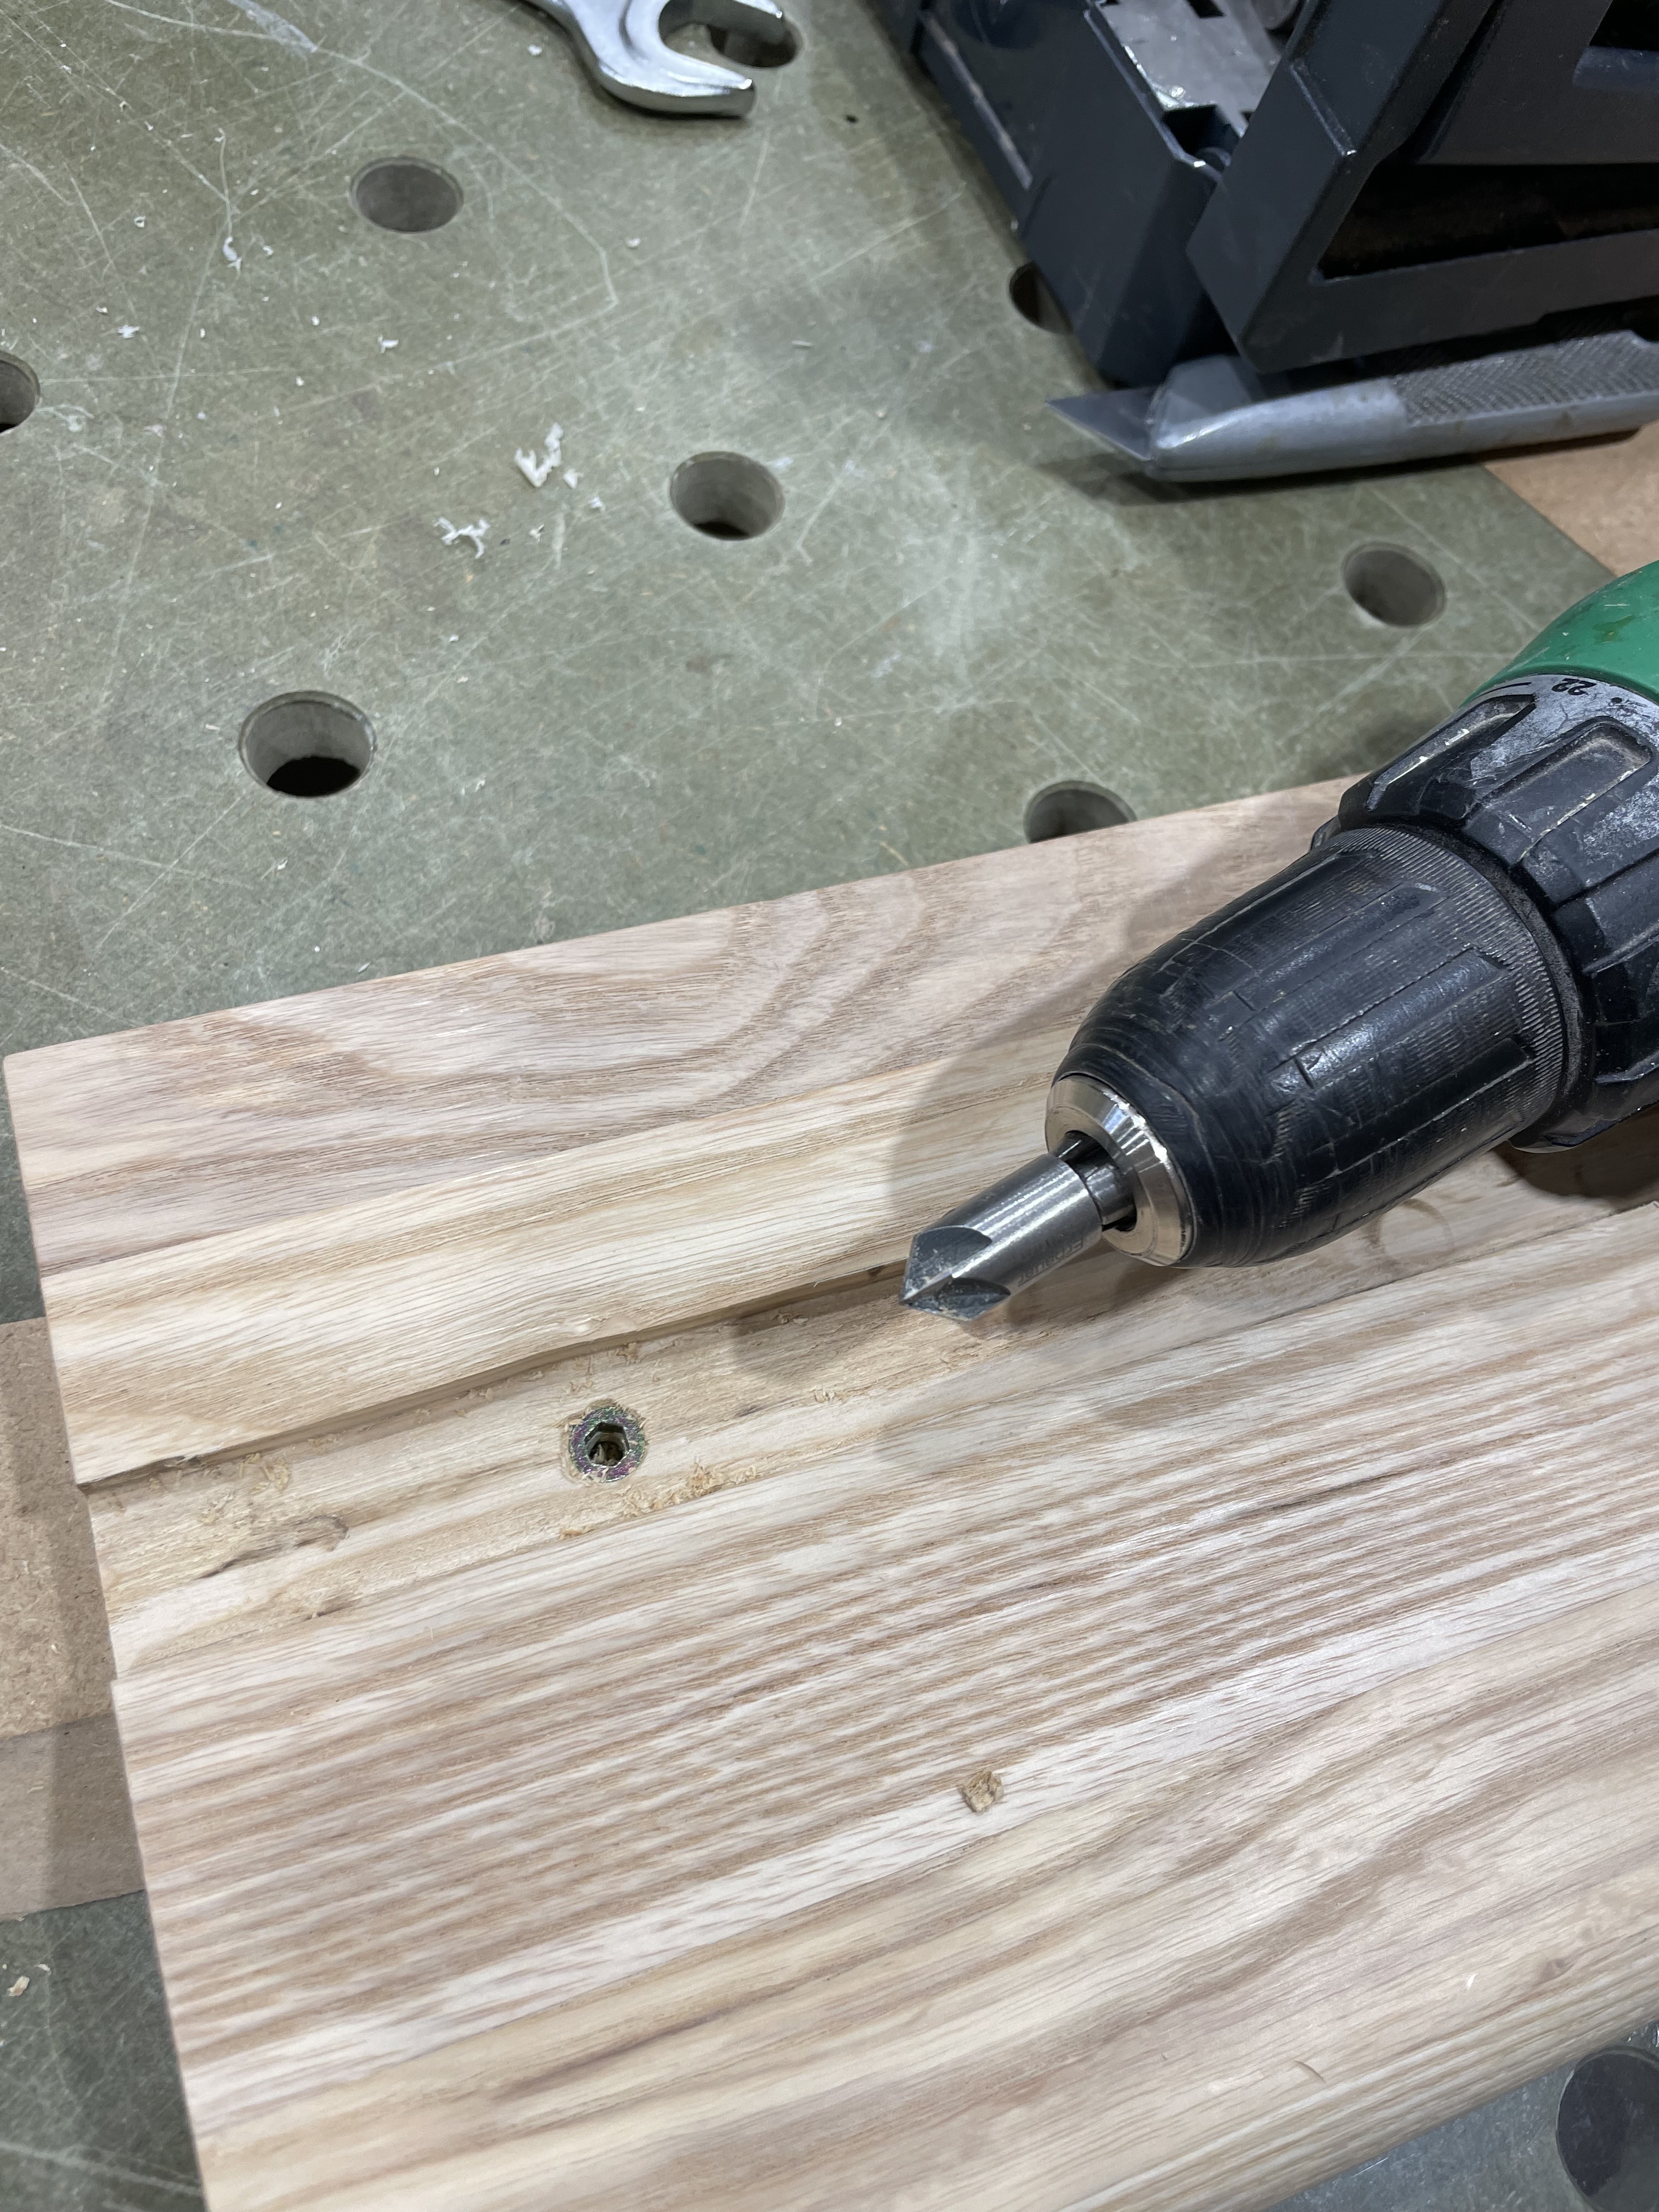
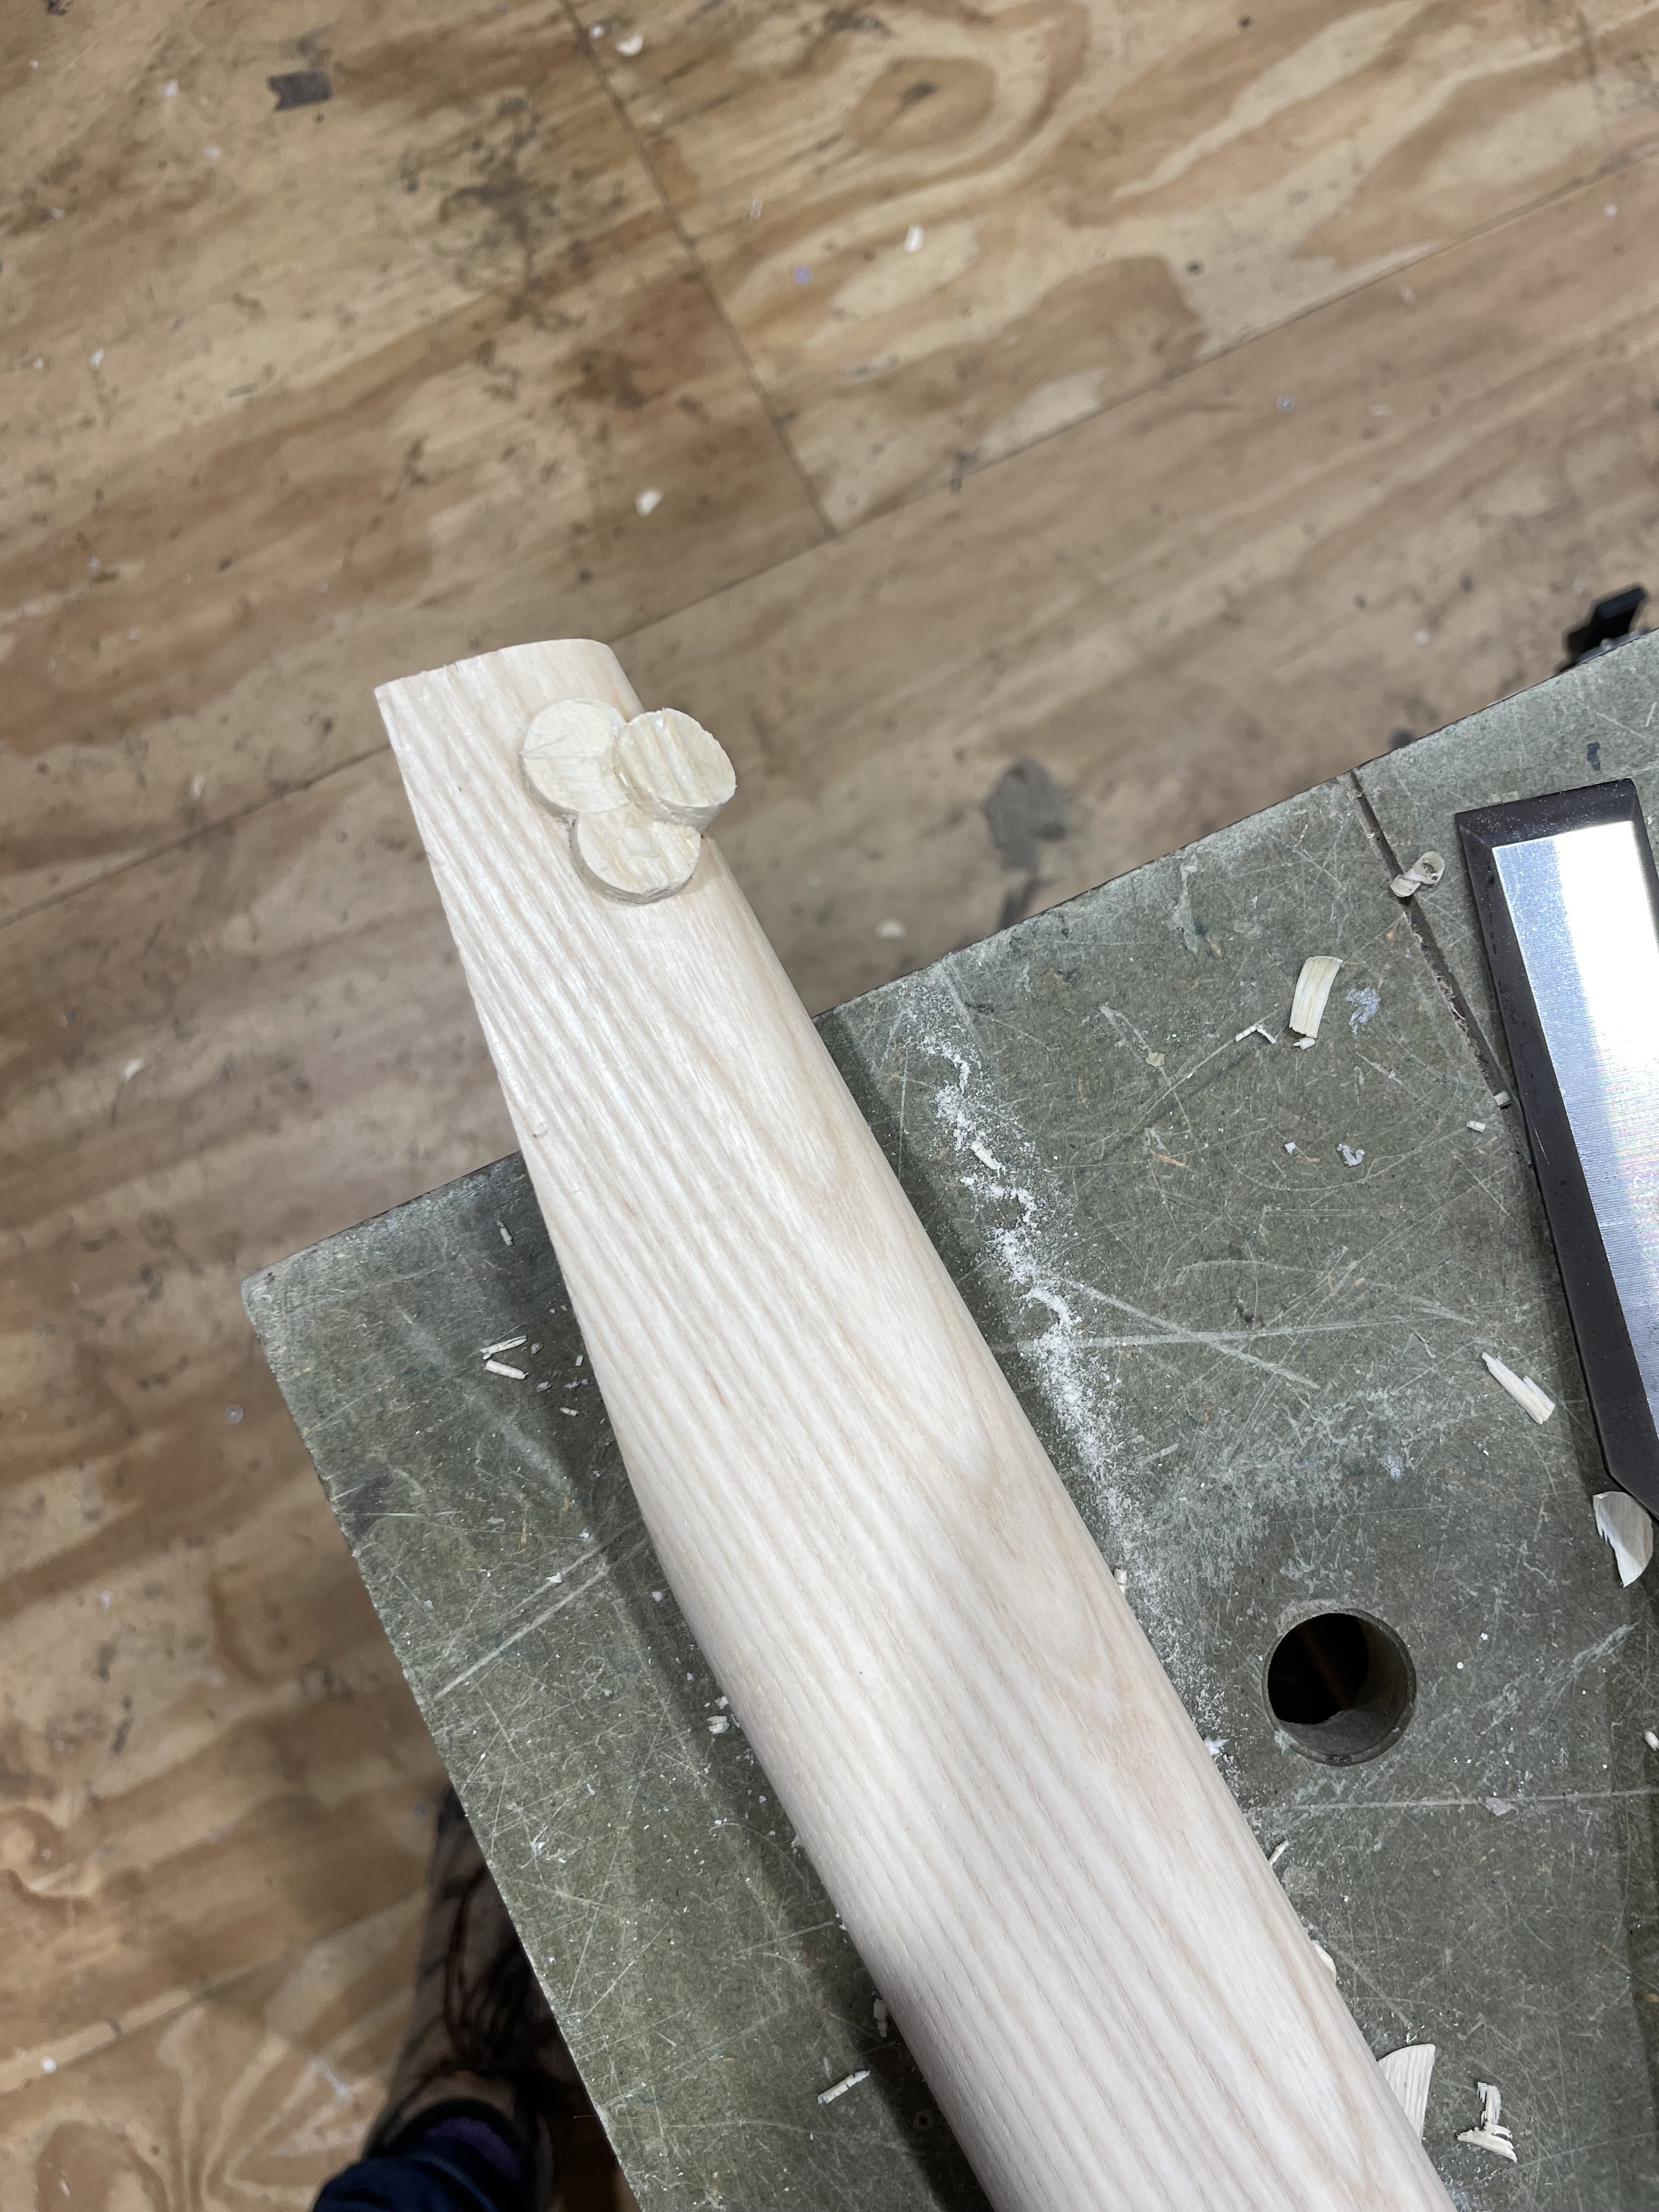
The intersection of the two legs looked a bit spare on their own, so I added three walnut plugs. These do nothing practical other than look nice and cover some of the gaps on the joint. After a test (always do a test),drilled the holes, dry-fit, then glued in the plugs:


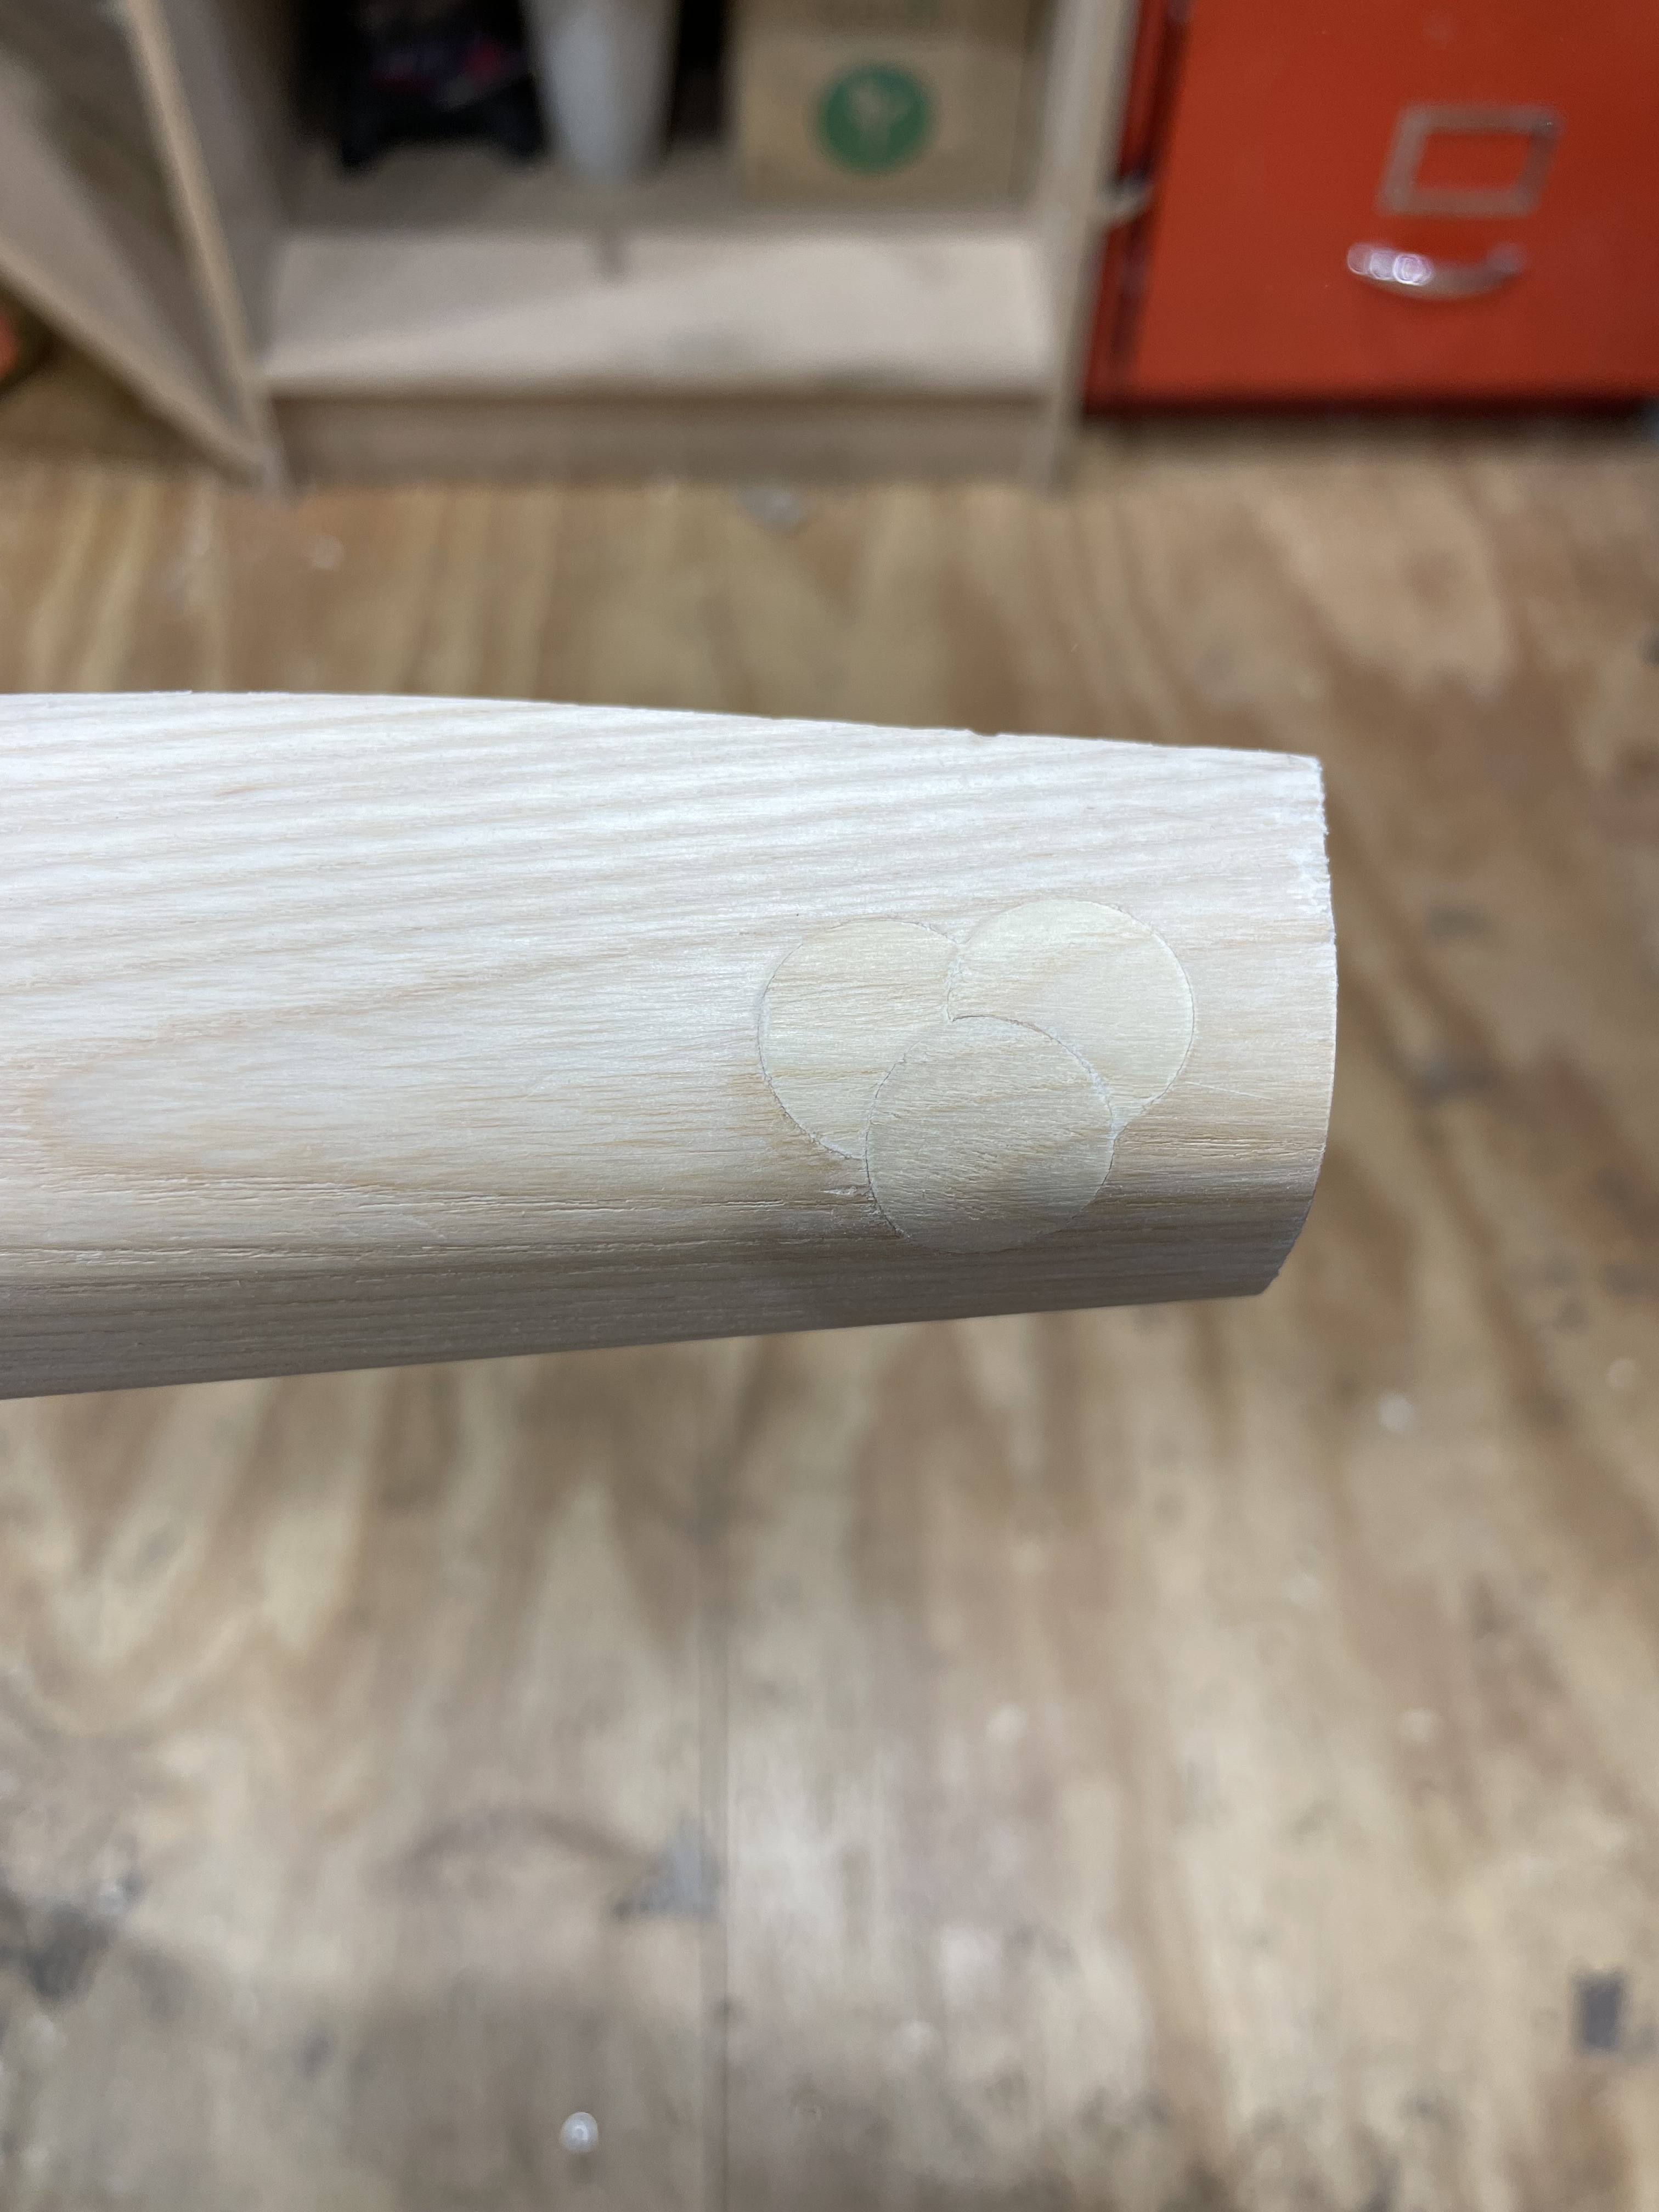
After the glue dried, used a saw and chisel to trim off most of the excess plug, then used a hand plane to get it flush with the ash.

Next up was to add the roundovers to the legs. Don’t have pictures of this part, but did it with a hand router as I couldn’t position the router table to accomodate the full size of the legs. Since I was using a hand router, I couldn’t get stable enough to route all the way through the ends of the pieces (I ended up gouging one). I was left with these nubs on a curved surface:

I used a piece of sandpaper glued to a straight piece of MDF to sand these off to the same profile as the roundover.

I did a final dry fit of everything after a final sand. This was important to identify any issues and practice the glue-up. Everything came out square without needing adjustment!


No picture of the glue-up itself, too stressful! Thanks @ed for your help here.
Wrapping up the shelves
click/tap to expand
Used the same sanding method for the roundovers as with the legs. Though since I did it on the router table, I wasn’t left with the nubs as with on the legs:

To make the grooves for the shelves, I used a straight piece of MDF clamped along where I wanted the back edge of the slot to be:

I then put the shelf on the frame, pushed it flush against the clamped MDF, then marked where the opposite wall of the slot should be with a pencil.
Here’s the cutting setup for the second shelf from the bottom. The micro-adjust on the edge gude helped dial in my cuts to be exactly on the line:

I did not cut grooves into the bottom shelf, and I widened the holes on the supports as well. This is to allow for wood movement.
To marking out where to drill the holes fo rthe inserts, the shelves were were first installed then shimmed to center them. I then came in from underneath with a drill bit the same diameter of the hole and lightly tapped with a mallet. This gave exact marks for where to drill the holes for the inserts:

Installing the inserts:
Don’t have a picture of the finishing process, but I used the rest of my Osmo Raw, and applied with a microfiber cloth. I was worried about the yellow look of the wood, but after another coat and waiting a couple days, the yellow mellowed out to a nice, neutral color. It still looks a tad yellow under indoor lighting, but looks great in natural light.
Mistakes!
click/tap to expand
Took a chunk out of the corner of tone of the legs. Luckily this got covered by the roundover, and isn’t visible in the final product.

Drilled holes in the top beam accidentally. Filled with walnut plugs.

Did round-overs on the top of two of the horizontal beams accidentally. Just put those ones on the bottom and towards the back, they sit in the grooves on the shelf anyways and won’t be seen.
If you look closely at the walnut plugs on the legs, the middle dots are not centered. Not entirely sure how I managed that… After cutting the first set, I decided to just run with it, and cut the holes for the plugs on the other 3 surfaces with the same (incorrect) placement.

Gouged the long beam in a couple places. Since I was already in plug mode, I experimented with a curved surface, which worked! Here you can see the test, how the plugs get made, as well as the test to calibrate the router depth. Always keep spare bits handy for a project like this!

Here it is on the actual shelf, had to do it in two places:


I dropped one of the shelves on its corner while sanding, denting it. The ol’ iron and steam trick worked really well, and the dented corner popped right back out!

I had not used an edge guide on a router before! After practicing, I made sure to start on the back, hidden edge to get a feel for it first. You can also see the unmilled section of the shelf that I left here because I didn’t want to make the shelf any thinner.
