Disclaimer
This is a project I’ve designed and put in place a schedule to get it to completion hopefully in an acceptable amount of time for the people willing to join. I’m on holiday from the 18/06 to the 27/06 so group session/workshop are likely to start on my return. Until than we have a lot of prepping to do, purchasing, 3d printing more details TBD
This post is a Work in Progress I will try to keep as close to what is written or define here but this might change. Primarily this post will used as reference /documentation for the project. Please create a new post if you wishes to go on discussing related point but don’t hijack/rail road this thread many thanks.
The goal:
It started with a pretty innocent conversation about refurbishing a 3D printer and the challenge to build the cheapest Prusa I3 printer initiative came up. After a bit of probing around a few of you seems interested
Must have an heated bed
This allow you to print a wider range of material
Must be able to print flexible filament or other exotic filament
Ideally must have a reliable auto bed leveling probe.
Optional run on octopi but for me it’s mandatory requirement and we got a box full of RPI in the space if they can be use for that project so great otherwise I got a few spare.
So I embarked into defining the BOM (Bill of materials) and the goal I set myself was simple it must be under £150 or you might be off buying a cheap kit of ebay. I think I’m getting really close to my target budget a few things to
The design:
Prusa I3 (Standard 200x200x200 build volume)
Laser cut 6mm ply or acrylic
If you want to take the cheap but nicest clone in mind I’ll recommend upgrading the electronic to a
clone mini rambo
clone mk42 heatbed
clone pinda probe
But this almost double the price. I’ll provide link to those item when I will have added them to the spreadsheet.
3D printing all the parts for the printer either using the Ultimaker in the space I will get build plate gcode ready and inform member participating to the project build where they are and
More as we go along be patient please and many thanks in advance
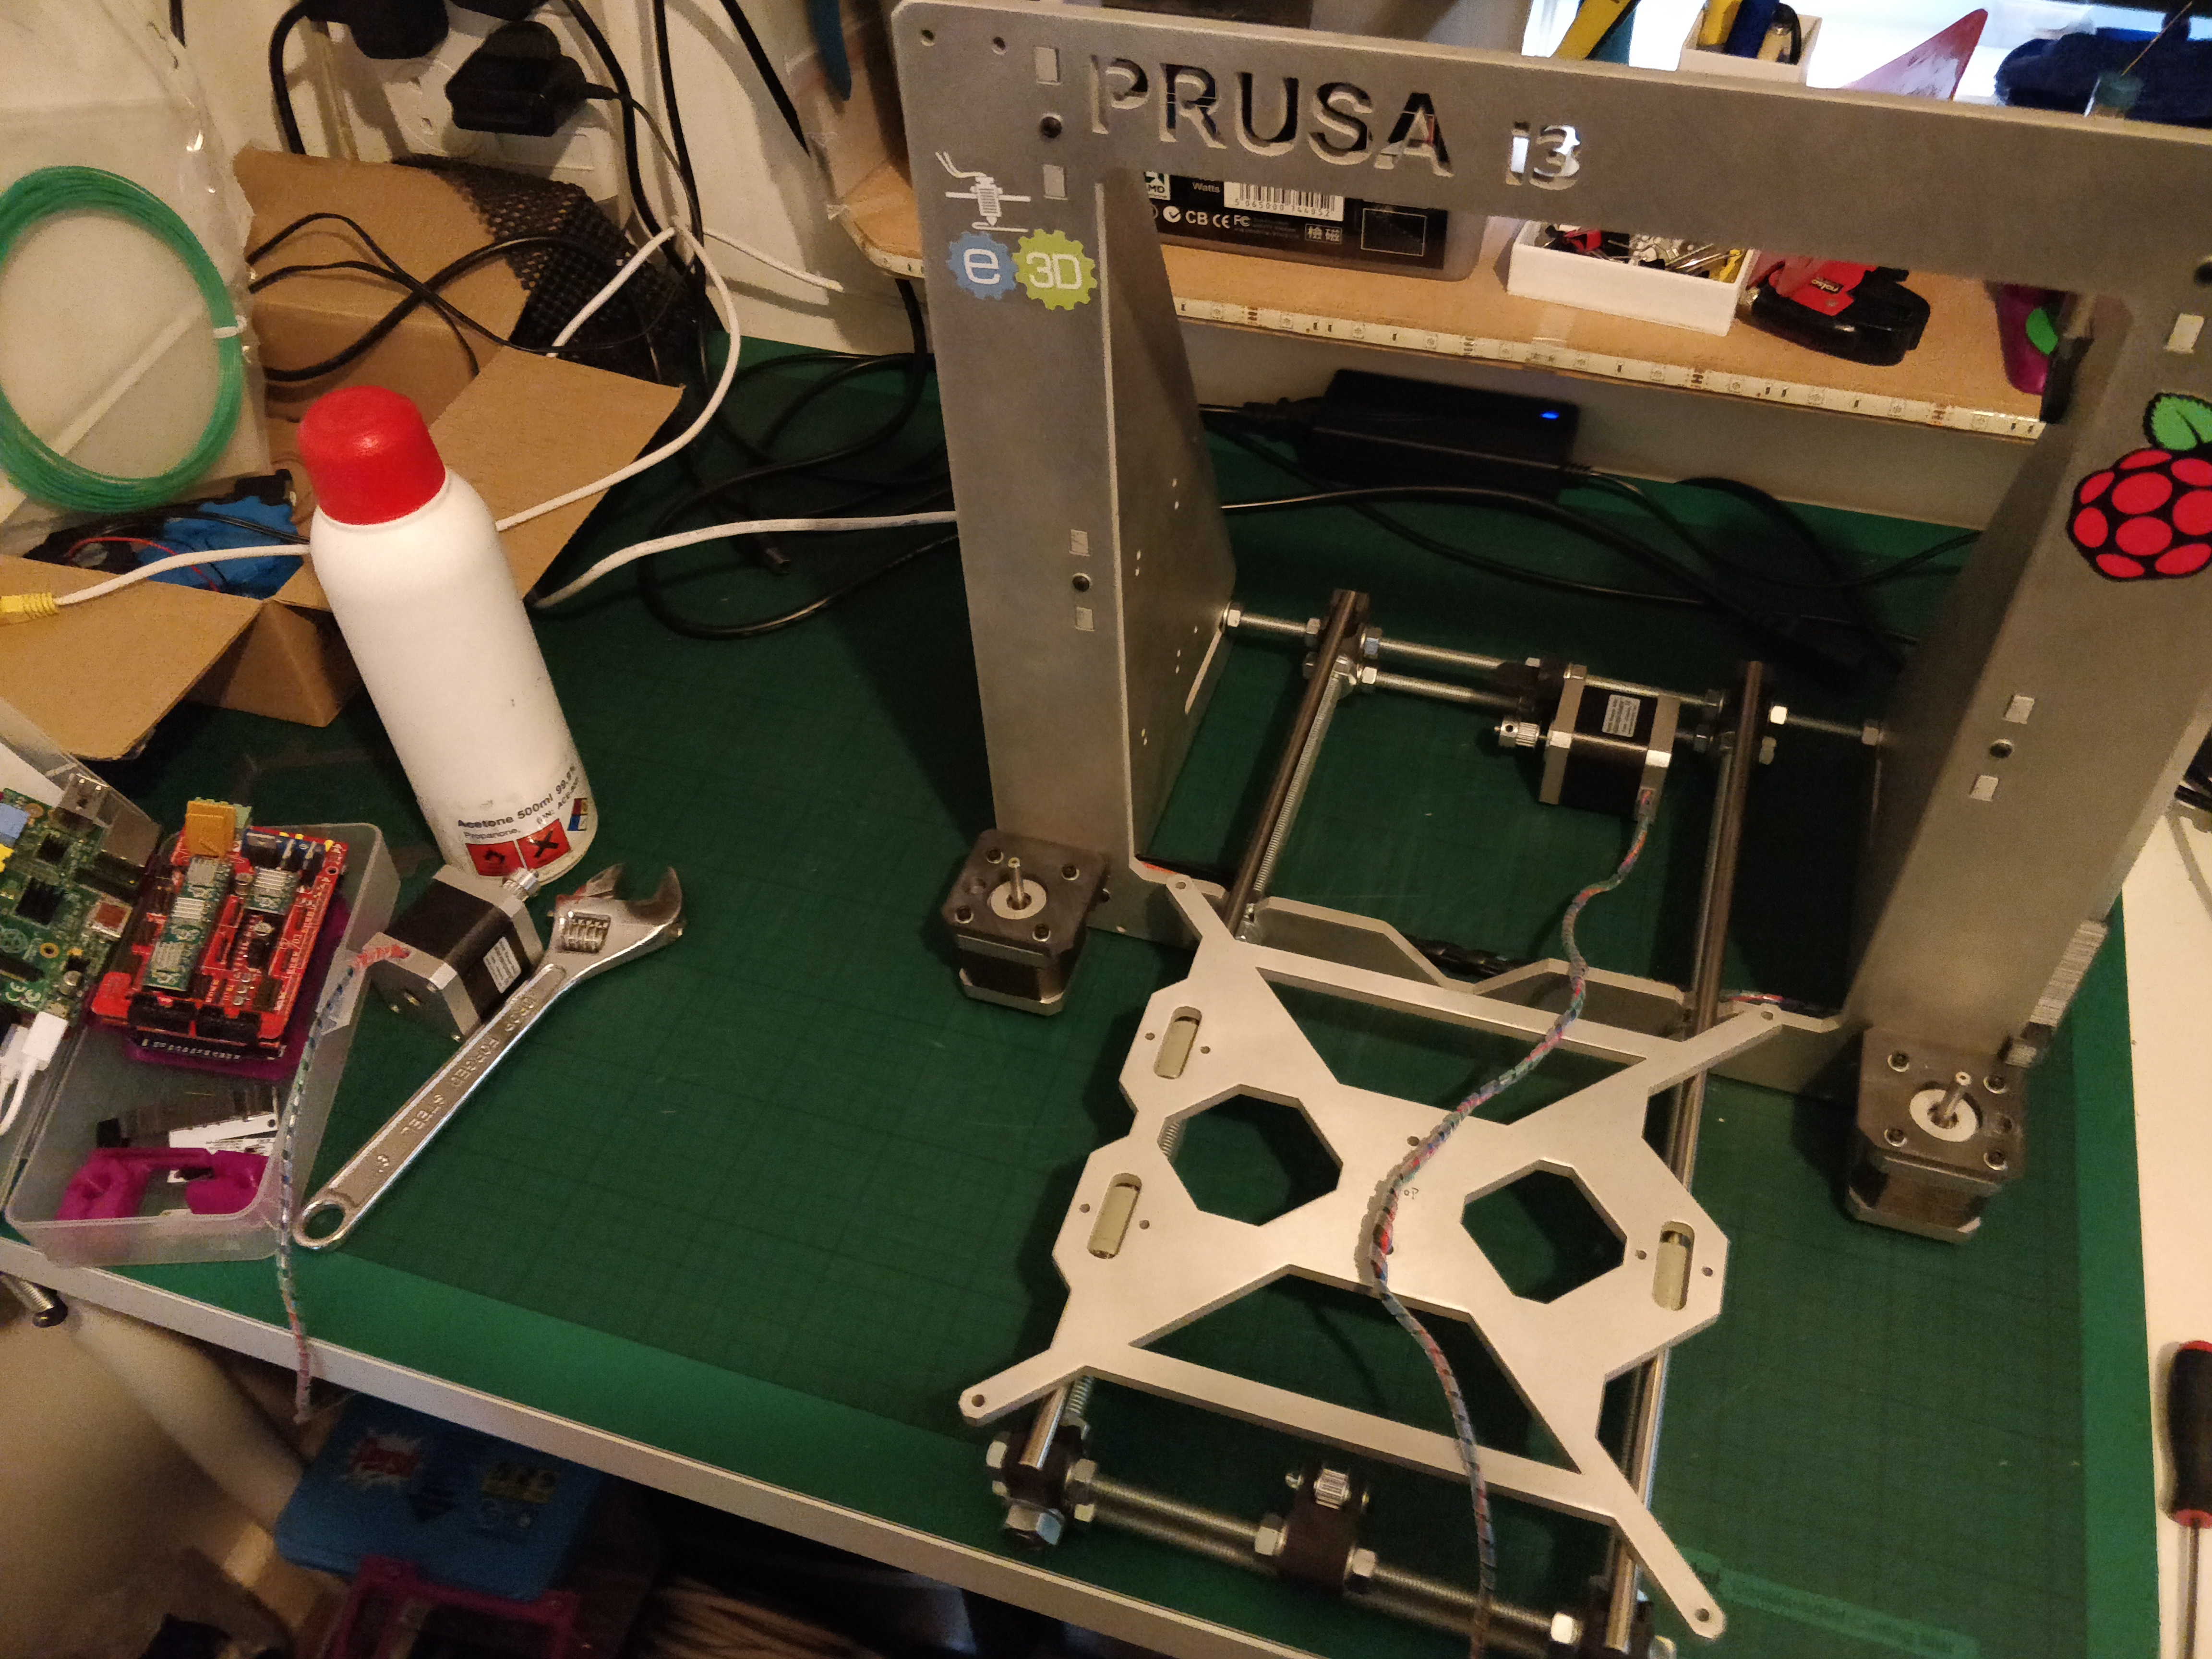
As promised a few pix showing the prototyping and getting parts ready.
Last night work: Mostly been working on the x-axis/z-axis idler as the stock mk2s files only support a specific type of thread rod nuts and the one I’m using have a slightly different dimension so luckily I’ve found one on thingiverse that was already modified
So for the z-axis motion thread there is 2 options with slightly different price tag
Using a M5 thread and 2 M5 nuts under £2
Cons: The M5 threaded rod work fine but if the one you get are a bit bent it will leave small defect artifact known as banding.
They require a bit of lubrication that catch all the dust and make them dirty black after a while
They can wear of faster
Pros: it’s cheap
Using 8mm Lead Screw around £10/12
Cons: buying them cheap mean you can get some of the nuts that are not great (I mean the thread is not perfectly perpendicular to the mounting plate causing similar type of banding artifact)
Pros: much more precise and greater diversity in the thread pitch make them more attractive for certain type of motion.
I’ve done a bit of looking around now that we know approx how many are joining the build so in total there is 8 of us and it kind of fit perfectly for the bulk order each printer require 5 motors by buying them in that set it cost us £6.4 per motor
Once the we pass the deadline @peter_hellyer will let us know where we can send the deposit and we’ll be ordering 2 set of 20 motors shortly after a nice way to get our feet wet.
In regard to the filament I’ll recommend that we ABS X but we could go for normal PLA
The reason for the ABS X is that he got some really nice properties like low warping but he give us a higher glass transition temperature meaning if your motor do get hot a bit or around the extruder and hotend it might be beneficial. However all my printer are build with PLA and as I correctly set the current on the motor they never overheat too much even when pushed
Below is the list of member who subscribed to the project. As mentioned earlier I’ll be in the space tomorrow and will probably drop by the pub for the social evening come if you are around I’ll see you tomorrow.
Hi @Dermot, I picked up the PSU and steppers last night thx. You told us the electronic arrived as well. Would you mind to take a picture of the back&front of the LCD screen next to ruler if possible. Those LCD come with slight variations such as vertical or perpendicular and the potentiometer for brightness is rarely in the same place, the front is pretty much standard
Ps: surprised to find the space empty and close when I did get there.
I think it is called the world cup semi-final effect. I don’t mean to typecast you @laurent_muchacho but you might have been through this already, yesterday to be more precise
Call for advice @metaltechs or anyone with metal knowledge.
So first question is which type of stainless steel to choose from from most listing I can find 303 or 304 I guessed that we don’t need the high resistance to corrosive material 316 offer
Second do we have the ability to do the cuts ourselves in the space or we should order them cut already (metal average cost would be around £10 and the cut is £3 per printer)
Math challenge:
Knowing that each rod come in either 1.5 m and 3 m and we need 9 set of the cut below how to assign the cut to reduce wastage. Each cut waste 5mm of material.
If Anyone have a supplier for the 8mm smooth rod preferably chromed or stainless as described above we need 2080 mm for each printer
The exact list of cut is
2 x 370mm
2 x 350mm
2 x 320mm
My angle grinder and chop frame (or whatever it’s called) is available for fast cutting of most metal items. It gives a nice clean cut with a very quick cleanup.
I don’t think it’s allowed in the space for various reasons but it’s fairly safe with care, PPE (glasses and ear muffs), away from flammable materials and preferably outside
You seems a nice guys and thx for the tips but don’t take this the wrong way! I will prefer an official answer from @metaltechs or @directors in regards to the ability to do the cuts instead of well wish thinking about how to do it.
That looks like a fair price for low volumes of 8mm bar.
Cutting it with an angle grinder would be fine, and then either file or clean up with a flap disc. If you are really fussy about length and squareness of the end you could chuck it up in the lathe and turn to length.