Notice
- This machine should not be operated without induction.
- This tool should not be used while alone in the space - lone working rule.
Colchester Bantam Lathe

Details:
This is a Colchester Bantam Metal cutting lathe with power crossfeed and can be used for turning, facing, boring, die cutting, and tapping metal and plastic sections.
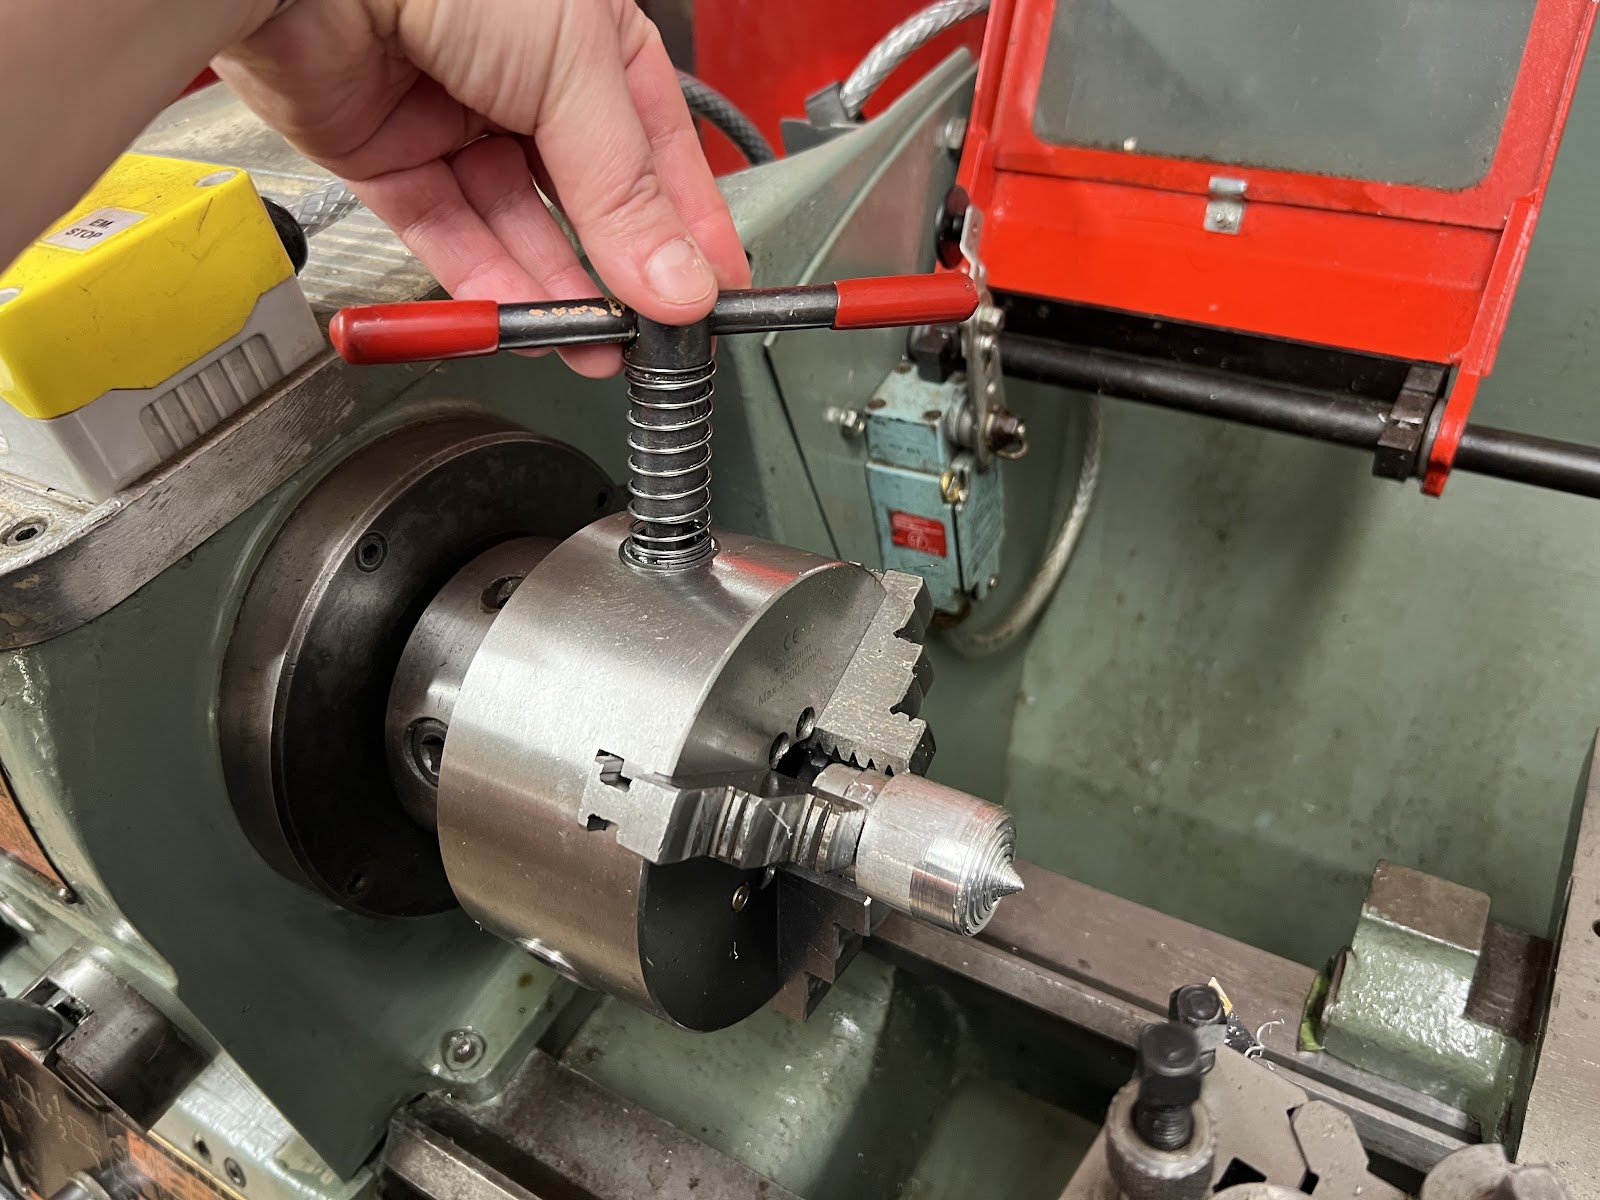
The three jaw self centring chuck is used for circular and hexagonal cross-sectional material.
The four jaw independent chuck is for square and irregular cross-sections.
It also has a suds pump for workpiece cooling and screw settings which can be switched between imperial and metric by changing gears.
Specifications:
- 143mm centre height with turning diameter 286mm over bed and 178mm over cross slide.
- Distance between centres 762mm.
- Diameter of faceplate 254mm
- Diameter of 3 jaw chuck 125mm
- Diameter of 4 jaw chuck 205mm
- Head stock bore 25.4mm with a No. 4MT taper.
- Tail stock fitted with a No. 3 MT taper.
- 8 speeds between 36 and 800 rpm.
- Fitted with an 1HP 3 phase motor.
Additional tools:
- Quickchange toolpost with 6 tool holders.
- Tailstock 3MT 5-20mm drill chuck.
- Tailstock die-cutting attachment.
- Tailstock thread-cutting attachment.
PPE
- Safety glasses are mandatory
Safety Checklist
- Do not wear loose clothing.
- Ensure long hair, jewellery, and any clothing drawstrings are securely tied back
- Sensible footwear with sturdy toes should be worn at all times in the workshop. Steel toe-caps are a bonus.
- Do not wear gloves - they are an entanglement risk with metalworking machine tools - if you are concerned about grease and oil use barrier cream
- As with any power tool - be alert. Do not use the lathe when tired.
Condition Notes
Second hand vintage 1975 owned by the Makerspace. Older unit but in reasonably good condition. Has had an extensive overhaul by SLMS members – notably @Will.
Maintainers
Risk Assessment
Induction and Training
Anatomy of the tool
Switches and Safety
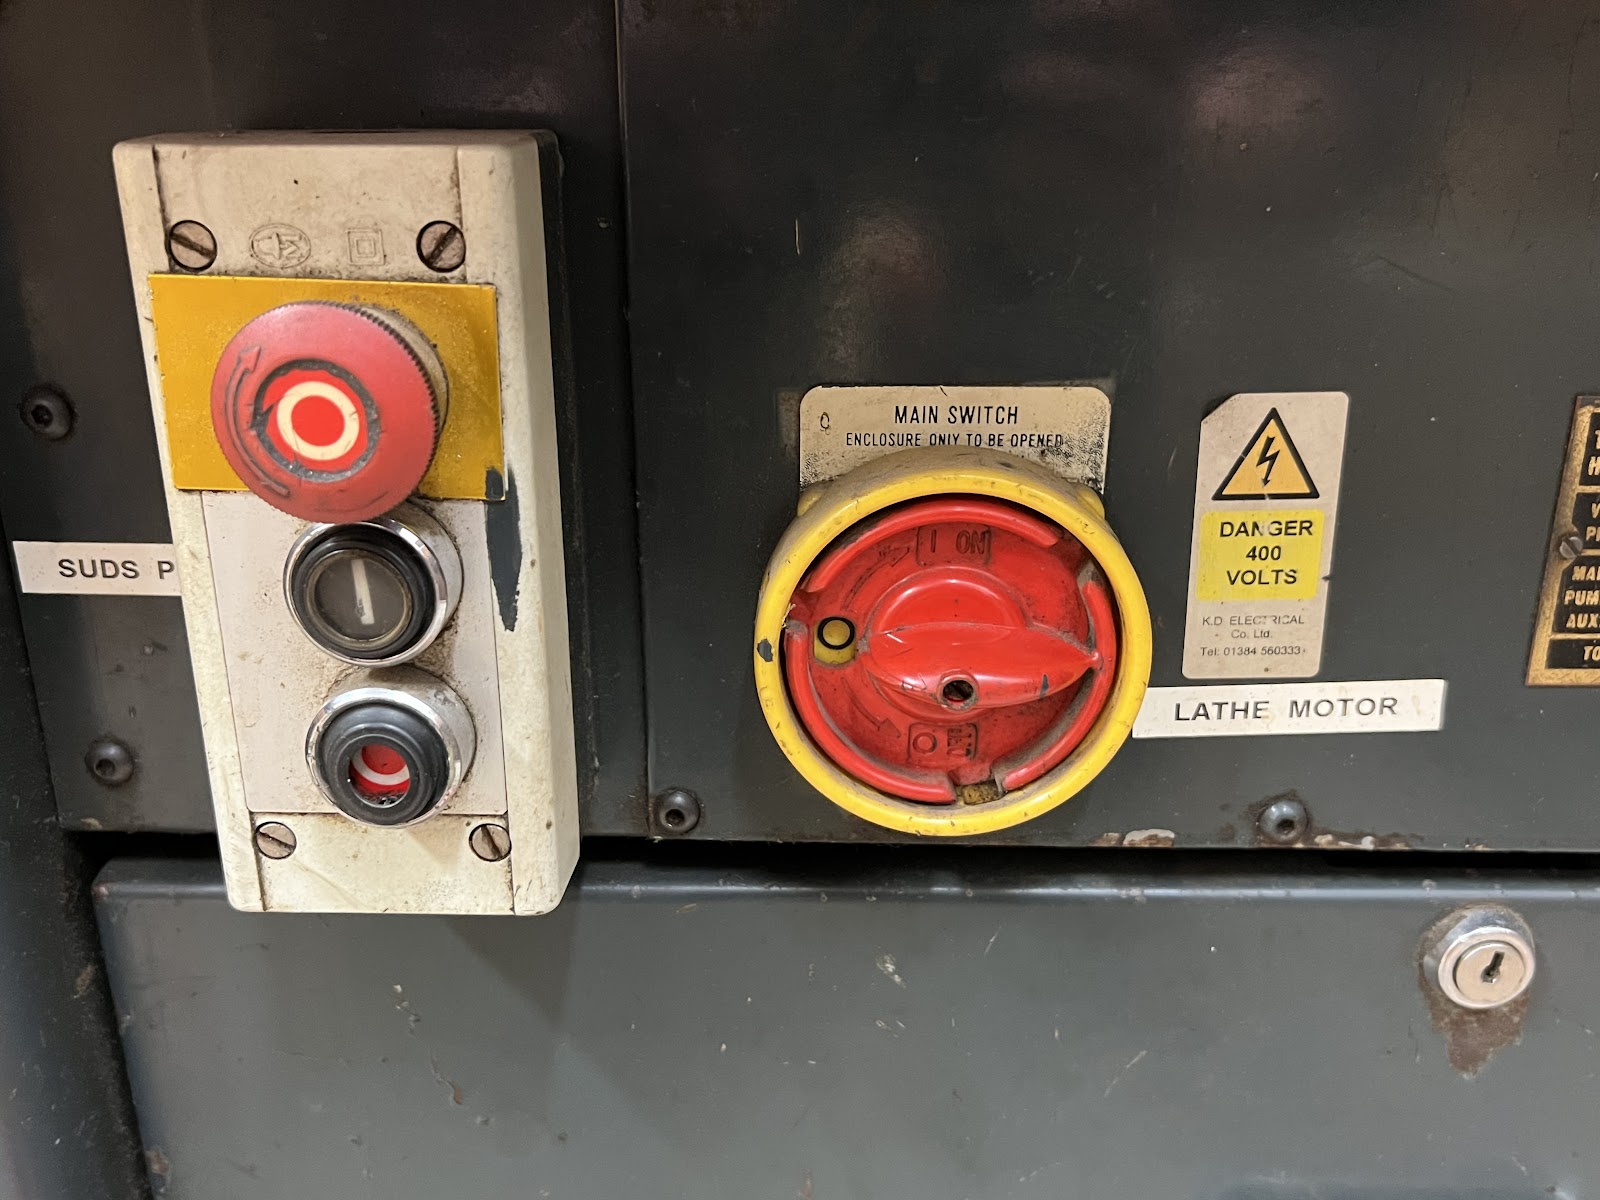
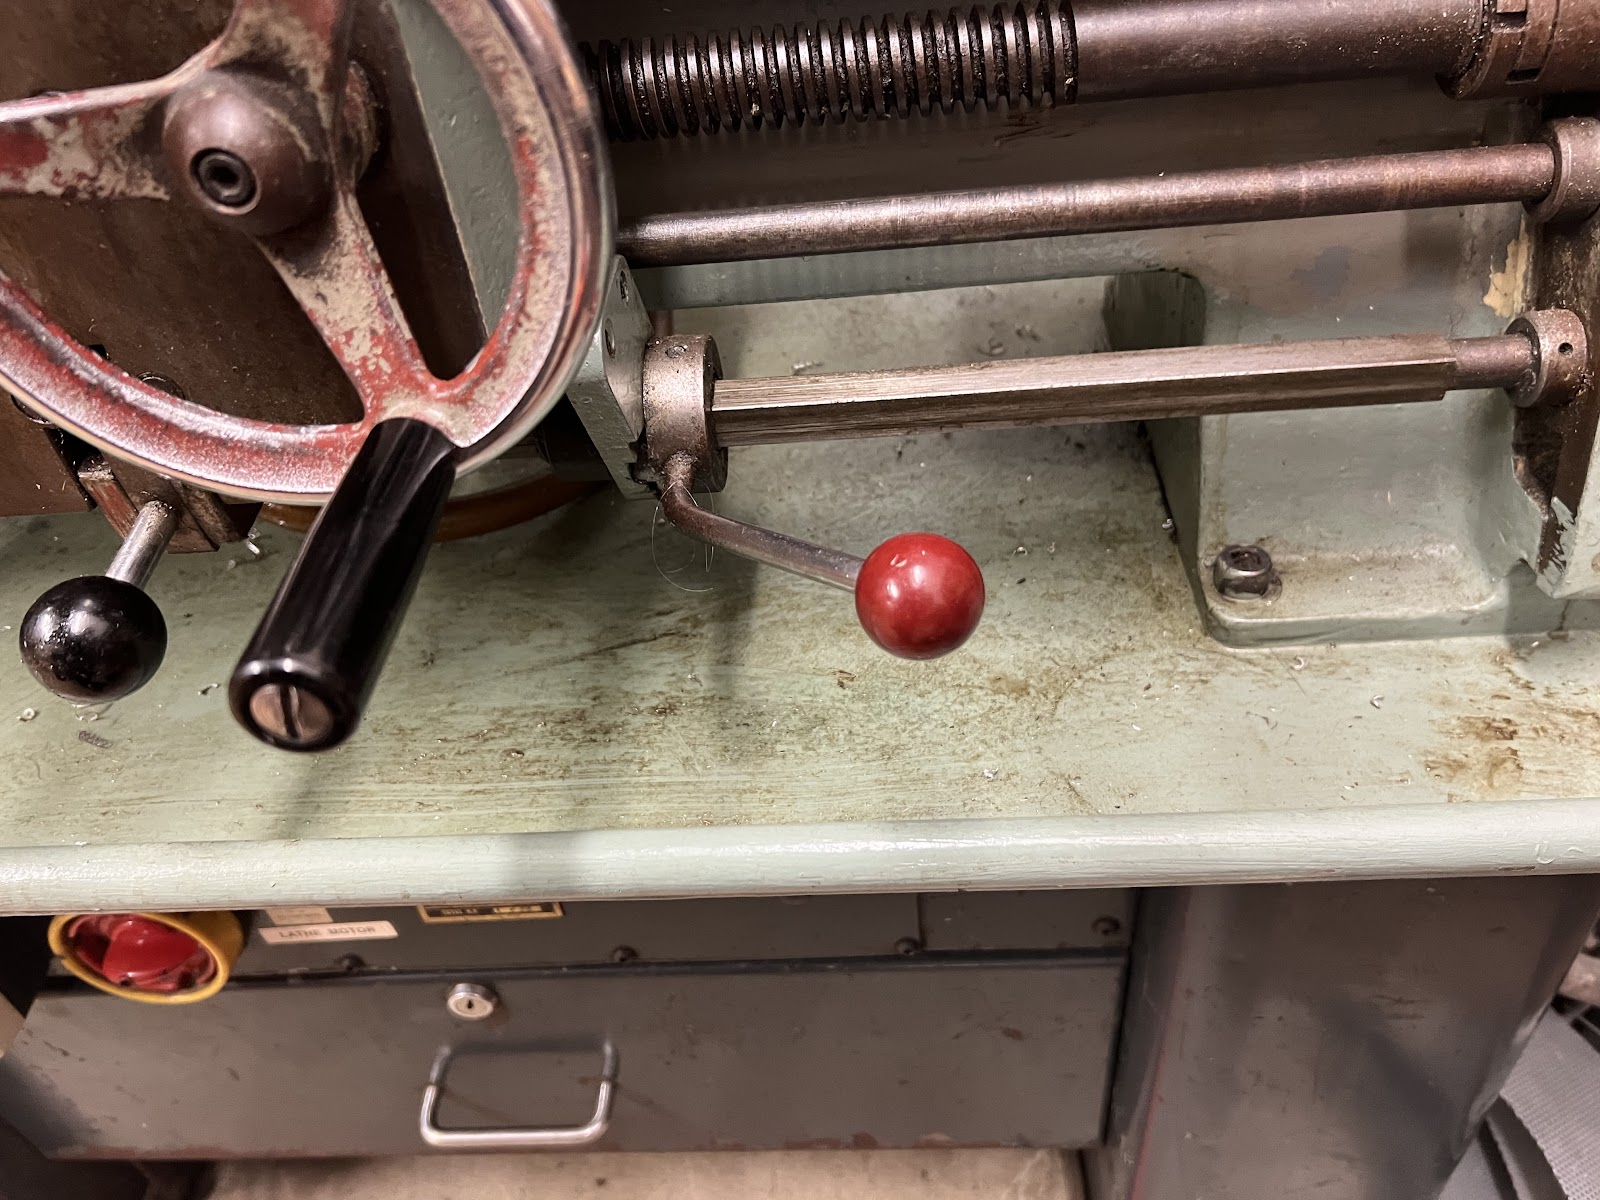
- Power control: Once the power is activated by the tool control, you can isolate/de-isolate the machine using the switch on the machine. Then use the red lever to start the machine. Note: Before turning the lever make sure to adjust the speed, fix the tool, rotate the chuck to make sure the tool is not in the way.
-
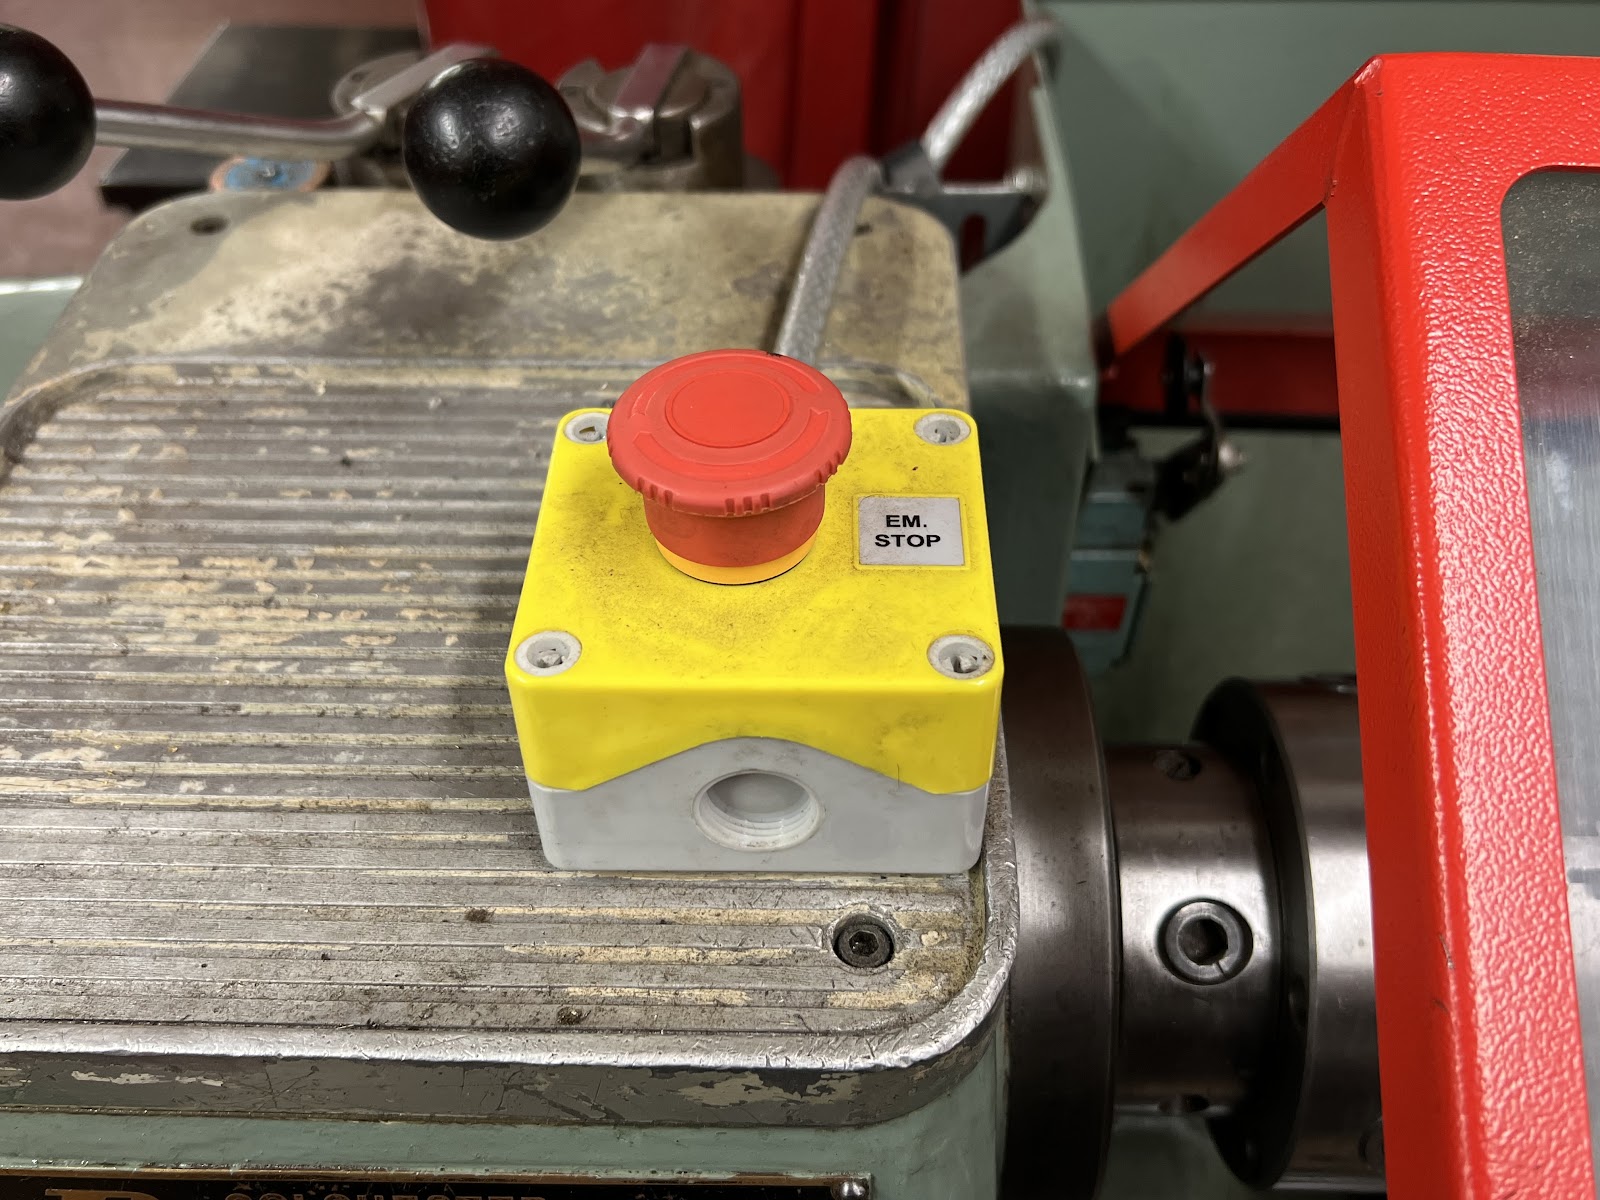
Emergency stop:
-
There is an emergency stop button on the left top of the machine.
-
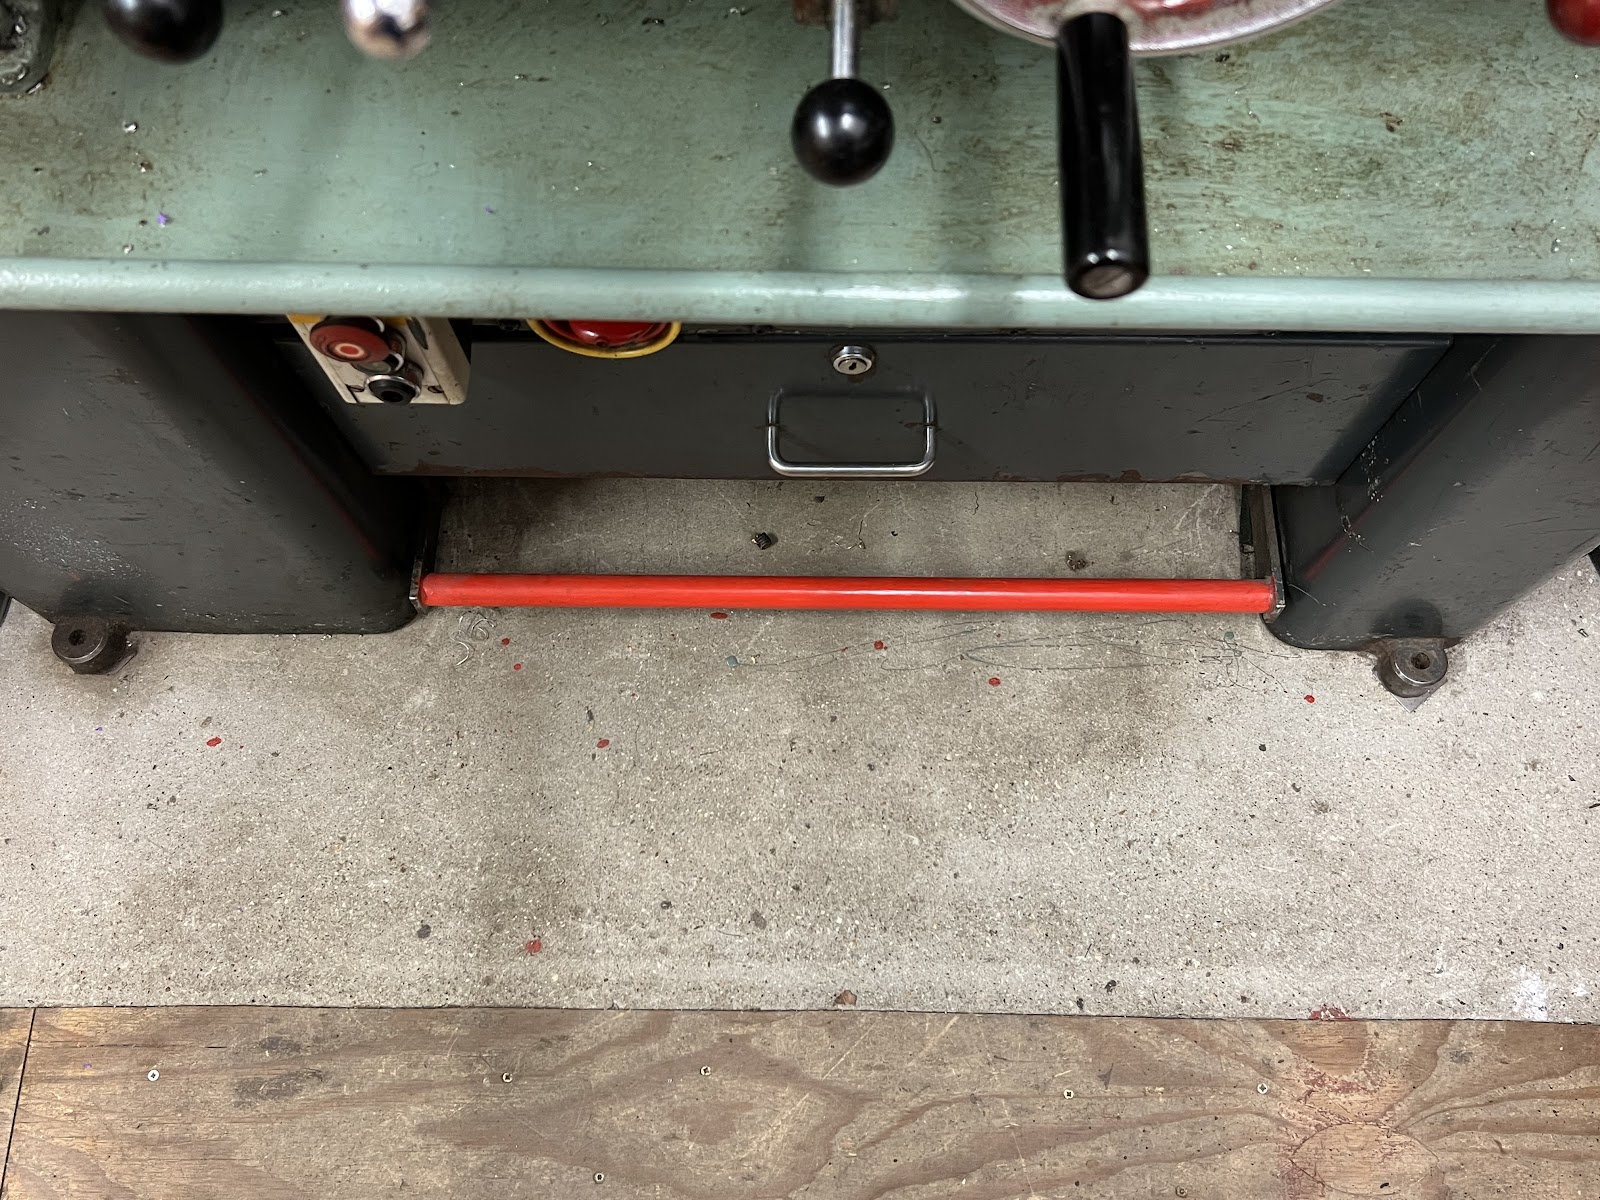
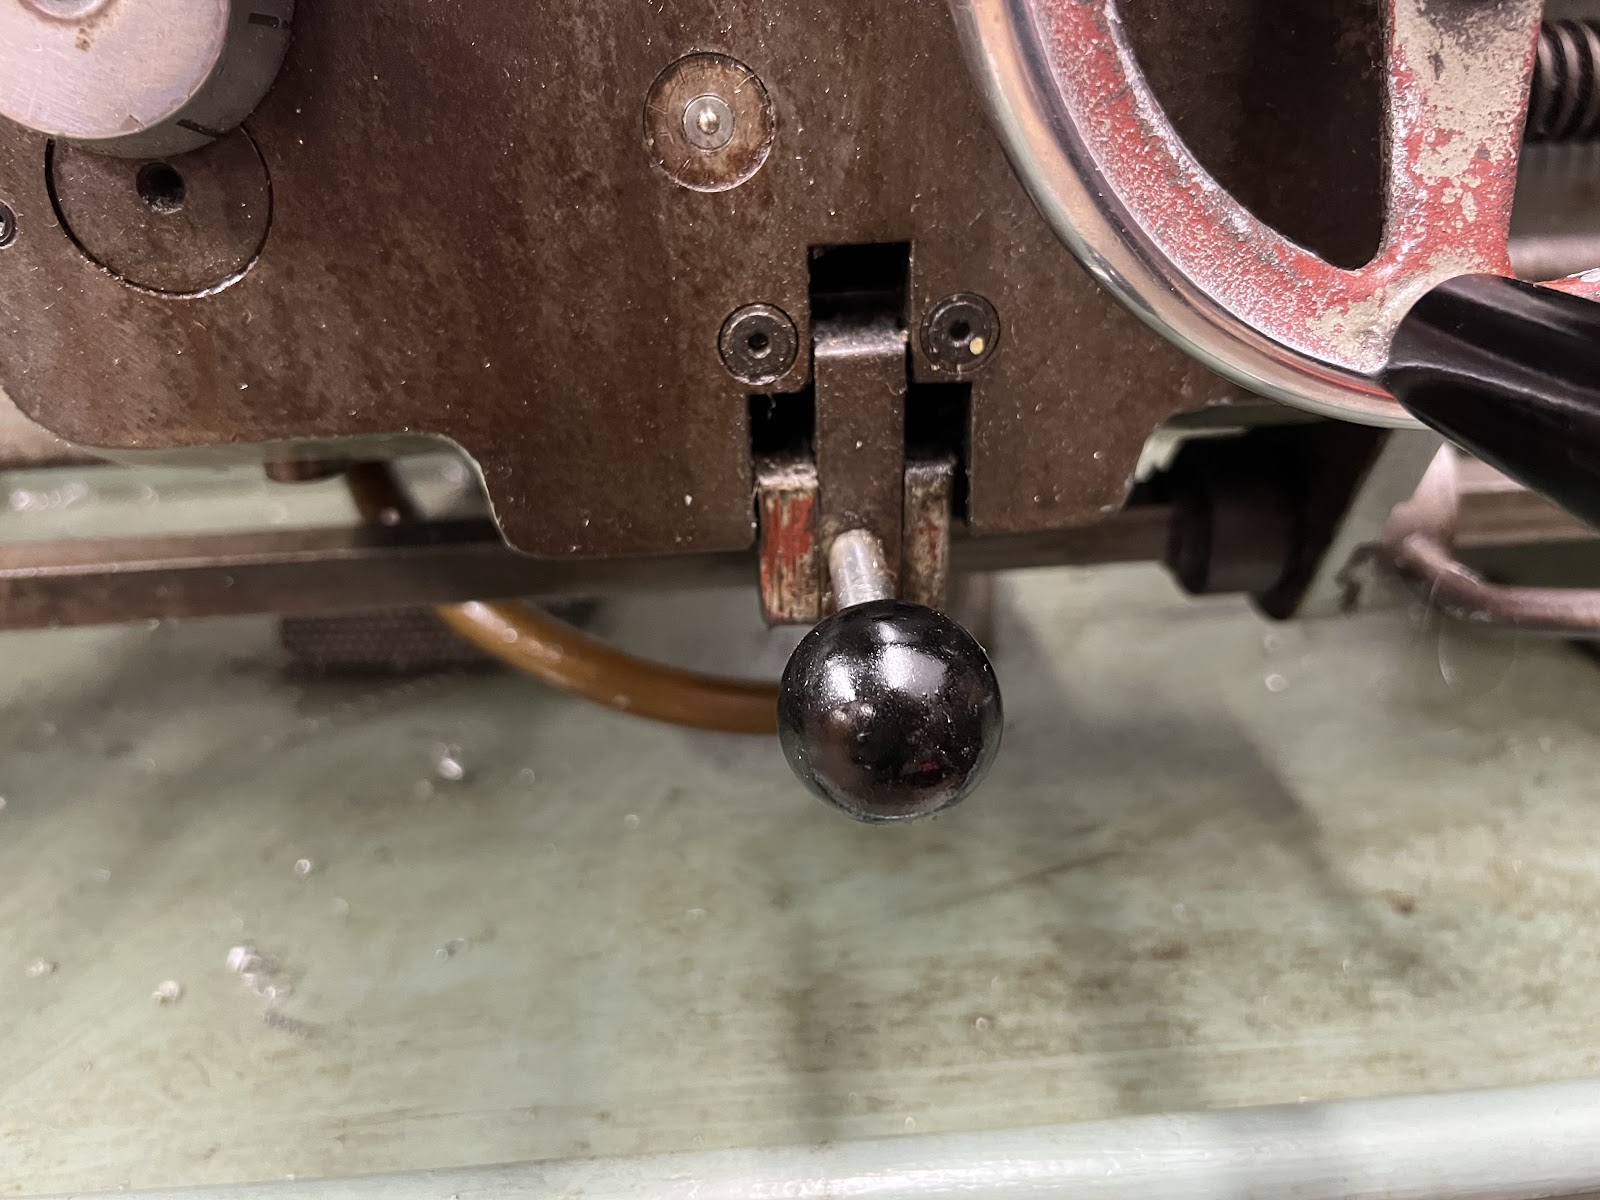
The second stop is the red bar across the front close to the ground which is operated by foot.
-
Remember - emergency stop buttons are generally damage limitation - bad things are usually already happening by the time they are hit. Try to avoid this by working carefully.
- Chuck guard: The red chuck guard needs to be fully down for the machine to work. It protects the user from flying swarf or lubricants. NEVER reach under the guard when operating the machine. Always open the guard to make any adjustments. Be careful when cleaning the screens of the guard to prevent it from scratching.

Headstock: The headstock houses the main spindle, speed change mechanism, and change gears.
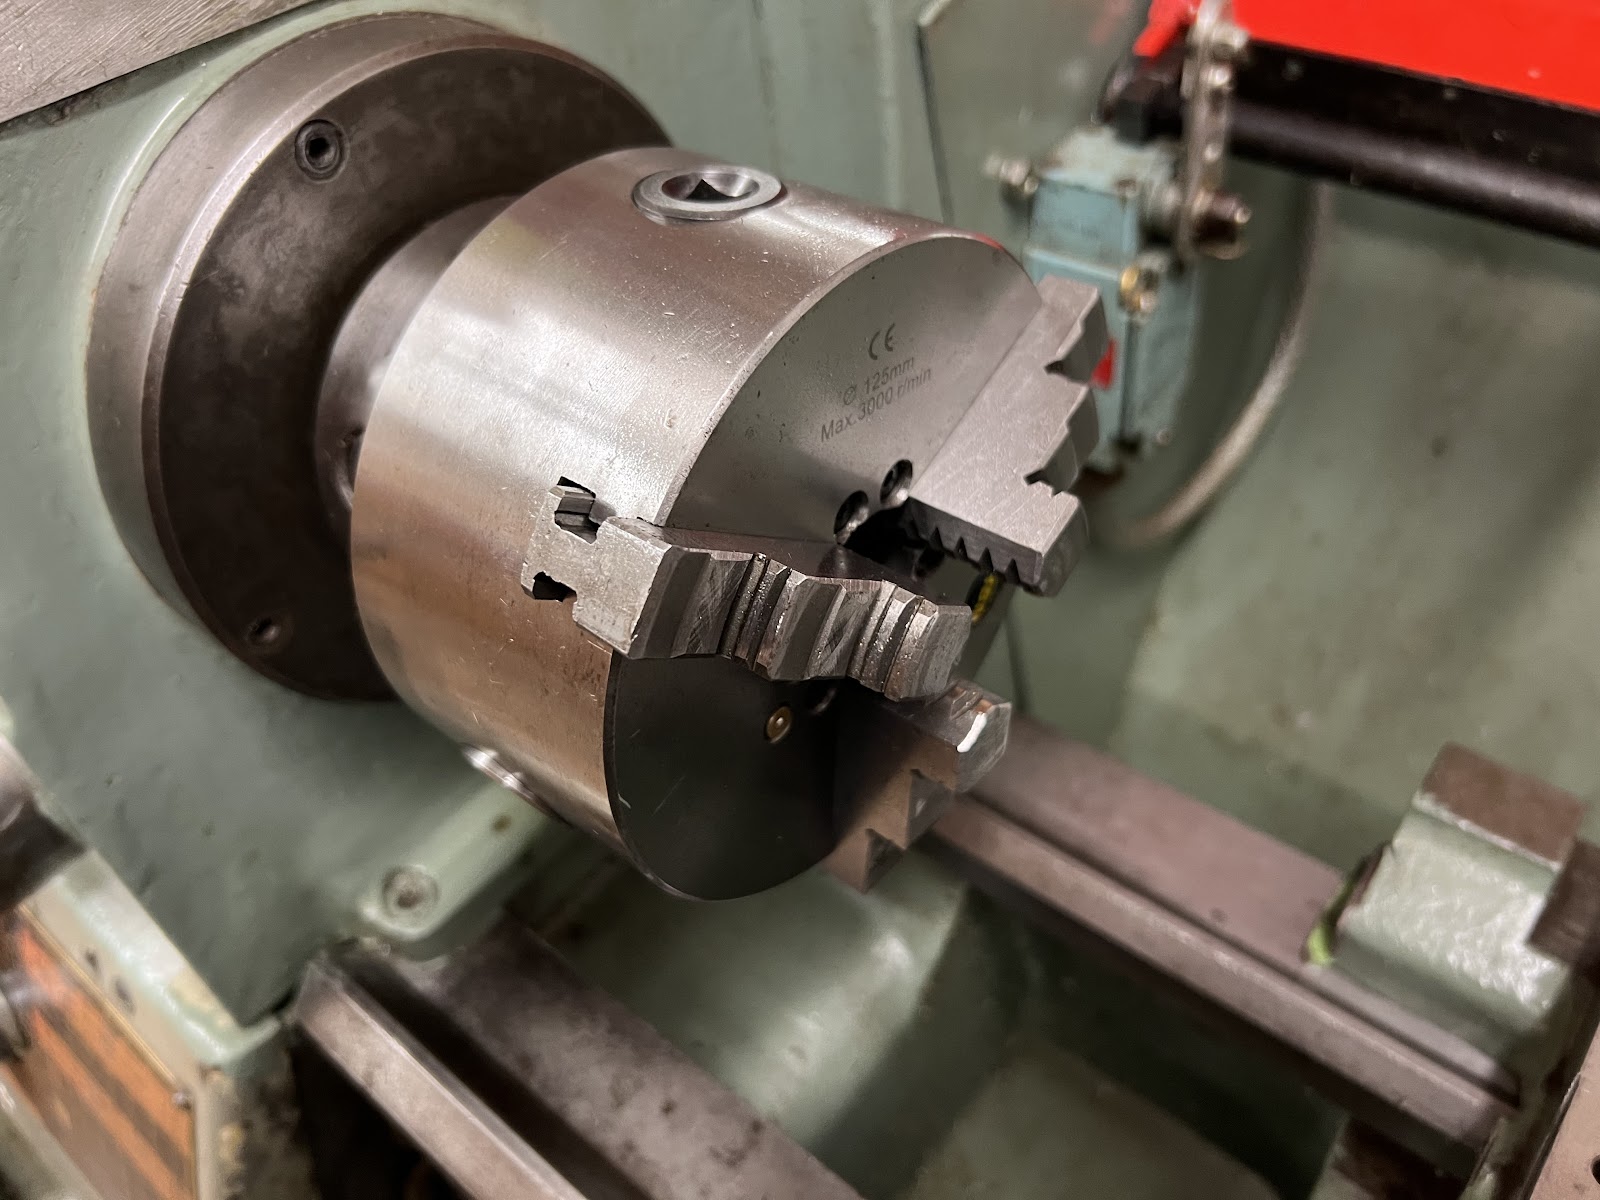
- Three jaw chuck: This is a self-centering chuck used for holding symmetrical workpieces. It has three jaws. all the three jaws move towards the centre on a scroll arrangement. The centering and gripping of the workpiece is done quickly, since all the three jaws move simultaneously by turning the key.
Other types of chucks we have are a 4 jaw chuck and a faceplate.
- Speed change mechanism: Depending on the material, size and type of turning there are different speeds that can be changed here.
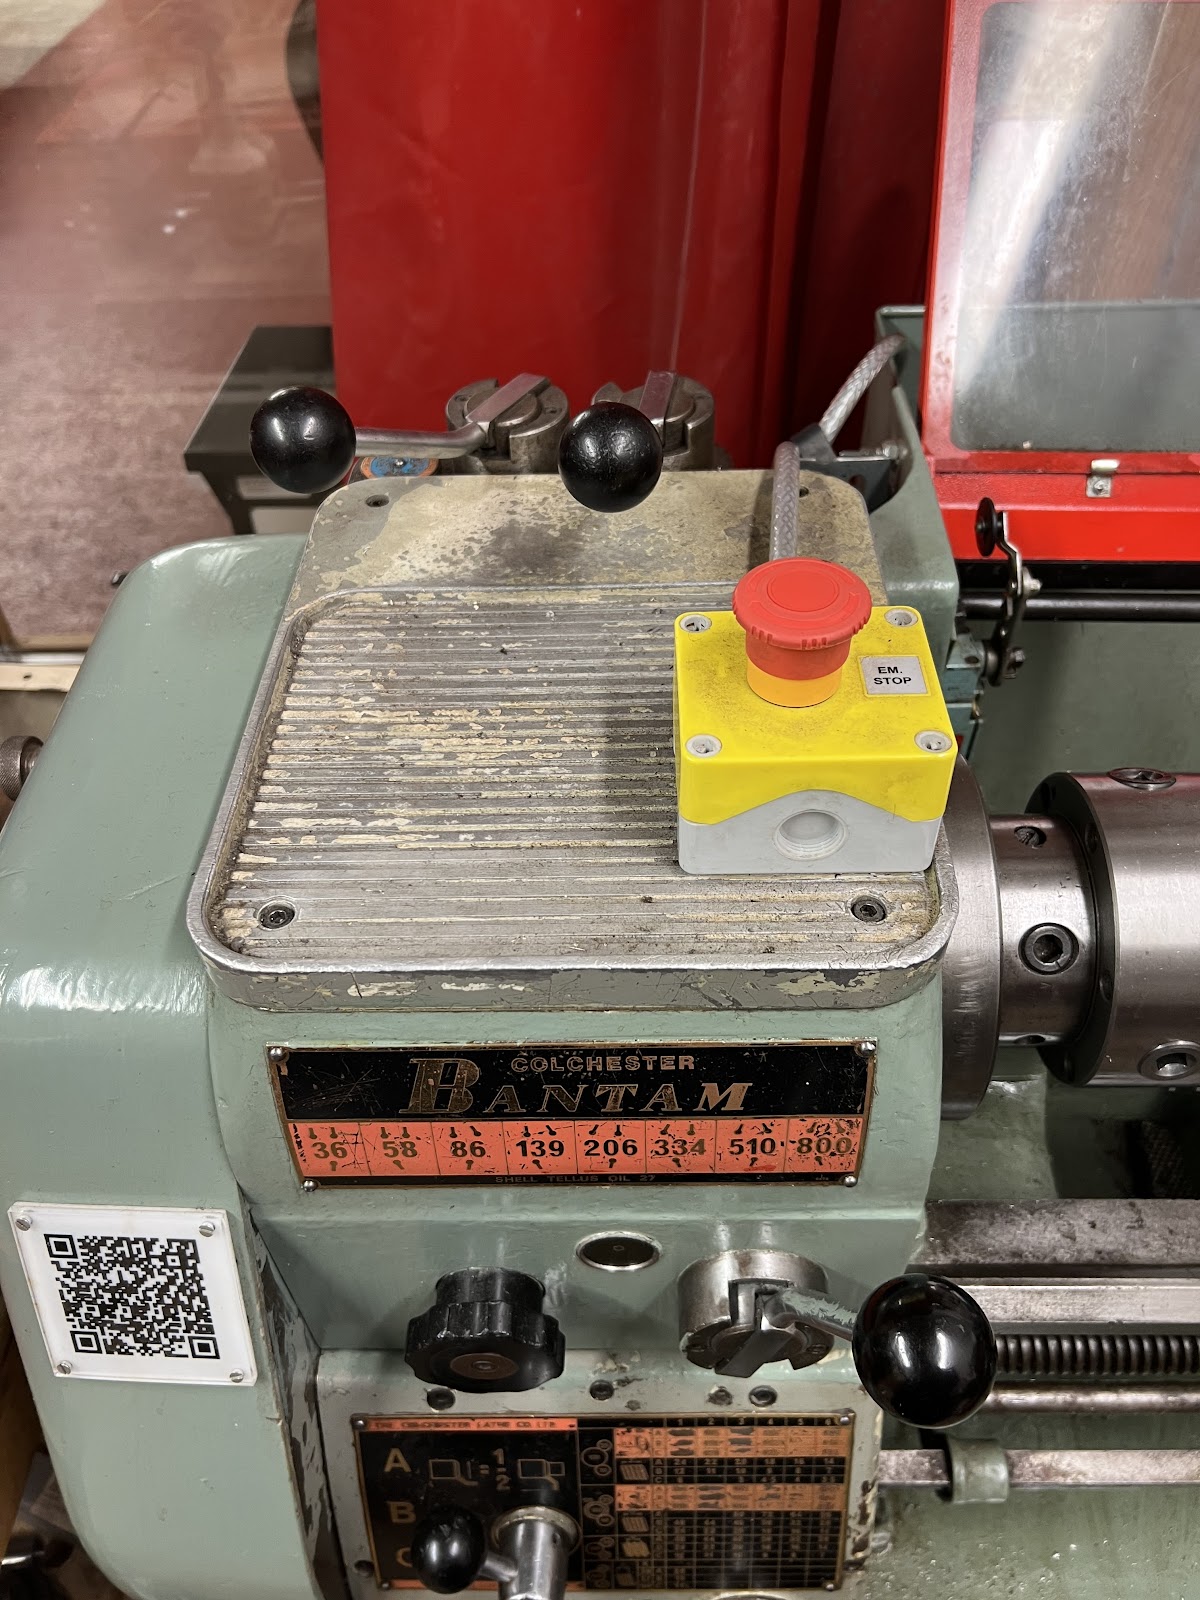
- Oil pump windows: For turning certain materials the oil pump will be used. The switch for the pump is below the bed next to the main on-switch
Bed: The bed is a robust base that connects to the headstock and permits the carriage and tailstock to be moved parallel. Note: Cleaning the bed is very important as grit or swarf can get stuck and make it hard for the carriage to move and cause wear to precision surfaces.

Carriage: The carriage holds the tool and moves it lengthways or perpendicular - either manually via the wheels or automatically by engaging the feed mechanism.

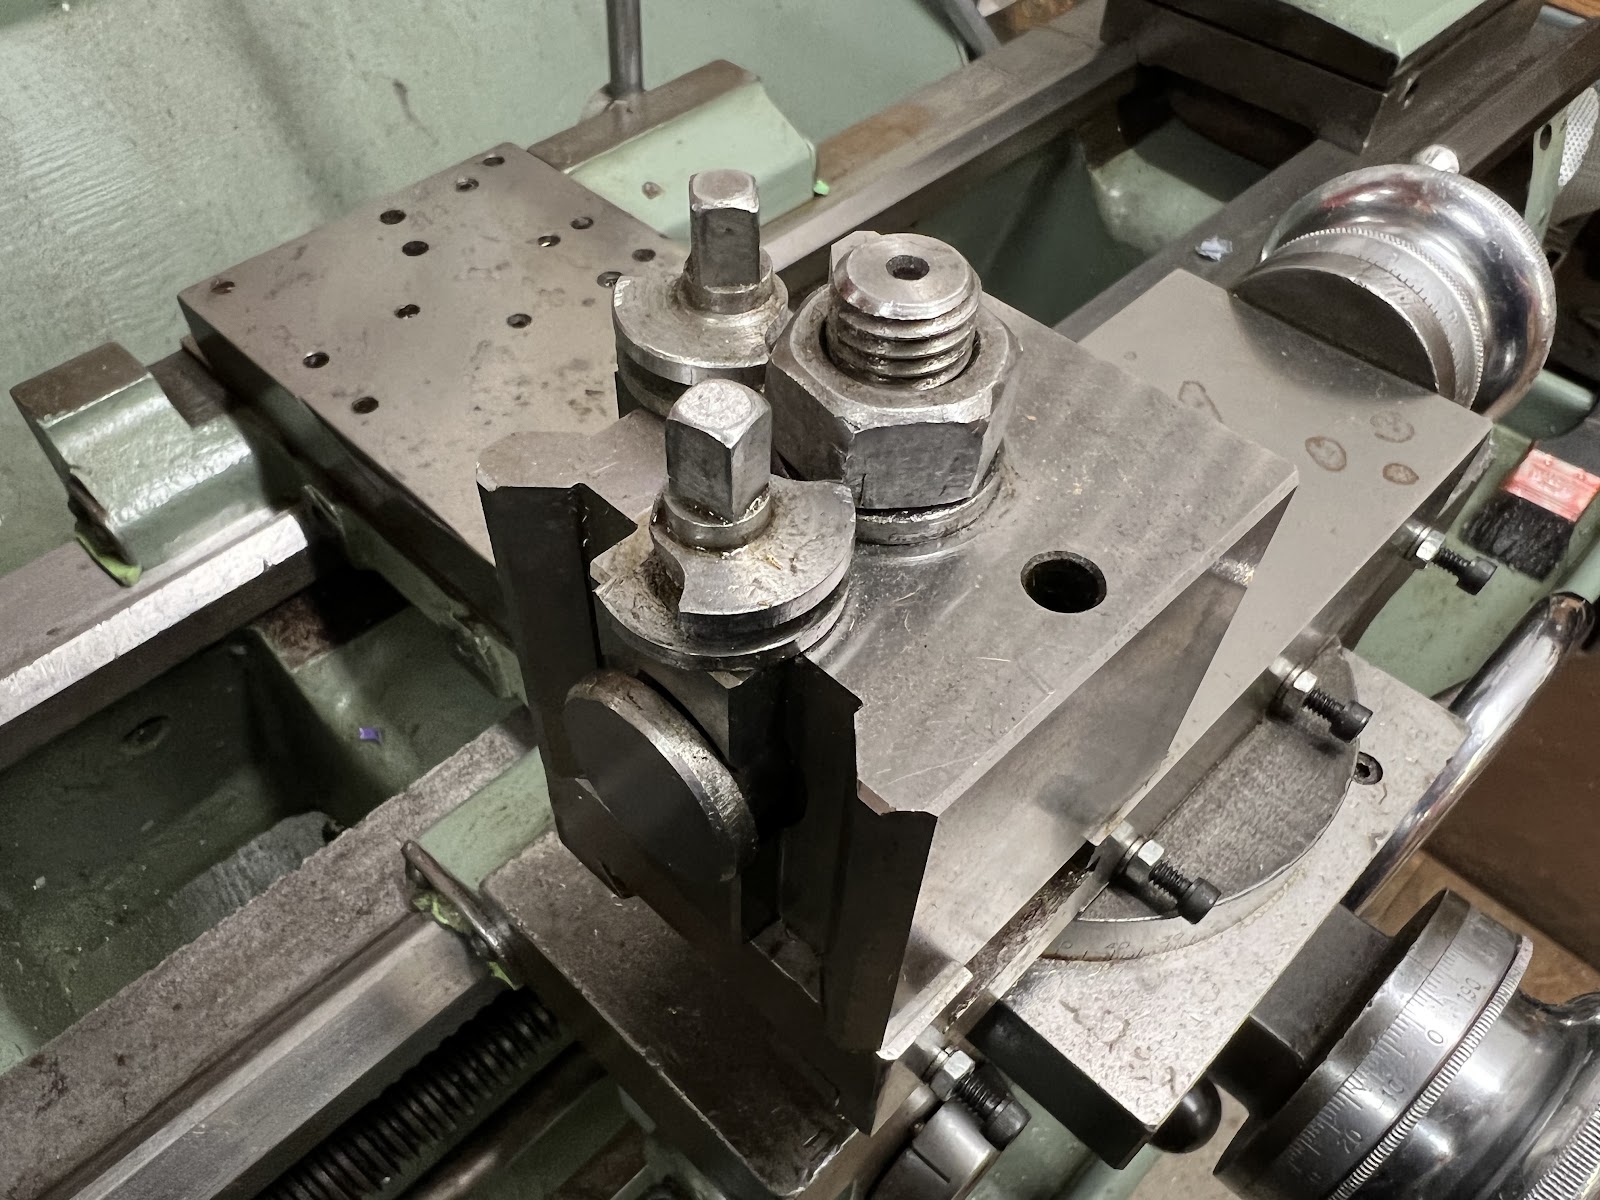
- Tool post: Different tools can be fastened to the tool post to perform different jobs on the workpiece. It can be rotated so the tool faces the workpiece from different angles.
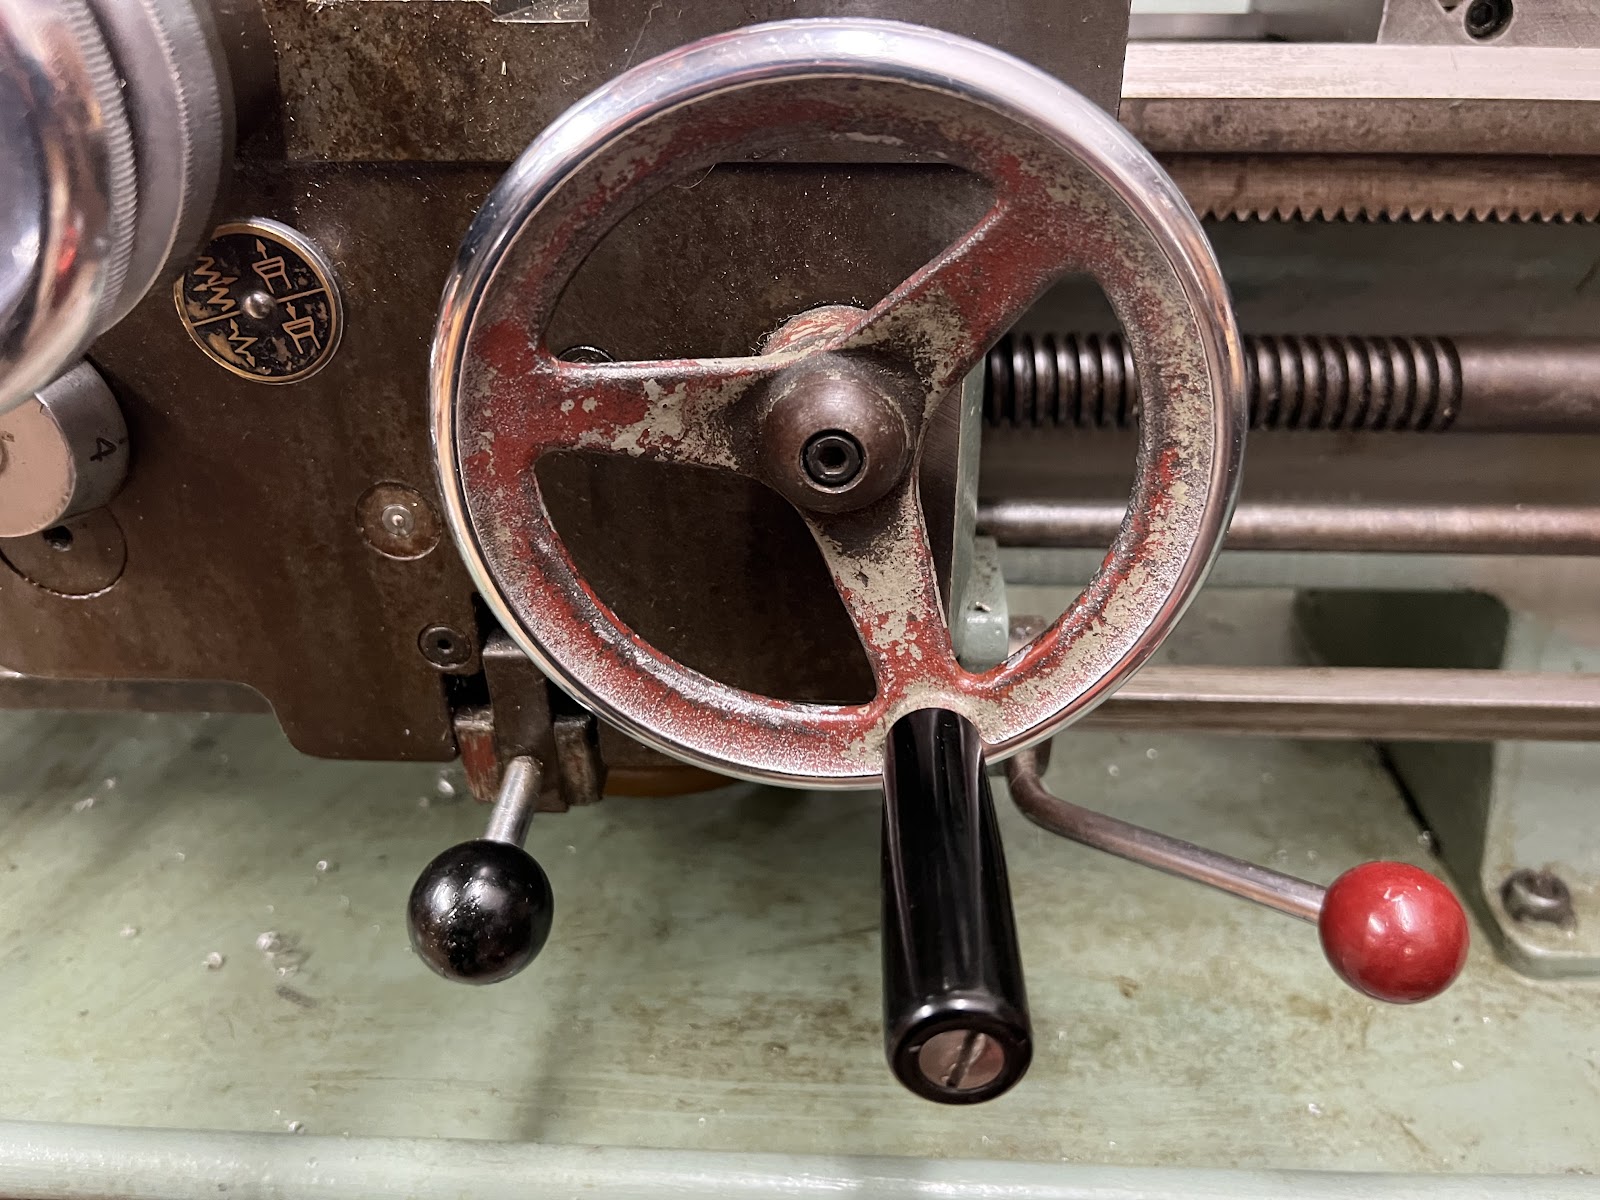
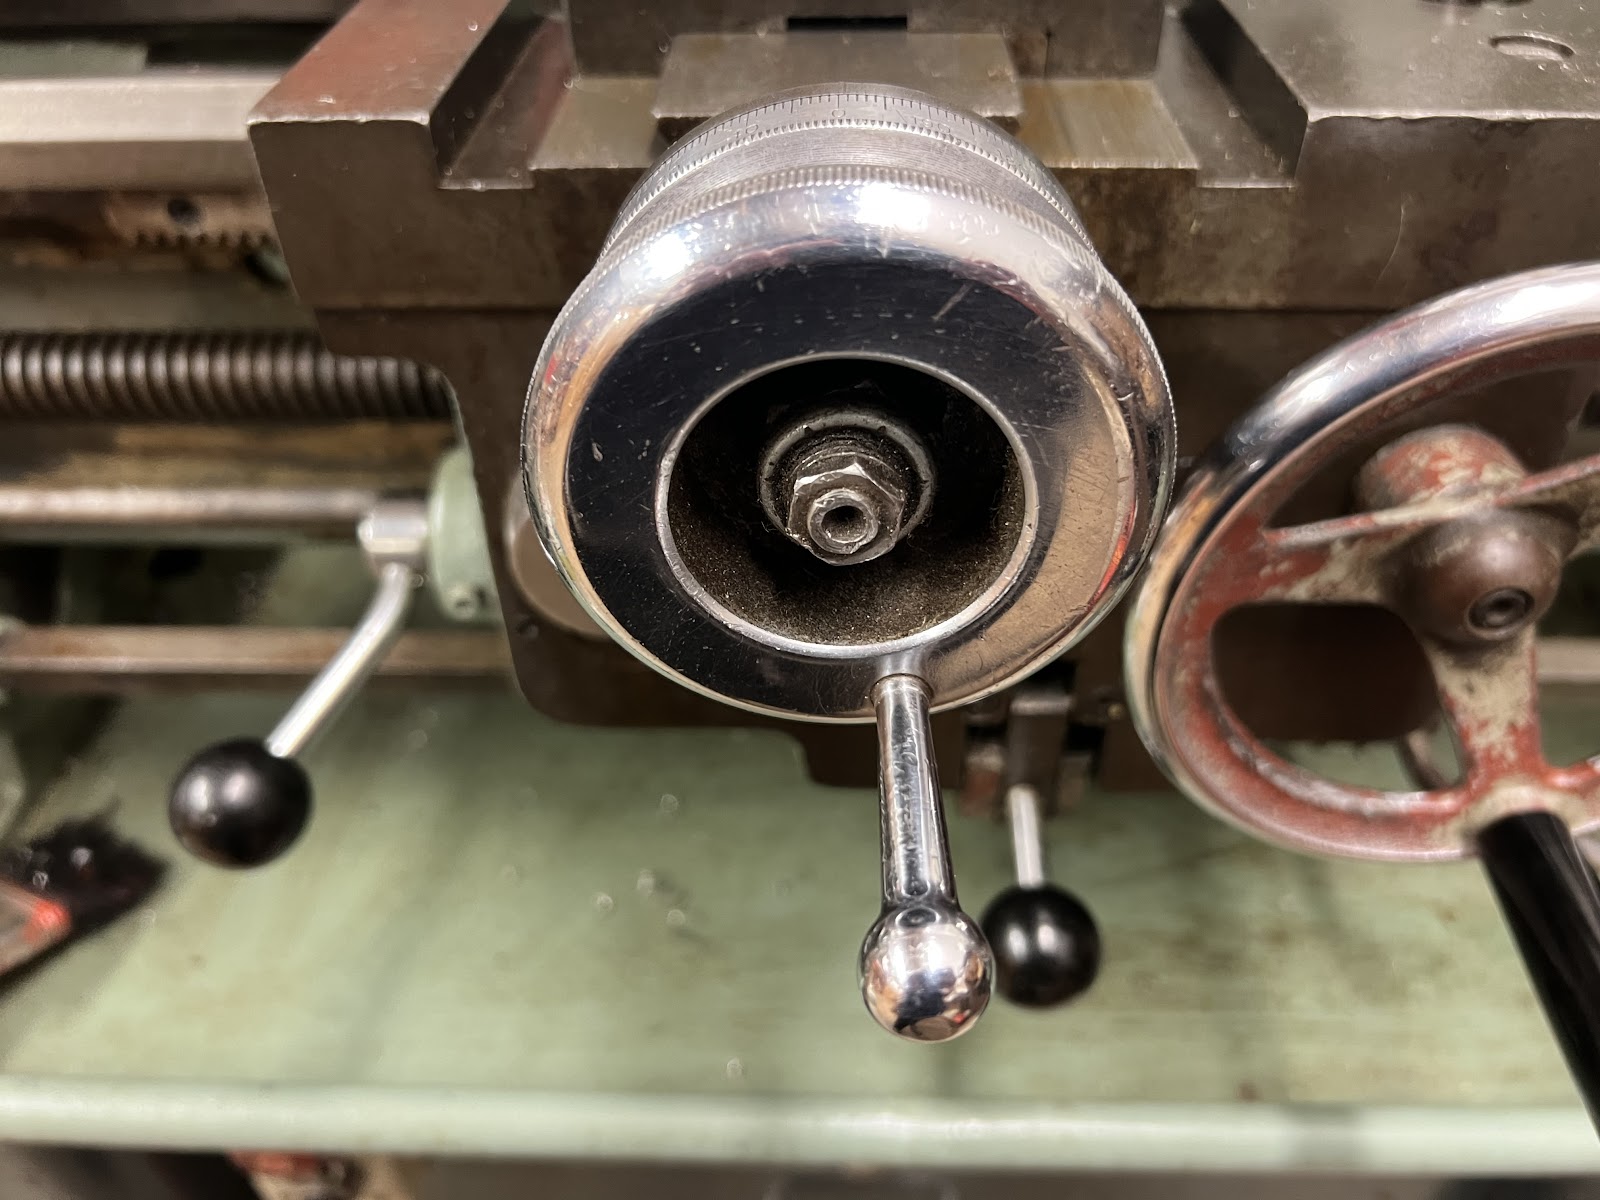
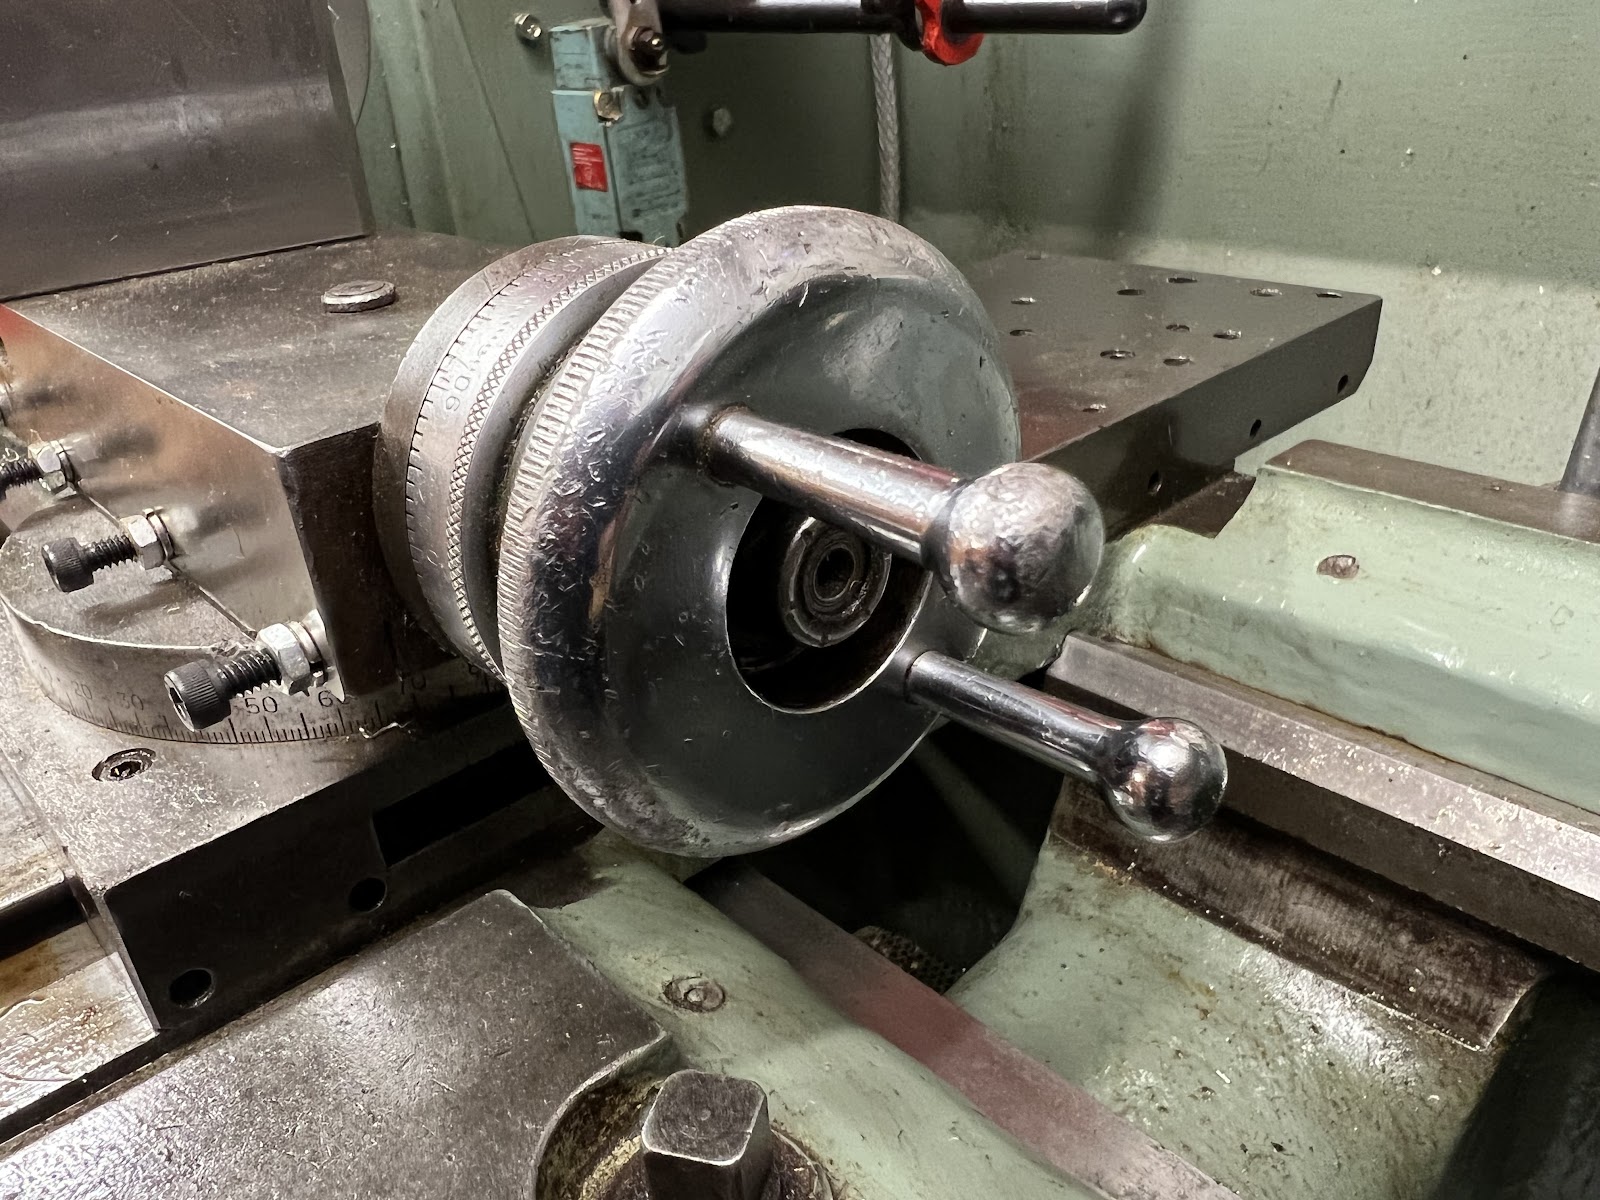
- Handwheels and feeds: On the carriage the wheels can be used to move the tool lengthways or perpendicular for different operations.
- Carriage stop: The lever locks the carriage in place lengthways so the tool can be fine adjusted.
- Facing and turning tool: The diamond shaped carbide tip can be used for facing and turning.

- Parting tool: The thin carbide tip on the parting tool cuts through material to remove it from the rest of the workpiece.

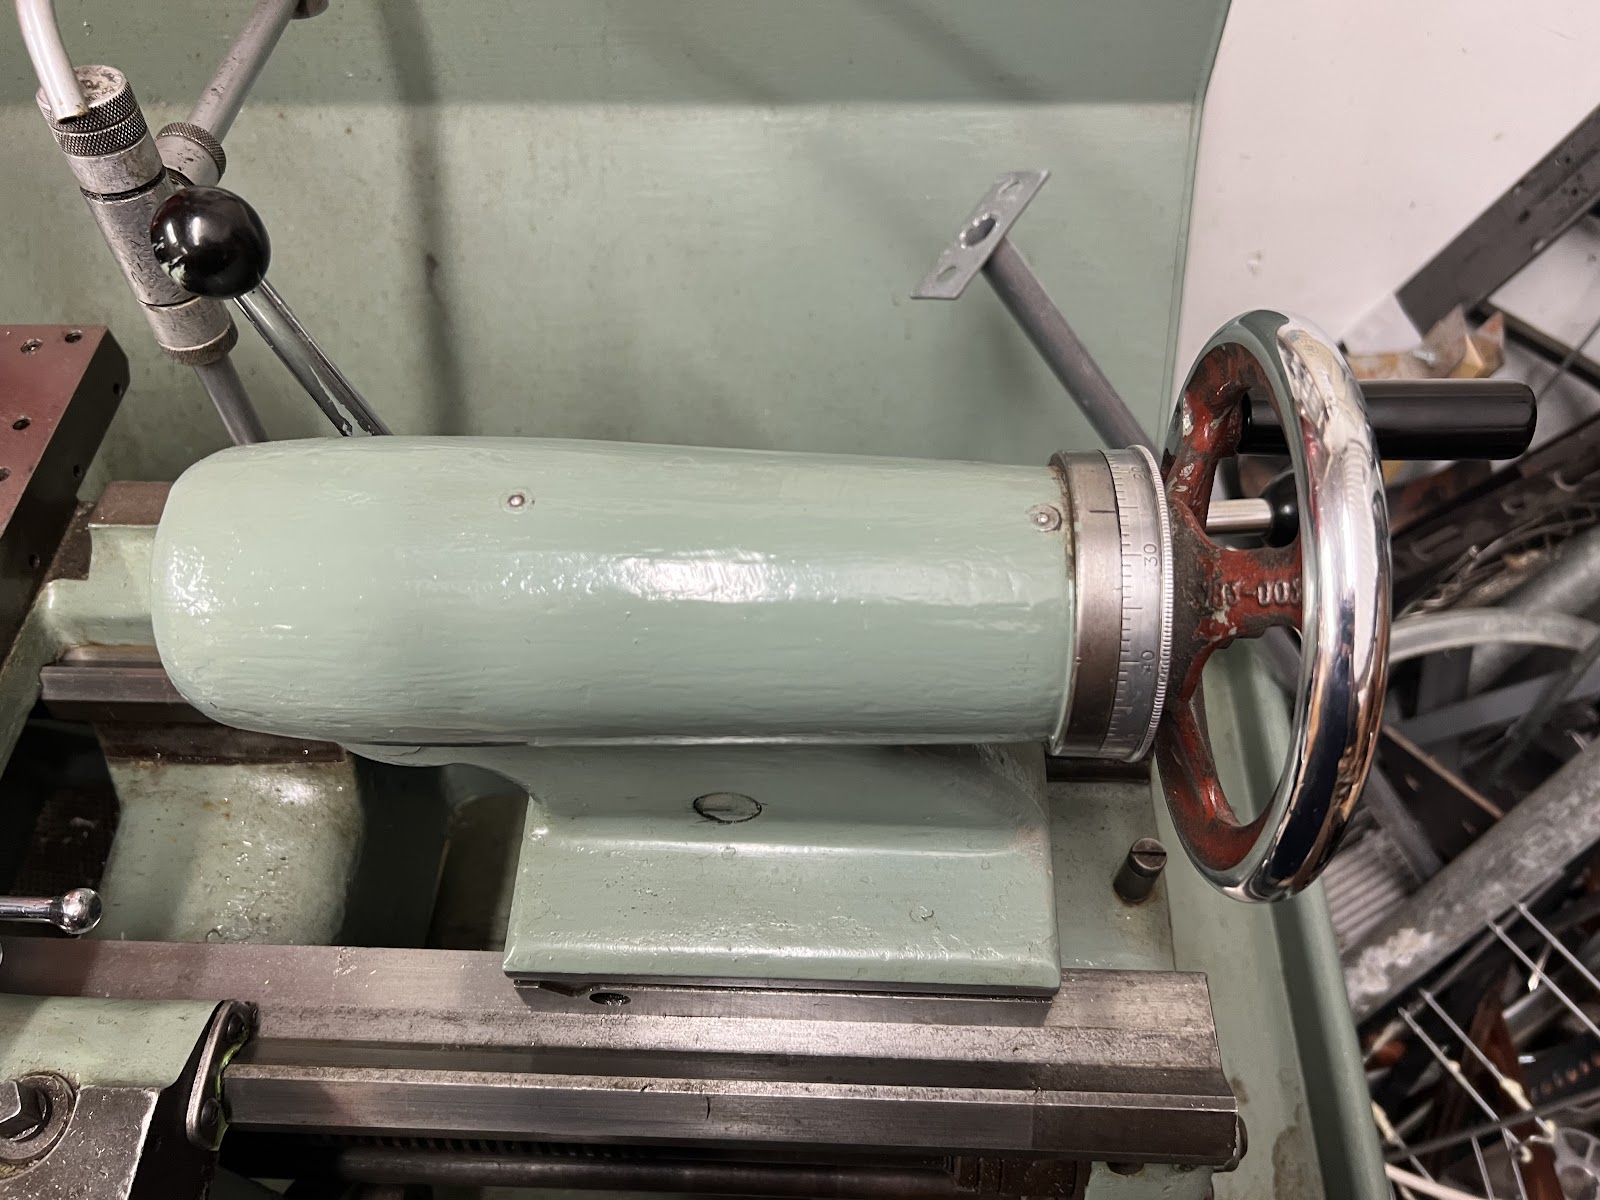
Tailstock: The tailstock is a tool and center mount, opposite the headstock. It can be positioned along the bed and clamped in position according to the length of the workpiece for turning longer pieces between centres, threading with taps & dies and drilling with a chuck.
Before operating the lathe:
- Clear the work area of anything that may be in the way.
- Don’t ever place things on the bed, carriage or headstock.
- Make sure the bed is free from particles.
- Make sure your tools are in good working order.
- Have your work area set up with the things you need i.e.cutting paste, brush, tools, blue paper roll.
Materials allowed on the metal lathe:
Level 1:
- Brass
- Aluminium
- Acrylic
Level 2 and 3:
- Stainless Steel
- Cast Iron
Start-up/Shutdown:
- After turning on tool control with your fob, turn the main switch to on.
- To start the lathe you need to pull down the red chuck guard and then move the red lever up to start the chuck rotating.
Note: rotate the chuck by hand to make sure that the tool is not touching the chuck or workpiece
- Turn the lathe off whenever you leave it, even briefly.
Mounting the tools:
- Select the right type of tools HSS vs Carbide (level 1 carbide only).
- Briefly inspect the tools before fitting, checking for sharpness.
- Hold the tools in the holders, keeping as little as possible sticking out
- Fit the tool into the quick-change toolpost and tighten the toolpost.
- Rotate the chuck by hand to check that the tool and work hitting into anything
- Make sure only the tip of the tool touches the work.
- Change the angle of the tool holder if needed.
Mounting the workpiece:
- Make sure the smallest amount possible is exposed, maximum of 3-5 times the diameter. Large/Long/Delicate pieces can’t be held at this level of induction
- Use the through-bore if necessary and material diameter allows it.
- If your workpiece is not concentric, it needs approximate truing and even tightening
- The 3-jaw is not 100% concentric, so don’t take the workpiece out until you’re finished.
- Do not leave the key in the chuck! This is the most common source of accidents on lathes and can cause serious injury.
- There is a spring attached to the red chuck key to make it self ejecting.
- After using the key, replace it immediately in its tool holder.
- Make sure the workpiece is held securely and rotate the chuck to visually check if it is centred.
The 3 main slides:
- The main slide is for fast parallel moves but be careful as it’s easy to slam the tool into something. It can be used for turning when absolute parallel motion is vital, but usually it’s much easier to use the top-slide.
- The cross slide for perpendicular moves has a dial that’s calibrated for RADIUS, not diameter. Every small marking is 1 thou (0.001") on the radius, or 2 thou in the diameter of the piece.
- The top slide works for small controlled parallel moves up to 100mm long, it can be used to cut tapers but that’s for the level 2 induction. Each marking on its dial is 1 thou (0.001")
Lamp:
- [To be added]
Selecting suitable speeds:
- [To be added]
Powerfeeds:
- Make sure that the powerfeed and screw cutting feed are disengaged before starting up the lathe.
- Warning: Things can go wrong very quickly if they’re left engaged!
Facing off:
- Get the rough position using the main slide. To get the actual job done, use the cross and top slides.
- The lathe mustn’t be stopped with the tool in the work.
- Touch on then zero the dials and advance in suitable amounts.
- Remember to compensate for backlash in all 3 slides.
- Make smooth even movements, using 2 hands on the slides.
- Listen to the tool and the machine, grinding noises or audible loading of motor are seriously bad.
- Wind in to just past the centre and then out again.
- Go slower near the centre and if there’s a nub left or the tool tries to ride up, the tool height is set wrongly.
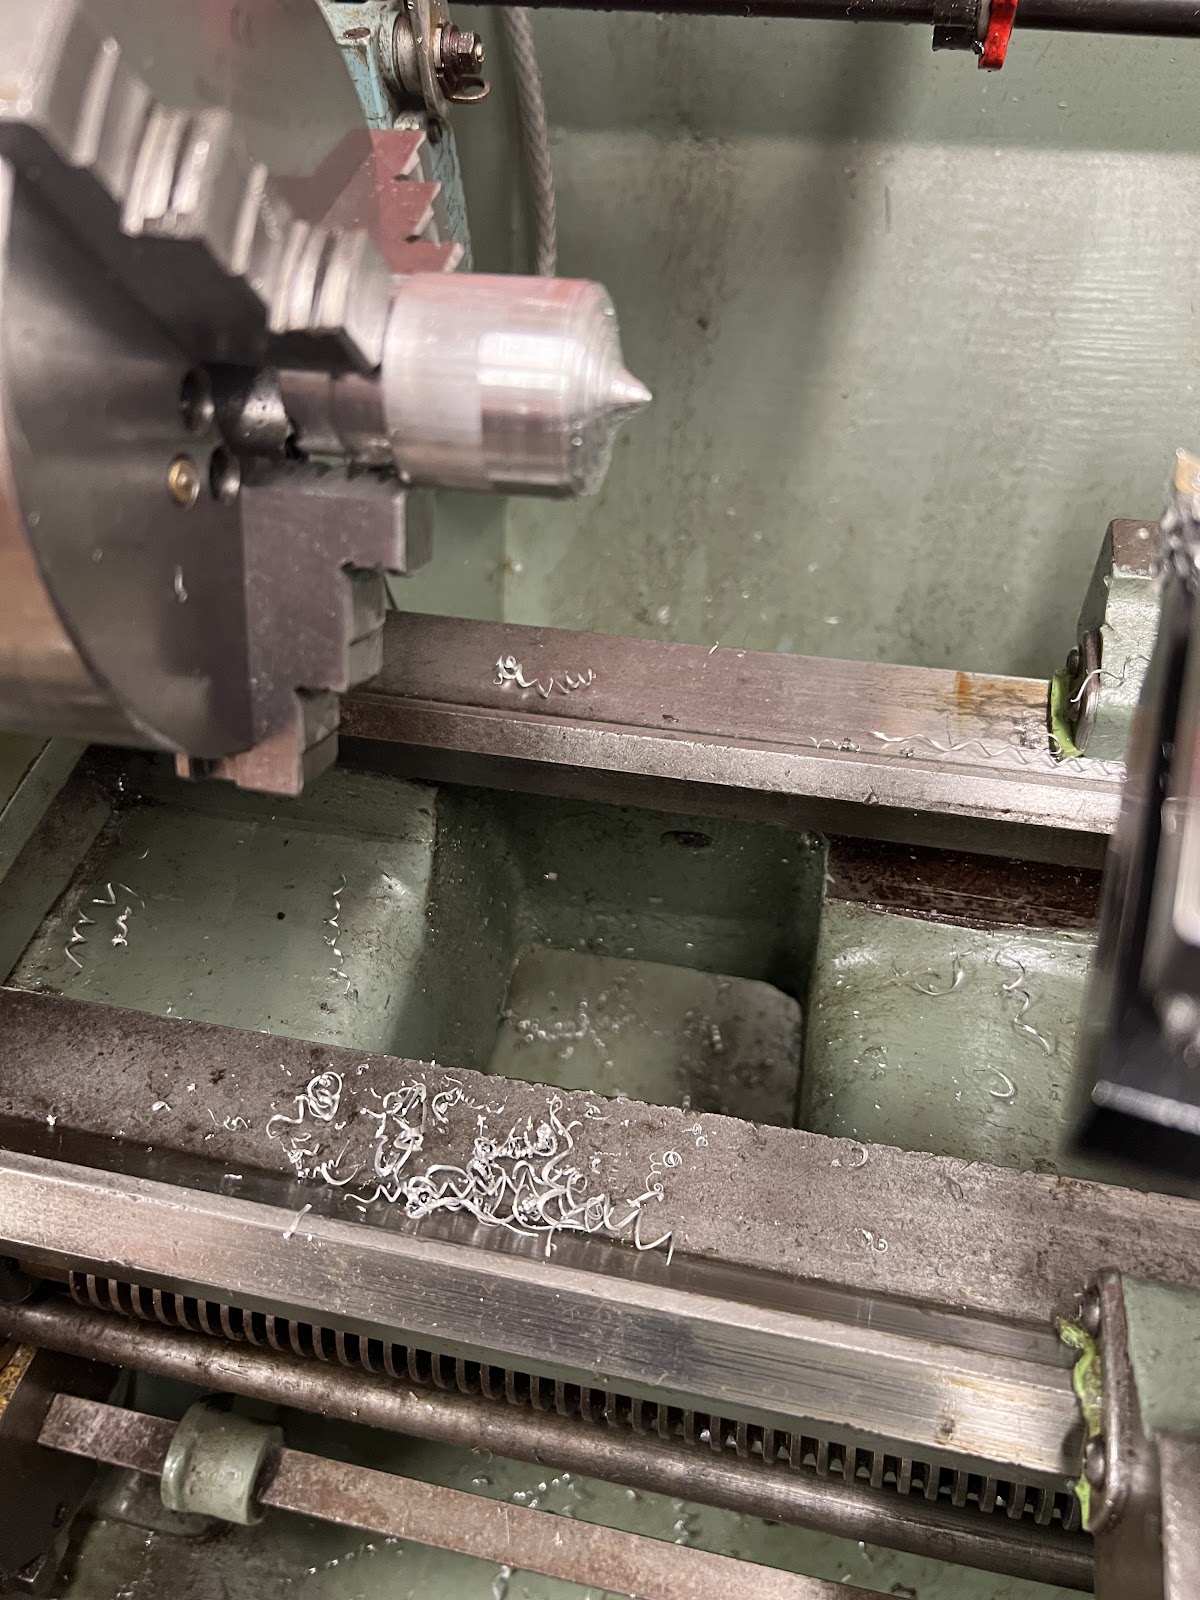
- Check the warning signs of very bad chip form (for all materials) and colour (steels): Discrete small chips with a slight yellow colour are best, silver is fine, blue is too hot for HSS.
- Long ribbon swarf - although not ideal - is acceptable. However, very small chips, dust, or “vanishing” chips are rubbing and NOT OK.
- Roughing passes and a finish pass
Parallel Turning:
- Pick the correct slide for the length of cut by positioning correctly at start of the cut
- Touch on and zero dials.
- Smooth even progress using 2 hands on the wheel.
- What does good chip form looks like?
- Reasonable depth of cut for roughing?
- Try to accurately stop at the same place on multiple passes.
- Come to an accurate diameter and depth of the shoulder
- Do a finish pass and clean up the shoulder.
Drilling:
- Mount the drill chucks in the tail-stock.
- Check the maximum drilling capacities for each chuck.
- Select suitable drills for the material
- Move the tailstock by sliding it in position
- Use the lever to lock it off.
- Use the handwheel to move and position the tail-stock more precisely
- Select suitable speeds using the table. (2 flutes ⇒ 50% speed).
- Use a centre-drill to start the hole.
- Drill the hole in stages backing out frequently to remove swarf
- Use the dial on the tail-stock to pick a depth.
- Feel for suitable feed rates and check the symptoms of too little/too much feed pressure.
- Watch out for thermal issues, a flood coolant is preferred.
- Make sure the coolant is non-corrosive and doesn’t need to be wiped off after.
Parting off:
- Set the tool and check the maximum parting depth based on the tool’s protrusion and absolute max. Ensure very accurate perpendicular tool positioning and precise and very even movement.
- Parting should be done at less than 35% spindle speed compared to other cuts.
Cleaning:
- No workpiece should be left in, no tool left mounted, nothing in tailstock.
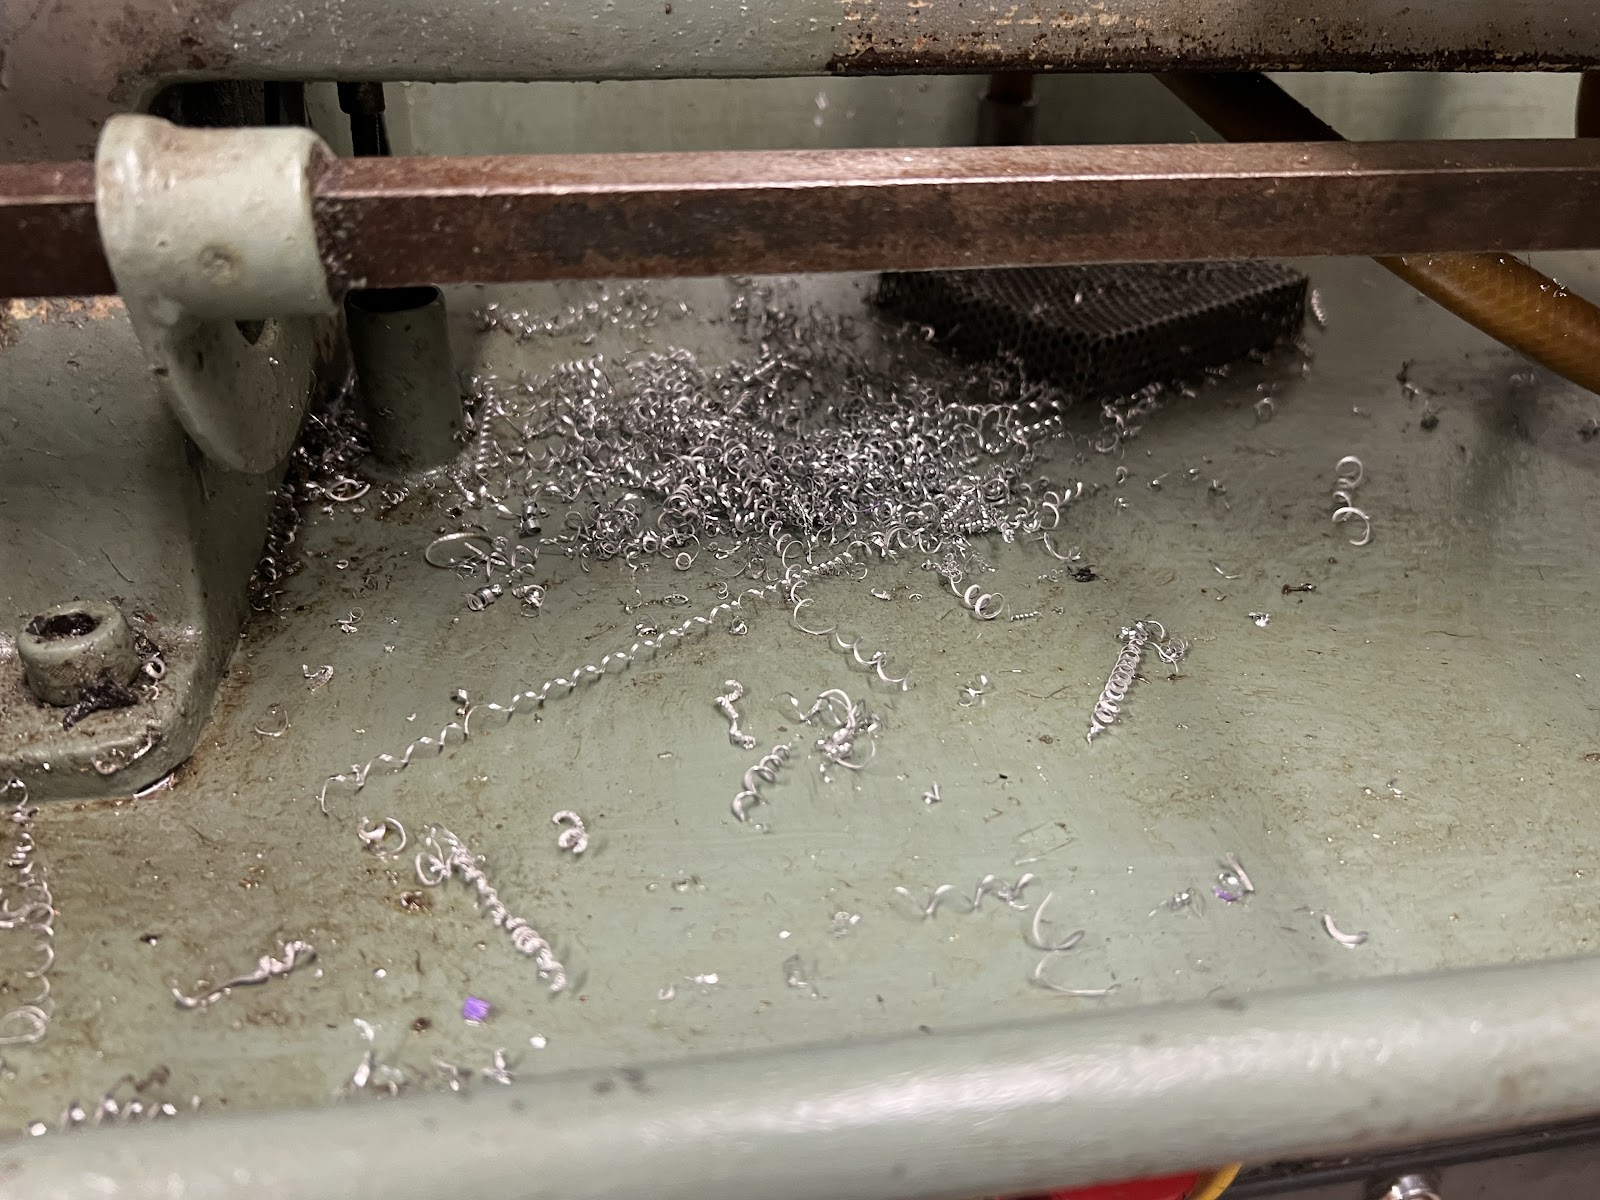
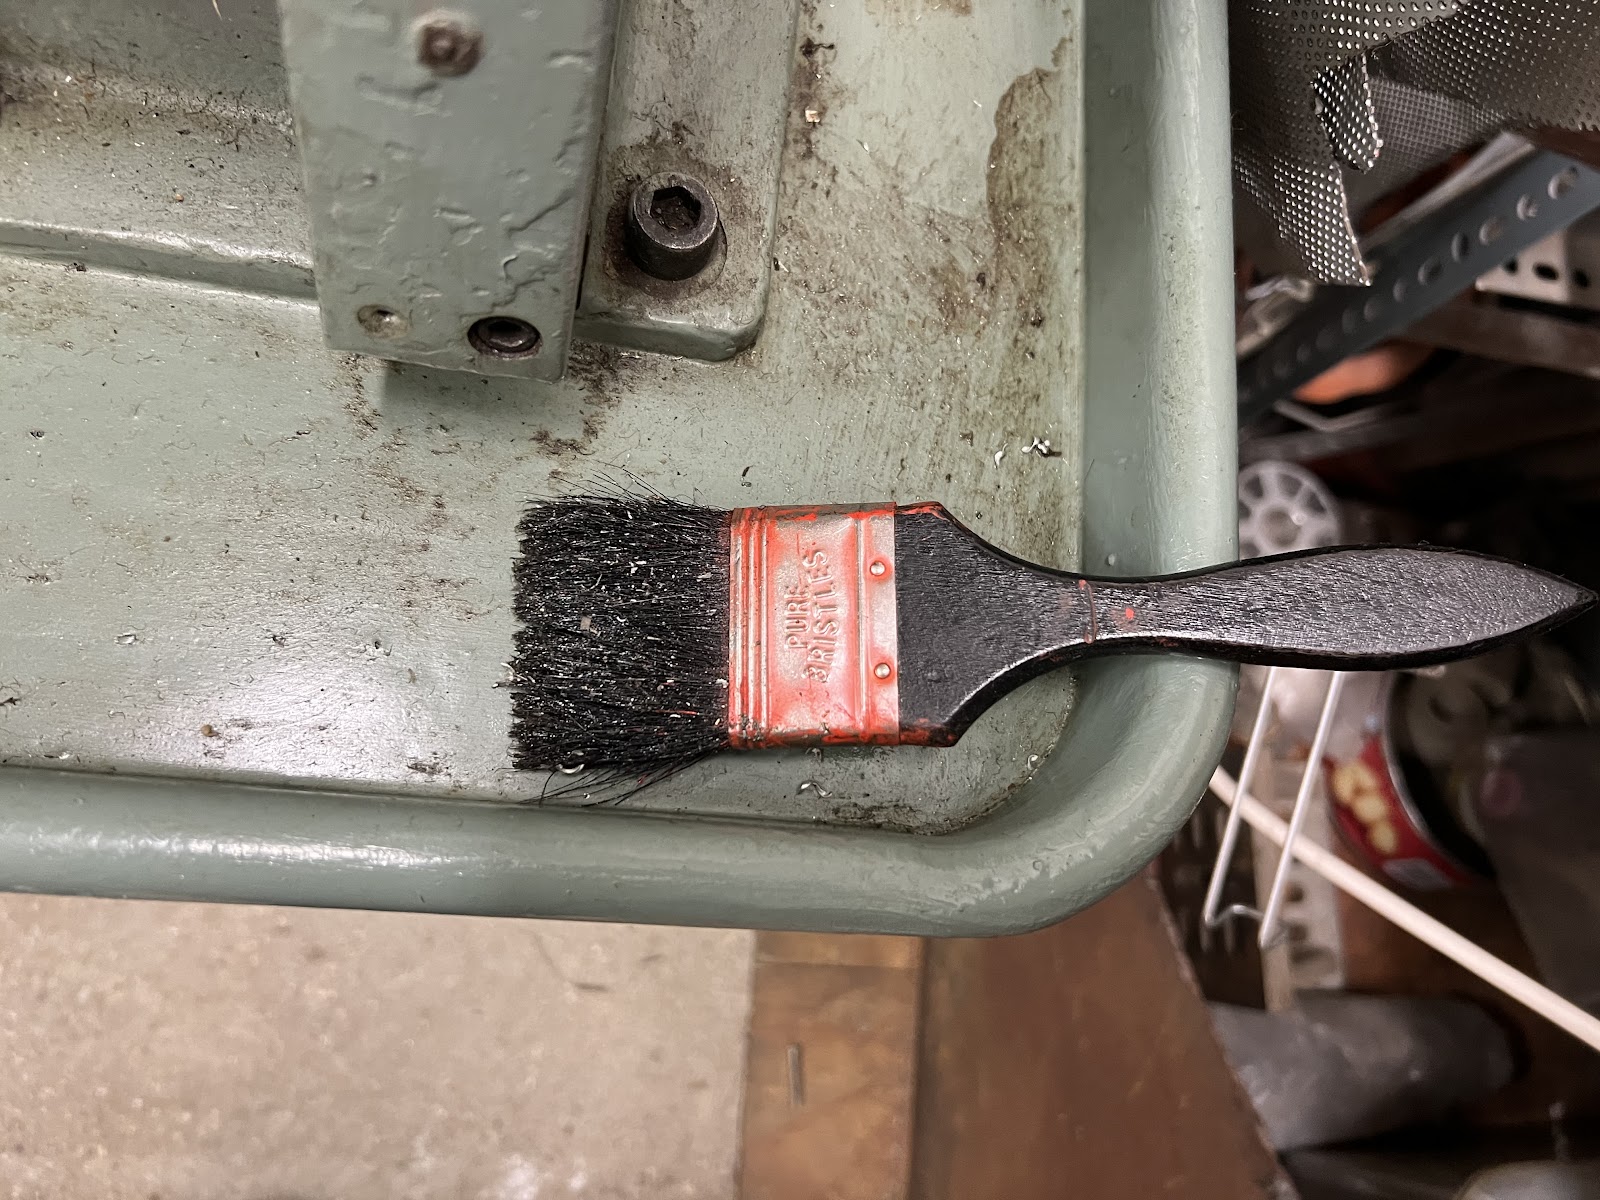
- Pick up swarf using the brush and paper towels, watching out for sharp edges and cuts.
- Drain tray and clean the rest of the flood coolant.
- Put the waste swarf in the metals bin.
- Wipe down the machine and especially the bed, reoil with WD40 and wipe down if heavy cleaning was needed.
- Clean the guard.
- Mop up any spilled coolant.
- Make sure all tools and accessories are back in its place and you cover the lathe.
- We don’t expect the lathe to be left spotless, just all the swarf gone.
References
Colchester Bantam Manual:
Additional Spare Parts Section: