I made myself a couple of cabinets a year and a half ago for the jewellery I make, kind of heavy when compared to it’s capacity - built more in mind to give to a shop to sell for me… so I set about scheming a new one for my market use in keeping with the new theme of the stall as defined by my previous project (First Finished Project, Padded Fabric Lined Oak Box).
No photographs of the first half of the project, I tend to get a little to into the making to step back and track the project, so text and some post photos will have to do…
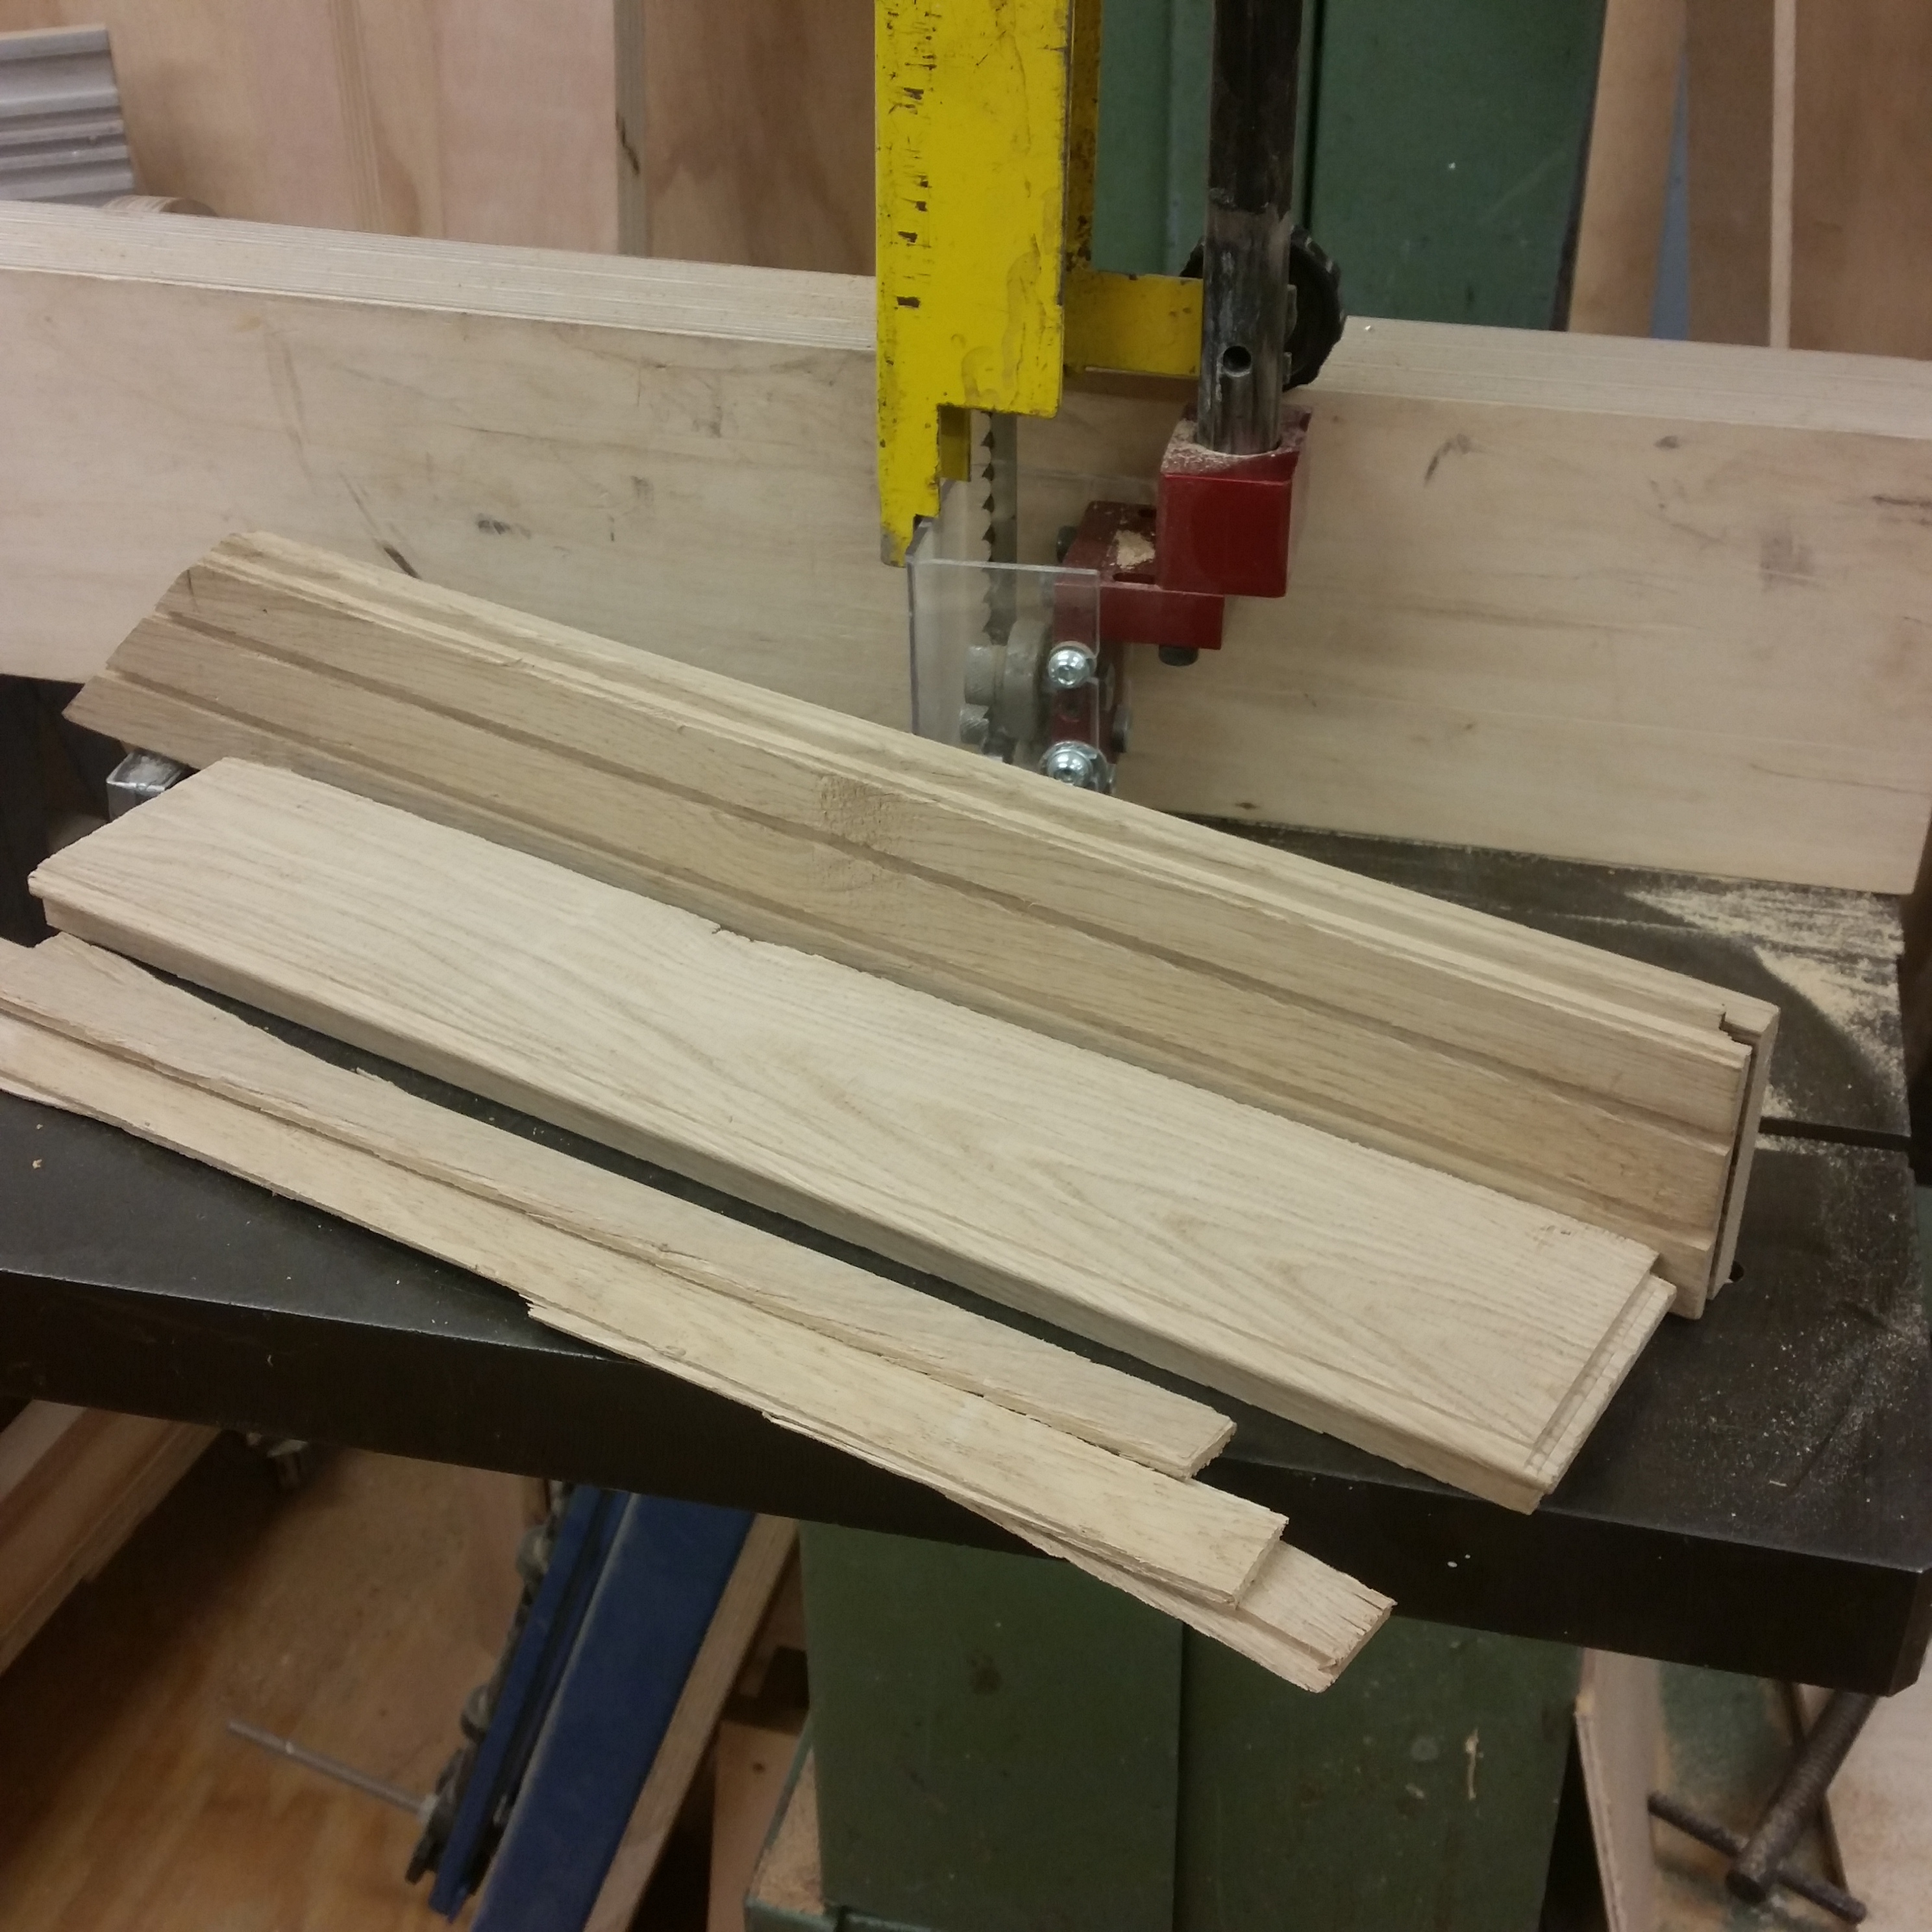
Using a load more of the oak flooring offcuts the universe gave me for my birthday.
First off buzzed the bottom grooves for the glue off with the band saw, giving me a load of useful strips for later on in the build, planed the tongues and grooves off the sides, and glues a load of bits together to make up the sides of the box.
Ran these over the jointer to get them even enough to be grabbed by the thicknesser.
Thicknessed the pieces, planed one edge, and cut the remaining sides to width and square using the table saw, 45° for the mitred corners.
Cut a diagonal using the mitre saw to give me my two slanted sides, ran a 4mm groove along the top of the diagonal edge and another parallel to the bottom for the display board and cupboard bottom using a biscuit bit for the makita router.
I then cut a load of lengths for the front and rear, planed two of them to match the angle of the diagonal, and cut an angled 4mm groove in each piece to match the ones on the side. Similar for the cupboard bottom. Then glued some of these pieces to the whole, leaving the top rear piece until after I made the display board.
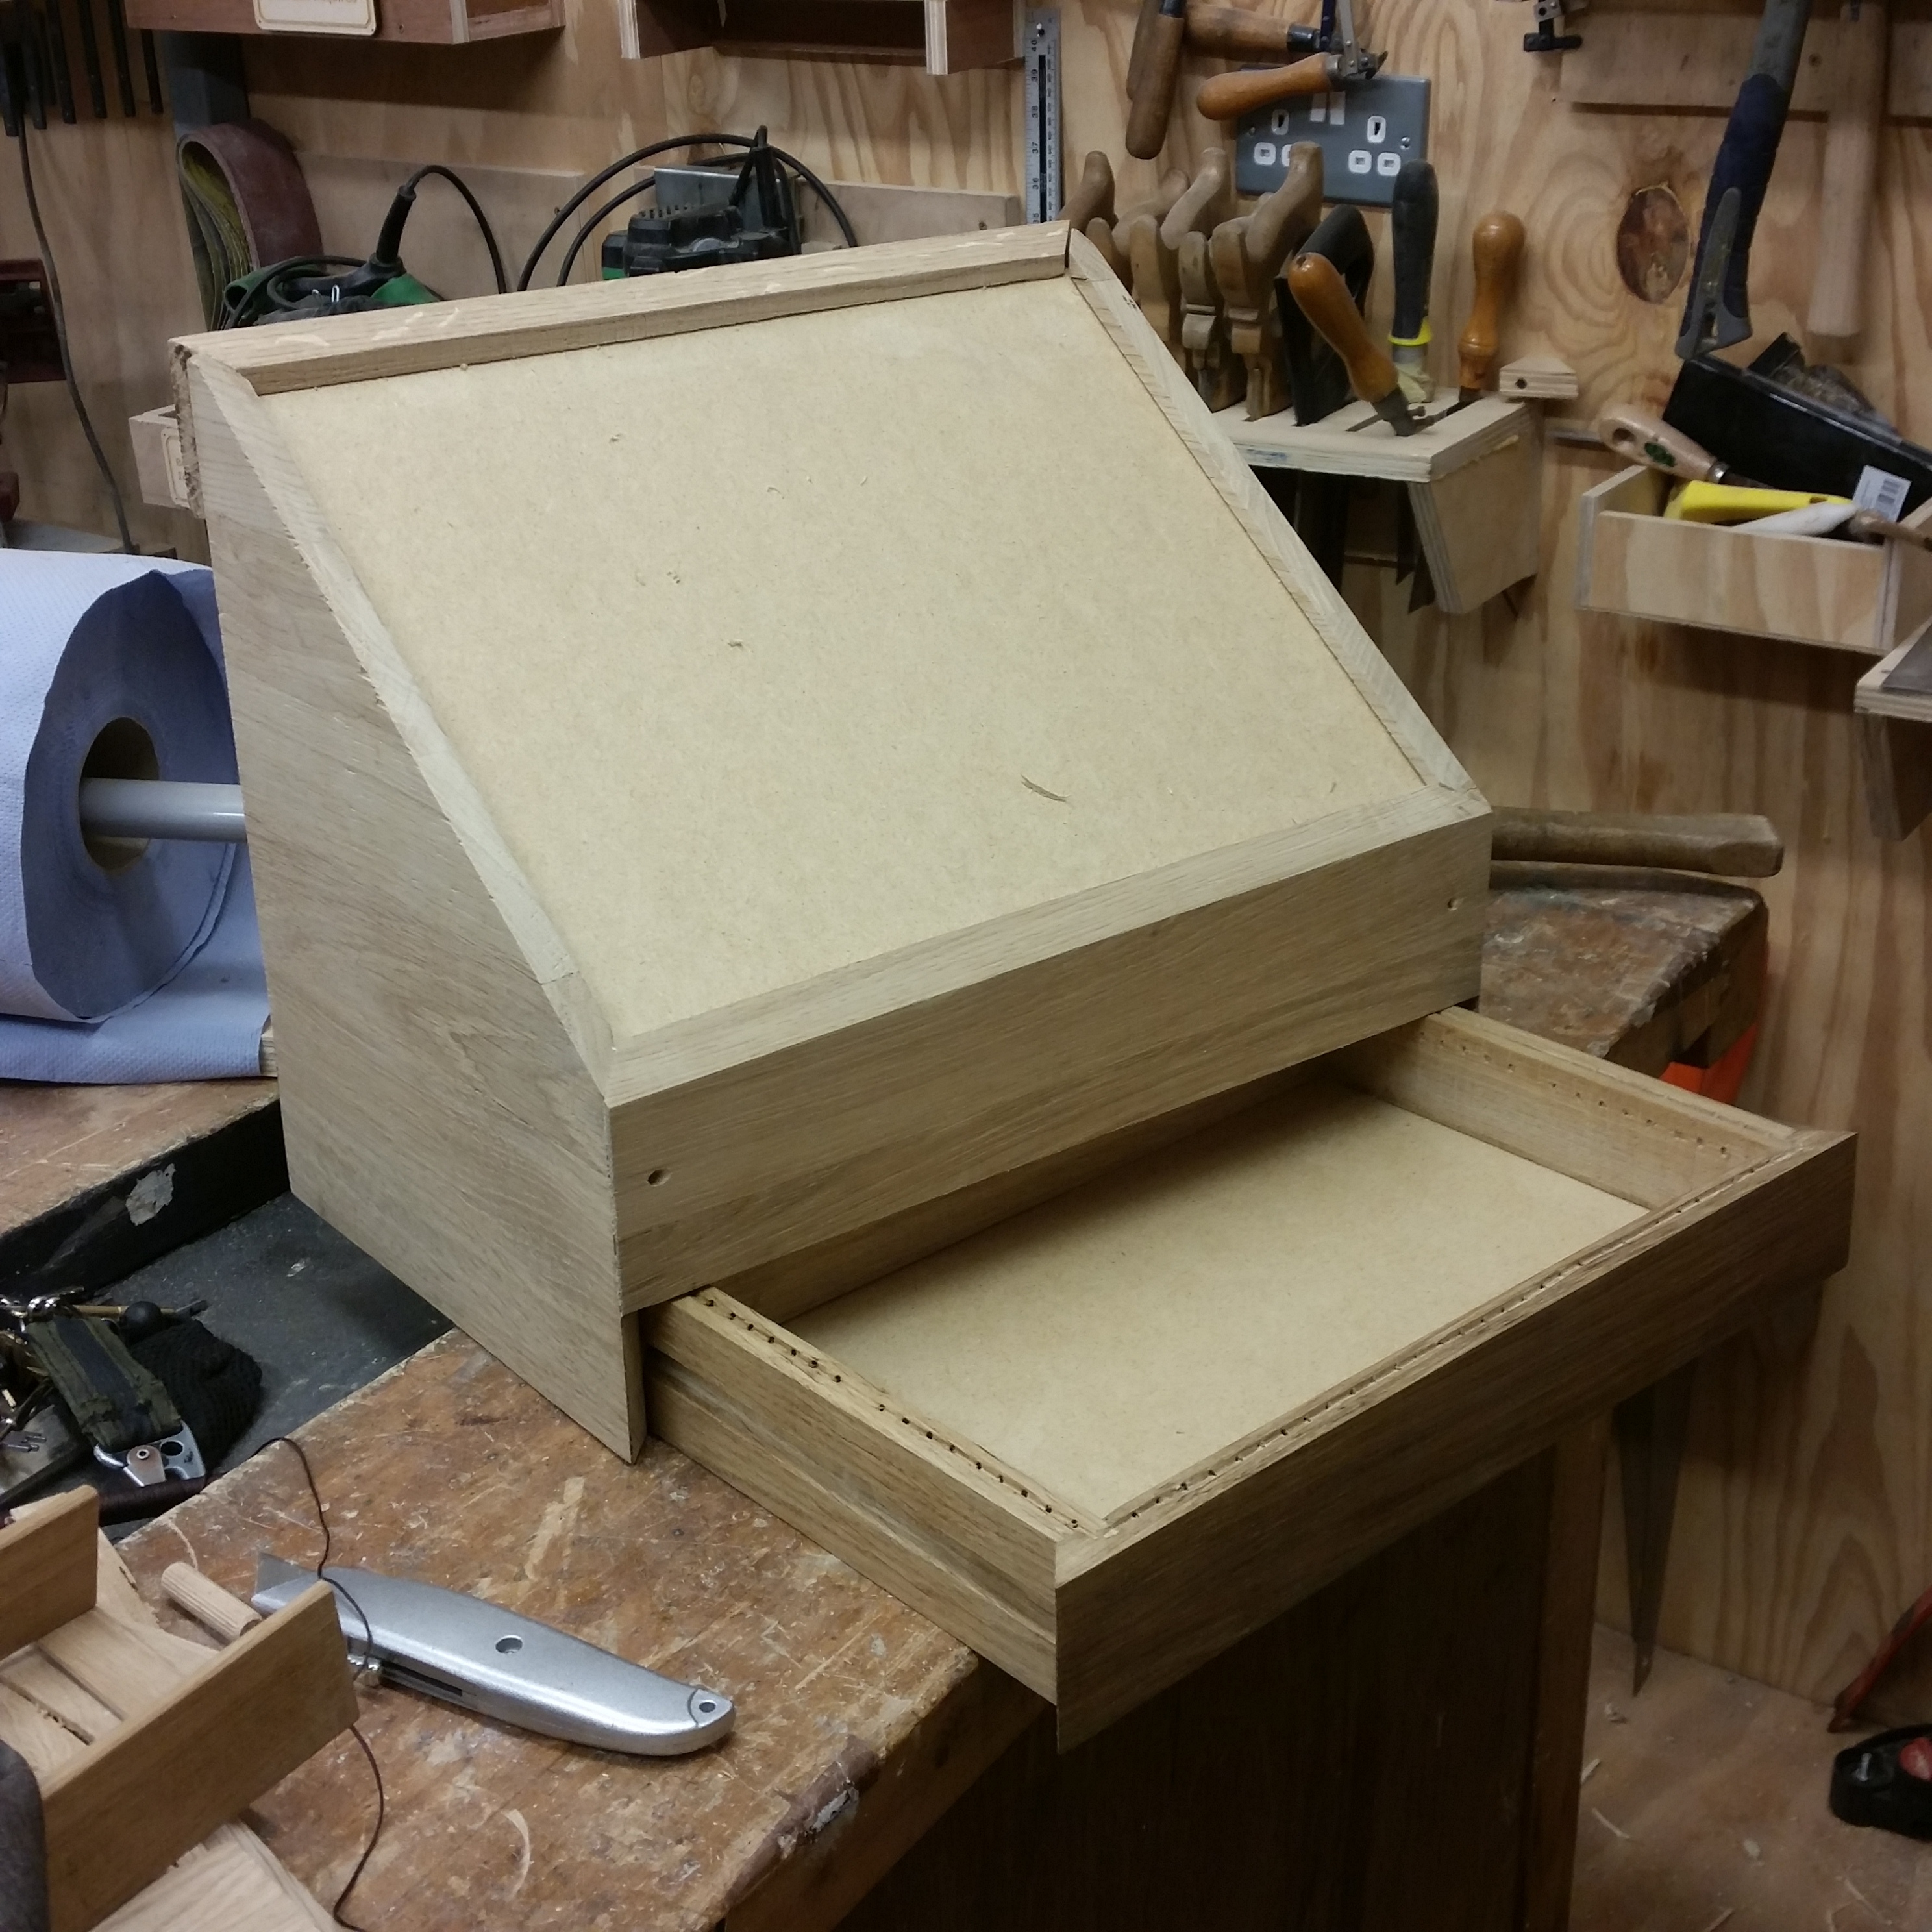
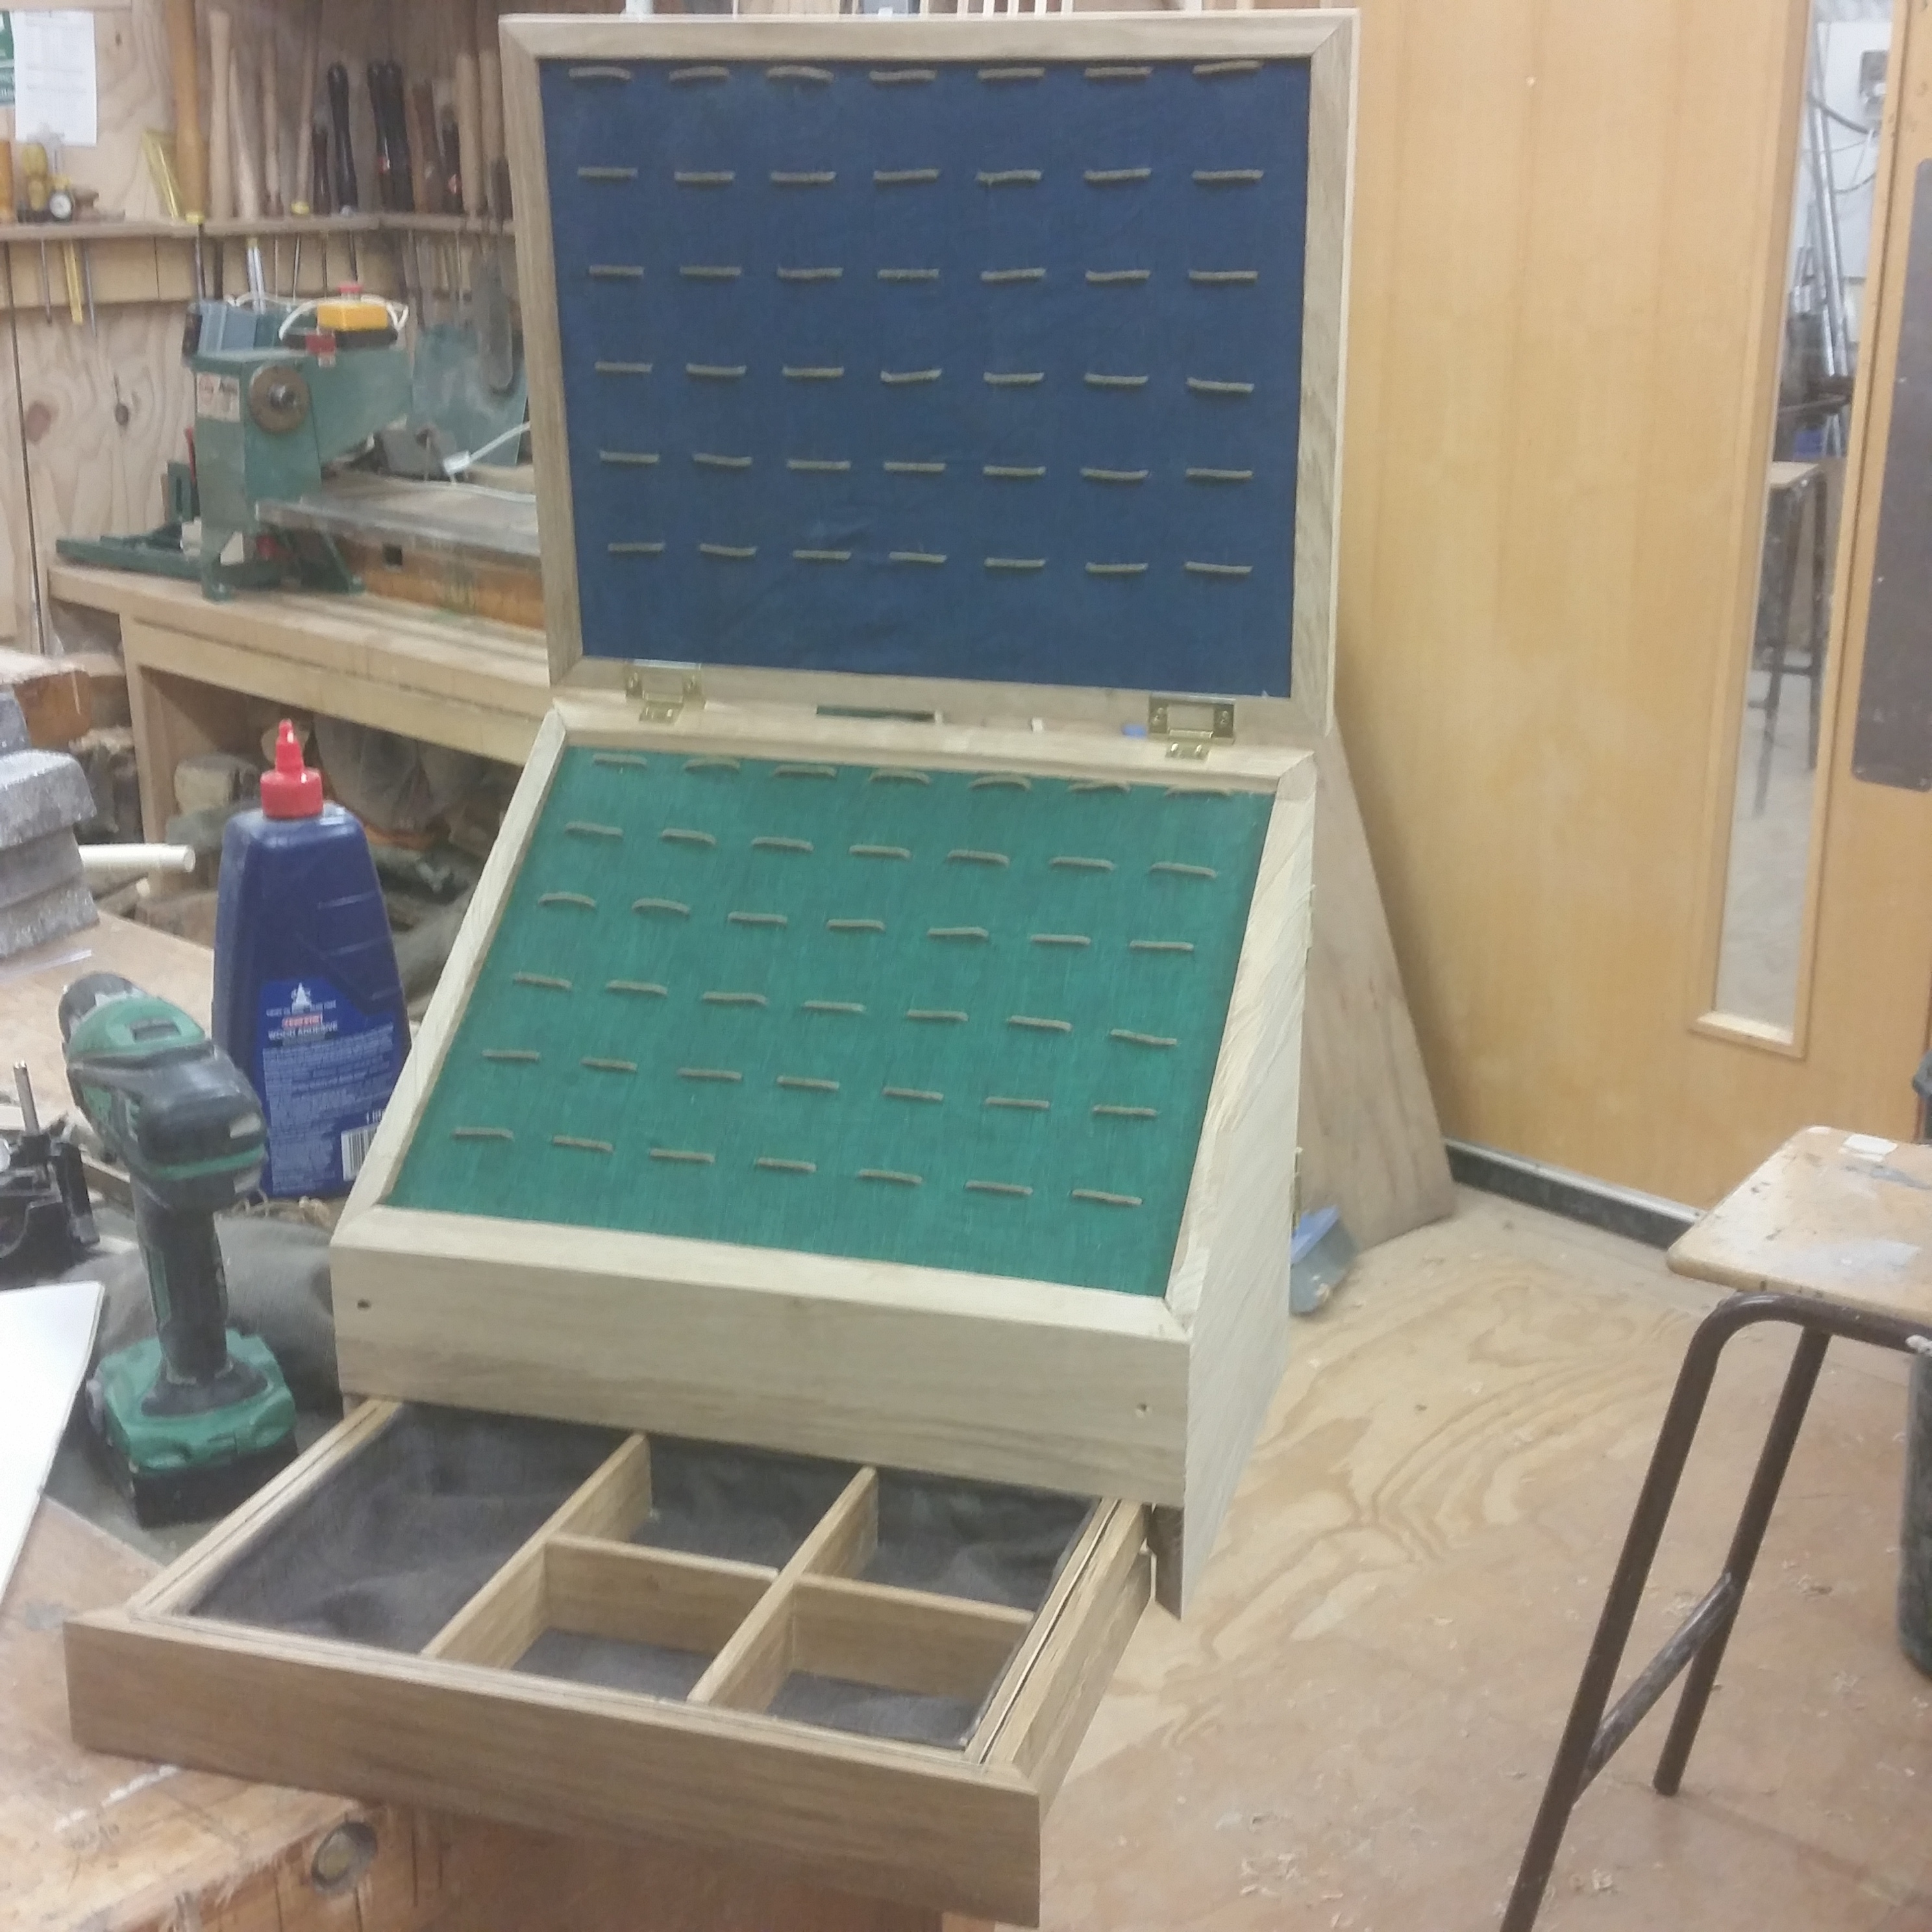
Then started on the draw, cut pieces to size, mitred the corners on the front face, cut some grooves and rebates to increase glue surface area, cut the grooves for the bottom, cut a piece of hardboard to size, glued and clamped.
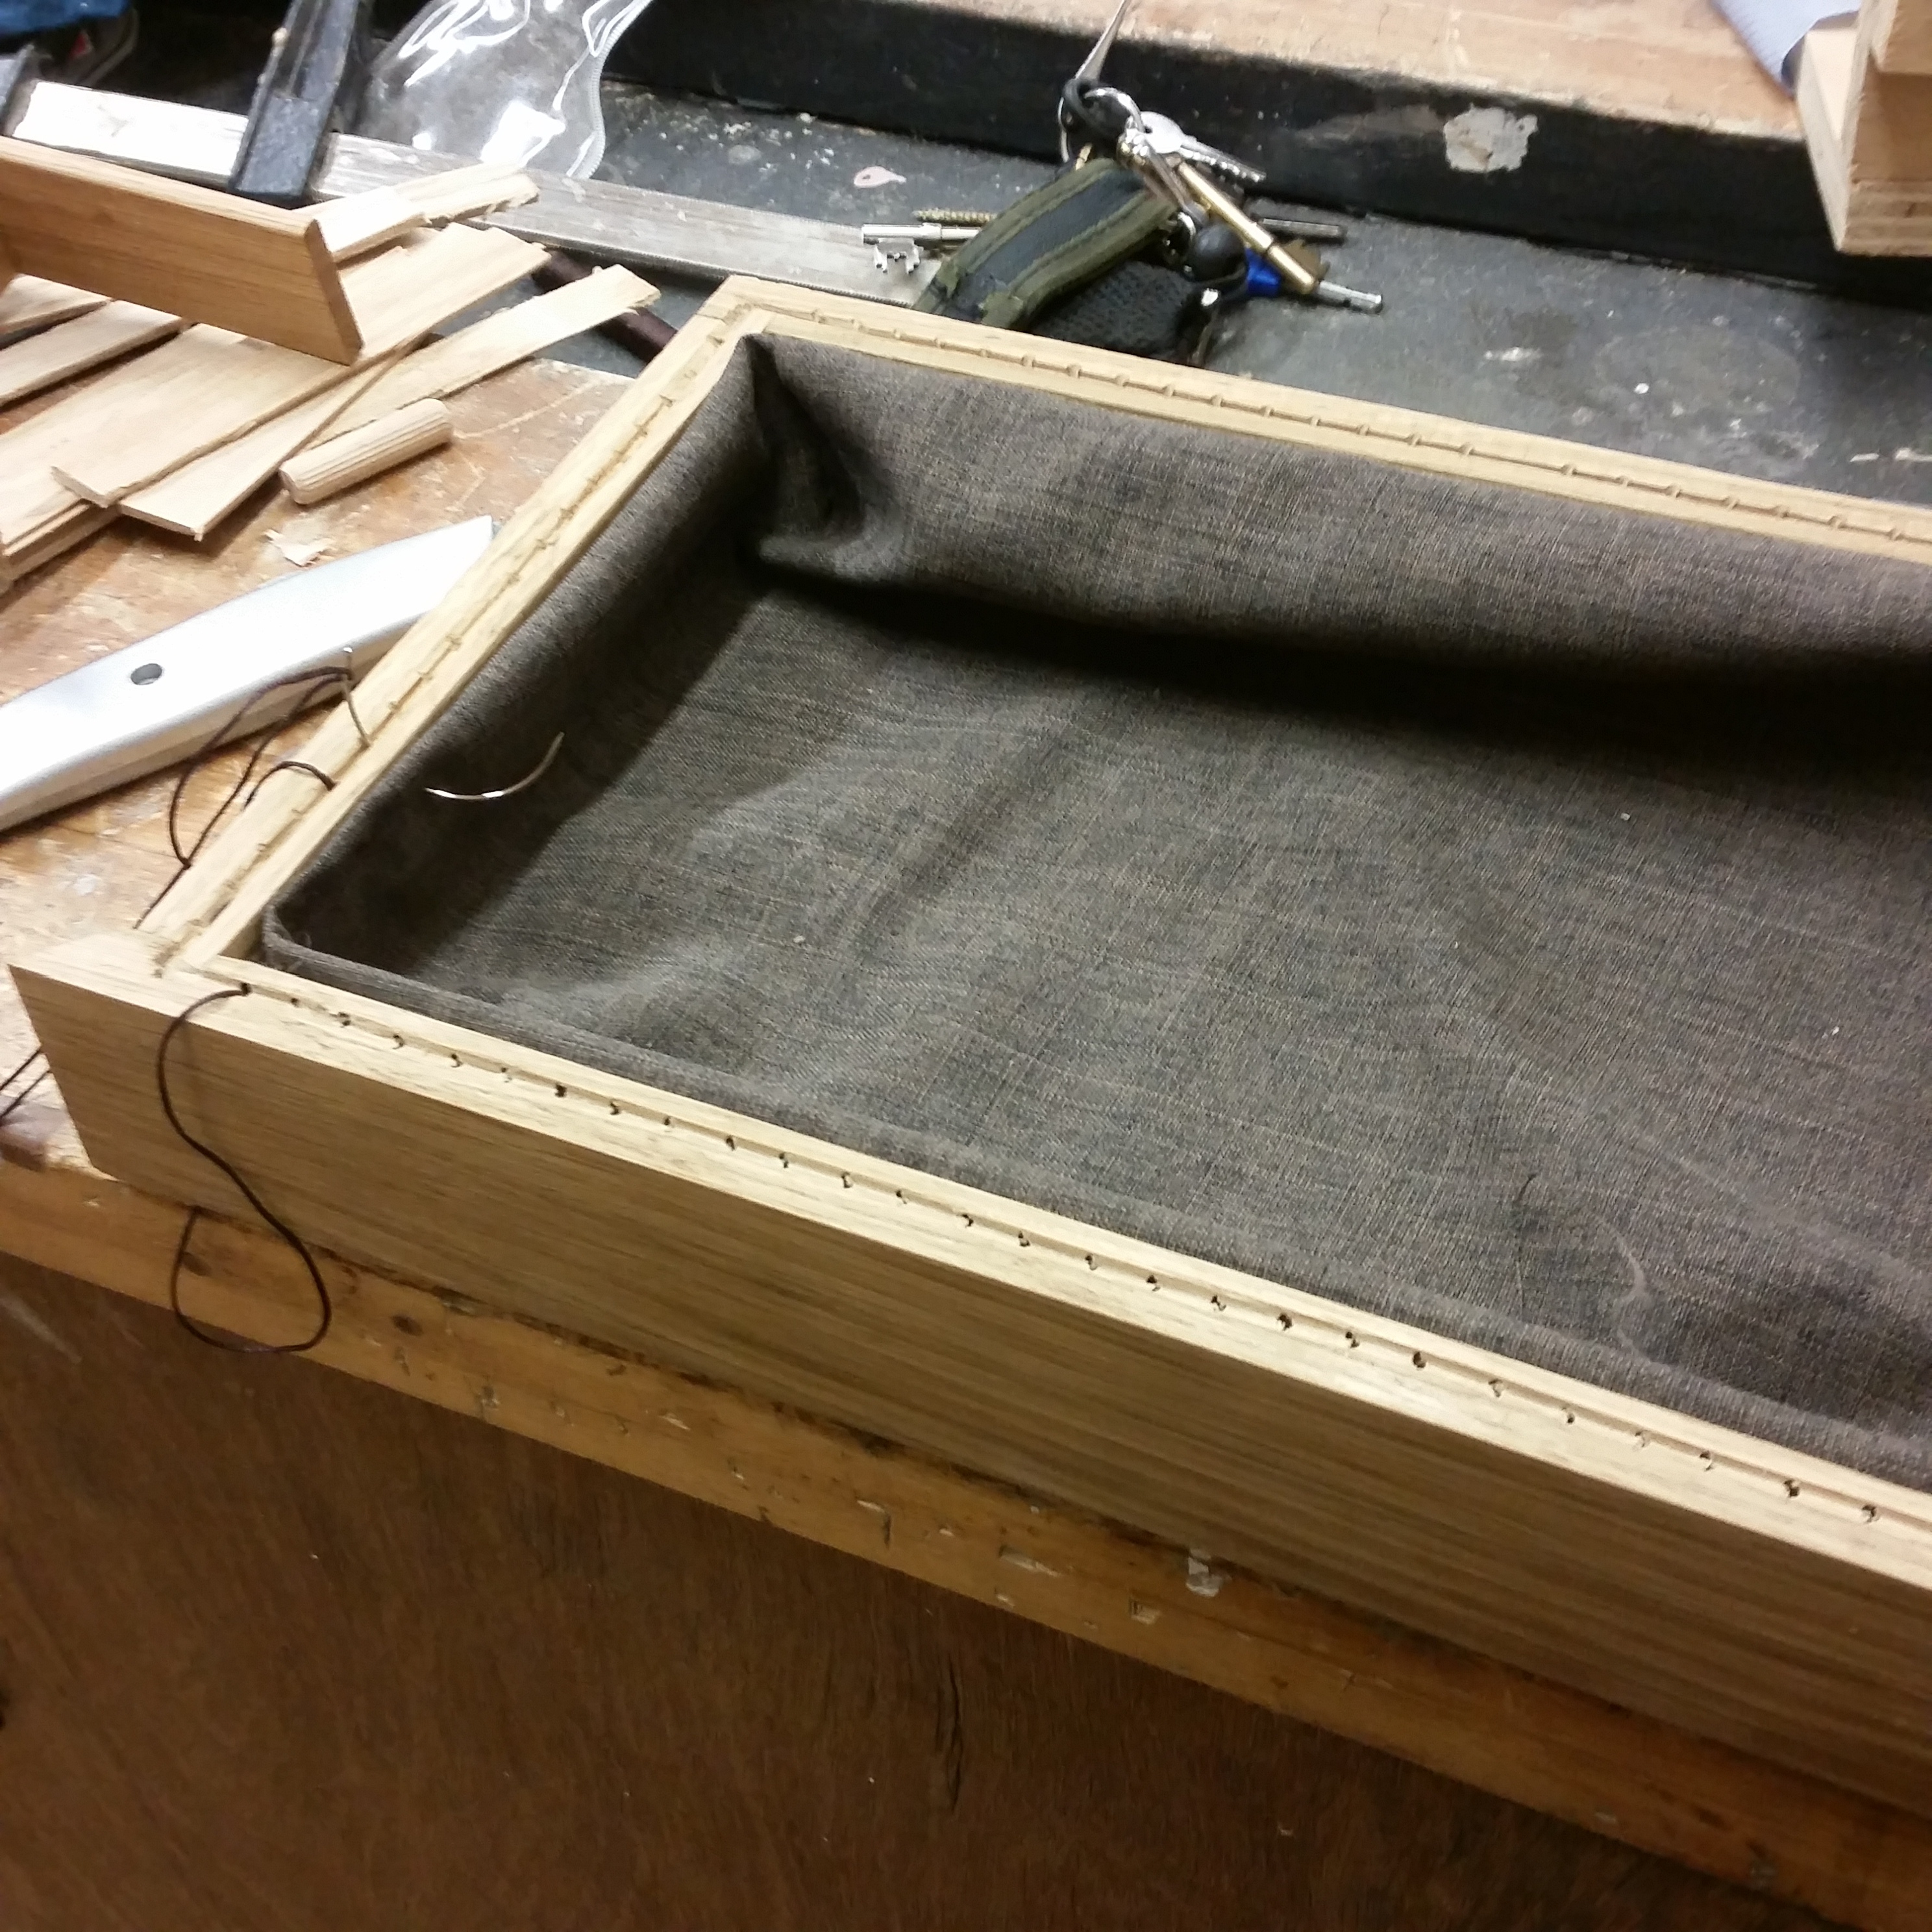
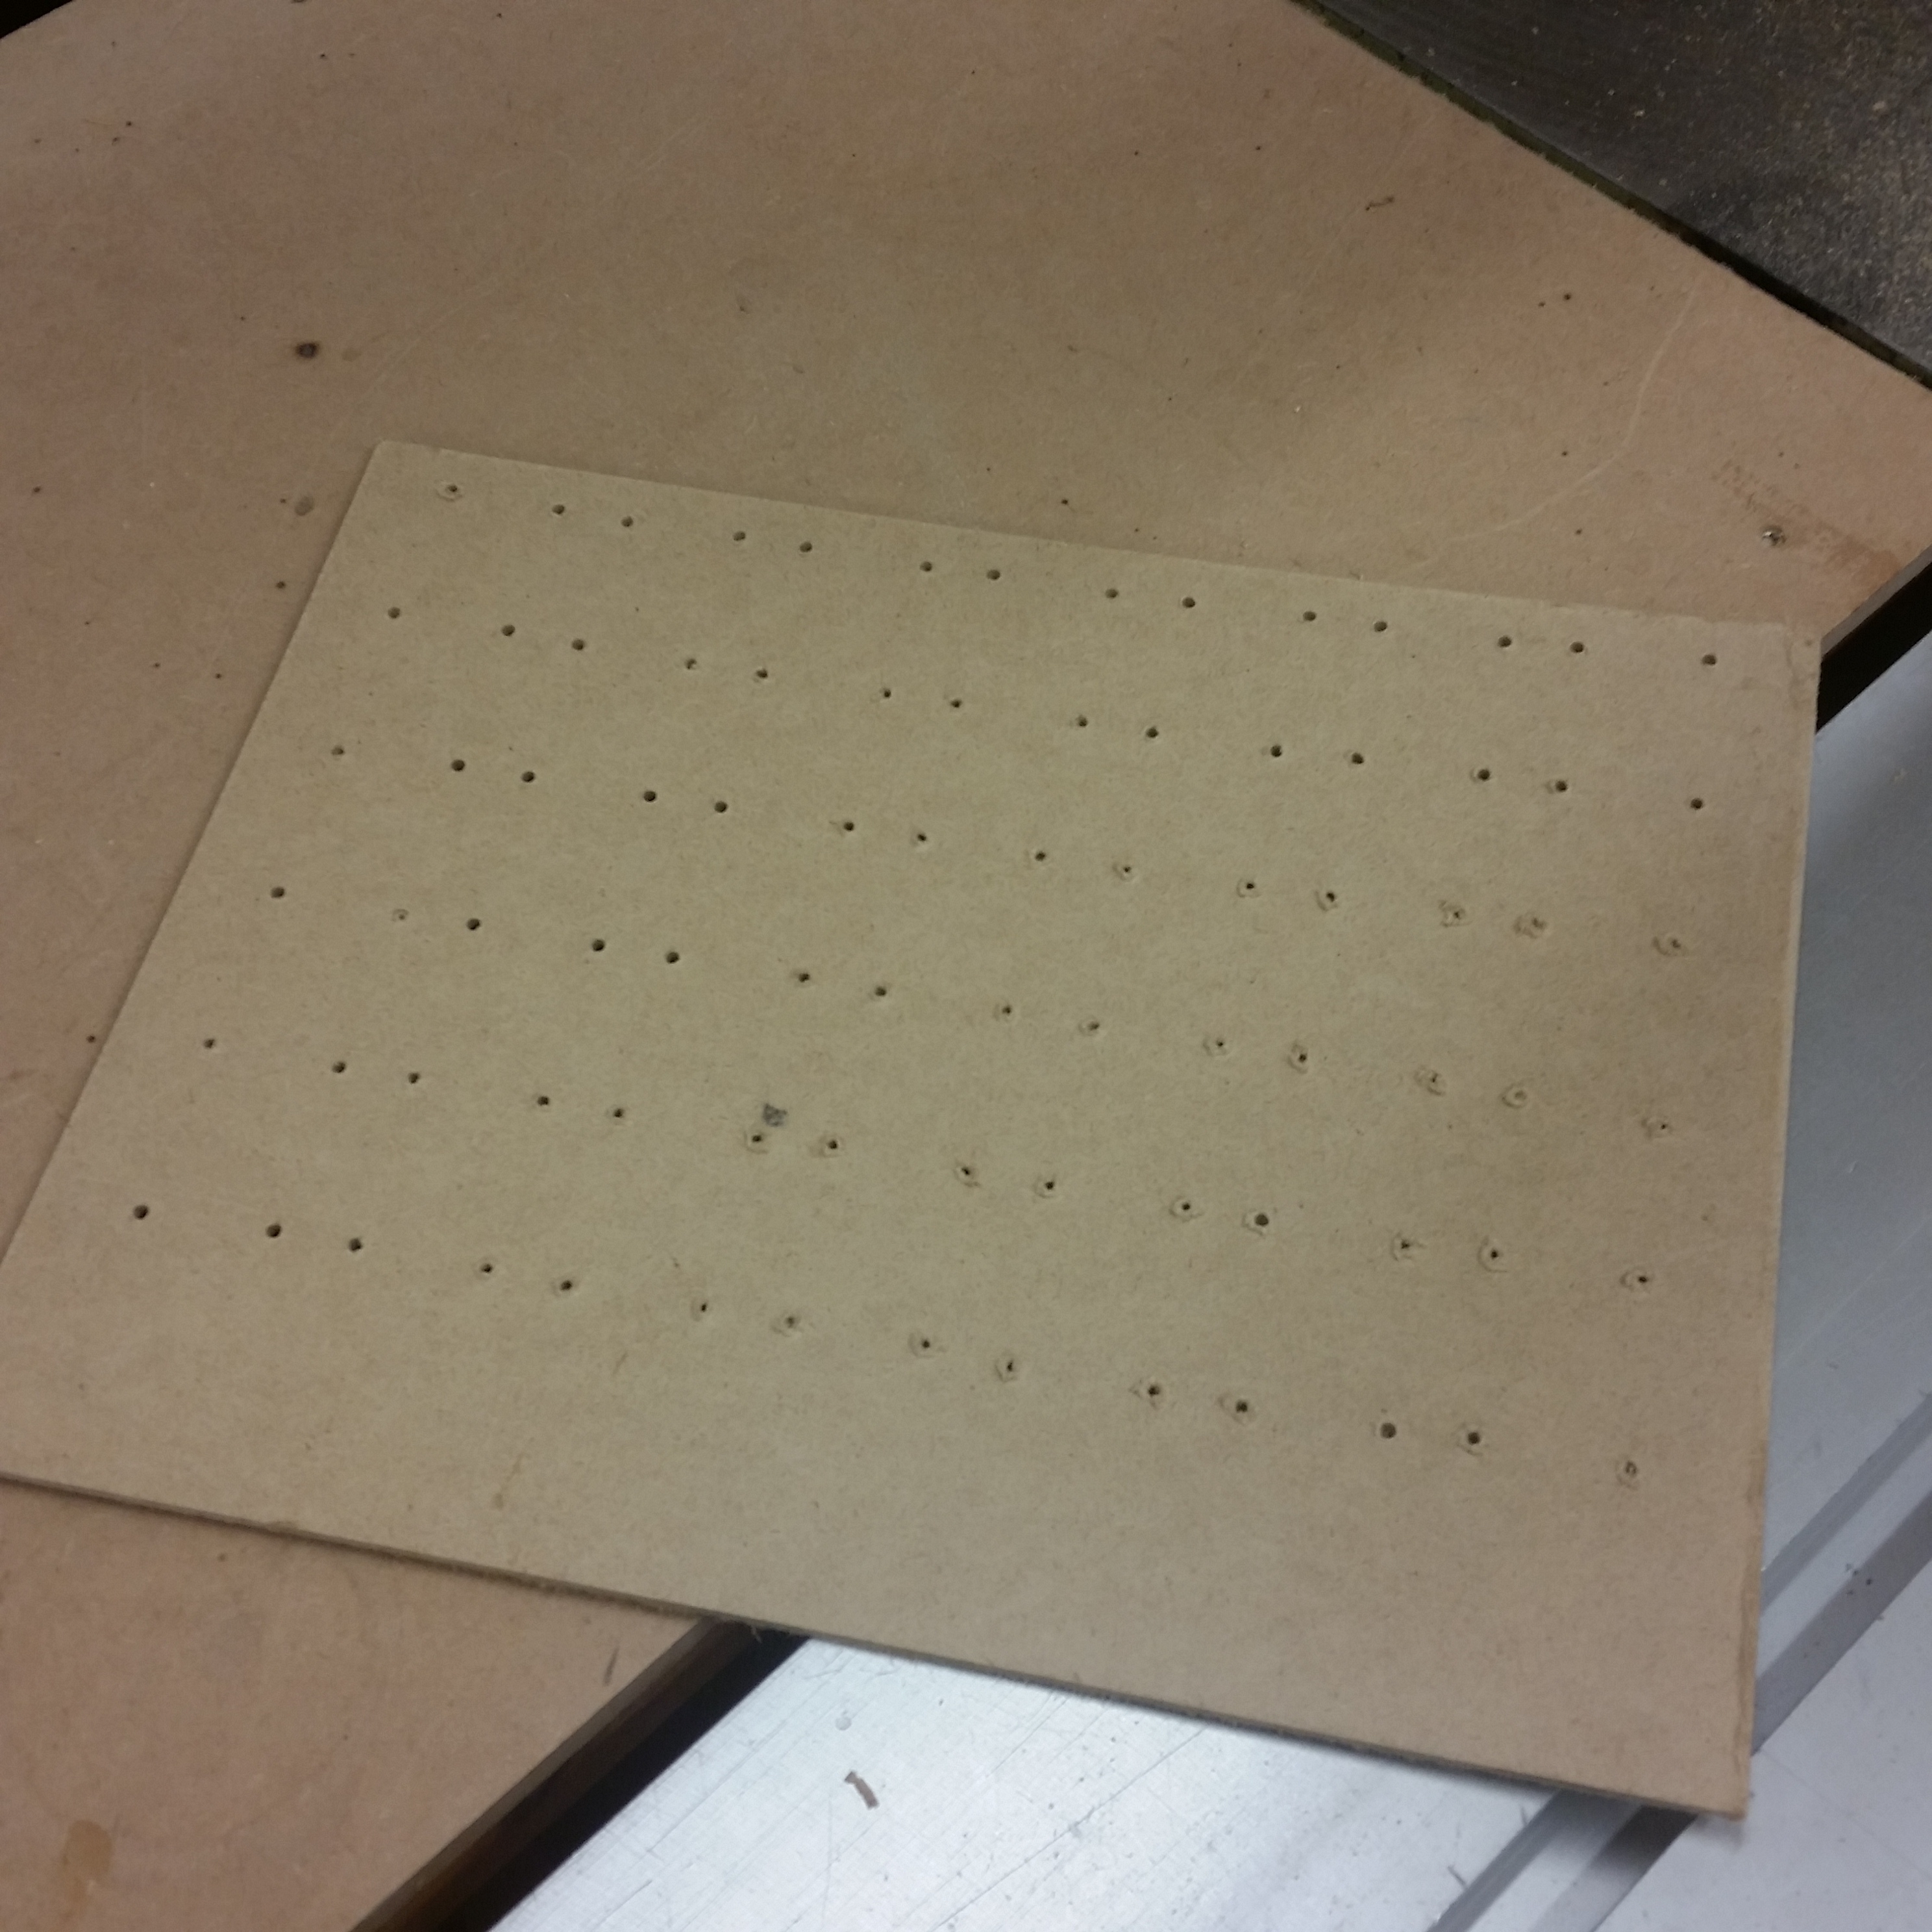
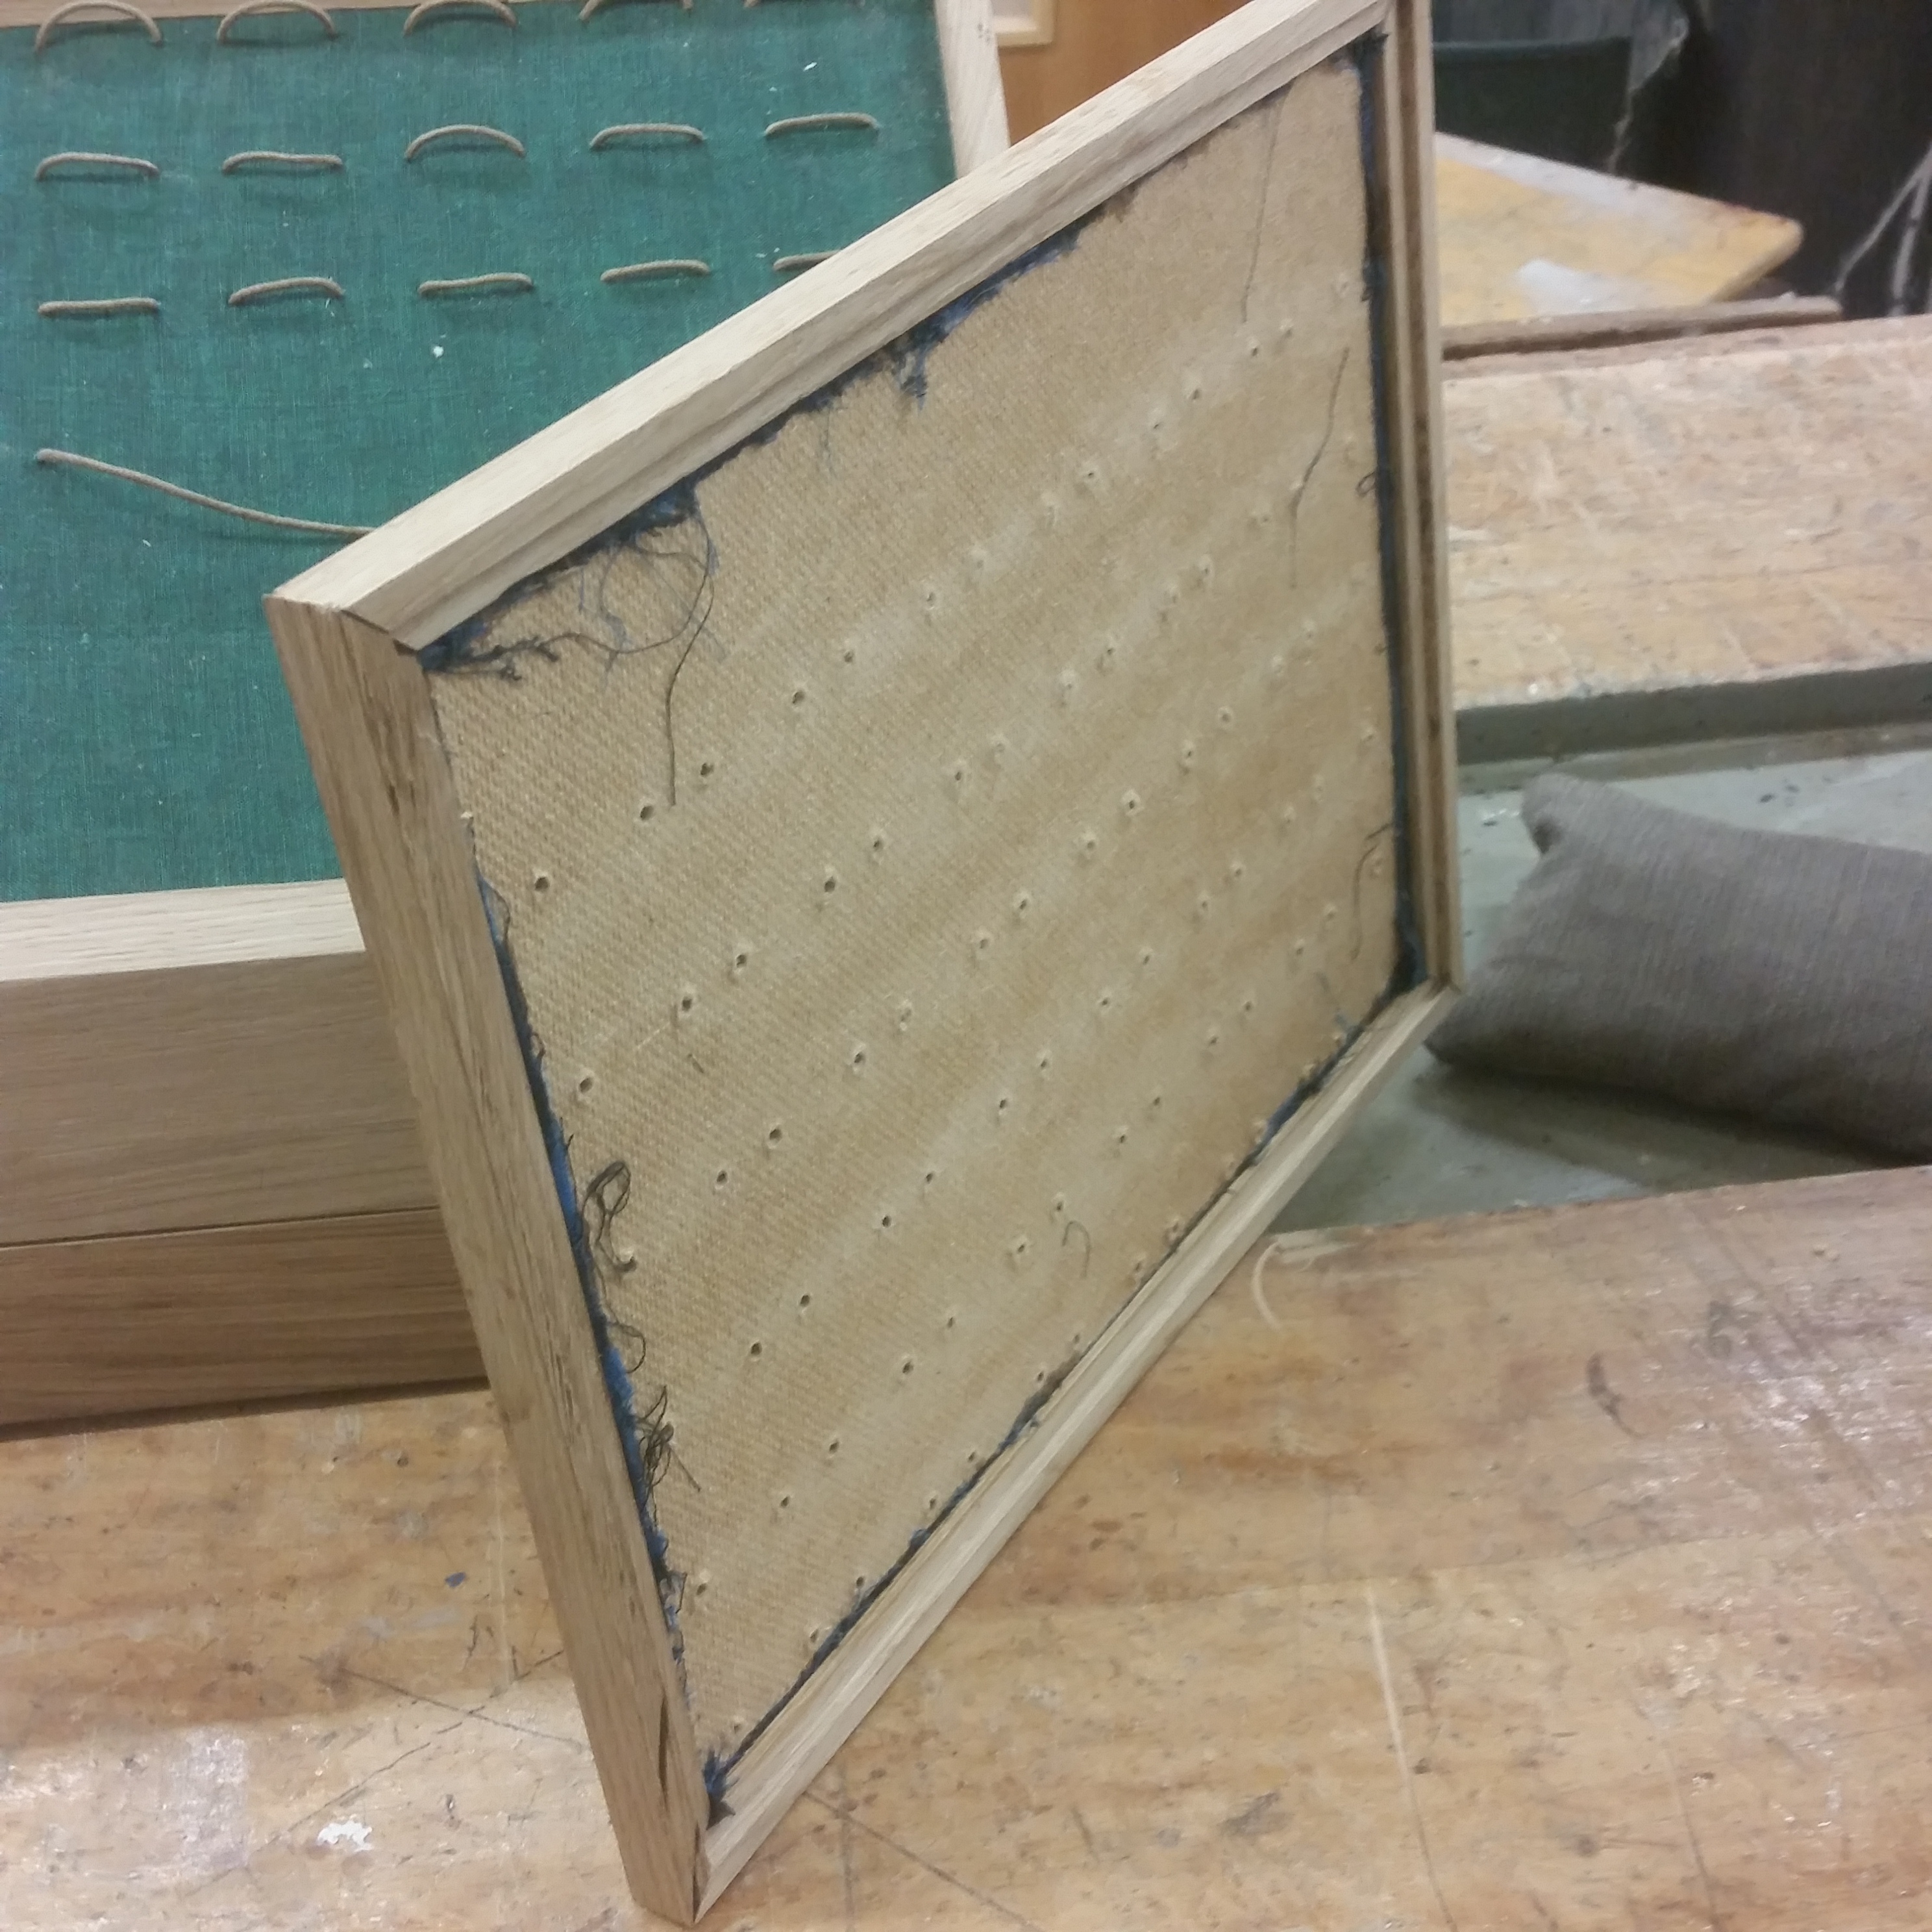
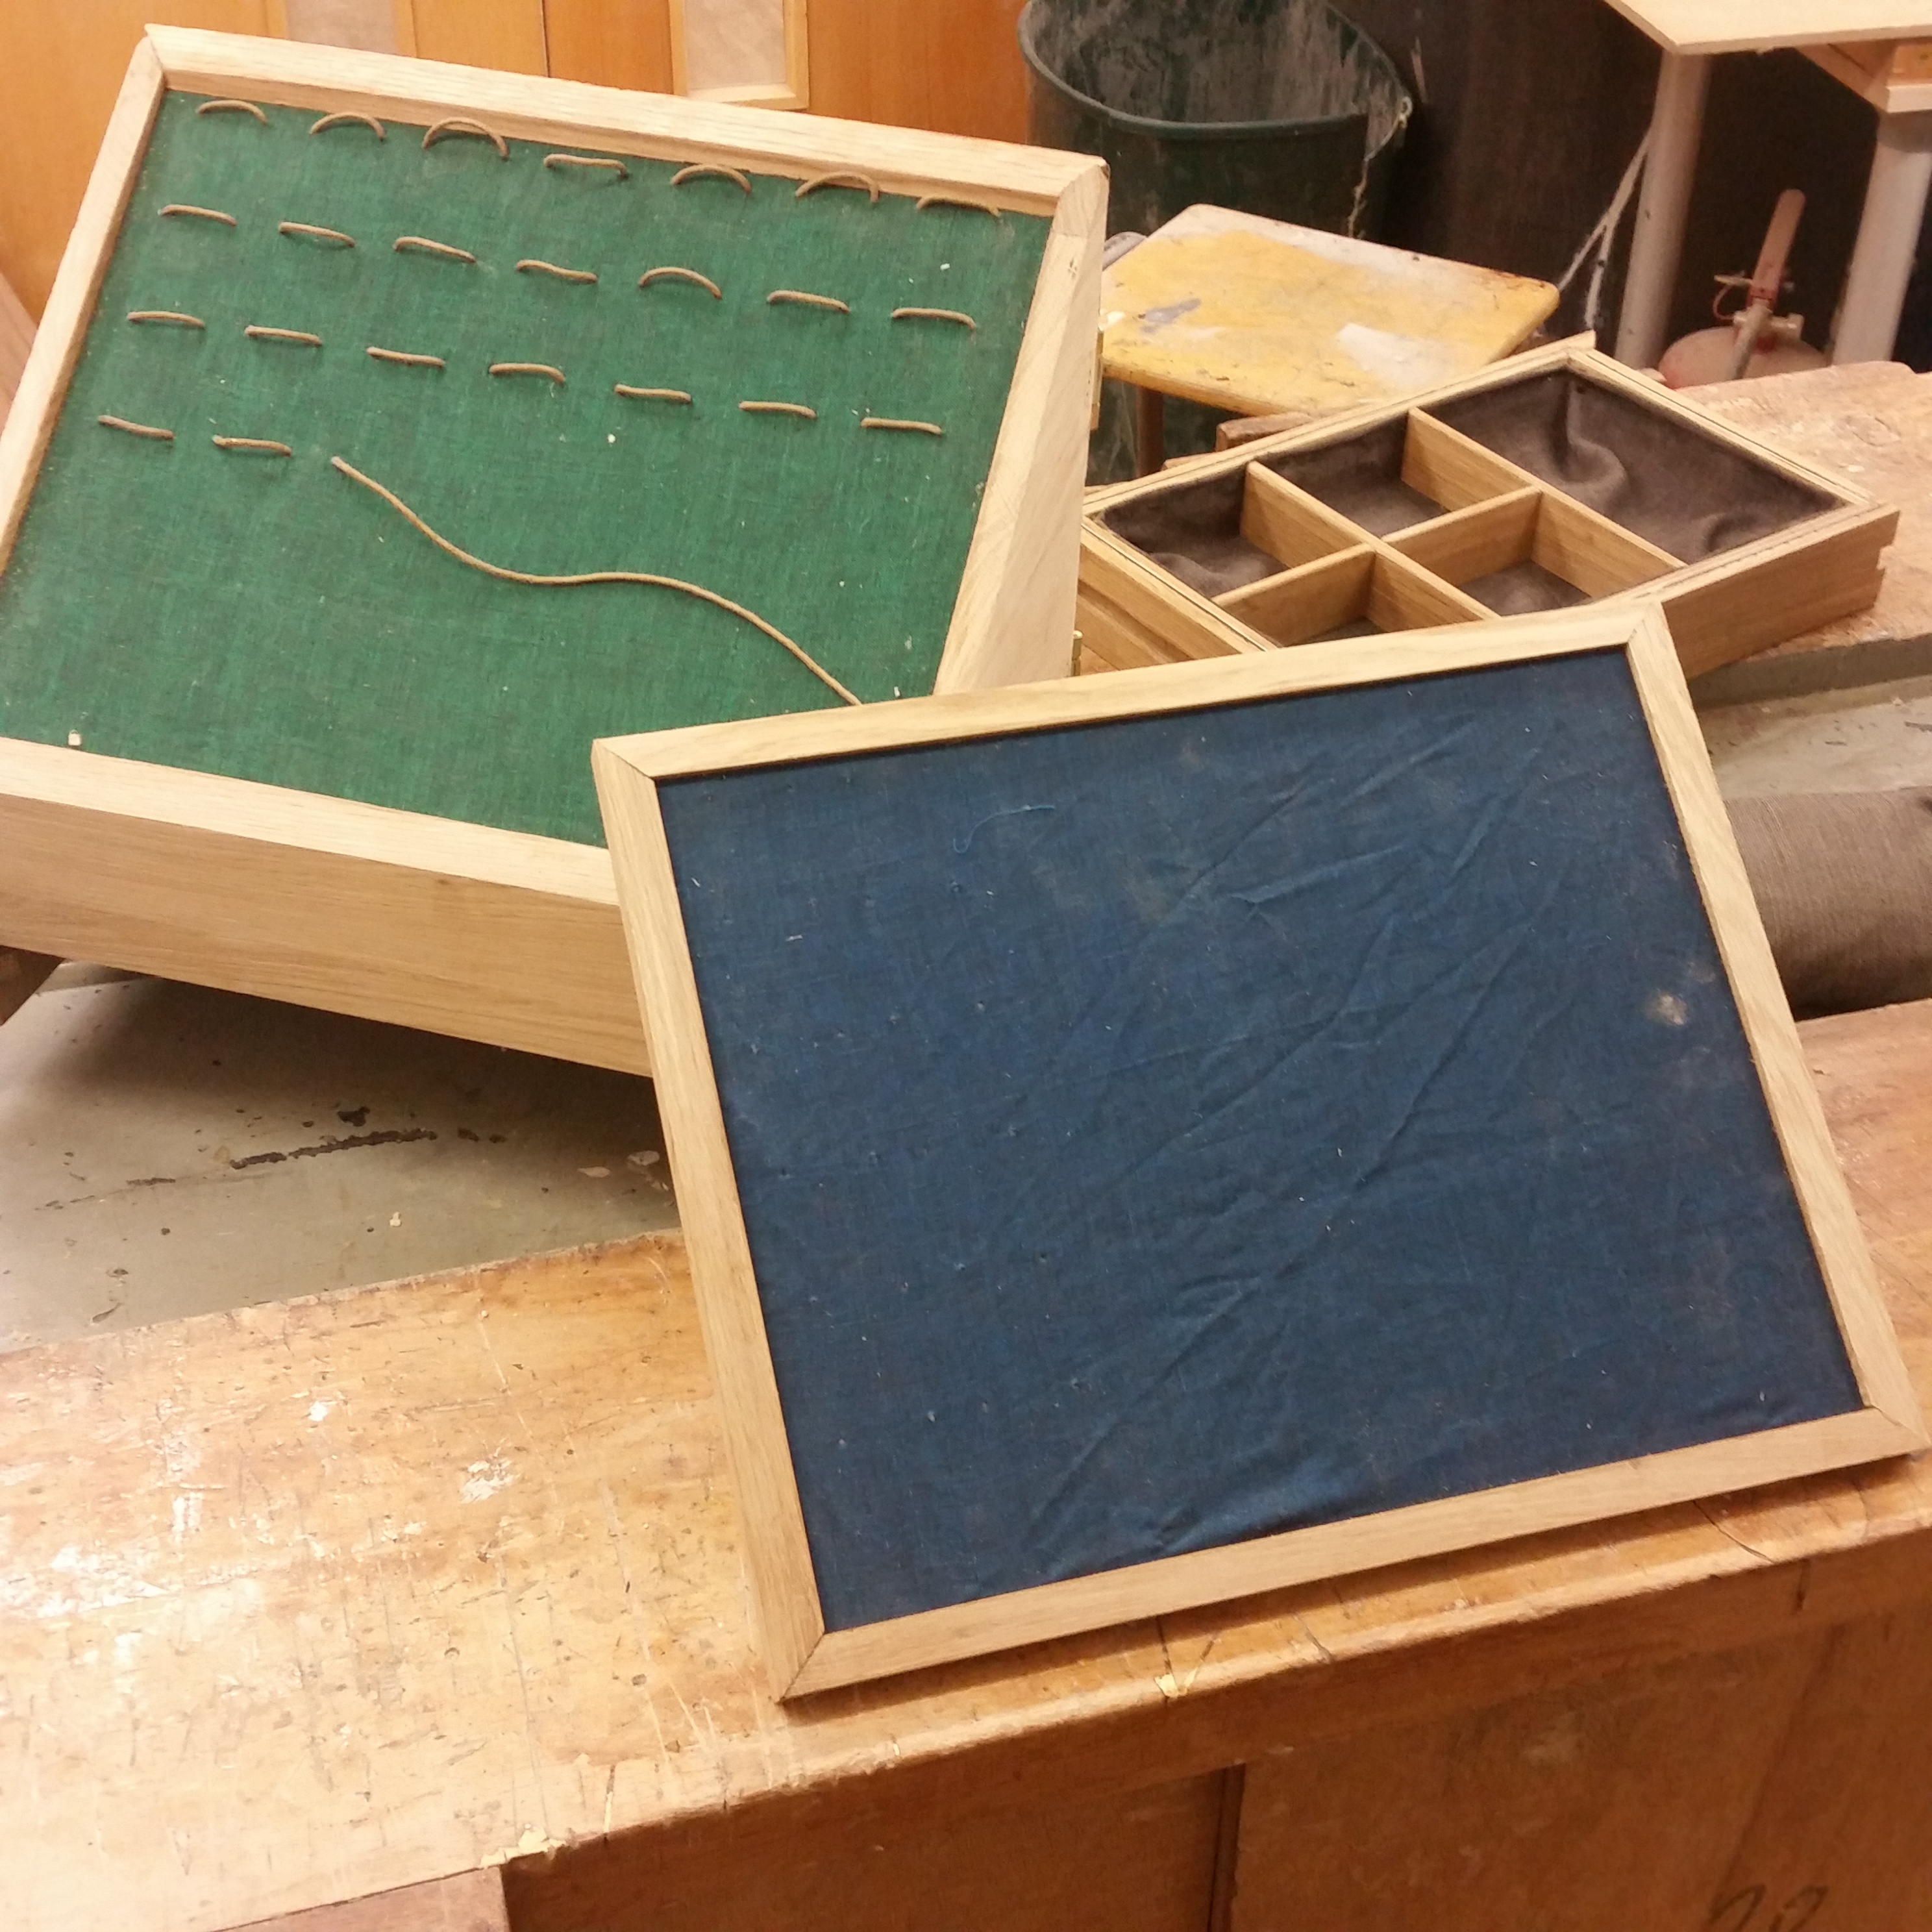
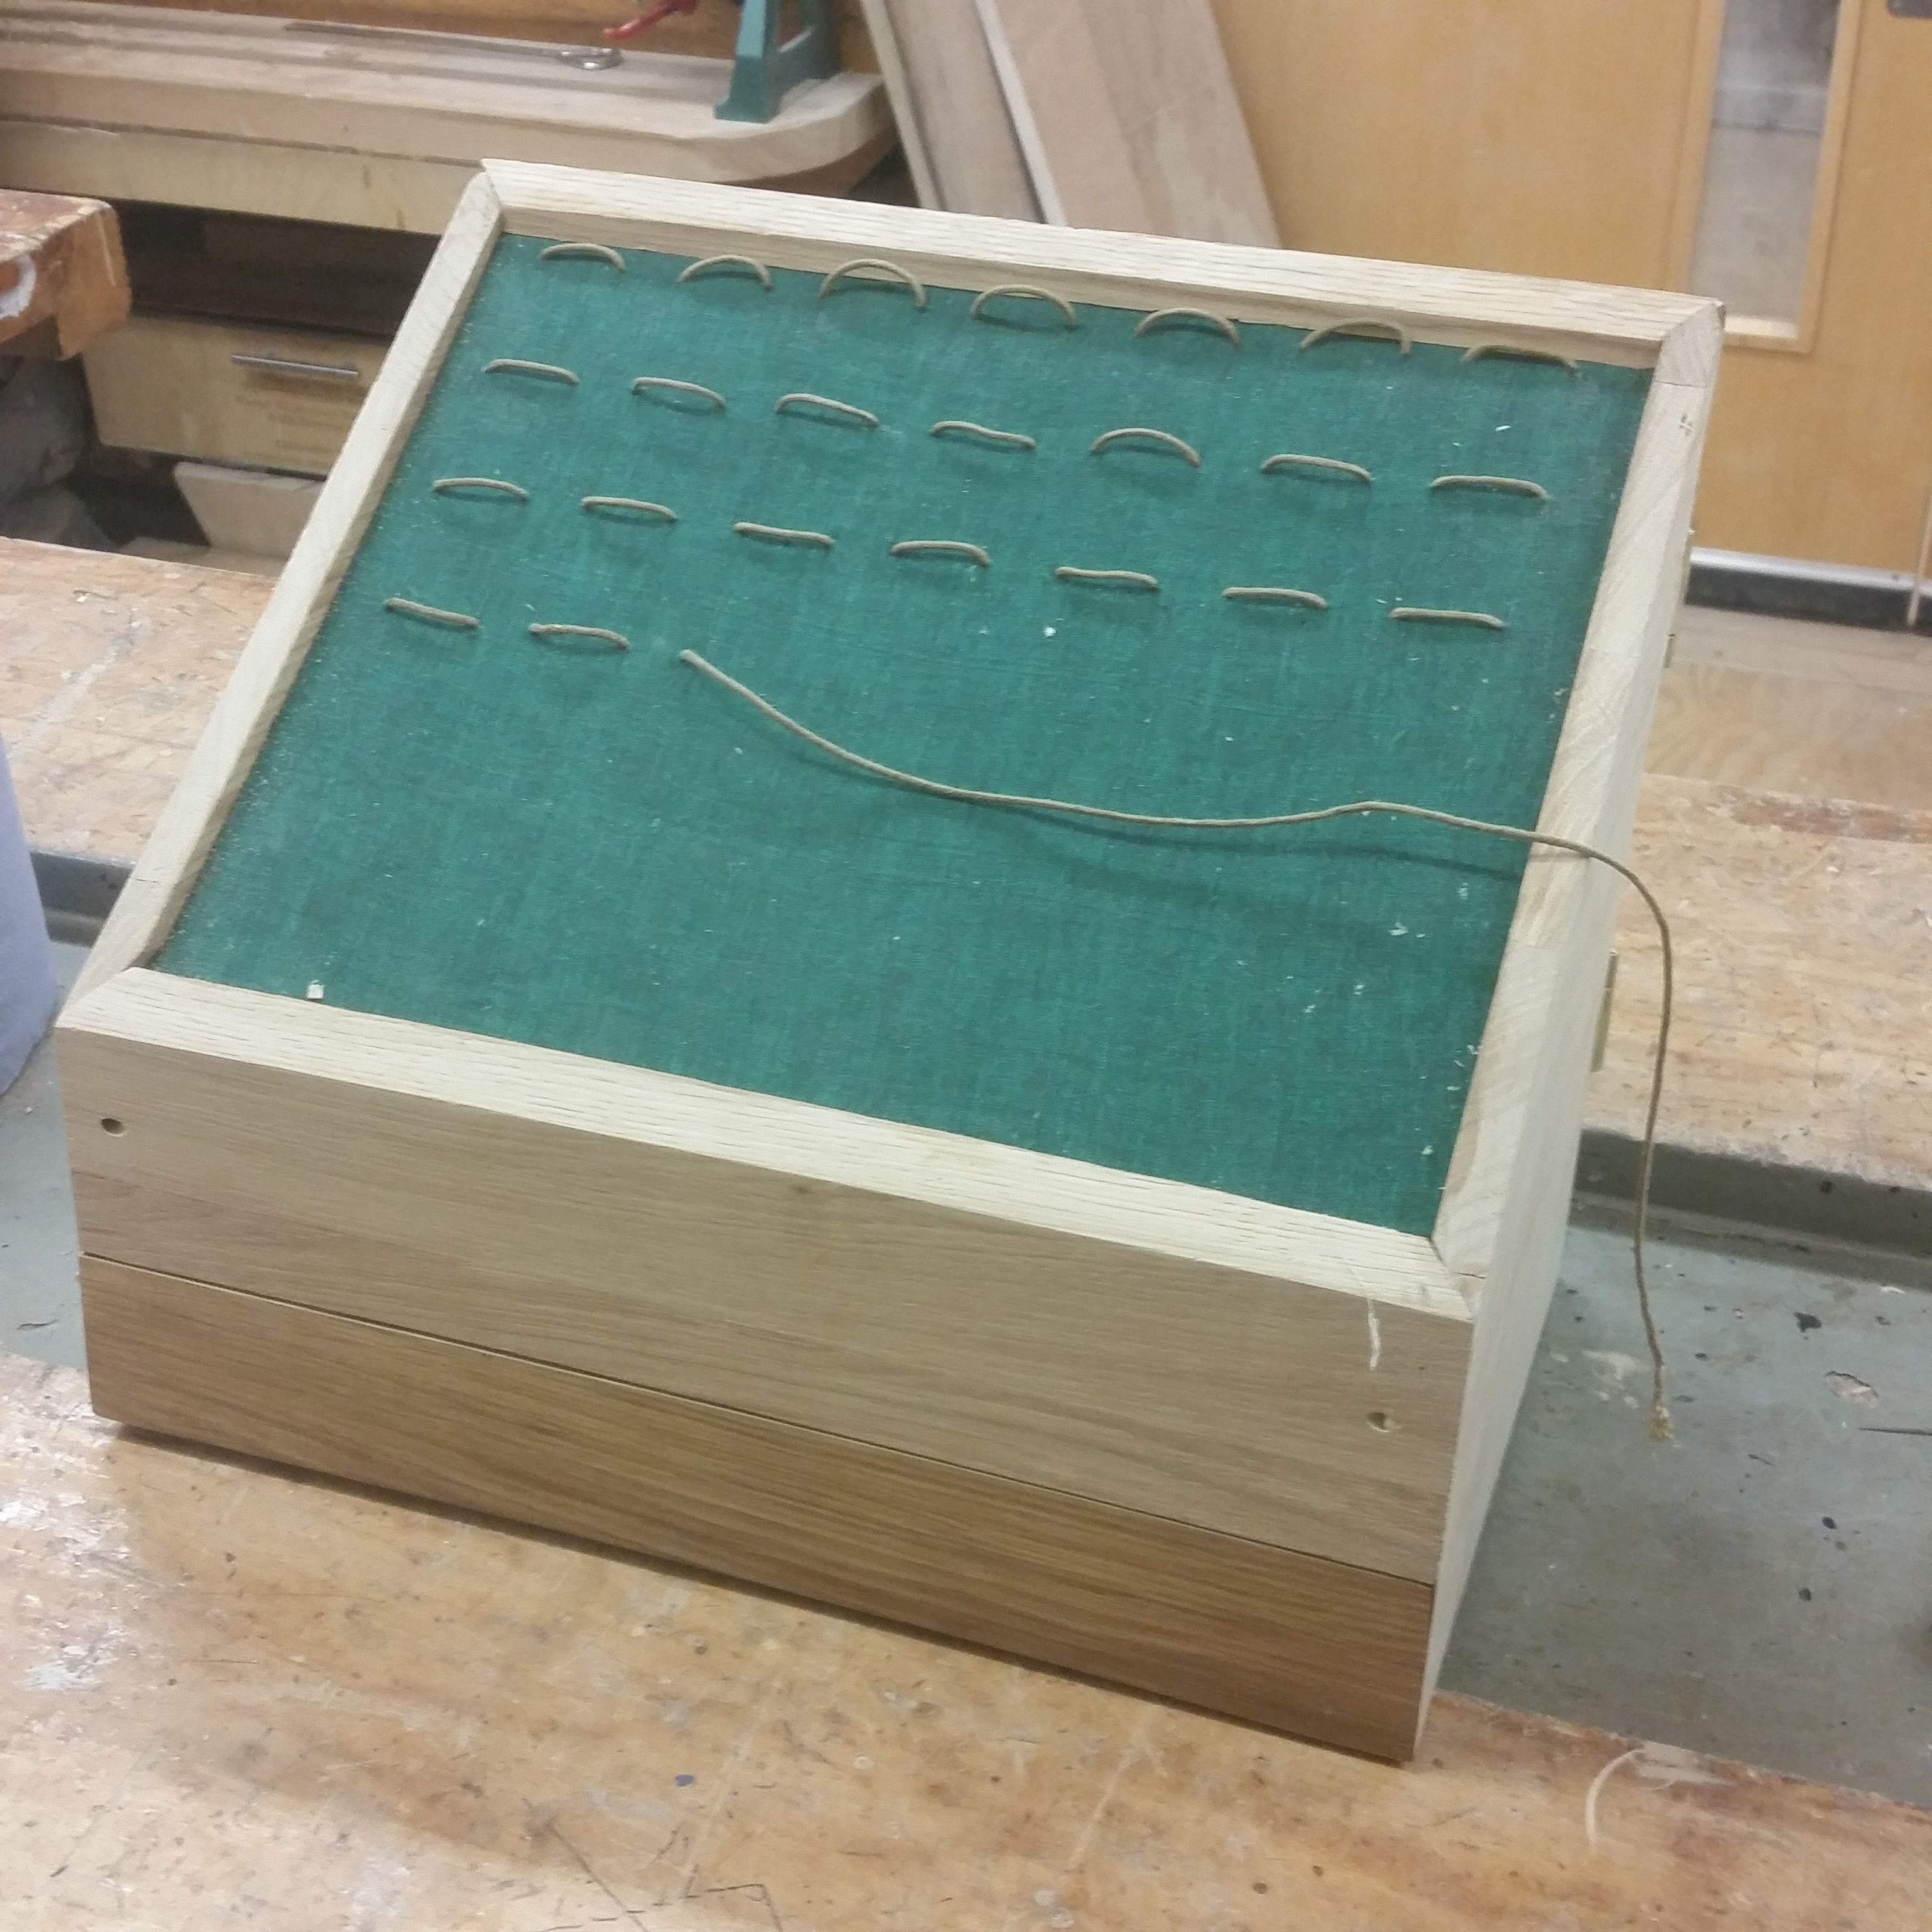
Then marked a load of holes evenly spaced for stitching in the fabric lining, 2.5mm holes at roughly 45°.
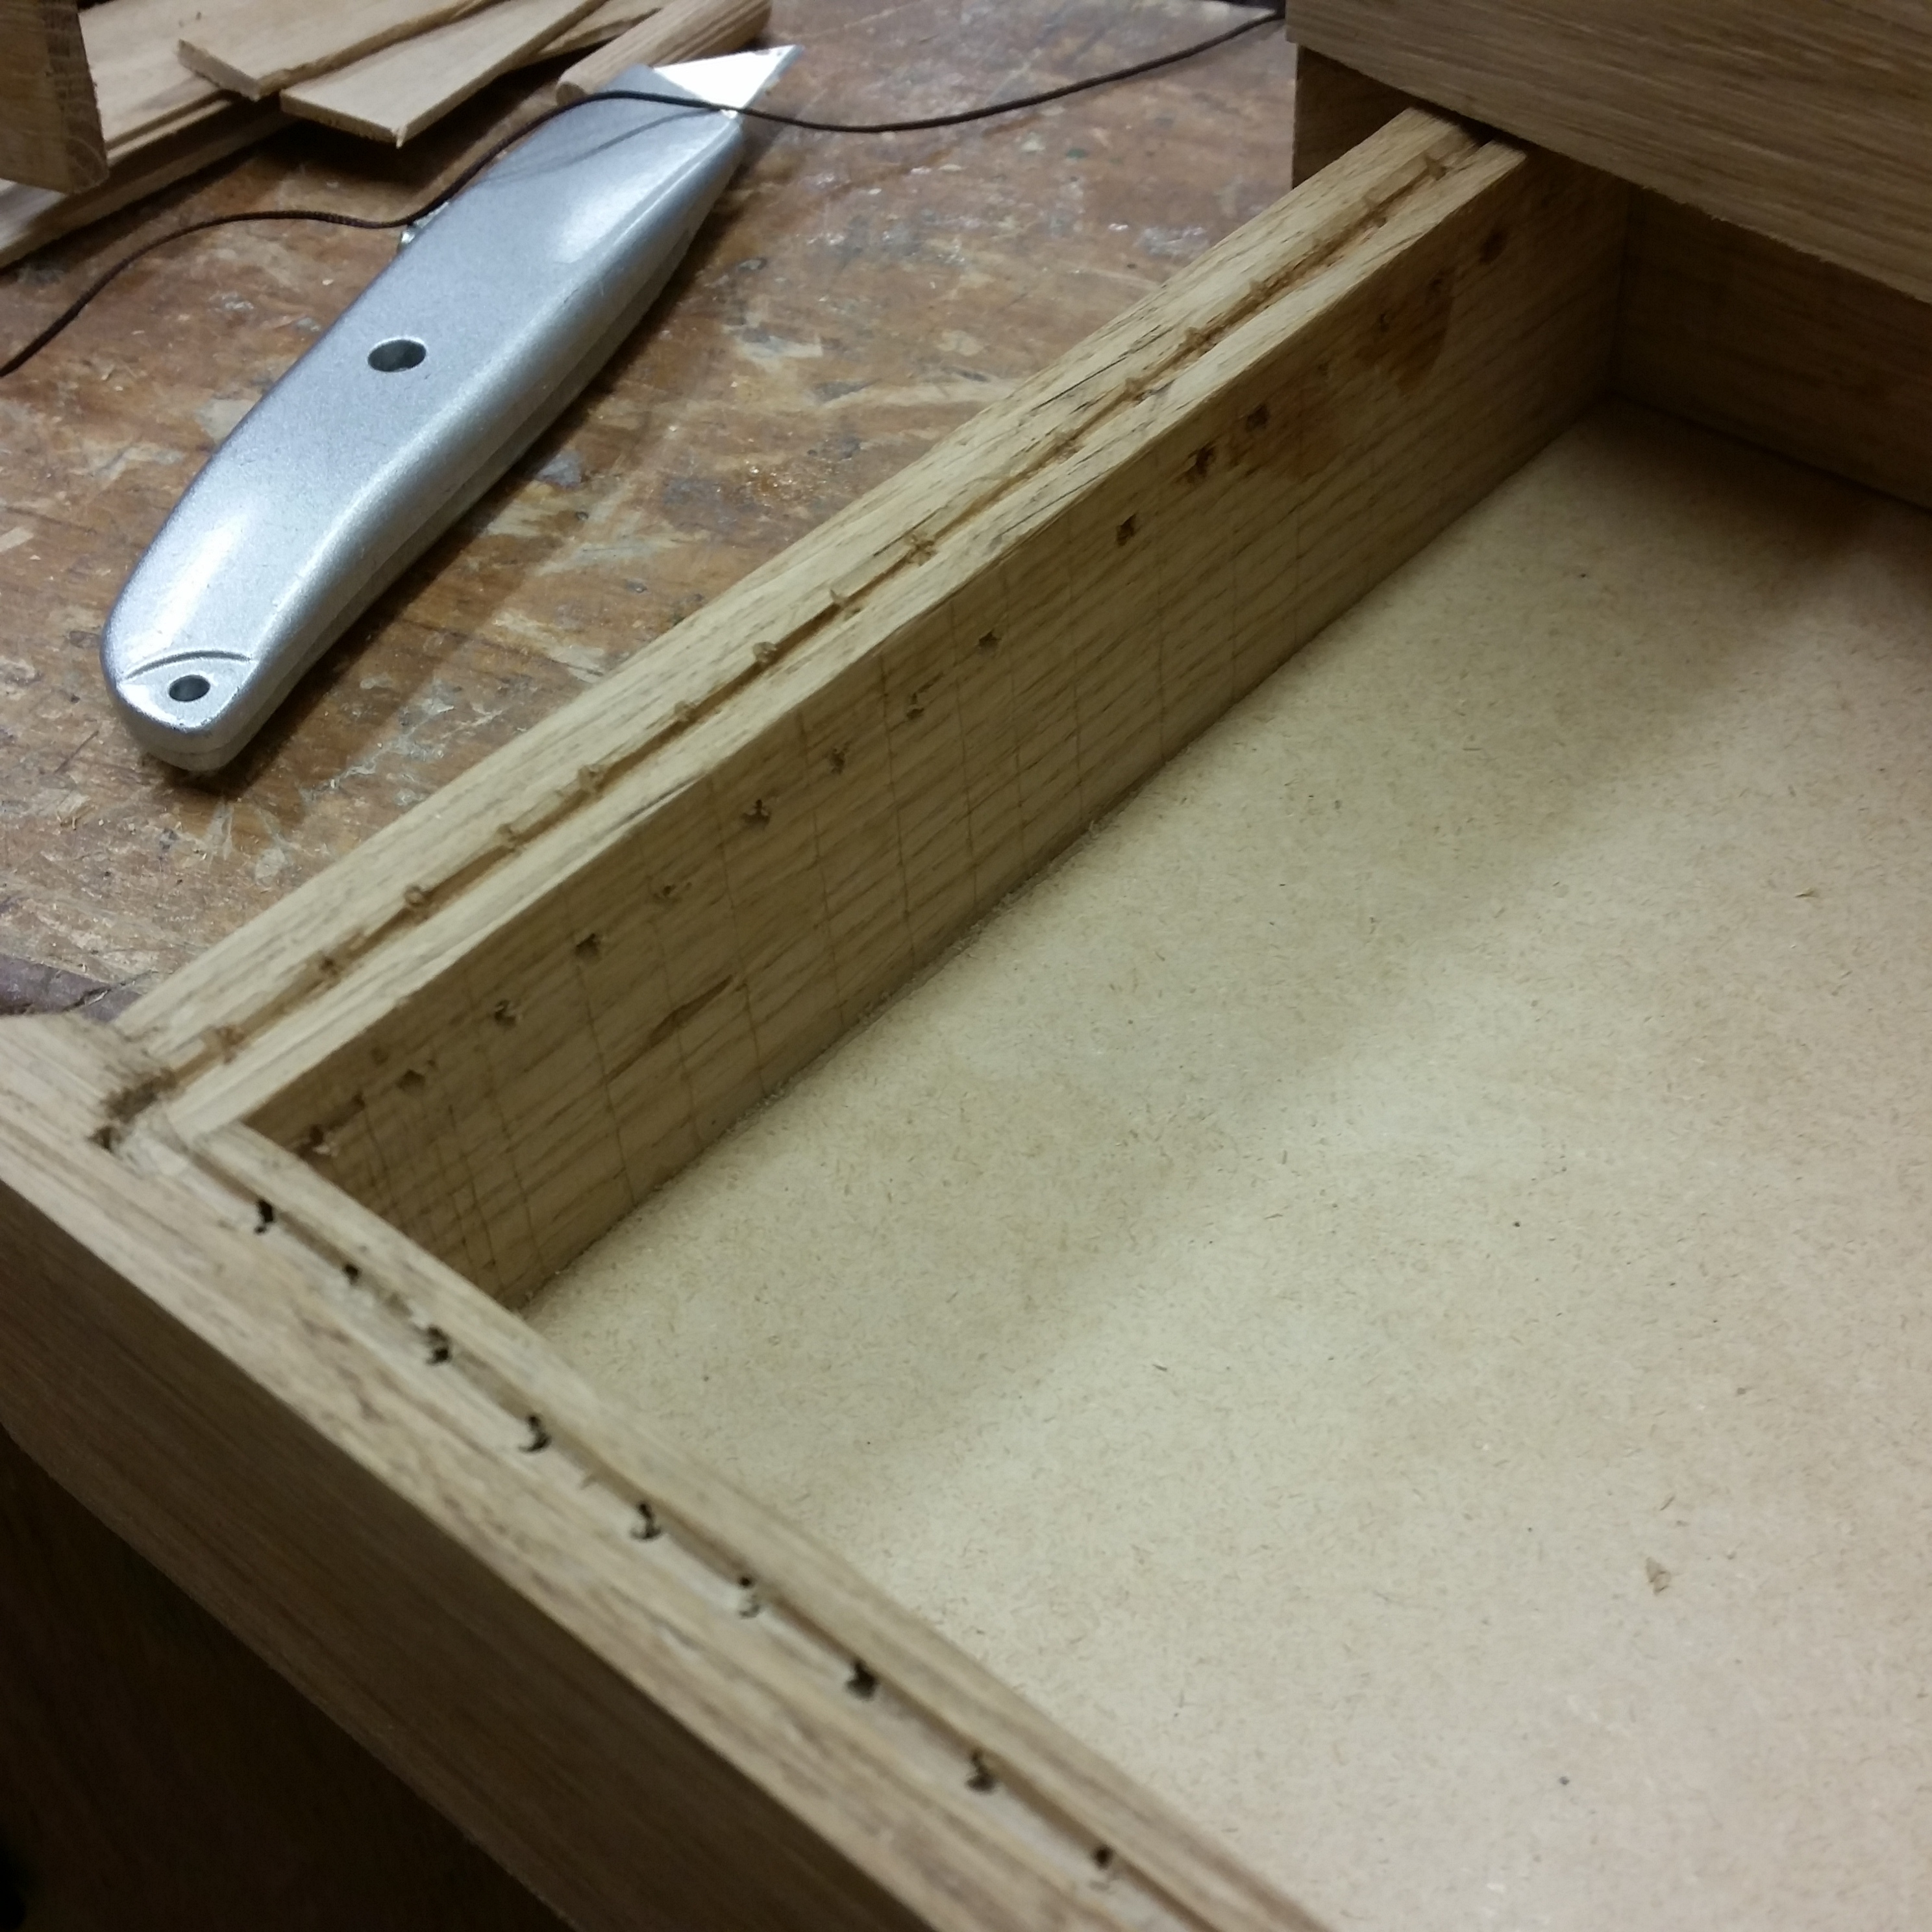
Stitching, curved upholsterers needle and some 1.5mm polypropylene thread.
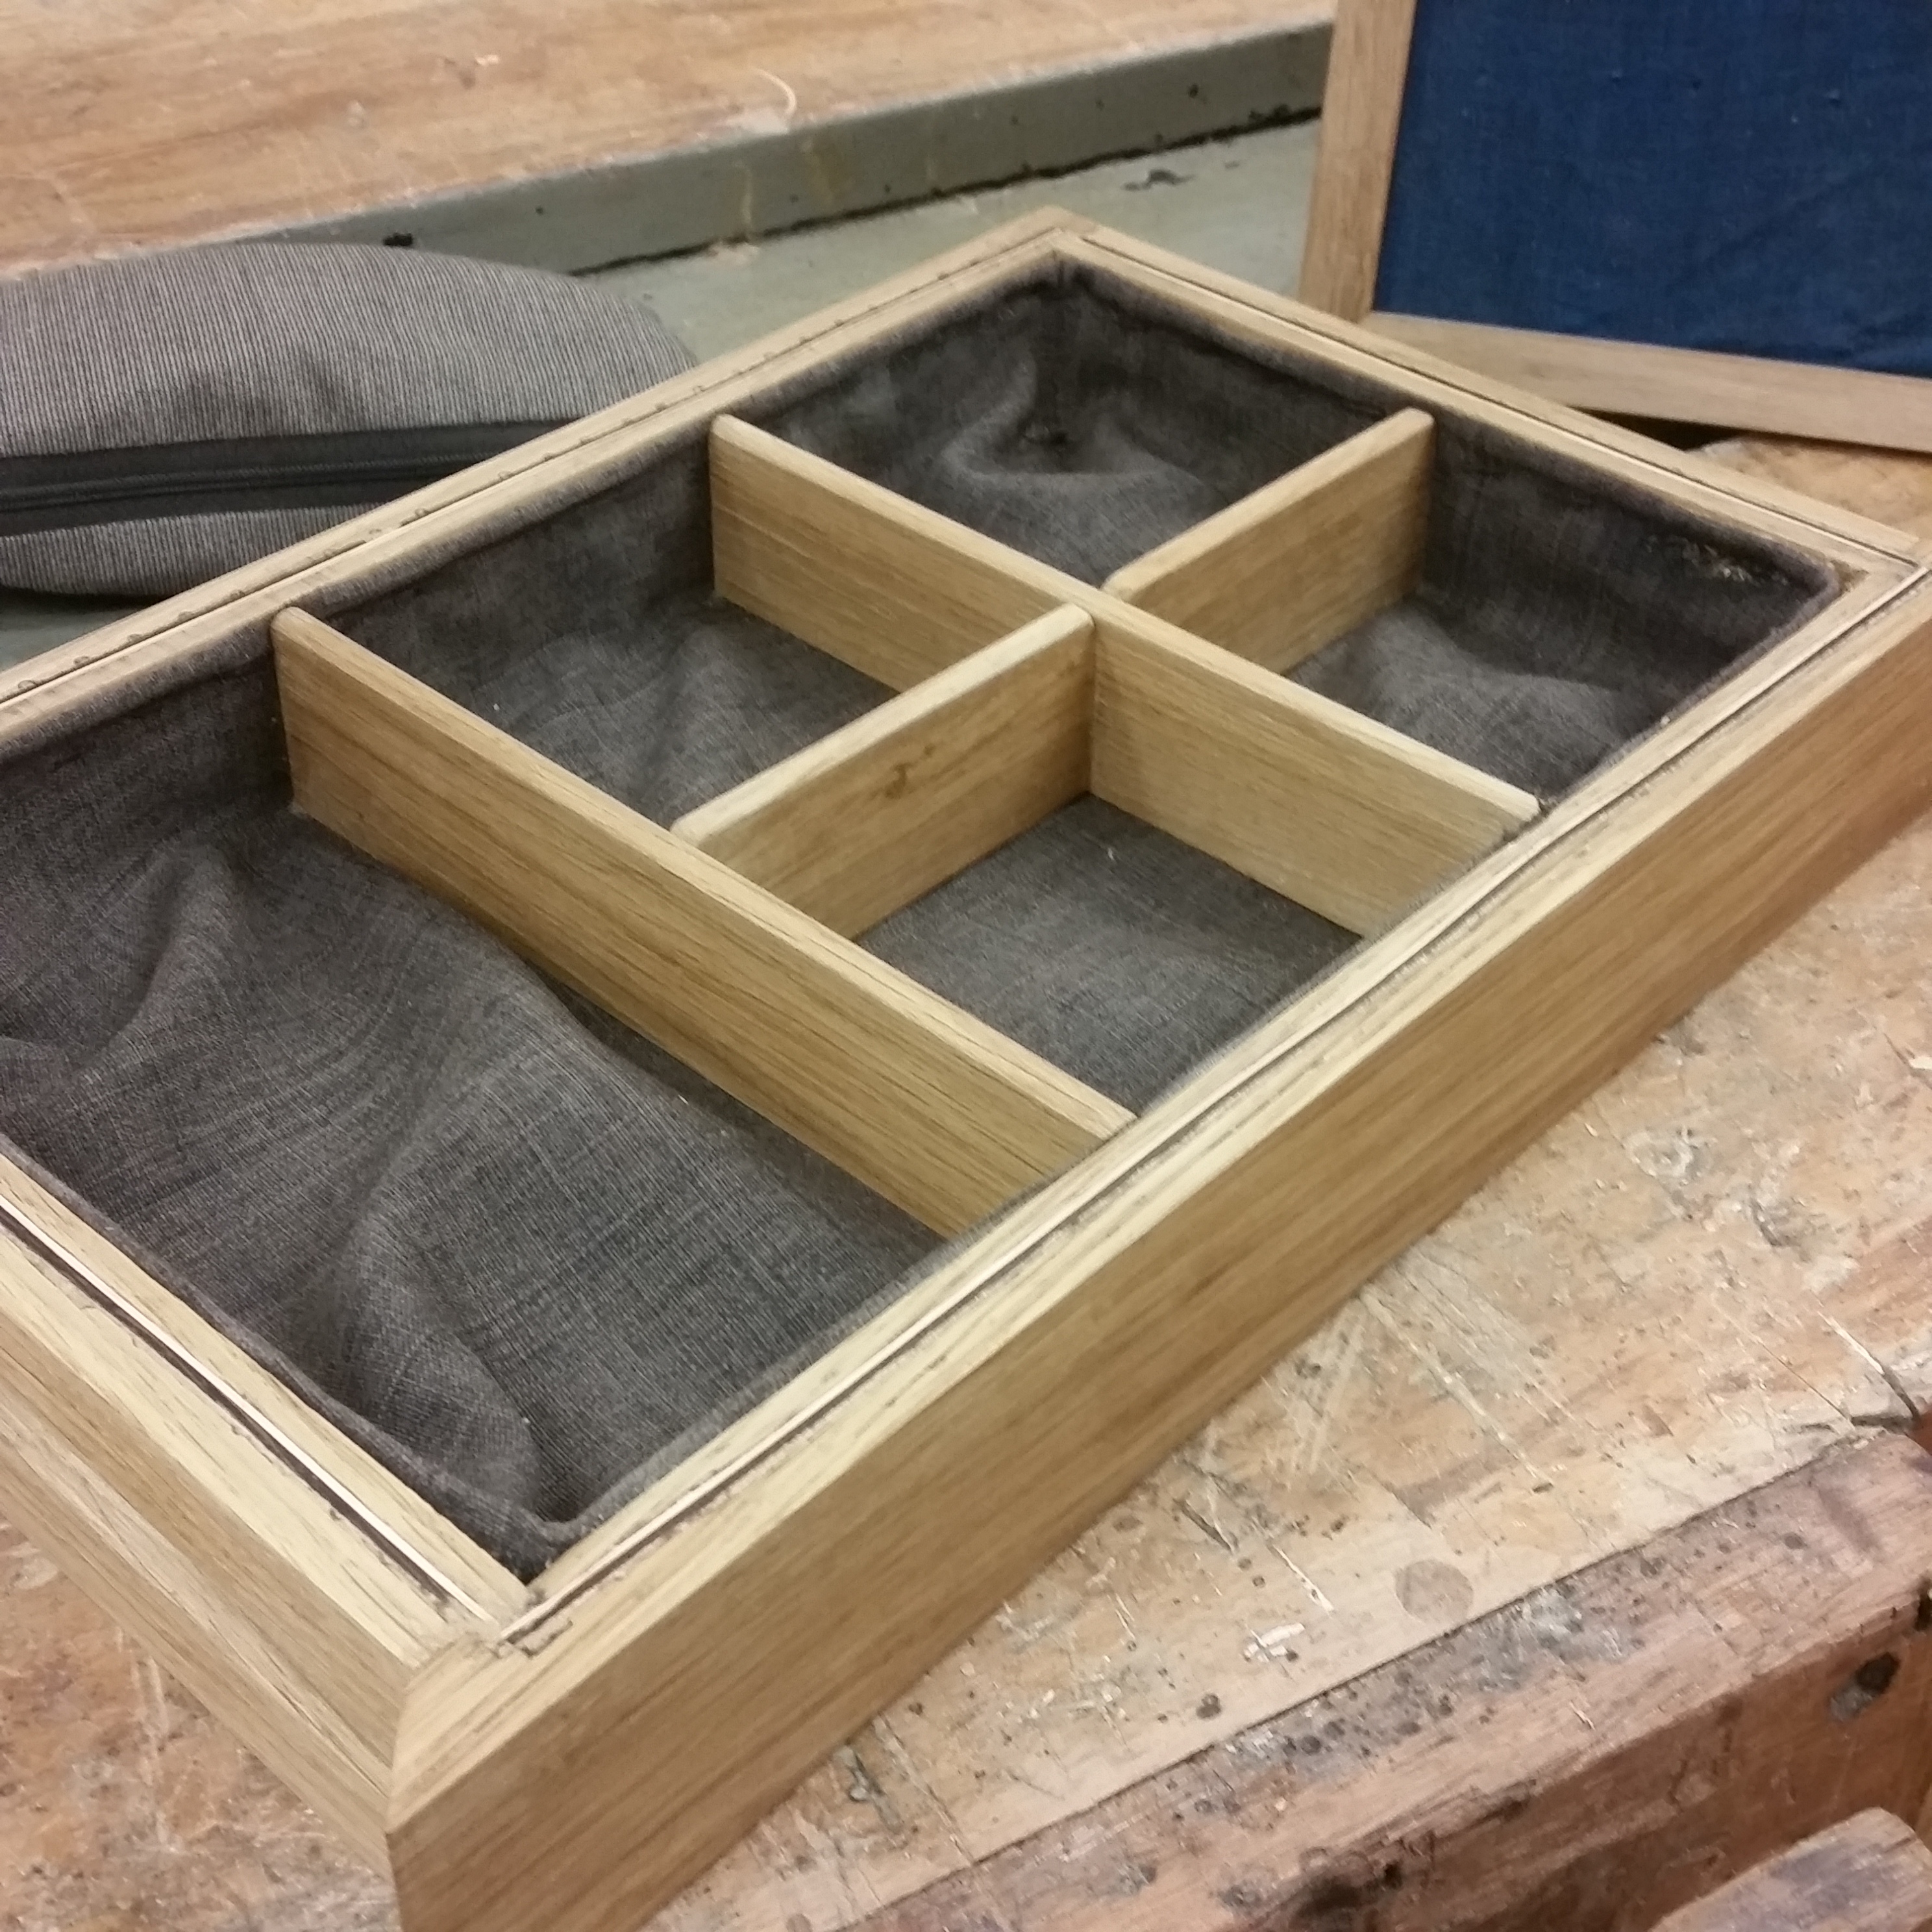
Glued the dividers, this is one piece pinned in place on the side and rear, pilot holes drilled and some long thin nails driven home.
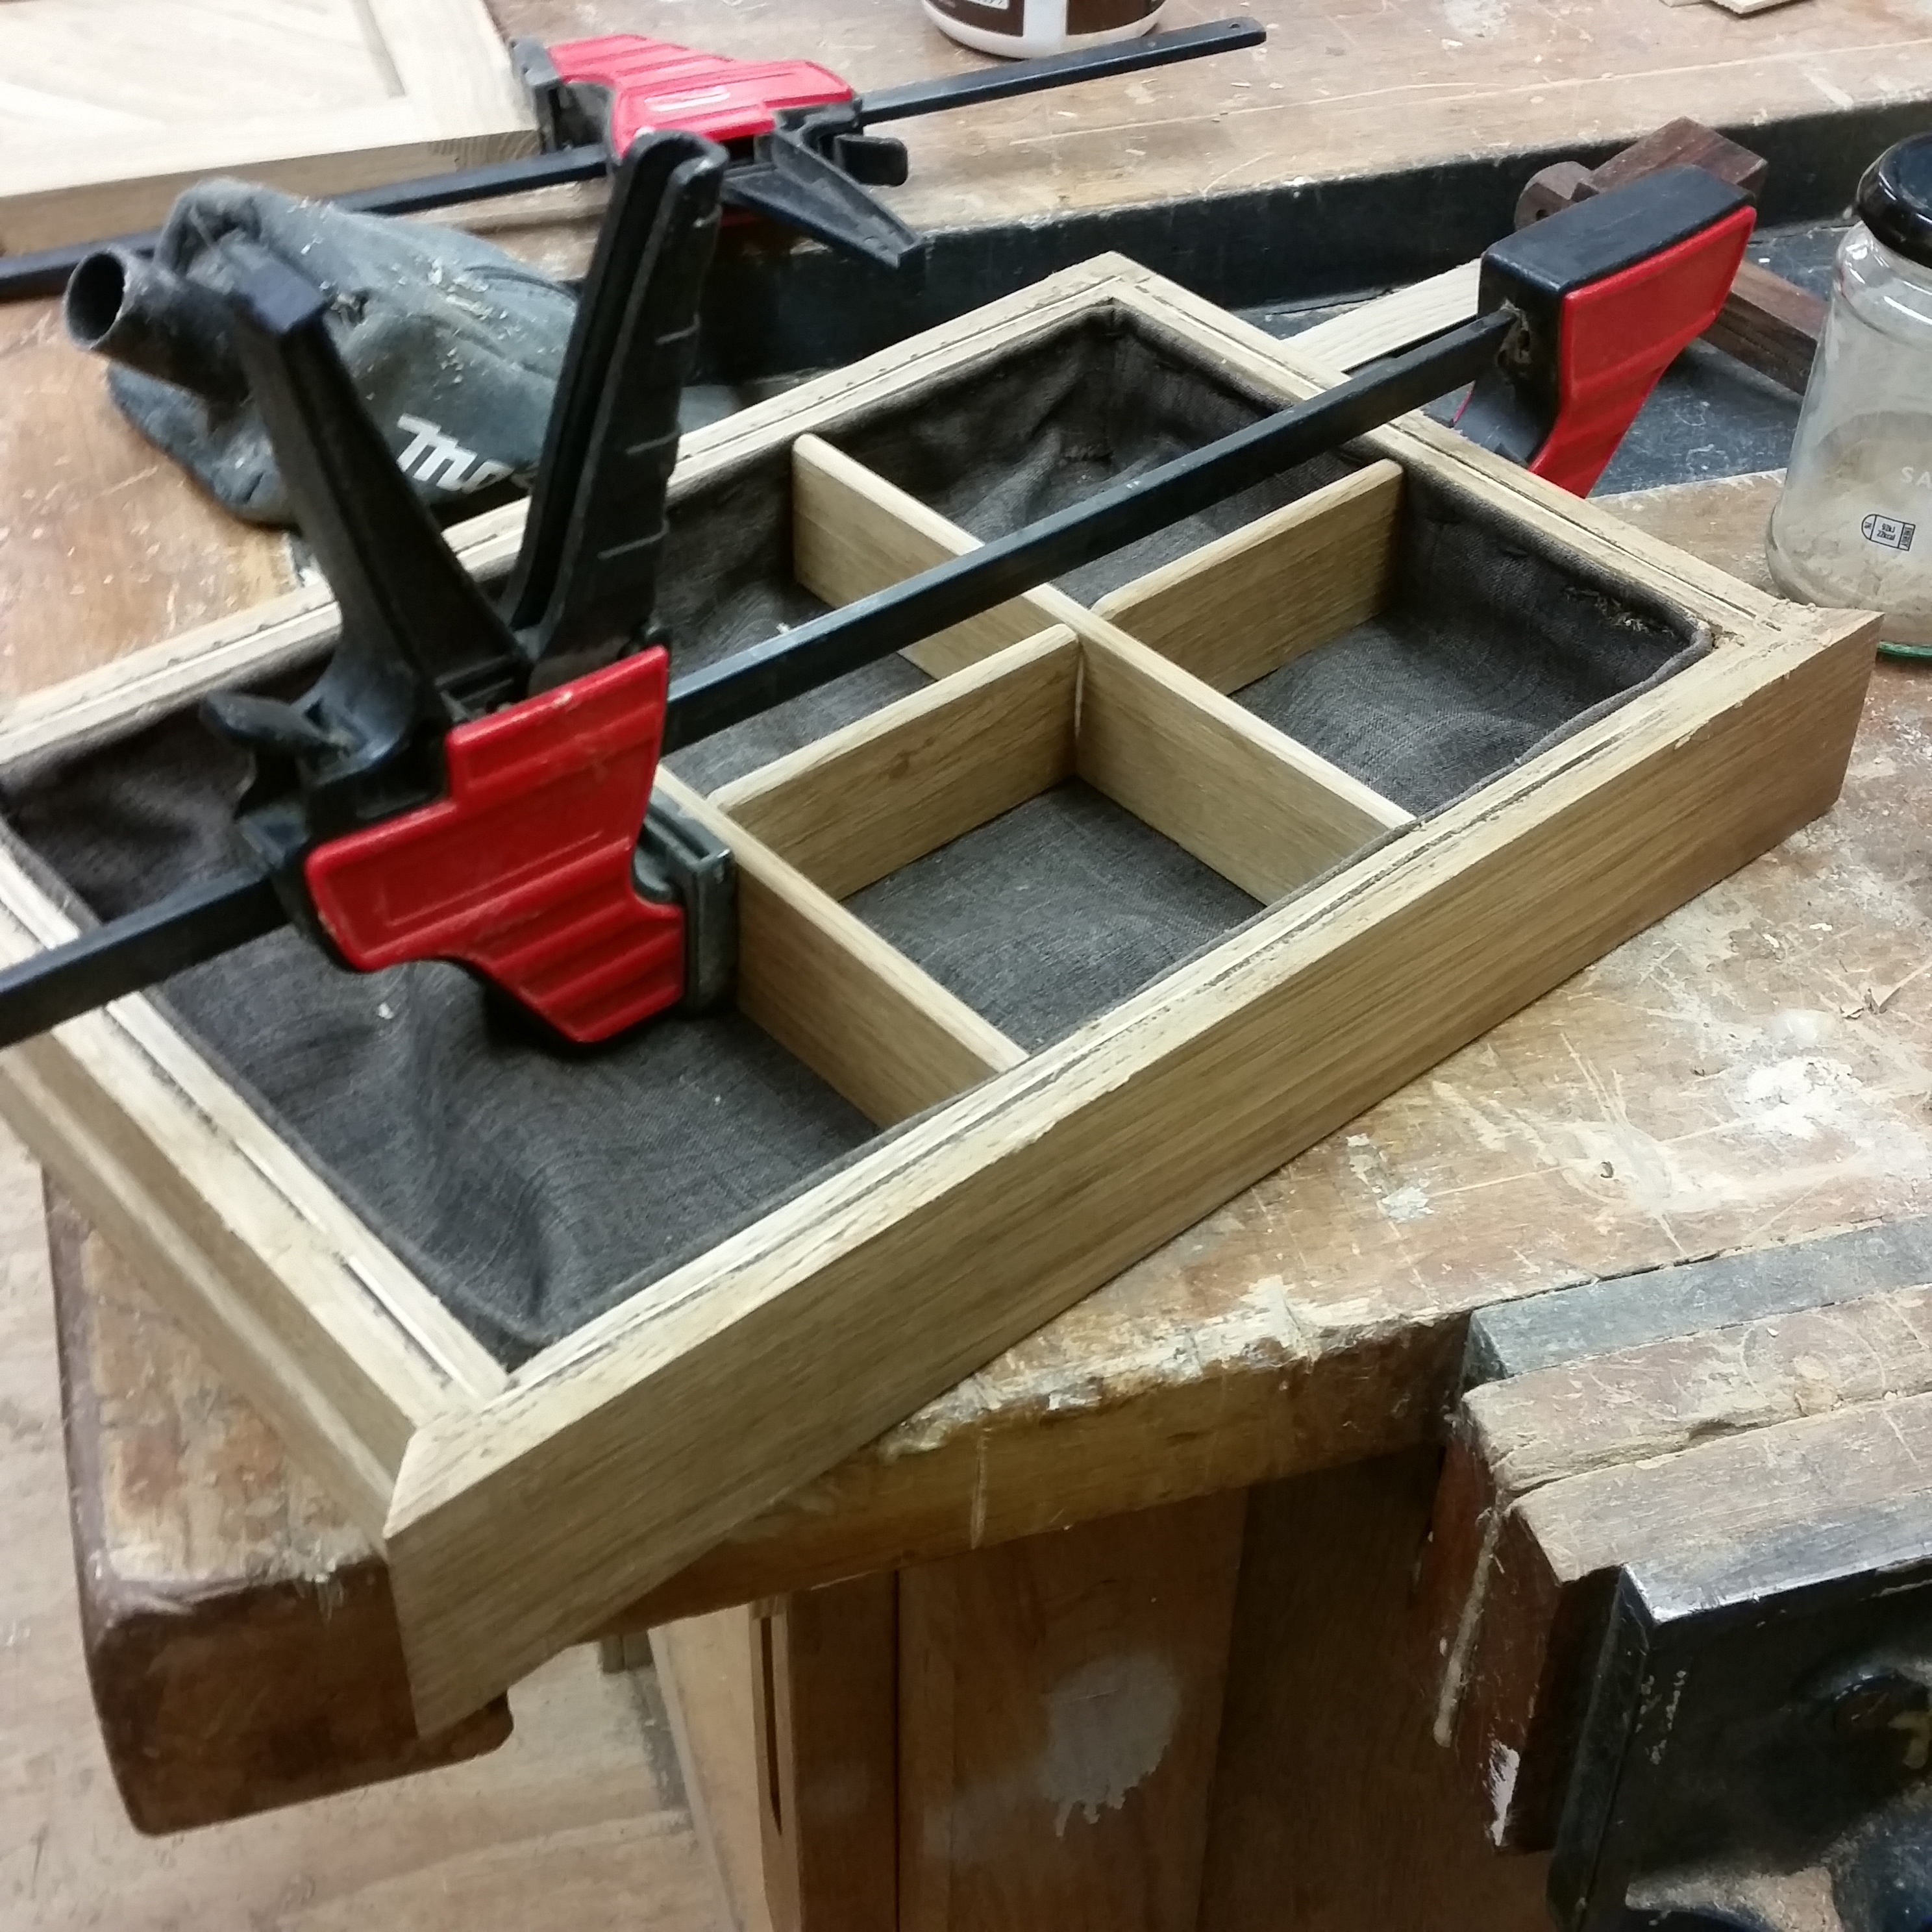
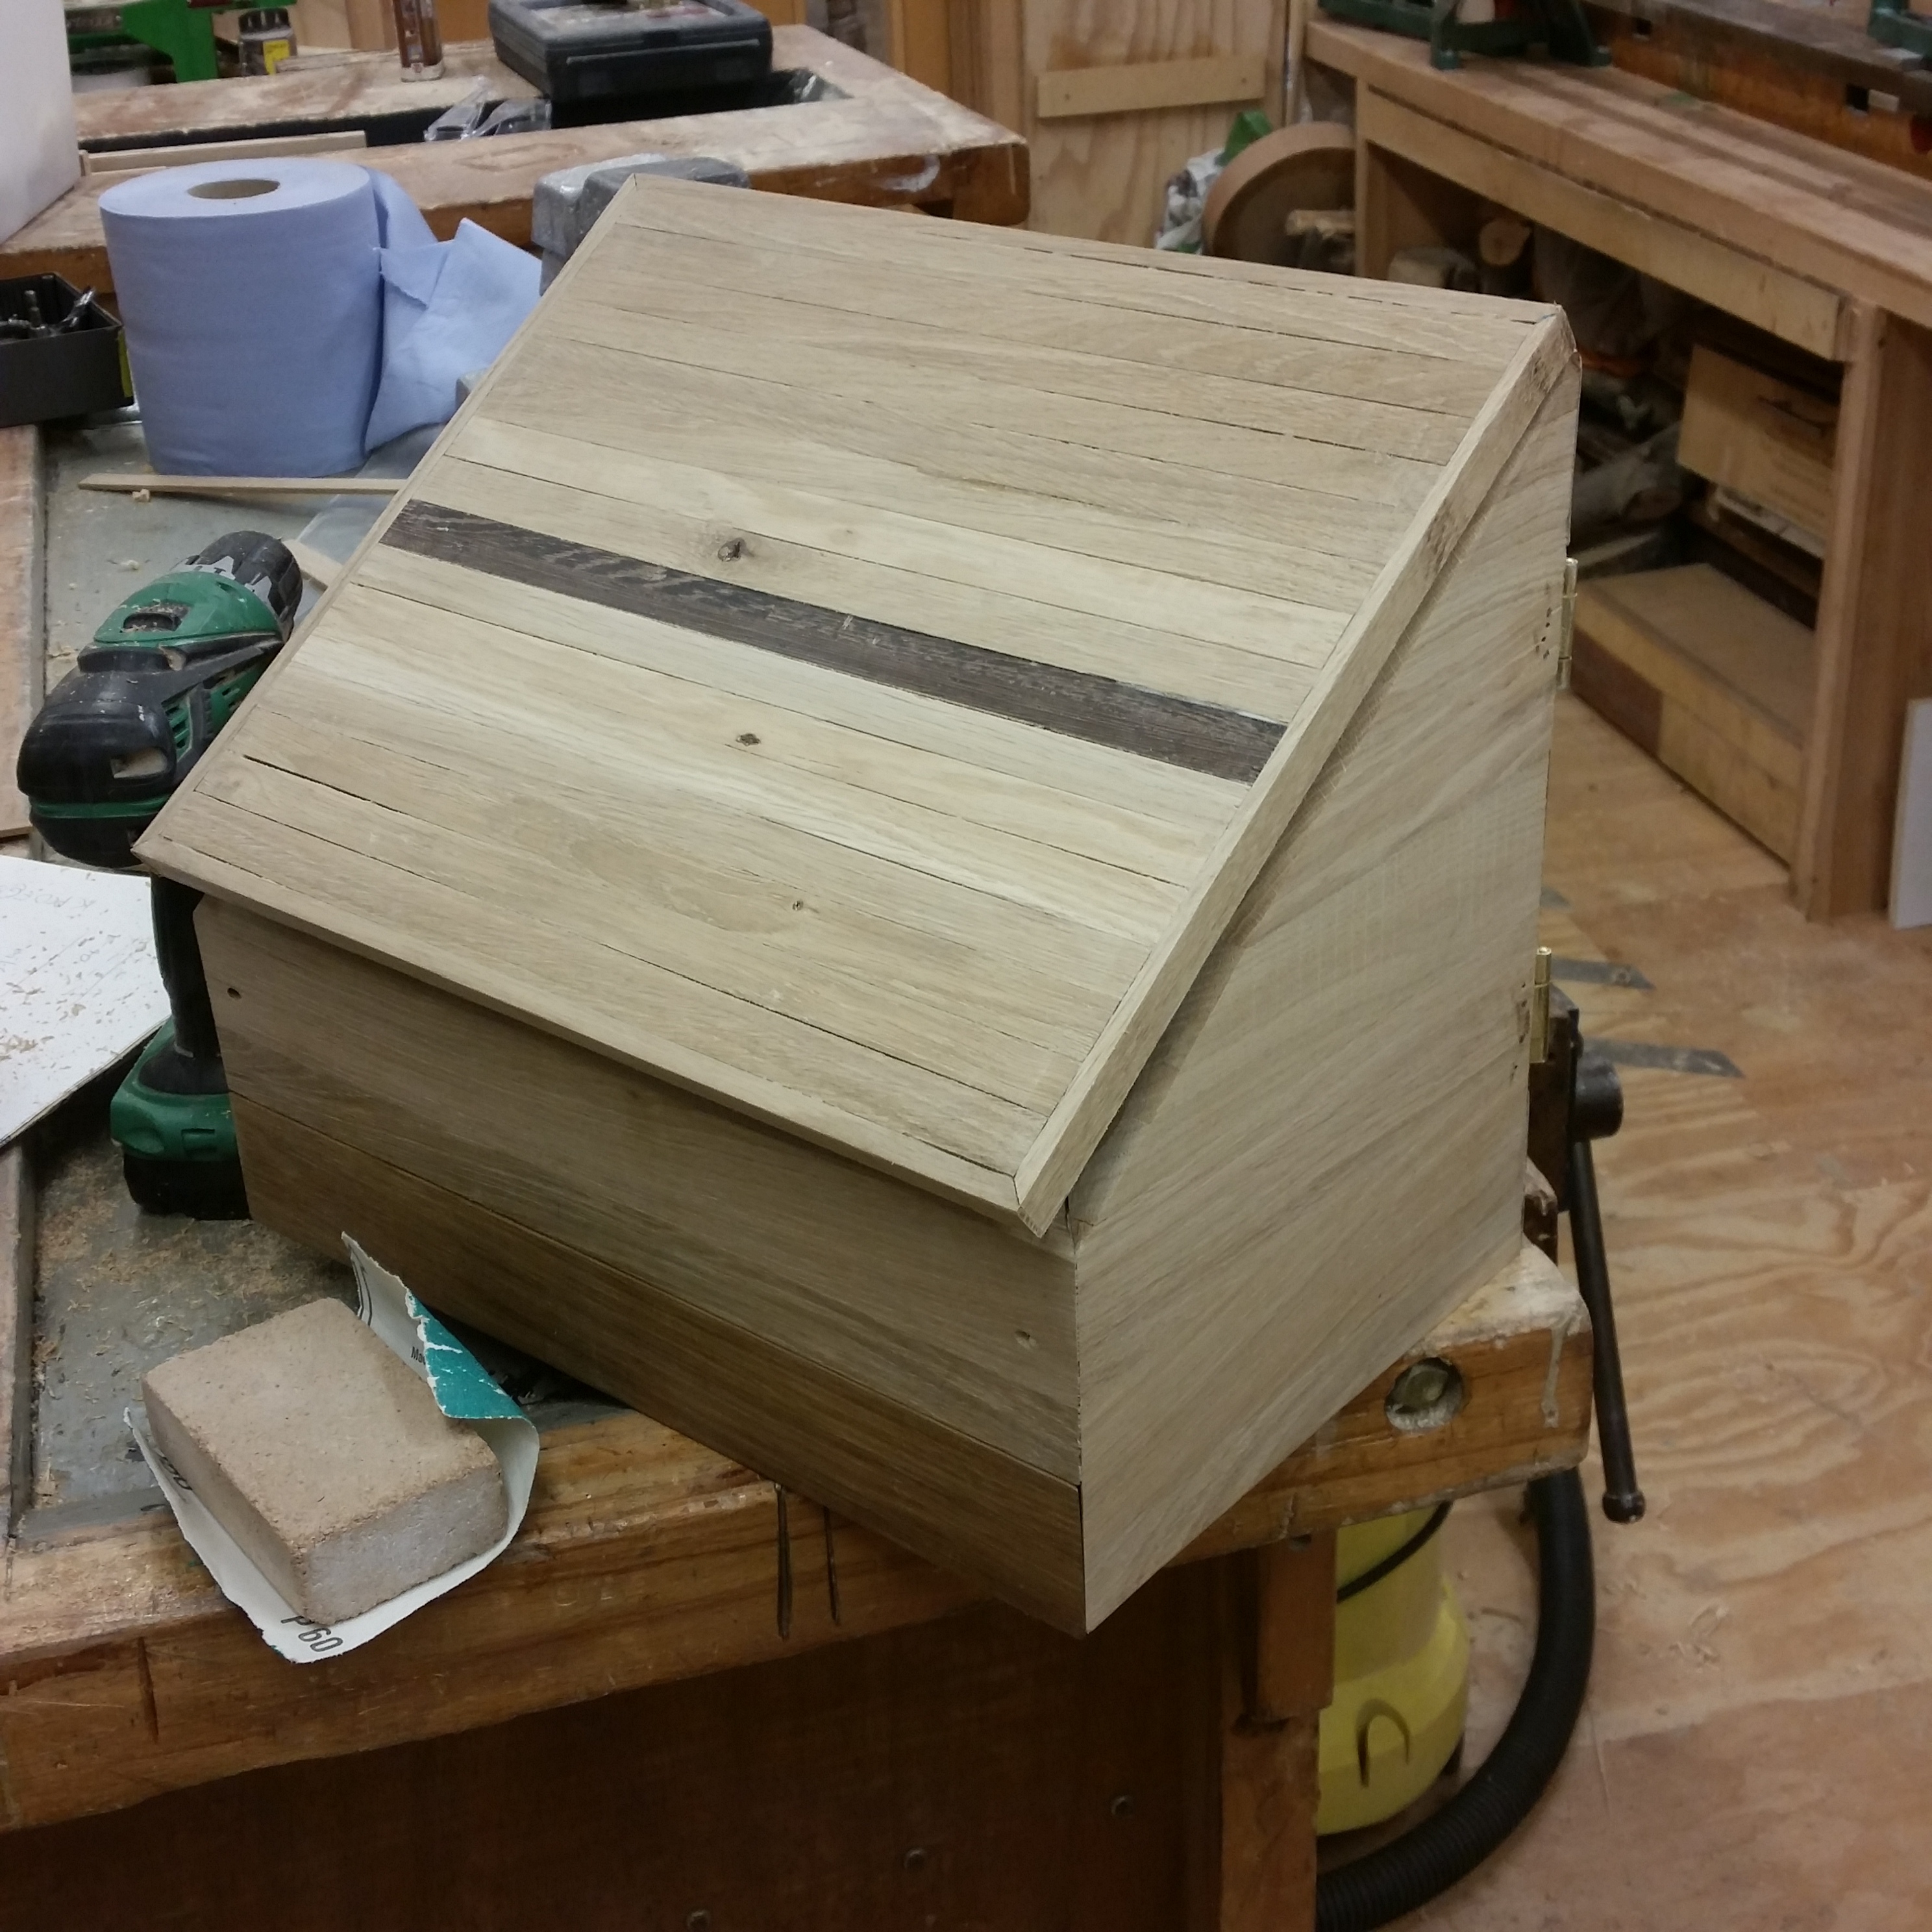
The previous box I made in similar style I filled the groove with beesewax, this time I thought I’d try an inlay…
Glued some thin strips of ash and wench, and took slivers off with the bandsaw, about 2mm wide and 1mm deep. Needless to say it chipped out in places… perhaps stick with the plan rather than ad hoc overcomplicate things…
Little scrappy in places as didnt really have the space and depth, nevertheless pretty pleased with the result.
Draws done.
Cut to size the hardboard for the display face, marked holes to be drilled, drilled the holes…
Covered with fabric, slid it into the grooves and glued the rear top piece, then set about threading the cotton chord to have something like this, lobster clasps to be added when they arrive…
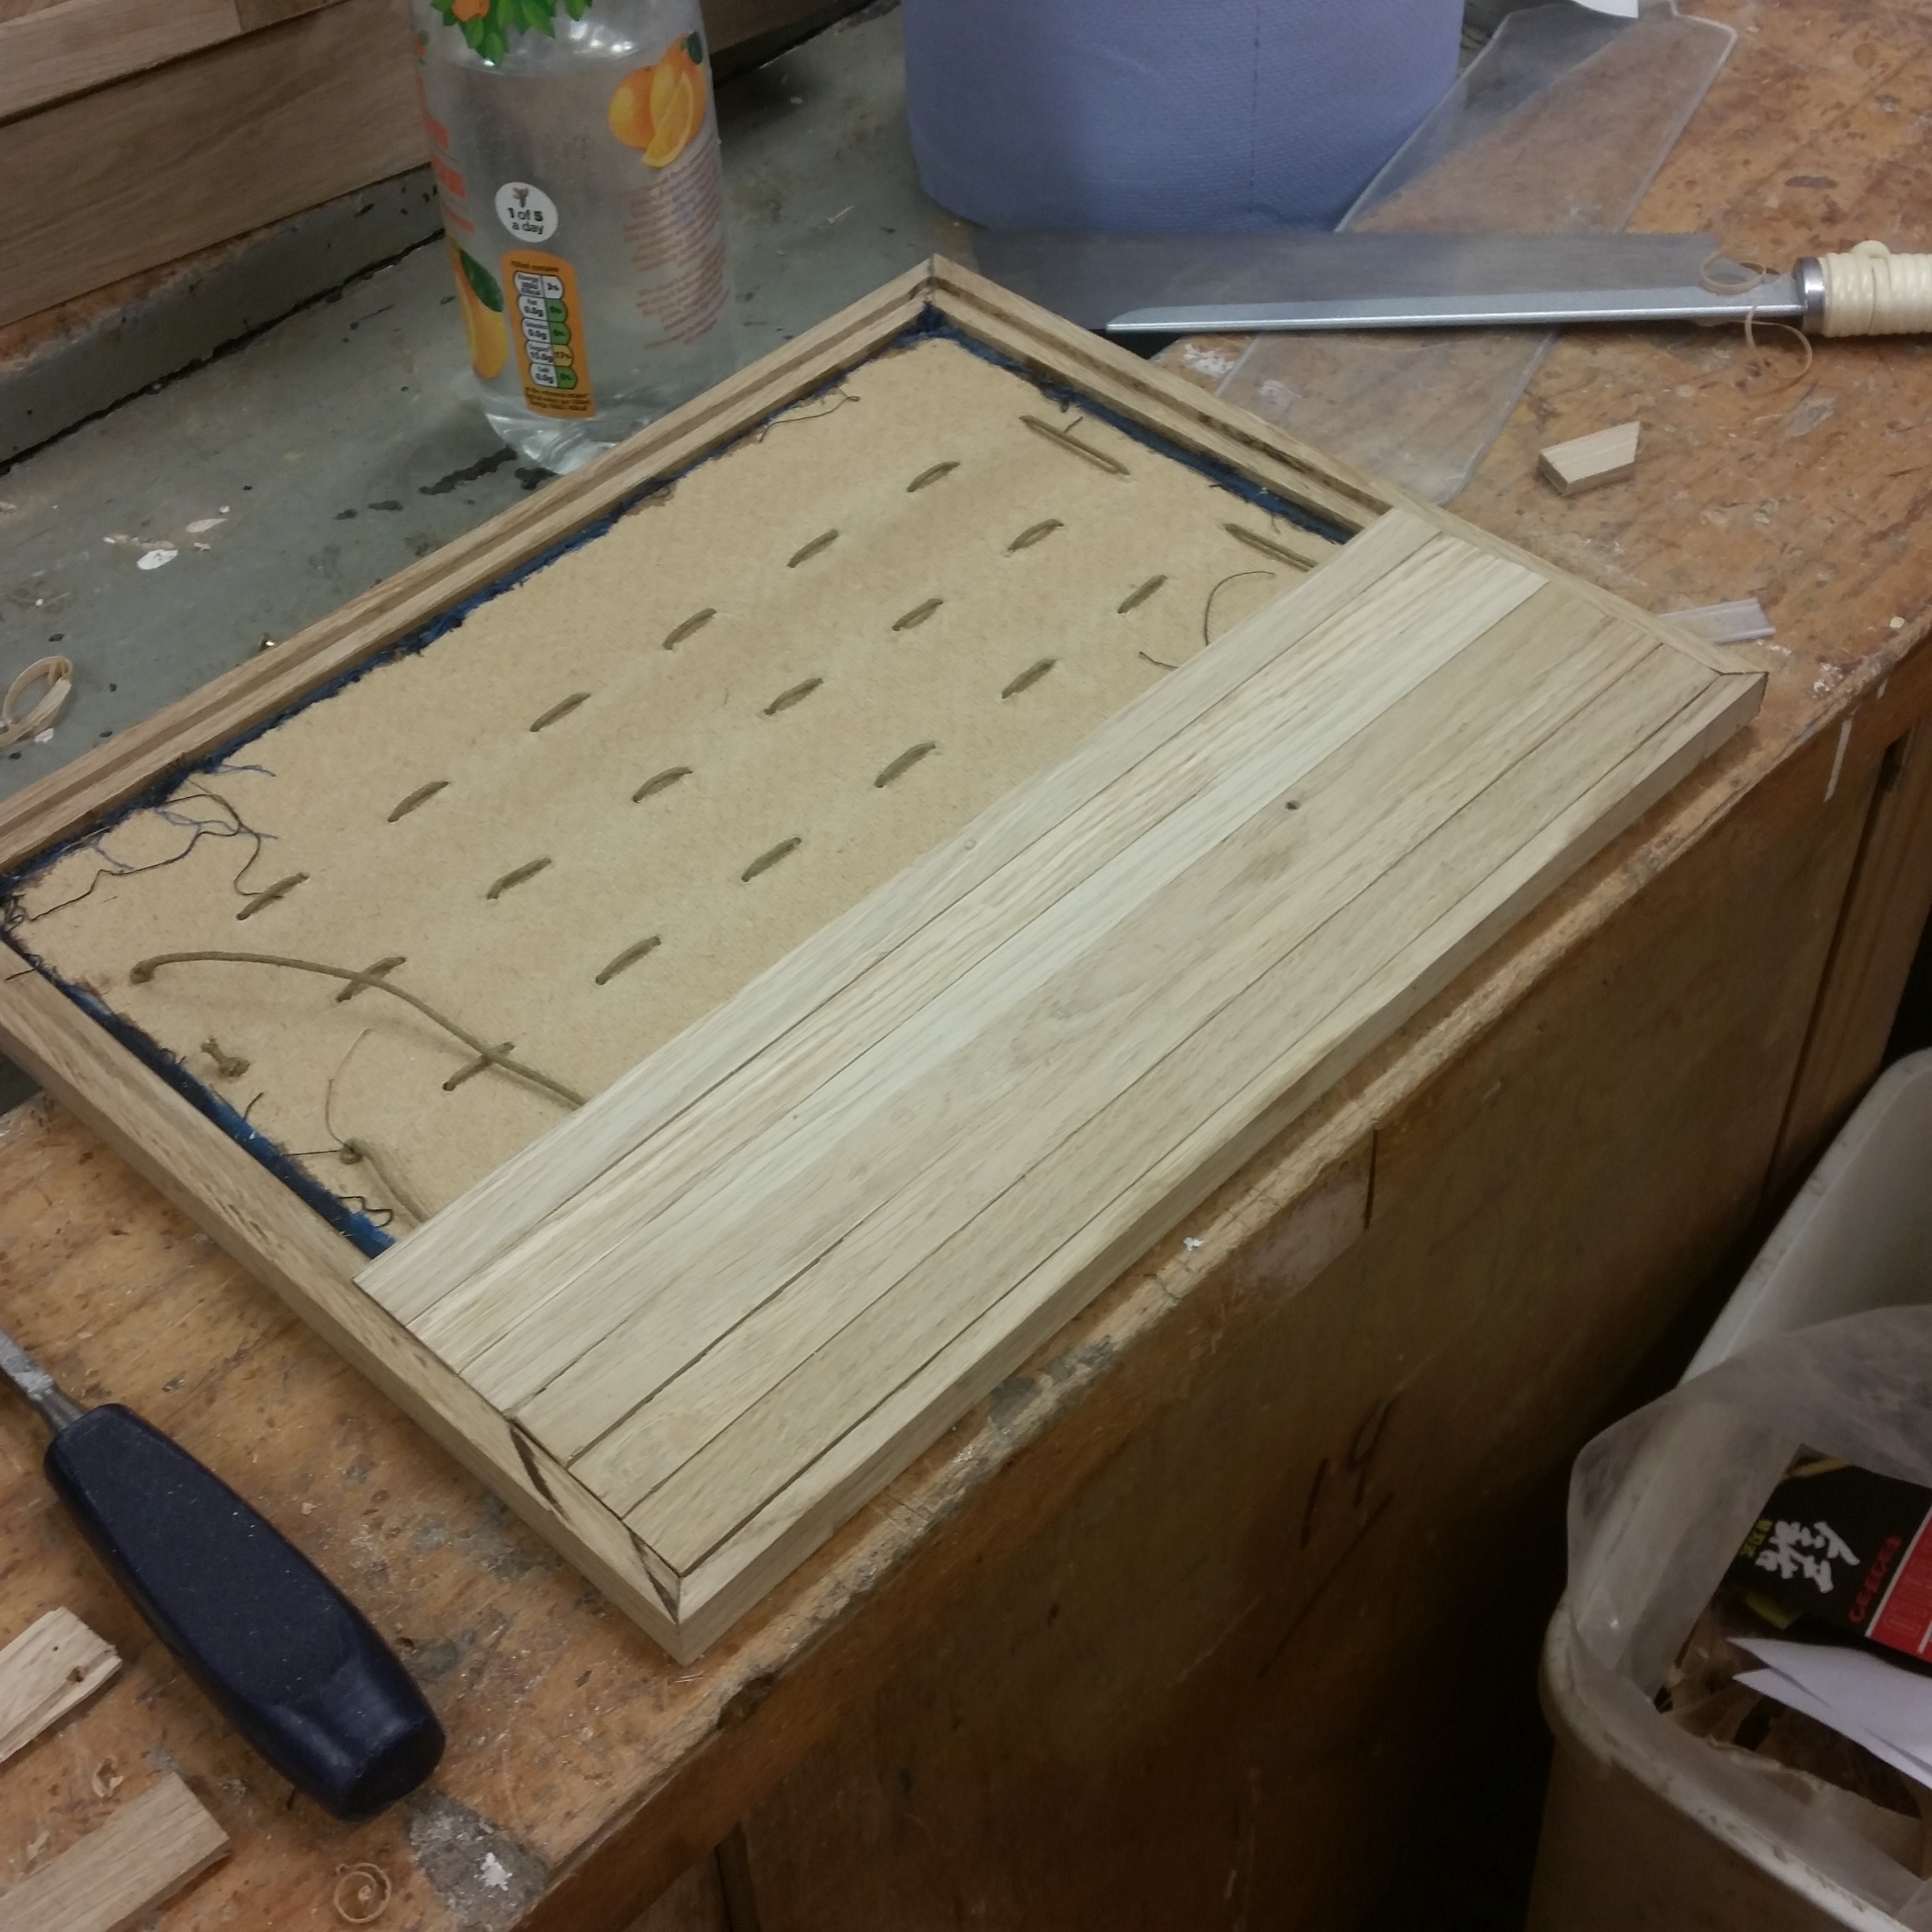
The blue piece is to be the lid, hinged such that folds up and stands vertically holding more pieces. Made up of square pieces of oak, mitred, 4mm groove cut for the hardboard, and a rebate for some thin strips to sit on.
Made up some doors for the back, tenon joints, 4mm groove for the thin strips to sit in, pieced together and glued, I probably won’t be doing hinges on mitred edges again, nor would I recomend doing so…
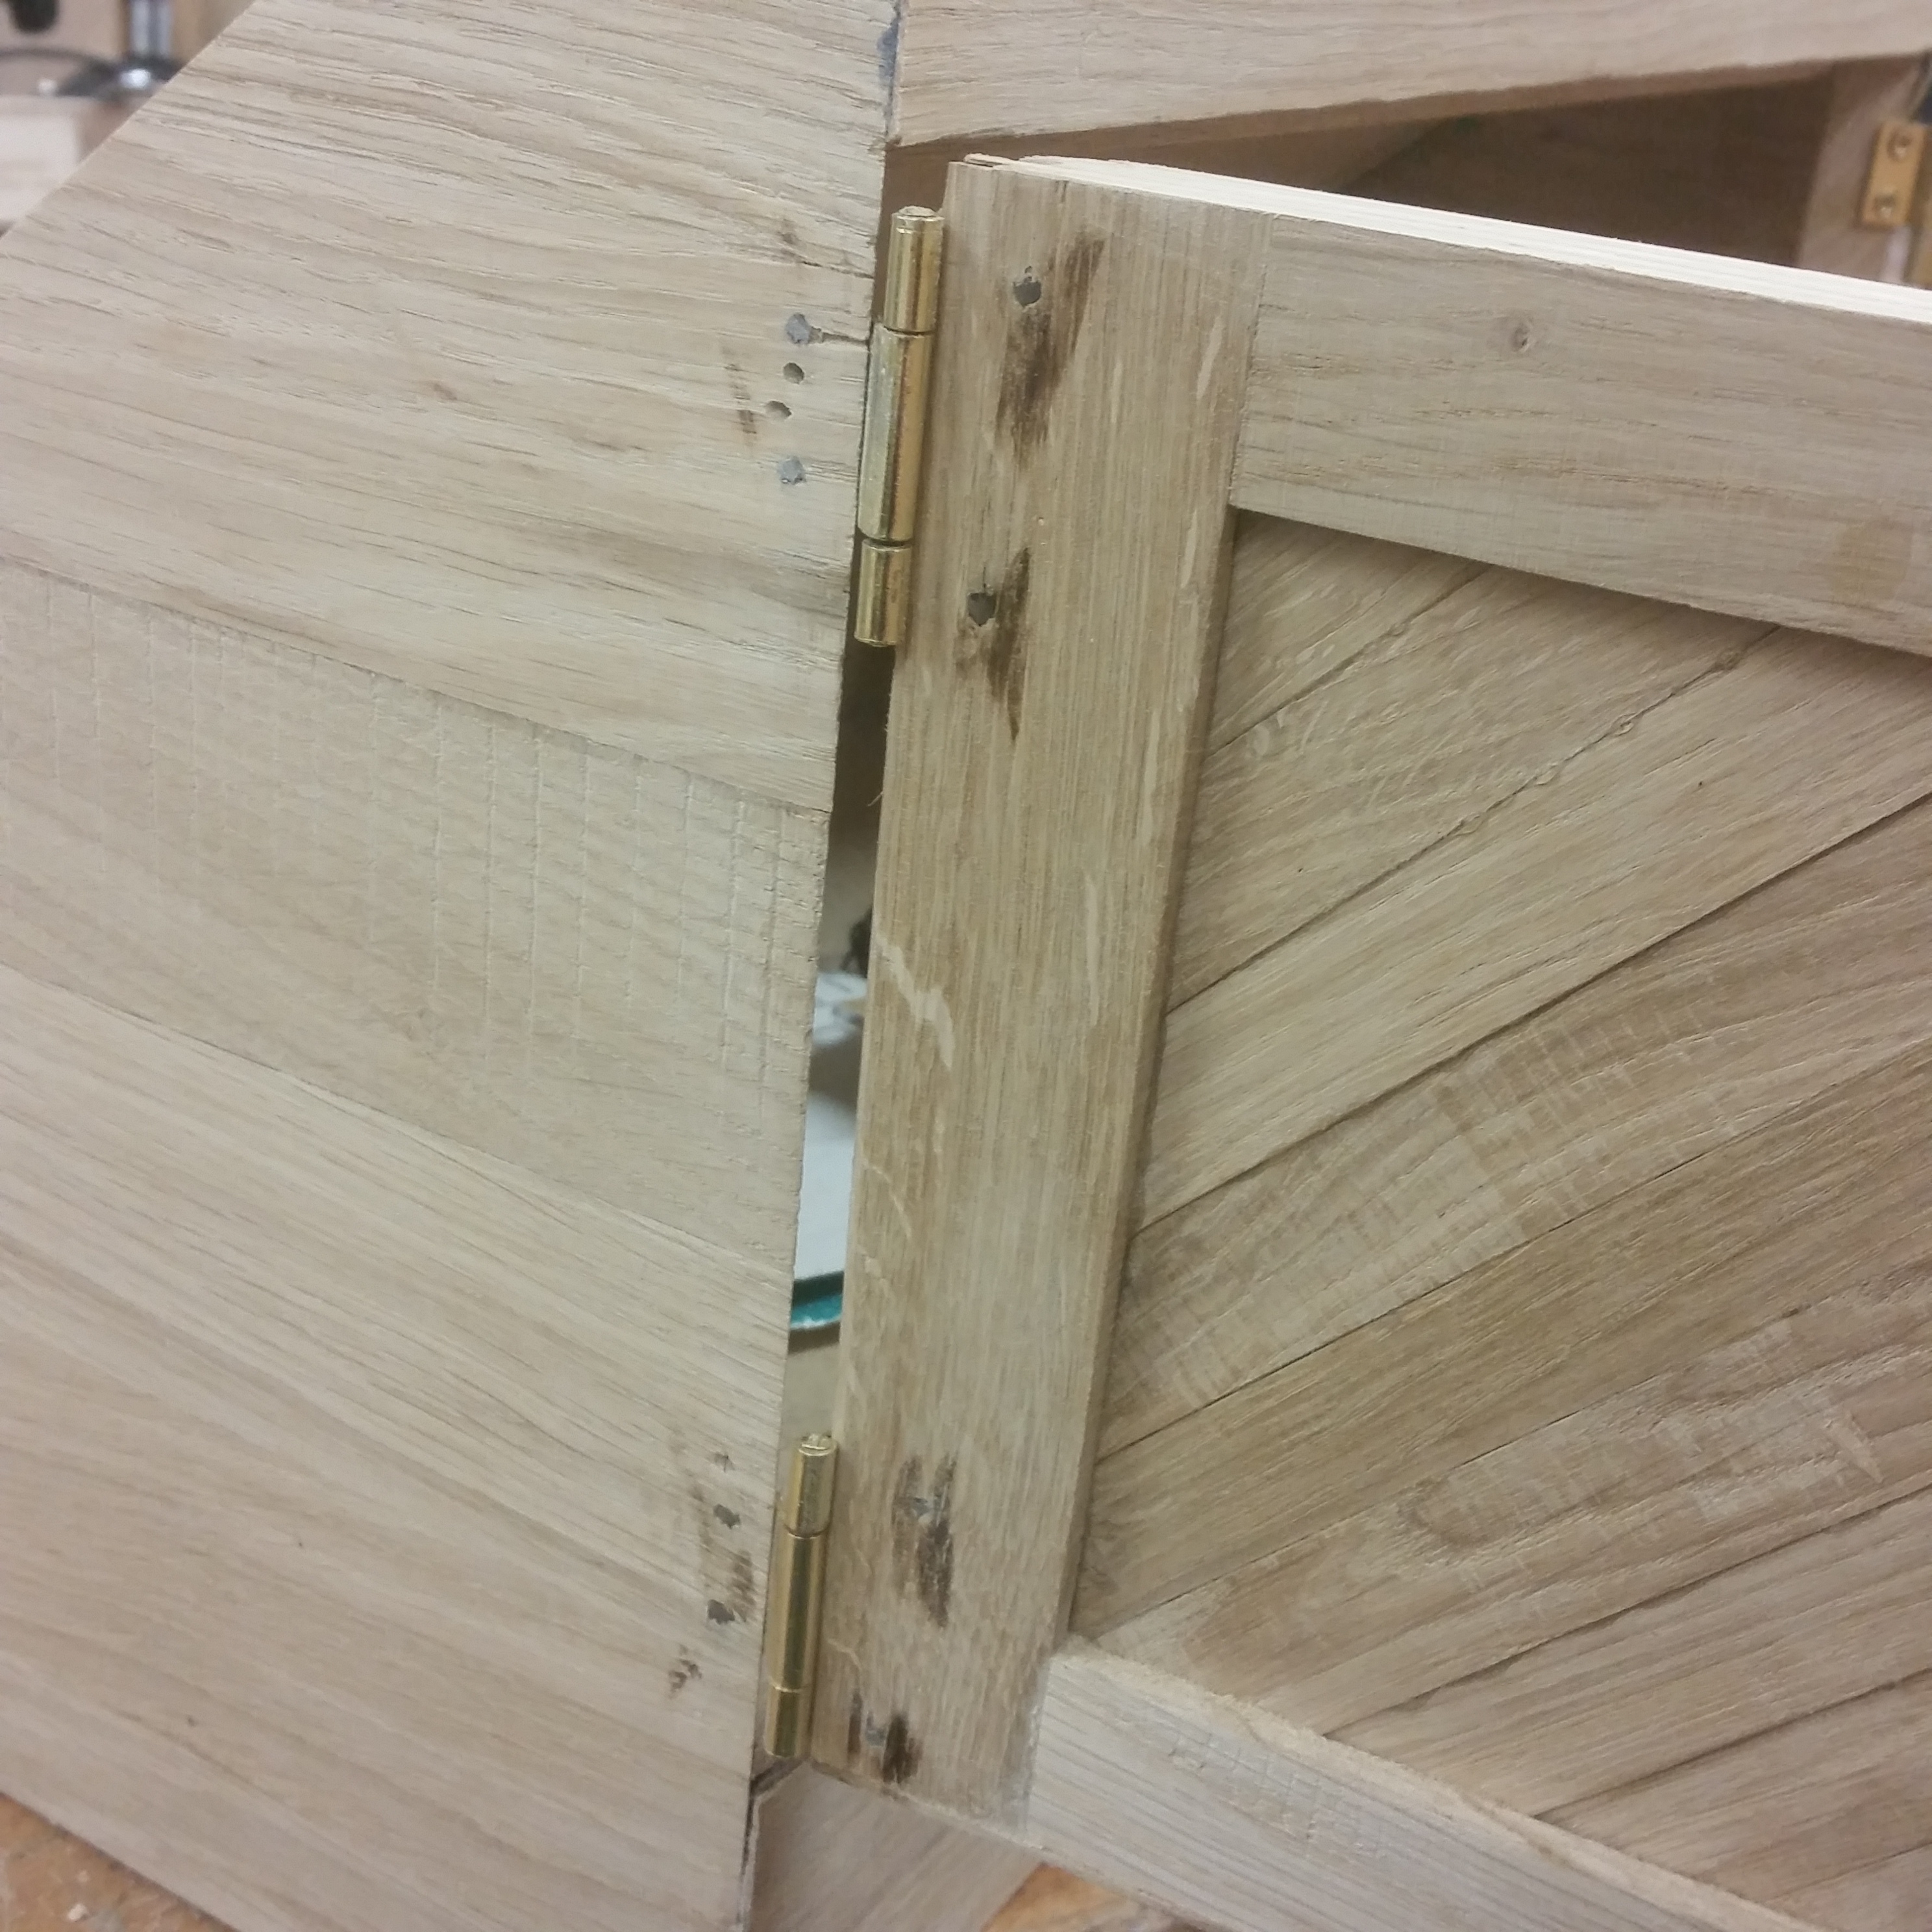
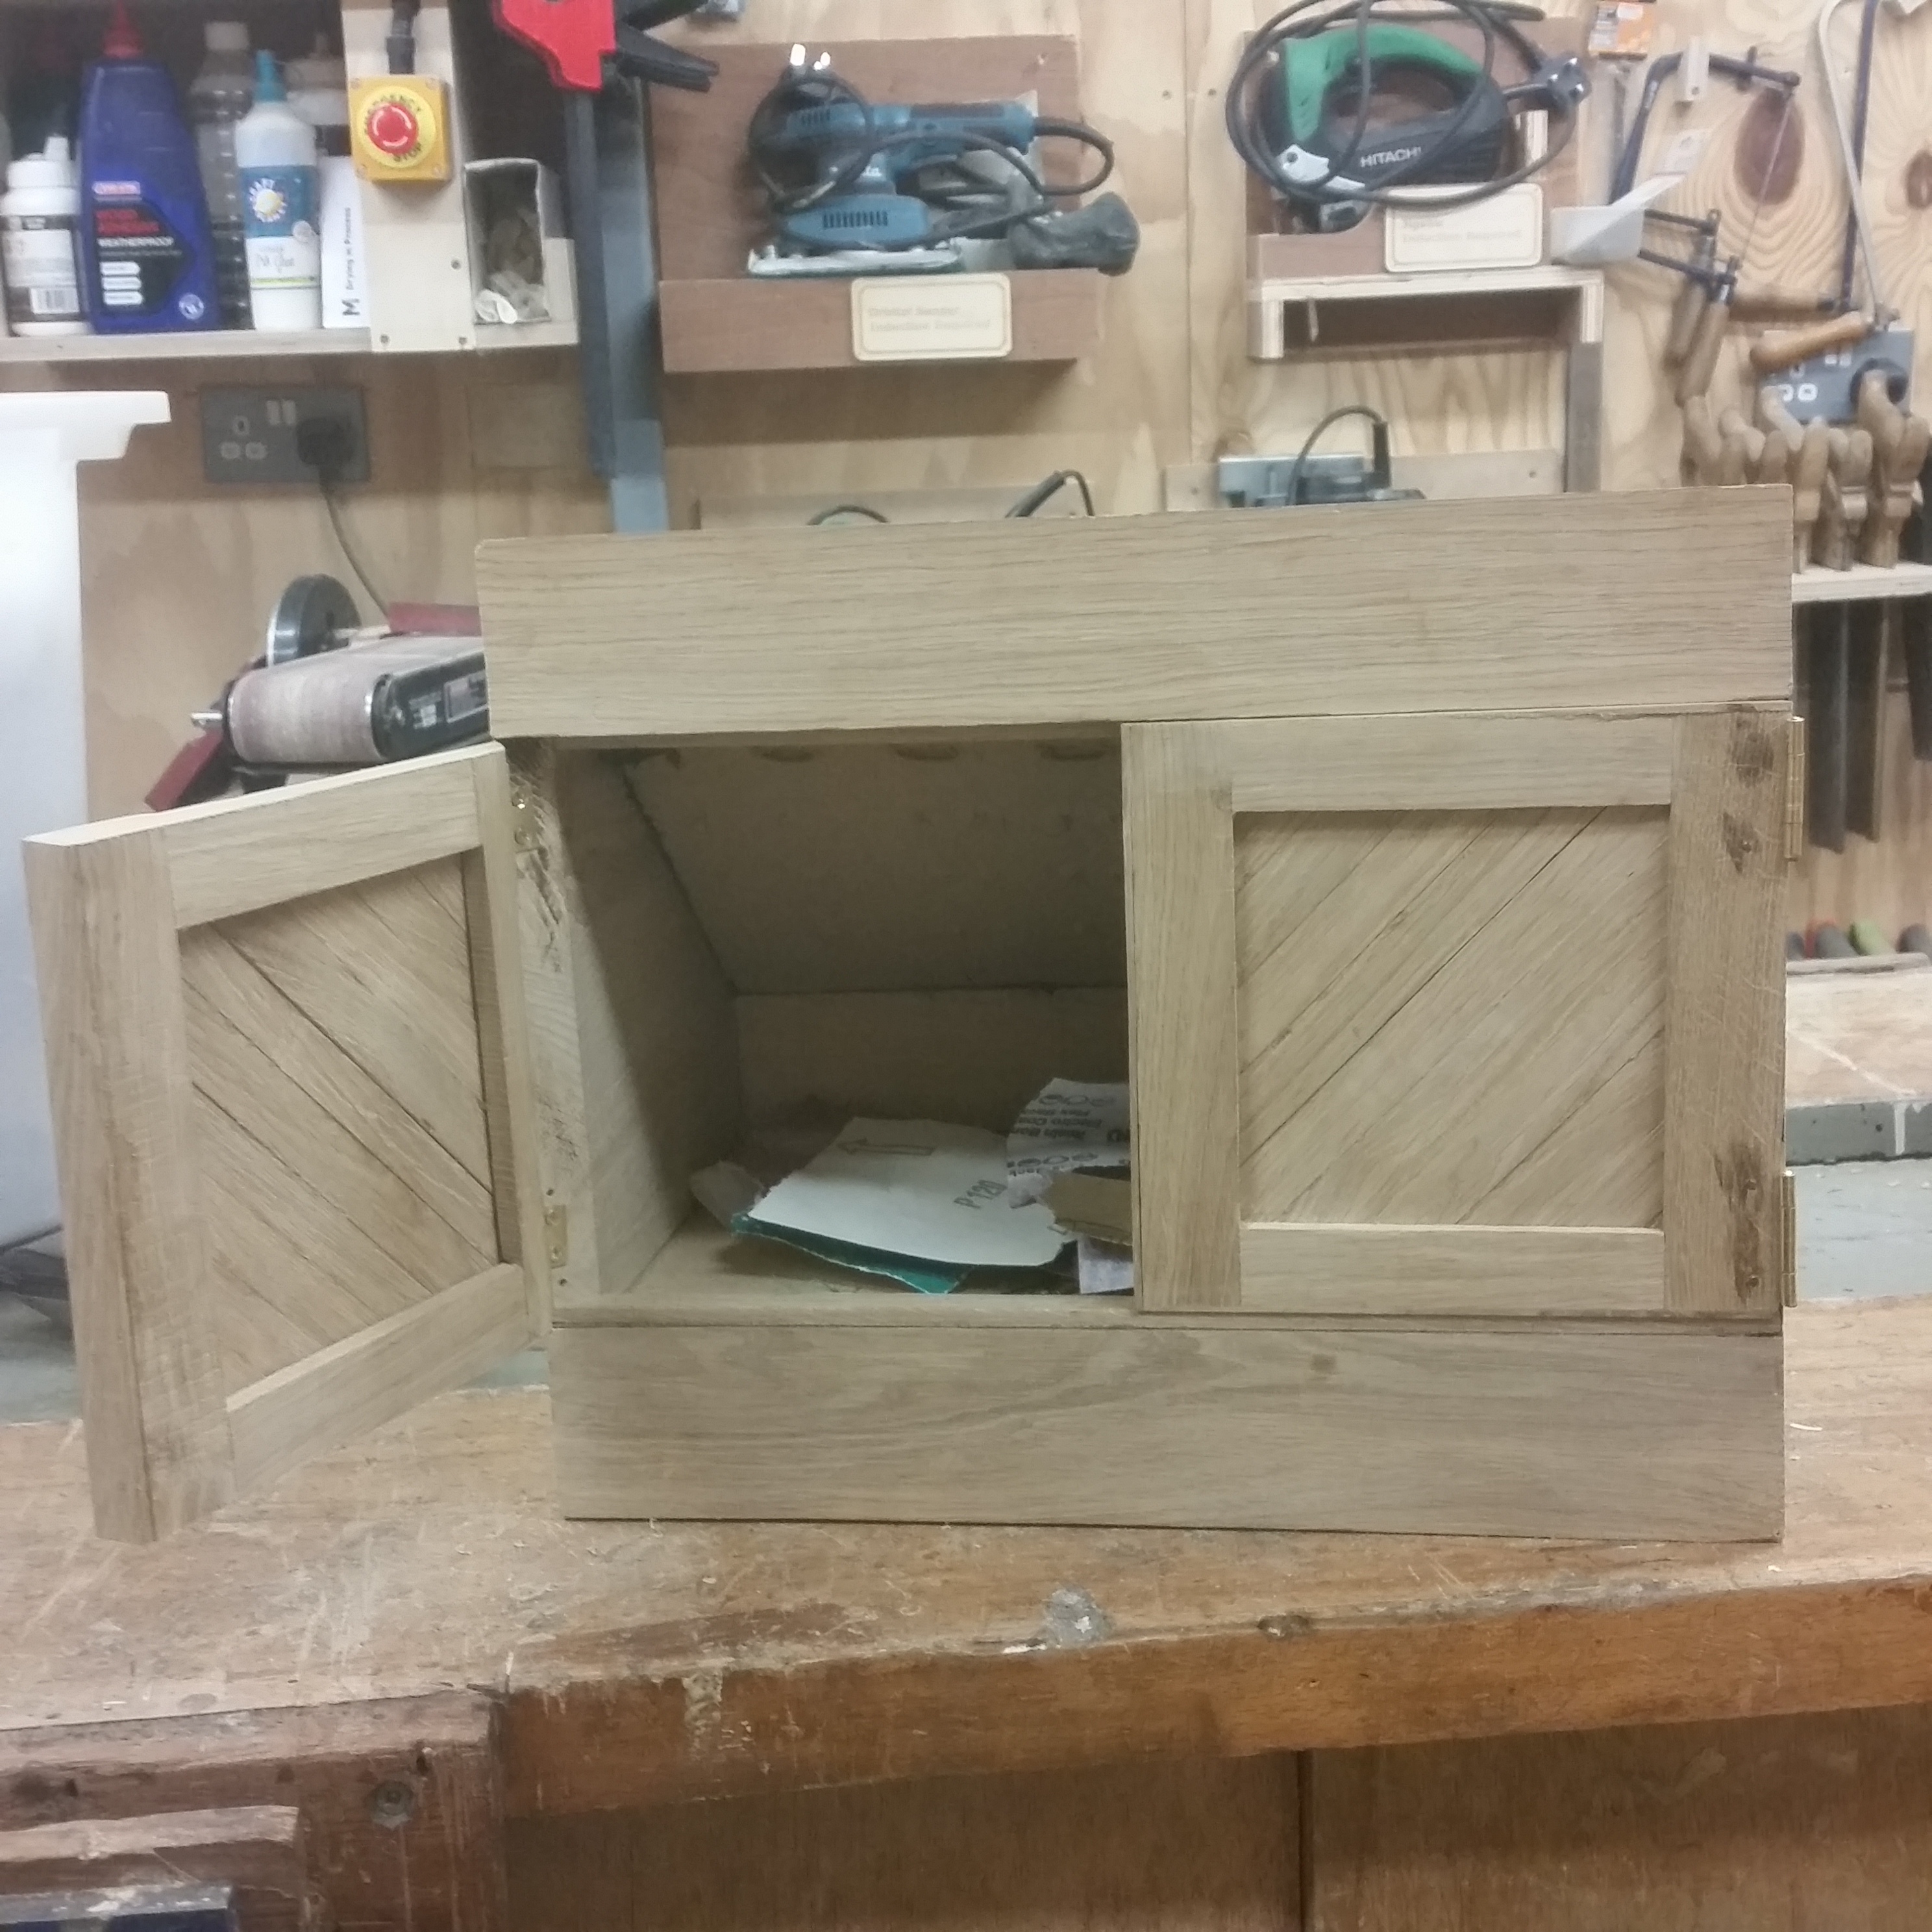
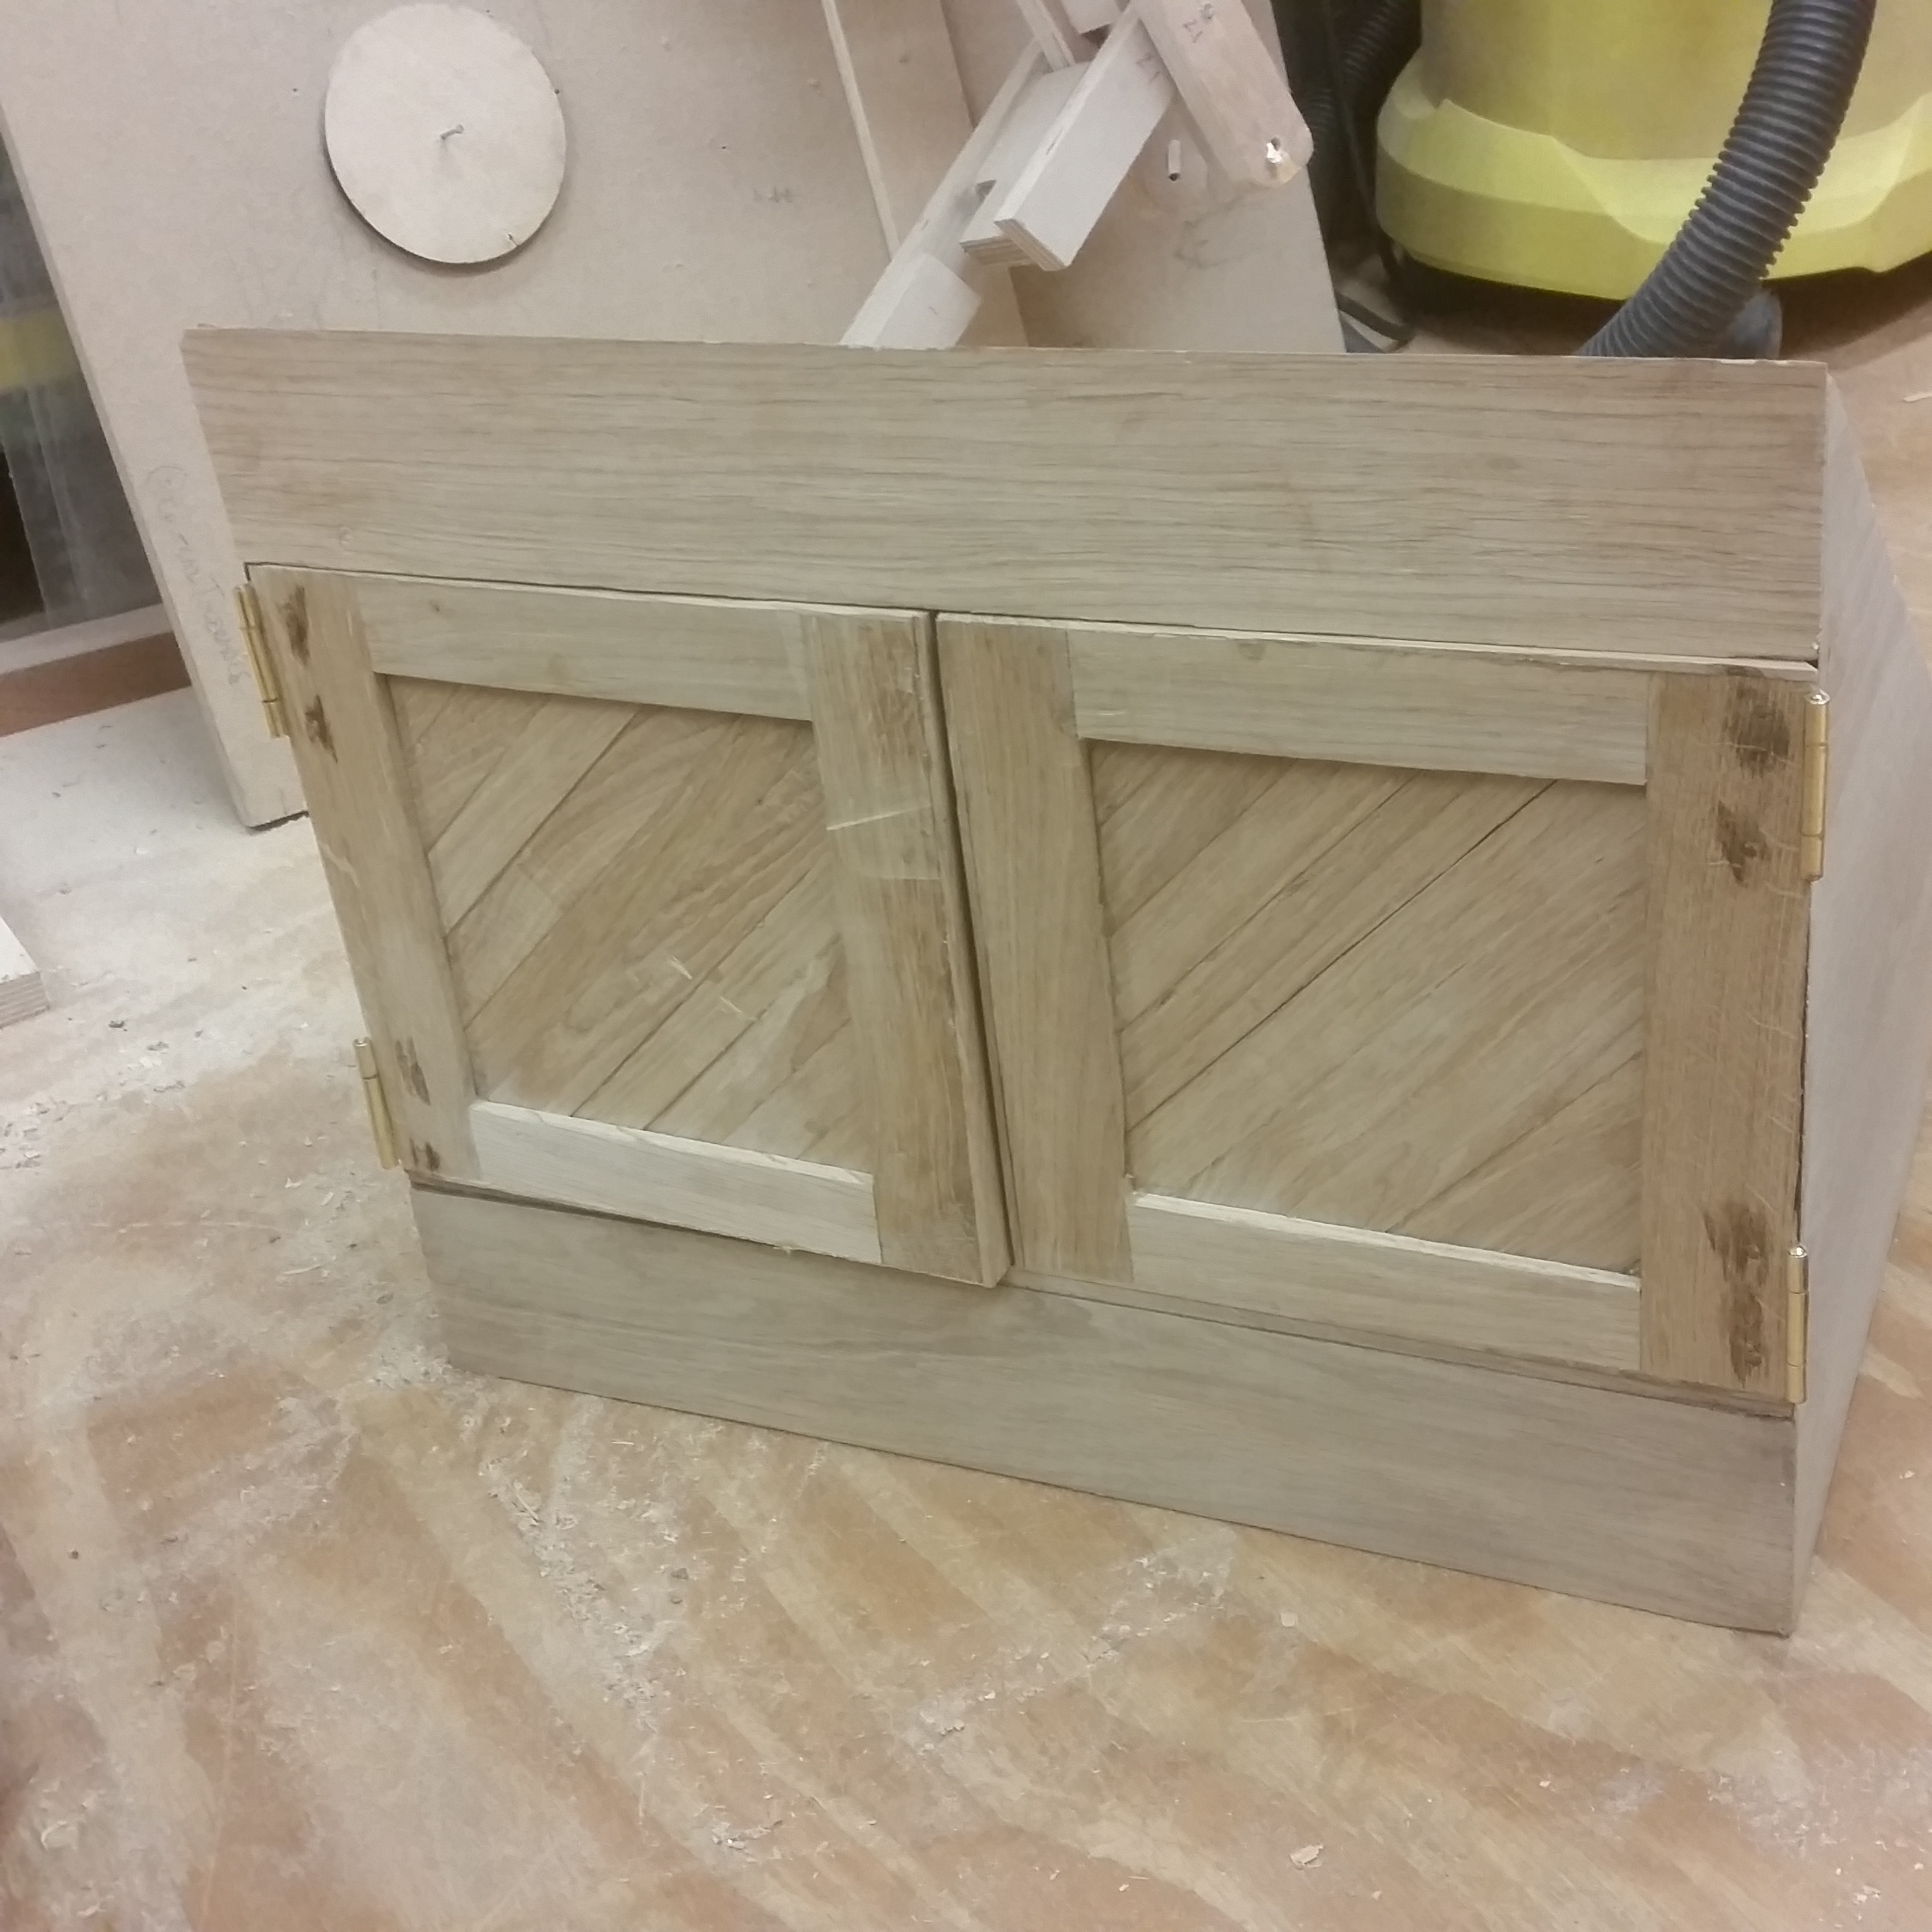
Should sand out okay…shame one of the doors warped. Might redo these with squared pieces at a later date… scrapping the mitred corners…
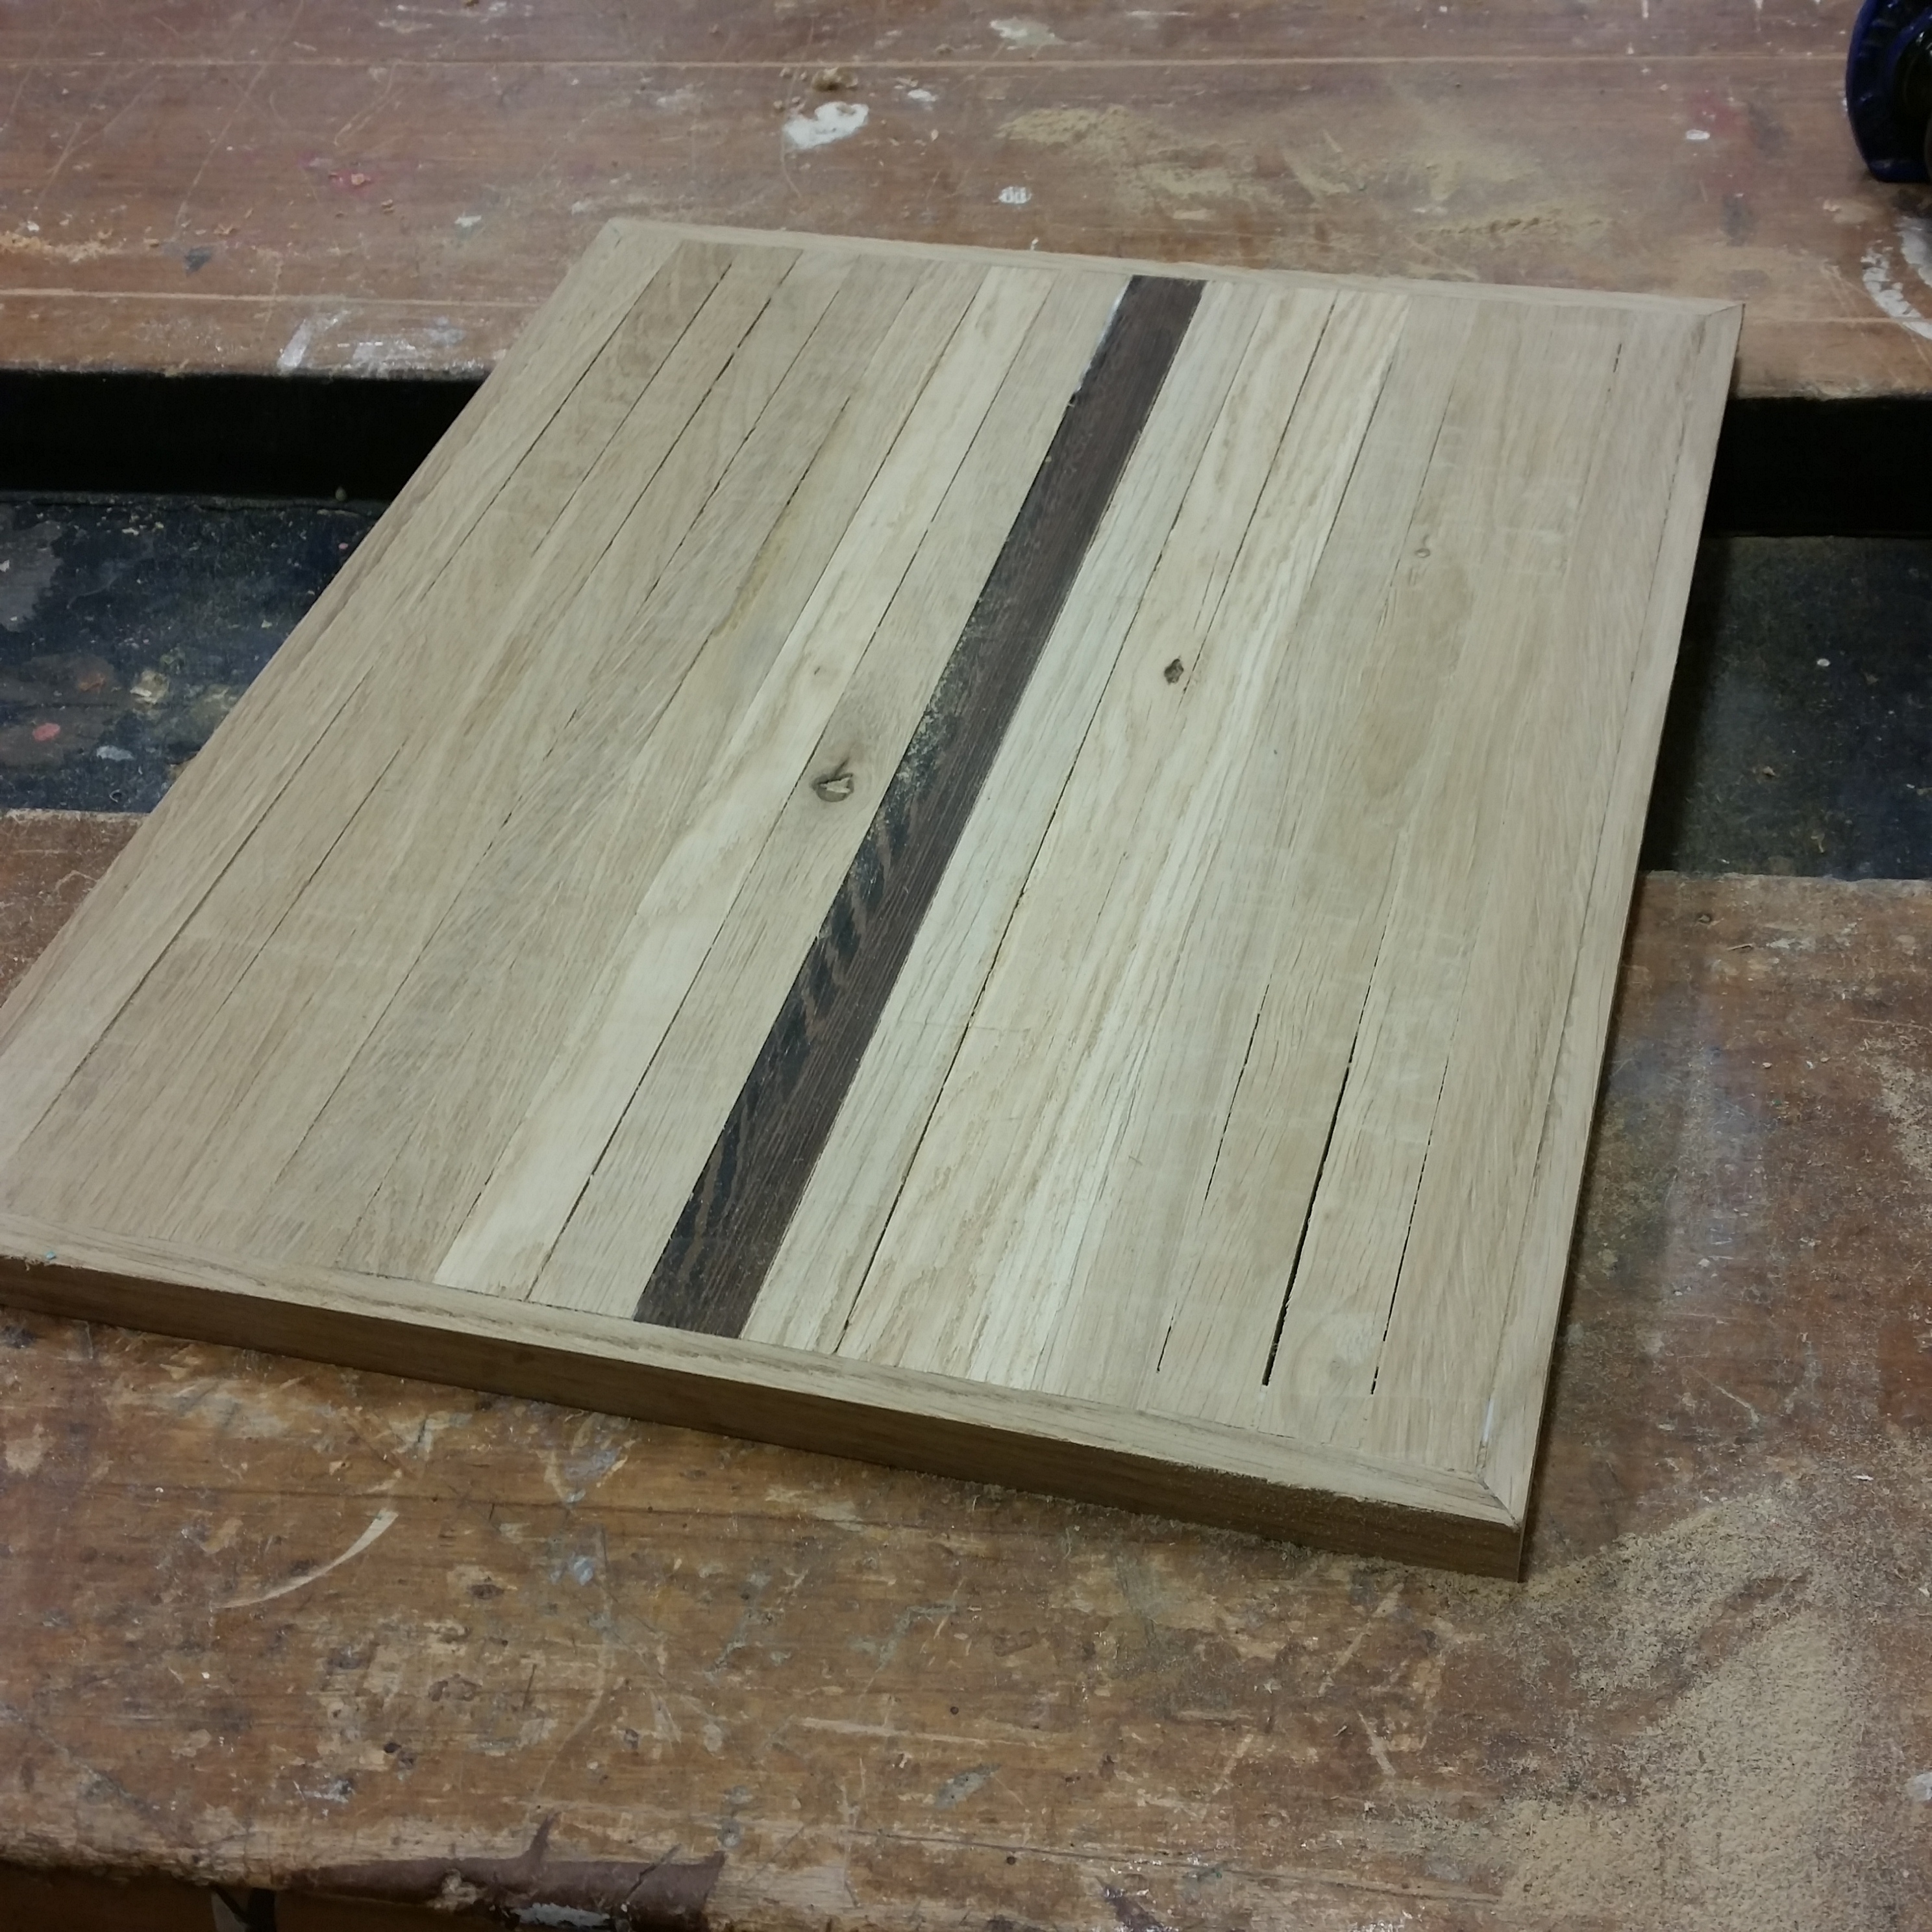
Planed and cut to length a load of the strips of oak cut from the bottom of the boards…
One strip of wench chucked in for the hell of it, glued and weighted down.
Router planed, and a good bit of hand sanding.
Fitted the hinges…
Bit more sanding, a load of oil, and the last few fixings and findings and that’ll be done…
Might add Marks suggestion of another fold out bit of display from the doors… thanks again for adding another days work…!
To be continued…