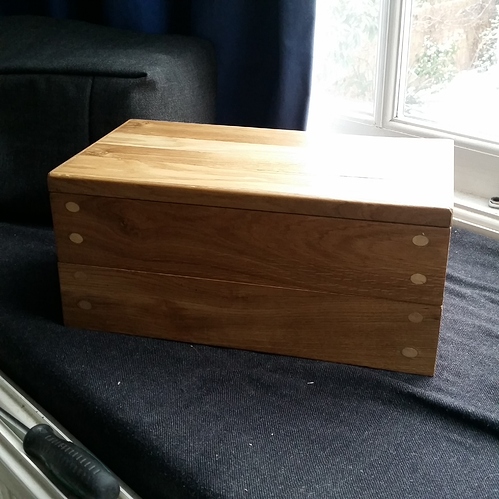
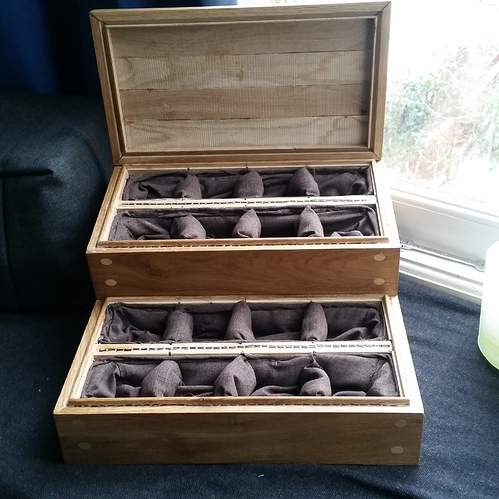
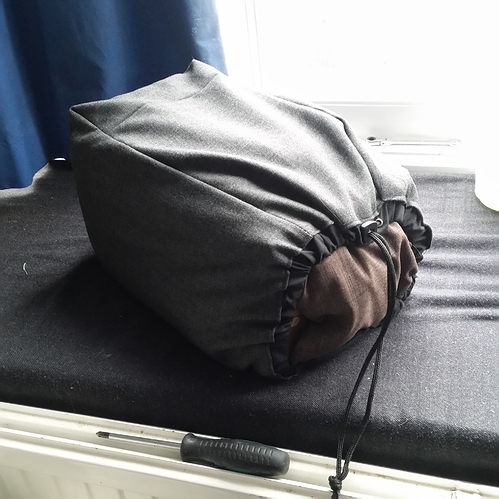
I eventually got round to finishing the first project I started in the space the other day, I’m afraid this won’t be the best documented project, will try to take more photos of the process in future / append relevant pictures of the process next time I do something similar.
My friend who kindly lets me join her on her table at the Northcross Road market, sells semi-precious stones, at present, she’s packing these away in a big builders screw and endless duct tape wrapped cardboard boxes, so I’d said I’d build her something a little nicer…
The universe gave me a king gift of approximately 1m^3 of oak chucked in a skip near a studio / garage in which I do most my work, some of this in pretty usable lengths - 50cm plus. Most around the 20cm mark, these were from a flooring job so had tongue and grooves precut; perfect for the stackable box I planned on building - saves me a load of routing.
Step - 1. Wood Prep
All pieces had a number of grooves on the underside to accommodate the glue so these had to be ran through the thicknesser a number of times to get them nice and smooth.
Step - 2. Chopping Mitres
Being relatively small pieces Joe recommended using the table saw rather than the mitre saw which Mark kindly helped me with, set the angle at 45 and the cut was pretty impressively accurate!
Step - 3. Base Grooves
I next took all the pieces home and ran them over my mini table router with a biscuit jointing bit to cut a 4mm channel in each of the sides to accommodate a hardboard bottom.
Step - 4. Dowel Holes
I planned on using 45 degree dowel joints on the corners for a little added support and glue surface area. I stood each of the pieces on it’s mitre and drilled some pilot holes using the pillar drill.
Step - 5. Groove for Middle Divider
I next chiseled out a groove down the centre of each end piece for the middle piece of oak to sit in so as not to wobble about, I drilled some holes in the centre of these for some additional dowels.
Step - 6. Gluing
Poured a little Gorilla wood glue on each mitre, and stuck them in mitre clamps for 24h in L shapes first, then sliding the hardboard in, completing the job.
Step - 7. Dowels
The pilot holes were drilled through with a 10mm drill bit from either side to minimize damage to the outsides, dowels tapped through, then flush cut.
Step - 8. Lid
I thicknessed a couple of other pieces of wood, then ran through the bandsaw to get the right width, then cut the rebates, I ended up doing these by hand with a marking guage to get a good channel to get a saw in. Clamped each piece to it’s respective side of the top box and used the flush saw to get an accurate mark, then cut the mitres.
I then ran another 2 boards through the bandsaw to get some thin strips to stick into the rebate I’d cut to finish the lid, cut to size by hand, then assembled and glued on the top of the box to ensure a good fit, all sides on, glue in the rebate, top slats fitted and all clamped downwards.
Step - 9. Sanding and Finishing
Clamped the whole unit and block sanded through the grits, then applied a few coats of Danish Oil, came up beautiful and golden.
Step - 10. Padded Fabric Lining
I next chiseled out a small groove along the sides of the boxes tongues before drilling a load of 2mm holes along the length of these grooves for sewing the linings in.
10.1 - Measured up, cut a load of wadding for the bottoms and sides, stitched together to make an open topped box, four times.
10.2 - Made some little wadded pillow cases to act as internal dividers.
10.3 - Cut a 2d template for an open topped box of internal dimensions of the box I built, only double height to double back on itself.
10.4 - Stitched the little padded pillows at 1/4 lengths of the internal length of the box.
10.5 - Stitched the sides of the open topped box template.
10.6 - Sat this within wadding, folding the higher fabric sides downwards over the outsides of the wadding, plopped this within the wooden box and got stitching with some 1mm brown thread and an upholsterers curved needle… Pretty time consuming - especially when you stumble upon a neater method having already done one…
10.7 - I then melted beeswax and dripped it along the little groove I’d cut to cover the thread slightly and fill the groove and holes.
Done on the box!
Then made a little padded fabric bag to keep it safe.
Initially I’d said I’d make her a prototype and then do a couple of others for her at a later date, so perhaps I’ll reclaim it…!
For now it sits on my windowsill where I eye it proudly, Saturday - weather permitting - it’ll see it’s first use.
Big thanks to the space, the company while working, and little pieces of advice and enthusiasm along the way.


