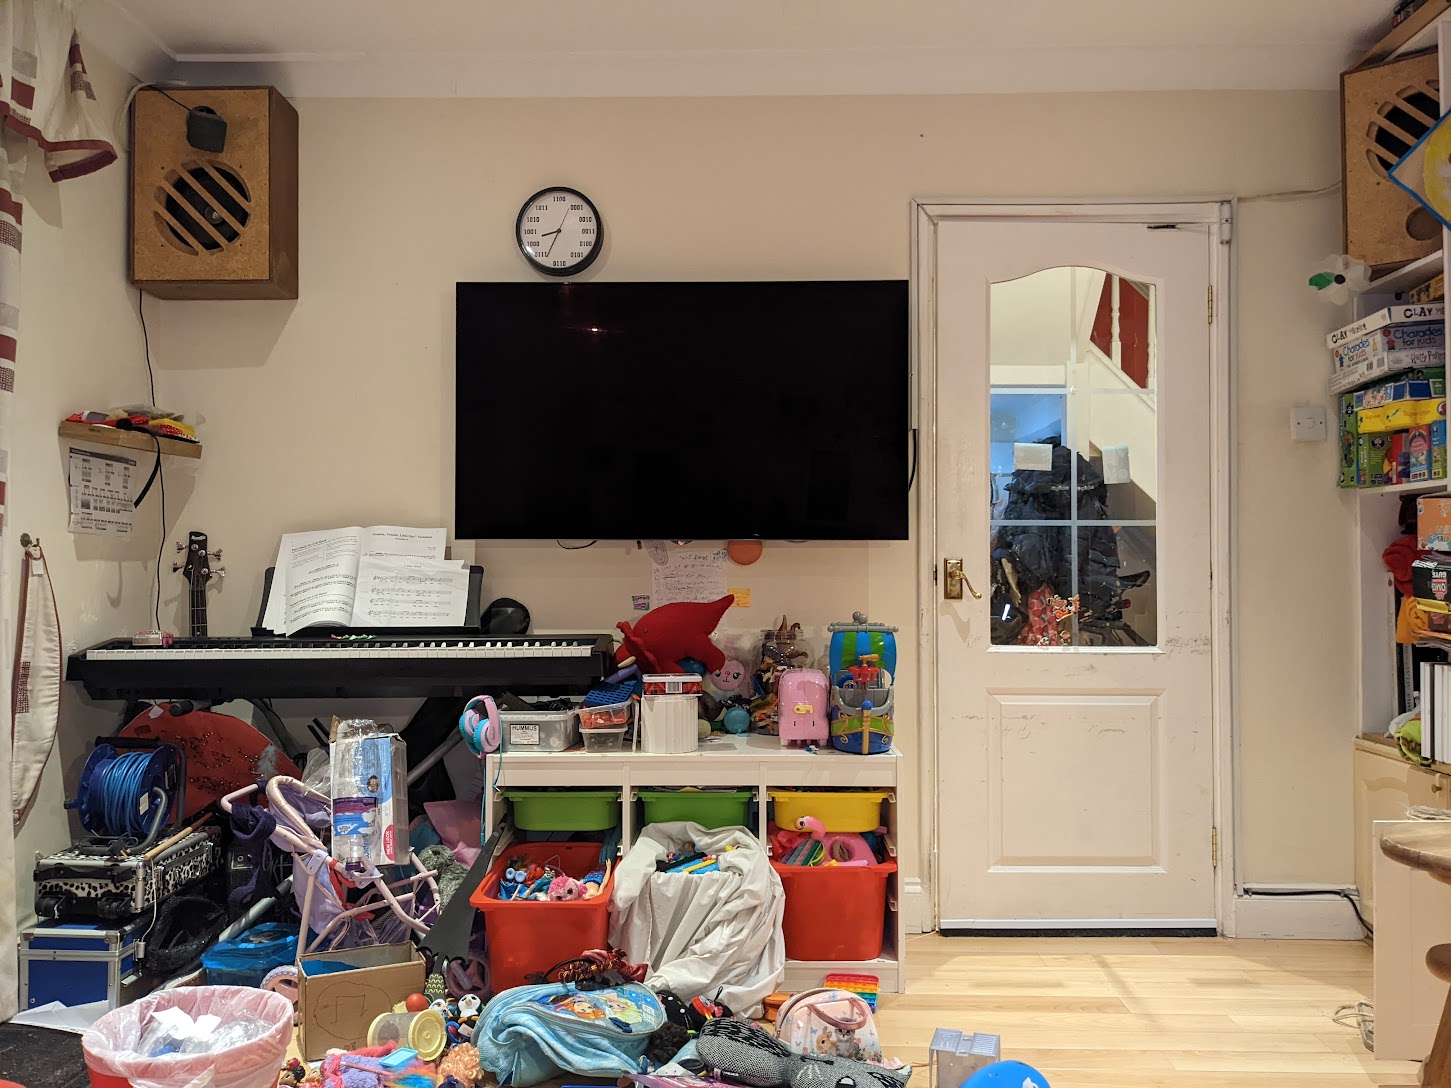
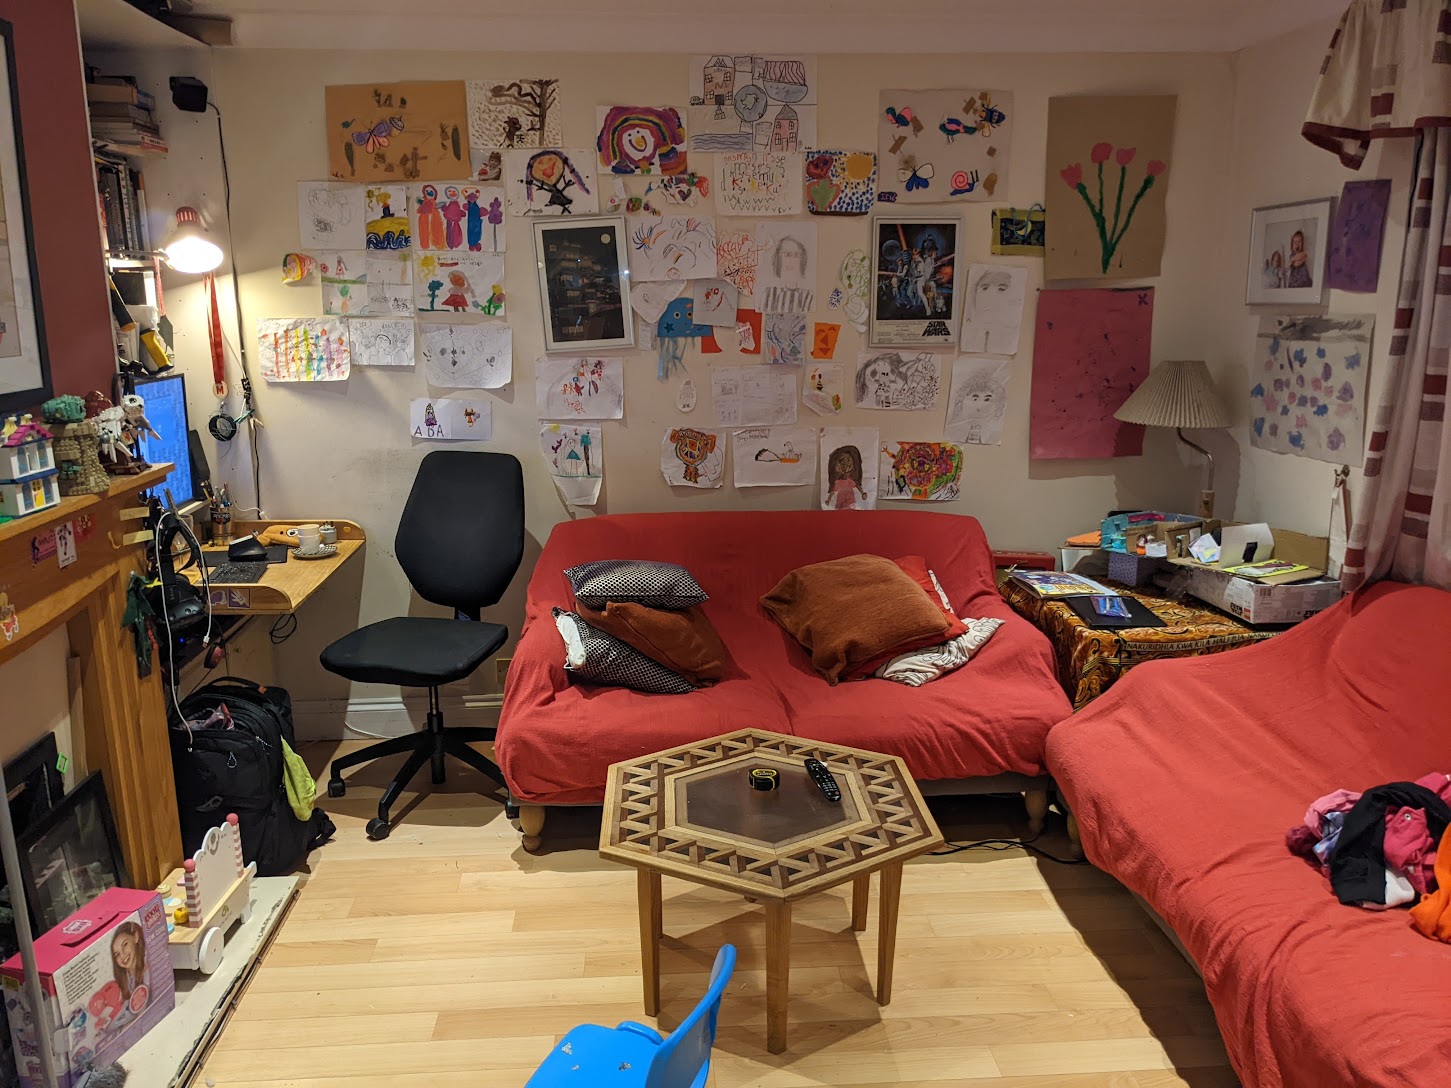
I’ve been living in this house for ten years this week, and I can do better than this!
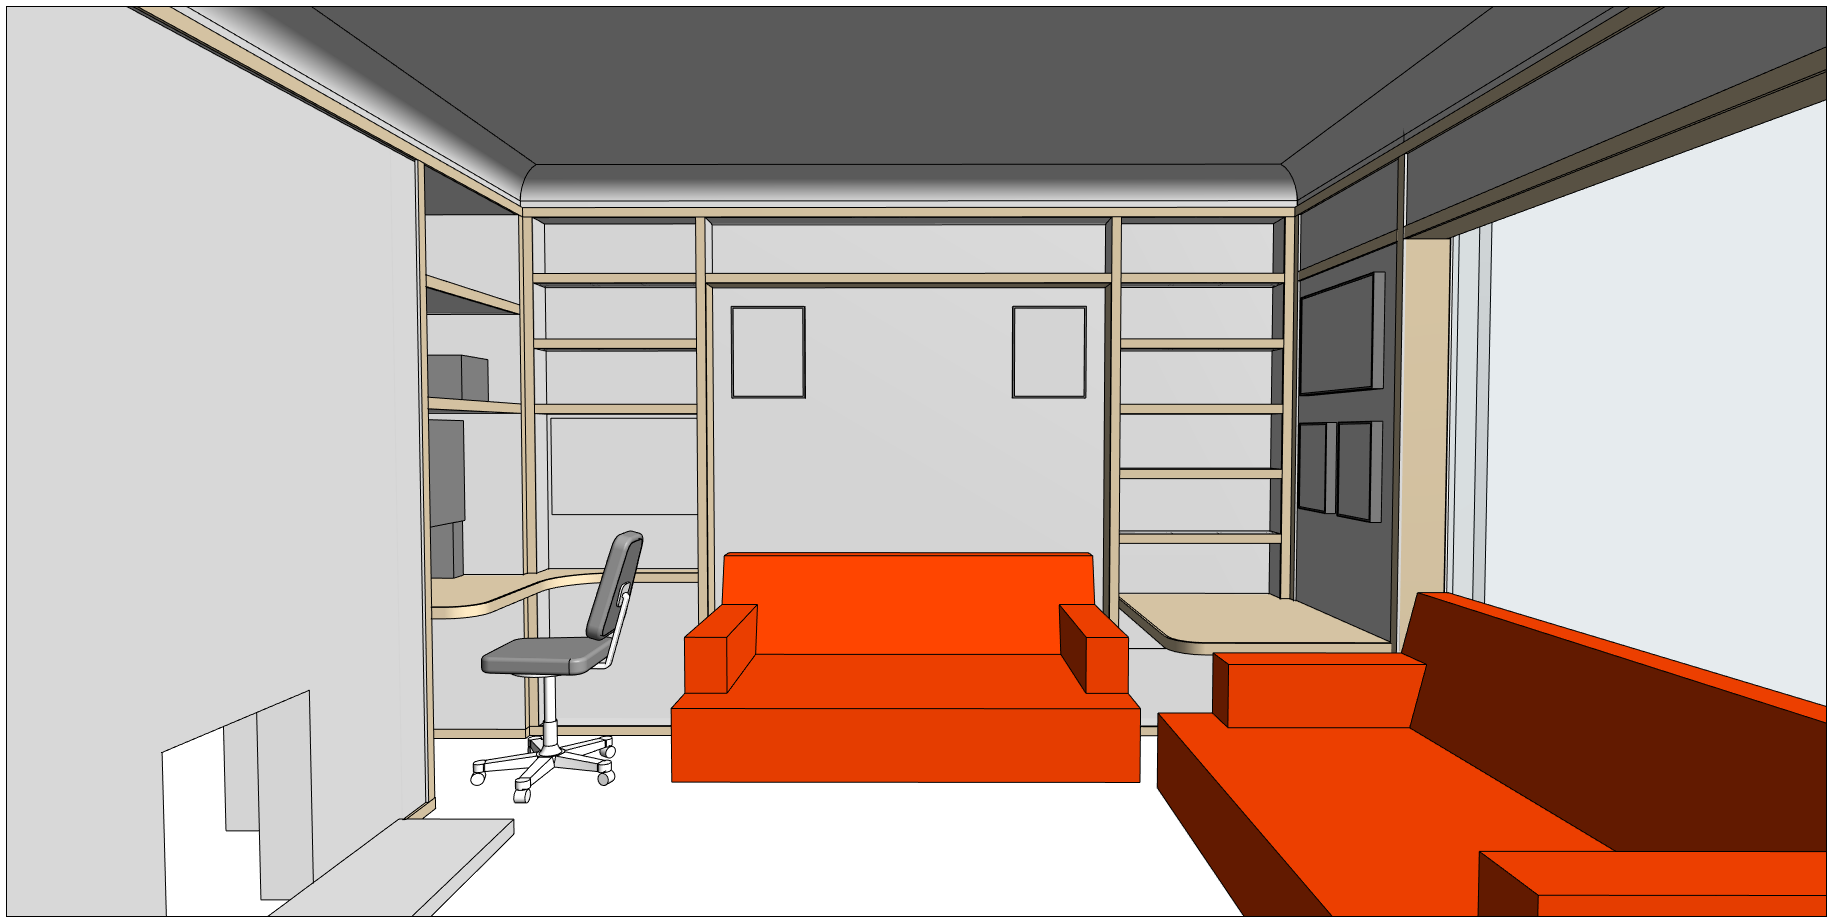
The plan is to attack it in phases, eventually (many months/years? later) doing the whole room in a cohesive design, with loads more shelves and cupboards, nicer materials, and just better use of the space.
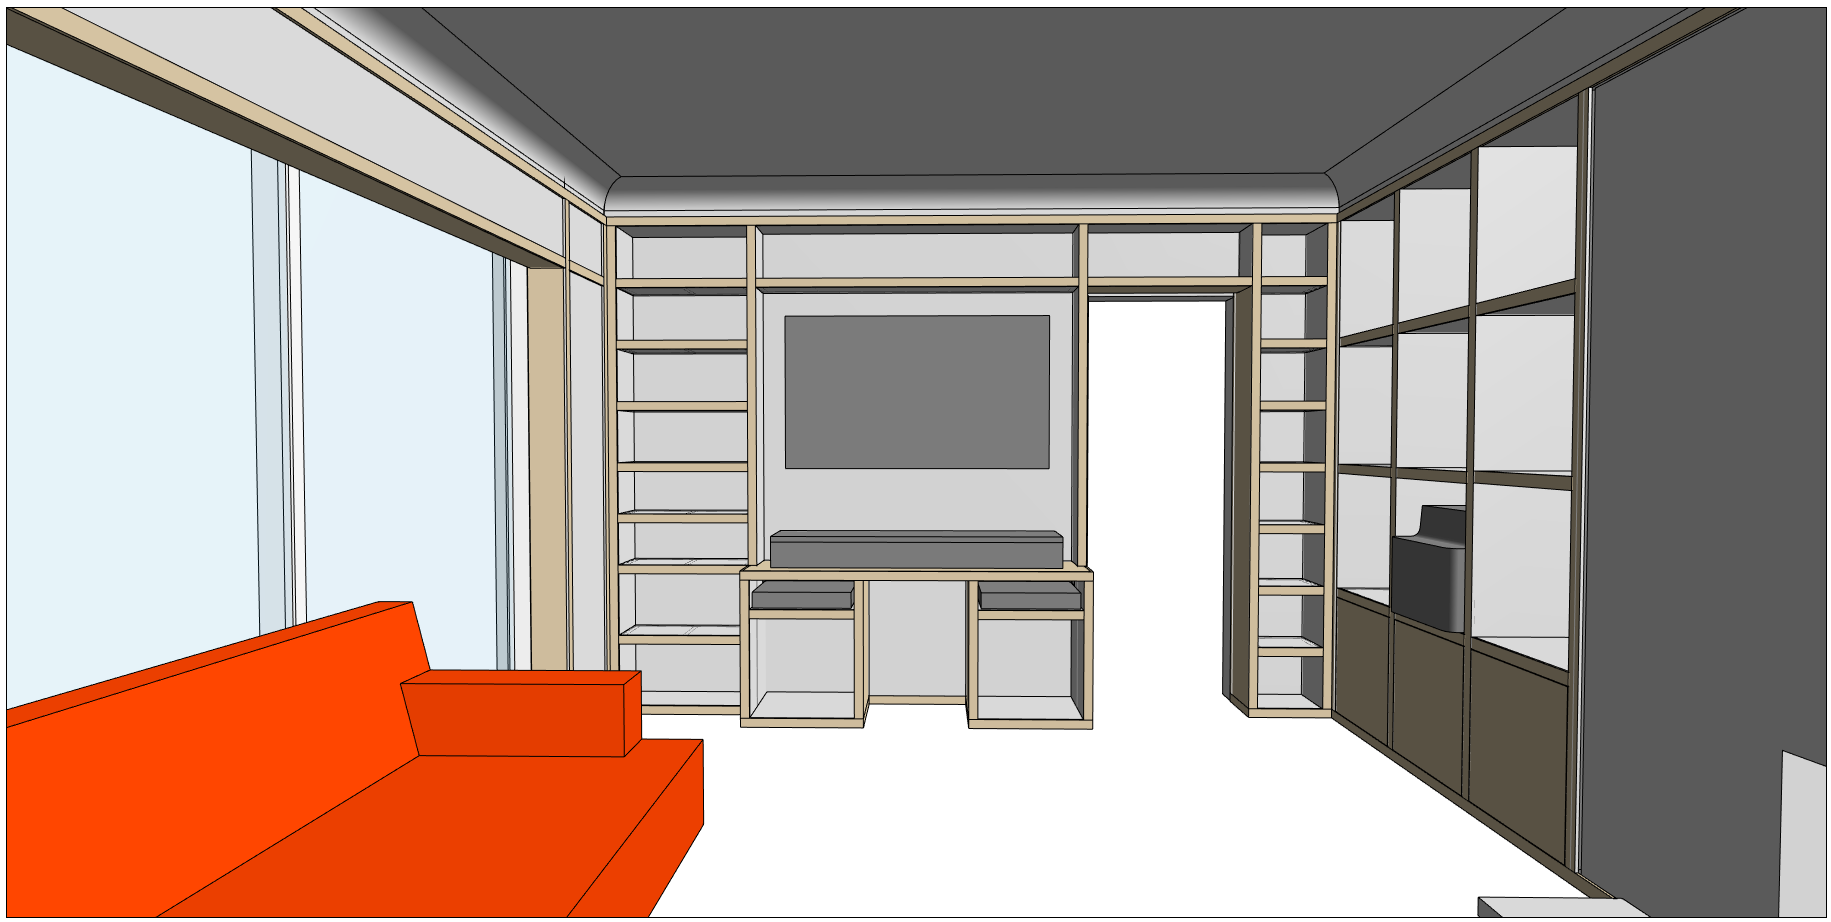
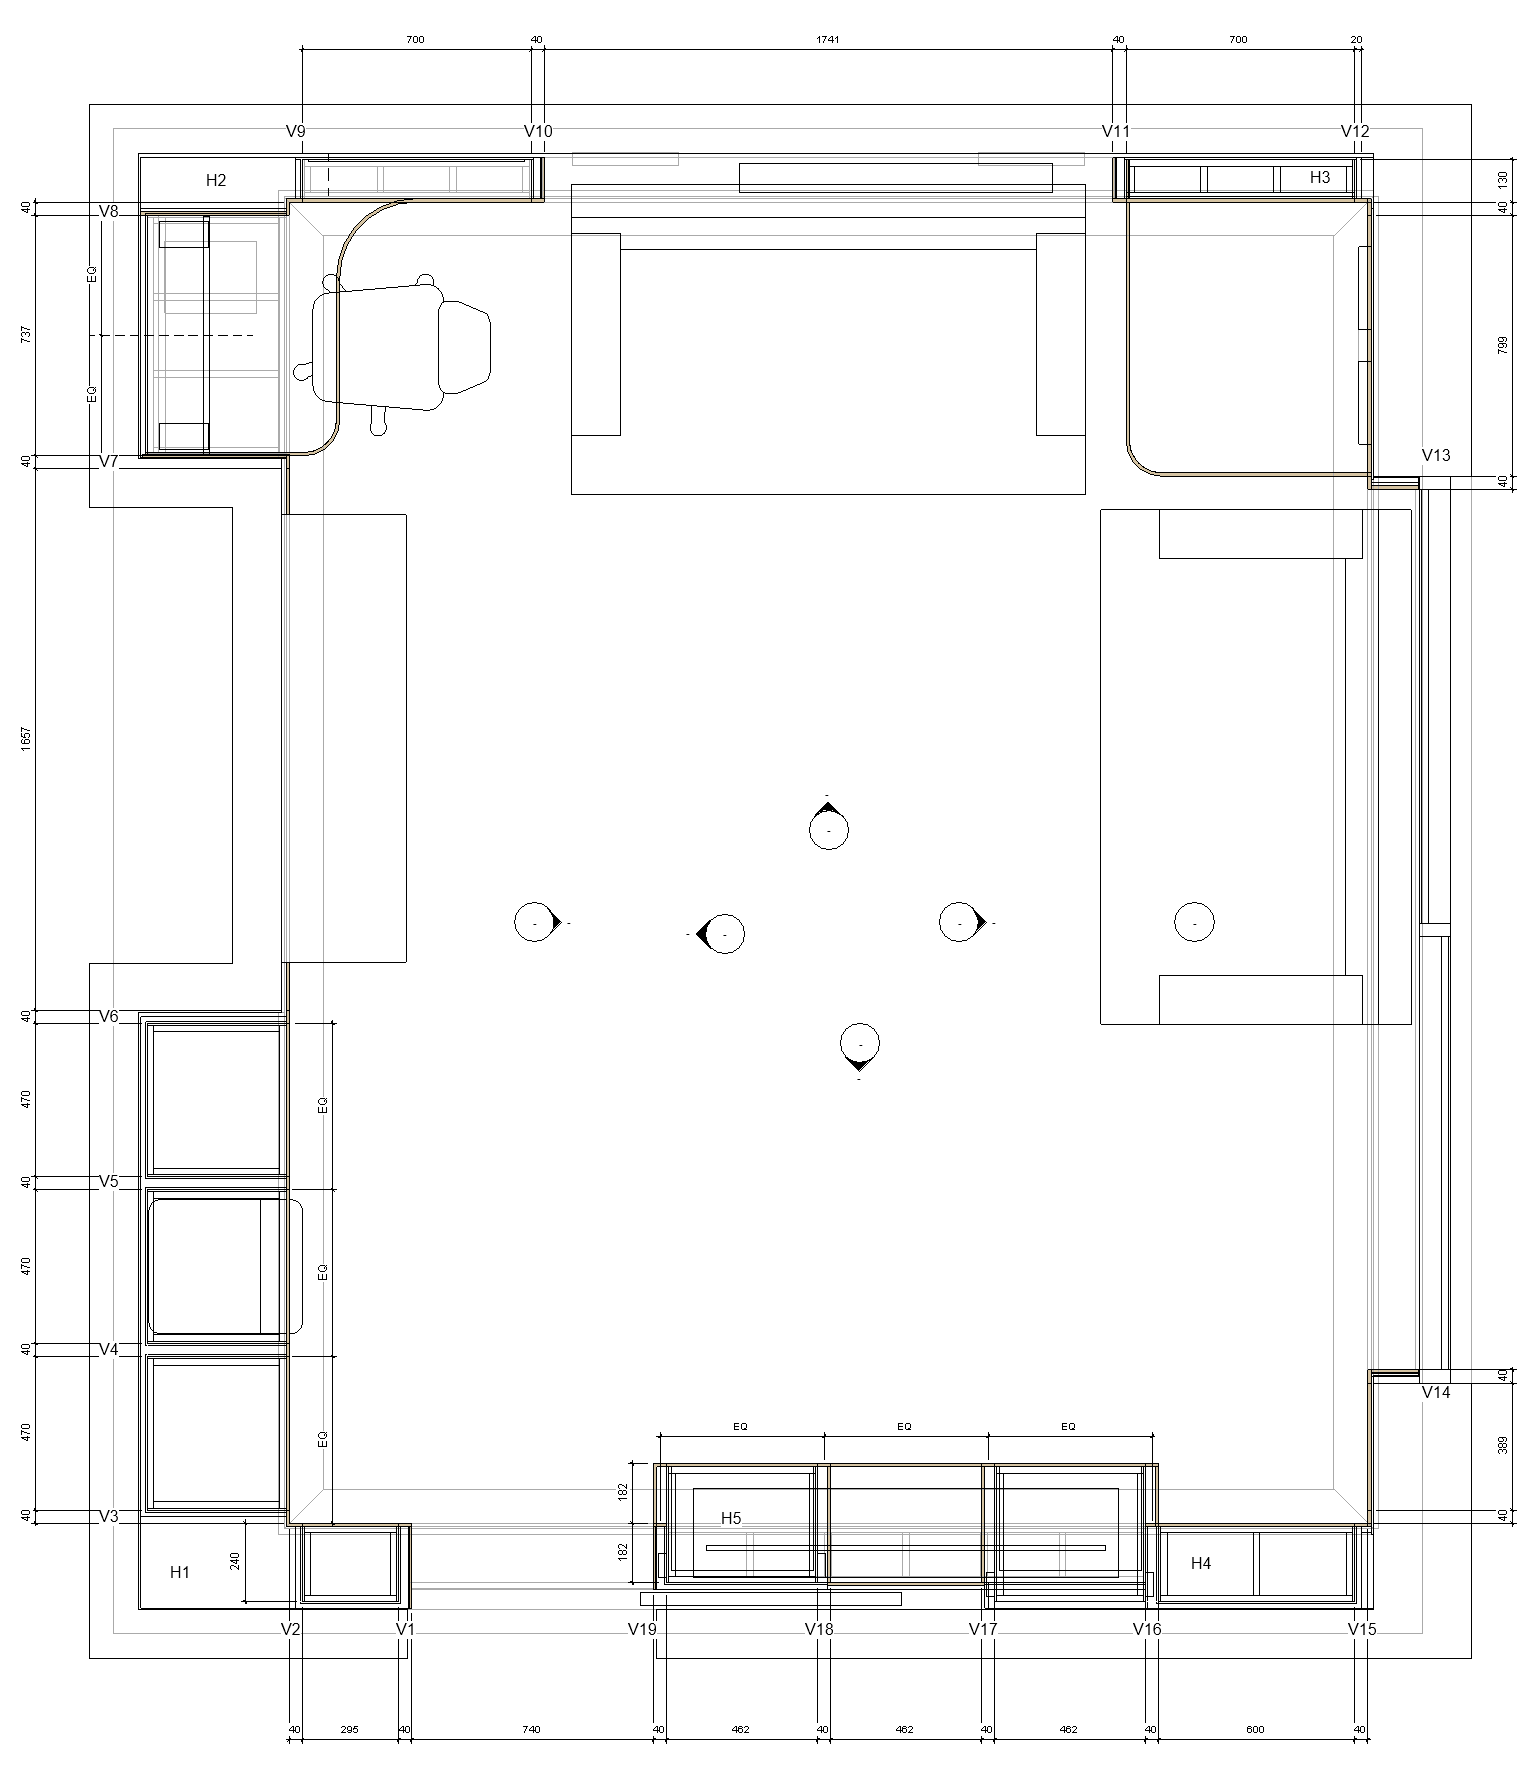
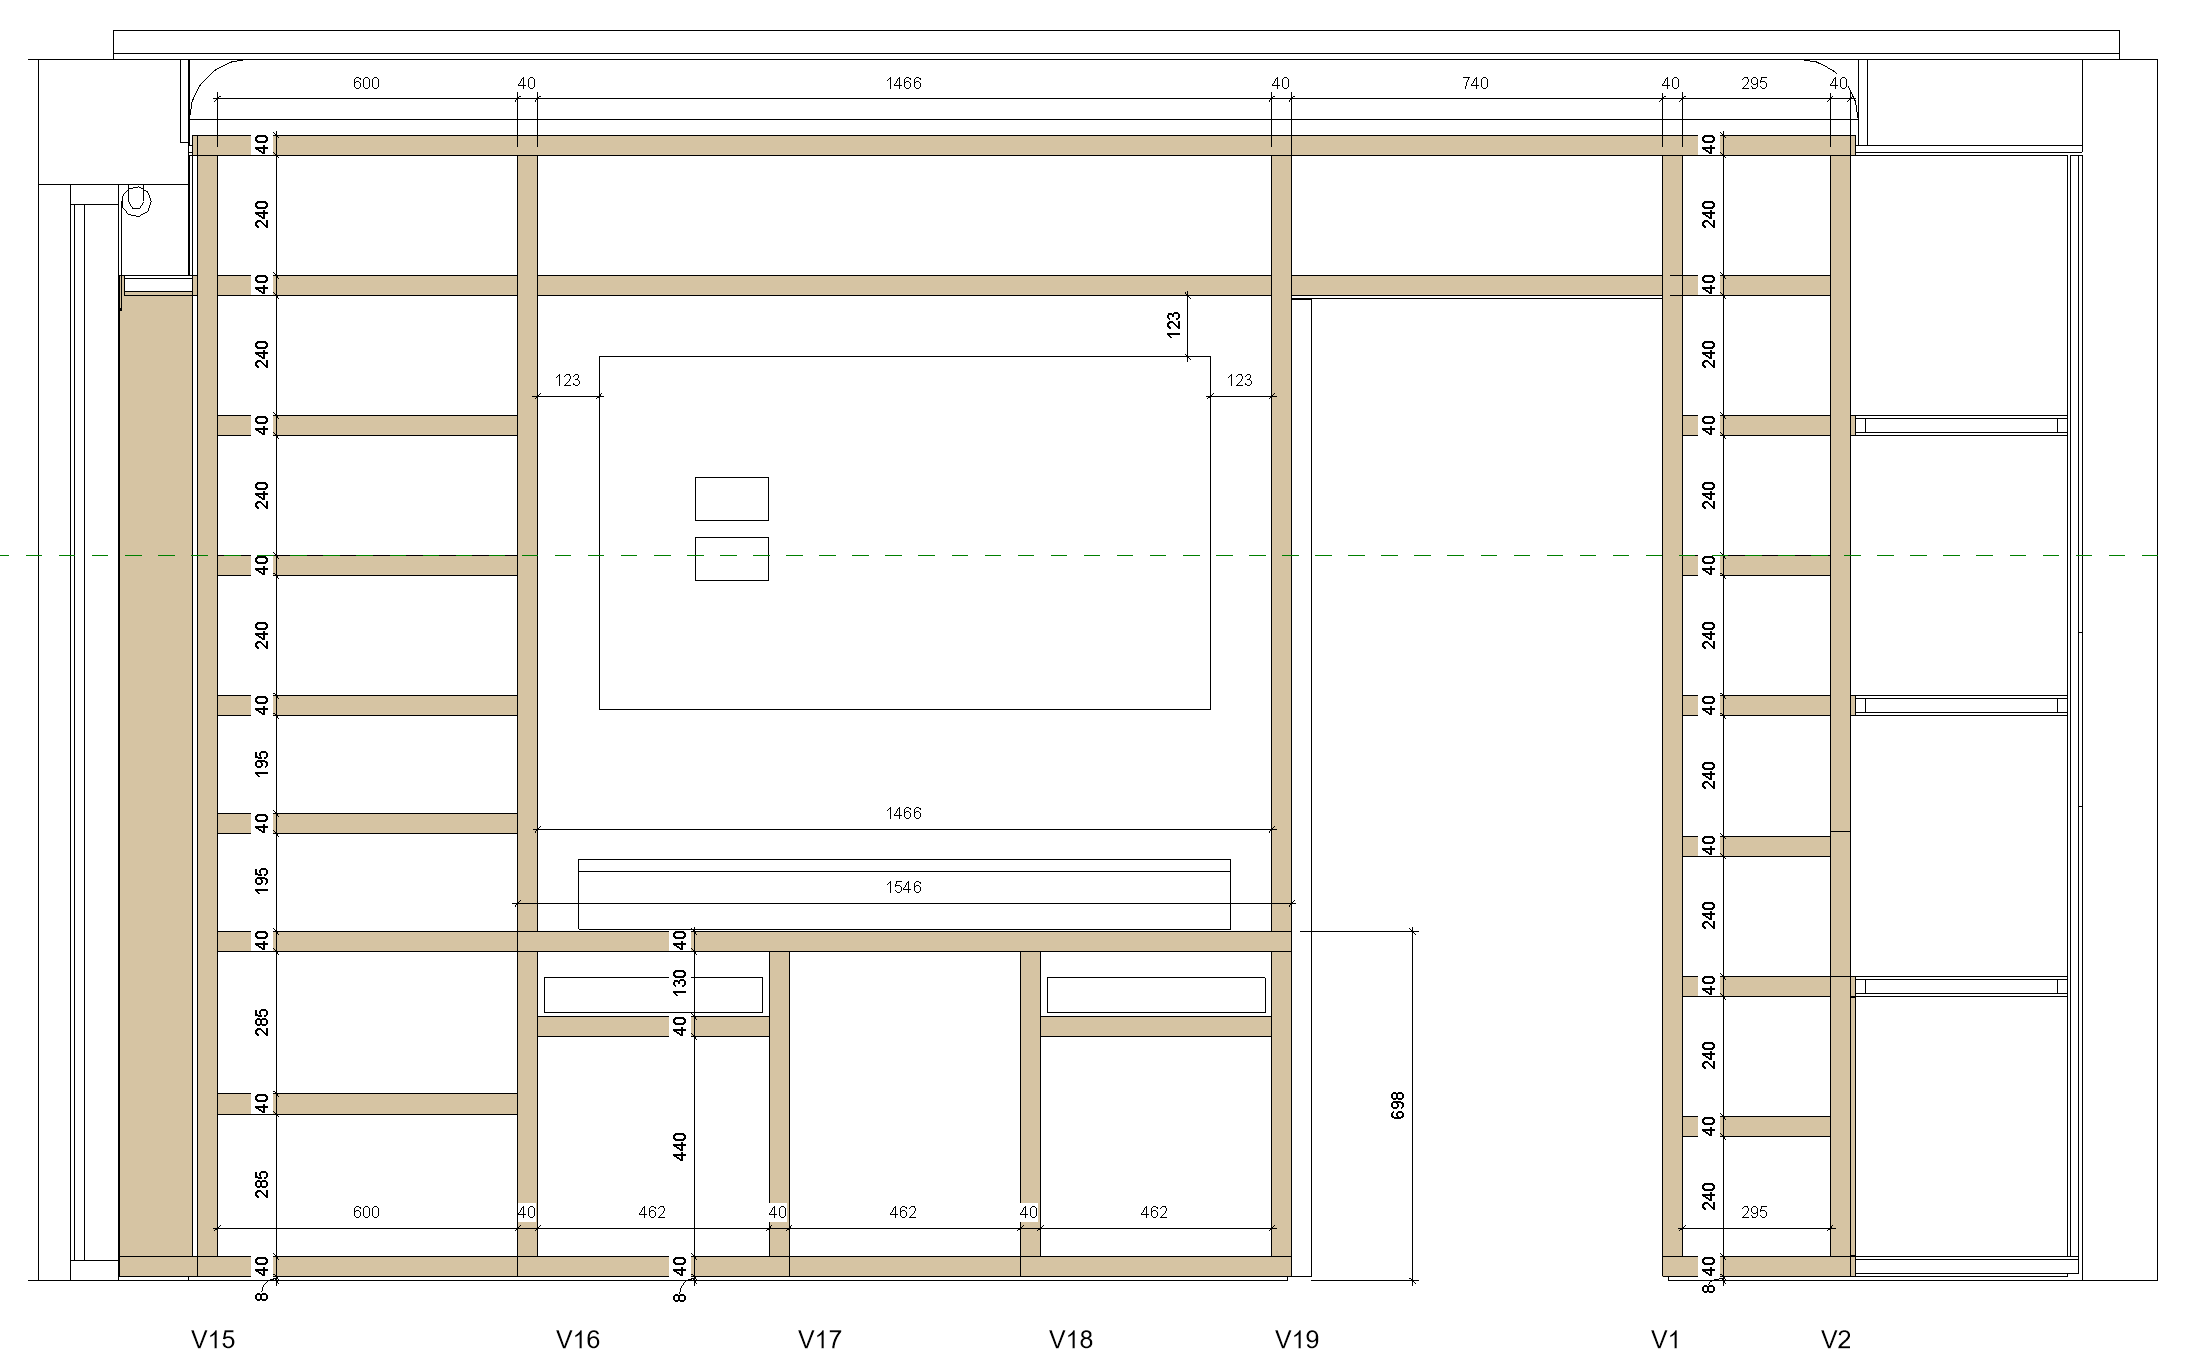
I’ve picked the TV corner to start with, as it gets looked at the most and is the most messy. The door will be replaced with a slider, which will go into a hidden pocket behind the TV.
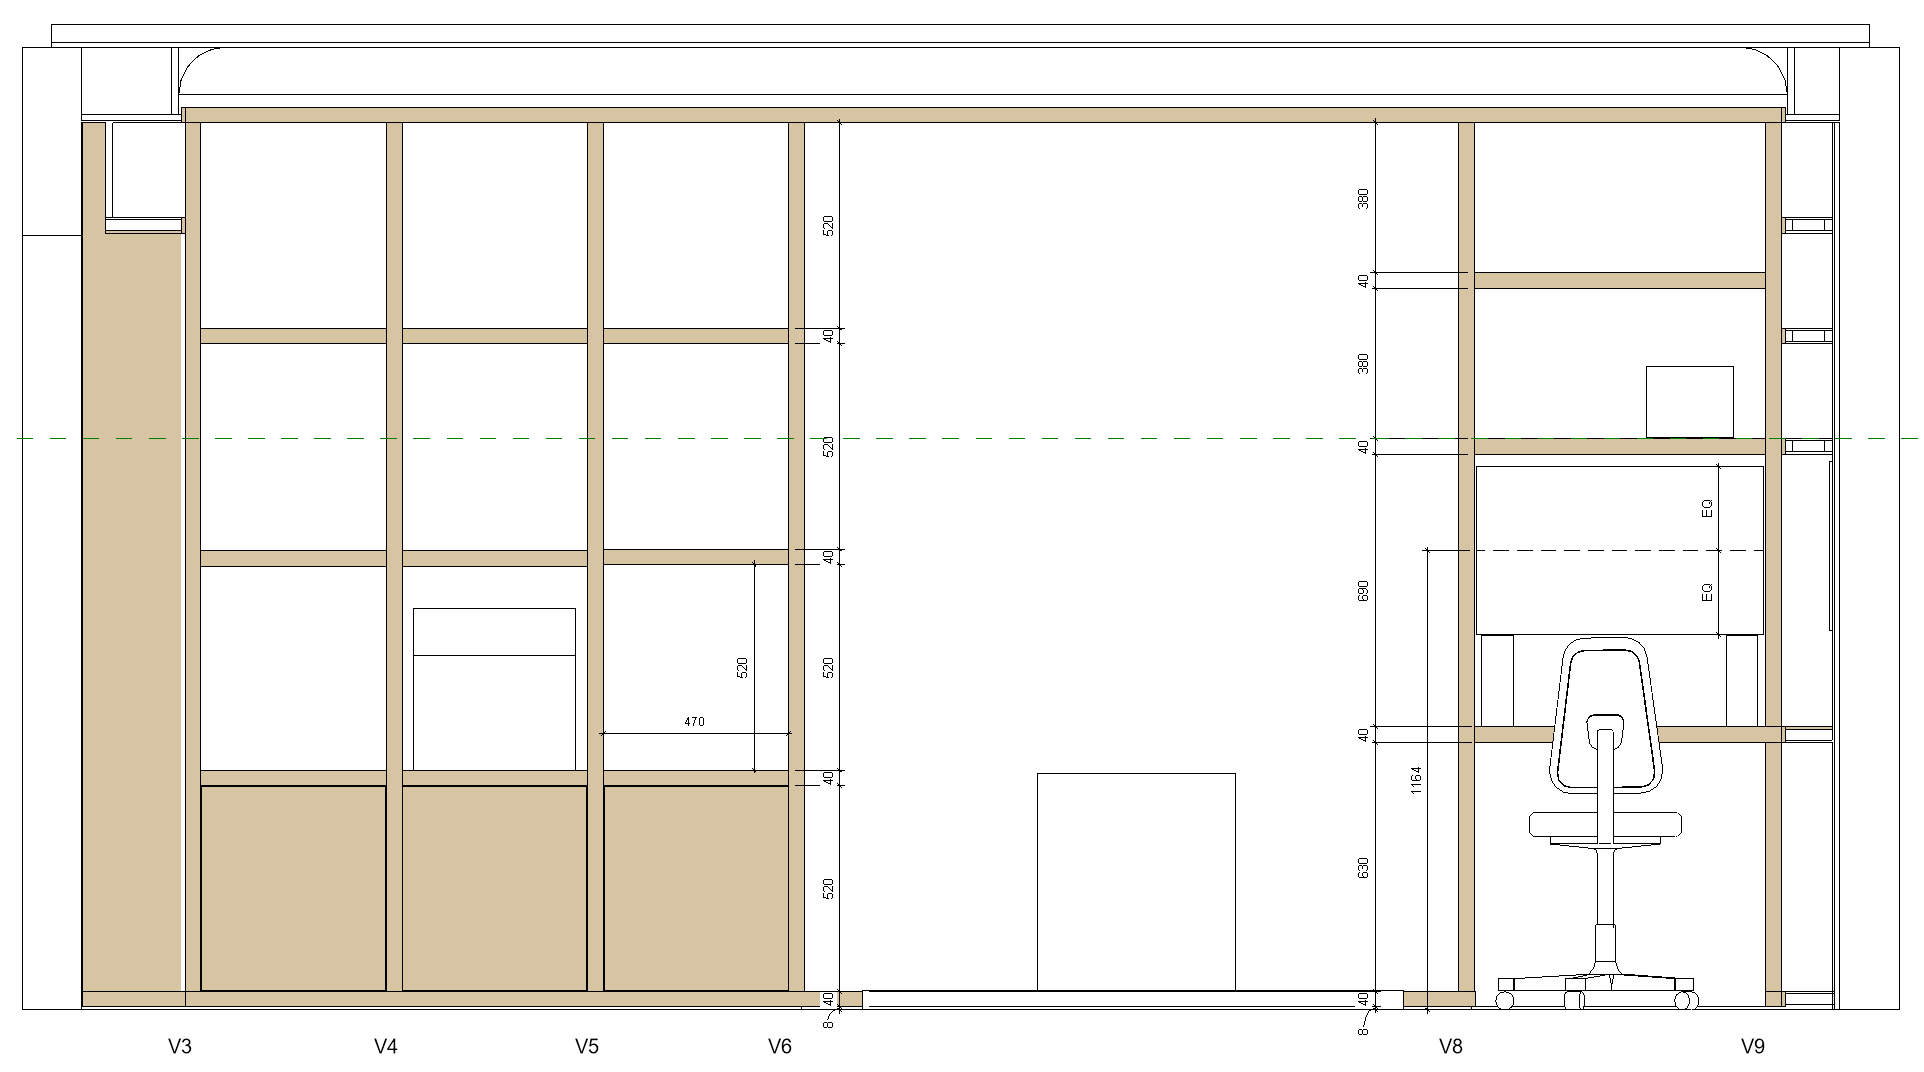
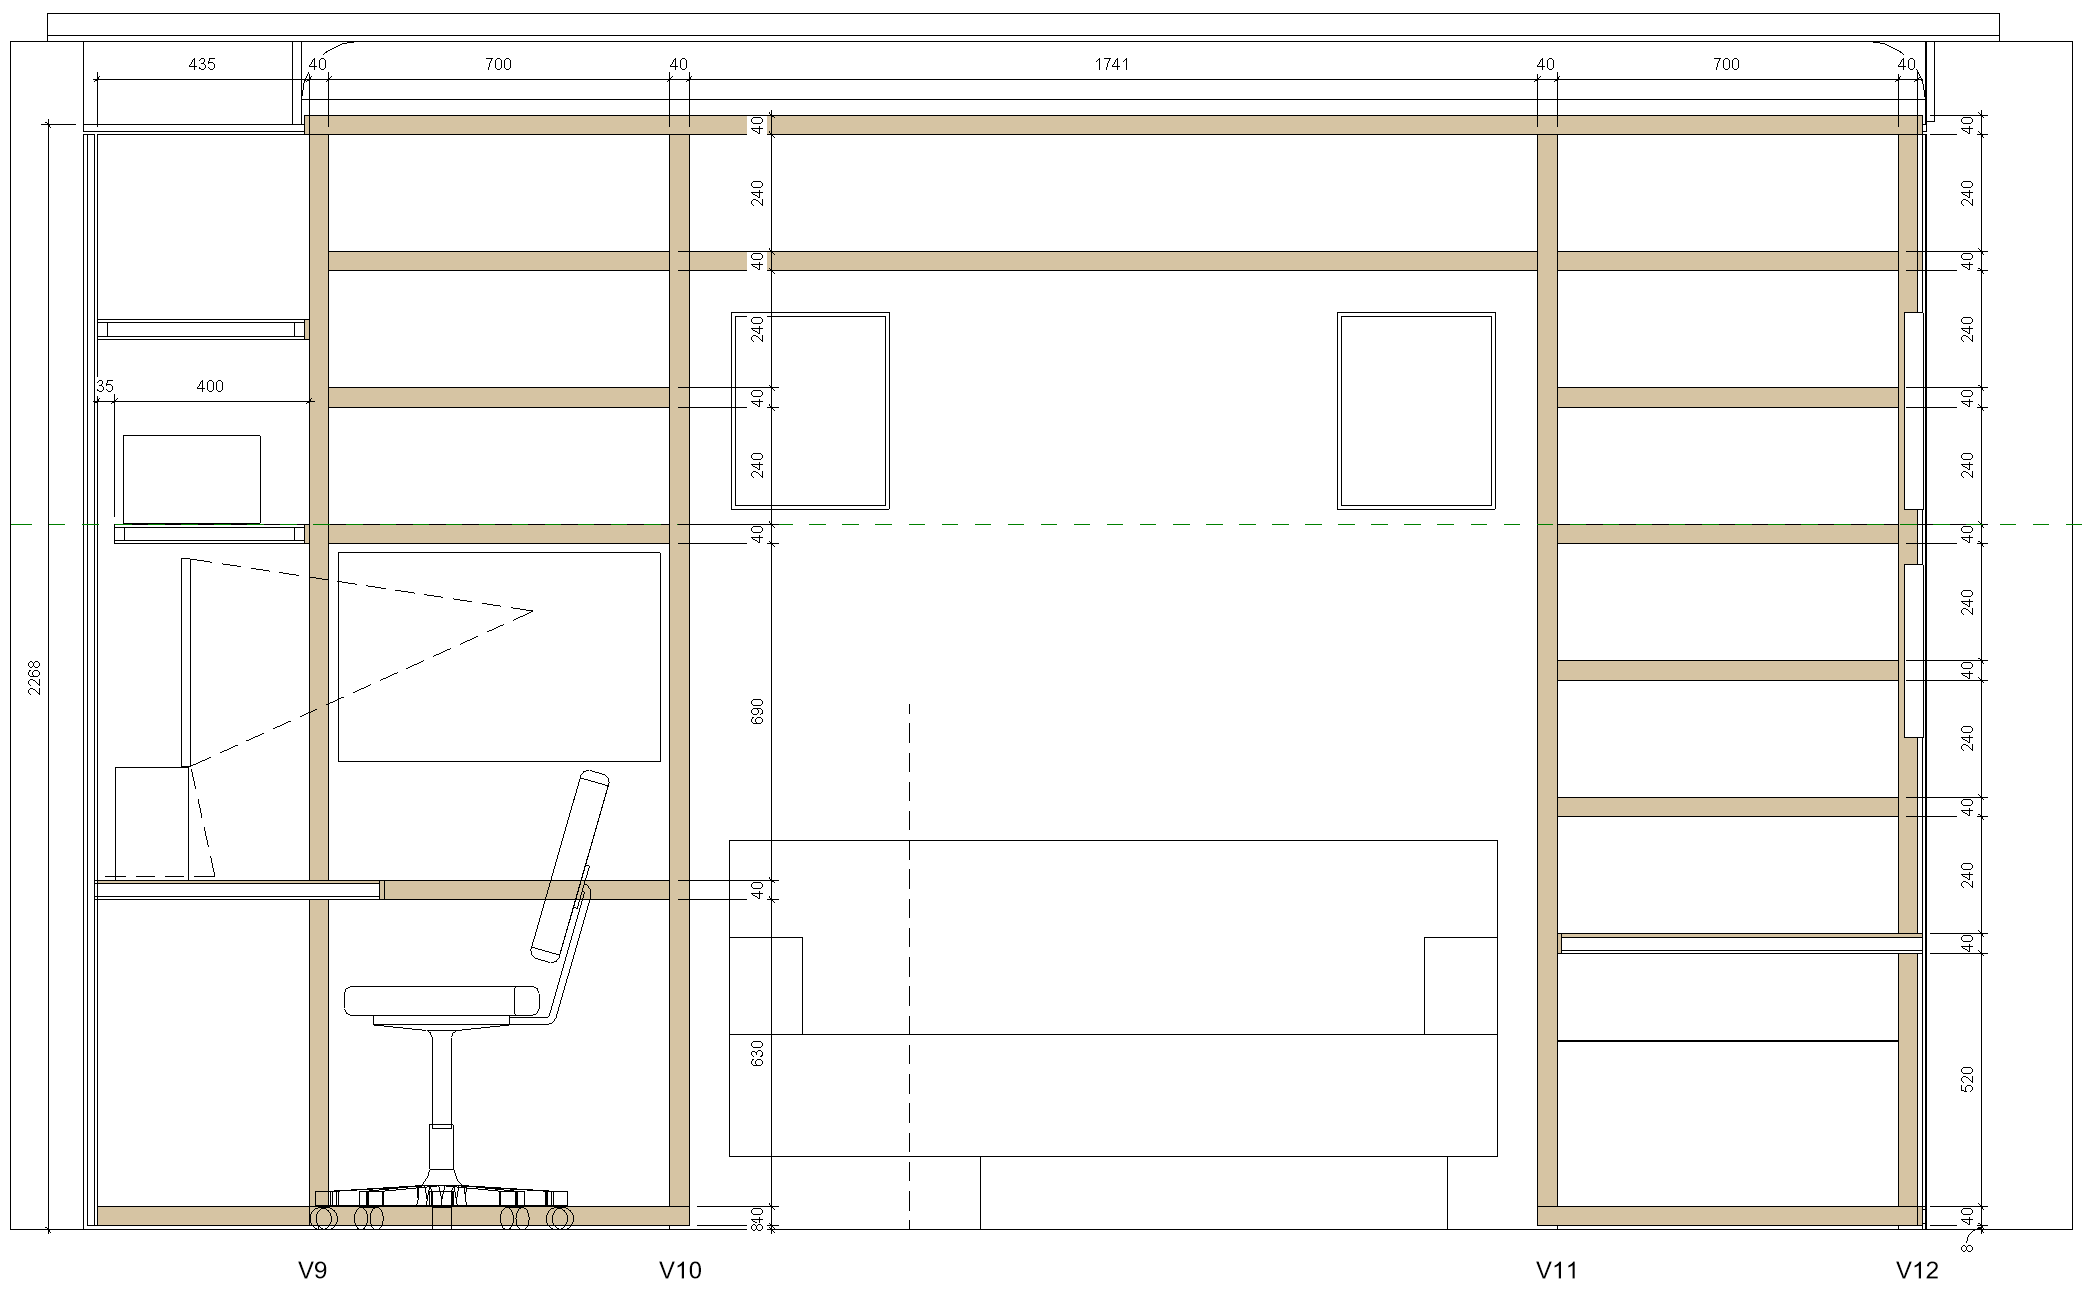
It’ll all be made of MDF-on-framework sandwich panels, oak veneered on the “outside” faces, painted white on the “inside” faces, with solid oak strips to all the horizontals and verticals. I’ll need to get well versed on the panel saw, but it should be a simple matter of making lots of mostly-rectangular bits and then dowelling them together. I’ve got my solid oak parts all scheduled, and my sheets all divvied up for cutting.
So on that topic, did you have any dates in mind for running that induction?
I’d also need to get trained/unlocked on the thicknesser. I’m considering milling my own oak strips from raw board as it saves a fair bit.
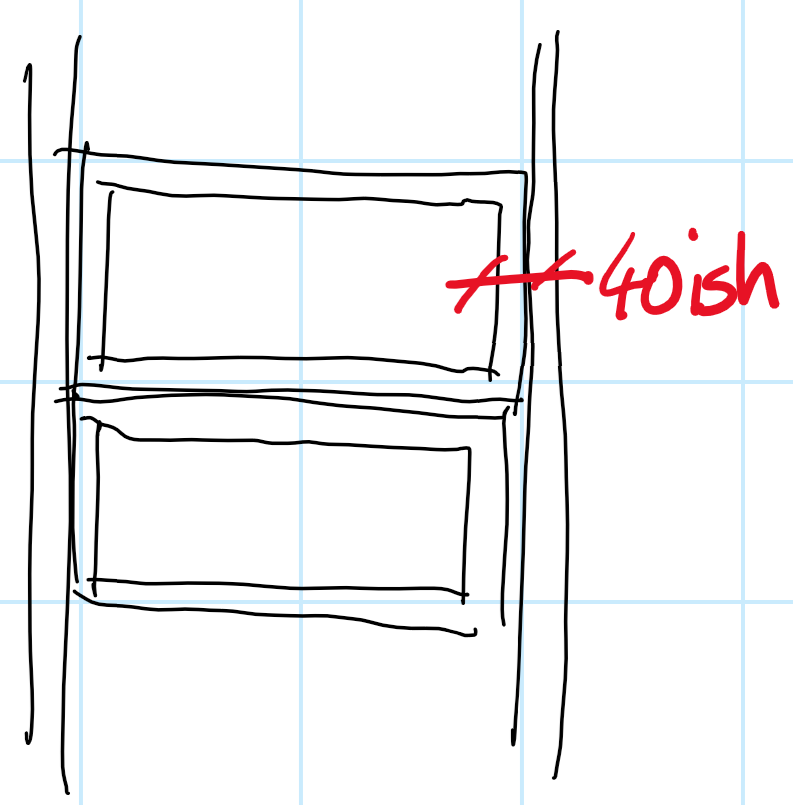
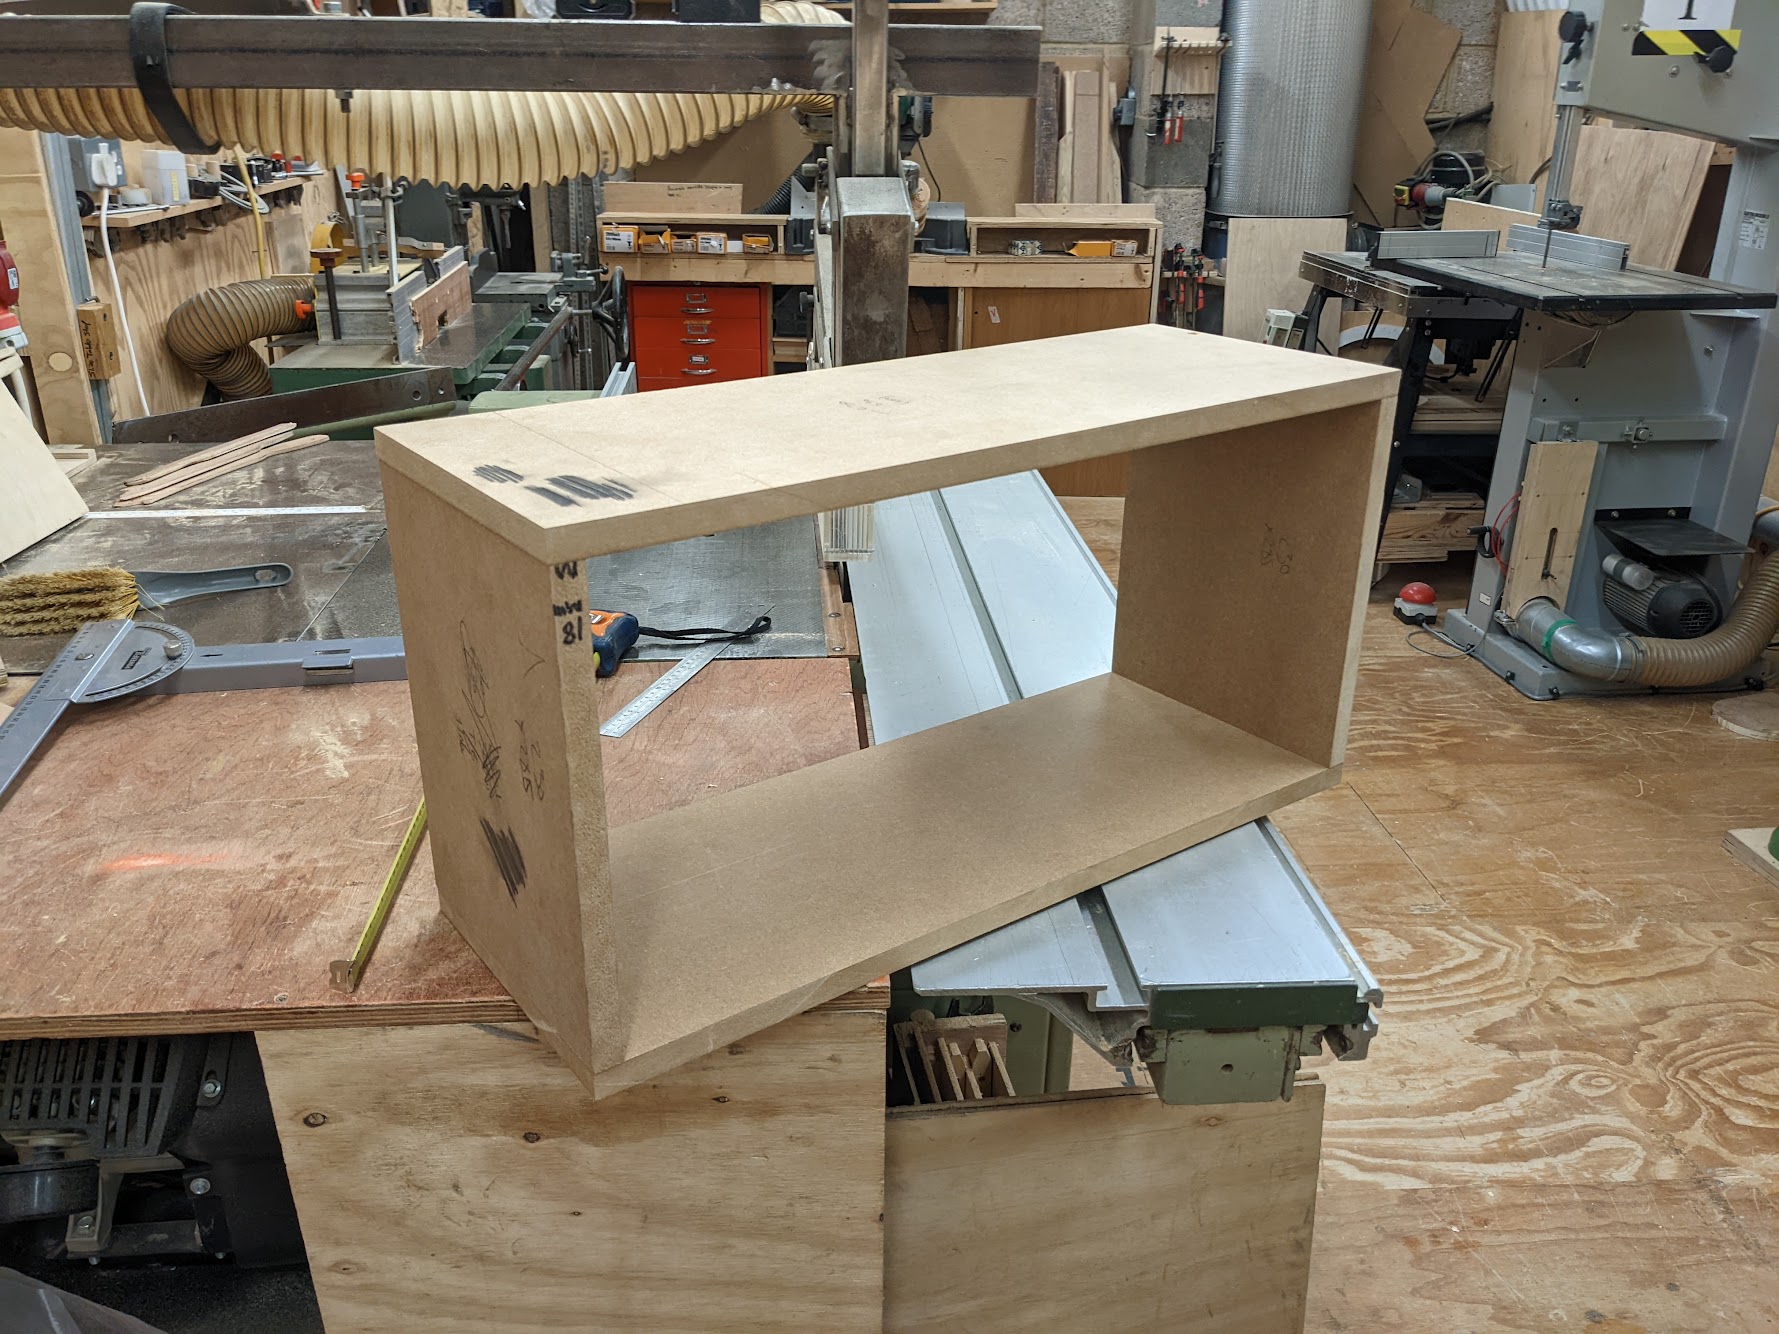
So @joeatkin2 made the very good suggestion that I’m making things far too complicated by effectively “making IKEA furniture” and that I should instead make it all out of simple 4-sided boxes in 18mm MDF, stacked screwed and glued and clad in another layer of MDF. With a little shimming and veneer, the front edges can all present the same thickness:
Then all the timber strips can be glued to the front, all cut exactly to length, and trim routed to flushness.
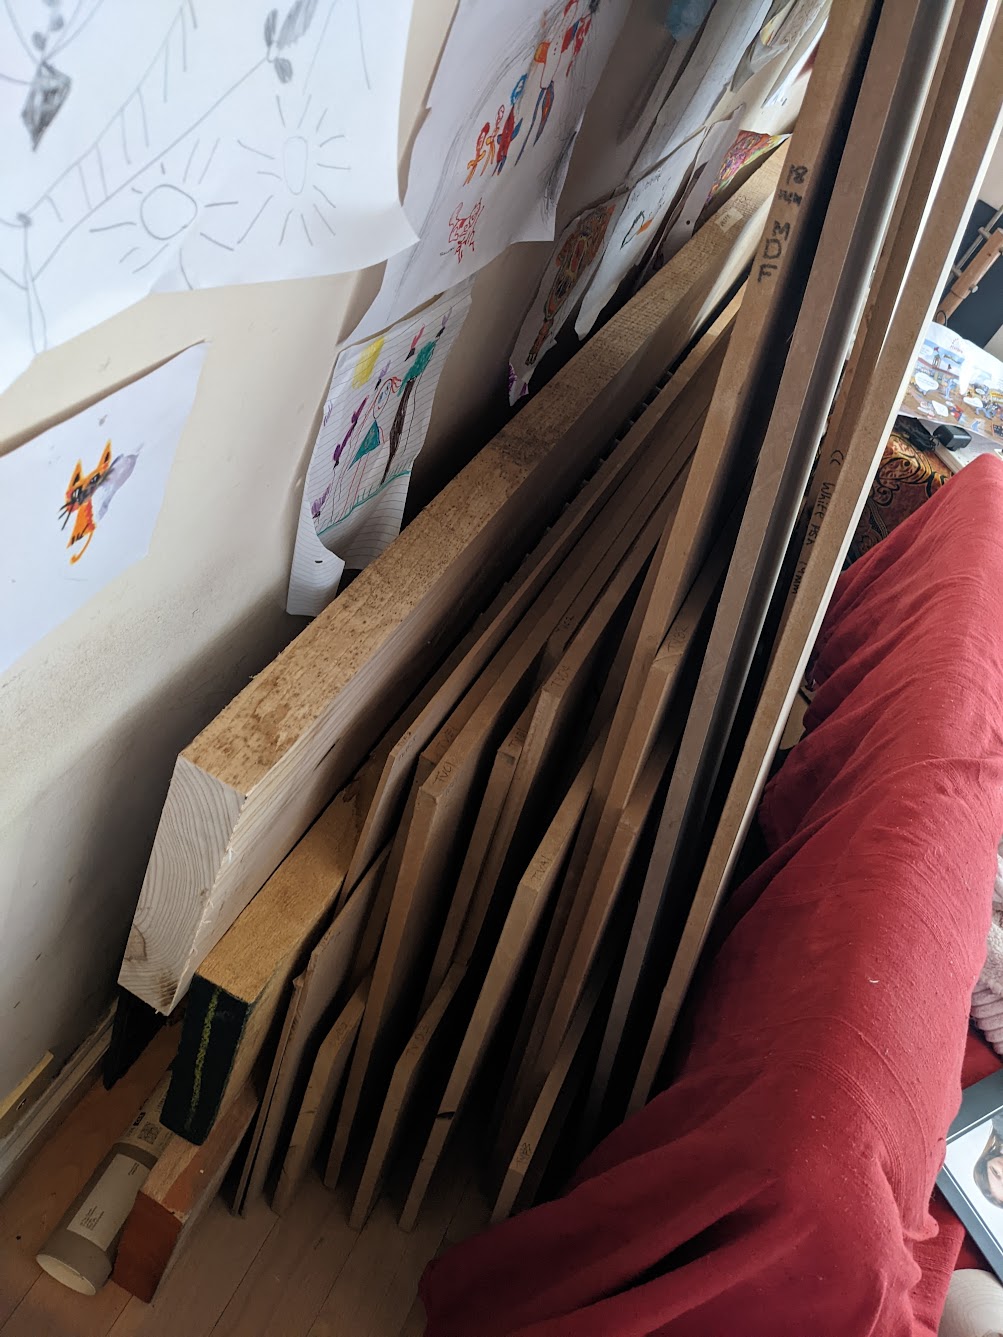
I think if I was a contractor building this on site, able to commit full working days, this would be the correct method. But I’m going to have to build this in dribs and drabs whenever I can spare an hour or two, storing the pieces as I make them and only making a mess in the lounge when I’m ready for final assembly. A bunch of flat slabs stacked against the wall in the spare bedroom will be much more family friendly than piles of boxes, and will require no dusty or wet work in the house.
I reckon you’ve sold me on Beech instead of Oak though Joe
Having now watched a bunch of cabinetry videos, yeah you’re right. Boxes it is. Will probably paint each panel while flat before final assembly on site though. Just trying to keep disruption to minimum…
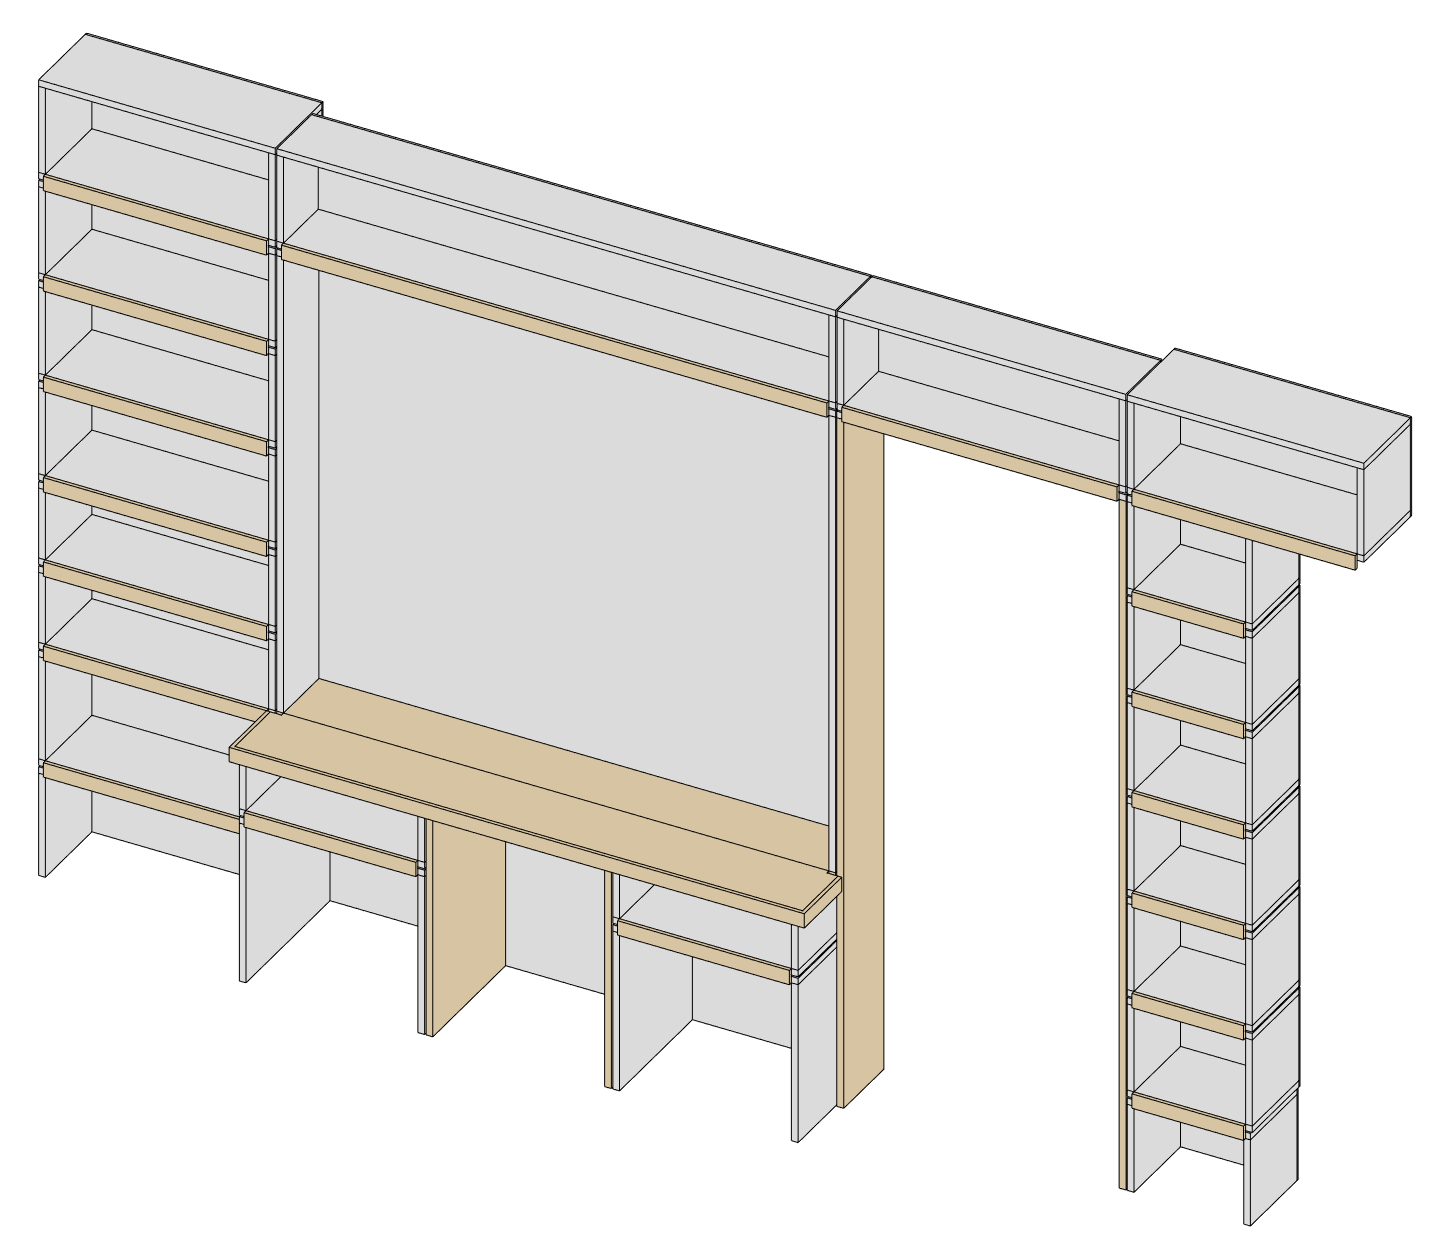
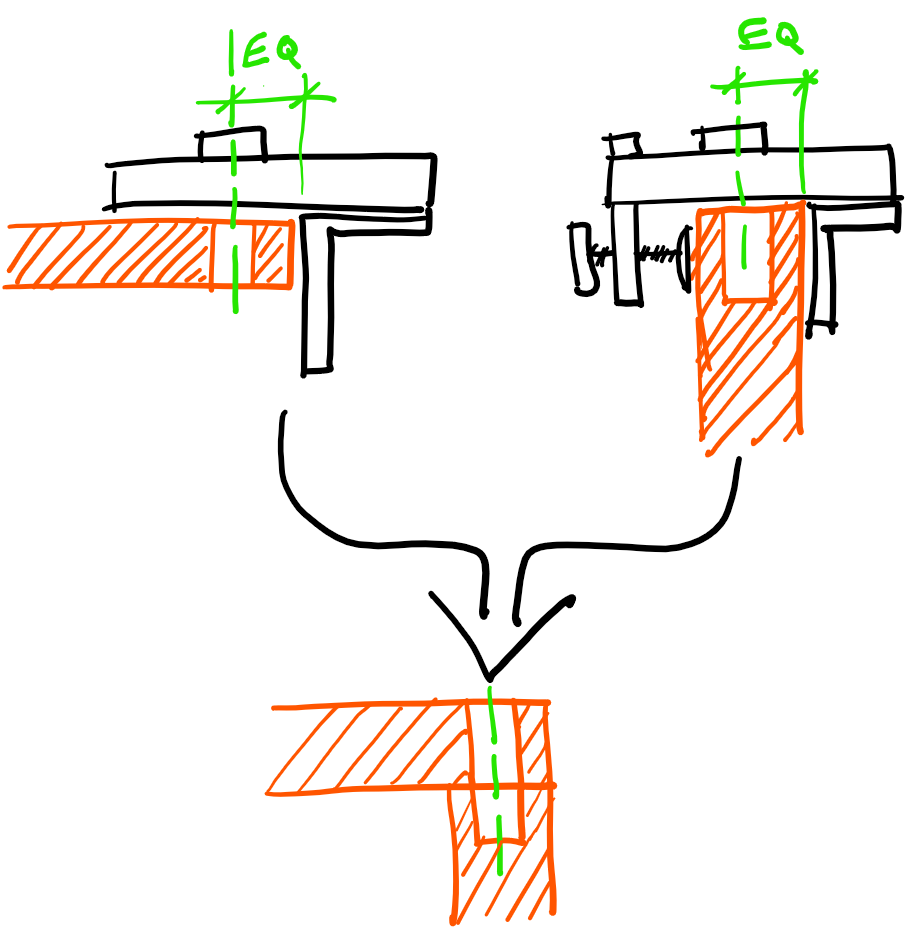
The solid timber lip of each shelf will be built in to the box above, so I can get a perfectly flush edge where it matters, then shim it as close as possible on the underside.
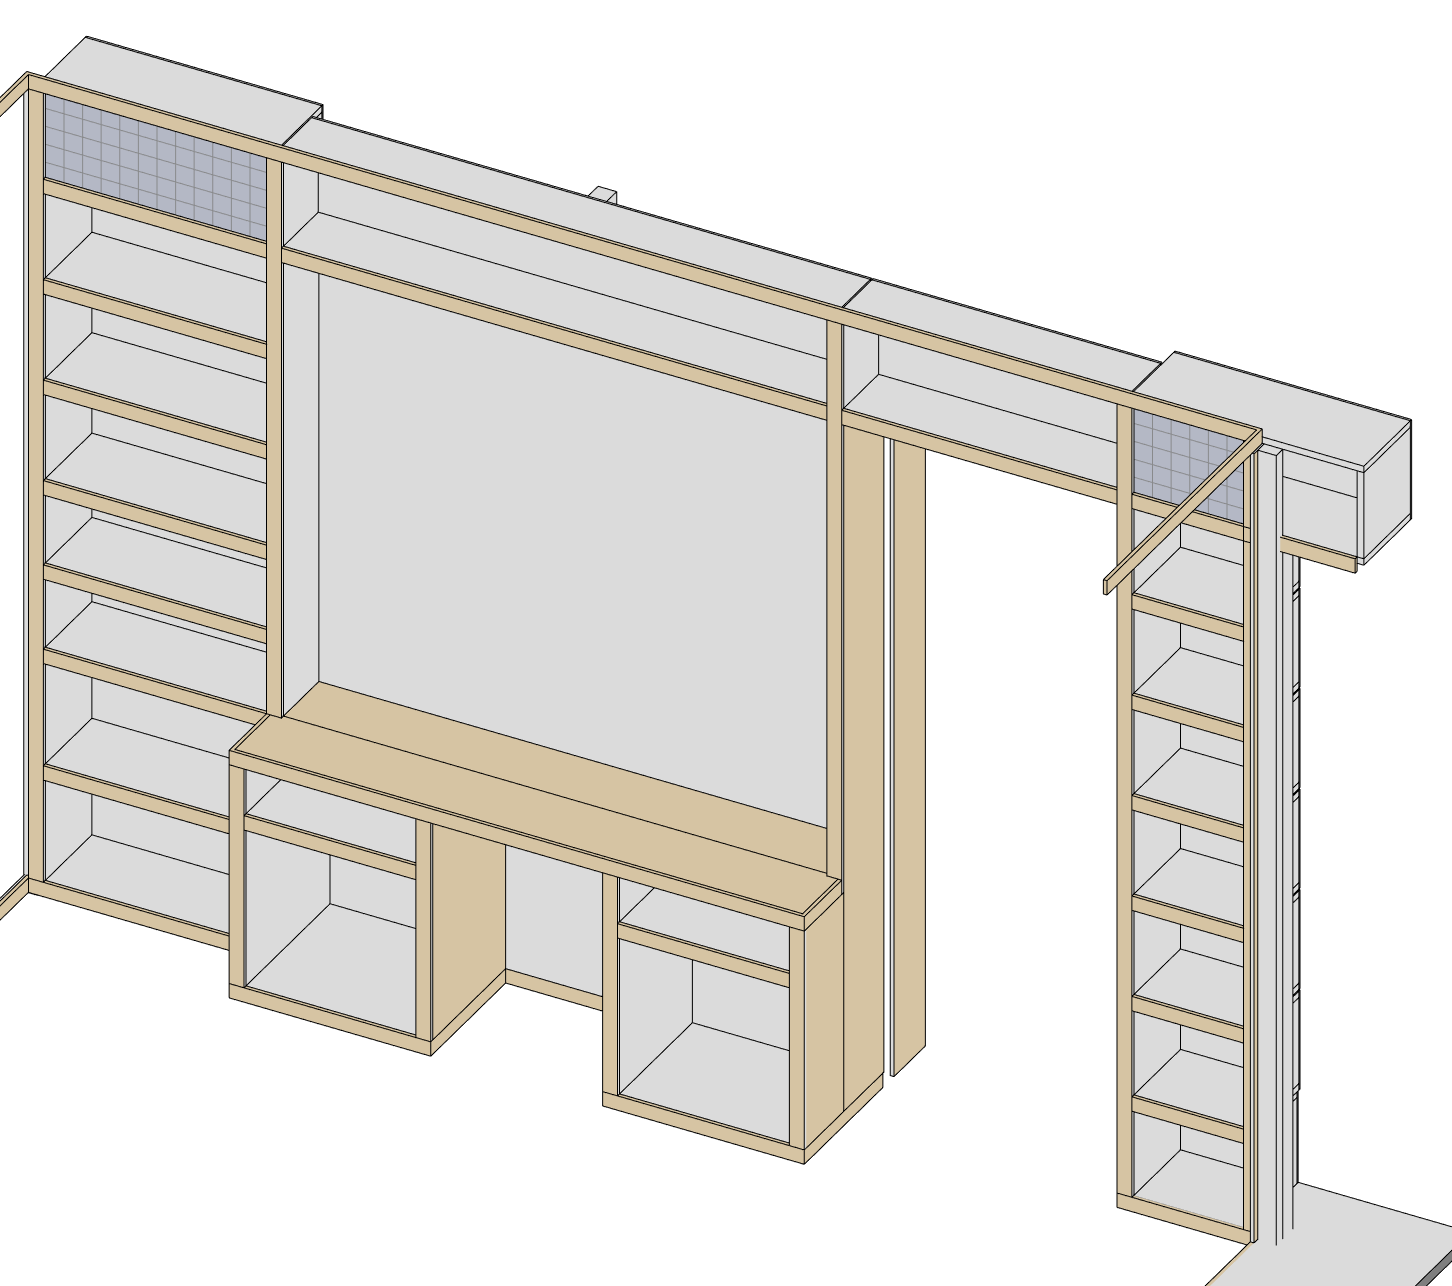
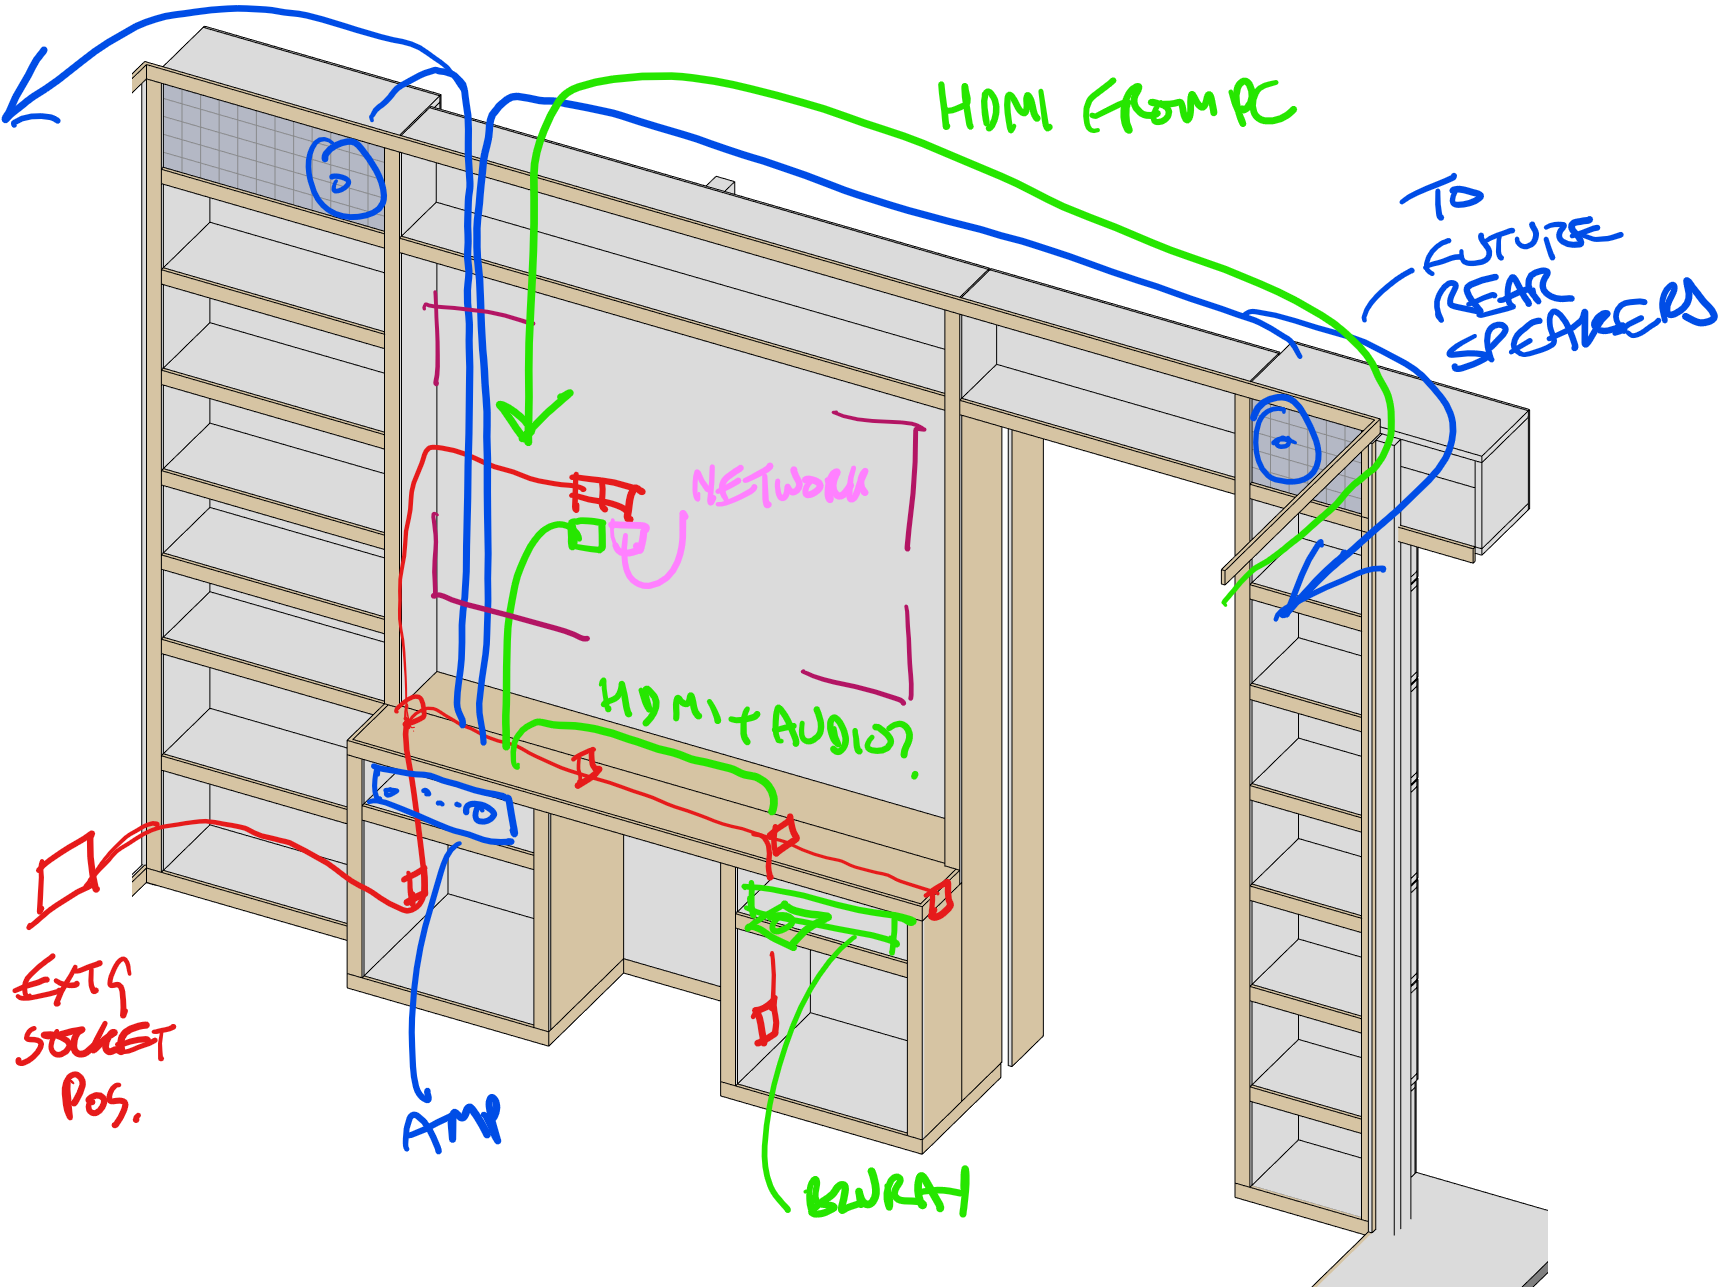
I may or may not build in speakers to the top shelves (grey hatching).
I may or may not register each box to its neighbours with additional dowels.
I will have some fun routing power/data/HDMI/audio.
Just spent a rather eye-watering sum at SL Hardwoods. Enough solid timber to do the whole room (I want it to come in one batch for the best matching) and enough sheet material to do the TV wall & shelves.
@joeatkin2 or anyone else who’s a certified spark: I intend to build the electrics into the furniture, all in 2.5mm² and in a loop, extending the ring that’s already in the room. What’s the easiest way to make sure it’s all signed off properly?
I went for Ash in the end, instead of Beech. Two reasons: 1. The laminate floor is already Beech(ish) so it wouldn’t contrast. 2. My coffee table has Ash legs and borders. Also I just like the way it looks. Strong grain and pores that pick up a patina over time.
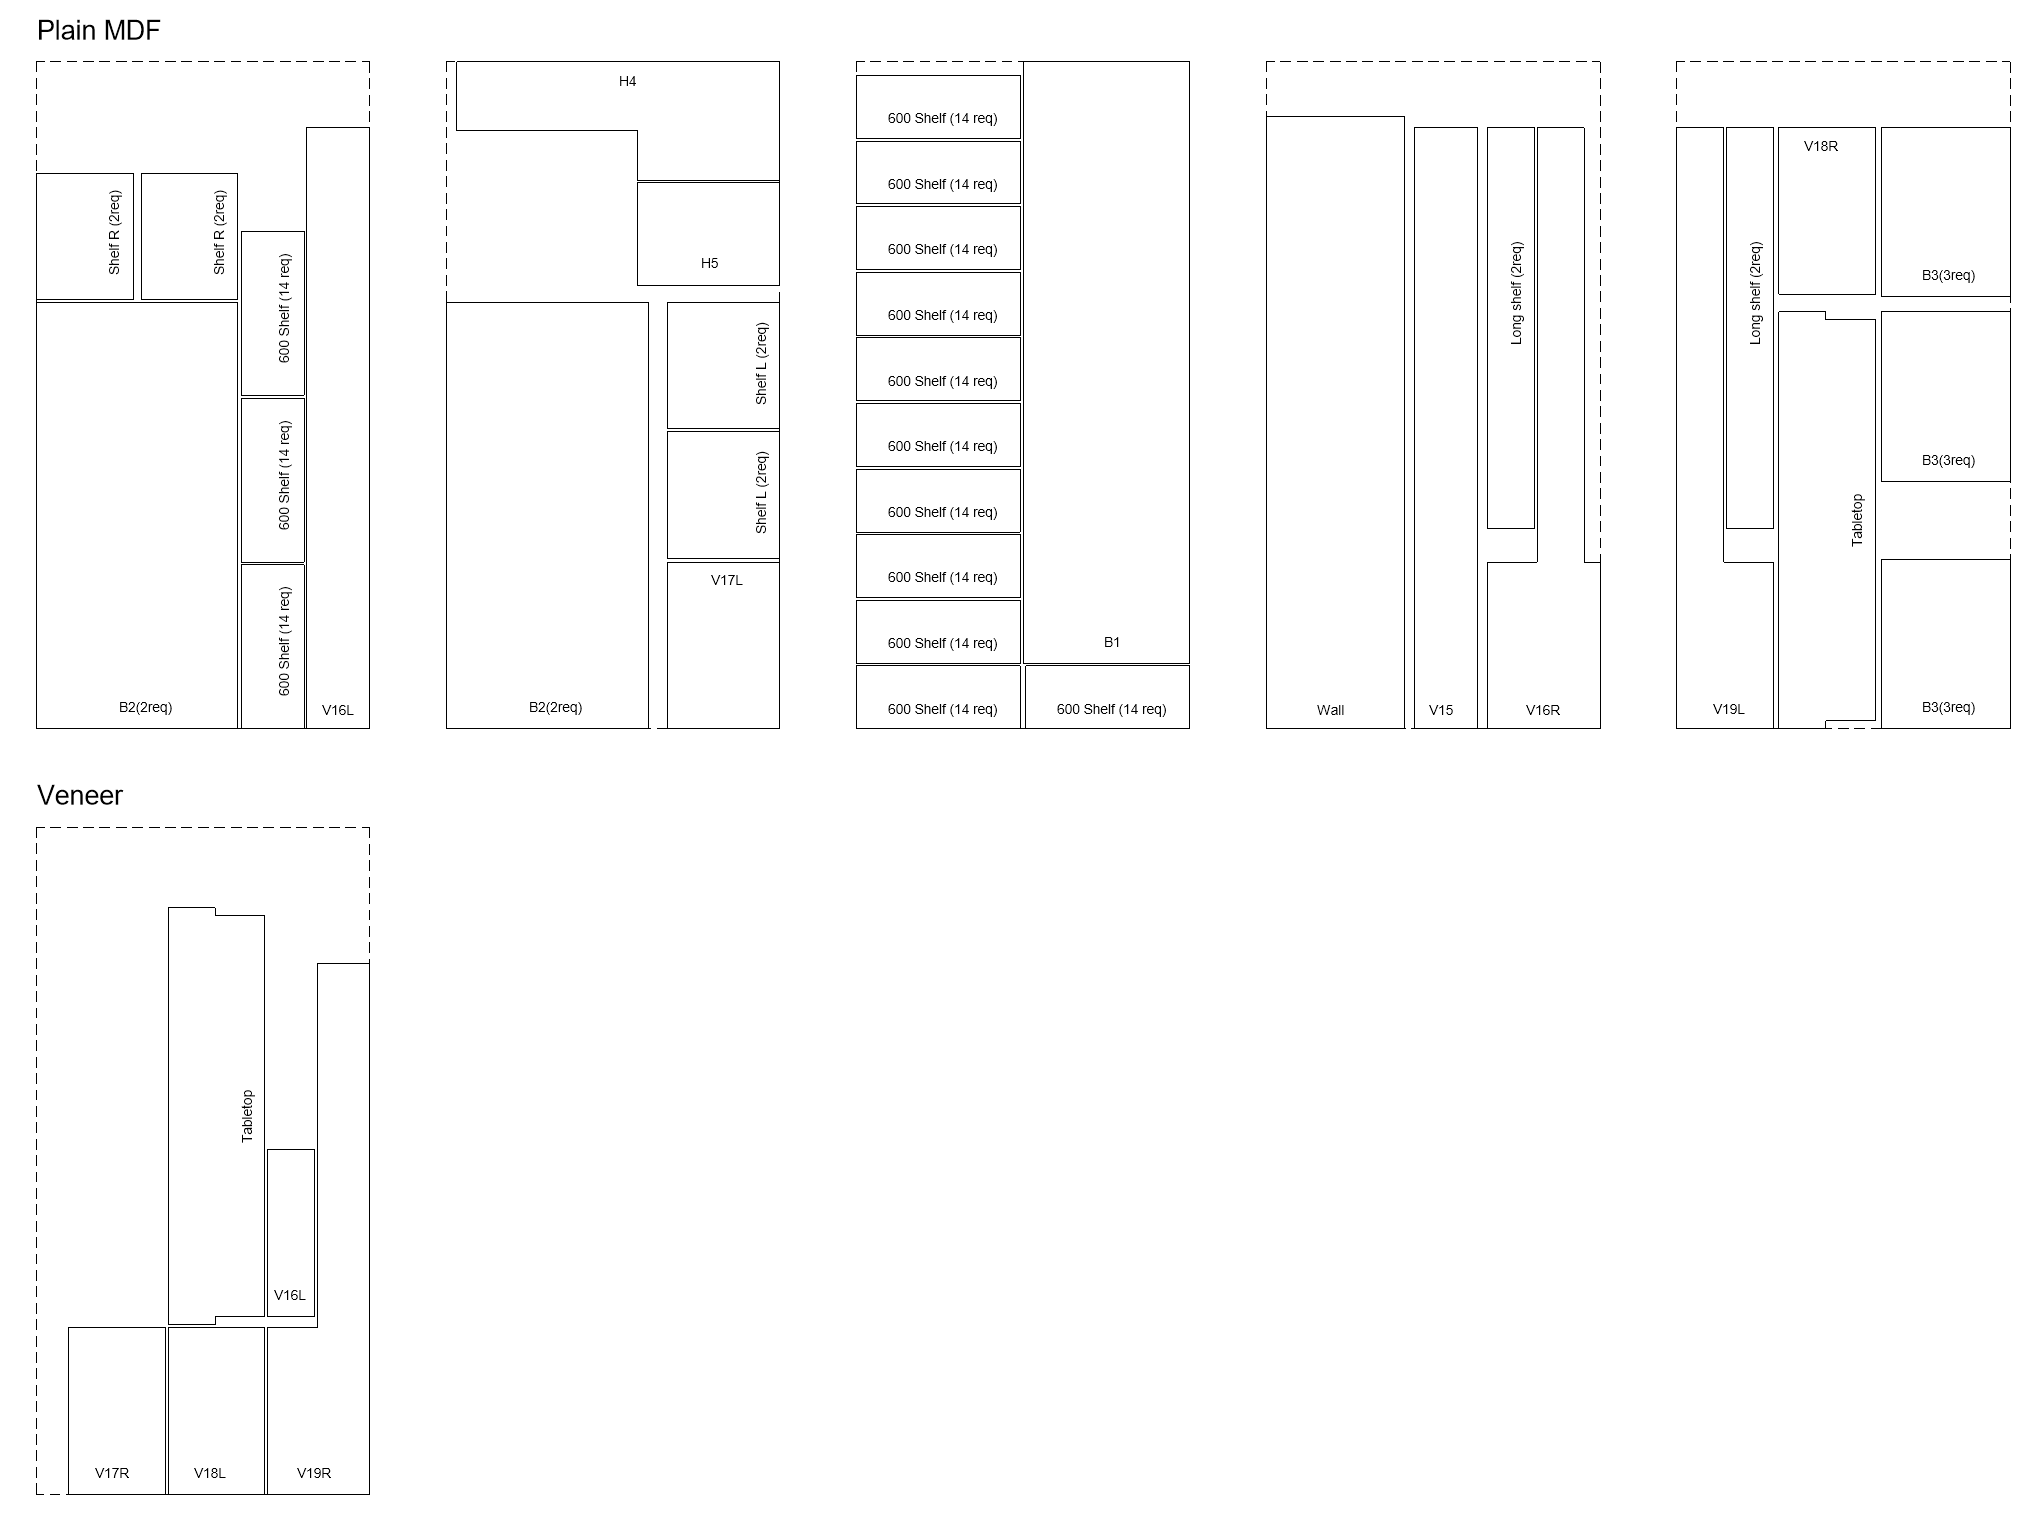
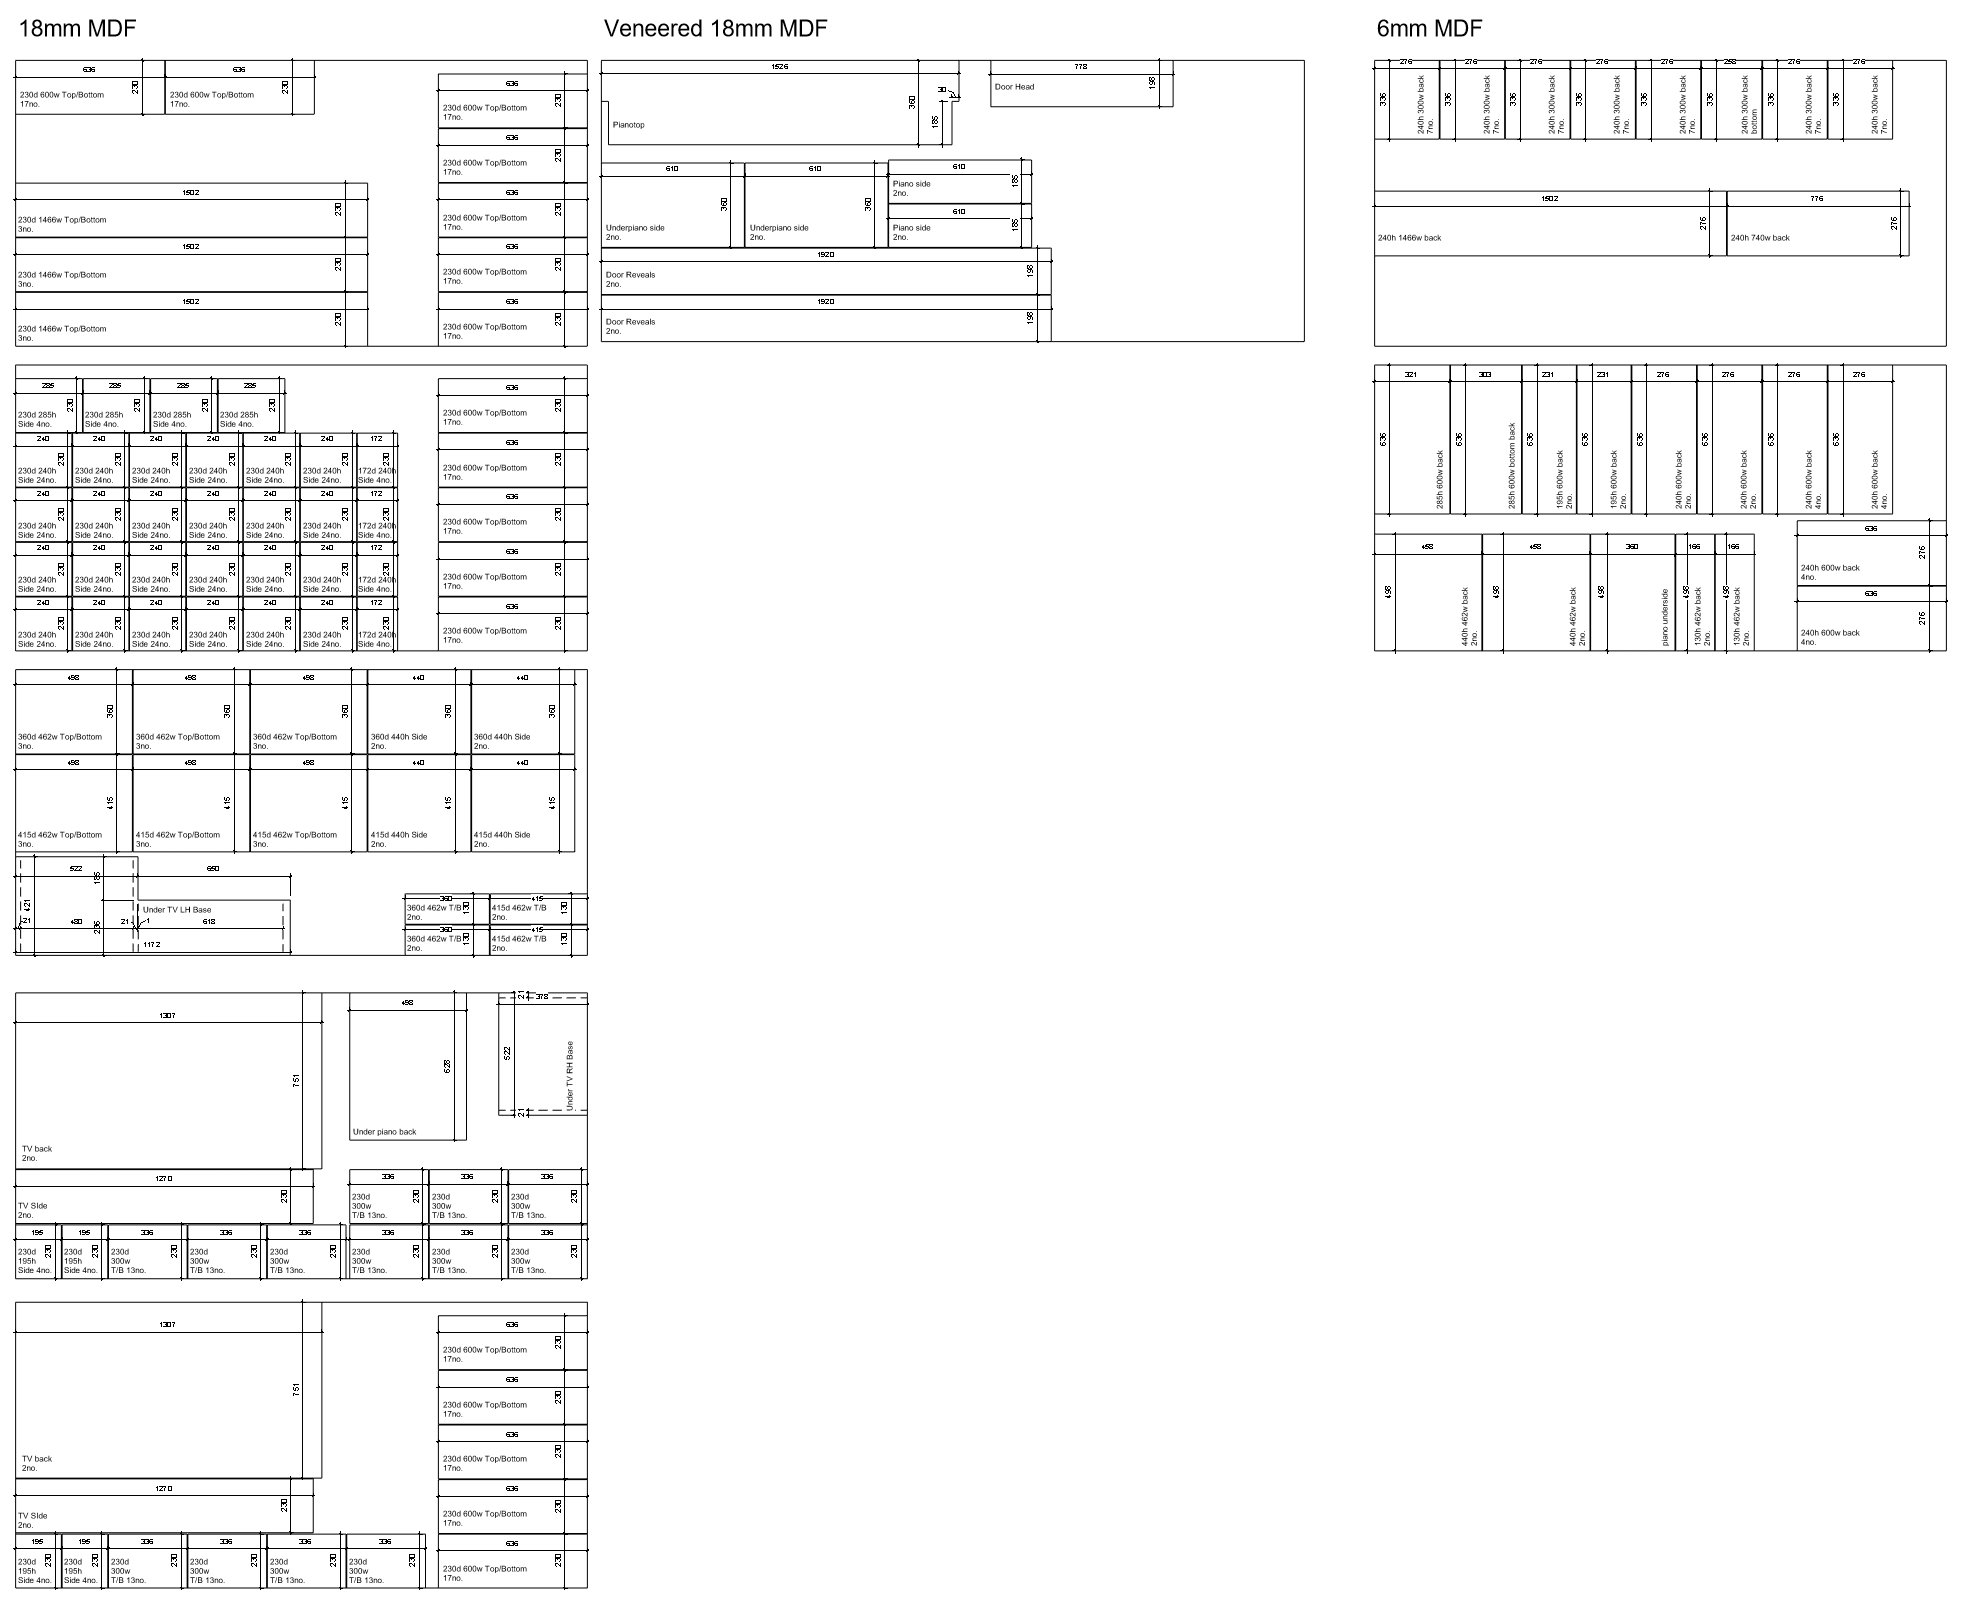
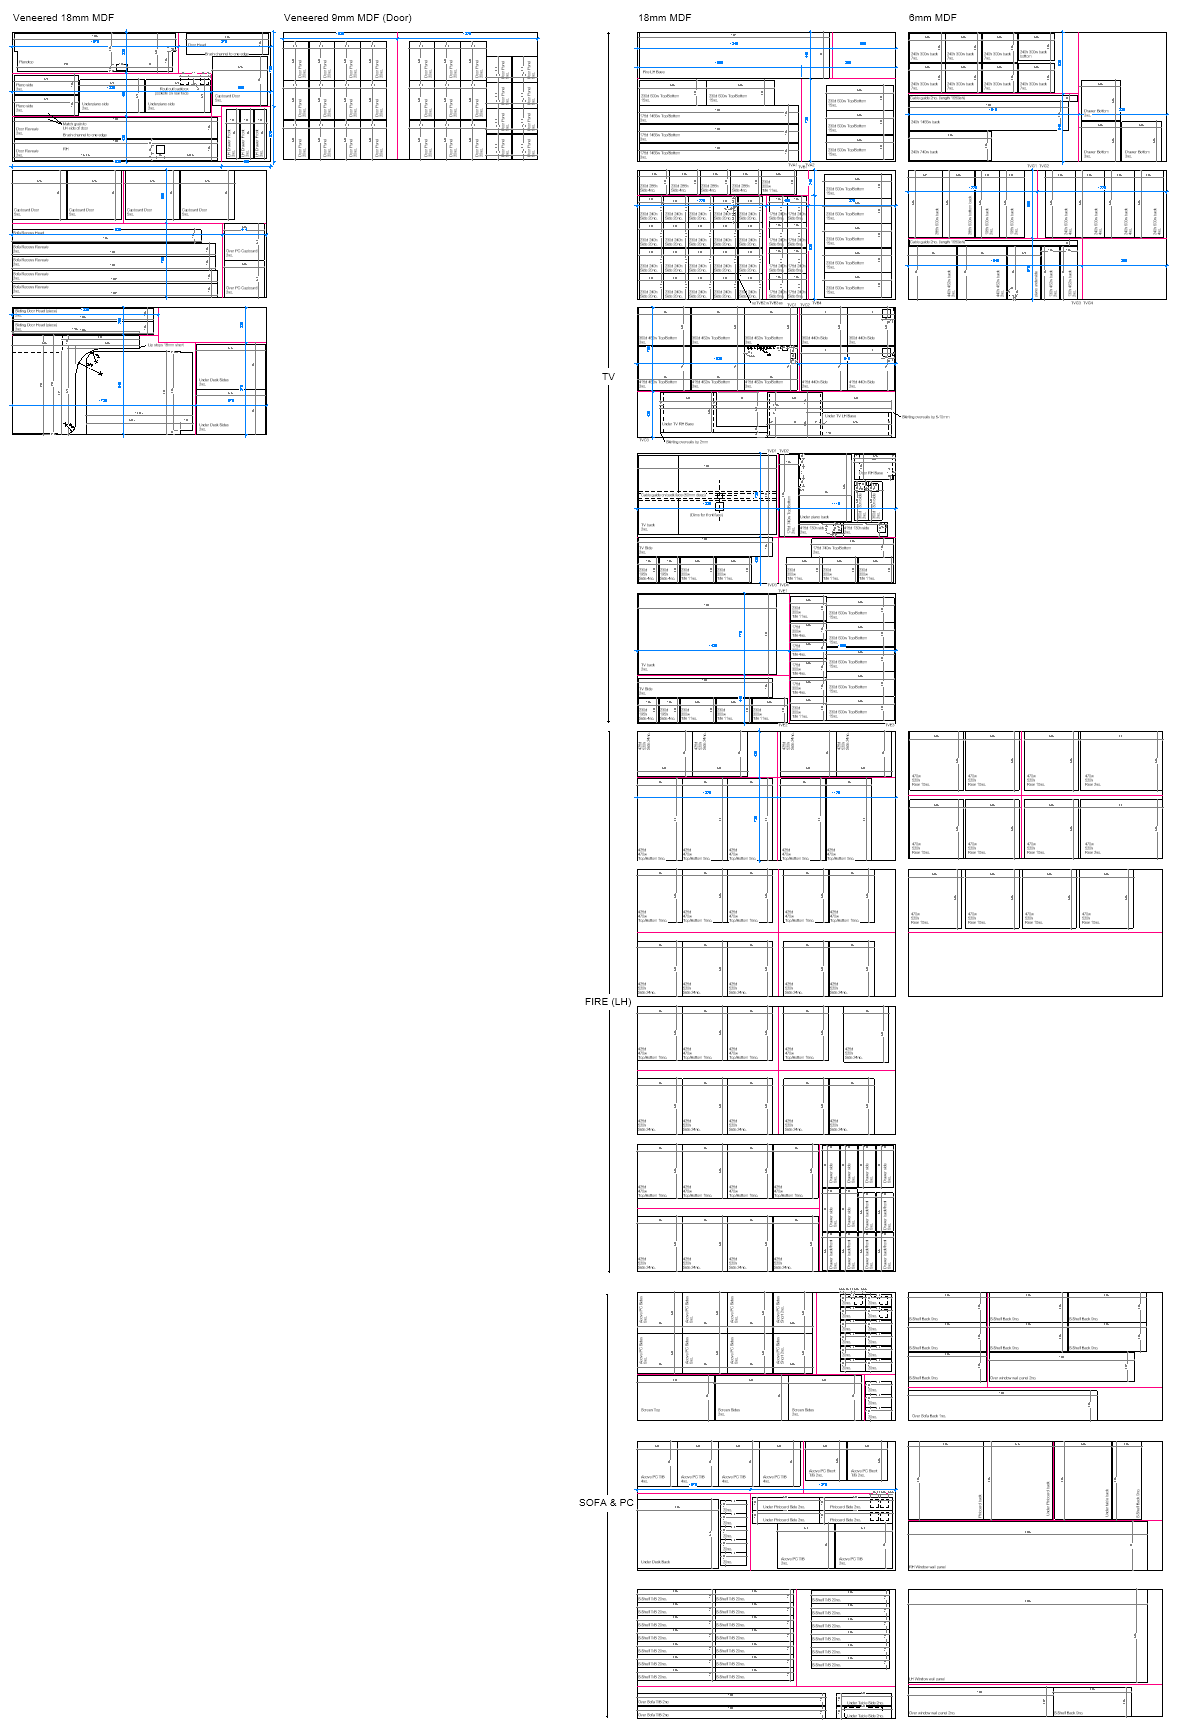
All by hand I’m afraid! With premium 18mm MDF currently over £50, I really wanted to Tetris the heck out of it.
Here’s the final cut list, with the major panel cuts in pink, so that I can store smaller pieces in my house, and take sensible batches down to the space:
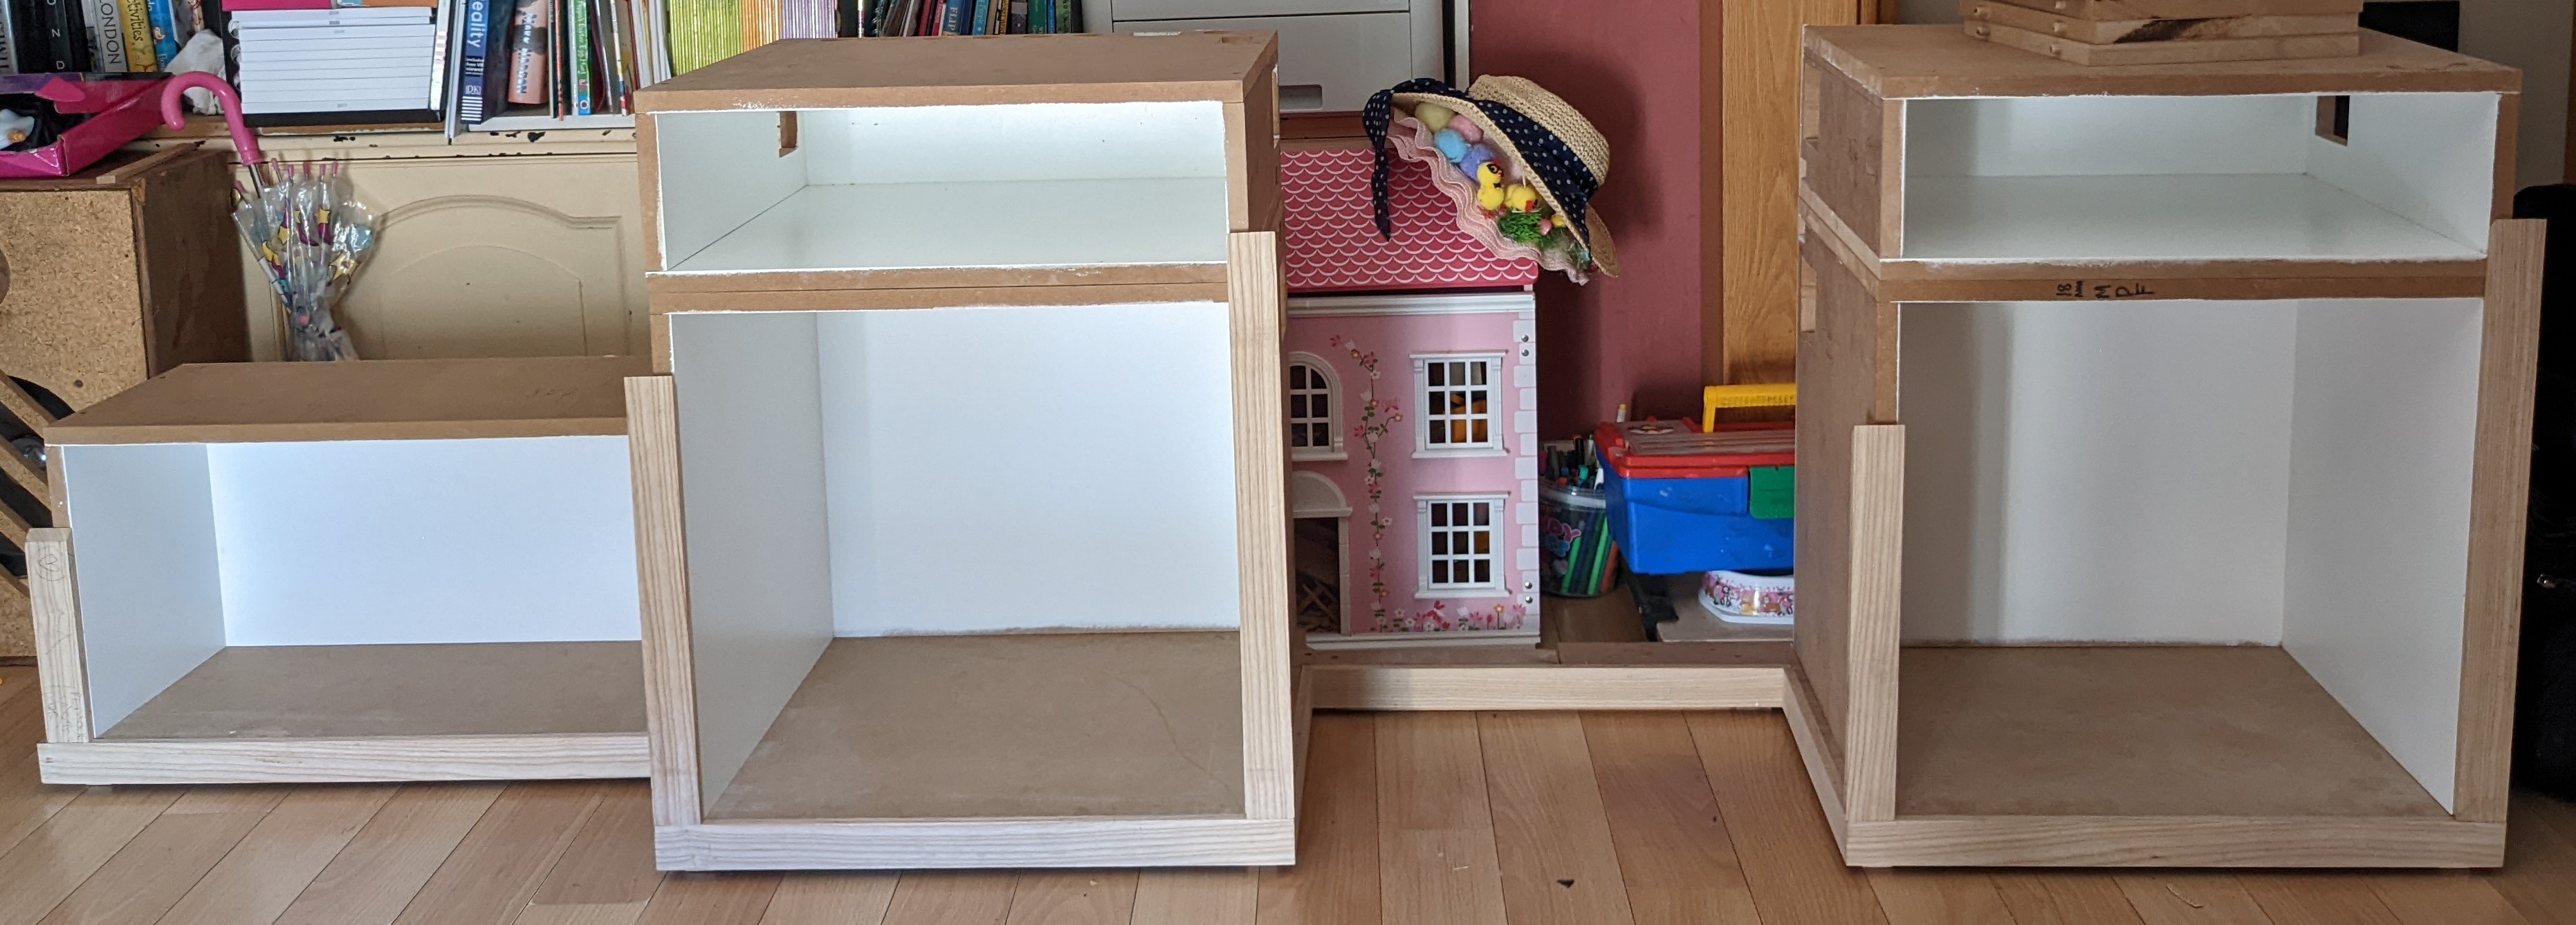
First baseboard and skirting complete, and here’s a bunch of boxes to go on it! For the first time in my life, I am cutting things exactly to the specified dimension and everything fits together on the first go. No shimming, shaving, bodging or bending. Even the mitres. (Vertical pieces in this photo just resting there to illustrate intent)
Floorboards removed and stored. I need to make a little bit of new floor under the desk in the other corner of the room and every plank counts.
Shadow gap backing pieces painted black and inserted behind skirting, loose.
Baseboard levelled out . The floor is not flat!
Sockets, backboxes and wiring installed at lower level (not powered up yet)
13 boxes drilled, dowelled, painted, glued
13 boxes installed and levelled. Despite best efforts, some boxes are off-square or the wrong size by a fraction of a mm. By designing it with shims everywhere I can keep everything straight & true by adding or subtracting from those shims. Also lets me eg. slip that speaker wire through. The bubble is in the middle of the level in all directions, which is a personal best
Behind the speaker (old drivers in new cabinets that I made) there are built-in red’n’black terminals so no trailing wires. Most boxes are also held back to the wall with an L bracket on top.
Started installing sliding door support. Might need to borrow an SDS drill off someone cos my puny cordless is not really cutting it.
Face in hands moment: The upper four shelves are 2mm too short for standard large-format hardback books. 9.5" = 241.3mm vs. 240mm shelves. Everything on the 2nd shelf (and lots of other books we have of similar size) are supposed to fit on the upper shelves. Aaargh.
Just over one month of construction time so far, but that will slow down as the weather gets worse (my home workshop is under a tarp stretched out over the patio) and I go back to university. Should have the whole room done by this time next year I reckon.
Next: the piano desktop and TV backing/surround. Also need to make sure all the cable guideways are made so AV stuff can be connected up without dangling wires in the void. No ash trim until it’s all assembled and I can make good measurements.