Hey all,
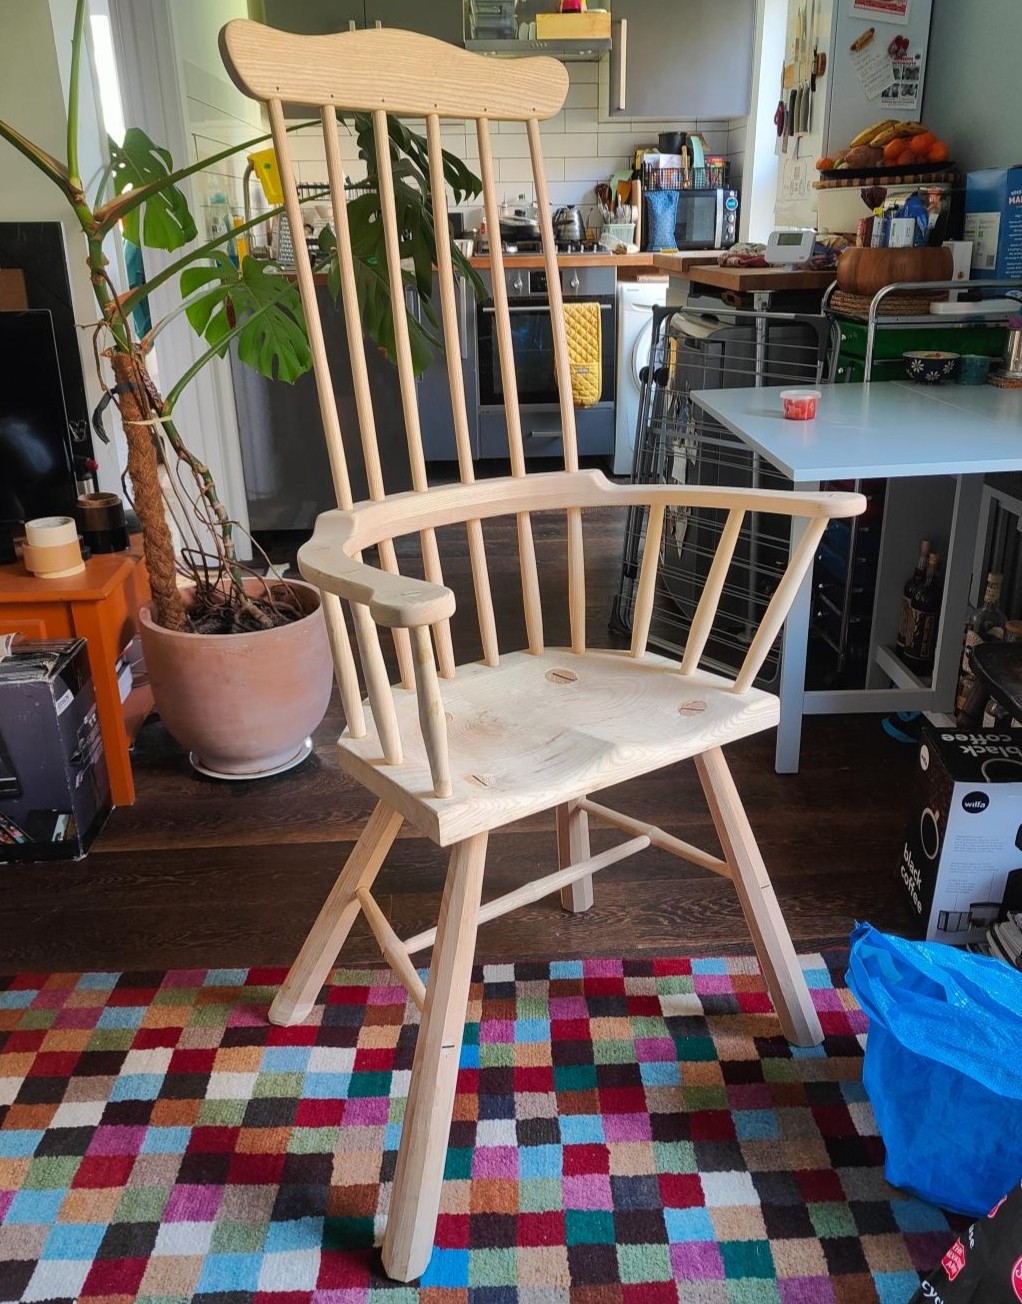
I recently finished my high-back stick chair and wanted to post a write-up for anyone interested!
Introduction
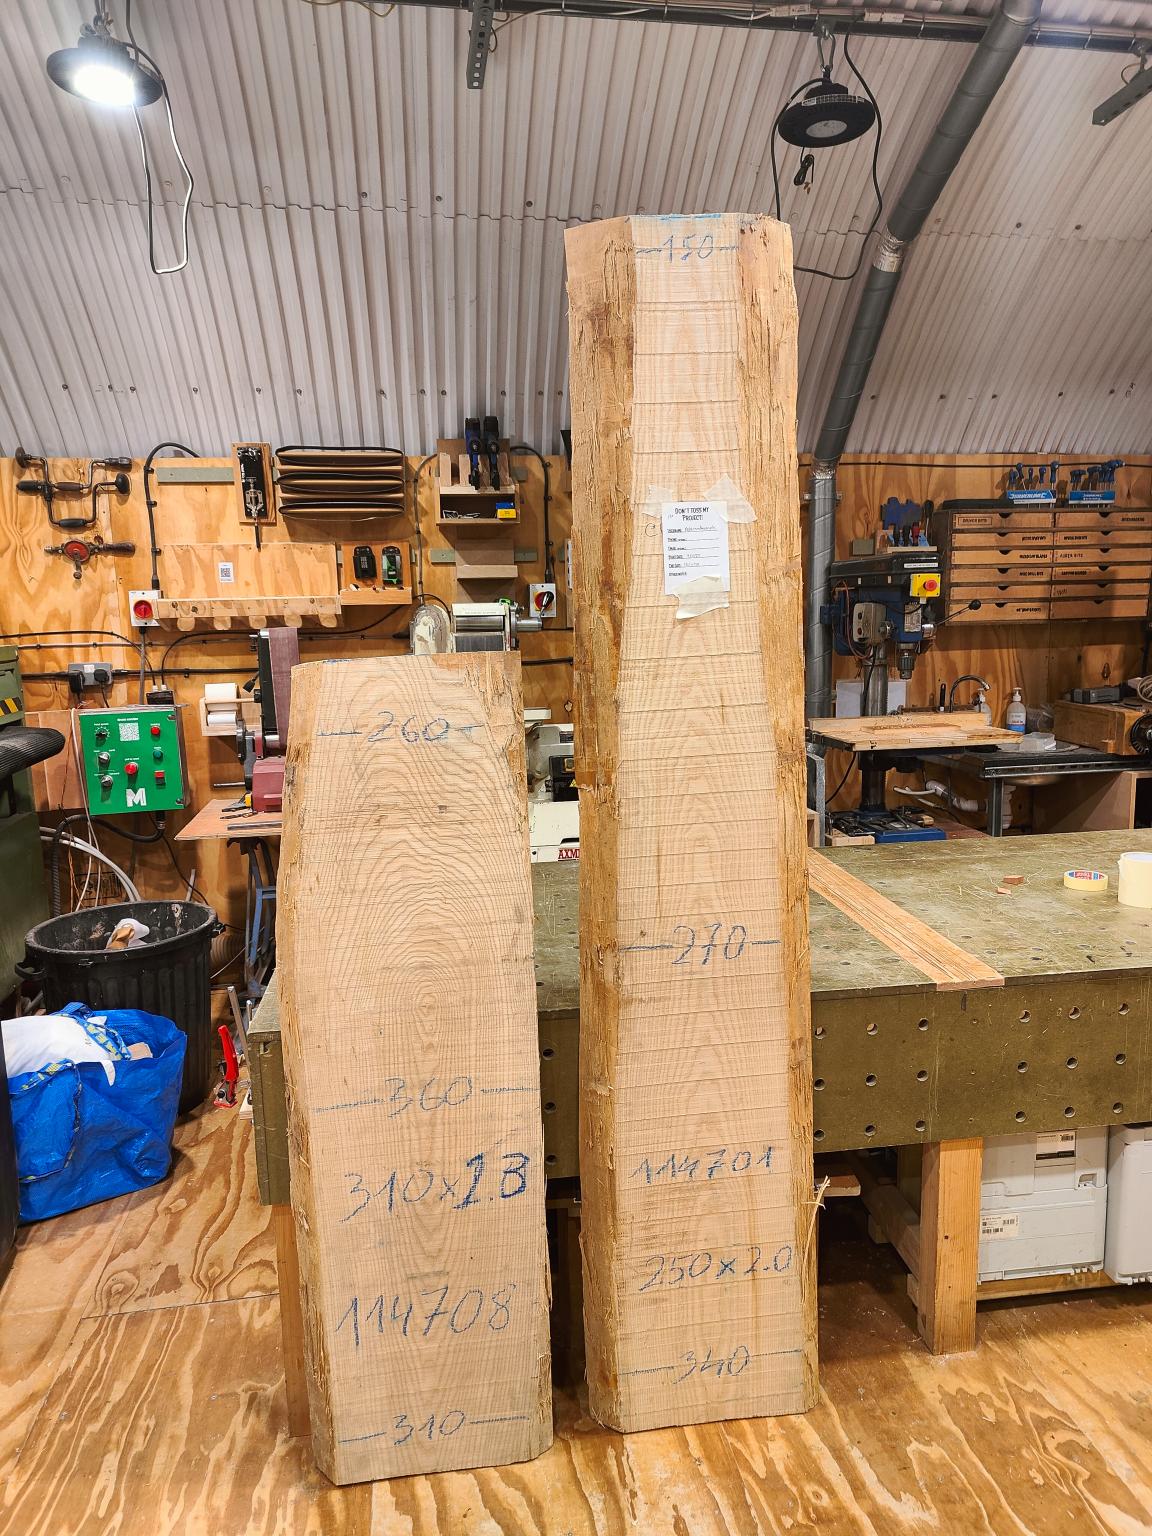
I started with a couple of chunky ash boards from English Woodlands Timber, not knowing what to use them for. Having recently finished a milking stool/staked side table, a high-back chair seemed a useful project that would be challenging but achievable.
Not knowing much about the variety of chair designs, I started by looking out for different styles in person and online, and settled on something styled after a Welsh stick chair.
After some pen and paper sketching, I landed on my final-ish design

Midway into the project, I came across this free chair design visualiser which was a great help for working out some of the layout angles.
Build Parts
The Seat
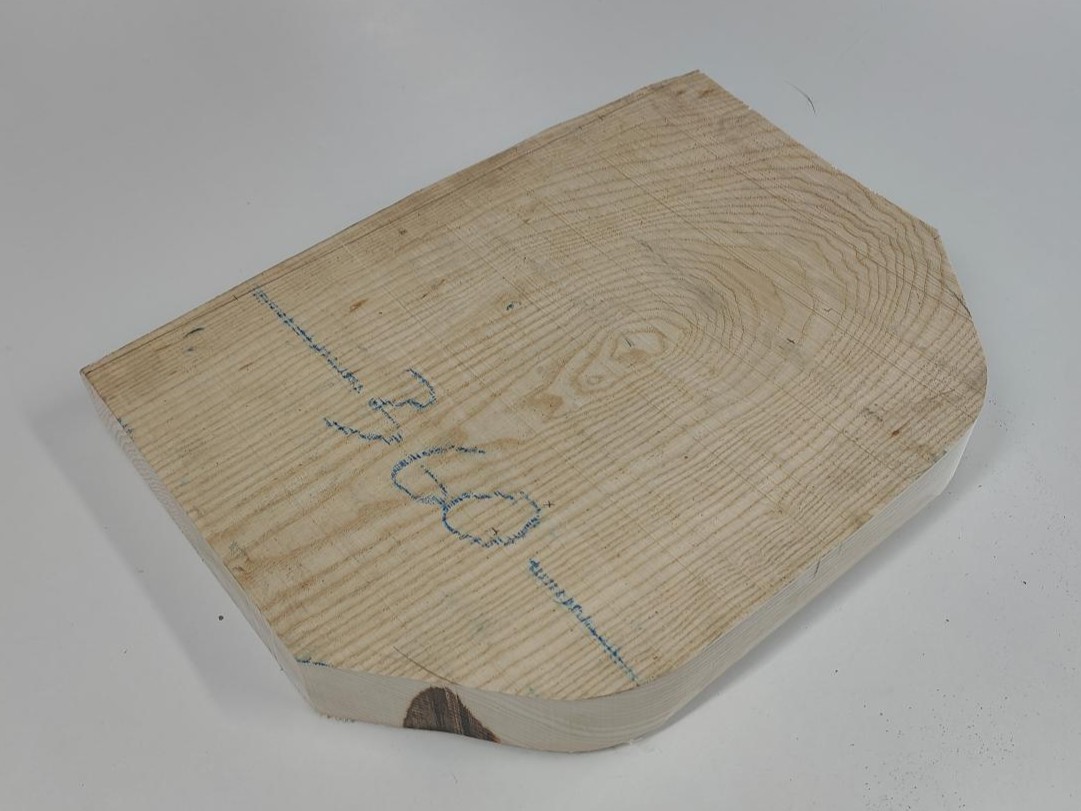
I started by cutting the seat to length from the shorter of the two boards, and lopping off the back corners to make a hexagonal profile.
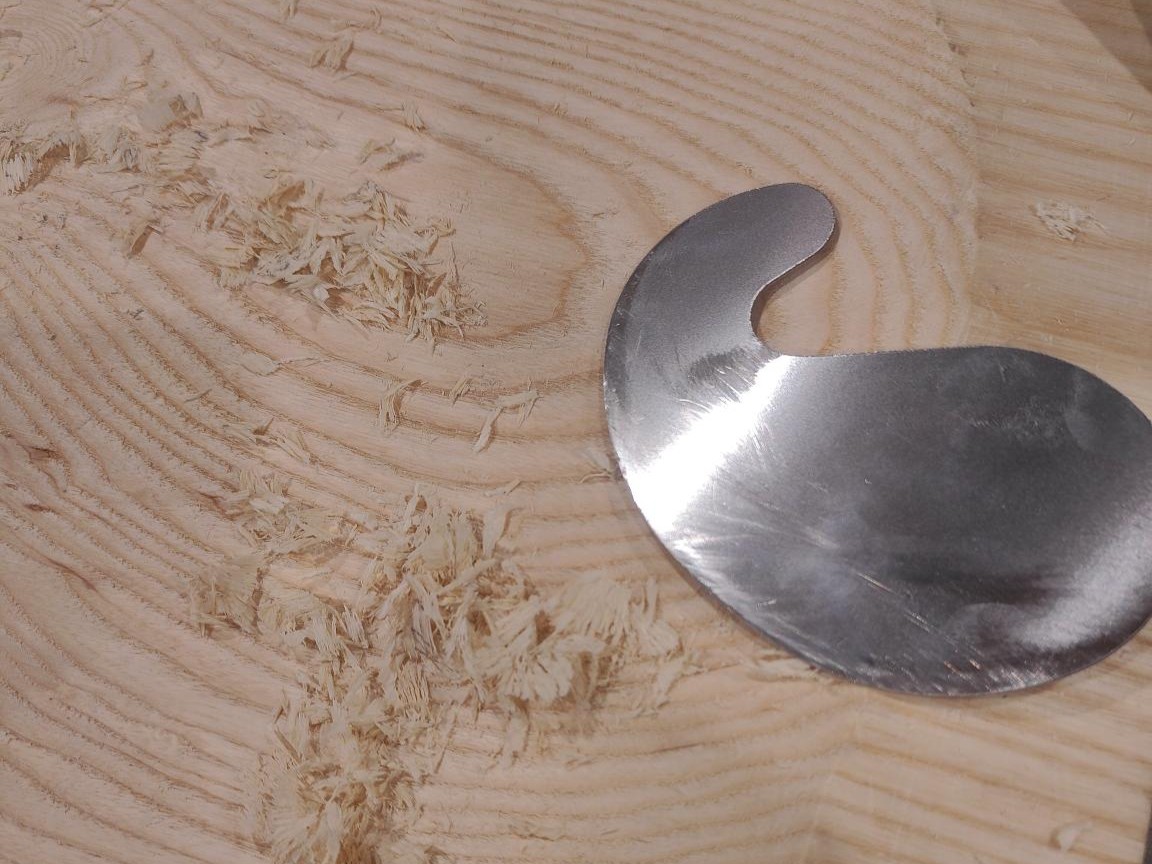
Then came the task of dishing the seat out. I used some traditional tools - a scorp and a travisher - to rough it out, then refined the shape using a card scraper and finished it using progressive grits of sandpaper.
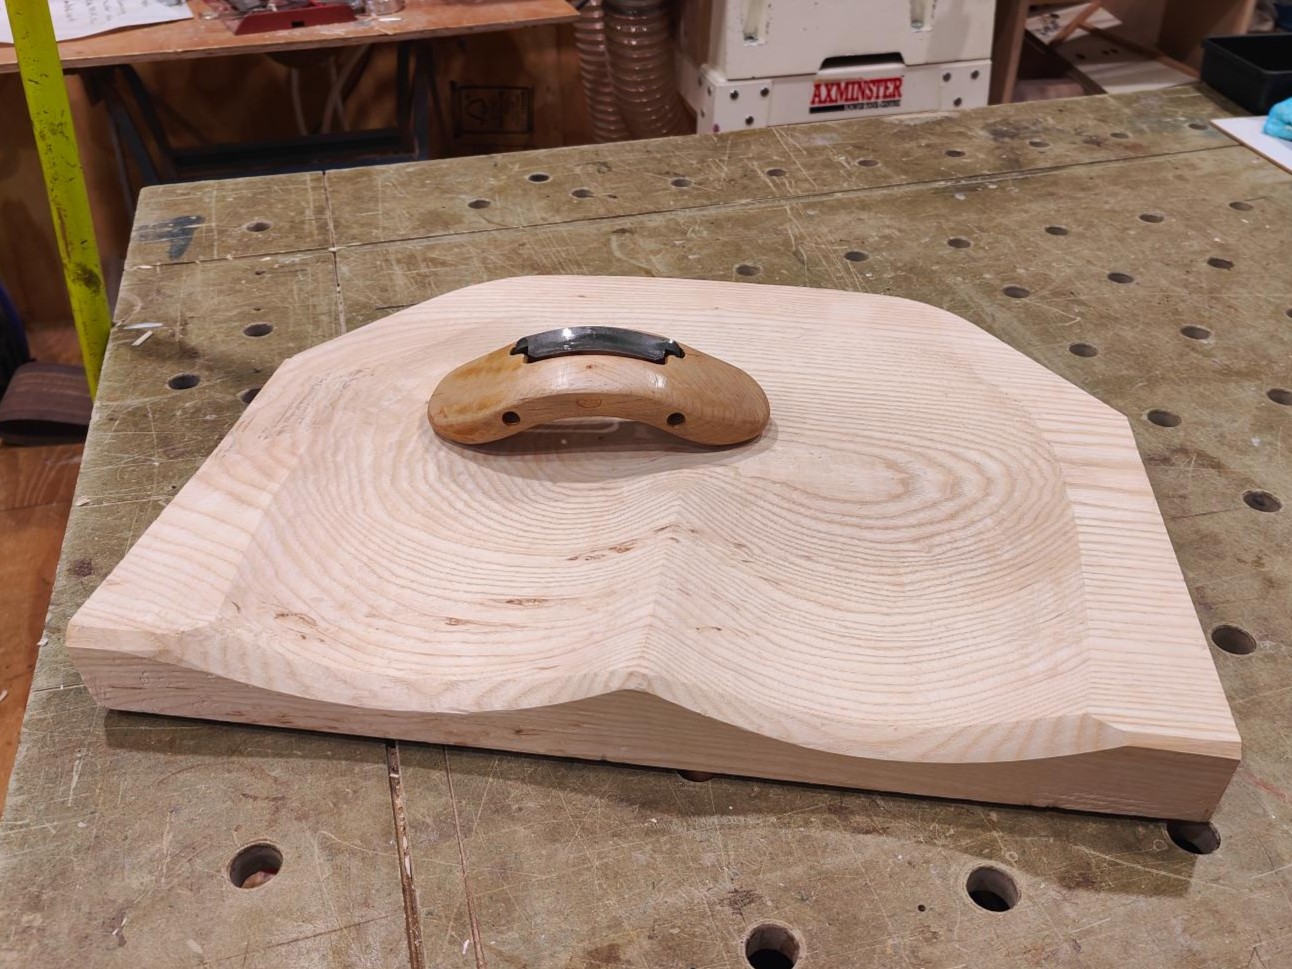
The card scrapers weren’t massively beneficial to smoothing the ash in my opinion, because the summer growth was much harder than the spring growth, and left undulations between annular rings, which I wasn’t expecting. This may be due to inexperience with preparing the card scraper but sanding sorted it out easily.
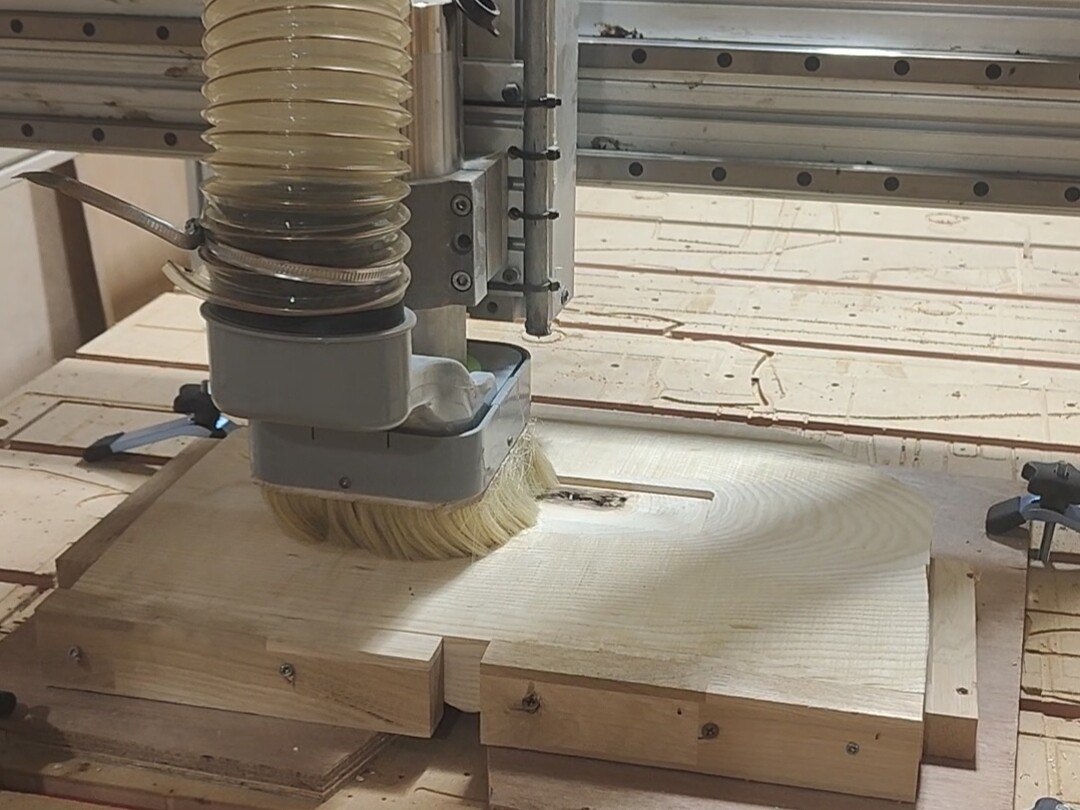
I failed to flatten the base of the seat before carving the saddle in, and used it as an excuse to get inducted on the big CNC. Aside from cracking a pretty chunky CNC bit, this went to plan nicely!
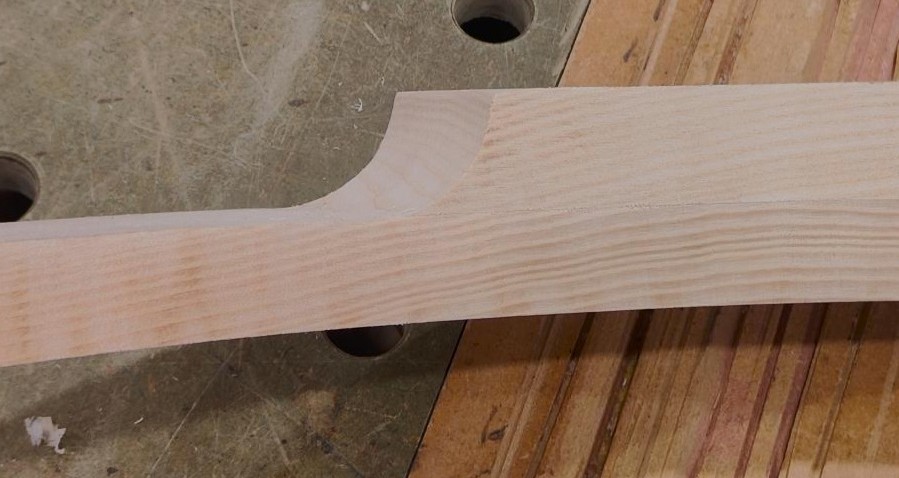
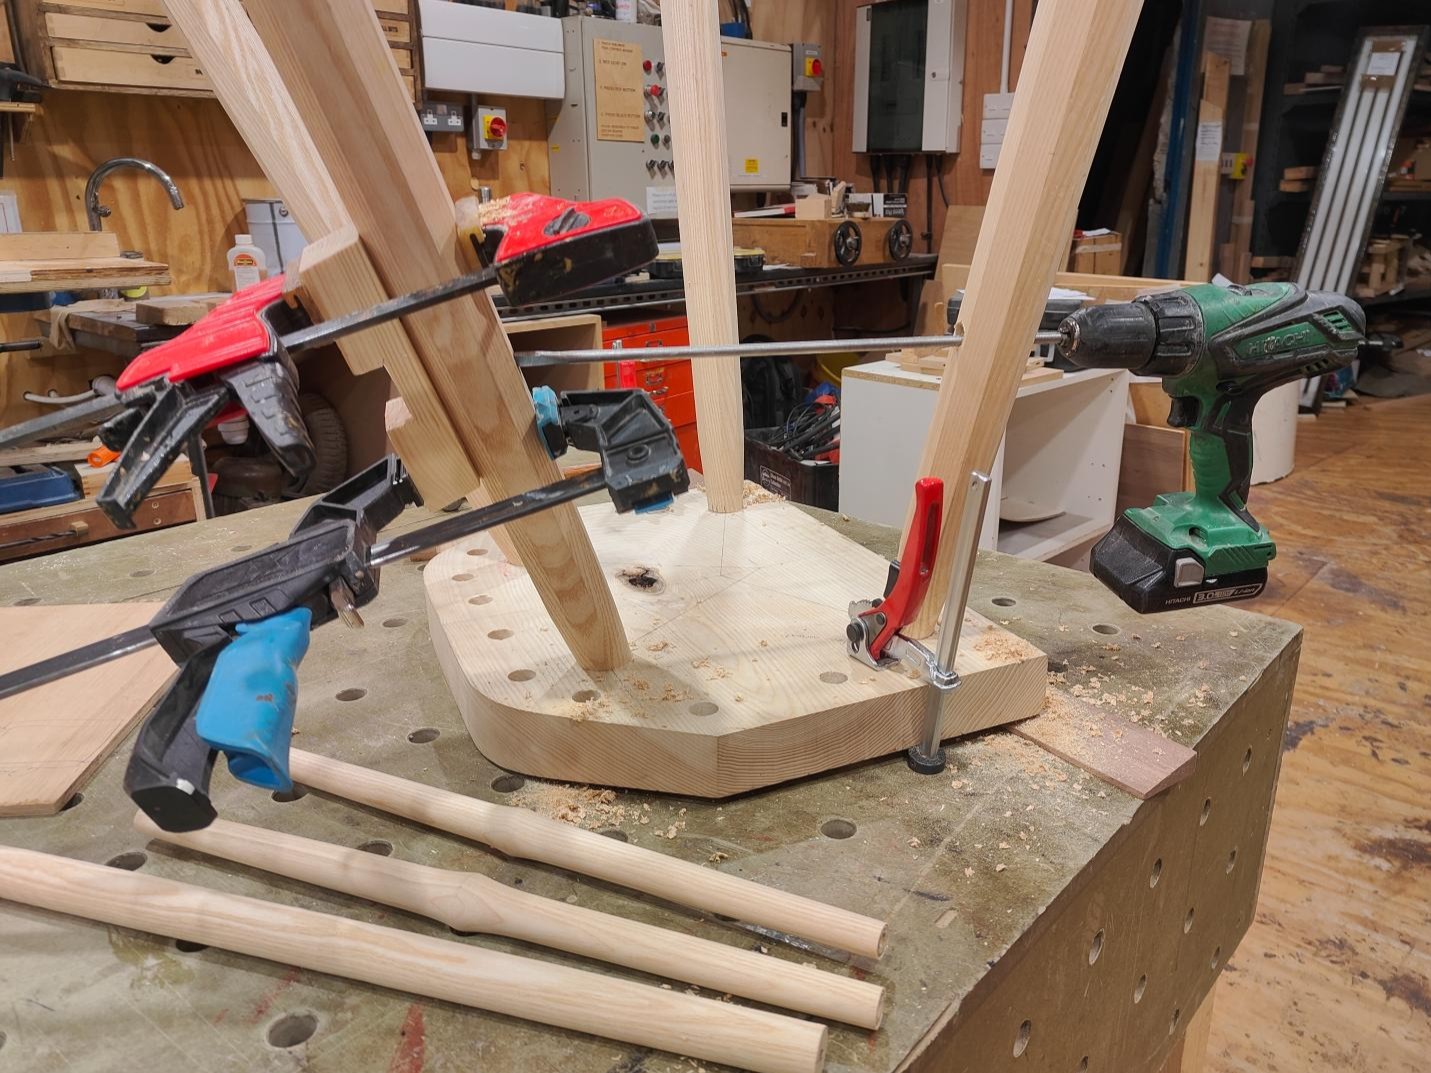
The Legs
I cut the smaller board into lengths on the bandsaw, then planed and thicknessed until all pieces shared a uniform square cross-section.
I marked out a smaller square on one end of each leg, and after marking layout lines used a no.7 plane to taper each piece.
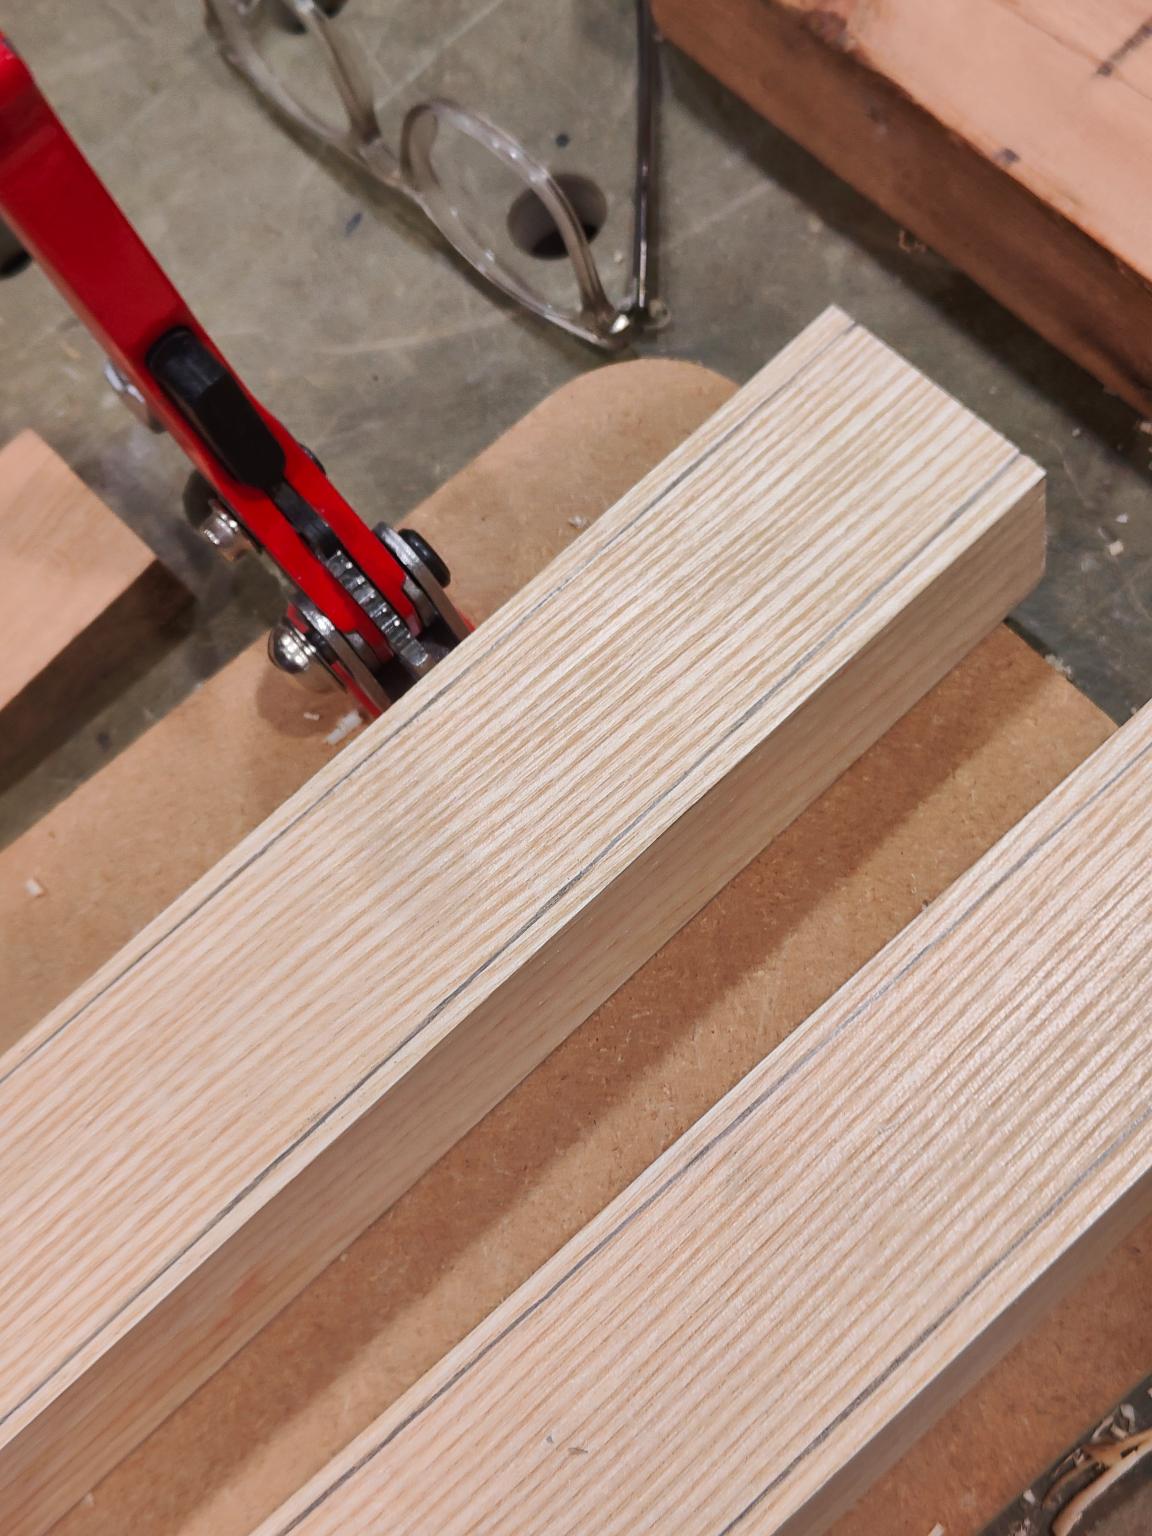
Using a compass, I then marked out equilateral octagons on the ends, and with the workpiece supported in an octagonal jig, used a no.7 plane to turn the tapered square legs into tapered octagonal legs.
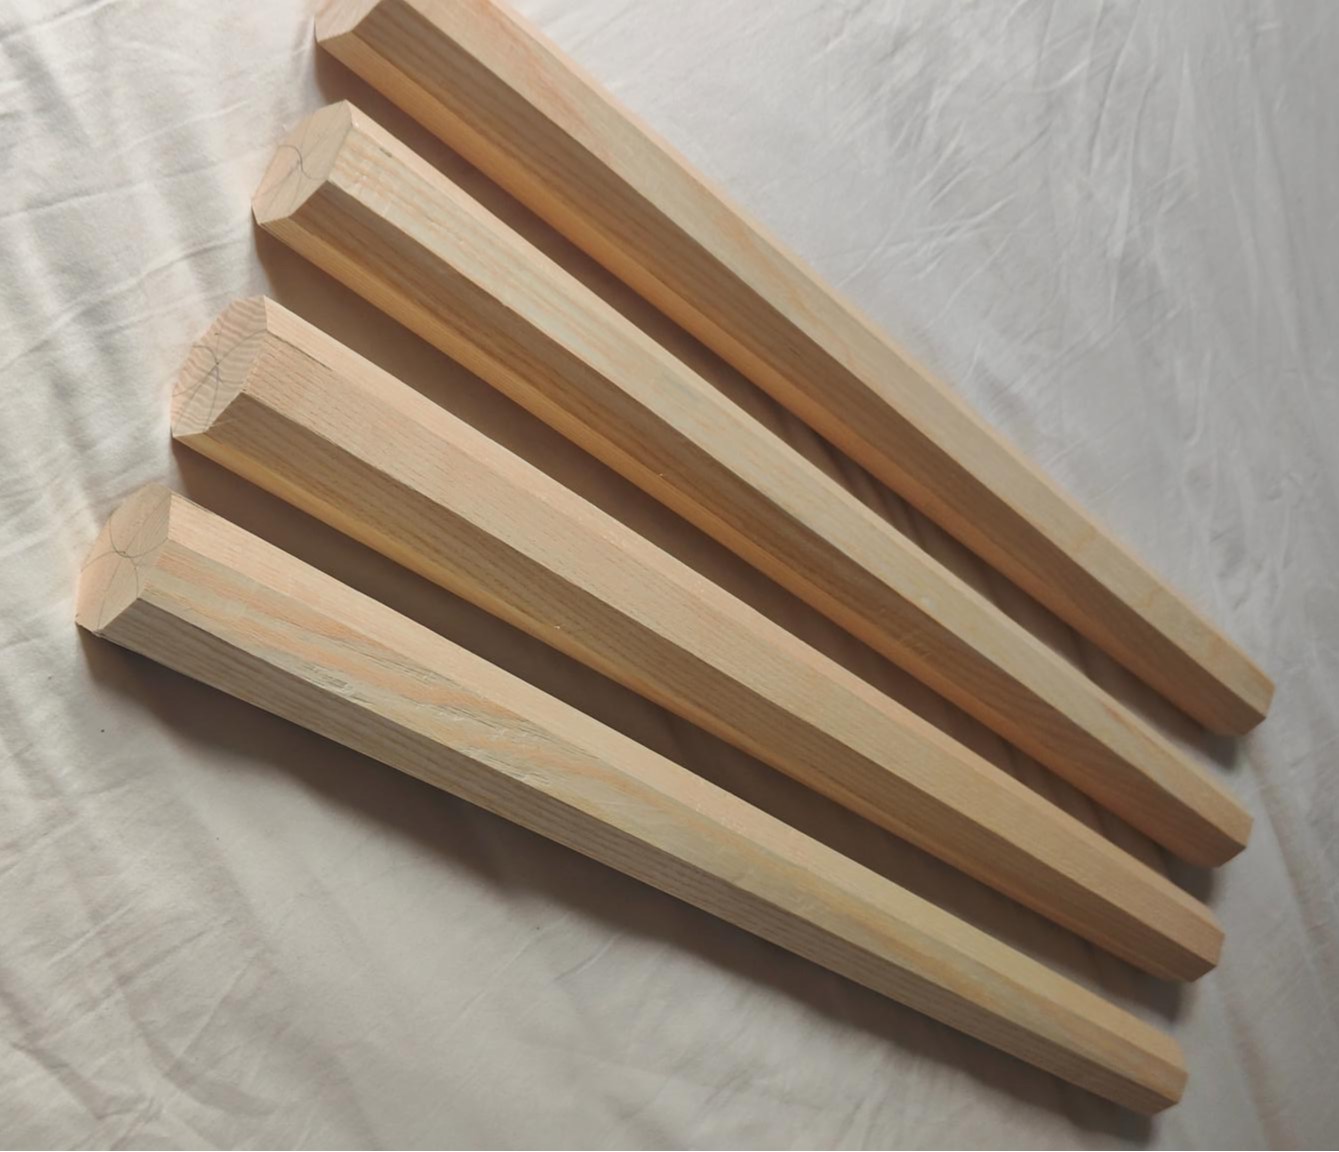
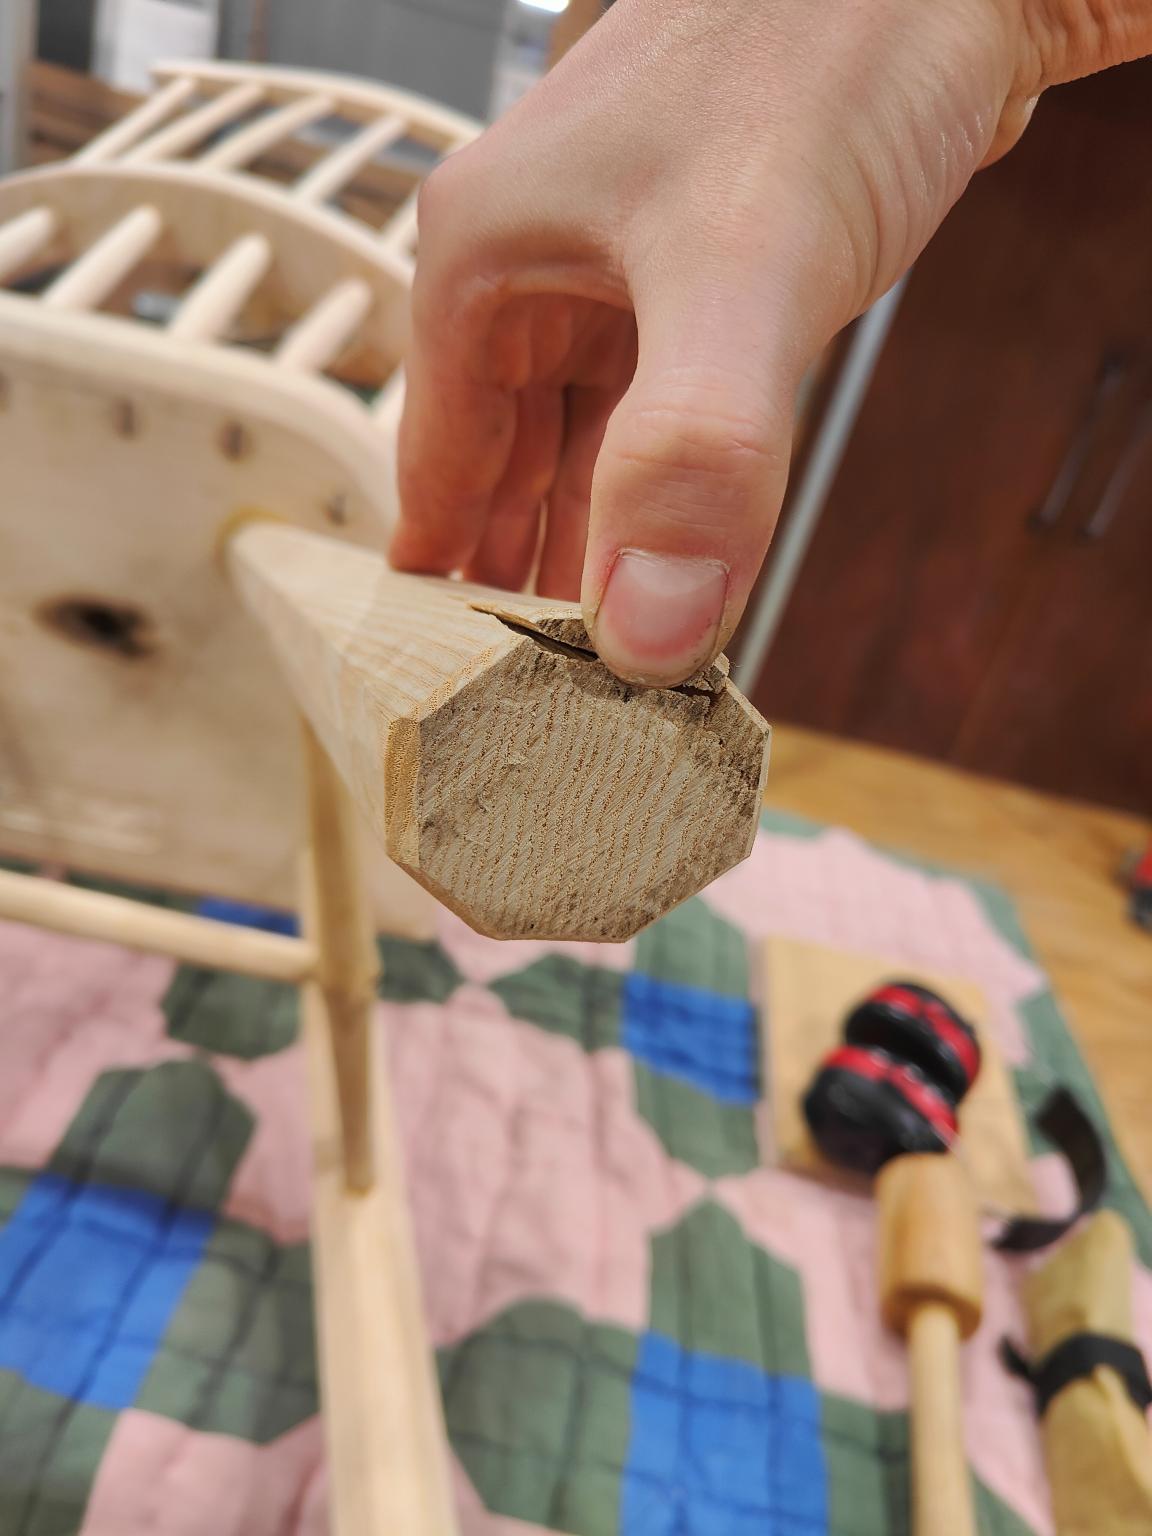
When fitting the legs to the seat later on, I used a spokeshave to make the cylindrical tenons.
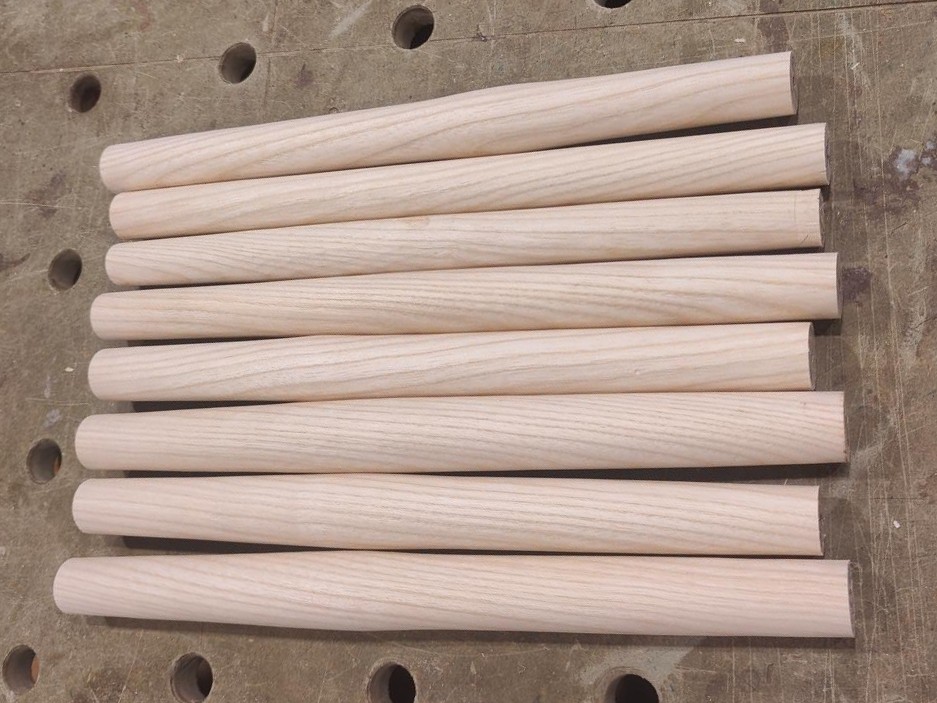
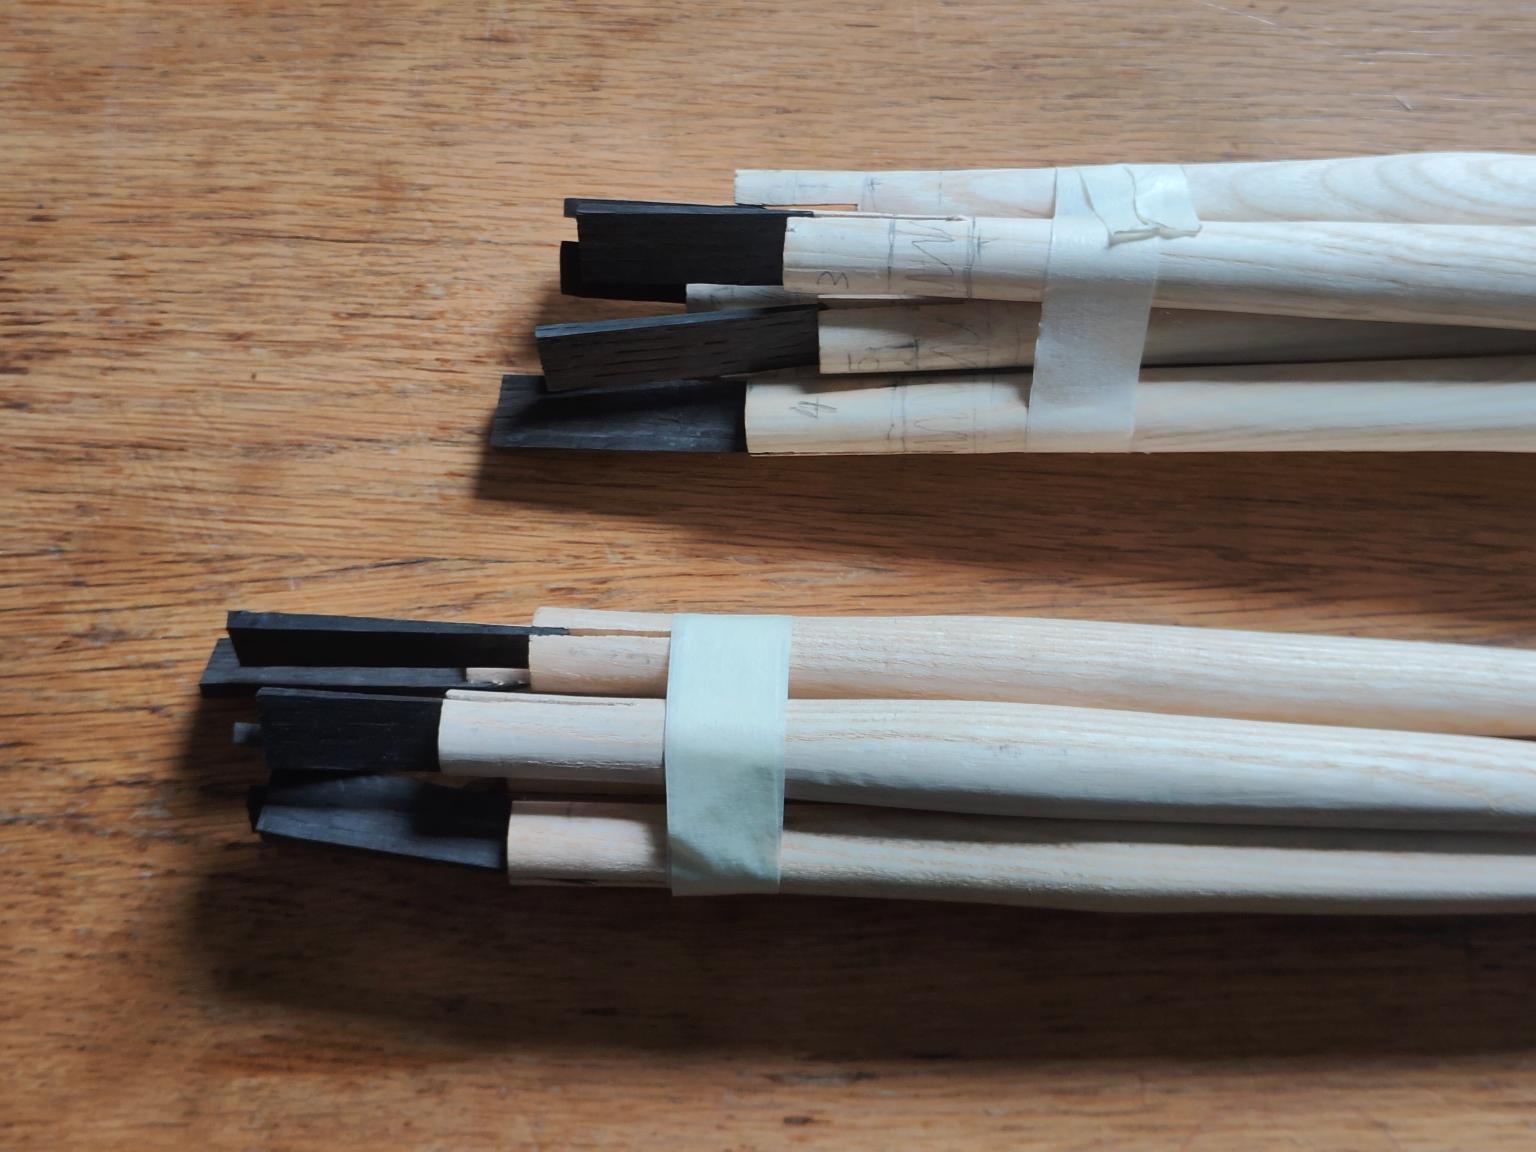
The Spindles
I spent a lot of time on the lathe turning spindles. And a lot of time redoing spindles which didn’t end up as intended the first time around.
The shorter sticks were cut out roughly, then turned on the lathe using a story stick to mark the important dimensions at key points.
To test for size while still on the lathe, I used both callipers and a drill hole of the corresponding size cut in half.

The longer sticks were a nightmare to turn. The grain needs to be continuous from start to end with ideally zero runout, so I was careful to follow the grain while roughing the pieces out on the bandsaw. At a bit over a metre long, I needed to use the steady rest to support the middle of the workpiece.
Having to unscrew it and change the position relative to the tool rest multiple times for each stick was just not the one at all. Next time I’d try using a shave horse or an alternative to see if this can be made more efficient.
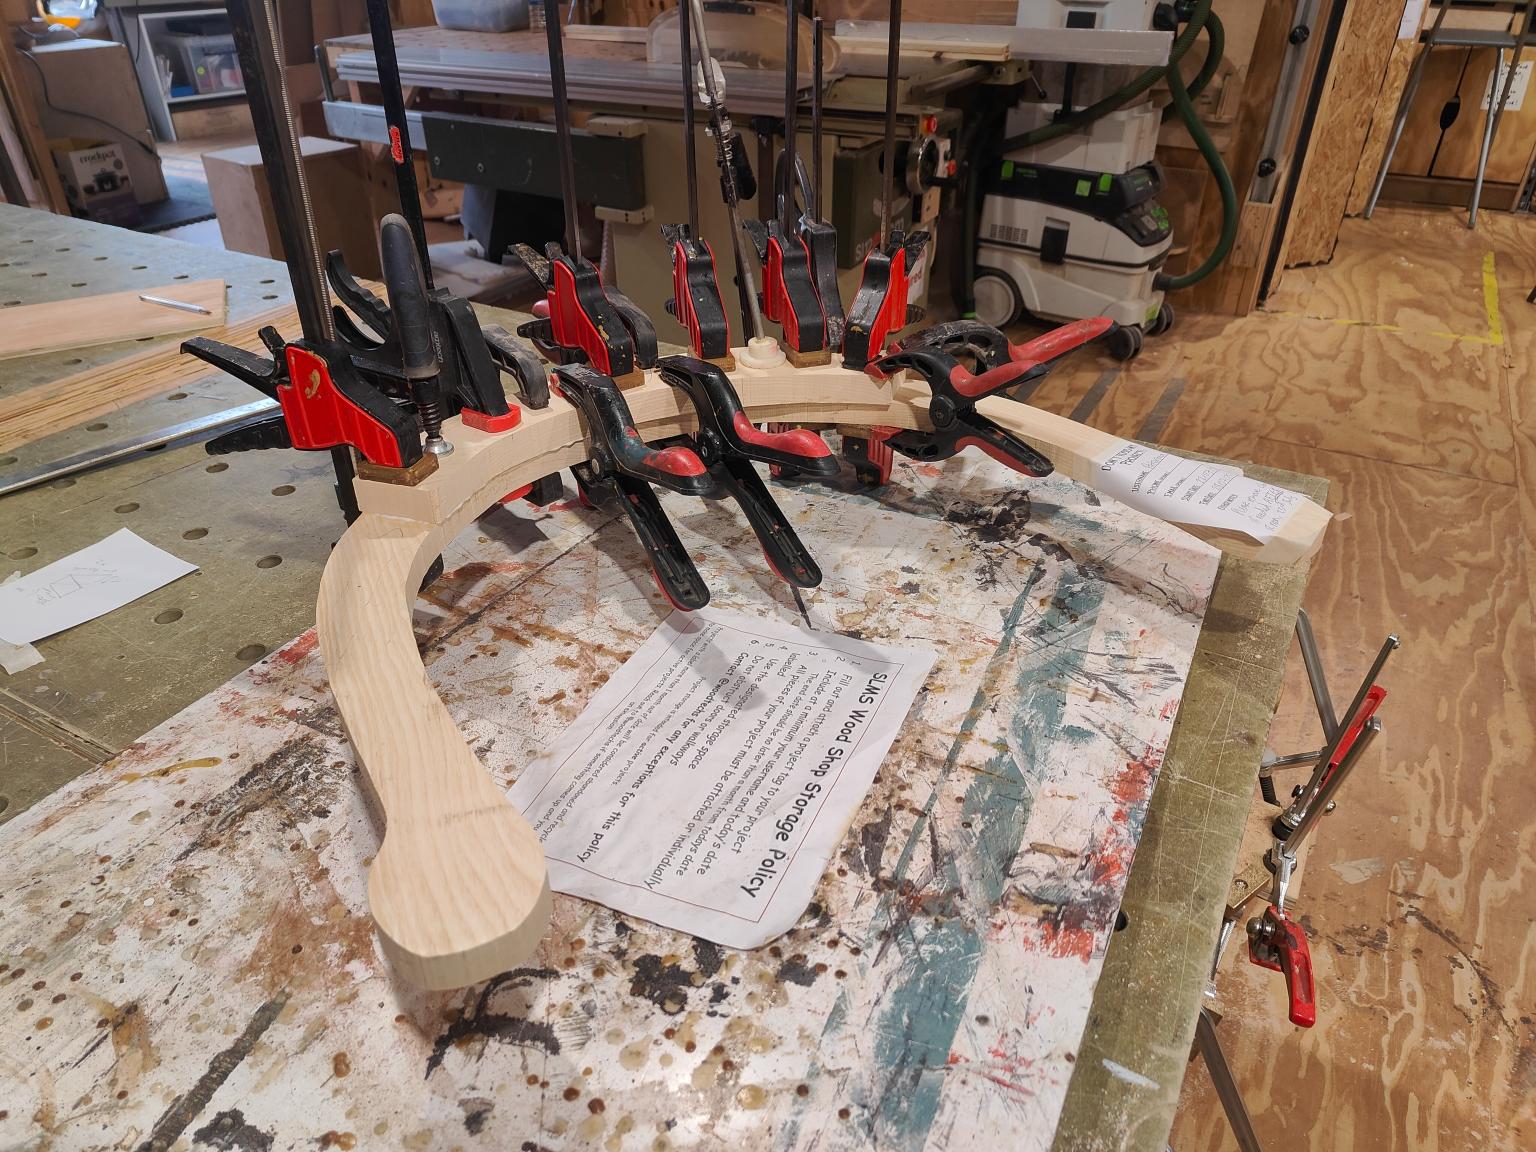
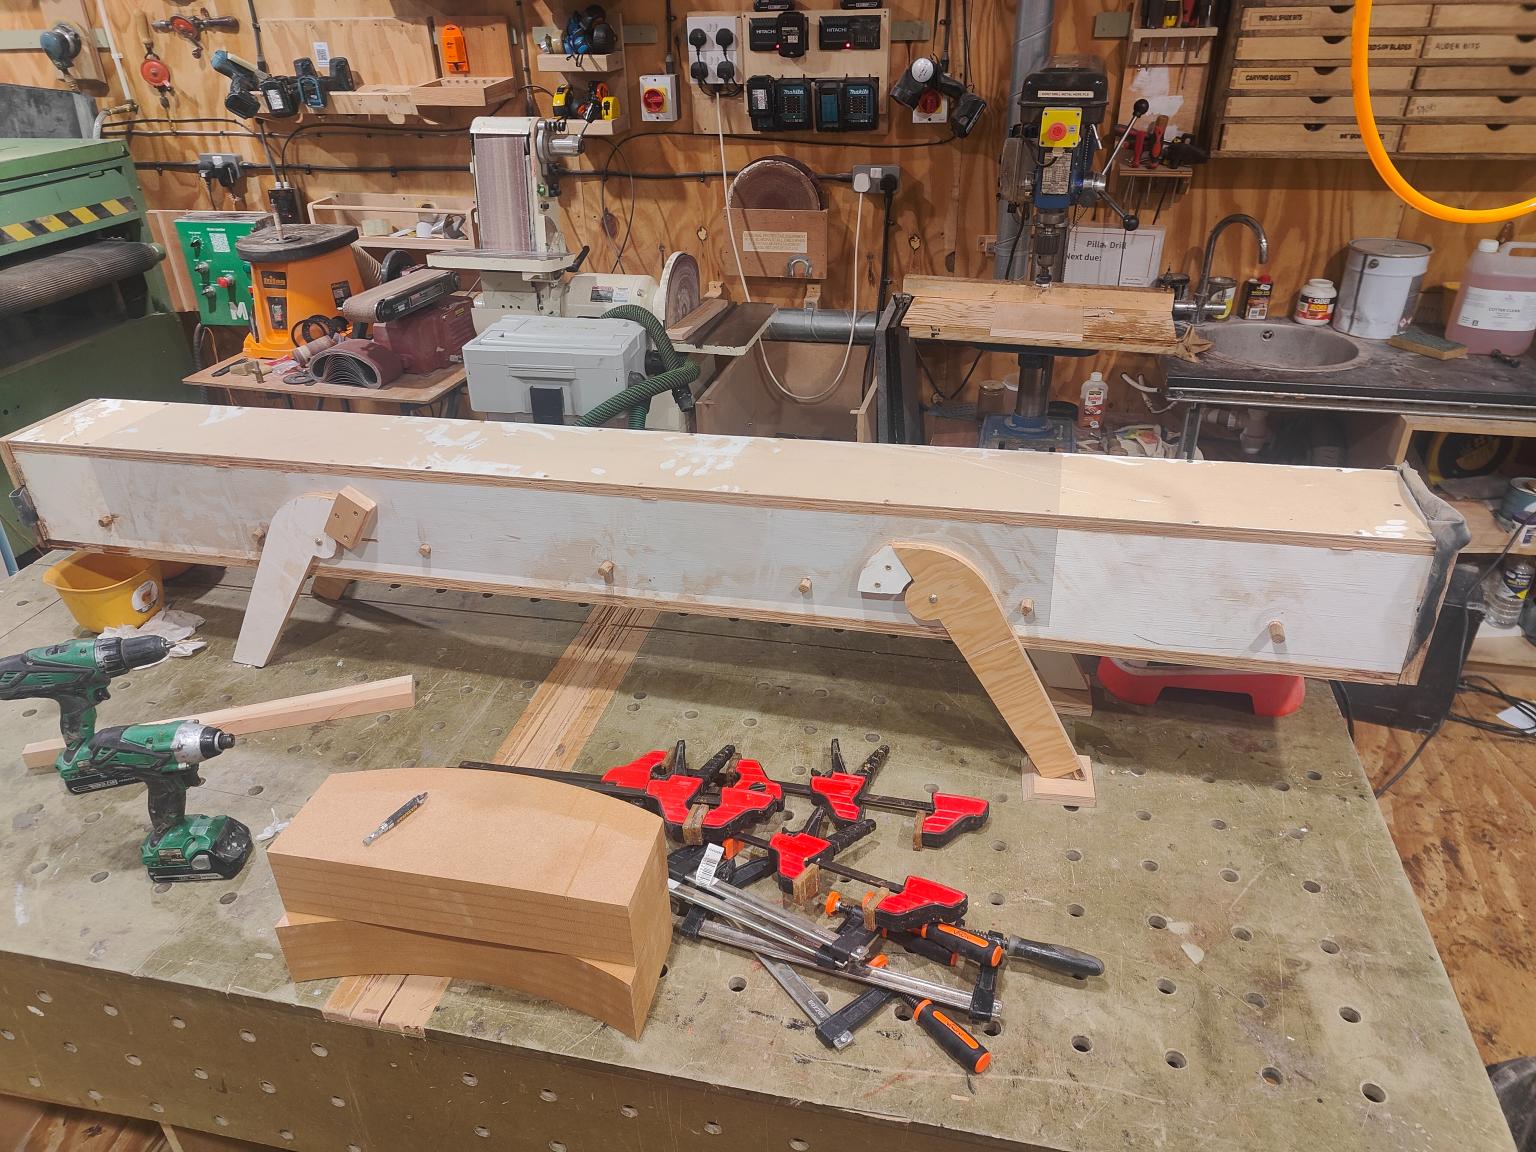
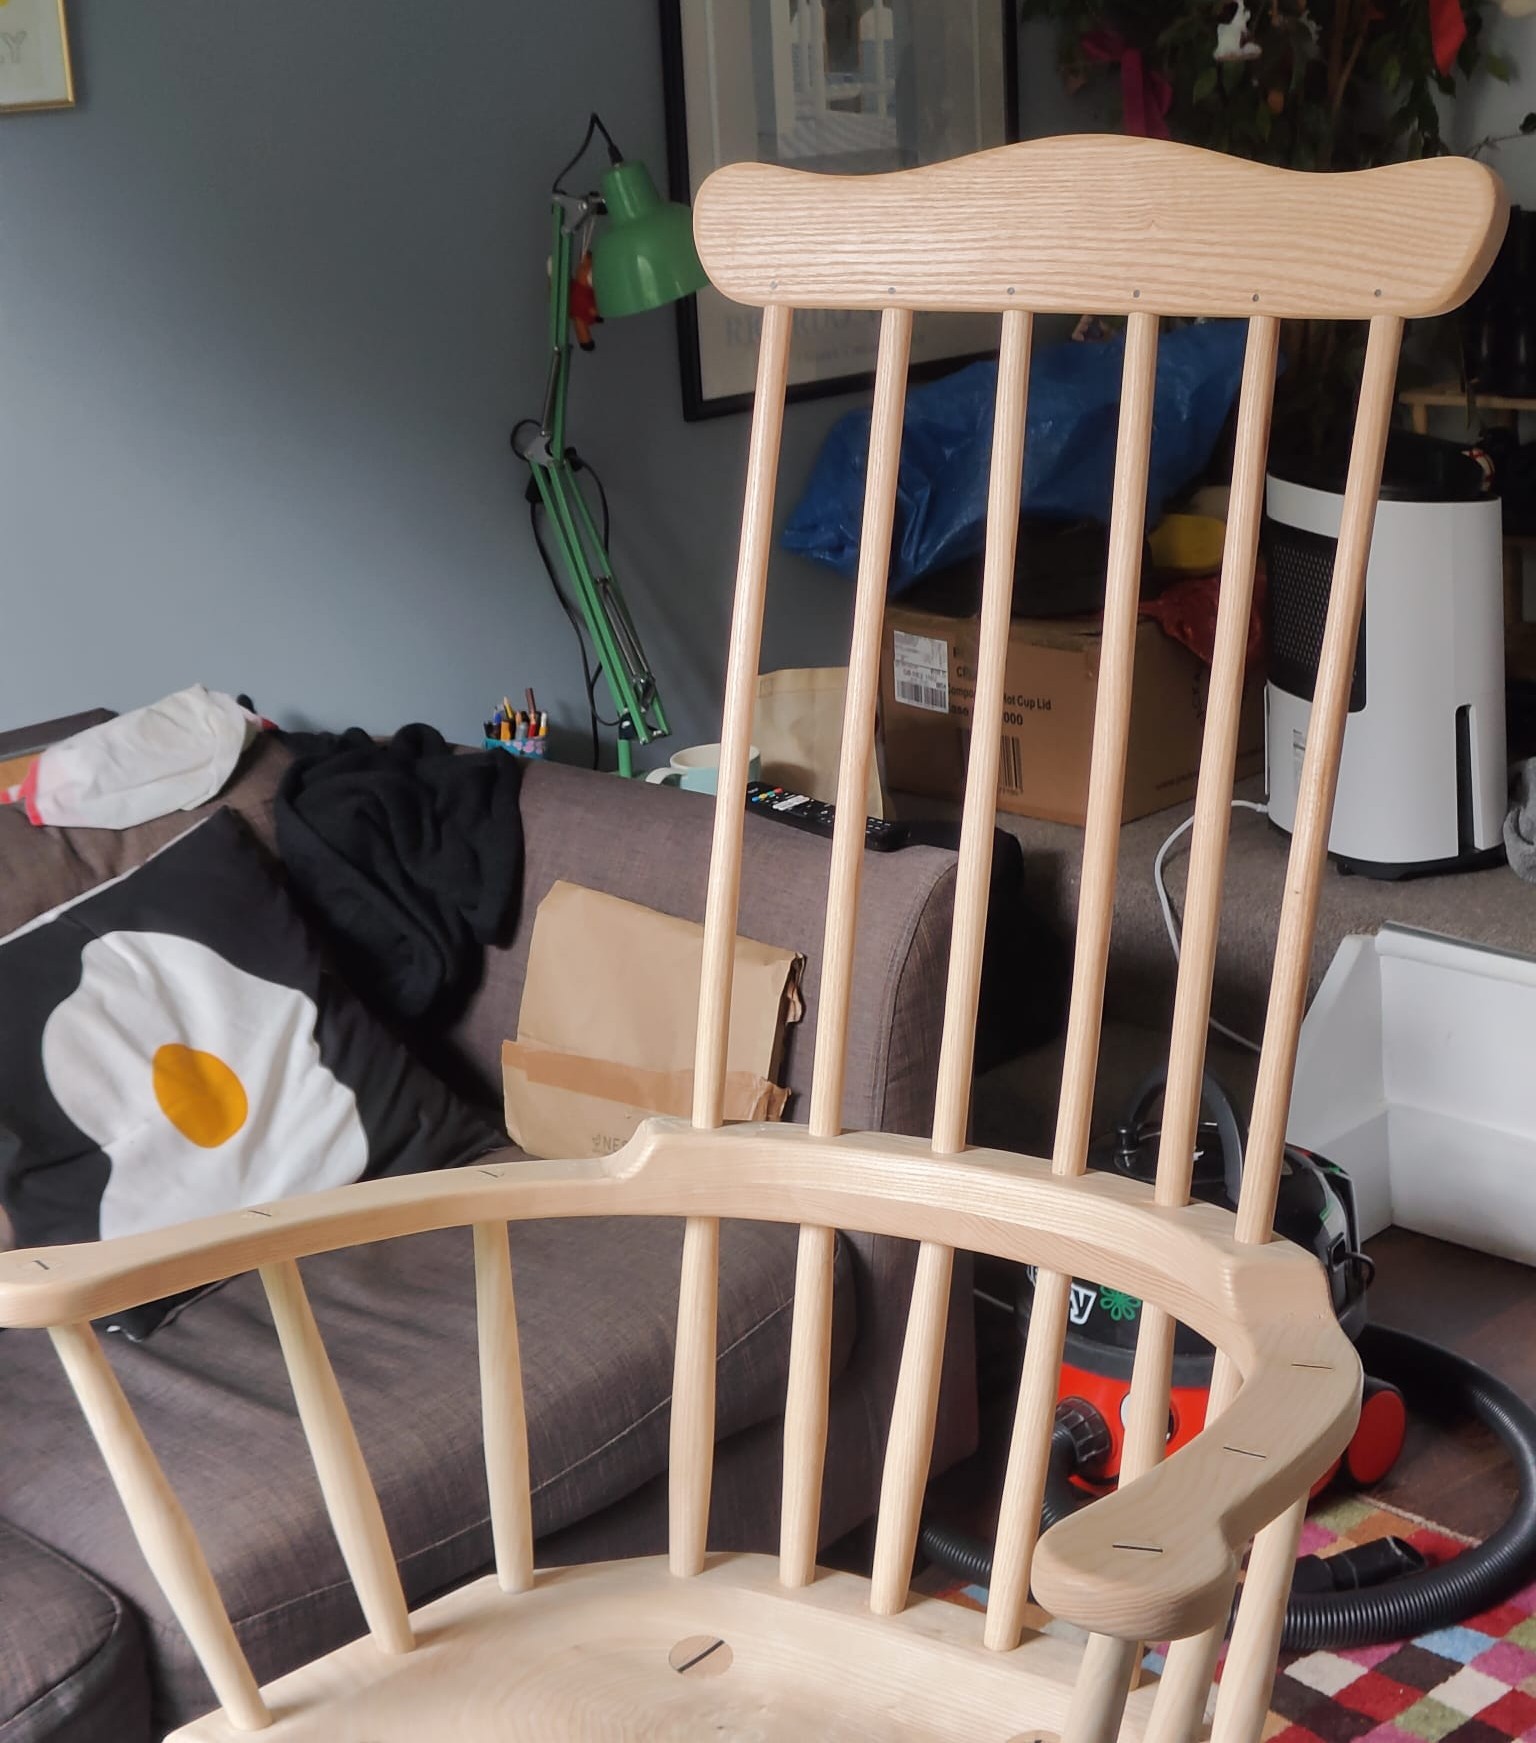
The Armbow
I drew out the armbow on large newspaper sheets, folded it in half and cut out one half of the armbow from one of the 2" thick boards. Using the bandsaw, I resawed this into two bookmatched arms and used the shooting board to flatten the ends ready for the glue-up later.
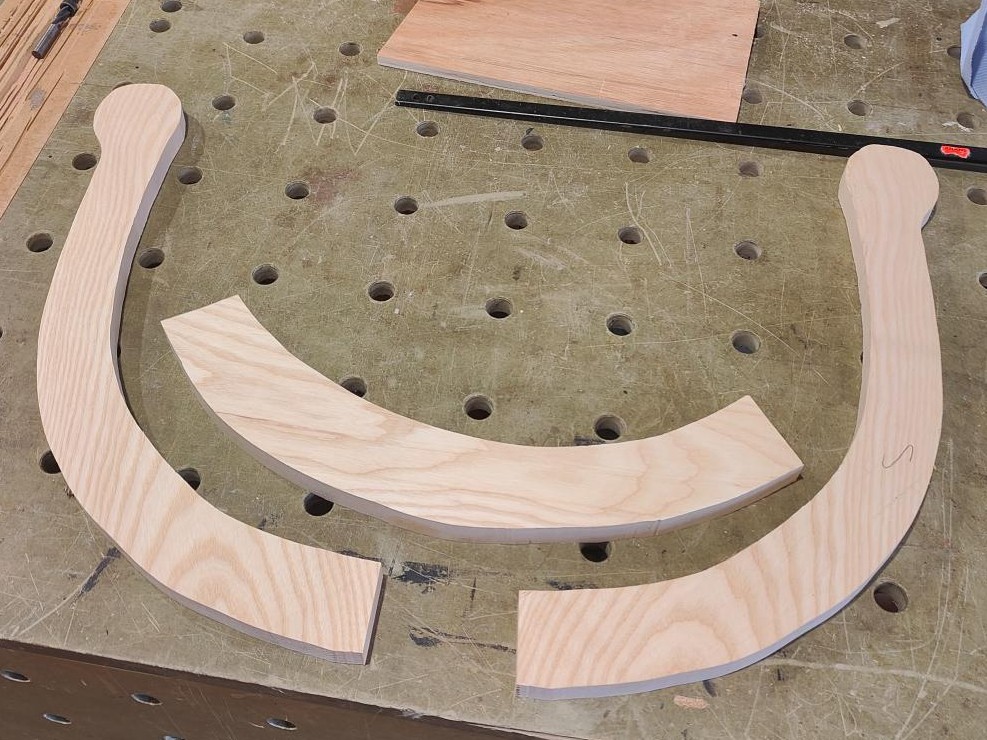
To strengthen the short-grain joint at the middle of the armbow, I added a length of long-grain ash to reinforce what would otherwise be a weak point.
I tried adding a cove to the section between the armbow and added reinforcement, firstly by using a forstner bit, which didn’t work very well. I then used a bobbin sander with a spindle the right diameter which was much more successful.
Next time, I’d try using one continuous grain piece of wood for the armbow. If I were to try using multiple parts again, it’d be nice to try some joinery which doesn’t rely so heavily on the strength of the adhesive, such as a wedged scarf joint.
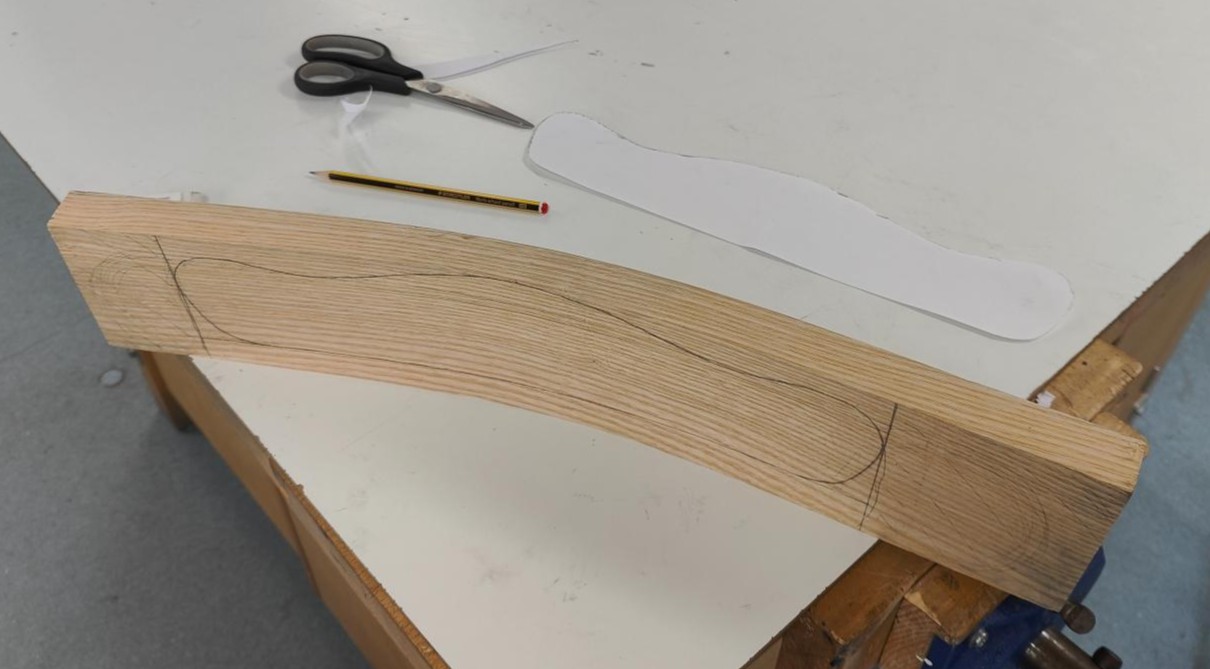
The Crest Rail
I wanted to try steam bending during this project, and the headrest seemed a good place to try. I soaked two 1" boards in water for a couple of weeks and made an MDF form the same thickness as the board width.
Although the advice I’d read was to steam for an hour for each inch of thickness, I ended up leaving it for two hours as I had to refill the steamer several times and wasn’t sure the temperature was high enough consistently to soften the lignin in the wood, making it pliable and malleable.
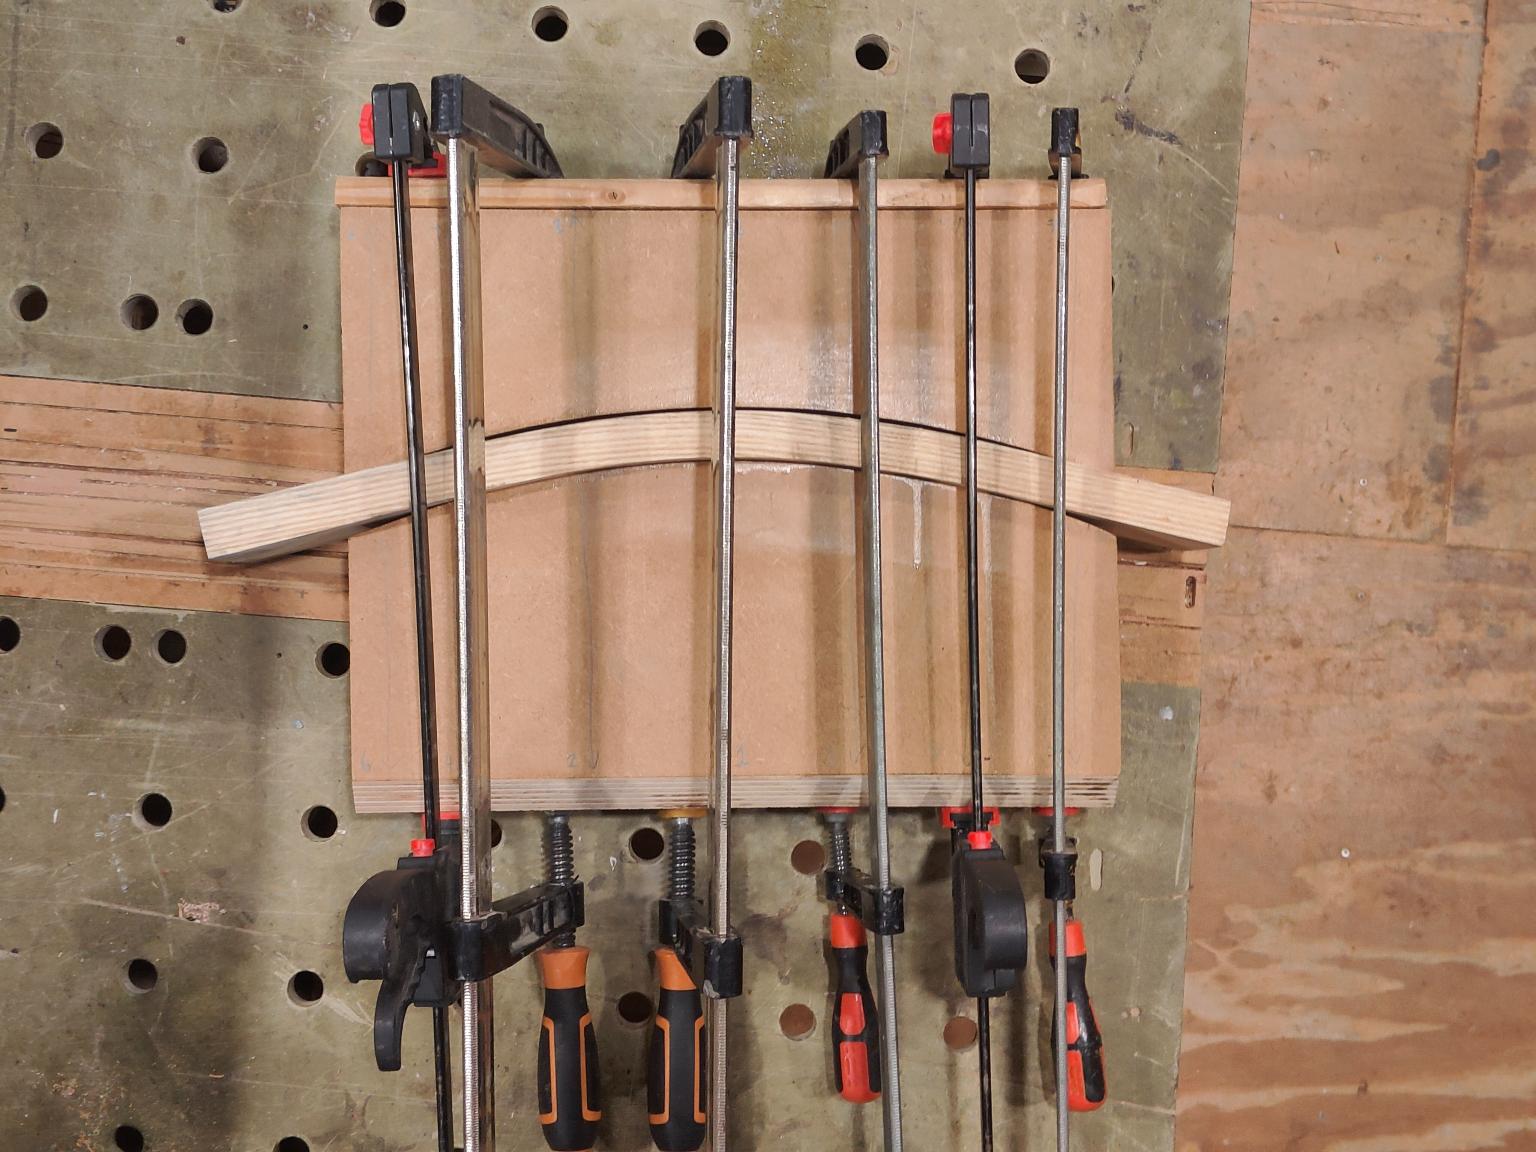
I didn’t accounting for spring back enough in the form, so the curvature on the final board wasn’t quite as noticeable as intended, but with lessons noted for next time, I’'m still happy with my final result.
The headrest was the part I spent the most time sketching out, and after firming my design, I scanned and vectorised it, and cut several versions at various scales from greyboard using the laser cutter to test sizing.
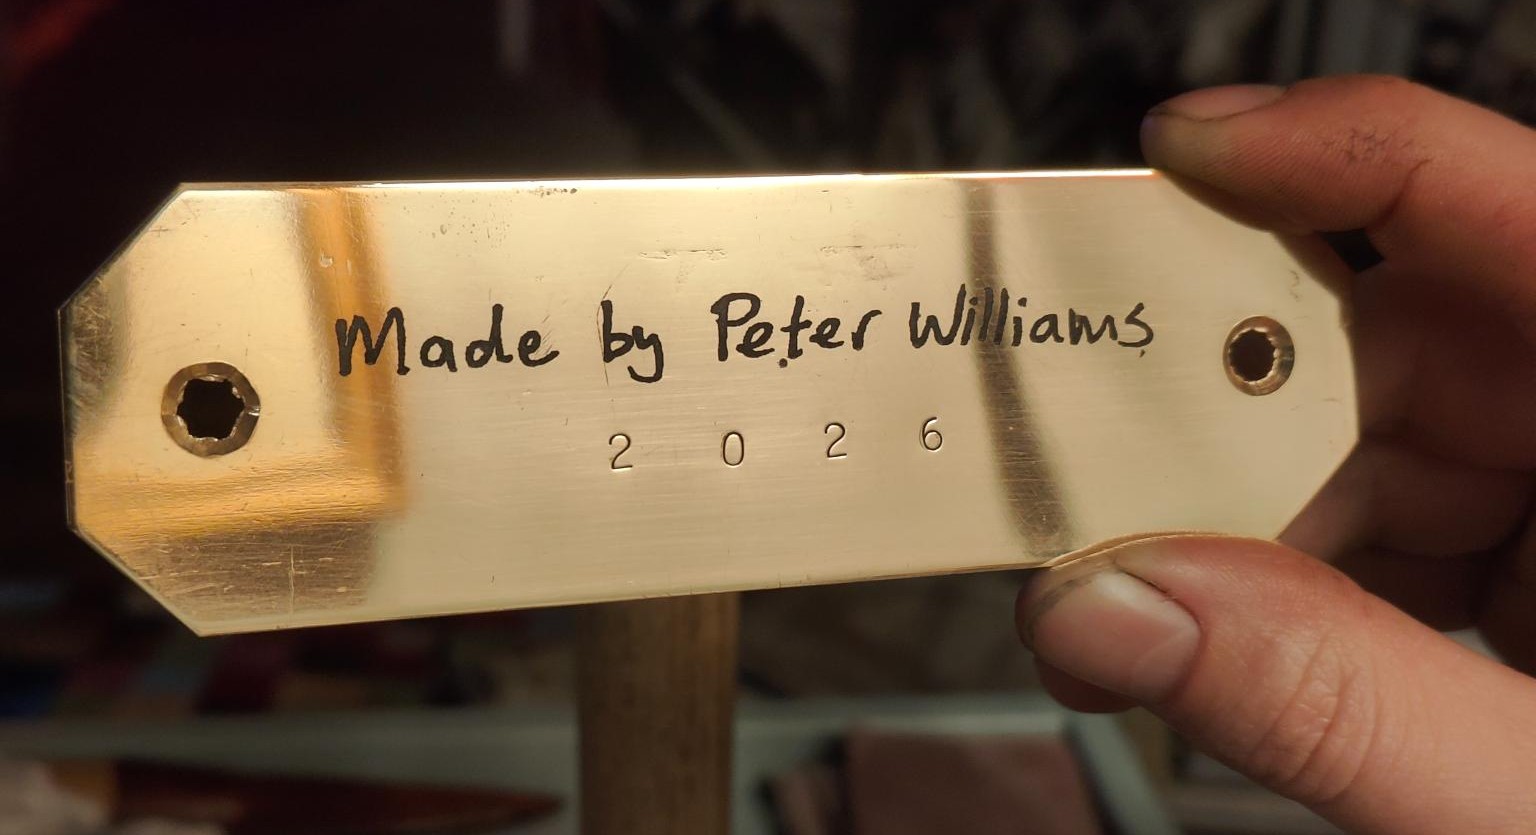
The Project Tag
To leave a personal mark on the chair, I made this brass project tag to attach to the underside of the seat.
I spent a few weeks trialling electro-etching with different metals and using different resists, the final method I used was:
- Cut the brass tag shape from sheet brass
- Sand and polish the tag
- Coat with a solid layer of spray paint (applying resist)
- Handwrite the text to be etched
- Scan and vectorise text
- Etch text through the layer of spray paint using laser cutter
- Make a concentrated salt brine in an electrically-insulative container (plastic tub/glass jar)
- Attach positive electrode of power supply unit to the brass tag, covering everything aside from the area to be etched with parcel tape
- Attach negative electrode of power supply unit to sacrificial piece of metal
- Submerge positive and negative terminals in brine, making sure they aren’t touching
- Turn on power supply unit (I used a 12V and 2.5A power supply unit and kept it running for two hours)
- Turn off power supply unit and detach tag
- Clean off spray paint using acetone or white spirits
- Once dried, add black enamel paint to etched areas
- Clean excess paint off tag using cotton buds
I fixed the tag to the seat using polished round-headed brass slotted screws, rubbing some paraffin wax on the threads first as brass screws are weaker than steel and tend to snap under the torque of being screwed in.
Construction
For most of the build, I used Titebond Hide Glue, and I was pleasantly surprised at its strength. It has a high tackiness which lends itself to getting everywhere but is water-soluble so you can clean it up fairly easily afterwards.
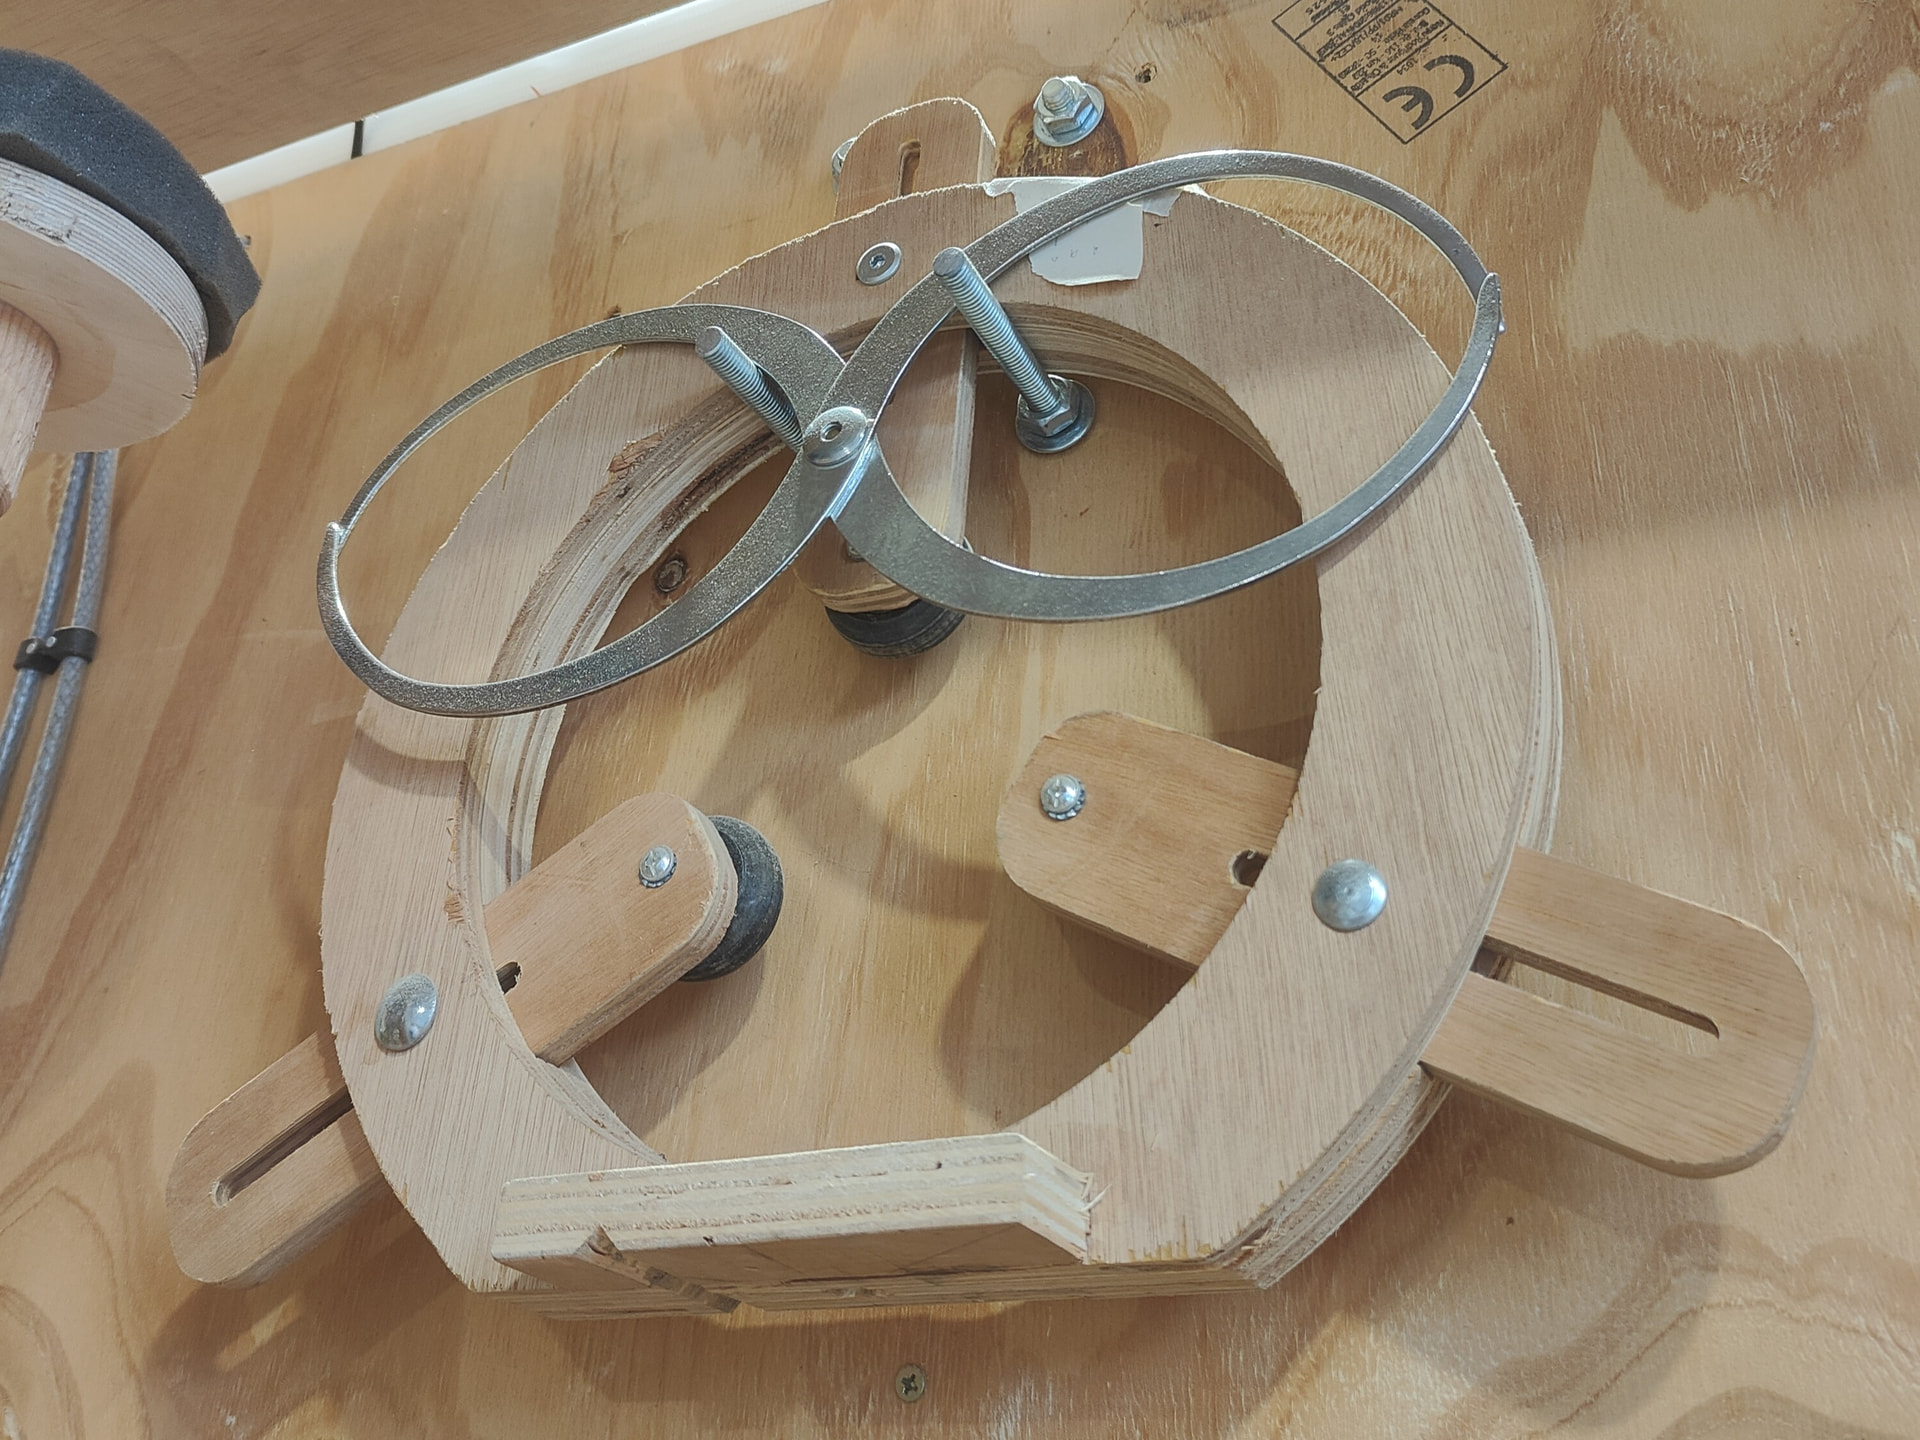
To get the angles mostly correct for the spindles of the chair, I propped the armrest above the seat using two wooden jigs. By blue-tacking bamboo skewers in place, I could then use them as a bastardised bevel gauge to align the drill bit with.

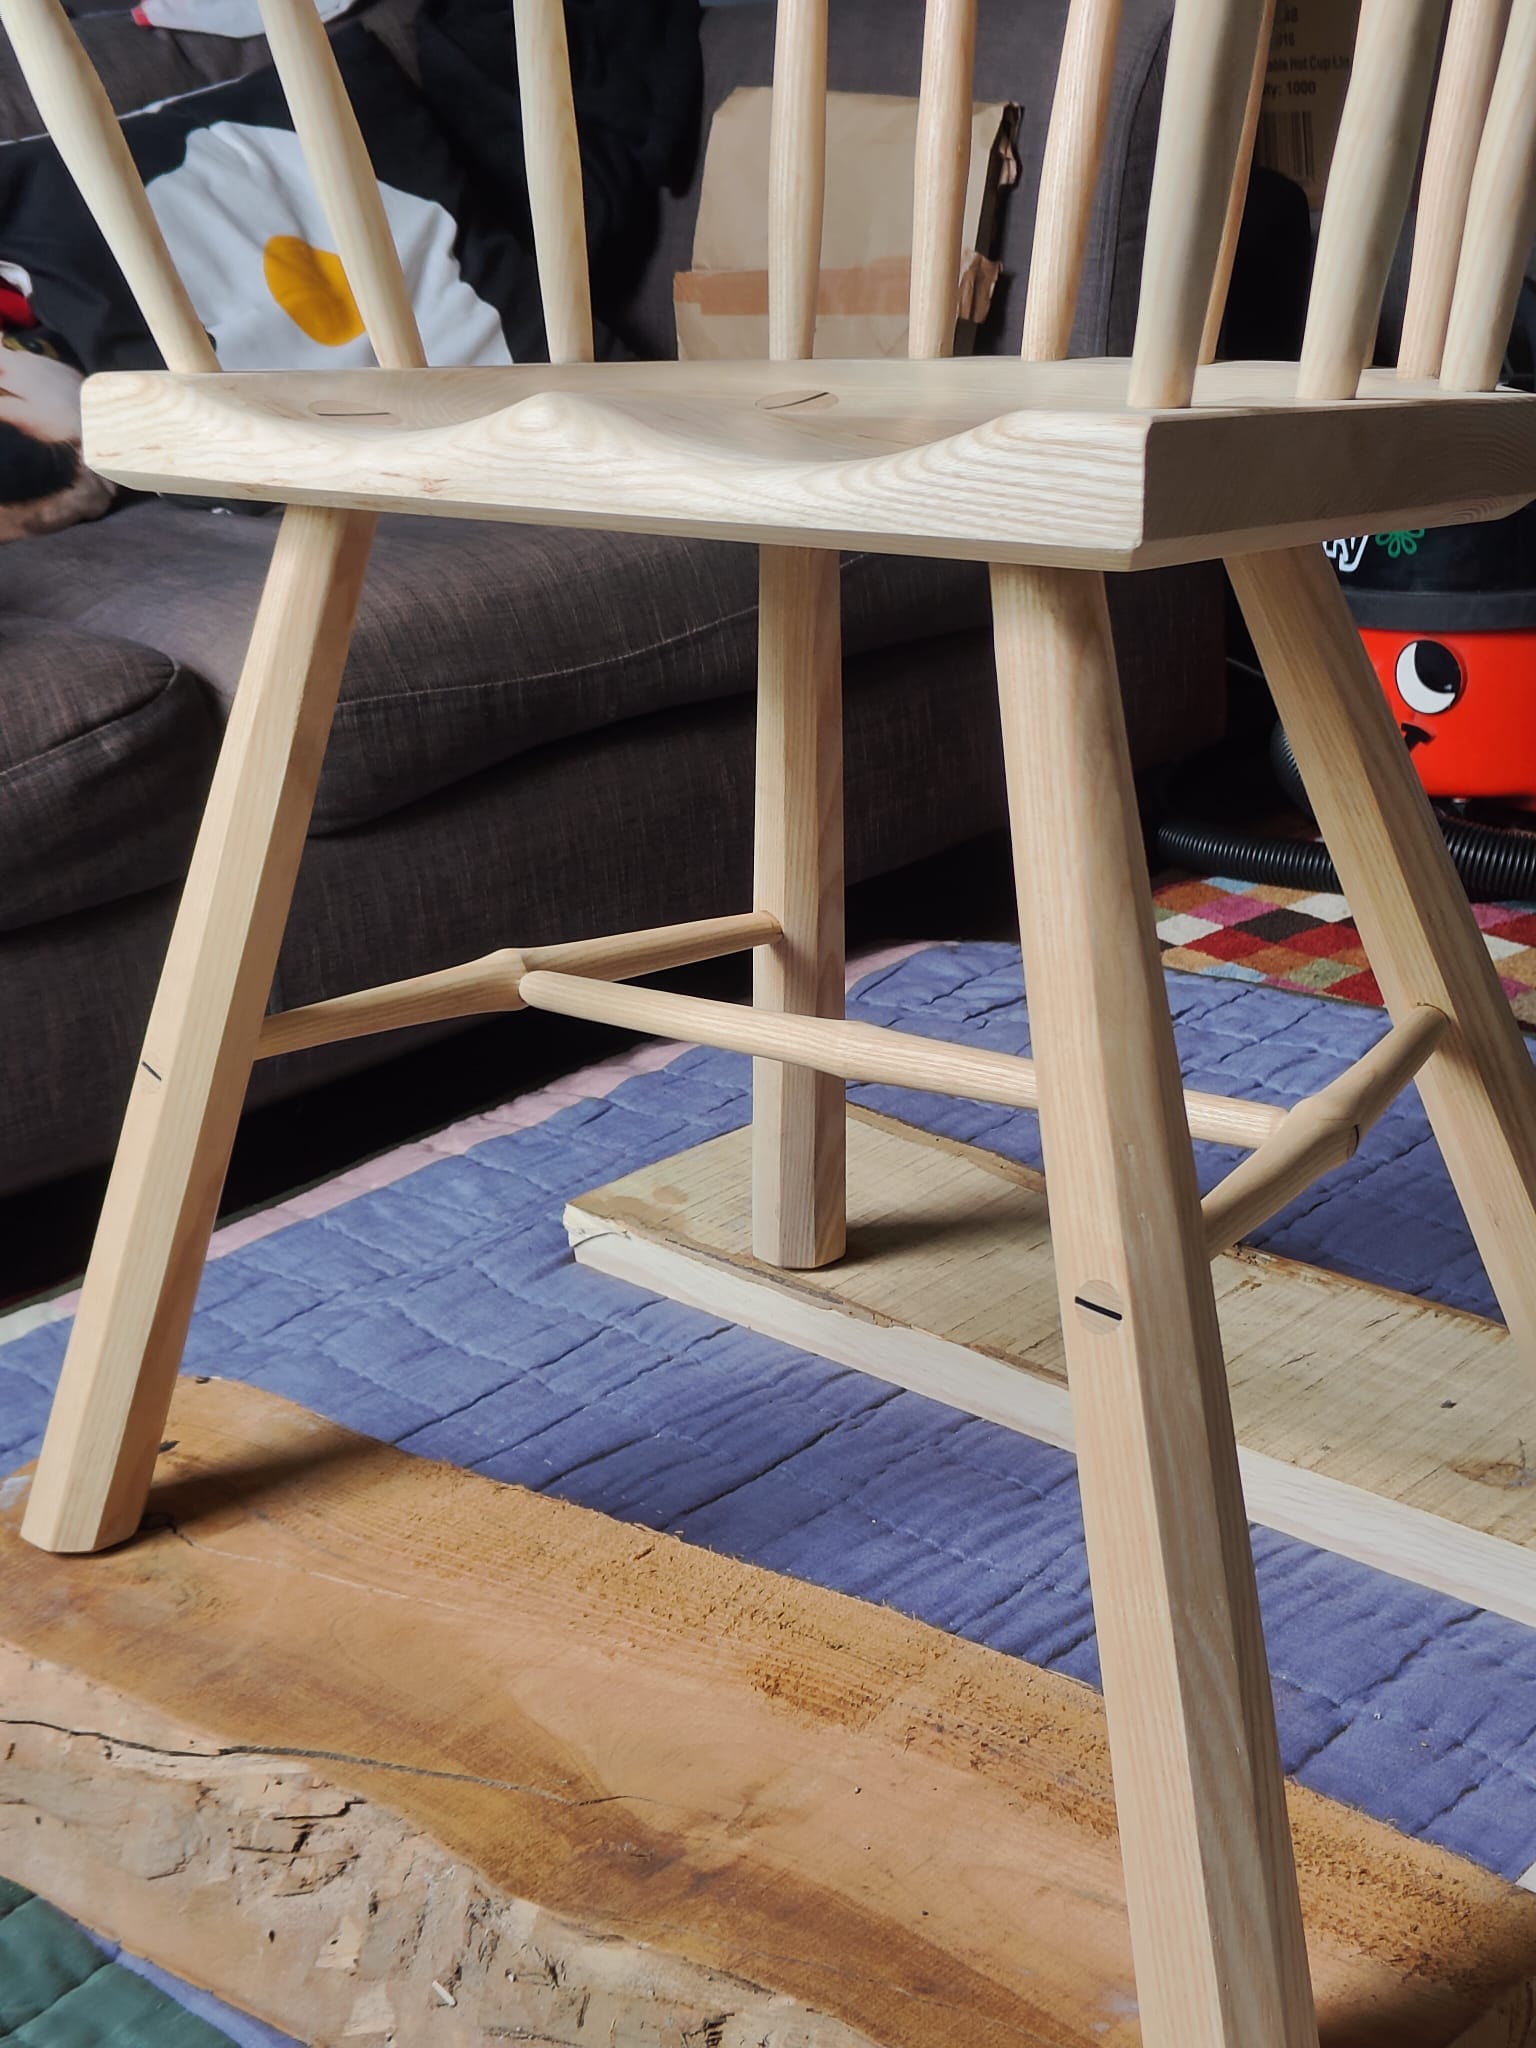
To bore holes for stretchers in the legs, I assembled the legs in the seat and placed them upside down. Then using an extra-long spade bit, I drilled through the centre of one leg while facing its pair, then keeping the drill bit level, bored through the second leg. The process was identical for the medial stretcher.
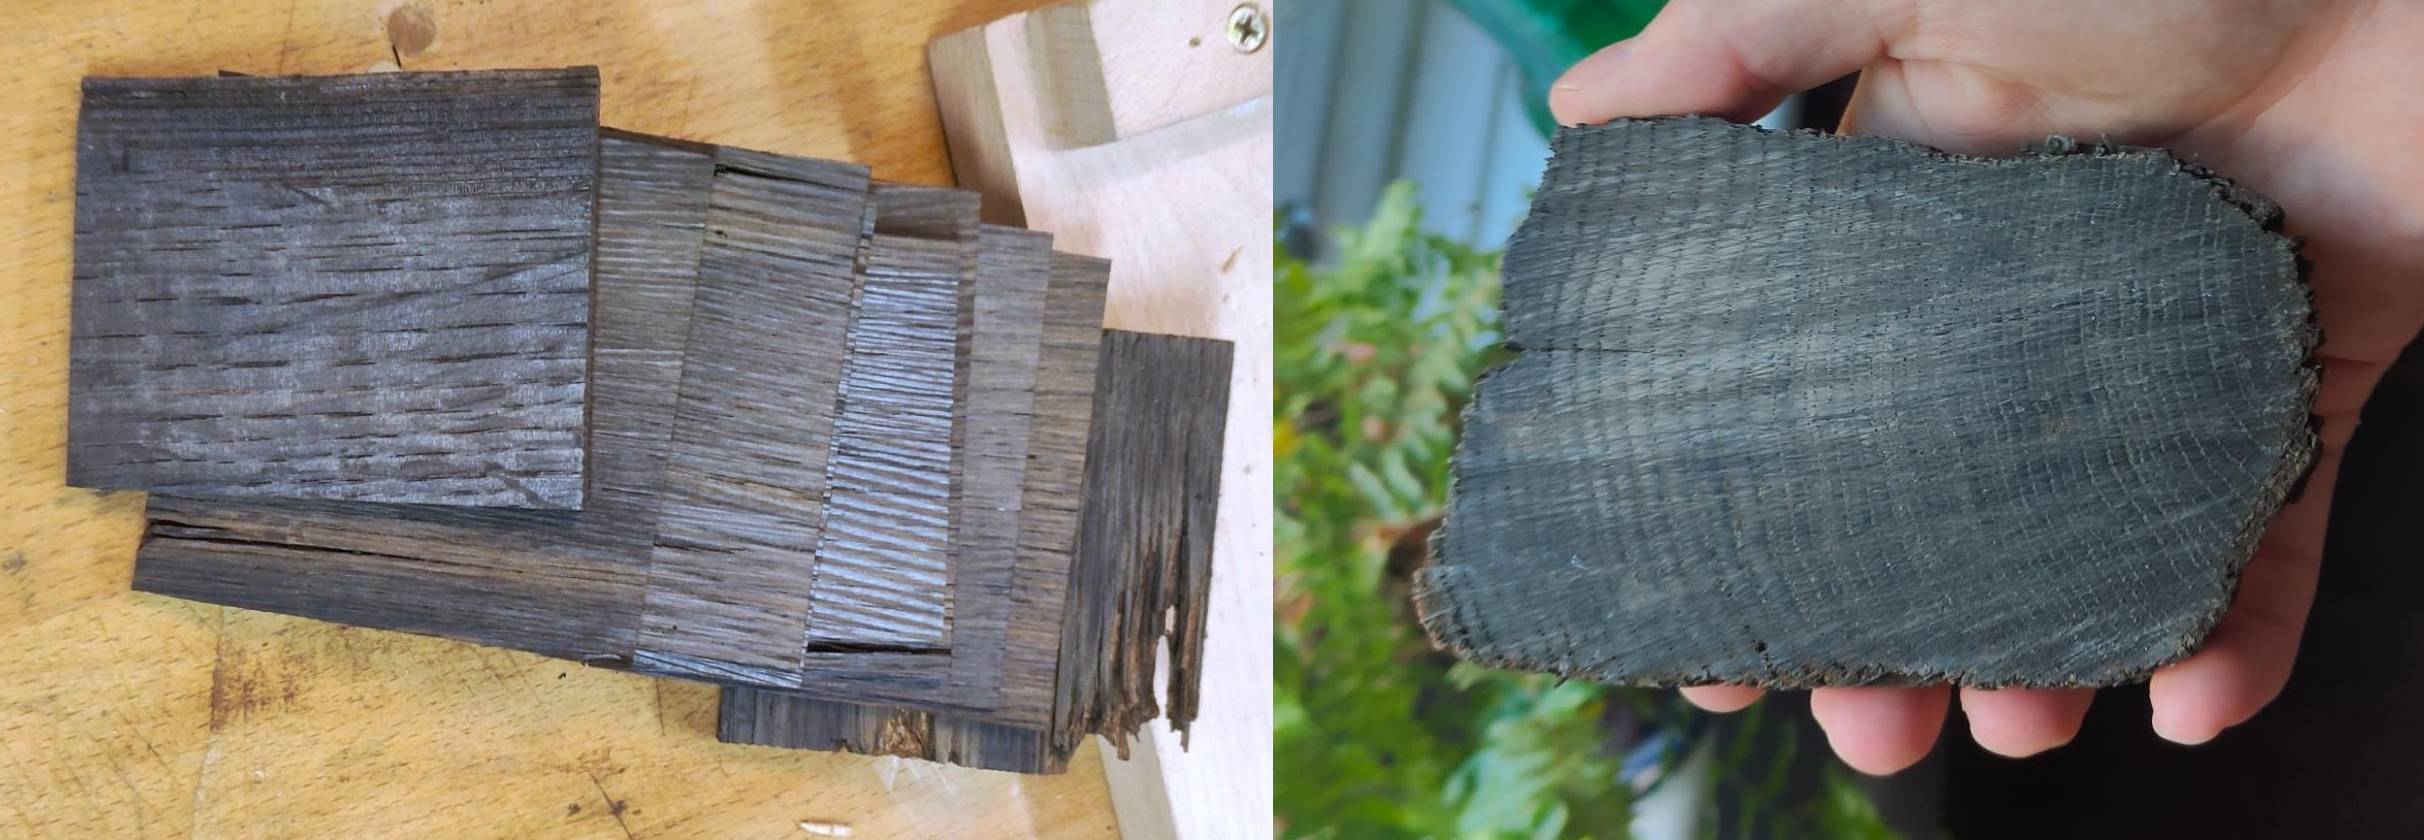
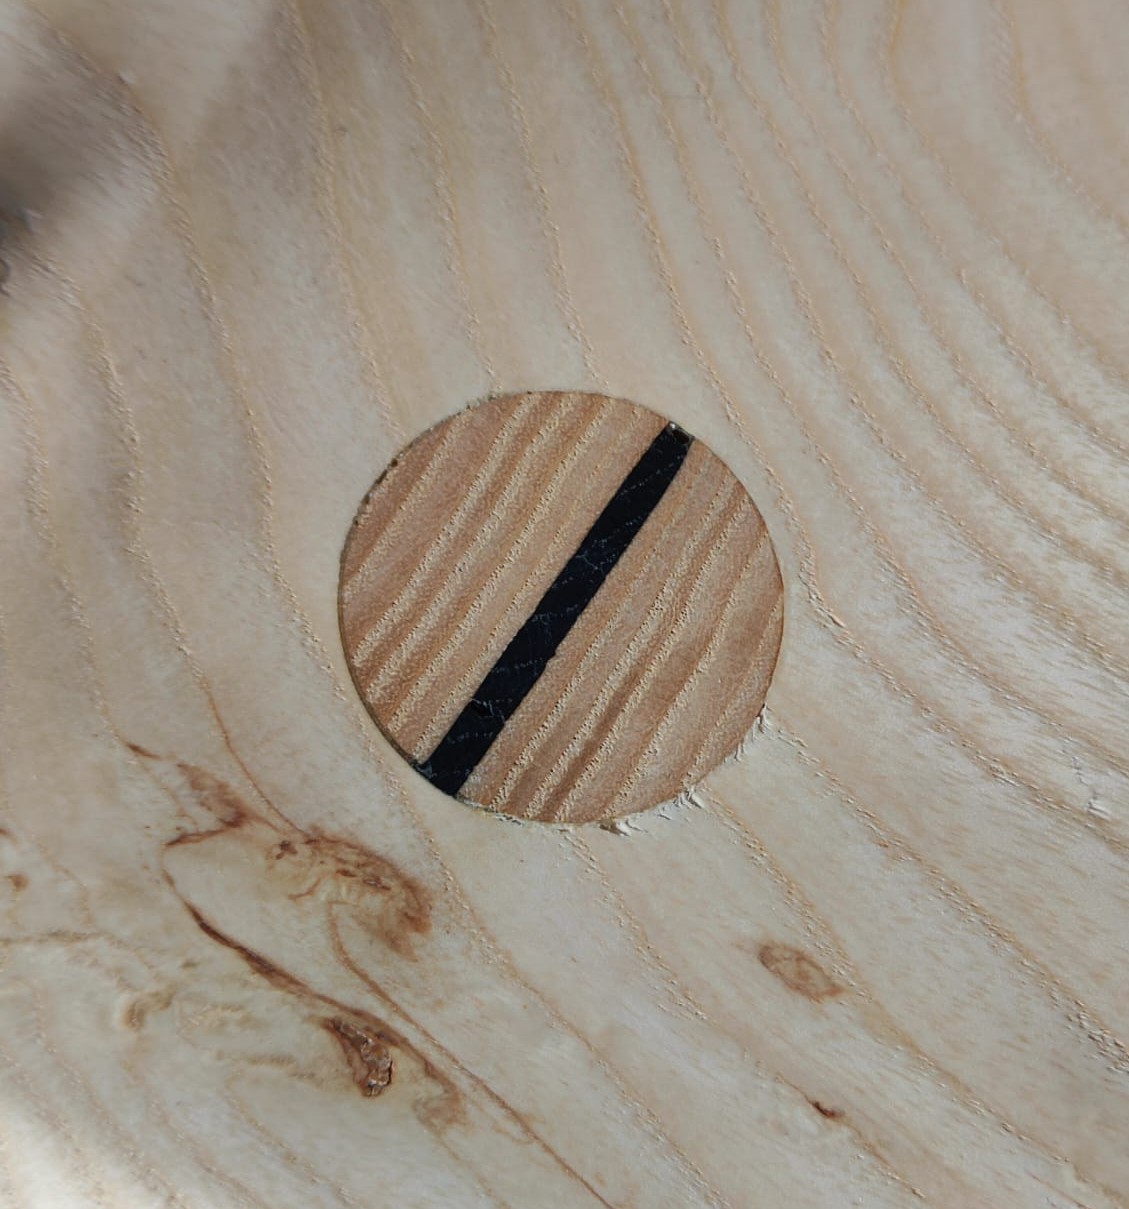
The chair is mostly constructed using wedged mortise and tenon joints, with the wedges coming from a small chunk of bog oak which my dad excavated on an archaeological dig a few years ago. The deep black makes a striking contrast to the pale ash timber and I love the pairing.
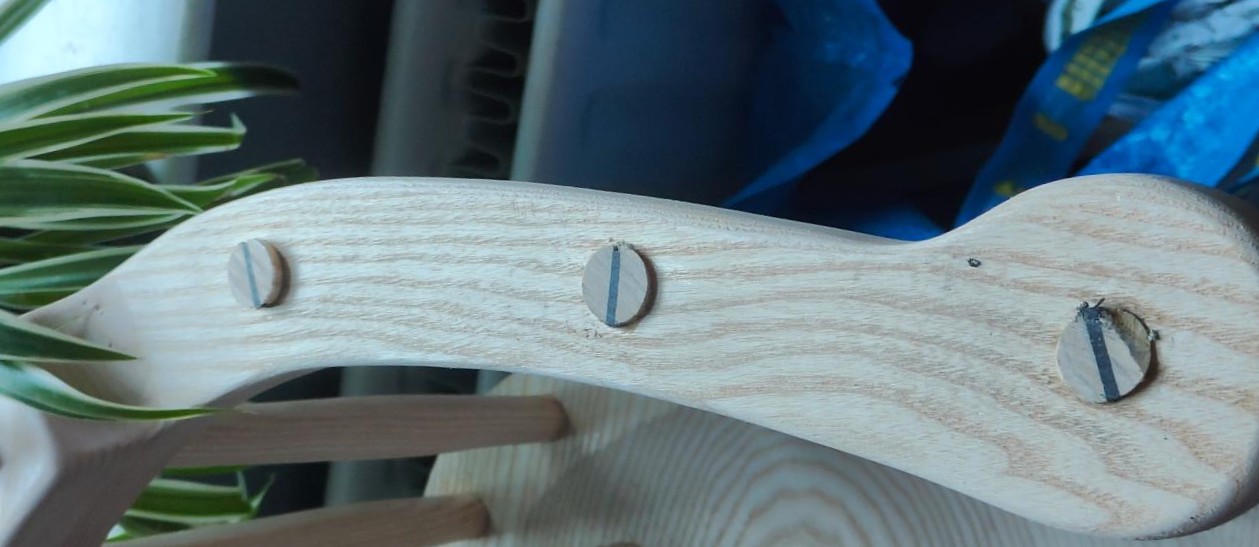
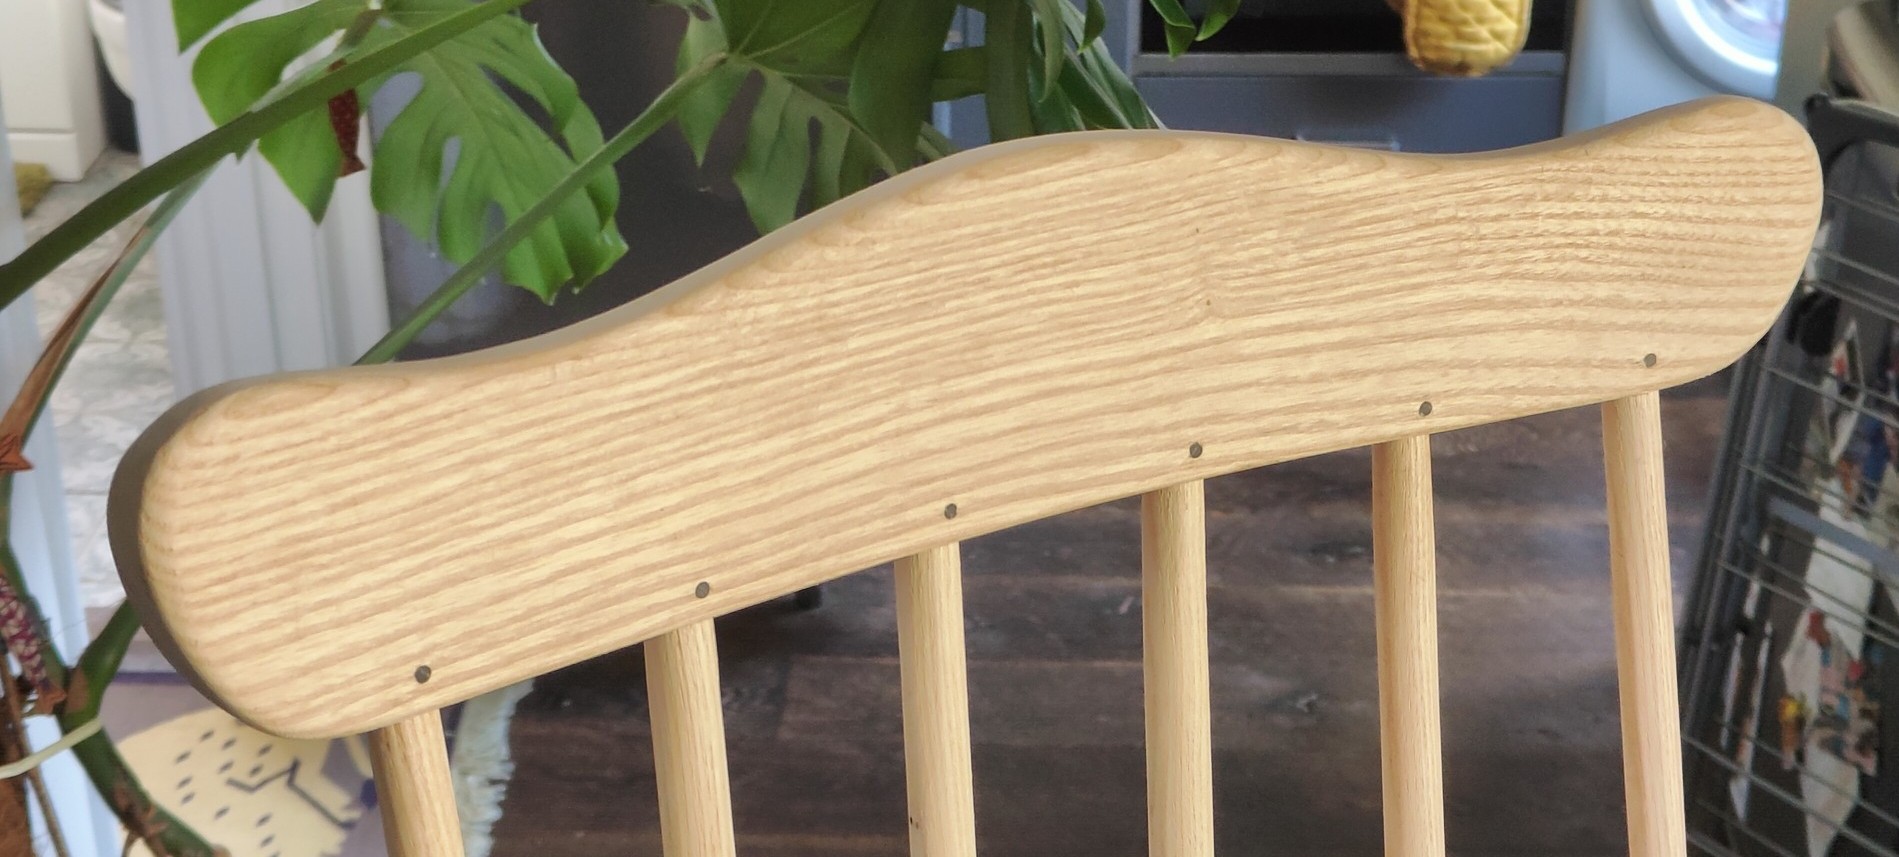
The only other joinery used (aside from blind tenons) are the pins fixing the back spindles to the crest rail.
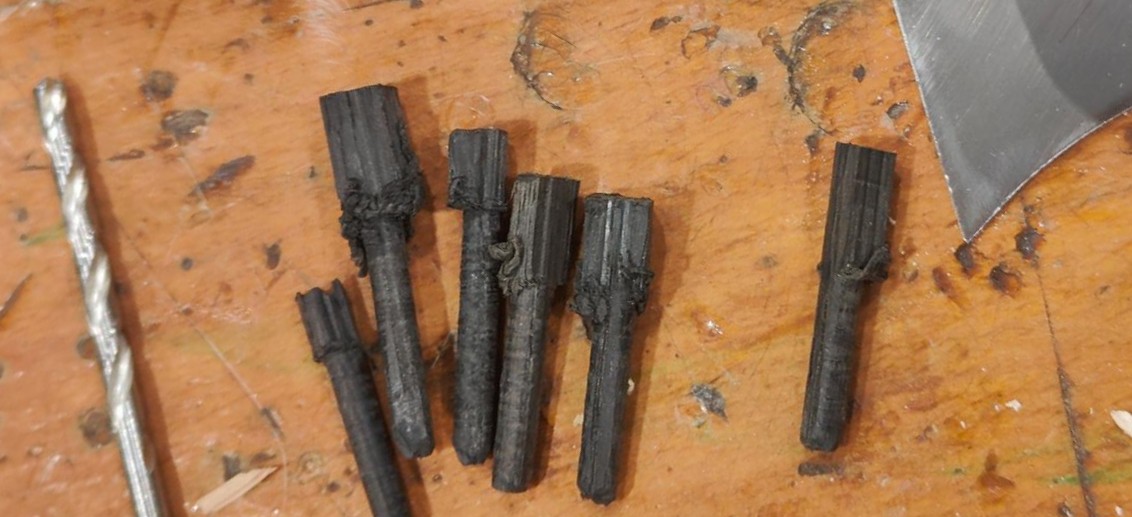
I made these by putting wedge offcuts through a dowel plate, finishing them at 4mm diameter. This locks the crest rail in place mechanically and keeps the contrasting wood running up to the top of the chair.
Finishing
My original intention was to try using a soap finish, sometimes used in Denmark as a traditional way to maintain wooden flooring, it’s non-toxic and easy to apply and reapply but isn’t very durable.
I changed my mind to using Osmo Polyx white tint - 3040 because of its higher durability and slightly higher sheen, along with the fact it keeps the light colour of the ash wood.
Mistakes (and fixes)
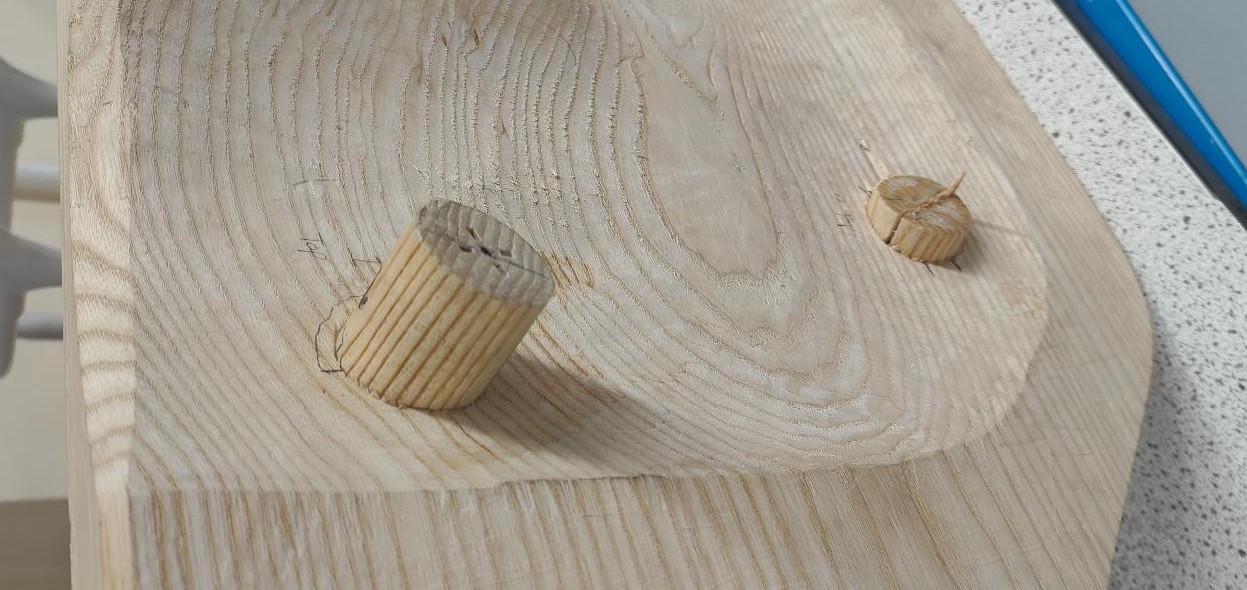
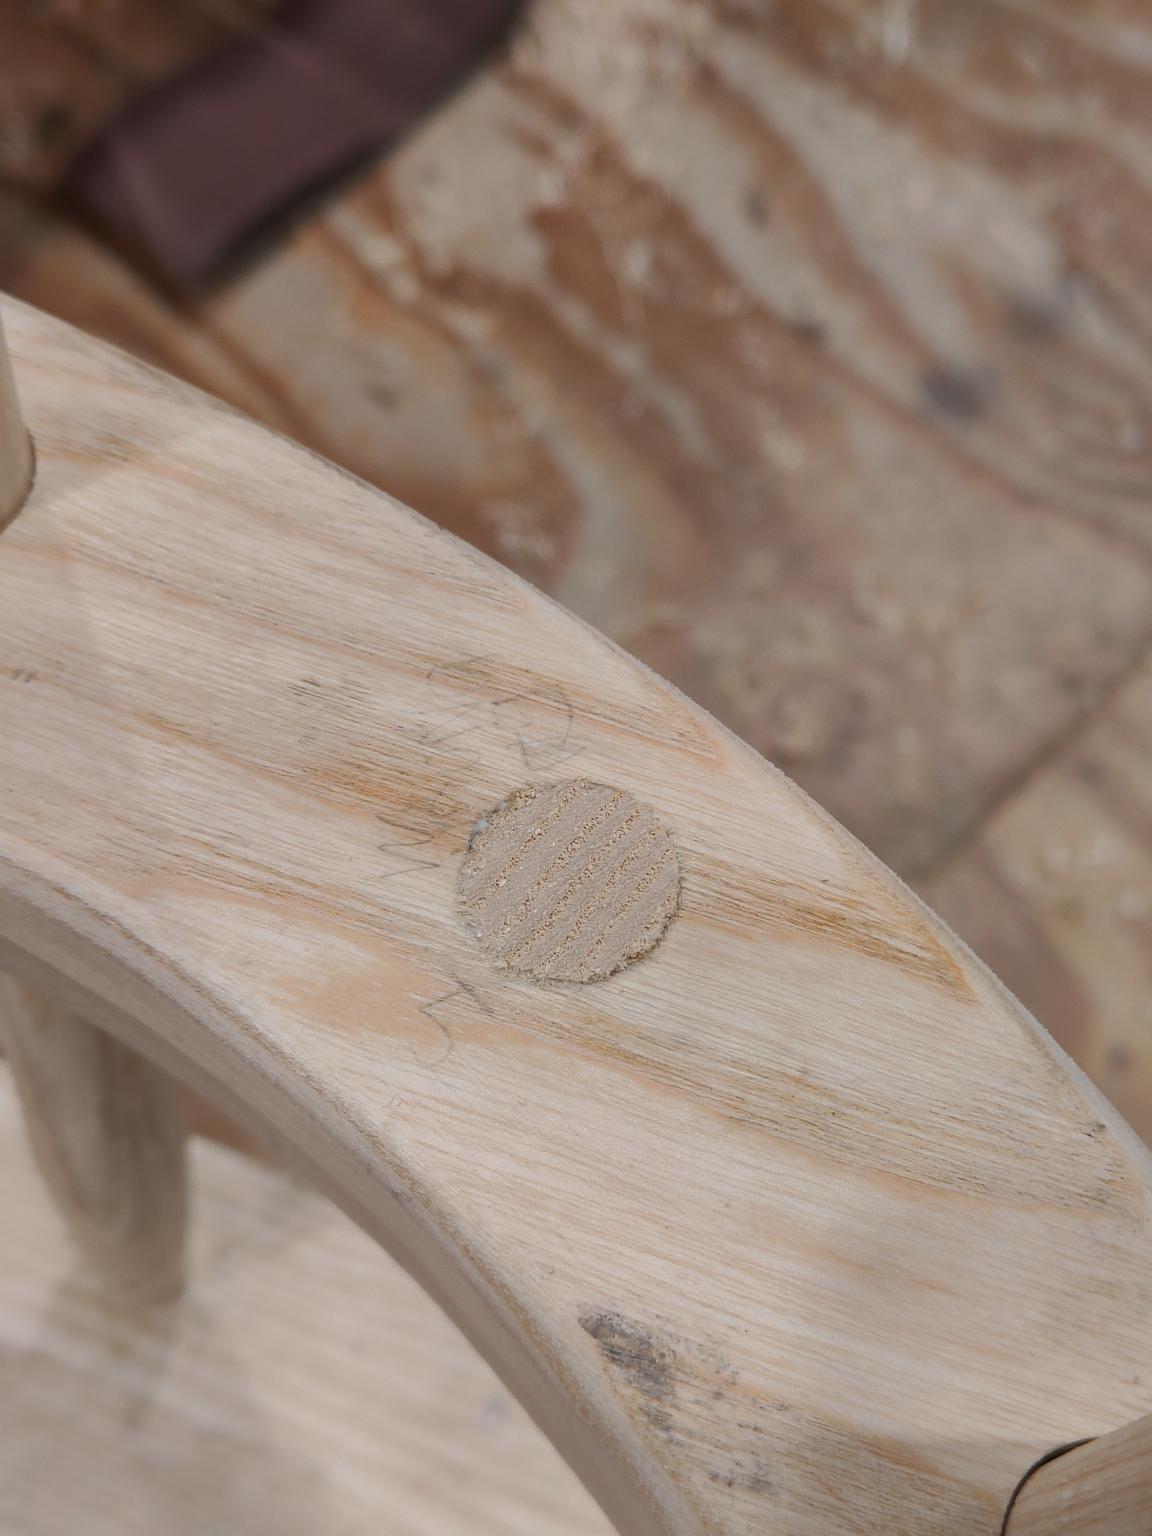
The first and largest mistake, was drilling one of the leg mortices at the wrong angle… and then doing it a second time… This was inconvenient but good practise in repairing mistakes. I turned a cylinder the same size as the mortice, glued and wedged it in place to get a good fit, before re-drilling the hole at the correct angle.
When drilling the mortices in the armbow for the long back sticks, I messed up the angle of the first hole and drilled it at the wrong angle. Same fix as above!
Dishing the seat before deciding on the chair geometry was a bad idea. It made drilling the mortices imprecise and more difficult.
Before I’d glued up the undercarriage, I cut the bottom of the legs level to the floor. DO NOT DO THIS! When assembling the chair, the force of the mallet driving the legs into the seat proved too much for a single point and split one of the legs in the process. This was fixed easily with an extra glue-up, but provided extra cortisol when it wasn’t needed.
Two of the leg tenons didn’t seat properly in the seat, which I later found was due to the leg stretchers not being in the position quite as I’d expected.


Thank you!
Thank you @msparker for letting me hop on an English Woodlands Timber order over a year ago! I also started reading the stick chair book after seeing your post, and generally took inspiration from your write-up.
Thank you @plietar for lending your scorp and travisher to the makerspace which allowed me to dish the seat out by hand.
Thank you @James_Nahajski for inducting me on the big CNC and patiently helping me flatten the base of the seat.
Thank you to @Giles for showing me how to prepare a card scraper.