Saw this the other day, thought it could be useful for a few projects I’ve got in mind.
I’ve used CNC machines that were a fair bit bigger for cutting whole sheets of ply etc, but would like to use the shapeoko to cut a few things out of acrylic and similar - also would be great to drill holes in PCB’s after etching. Can calculate speeds and feeds and all that - haven’t used a shapeoko machine before but reckon I can figure it out. Do I need to do some kind of induction before I can use it or can I just proceed cautiously? Reading back old threads it sounds quirky but manageable.
It could still do with some work to be honest. There was an issue last time I remember looking about it with the router mount being a bit too flexible. Could do with being re-engineered in ally.
It works, sort of. It should be ok for engraving wood but that’s about it. Its not very rigid and doesn’t leave very clean edges, and really struggles past 4mm depth.
We could improve it a bit but might as well build a new stiffer gantry CNC from scratch since this one is on loan.
Had a look at it this afternoon, do we have any more bits/where would they be hiding? There was one in the collet but it had four flutes - which I gather is less than ideal for wood/acrylic especially given our limited speed control… Had a good play around with a pen attached though and very psyched for more adventures.
We have speed control. Its a big thing with a wheel and variac written on it.
The ryobi takes 1/4"bits. Its a trimmer router designed for wood. There is a small chamfer bit for it knocking around that you could do wood engraving with.
There is also the dremel but you will have to switch the 3d printed clamps for the old aluminium ones to put it back on.
according to @joeatkin2 the voltage and speed are linear proportional. Top speed at 230v is 33,000 rpm so that should give you an approximate idea of rpm
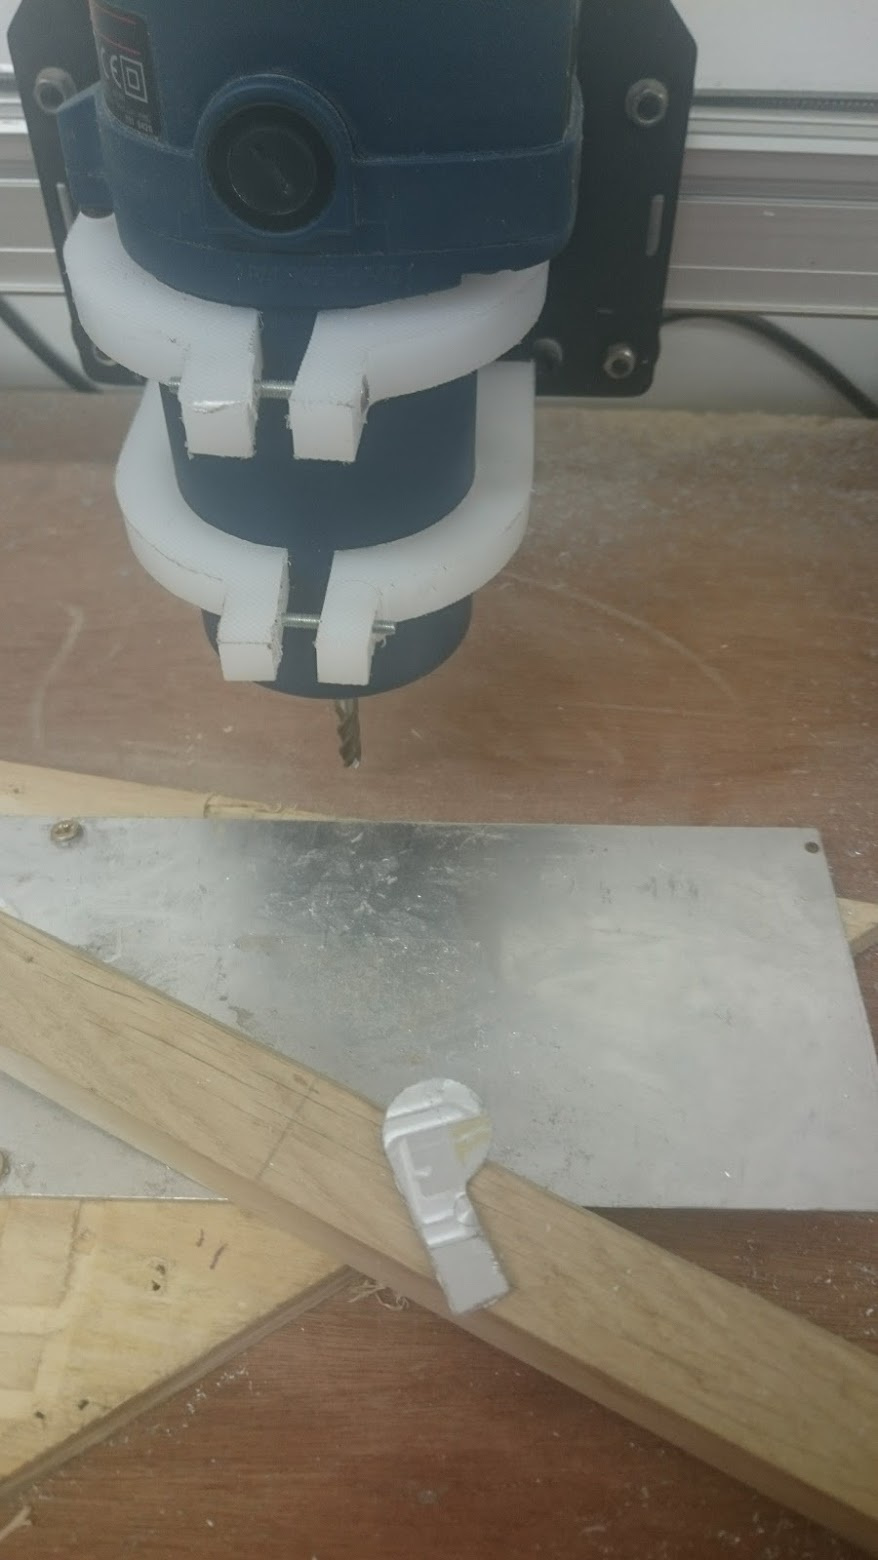
Made some clamps out of an old chopping board I had kicking around. It feels reasonably rigid (though obviously not as much as aluminium). Was impressed how excellently LDPE chopping boards machined - the finish was very good with the exception that I forgot to add holding tabs so the bottom was a bit rough. Also reattached a wheel that I noticed had fallen off.
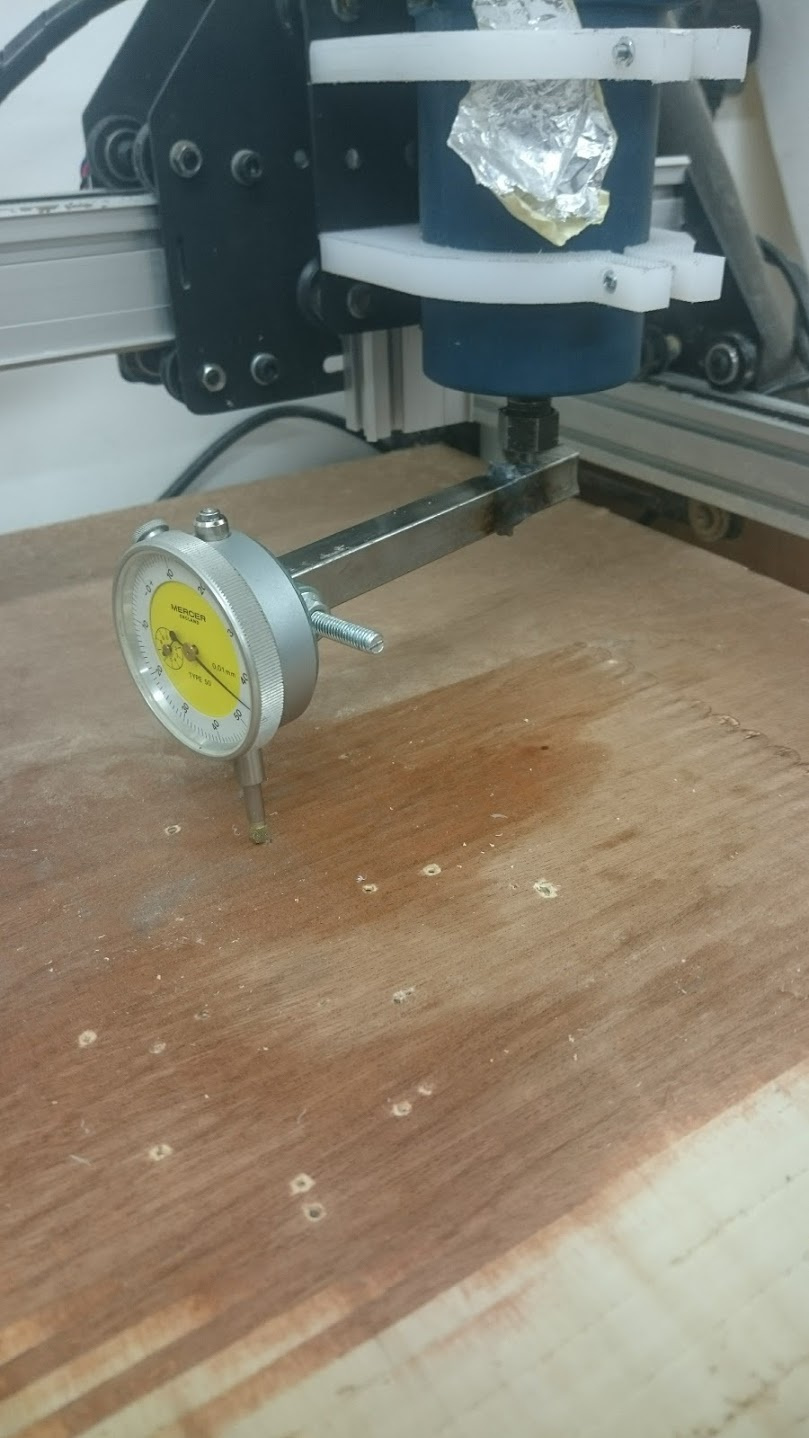
Next thinking is to check it’s square, then level the bed, then square the spindle - I reckon using an old endmill in the chuck attached by a rod to calipers (or ideally a dial indictator if we have one) might be the thing.
Also need to figure out how best to attach aluminium - heard double sided tape is good…
We had a good session on the shapeoko the other night - using a clamp for the dial indicator. Initially, it was welded - but turns out this made the (hss) tool exceptionally brittle and it cracked in use. So we used a press fit for the second attempt.
We got some good measurements of the shapeoko - deflection is mostly in the y direction (front to back) - x (left to right) is actually fairly rigid. We could deflect it (using reasonable arm force) about 1 degree in the y direction but more like 0.05 degree on the x. This means that cutting a 10mm deep slot, it would be able to deflect 0.15mm in y direction - enough to cause massive problems when cutting aluminium etc. Whereas in x direction it would be more like 0.01mm - hopefully low enough to avoid any issues.
The issue we don’t think is the clamps - instead, it’s in the v wheels that slide it across. Not entirely sure how we could make these better.
One interesting workaround might be to cut most of the item with x axis cuts only - or even reduce y feed to much lower than x - I’m not sure if either of these are possible in fusion?
We also need to get it straight - which is currently annoying trying to shim it. I wonder about making a clamp where the shapeoko is held in place with 3 screws (like a chuck) and each screw could be adjusted - thus much easier than trying to add bits of foil etc.