Hi all,
Over the last week I have been working to get the FlashForge Dreamer up and running in the space. What’s special about the Dreamer is that it’s a dual extruder 3D printer and so allows us to print 2 different materials/colours at the same time.
As neat as this functionality is, setting up the printer proved to be a little bit fiddly. However, I have had some success.
Some of you may have already seen in person the progress I’ve made. And for those that haven’t, please admire this successful ‘calibration cube’:
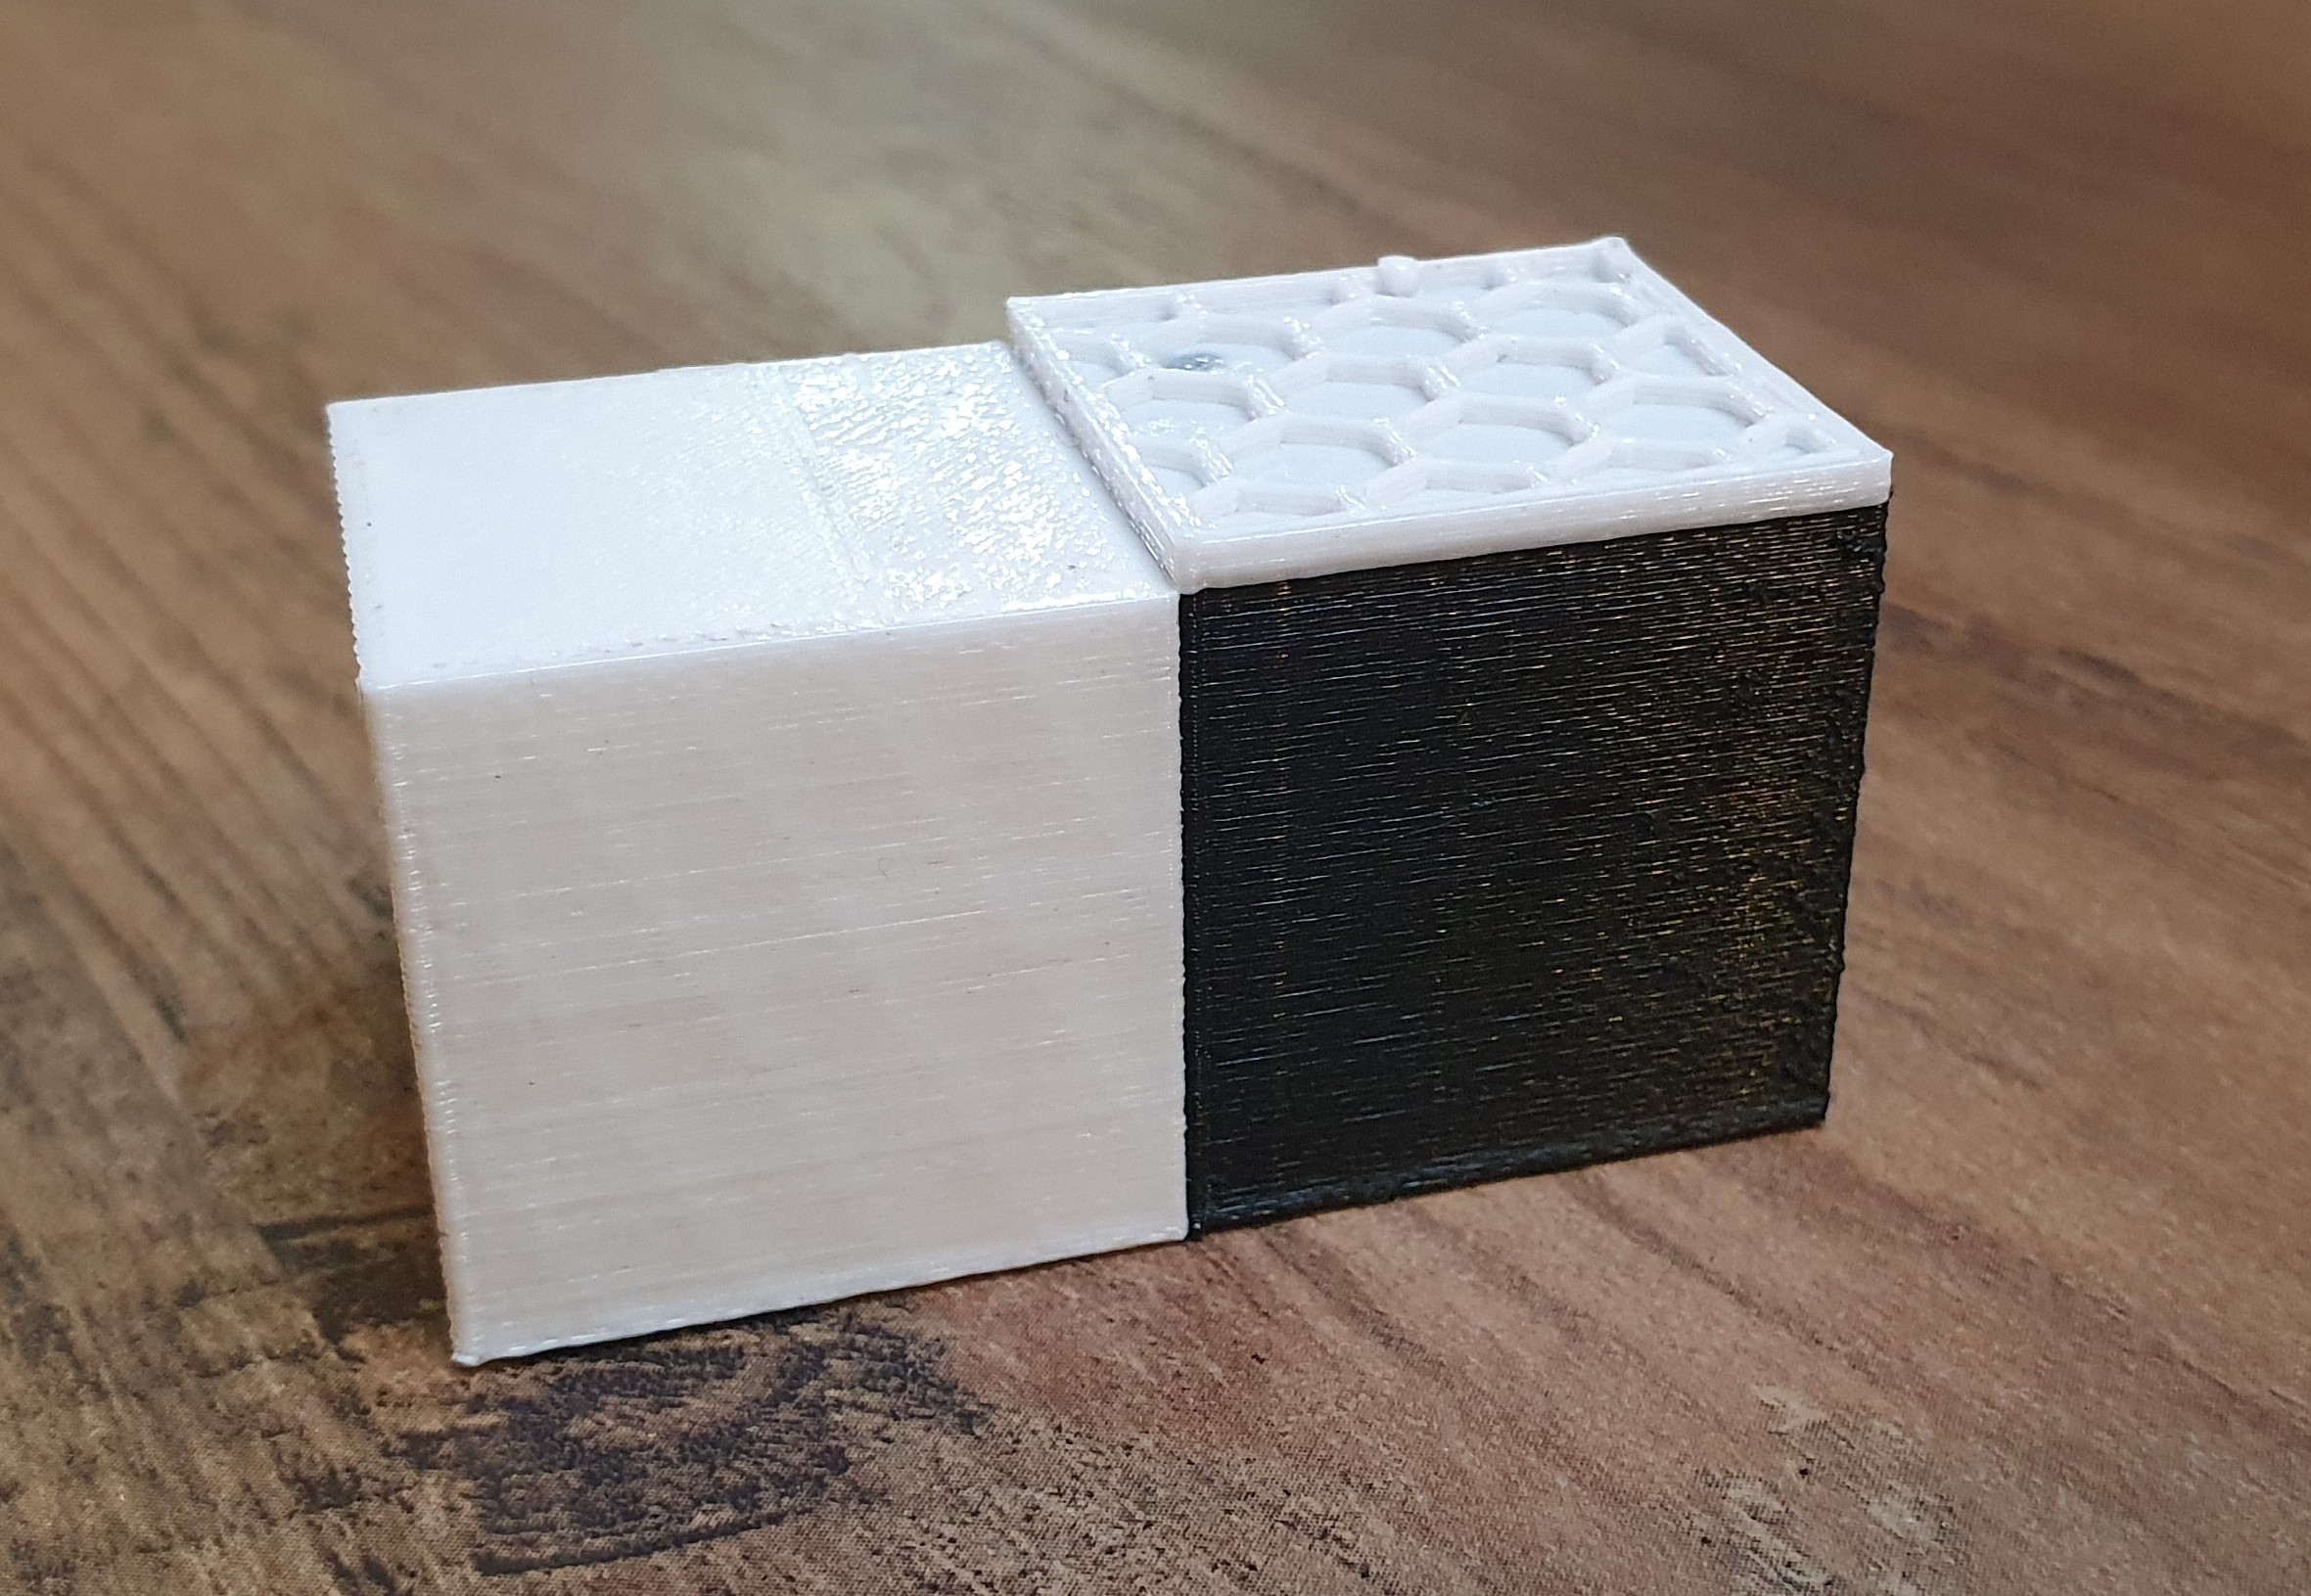
Looking at the cube closely you’ll notice a few interesting things:
1. The white layer on top of the black cube looks incomplete and has in-fill structure:
You would be correct. I cancelled the print because it would have taken another 45 minutes and we’d already proved that the print was going succesfully.
2. On top of the white cube, the right hand side looks to be more polished:
Well spotted again! This was caused while the first white layer was being printed on top of the black cube. The second extruder was still hot and touching the top of the white cube, slightly melting it and ‘ironing’ it out. If you really want to avoid this you’ll need to think hard about which extruder you want which material/colour to come out of. Otherwise, ironing is a setting that most slicers also support if you delibertely want this effect.
3. The black cube looks to have a vertical line going down the left side:
Every 3D printer nozzle dribbles a little bit when it it’s paused/moving and not printing any material. This is especially the case with dual extruder 3D printers where the second nozzle might not be printing for 10’s of seconds at a time. In order to mitigate this and keep the quality of the print, a setting can be used that creates a secondary ‘shell’ around the print to capture any excess that may have oozed out of the nozzle as well as re-priming the nozzle. Though, even with this setting it’s still possible for a tiny bit of excess material to remain and get passed onto the print itself.
While I would class this print as a definite success. The process of getting the print to work in the first place on the printer was far from simple. And so for the mean-time I want to continue working on the dual extruder printing process workflow to simplify it so that it becomes as simple as a one-click ‘slice’ press in Cura.
Looking forward to having the FlashForge Dreamer up and runnign soon!
