The concept was to mod this cheap Chinese JOYO compressor and refinish the enclosure with 70s/80s New York subway graphics.
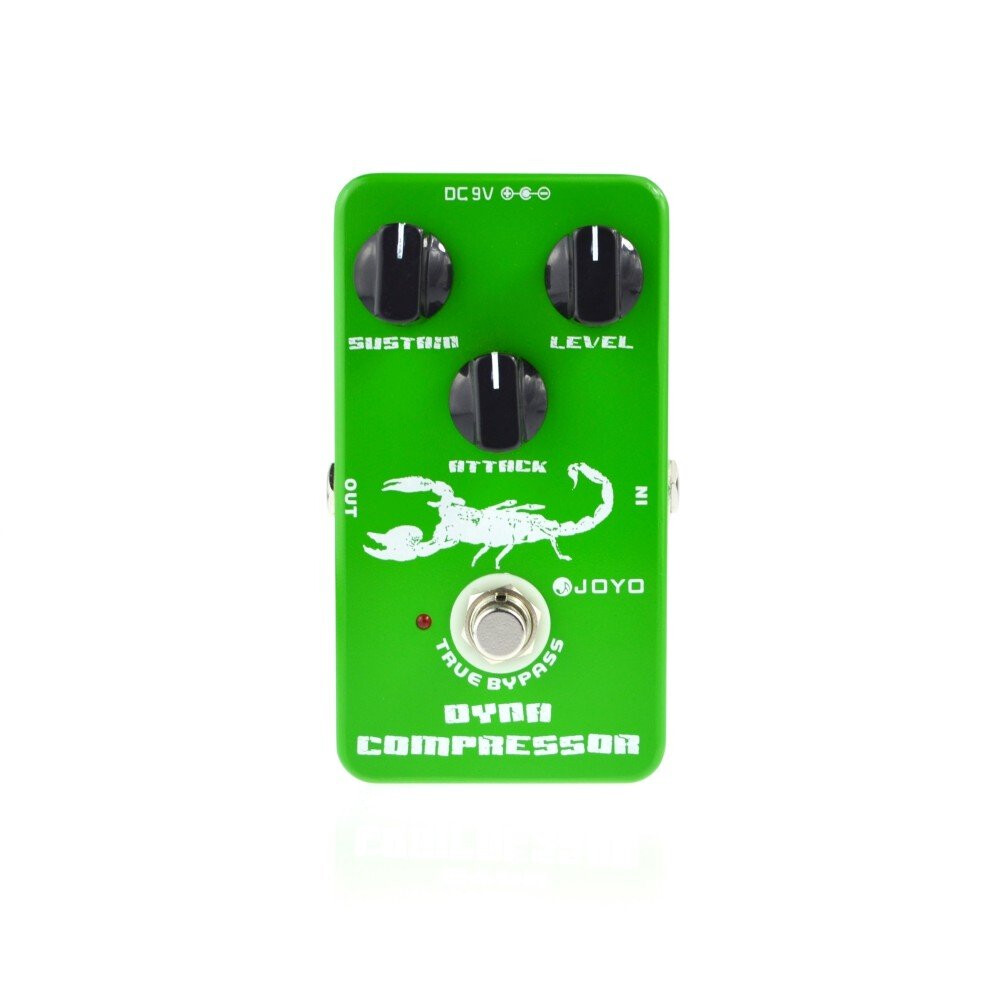
The Joyo JF-10 is essentially a clone of the classic Ross compressor of the 1970’s, also marketed as the popular MXR DynaComp. Like all compressors, it smooths out the volume difference between loud and quiet sounds coming out of the guitar. Joyo made a few “improvements” to the circuit, including a true bypass" buffer, and an “Attack” knob which was not included on the original DynaComp but was added later by MXR. However, they also changed a few component values, probably to improve the tone characteristics of the pedal. The purpose of this mod was to return it closer to the original design which many Nashville guitarists love.
The full mod instructions are at:
https://www.freestompboxes.org/viewtopic.php?p=306251#p306251
It’s a popular pedal for modding because it uses an old-school PCB instead of the modern SMC surface-mount method, which makes it easier to de-solder and replace discrete components. First step was to dismantle the pedal for painting:
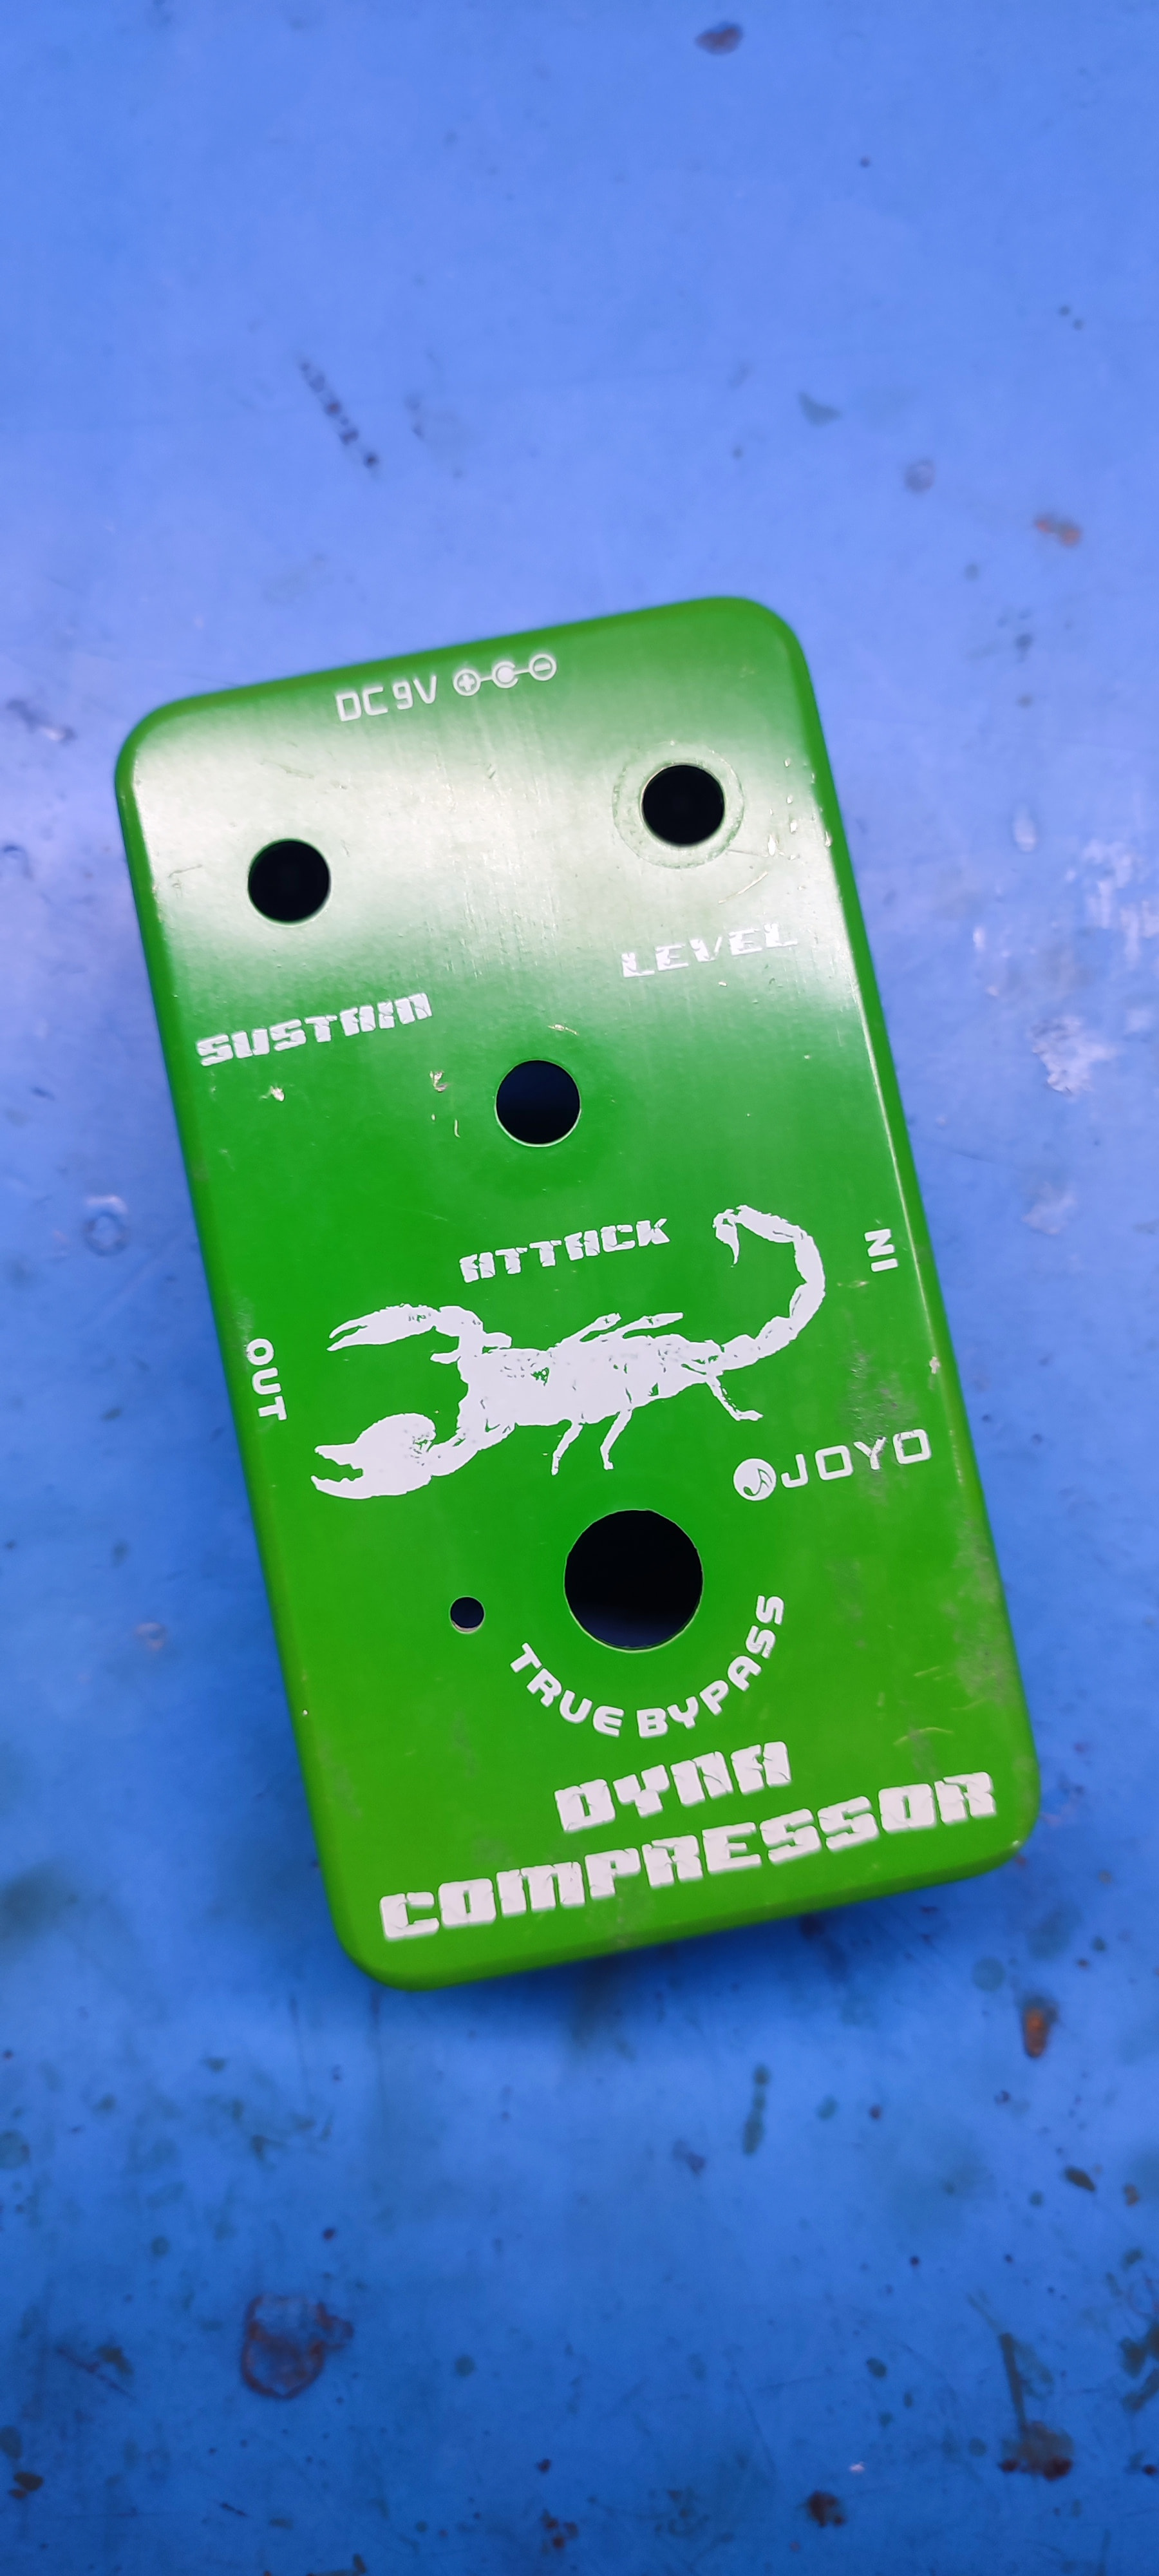
Joyo made a decent pedal, but the decoration is horrible! What’s that scorpion about? A redecoration was essential.
Note that the pedal has three controls: Level (controls the output volume), Sustain (the degree of compression, i.e. how much the pedal reduces the loud sounds and increases the quieter sounds) and Attack (theoretically how quickly the pedal starts compressing when a note or chord is played, but various sources agree that this circuit actually controls the how quickly the pedal stops compressing as a note fades in volume - so it should be labelled decay instead. We will come to my own labelling later.)
Preparing the Casing
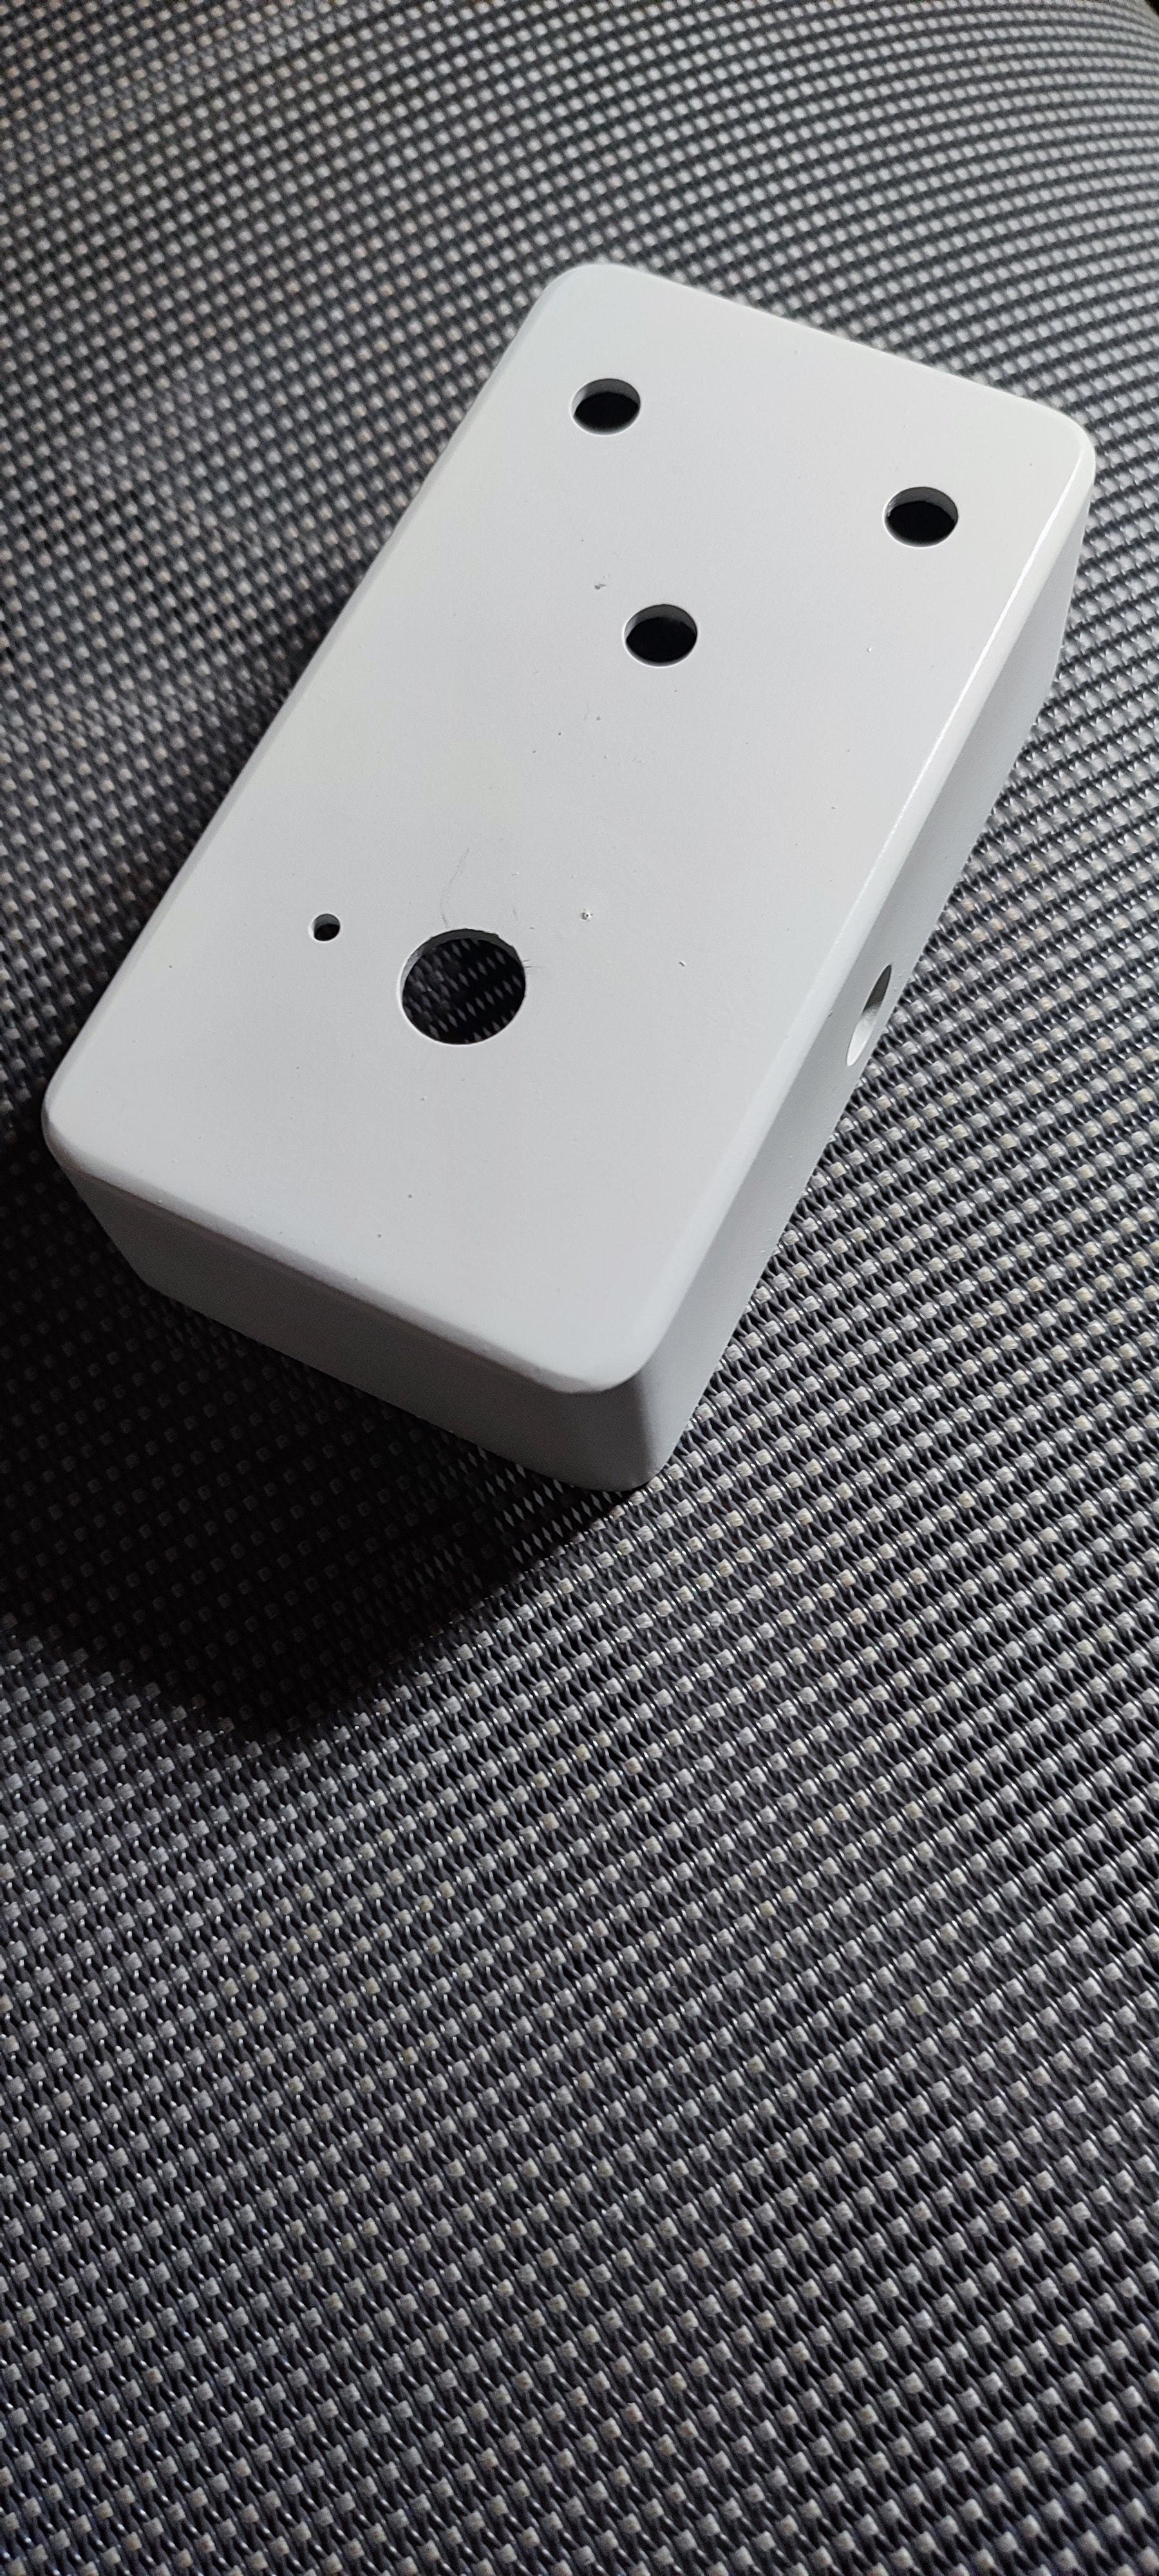
First step was to respray the pedal with white aerosol paint, which I did in the spray area that Arch Co. generously constructed for us outside the Space - those big ugly chunks of concrete. Lots of thin coats made a surprisingly good surface. I didn’t bother to remove that ghastly green paint job, just roughed up the surface a bit and cleaned it well.
While that was drying, I started on the circuit board
Modding the Pedal
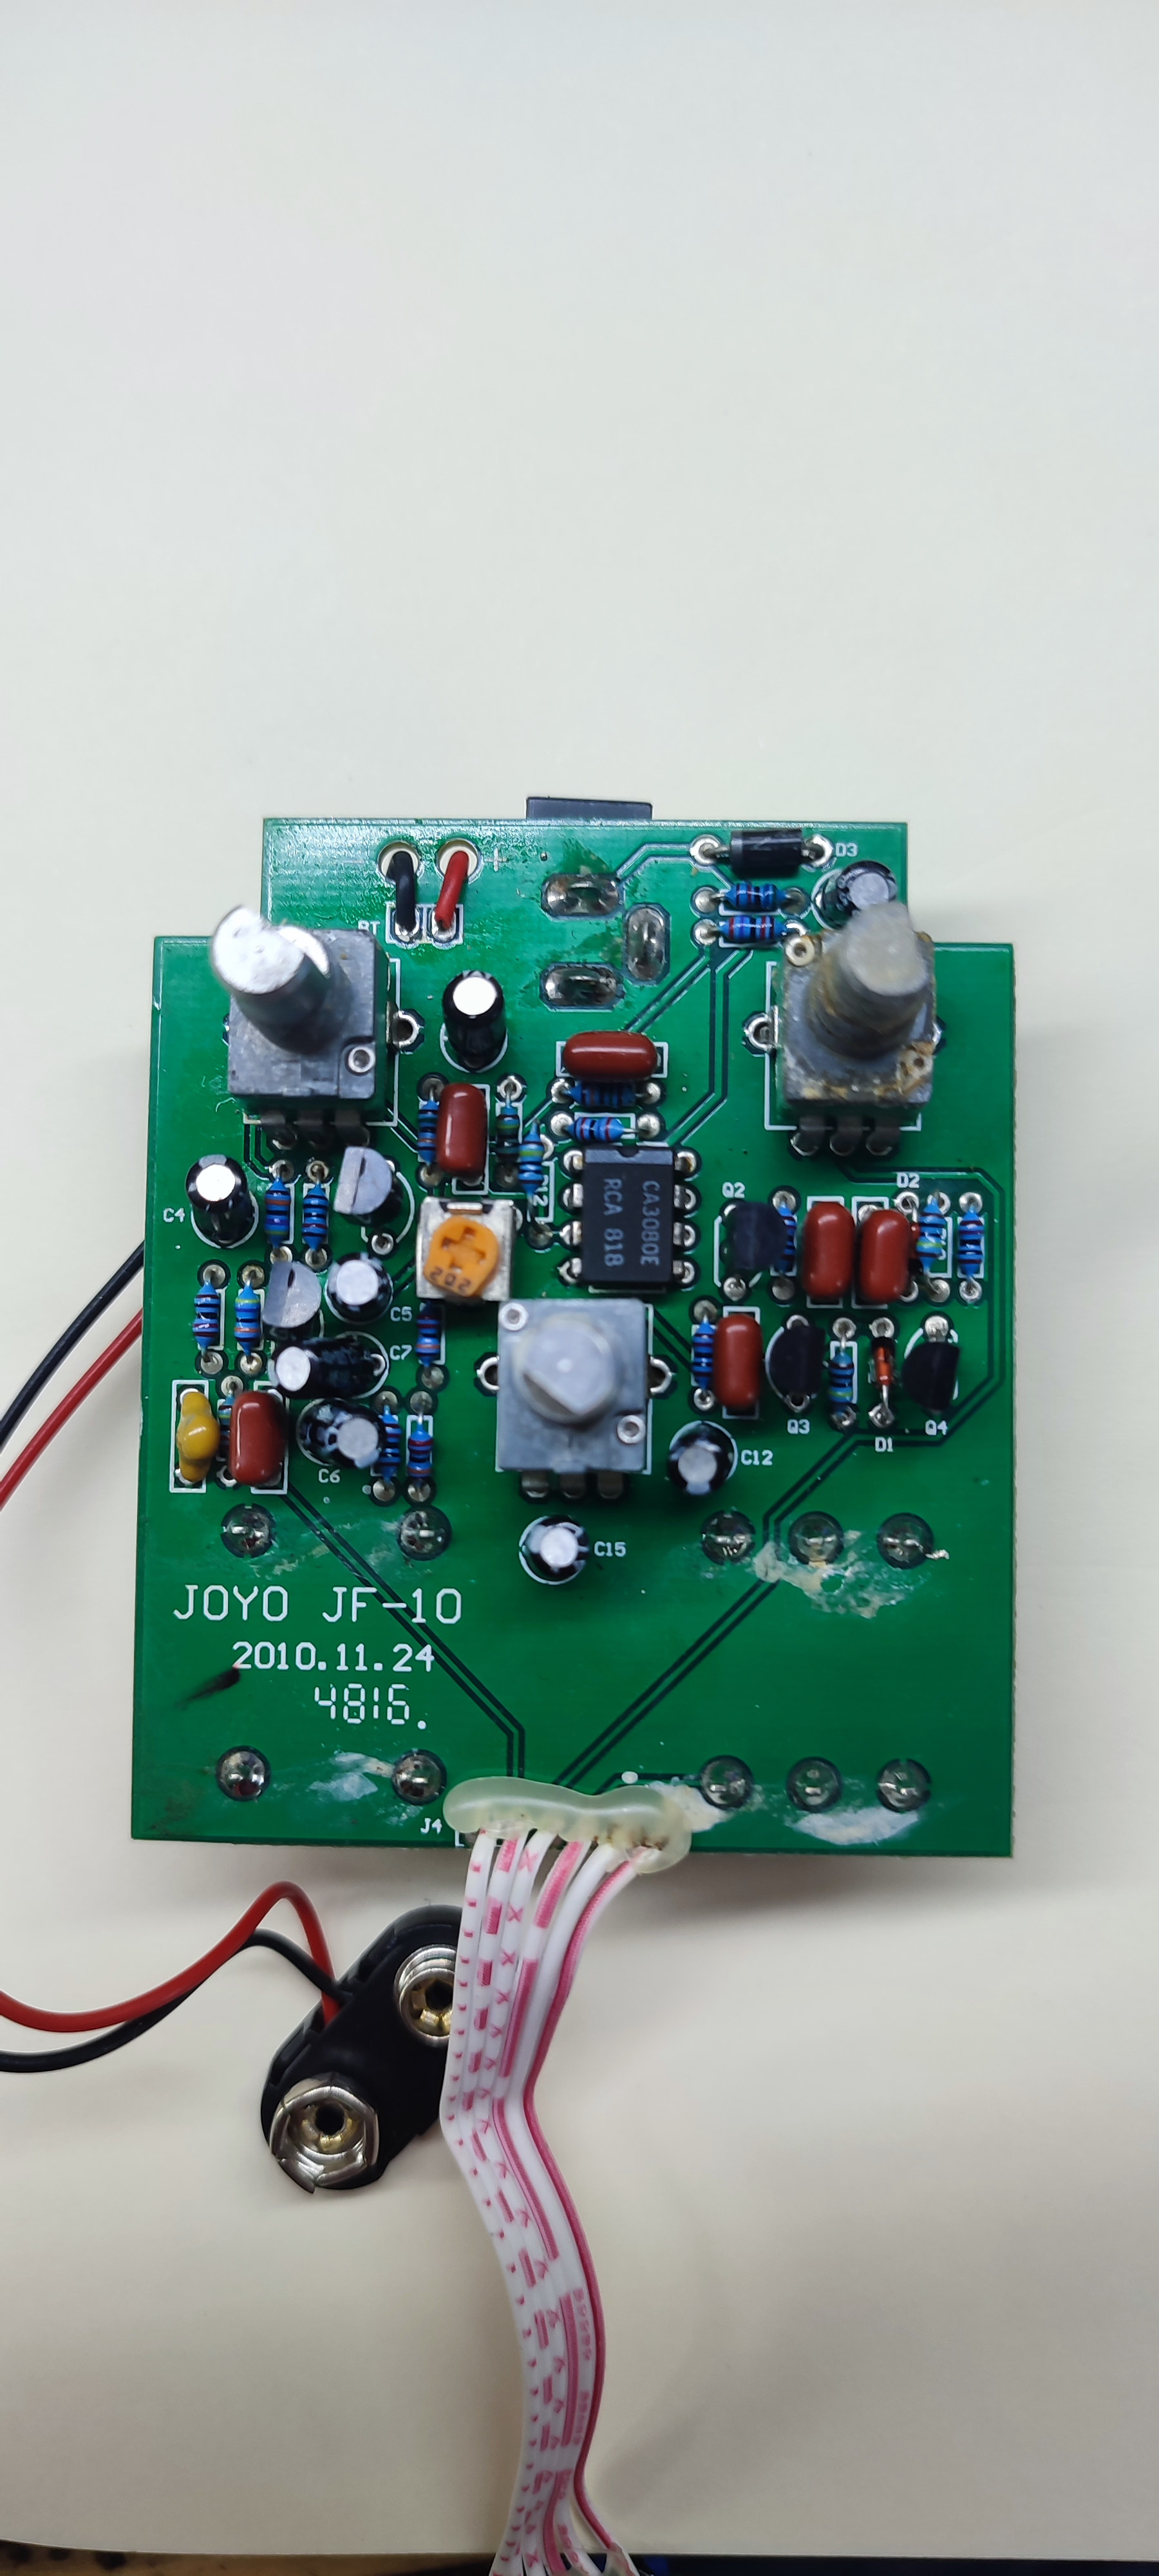
Unfortunately, the components I needed to replace, a capacitor and a couple of resistors are packed closely together so de-soldering was a bit tricky and resulted in some damage to the battery cables, but nothing serious. Thanks to the thread on freestompboxes (see above) it was easy to identify which components needed replacing.
I stopped short of removing the “Attack” pot and replacing it with a simple resistor for three reasons:
- The pot is solidly soldered to the PCB and I was afraid of doing more damage by removing it.
- I was giving the pedal as a gift, and the recipient might want to experiment with different settings. I have never found the Attack knob makes much difference, so leave it at about 2 o’clock position most of the time.
- I would have a gaping hole in the case which I would have had to fill in somehow.
The six-wire strip at the bottom of the pedal (see photo) connecting to the stomp switch was not very well soldered, so some of the wires detached themselves during this process. I had to cut them all off and re-solder them. I did think about removing the switch altogether, as I usually leave my compressor on full-time, but for reasons 2 and 3 above decided not to. It’s individual preference.
All mods done, I reassembled the unit outside the case, and miraculously it tested OK. Time to move on to decoration. Which proved to be the hard part.
Decorating the Case
Originally I planned to spray a simple design onto the pedal using a laser-cut template, designed in Inkscape and cut on mylar or similar suitable laser-safe material. Thanks to @Brendon_Hatcher and others for advice on how to do this. But why do something the easy way when there is a harder, more complicated and more expensive method with high risk of making the project worse, right?  It’s not the Makerspace way, is it?
Also I wanted to use this stomp box decoration method as a test for another, larger project. I love the graffiti painted on New York subway trains by “taggers” in the 70’s and 80’s. The idea was to scan a photo from one of the books I have on the subject and “print” it onto an object. Most commercial stomp boxes are screen printed with designs, usually in one or two colours. Clearly not suitable for printing something like this:
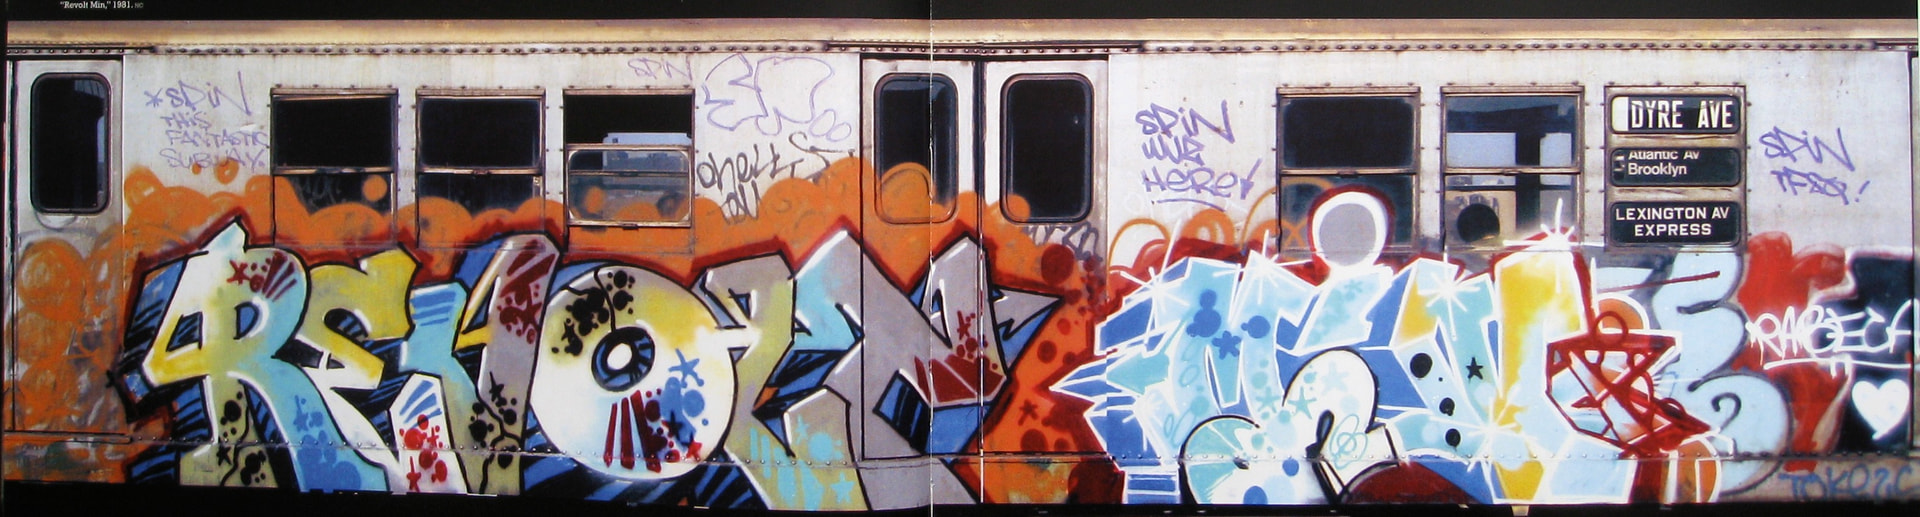
Selection of a suitable image was more of an obstacle than I thought. Since a subway car is a horizontal (i.e. “landscape”) thing, the format of the image does not fit the portrait shape of this guitar pedal. After some experimentation, I found that part of this image could be cropped out to make a decoration that would wrap around the top and two sides of the pedal. It was best to leave the front and back white for some labelling of the power supply 9v input, which I did with standard label printer and transparent tape.
So I cropped out a selection of the image above in GIMP:
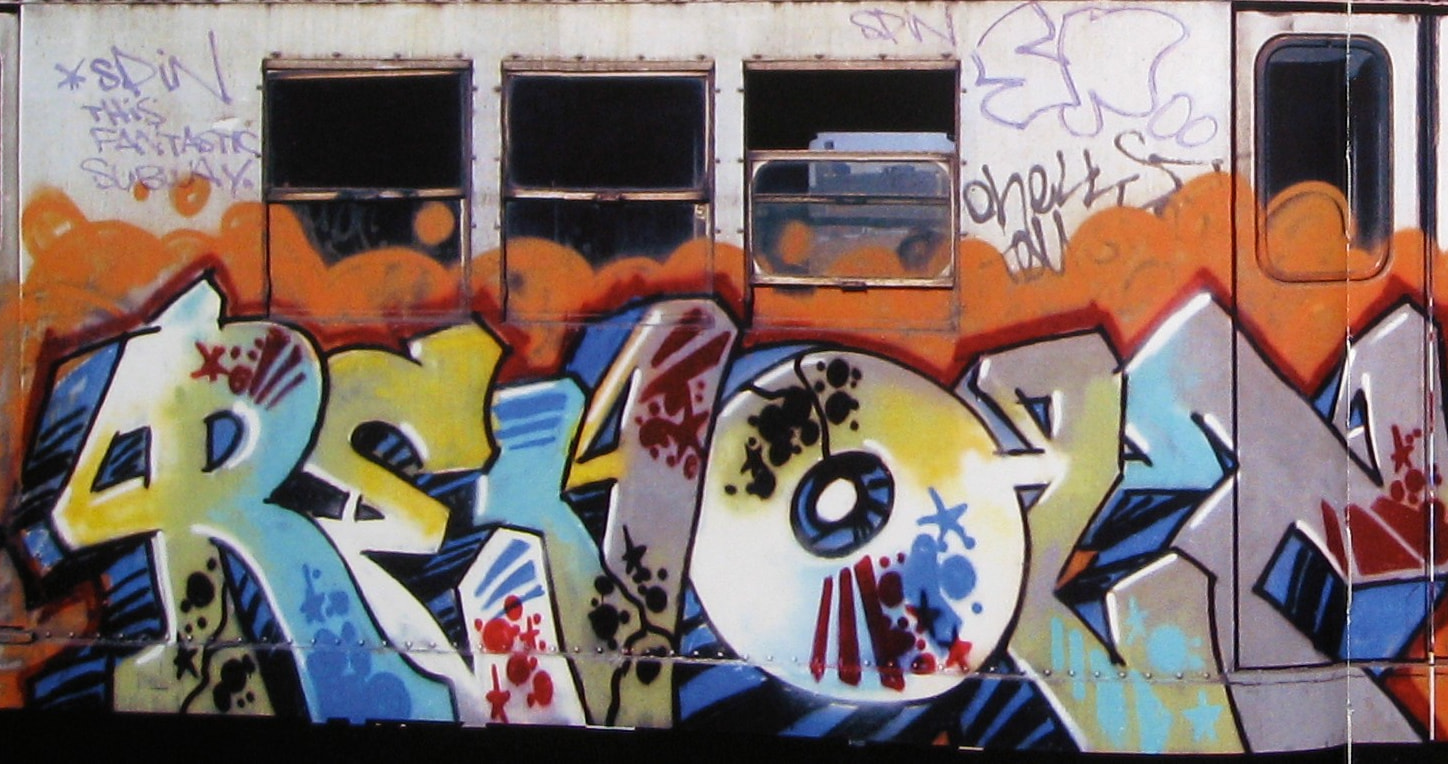
I measured the top and two sides of the pedal, which came to about 120mm total in size from left to right, when wrapped around the pedal. I laser printed monochrome dummies of the graphic on normal A4 paper to test the dimensions. It was a lot of trial and error because for reasons that defy my understanding, measured dimensions in a GIMP file NEVER correspond to the dimensions when it comes out of my laser printer.
I liked the appearance of what looks like a CD in the image, but it could be an LP (12 inch single?) because this photo was shot in 1981 before CD’s were widely available. It gave the graphic a musical feel which seemed right for the pedal somehow. The bonus was that the upper third of the image, the subway car windows, were a good framing device for the pedal’s control pots and their associated labels. Or so I thought, more on that later.
So on to adding the exact position of the pots and switch, plus their labels. I selected Inkscape for this, because I know it better than Photoshop or other bitmapped paint programs and I needed to add objects easily.
First I copied the cropped image from GIMP and simply dropped it into a blank Inkscape document. More paper printouts to get the dimensions right. Again, the dimensions in Inkscape did not correspond to the actual dimensions in the printed version. Finally I created a simple black rectangle in Inkscape and printed out trial versions until the dimensions were right:

Also I had to fiddle with the positioning of the image so that the graphic would look correct on the pedal. Eventually I got a file that looked right when wrapped around the pedal on paper. More resizing and cropping of the graffiti was necessary, but then I at least had the basis for the decoration:
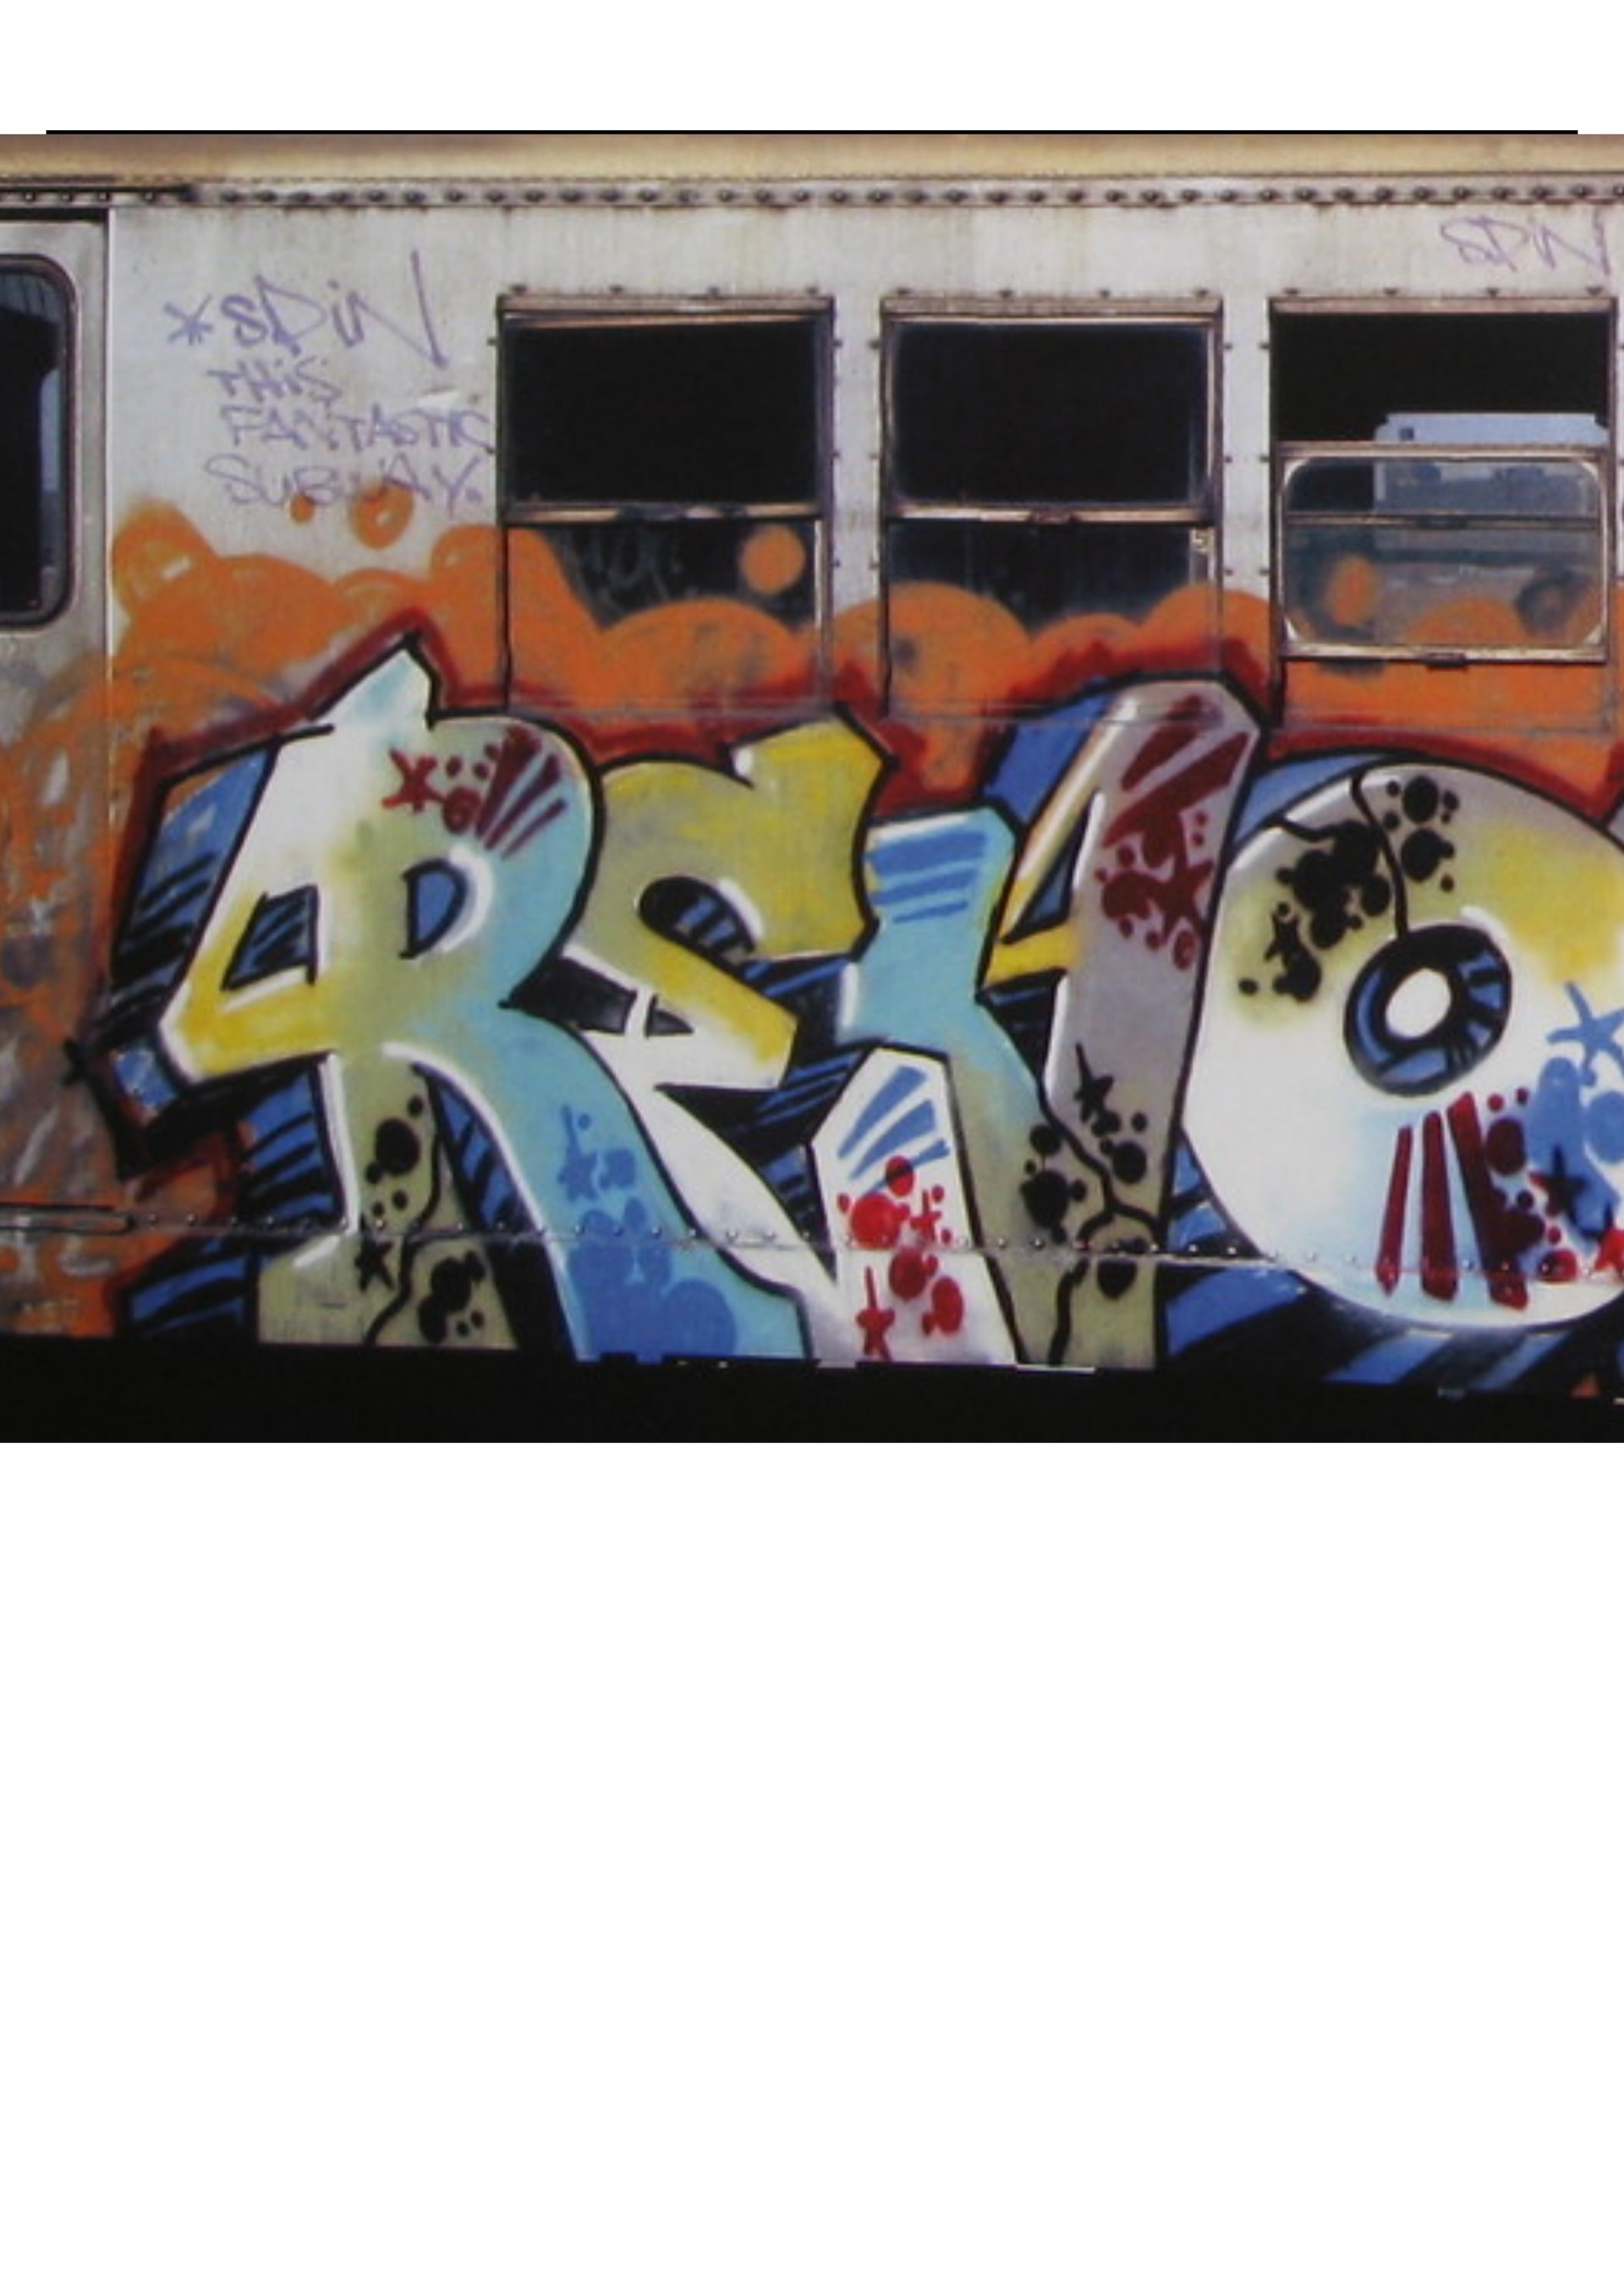
I knew the tricky part would be lining up the printed image with the pedal, so decided to use the position of the control pot shafts as a reference point. Again measurements taken carefully with ruler and calipers proved useless in Inkscape because when laser printed they were different. So it was trial and error again, placing small white circles on the image where the pots would go through:
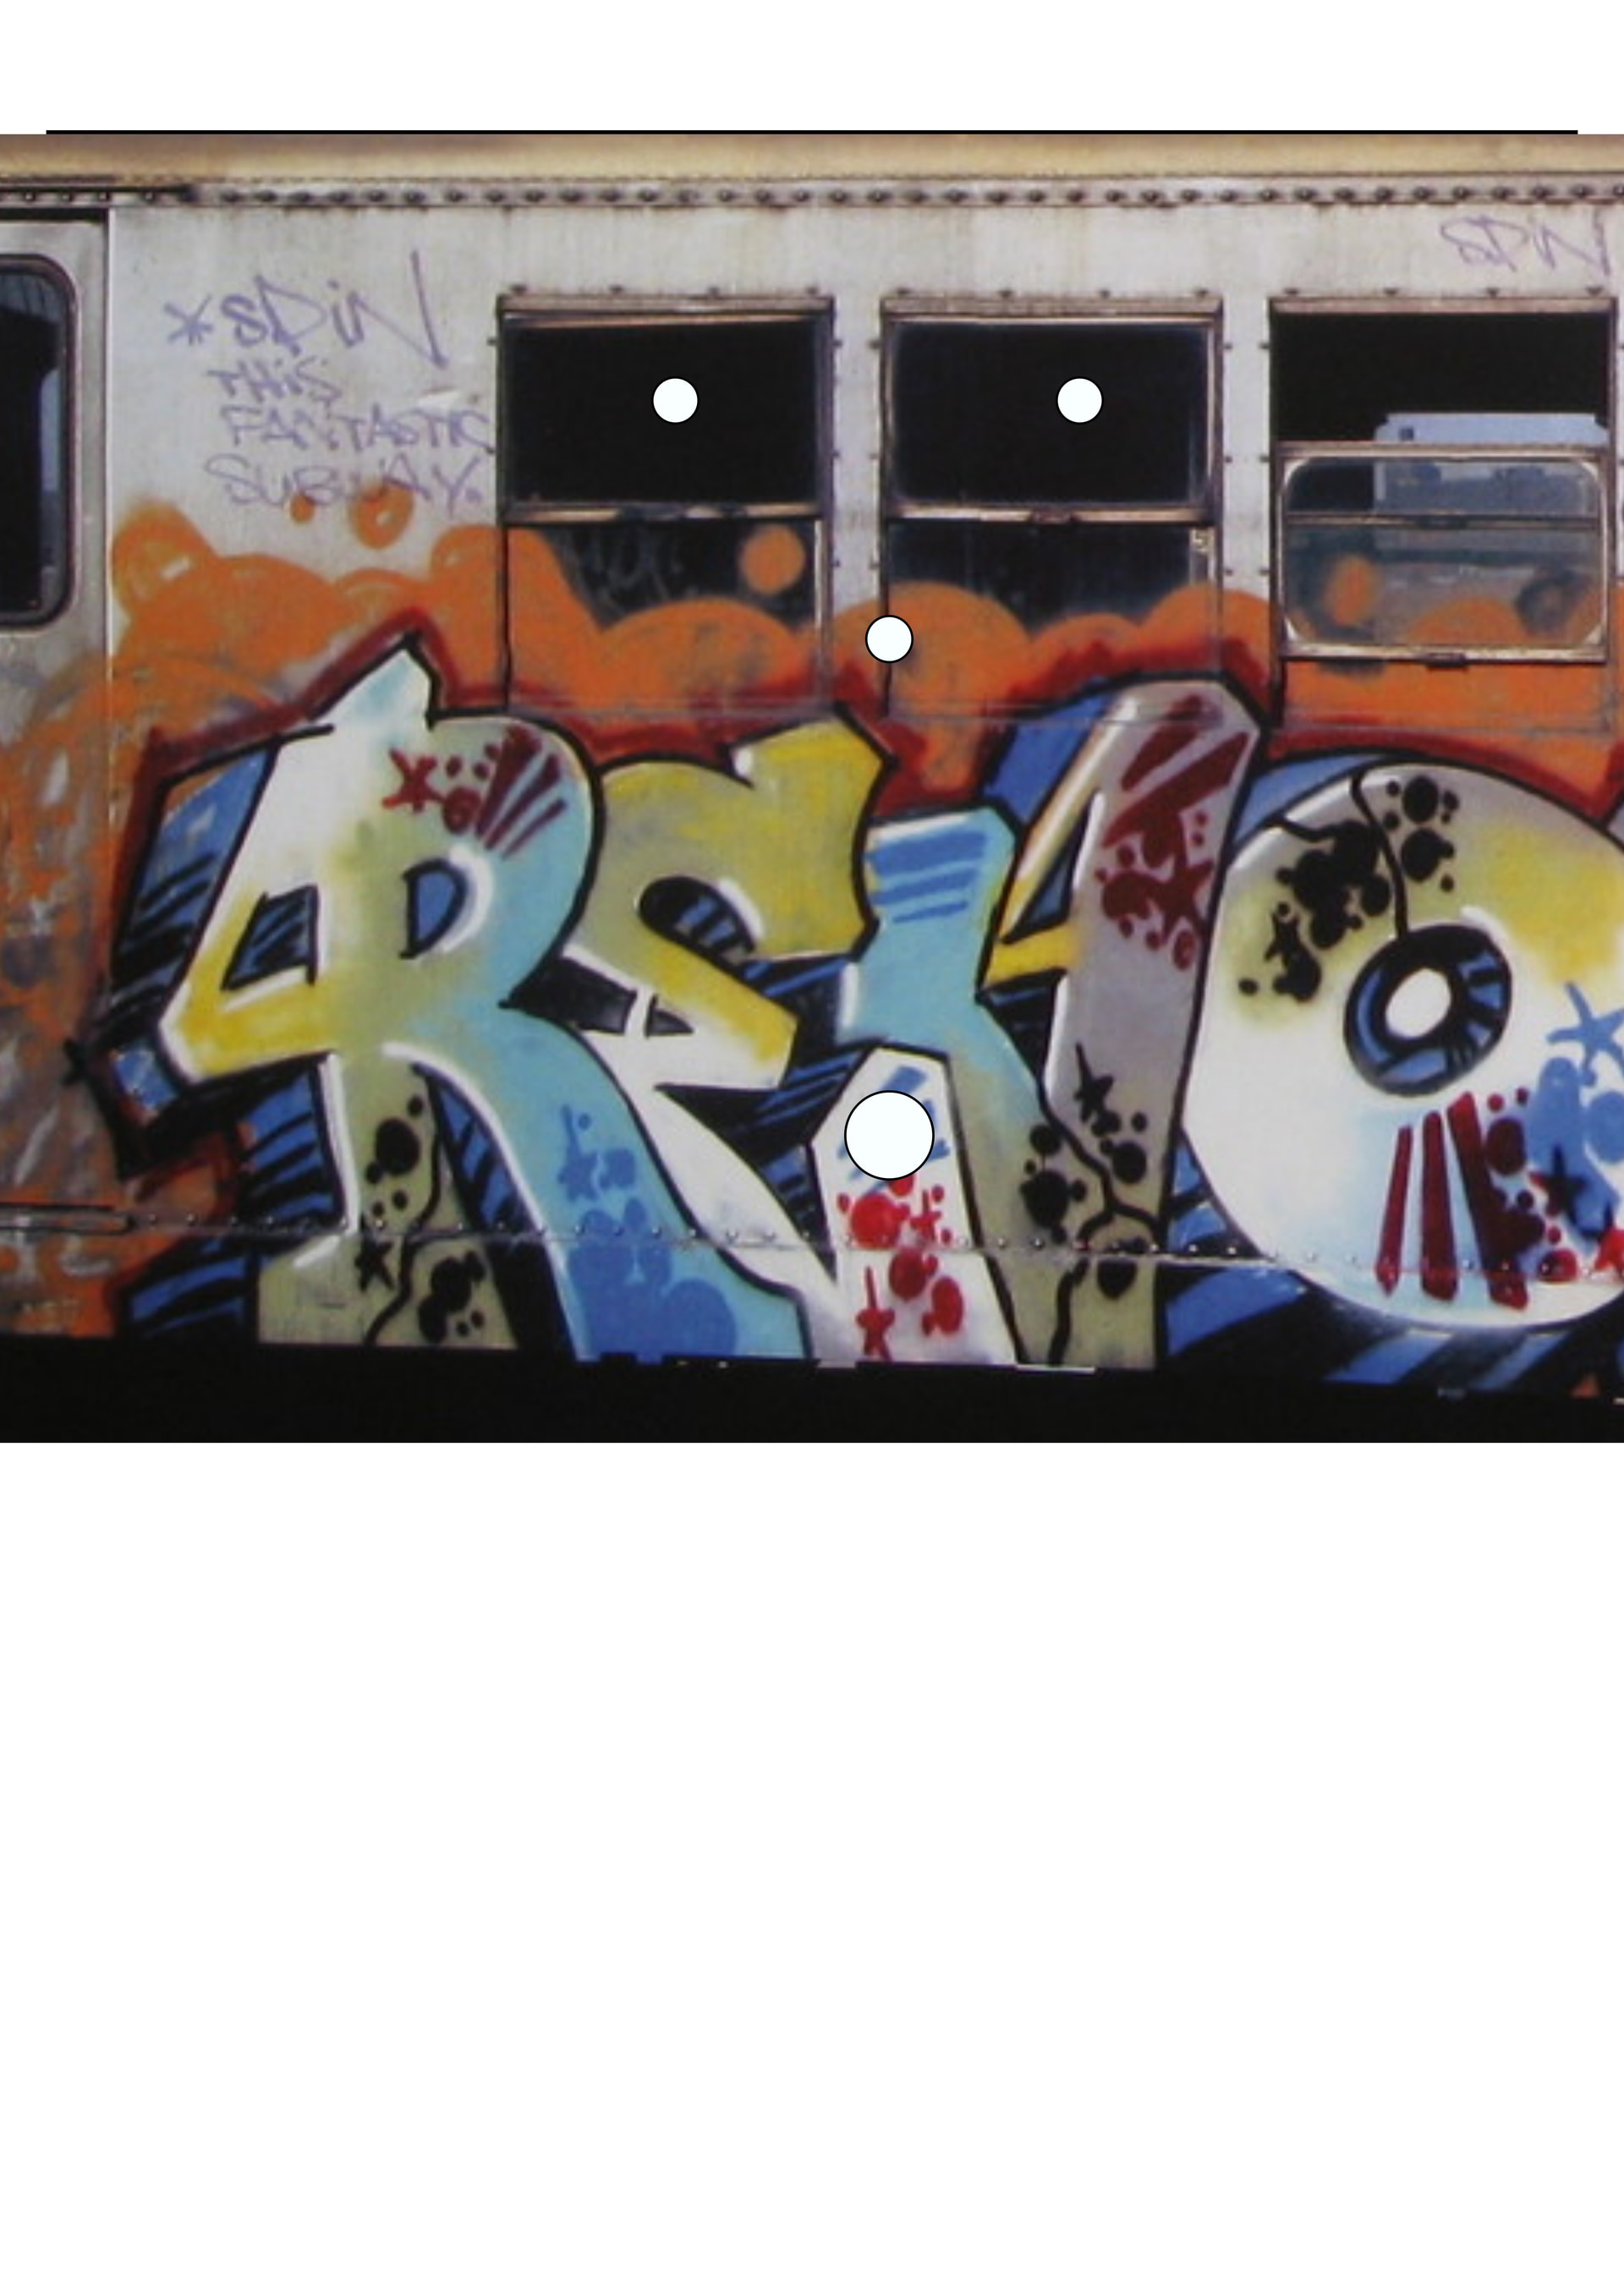
The three white circles in a triangle are for the control pots (level etc.) and the larger white circle at the bottom is for the effect on/off stomp switch. More trial and error and holding the paper up to the light to make sure the circles were in the right place. I wasn’t concerned about the black area at the bottom because I knew it would be trimmed off and gave me some margin for error.
I needed to add labels for the knobs. The original labels seemed inconsistent with the outlaw graffiti scheme - I needed something more radical. After (too) much thought I decided:
Sustain would be labelled “SQUEEZE”
Level (volume) would be labelled “BALLZ” (you get the idea)
Attack would be labelled “BITE” (sorta descriptive)
This was a gift so I personalised it by putting a name and the occasion on the side of the pedal. Also, the word “IN” on the other side to denote which side input was plugged into - pretty standard for pedals but to remove any doubt. All labels were done in white text to stand out and match the white paint on the rest of the pedal.
So the final image looked like this:
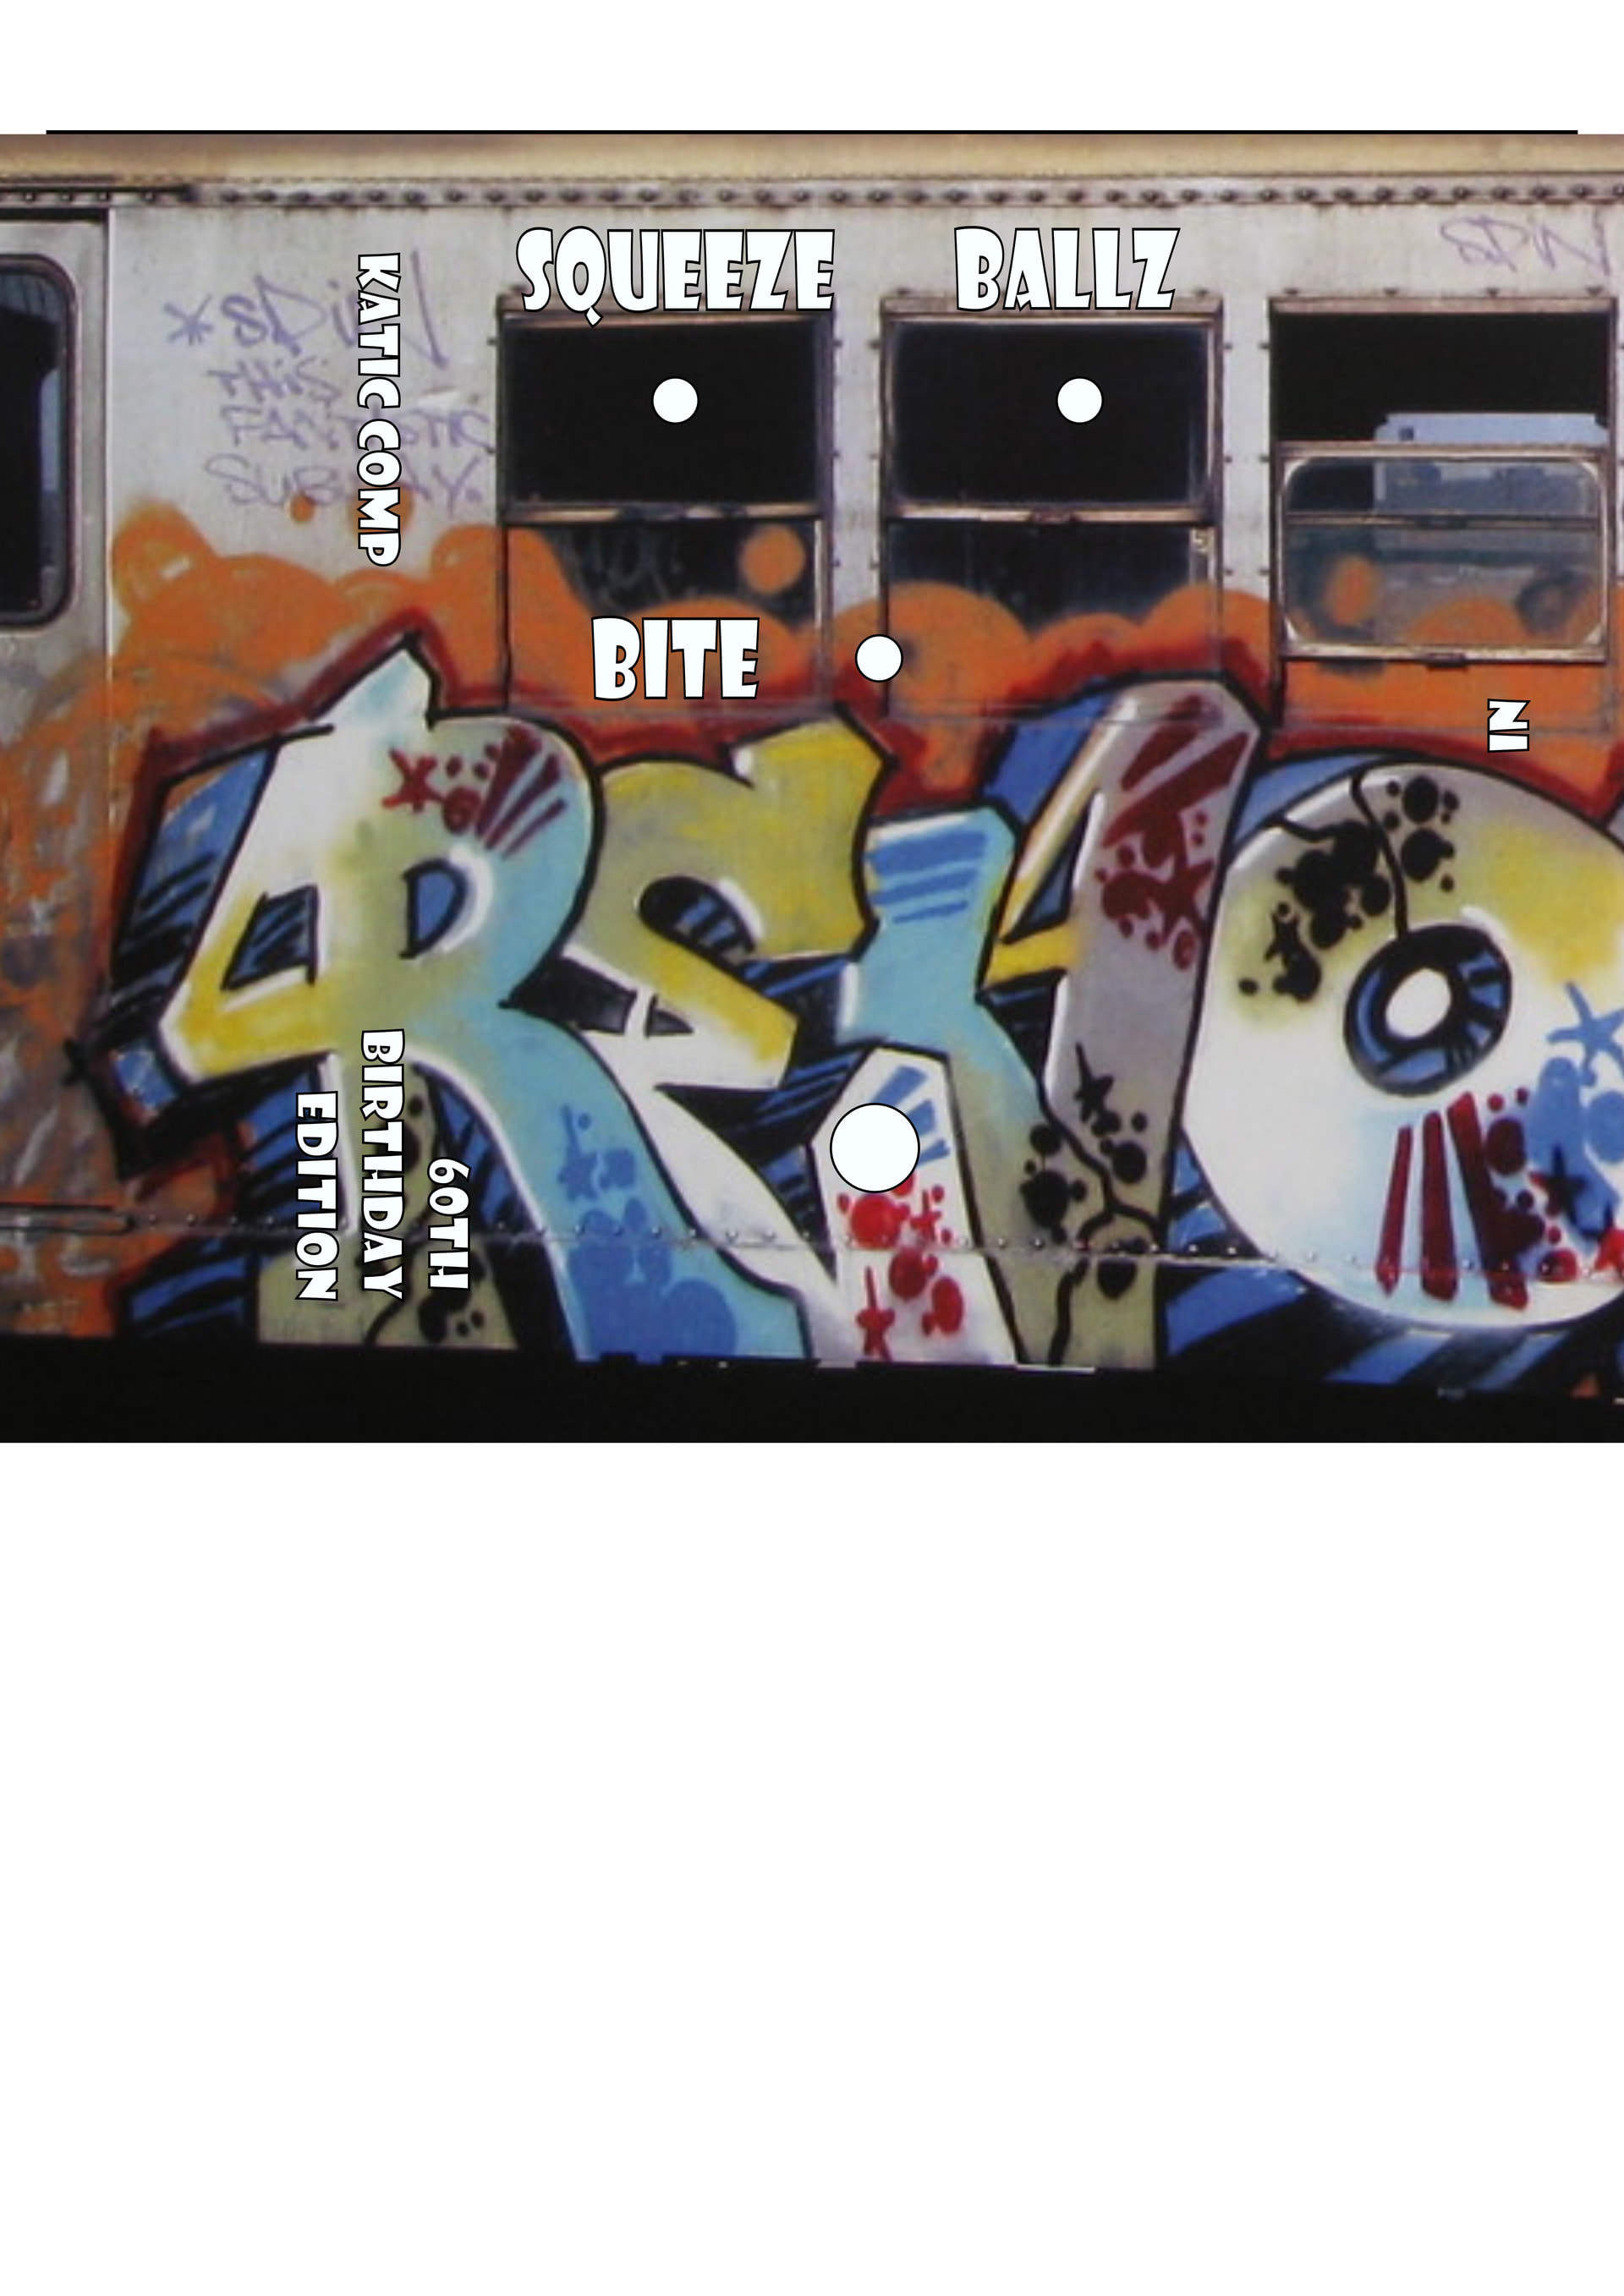
I didn’t worry about holes for the input and output jacks, I would make holes with a drill when the time came and positioning was not critical on the sides. One thing I got wrong somehow was the space available for the labels above the Squeeze and Ballz pots. I did not allow enough for the size of the knobs, but that could be solved by making smaller control knobs. As it is, the knobs partly obscure the labels. I should have measured the knobs more carefully, and probably made temporary outlines of the correct size in Inkscape to get the spacing right.
So now I had the design, now came the easy part - putting it on transfer paper and applying the transfer to the pedal. Easy? Noooooooo!!!
After researching different methods of printing a colour image on a three dimensional object, water slide decal paper seemed the most promising. I got mine some time ago from Mr Decal Paper, but the company’s web site is no longer operational, nor is their Facebook page so I assume they have ceased trading. One alternative supplier is:
They offer both laser and inkjet material in packs of 10 sheets for about £7 but shipping from the US is about £20. A wide variety of similar products are available - you can print your own tattoos!
A UK supplier is:
who sell 10 sheets for about £10 with shipping from £4 upwards.
In other words, it’s about a quid a sheet, quite reasonable really. Most vendors sell both white and clear background; I should probably have used clear, but bought white for a different project. It worked fine on my white painted pedal.
Application
The instructions say something like this:
- Print Your Design: Load the decal paper into your laser printer and print your design. Ensure the design is mirrored for the best results.
- Cut and Submerge: Carefully cut out your design and submerge it in water for a few seconds.
- Slide and Apply: Gently slide the decal off the paper backing and onto your chosen surface. Smooth out any air bubbles for a flawless finish.
- Dry and Seal: Allow the decal to dry completely and, if desired, seal it with a clear varnish for added protection.
After some more test prints with plain paper, I loaded up a sheet into my Lexmark colour laser printer, crossed my fingers and hit PRINT. I used the recommended settings of glossy paper and thick stock in A4 size with no image adjustment. If I had time I might have experimented with different colour rendering settings, but actually the end result looked fine out of the printer.
I trimmed the decal to just above the size of the pedal with a craft knife - the material is easy to cut. I made a water bath with a tea tray, filled it with slightly warm water, made a clear and clean workspace, cleaned the pedal again with alcohol and consumed some (different) alcoholic beverage myself. I knew this was a one-shot deal. I did a trial run with an offcut of the print, applying the transfer to a metal mug. So far so good. The image becomes slide-able after only a few seconds in water, but I gave it a good 30 seconds then gingerly moved the edge off the backing paper. It came off easily.
The moment of truth. I carefully immersed my pedal transfer in the water, waited about 30 seconds then very carefully picked up the backing paper, lined it up with the pedal casing and ever so gently slid off the transfer onto the side the pedal. Immediately things weren’t lining up! So it was some careful manual adjustment of the transfer, and sure enough the circles nearly lined up with the holes for the control pots. Holding the pedal vertically, I gradually lifted the rest of the transfer off the backing paper and onto the other side of the pedal. It worked! There was some creasing visible in the transfer, but given the subway graffiti nature of the decoration, it didn’t really matter - almost like it was relic’d or something.
At this point, I realised I had forgotten to get a sponge to “Smooth out any air bubbles for a flawless finish” but one was found and I did some mopping off of excess water, then left it overnight to dry. Overall, it looked good.
I used aerosol spray clear coat varnish as recommended to protect the transfer - it’s pretty fragile. I initially did three thin coats, but the next morning thought it needed more, so applied anther two coats, with about 45 minutes drying time between each.
All that was left to do was re-assemble the pedal (which I did in Crewe railway station’s waiting room - don’t ask). At this point I should admit that I intended to 3D print smaller, coloured knobs for the pots to match the colour of the graffiti and make the knob labels more visible, but just ran out of time. I will make them and switch out the supplied black knobs soon and update these photos.
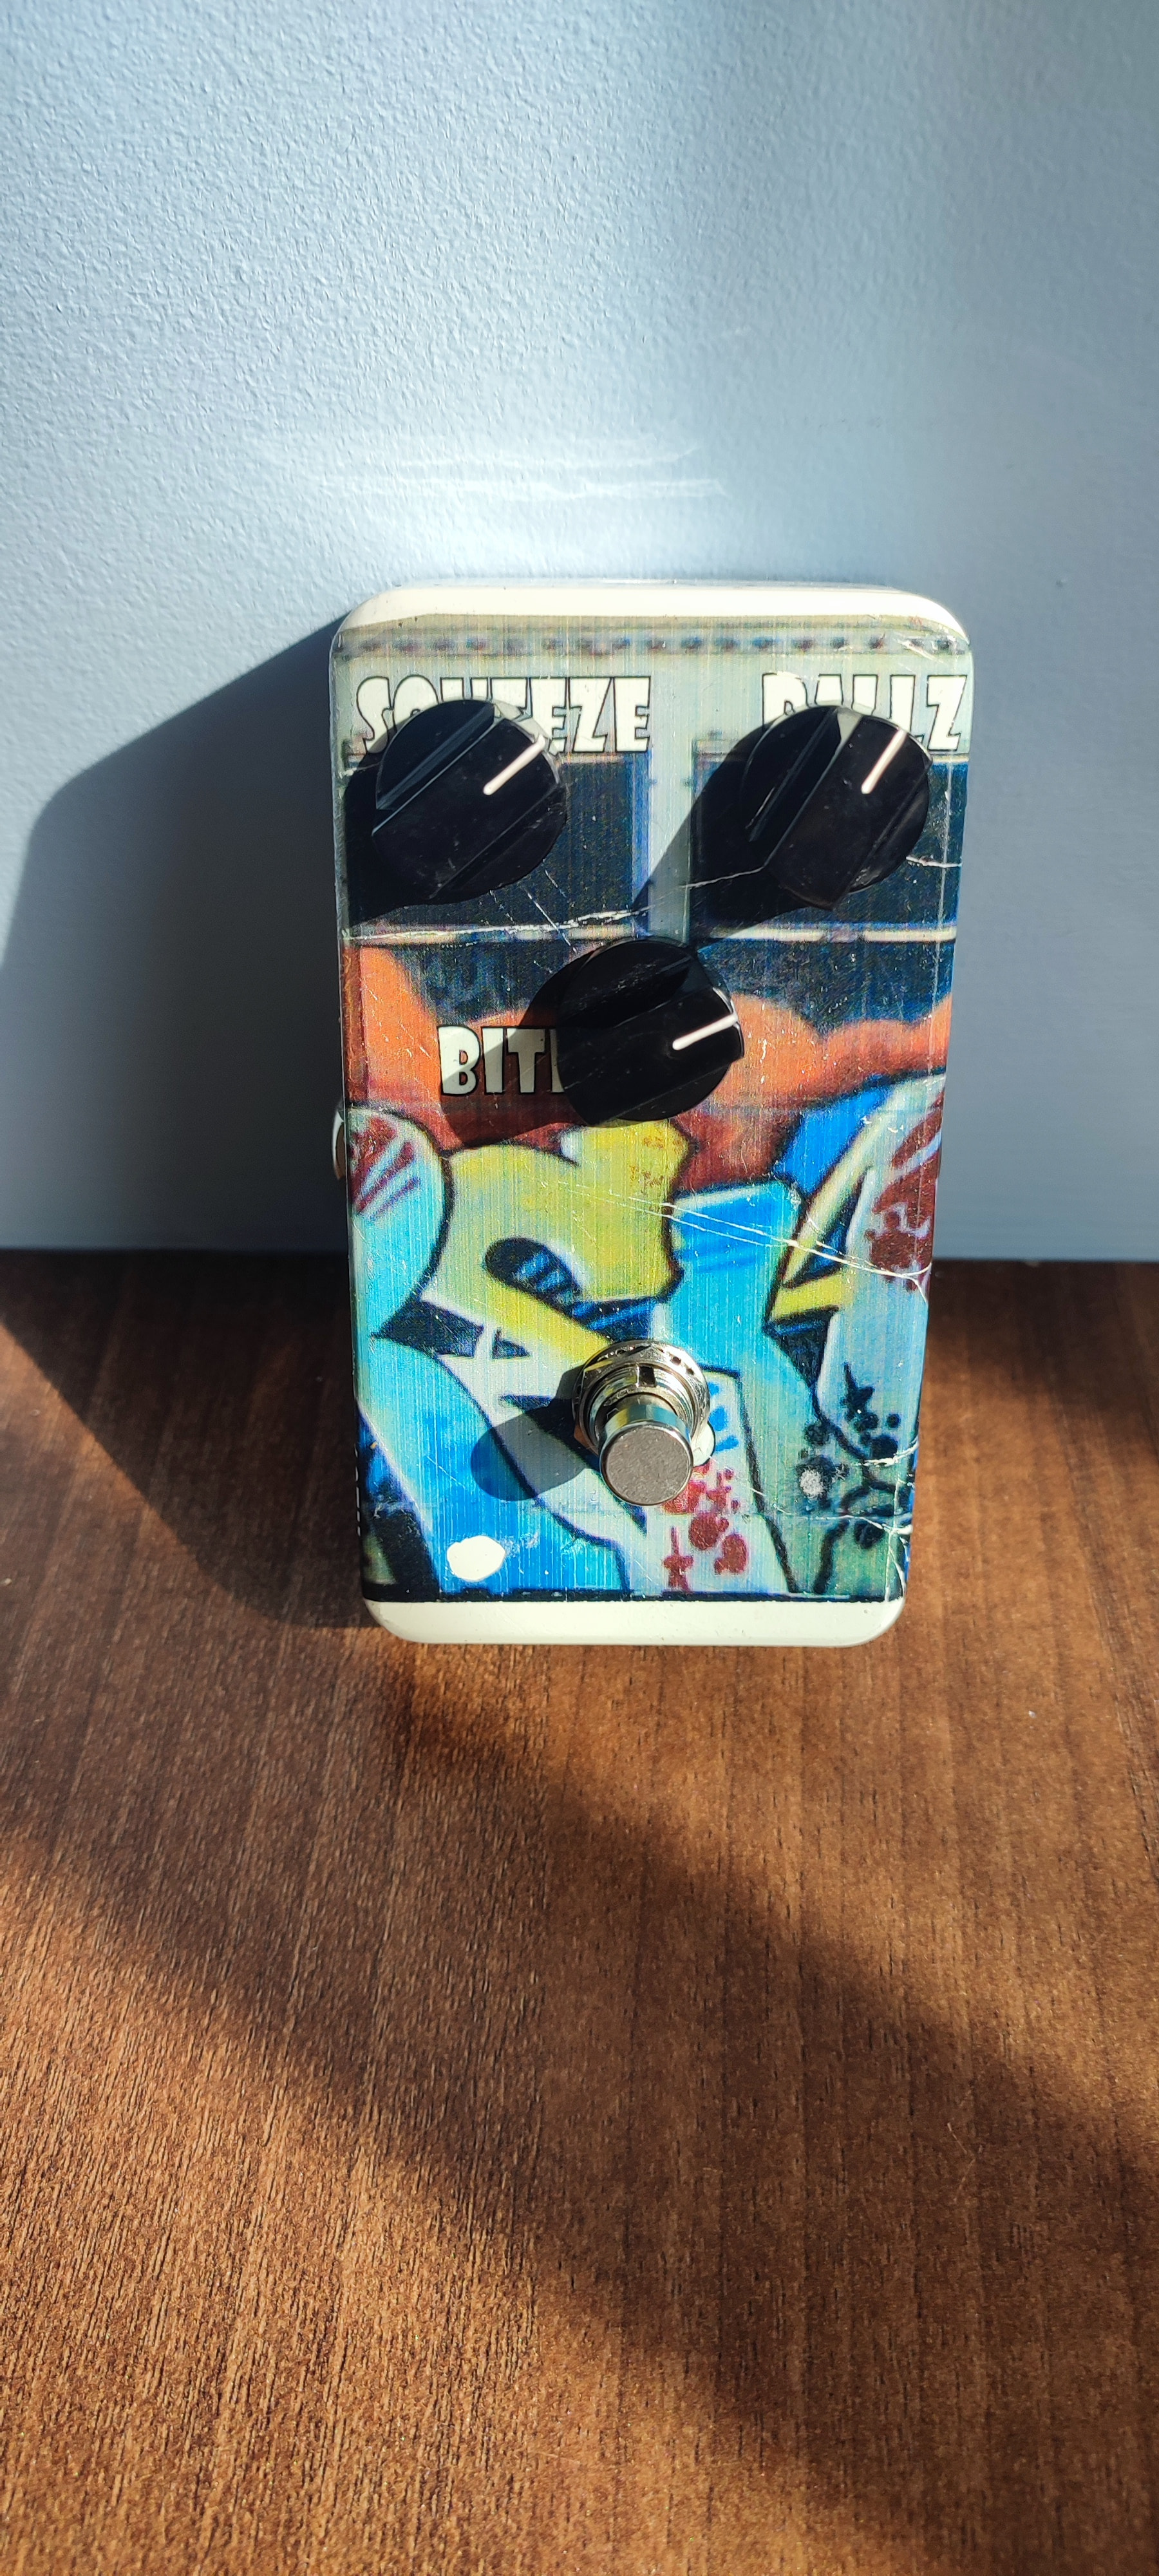
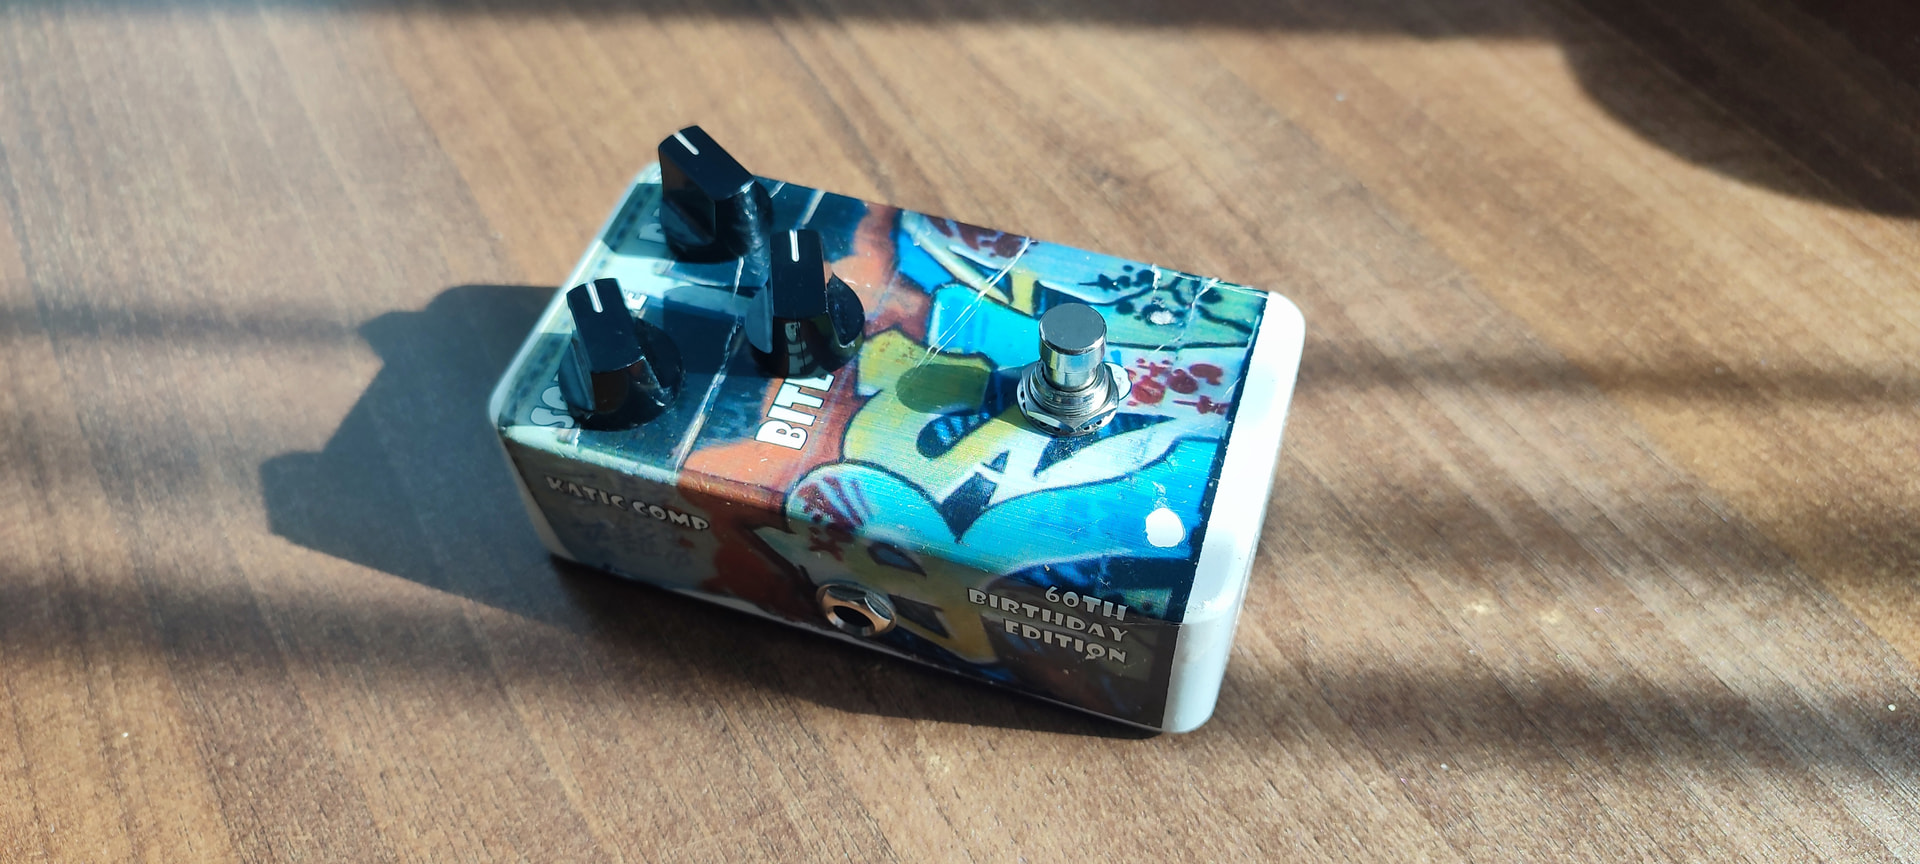
Overall, I’m pretty satisfied with the end result. Lessons learned:
- Practice de-soldering more, especially in confined spaces
- Clamp hanging wires in some way to stop them detaching from the PCB
- Figure out dimensioning in Inkscape as it translates to my printer. I have never really grasped this.
- Making multiple test prints on paper really worked well before printing on expensive transfer paper.
- Test colours on scraps of water slide laser paper
- Practice more with sliding and sponging transfers. There’s a skill to this.
- Allow plenty of drying time for the clear coats, it’s tacky stuff on hot days.
If you have questions, want to try your own pedal modding or waterslide transfer project, hit me up @fincheee