Details
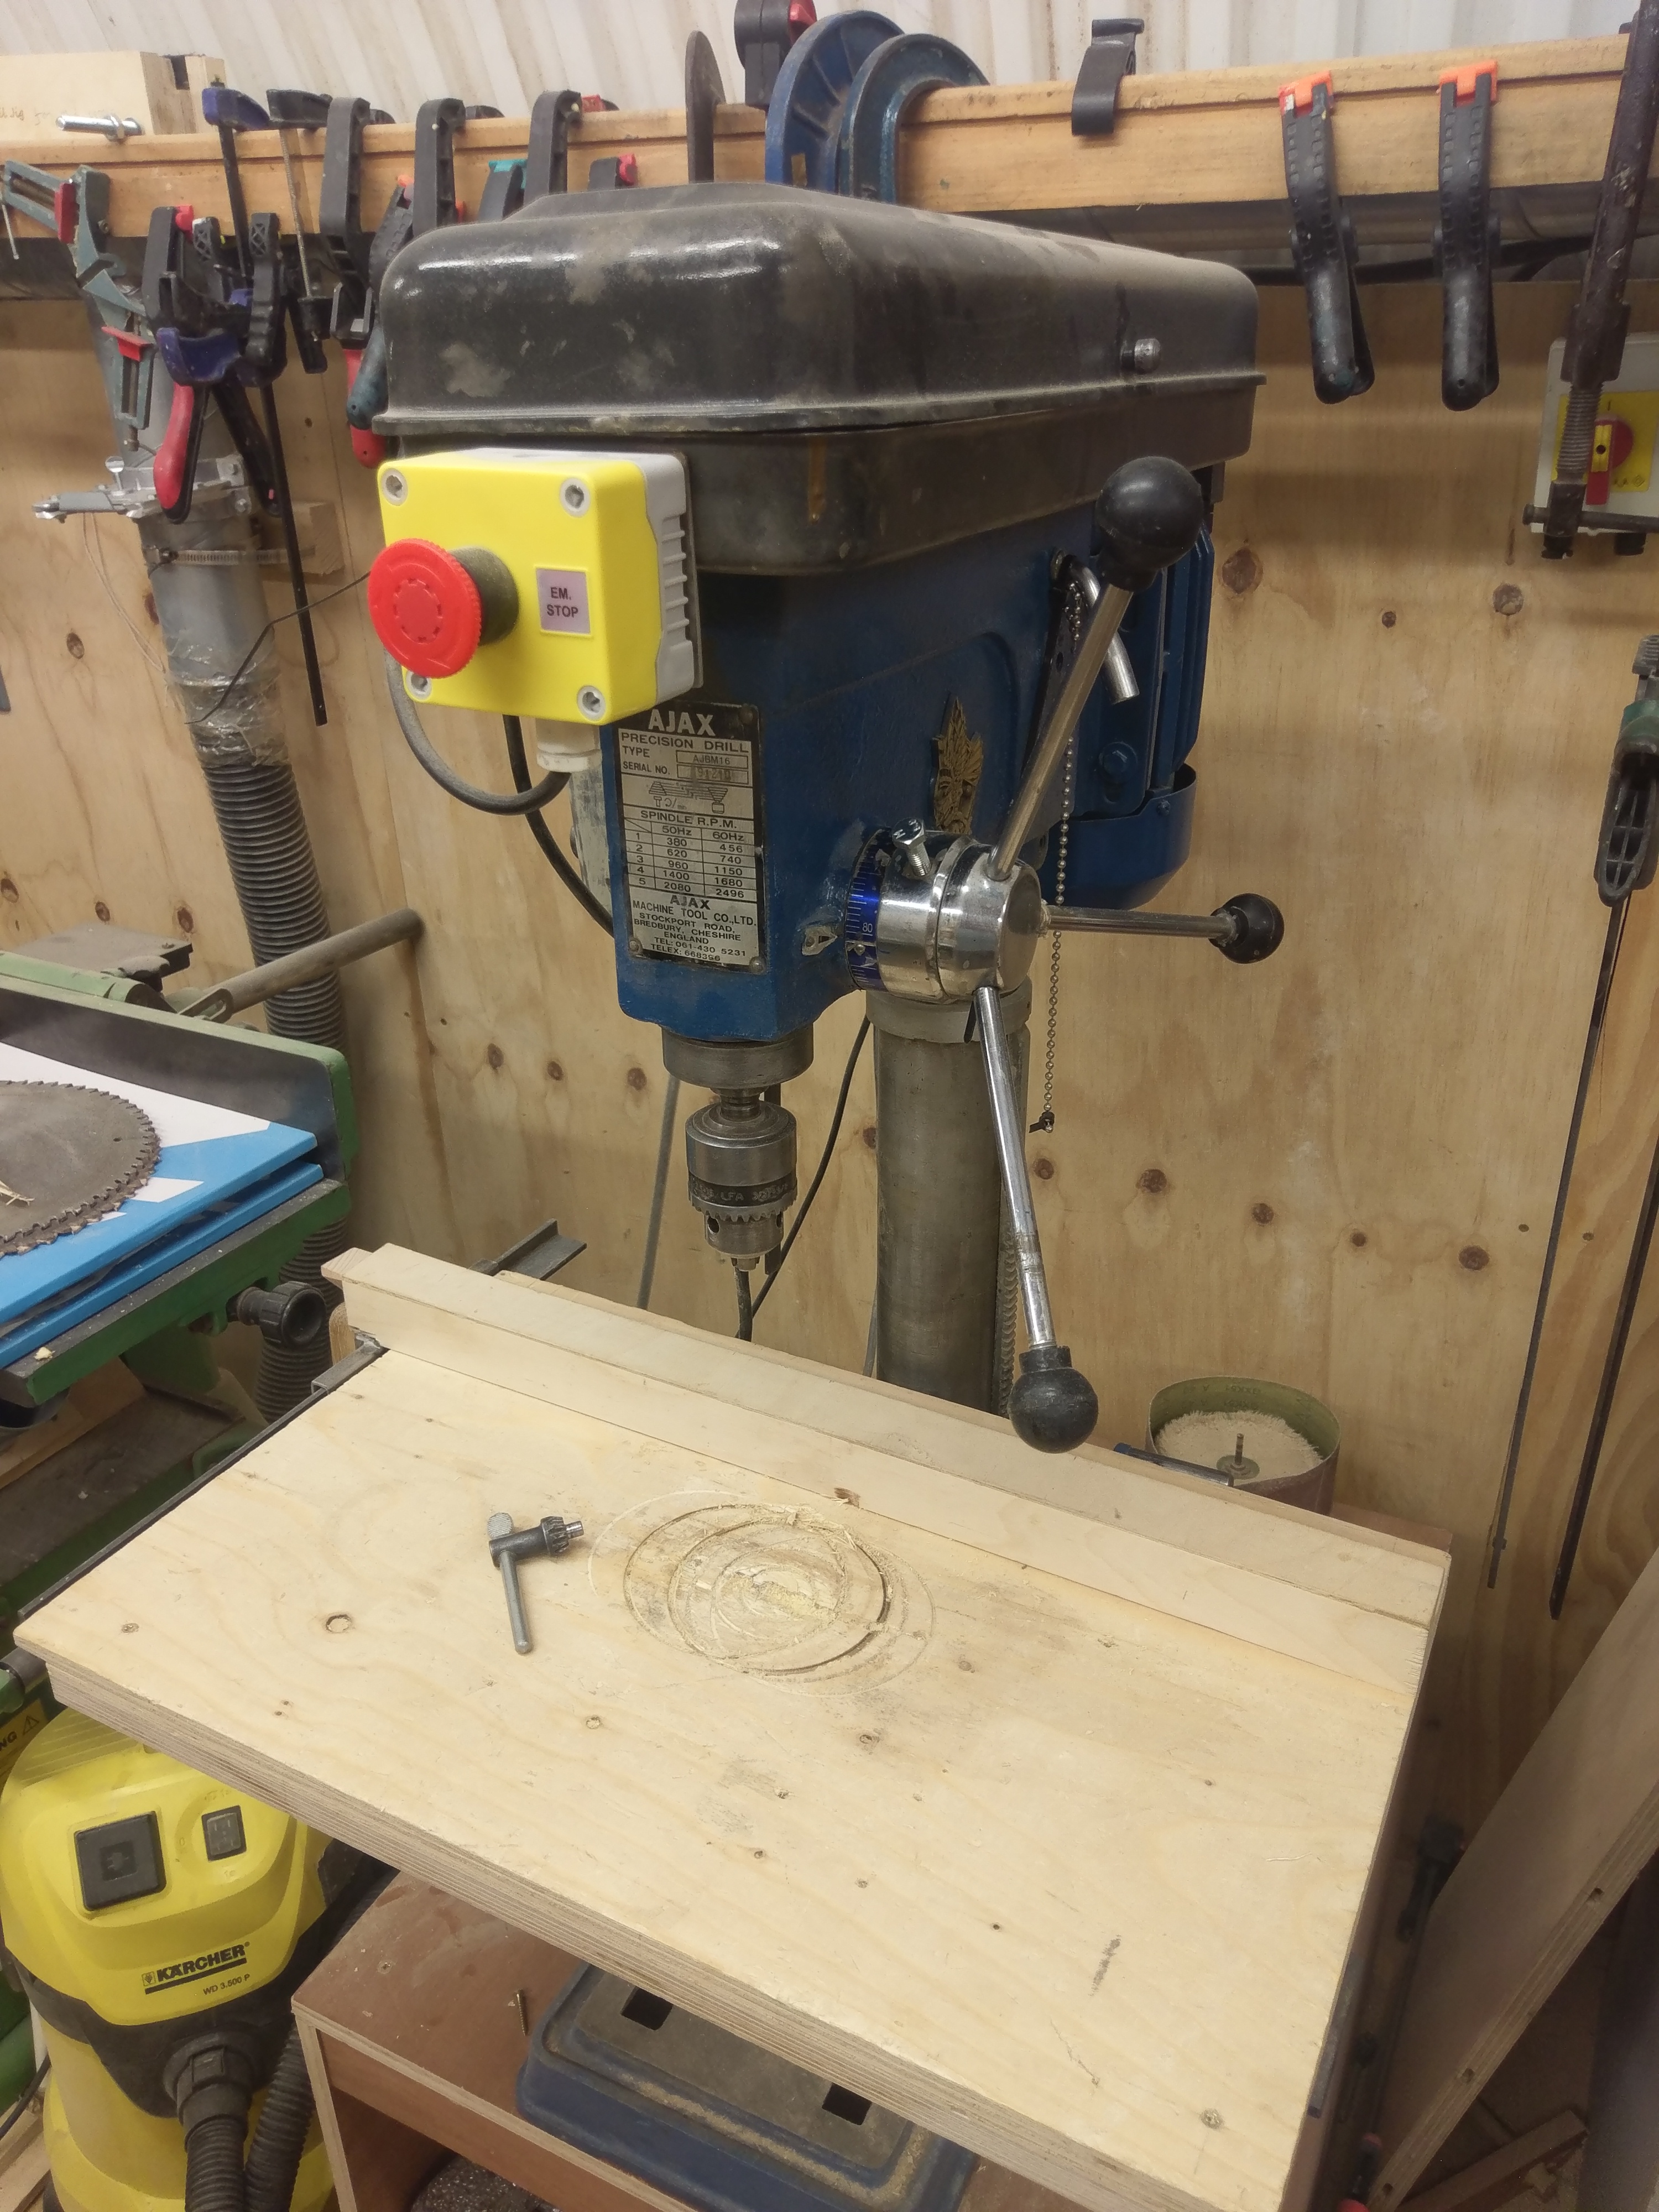
This is a tabletop 1kW pillar drill. It’s for drilling precise, holes - usually perpendicular to a flat side, though can be tilted at an angle
Condition Notes
Needs:
- drill flip down guard
- securing to work bench
- Would be good to fit the clamp to it too.
Risk Assessment
-
What are the risks?
-
Entanglement - user clothing or body parts being caught in the drill mechanism - this will do you extreme harm, as the motor on this pillar drill is very powerful. IT WILL NOT STOP - IT CAN REMOVE LIMBS.
-
Injury/damage from twisting workpiece - if the drill bit catches in your material, then the momentum will cause the workpiece to twist suddenly and violently.
-
Fire - sawdust can be ignited by the friction between drill bit and workpiece. Ensure that you do not allow much sawdust to build up. Extreme heat can be a sign of incorrect operation - if in doubt, please ask for help!
-
Shrapnel injury - if the drill bit breaks, or your material breaks under the force of the drill, then small, sharp fragments may be sprayed in all directions.
-
PPE:
-
Eye protection
-
Any loose hair, jewelry, clothing, etc. to be safely tied back/tucked in/removed.
Anatomy of the tool:
-
Bed - this is a large square metal plate onto which you place the piece into which you want to drill. As the drill bit should never been driven into the metal bed, it is securely covered with a wooden plate - though you should always try to be drilling into a piece of sacrificial waste wood! You can (and often should) clamp workpieces to the bed. The bed should always be left in a perfectly flat position, but can be adjusted to an angle if needed - ask a woodtech for help
-
Adjustable fence - this wooden bar runs along the back of the bed, and should be adjusted for your workpiece. It is there to stop your workpiece spinning, and to give you an additional surface for clamping your piece. It can be loosened and tightened using the handle on your left. It can be removed if necessary for a large or awkwardly shaped workpiece - however this will then require very thorough clamping to hold it steady.
-
Motor - the large cylinder at the back and top of the tool. Compare this to the size of the motor on one of our powerful electric drills or drivers. Consider how much more power the pillar drill can produce! This is where the danger comes from.
-
Gearbox - the rounded box on top of the tool, connecting the top of the motor and the top of the drill itself. You will need to open the gearbox frequently to check and manually adjust the speed of the drill.
-
Drill - the business end of the tool. Requires a chuck key to change the drill bit. Moves up and down in a perfectly straight line.
-
Handle - three-pronged handle which is turned by the operator to raise or lower the drill. Turn anti-clockwise (top handle towards you) to lower, and turn clockwise to raise. Note that the pillar drill is designed to automatically raise itself fully if the handle is released, whether it is on or off.
Preparation for usage:
-
Isolate the tool by turning off its power supply - always do this before adjusting any powered tool.
-
Choose the right drill bit - the pillar drill chuck will take drill bits with a hexagonal (6-sided) shaft - exactly the same ones as our powered hand drills. A small number of our drill bits have a square shaft, for use with the hand-powered brace and bit. These do not fit and should not be used in the pillar drill under any circumstances. Remember that auger bits are designed to pull themselves into your workpiece - so these must be used with extreme care in the pillar drill due its speed and power. If you’re not sure, review the WOOD WORKSHOP INDUCTION NOTES LINK, or ask a woodtech.
-
Fit the drill bit - double check the drill is isolated (switched off at the wall)

-
Insert the chuck key into one of the holes in the chuck, and loosen it by twisting anti-clockwise (lefty-loosey). Leave the key in the chuck for now.
-
If there is a drill bit in the chuck, then hold it to stop it falling out. When it comes loose, remove it and put it away, or put it under the pillar drill if you need it later. Do not leave it on the bed, or on a surface it may fall from.
-
Ensure the chuck is just loose enough for the shaft of your chosen bit to slide inside easily. Most bits should simply be slid into the chuck until around 5mm of shaft is left visible above the cutting edges. Ensure your bit is between all the teeth of the chuck - if you open the chuck fully, you may end up clamping the bit way off centre between just two of the teeth. Hold your bit in place, and turn the chuck by hand until the bit stays in place without you holding it.
-
Tighten the chuck by twisting the key clockwise (righty-tighty). You should only do the chuck up tightly enough that you can still loosen it with they key. An averagely built man should be able to get the chuck tight enough without using too much force - if you are of smaller build, you may need to put most of your strength into it. Ask for help if needed - never use any additional leverage or a mallet or hammer on the key!
-
REMOVE THE KEY FROM THE CHUCK. The dangers of starting the pillar drill with the key still in the chuck cannot be overstated. Place the key under the drill out of harms way.
Set the height of the bed
- Place your workpiece on the bed - if you need to drill right through it, ensure there is a sacrificial piece of wood underneath it which you can drill into and later discard. You should be able to fit these comfortably under the drill bit in its raised position, with an inch or so of clearance. If you have significantly more or less clearance than this, then you should adjust the bed height.
- Below and behind the bed, you can see that it is clamped to a pillar. Loosen the silver handle on the left of the clamp by one or two full rotations.
- Turn the blue handle on the right of the clamp to adjust the bed height. Anti-clockwise lowers the bed, and clockwise raises it. Raising the bed takes more effort.
- Once the bed is at the right height (around one inch clearance between tip of bit and top of workpiece), re-tighten the silver clamp firmly. Try lowering the bed with the blue handle - you may find it turns a little way before stopping.

Set the depth stop
- The depth stop prevents the drill from going further into your work piece/sacrificial wood than required. This may be important to your project, and is definitely important for protecting the bed of the machine! The depth stop is the part of the three-armed handle nearest the body of the drill - it consists of a blue ring with numbers marked on it, and a small threaded metal arm with a grey plastic knob on the end. There is a small arrow on the body of the drill that points to the numbers on the ring. Start by ensuring that the depth stop is loose, by undoing the grey plastic knob by a turn or so (lefty loosey)
- Lower the drill head to the full depth you require. You may find it helps to have your workpiece/sacrificial wood on the bed but not directly beneath the drill bit!
- With one hand, hold the three-armed handle steady, so that the tip of the drill bit remains at the right “depth”.
- Use the depth stop’s metal arm with grey knob to turn the blue depth stop ring anti-clockwise until it stops - at this point the marker arrow points to 0. Tighten the grey knob.
- You should now find that the handle which lowers and raises the drill stops at your desired height. It is still possible to push the handle through the depth stop limit, but the change in tension is very obvious!
Adjust the drill speed (ONLY ALLOWED BY WOODTECHS)
- Double check the drill is isolated (switched off at the wall)
- To open the gearbox, loosen the silver knob on the right-hand side of the gearbox. This needs to come out fully - be careful not to drop it! You can now open the gearbox lid up. If it is blocked by the woodwork, then the entire drill needs to be pulled further from the wall. Pull from the base, and ask for help if necessary.
- As a general rule, the larger the drill bit, the lower the speed setting you should use. If in doubt, leave the drill on its lowest speed, and only increase if necessary. Hole cutters in particular should always be used at the lowest speed. The drill is at its lowest speed when the rubber drive belt is at the bottom setting. If the drill bit is sharp, correctly fitted and suitable for your material- and still not able to drill effectively, then you may need to increase the speed. Ask for advice if unsure.
- If you do need to alter the drill speed, then begin by loosening the black plastic wing nuts on either side of the gearbox. They only need a couple of turns to be completely loose.
- Twist the silver lever on the left of the gearbox towards you (clockwise). It will probably be quite hard to turn, and will only turn around 30 degrees (12th of a full rotation). This lever pulls the entire motor towards you, just enough to adjust the rubber drive belt.
- Move the drive belt up to appropriate setting - ensure that you move both ends, and that the drive belt is level and correctly fitted. The label in the gearbox lid can guide you about speeds. Typically, increase one level at a time if unsure.
- To re-tighten the drive belt, push the silver lever from step 4 away from you (anti-clockwise). You can push the motor away from you with your other hand if this helps. Ensure that the motor is pushed back as far as it can go - remember that you are working against the tension of the rubber drive belt! Standing in front of the machine, push the silver lever hard with your right hand, to keep tension on the belt, and then tighten the black plastic wing nut on the left of the gearbox with your left hand. Once this is tightened, you can then tighten the right-hand side black plastic wing nut. This process is tricky, especially if you are of a smaller or shorter build. Ask for help if needed!
- You can now close the gearbox lid, and replace and tighten the silver knob from step 1. This is fiddly to refit, and you may find it helps push the gearbox lid down and angle the knob thread slightly down into the gearbox. This knob only needs to be gently finger-tightened. If you have increased the speed of the pillar drill, ensure that you set it back to the lowest speed when you are finished with the tool!

Secure your workpiece (and sacrifical wood if relevant)
- Place your workpiece and sacrificial wood on the bed, and adjust the fence as necessary. Make sure your workpiece is marked where you need the centre of the hole!
- Lower the drill and make sure that the tip/teeth of the bit are where you want them! Raise the drill back out of the way.
- Choose appropriate clamps and ensure that the workpiece is securely clamped to the bed (the large C-clamps are useful for this), and to the fence. Remember that the workpiece will be under a lot of twisting forces, so good clamping is very important. Use at least 2 clamps, on different axis.
- Lower the drill again, and double-check the position is still correct!
Congratulations, you’re now ready to drill!
Using the pillar drill
- Ensure you are wearing eye protection, and the power to the drill is still off!
- Do a visual and finger-tightness check of:
- Bed clamp
- Fence locking clamp
- Workpiece clamps
- Chuck
- Depth stop
- Motor-moving silver handle and black plastic wing nuts
- Gearbox-closing metal knob
- Ensure all clothing, hair, jewelry, etc. is secured and won’t come loose
- Switch the power on at the wall
- Press the green power button on the left of the drill
- The drill should now be spinning! Make sure that the bit is turning straight. It will either be perfectly straight, or way off centre if you have managed to mis-attach it to the chuck. If unsure, ask for help.
- Stand upright, comfortably in front of the drill.
- Grasp whichever part of the three-armed handle is pointing up (and possibly towards you)
- Pull the handle towards you until the tip of the bit is about to make contact with the workpiece.
- Apply smooth, firm pressure to the handle, bringing the bit in contact with the workpiece. Let the drill do the work - don’t pull down too hard or fast. Equally don’t pull too slowly - as ongoing friction will cause a build up of heat which may start to smoke and ignite! The amount of pressure you need to apply, and the drill speed required, is very variable depending on material, type/size of bit, depth of hole - you will learn through practice, but always ask if unsure.
- If you are making a deep hole, then periodically raise the bit back out of the workpiece to allow sawdust to clear, and heat to dissipate. If you notice much charring or smell burning, then stop and ask for advice
- Once you hit your depth stop, gently raise the bit back out of the workpiece and press the red stop button, next to the green start button. Wait for the drill to stop before removing your workpiece.
Between holes
- Isolate the tool by turning off its power supply
- Use the check key to check the tightness of the bit, as it may loose over time (or tighten).
When finished with the tool
- Isolate the tool by turning off its power supply
- Put away clamps
- Remove drill bit and put away
- Leave chuck key on bed
- If you removed the fence from the bed, re-attach it
- Loosen depth stop grey knob
- If you adjusted the speed of the drill, re-open gearbox and reset to its slowest speed.
- Sweep and hoover!
- REMOVE THE KEY FROM THE CHUCK. The dangers of starting the pillar drill with the key still in the chuck cannot be overstated. Place the key under the drill out of harms way.