I recently thought I’d try my hand at making a chair. I read a couple of books on the subject, the most useful being the stick chair book from lost art press. This book, plus various of their blog posts steered the construction method. For the design I was inspired by George Nakashima’s lounge chair.
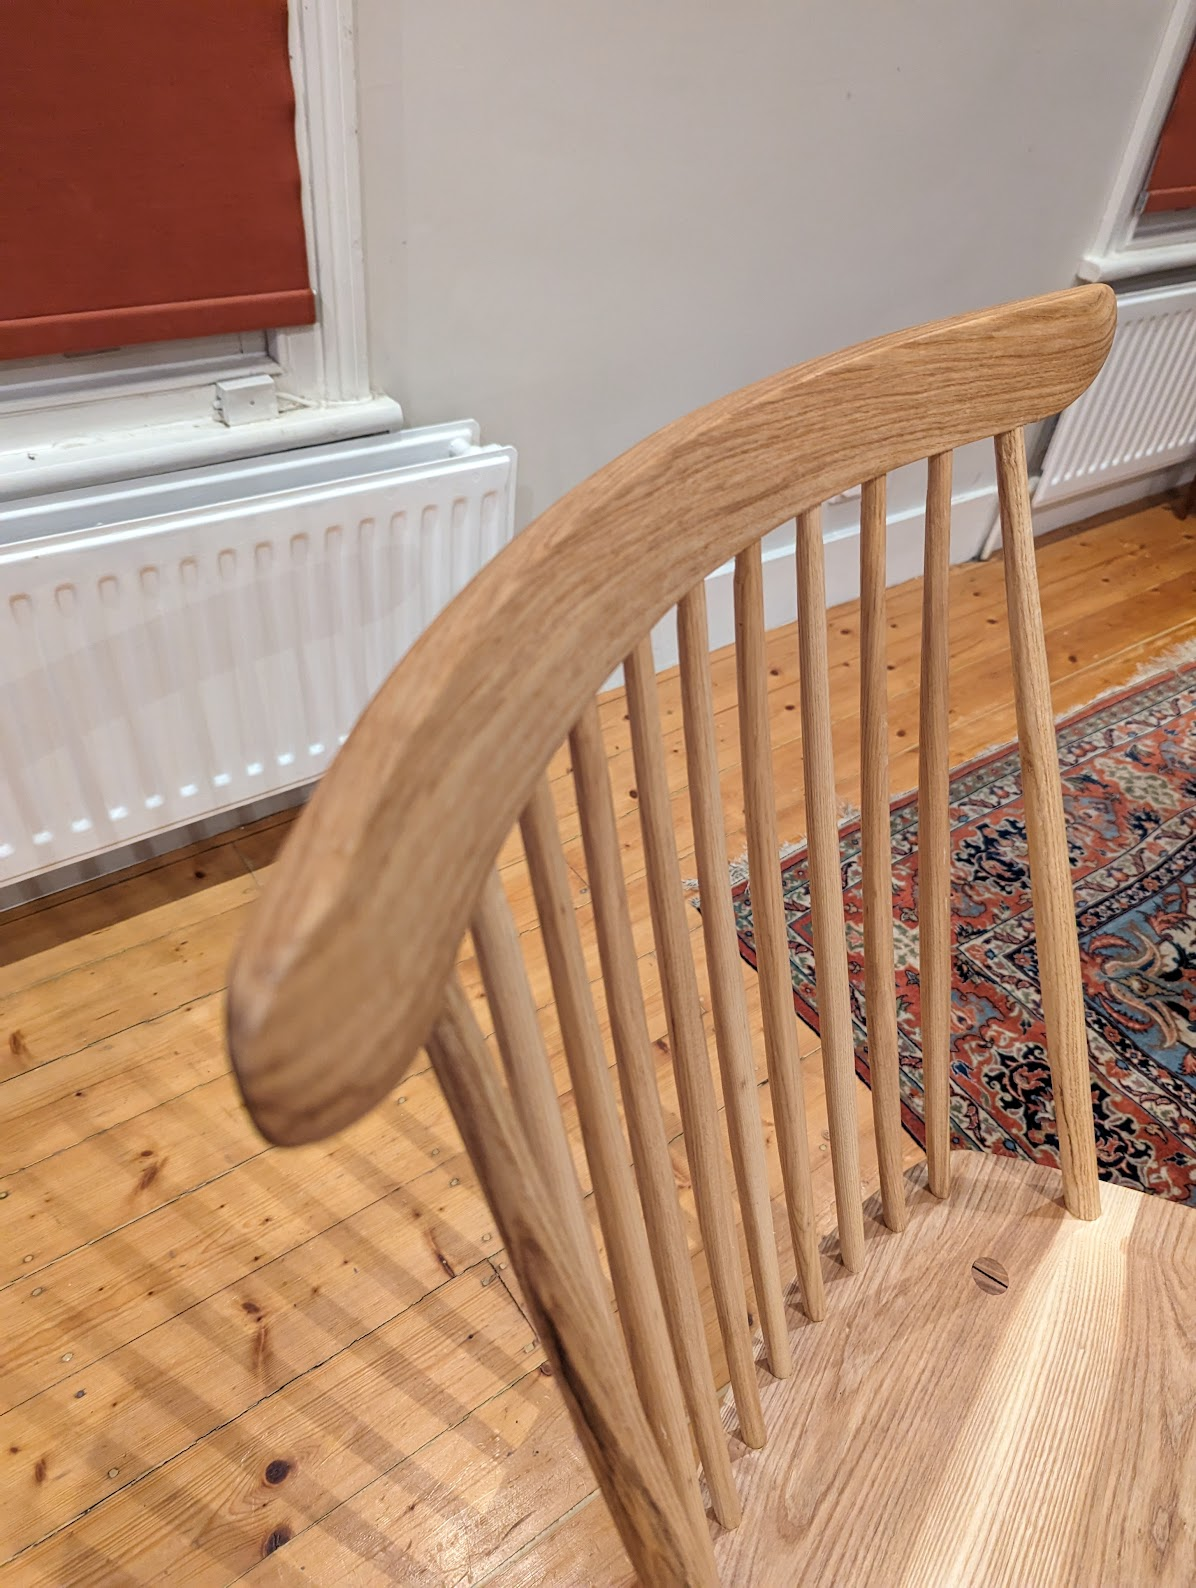
The final chair:
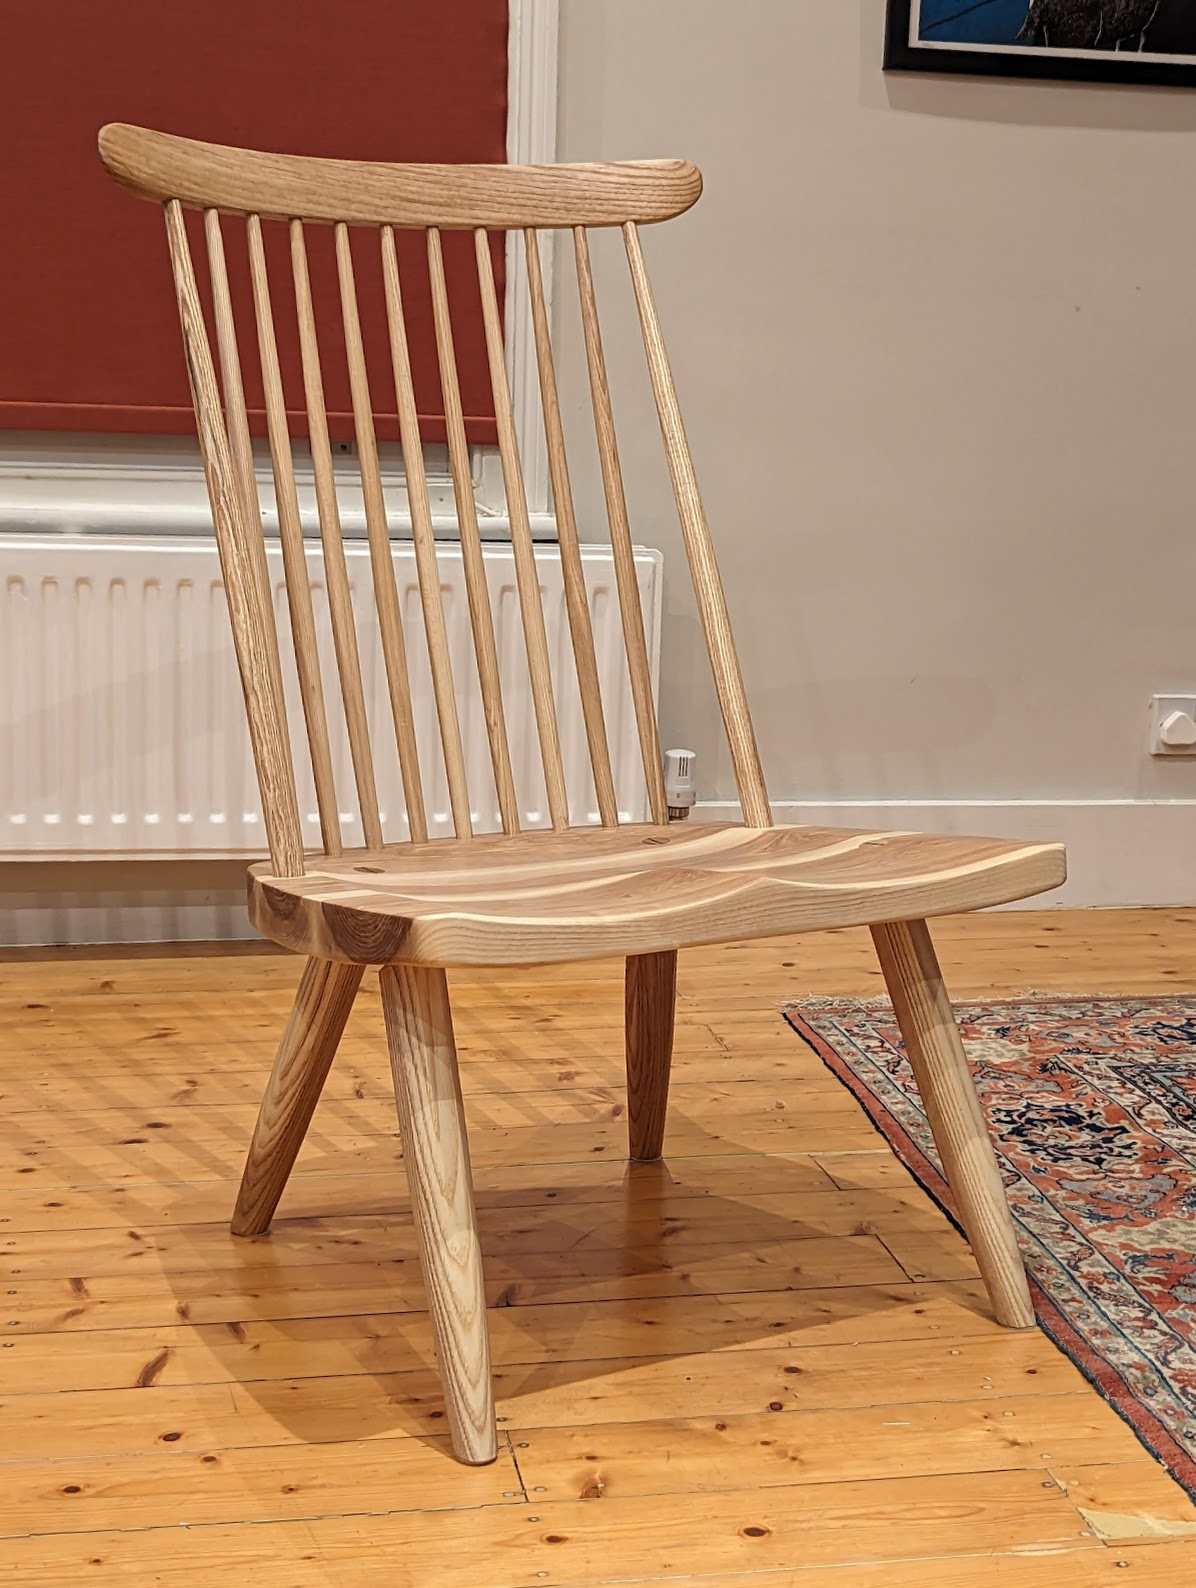
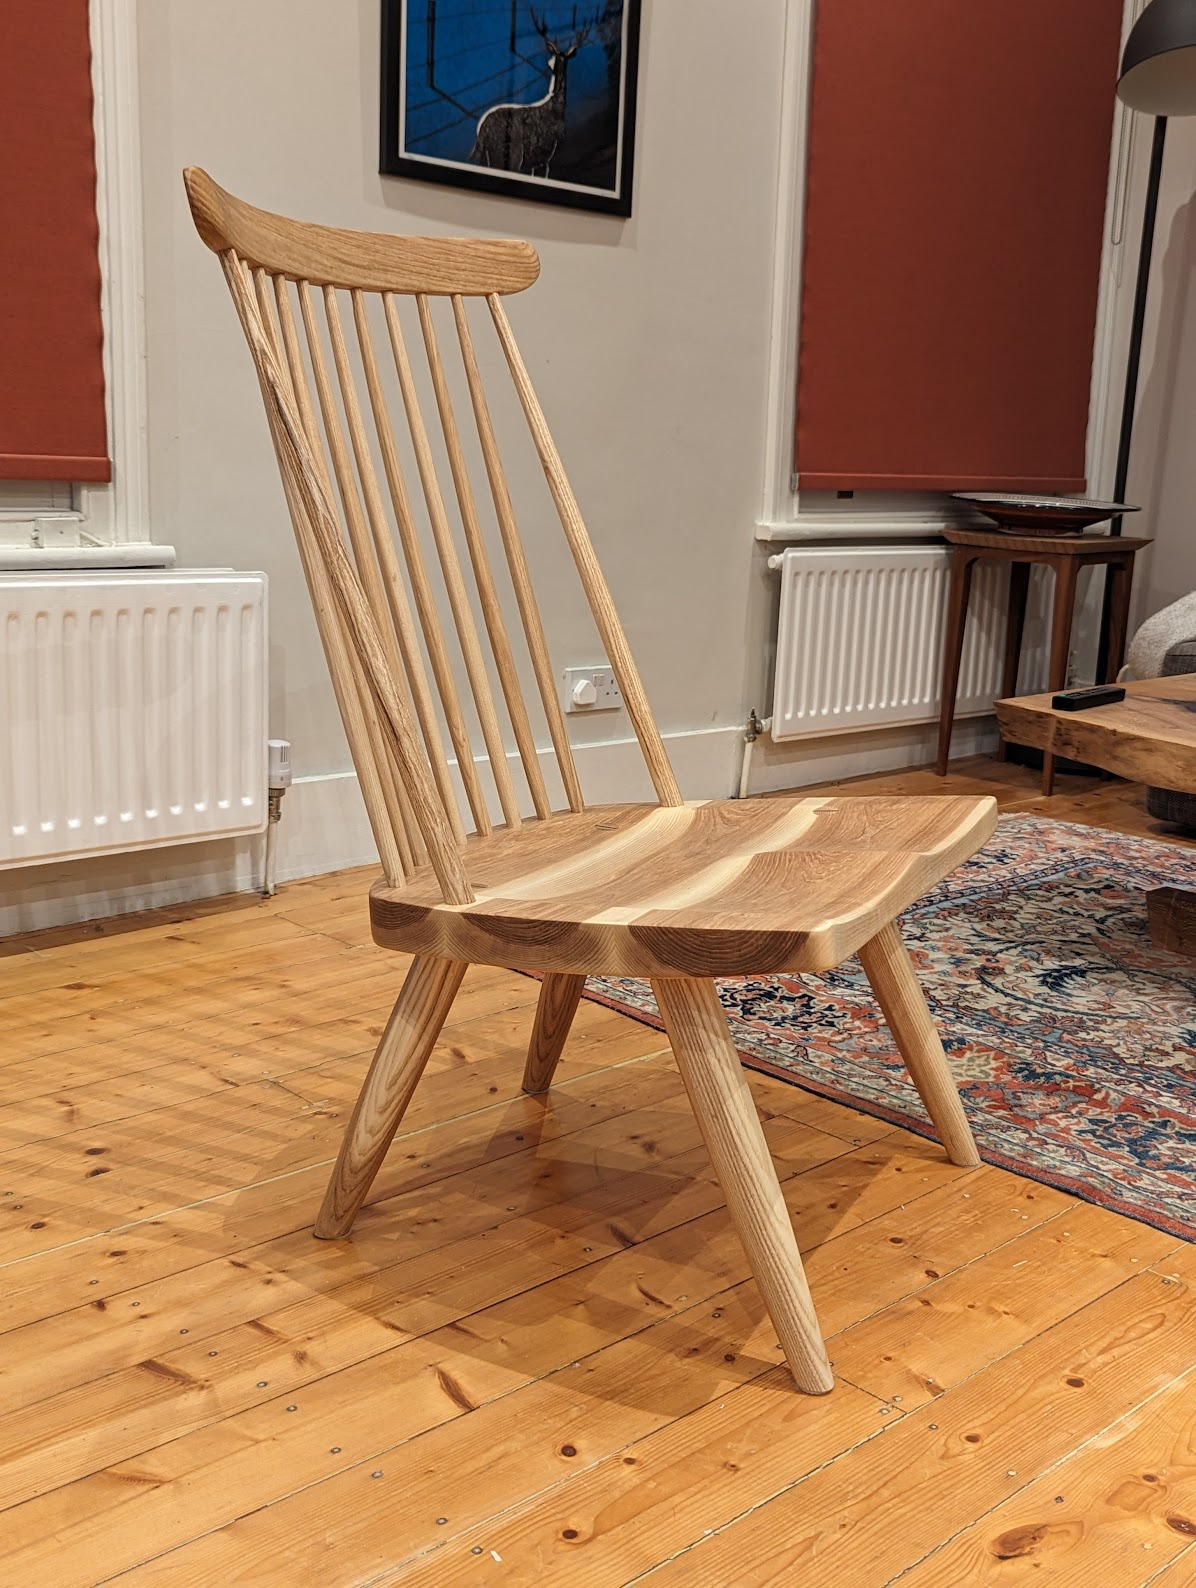
(I wish I had better photos, it looks great in real life!)
An overview of the steps:
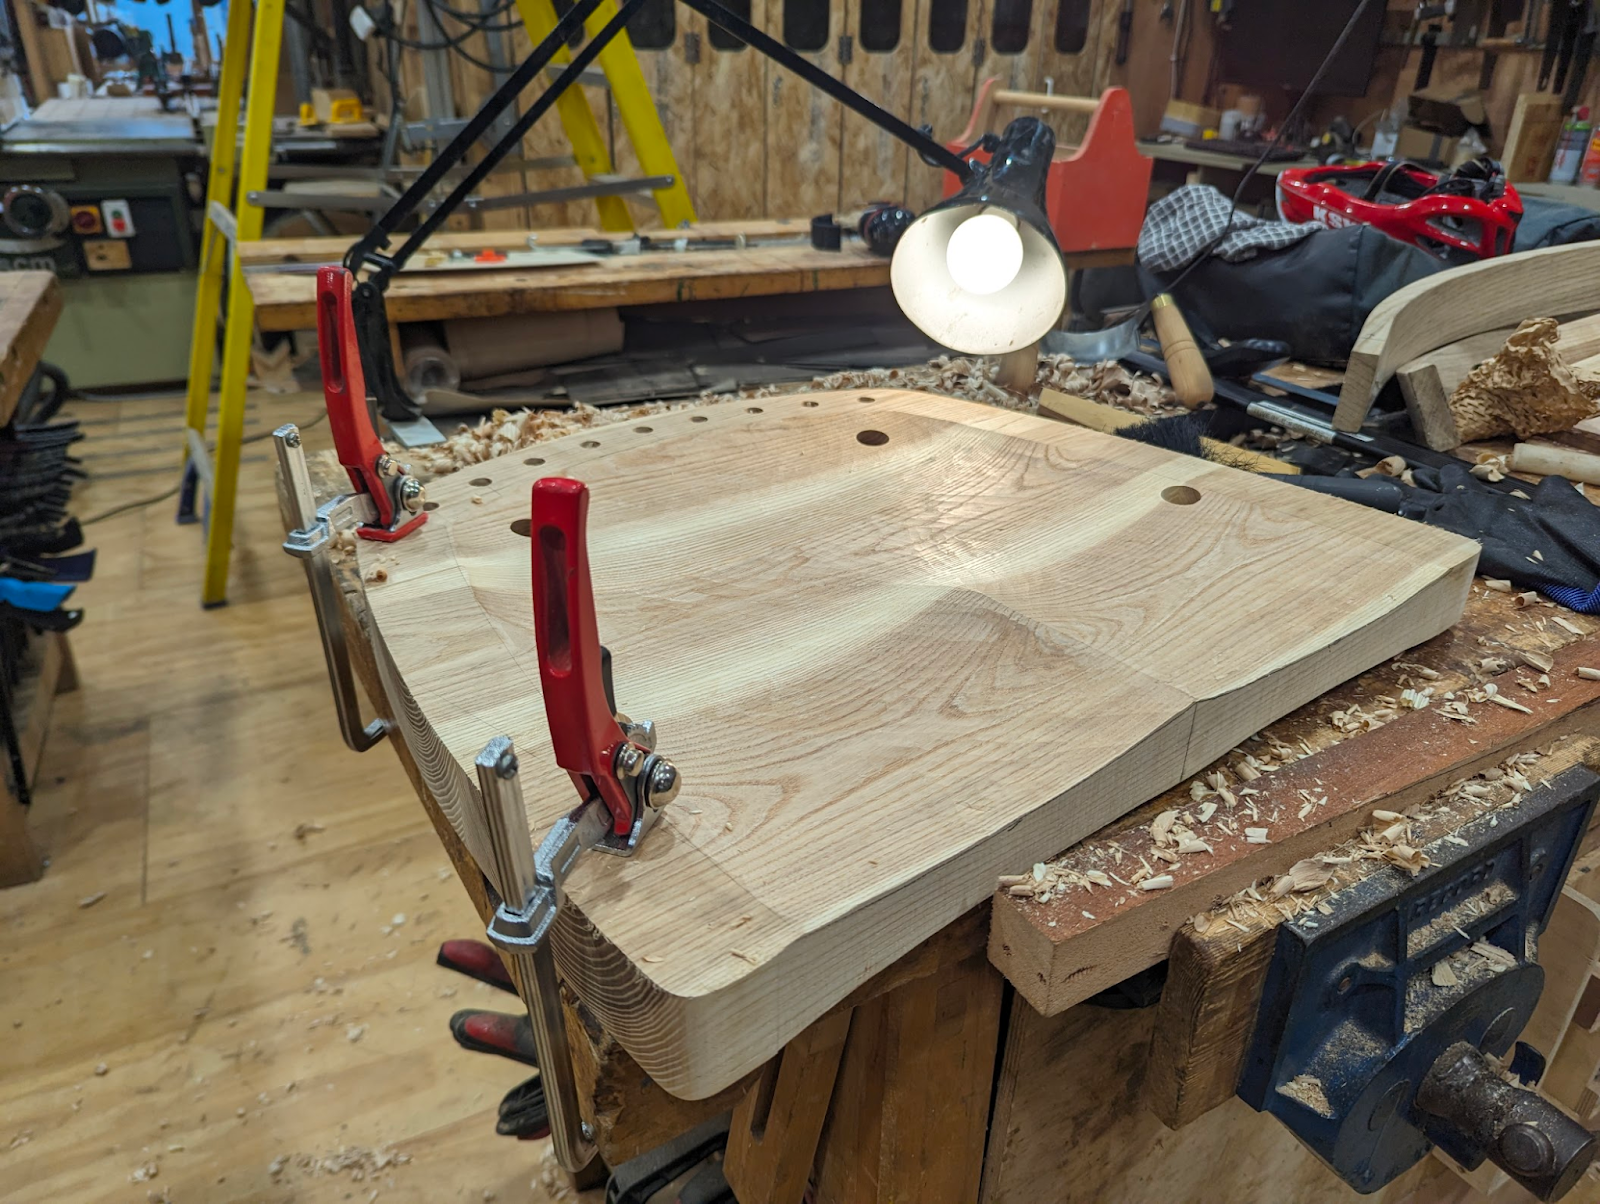
- The seat was glued from three pieces from a single plank. All of the wood for the chair is Ash, and the seat used a board from near the center of a tree which had olive heart wood. I bought it rough sawn, squared it on the planer and then jointed the edges by hand before gluing it up. I used a combination of a scorp for rough material removal, a travisher for refinement and a curved card scraper to saddle the seat. I didn’t own any of these, but it was my birthday so…
-
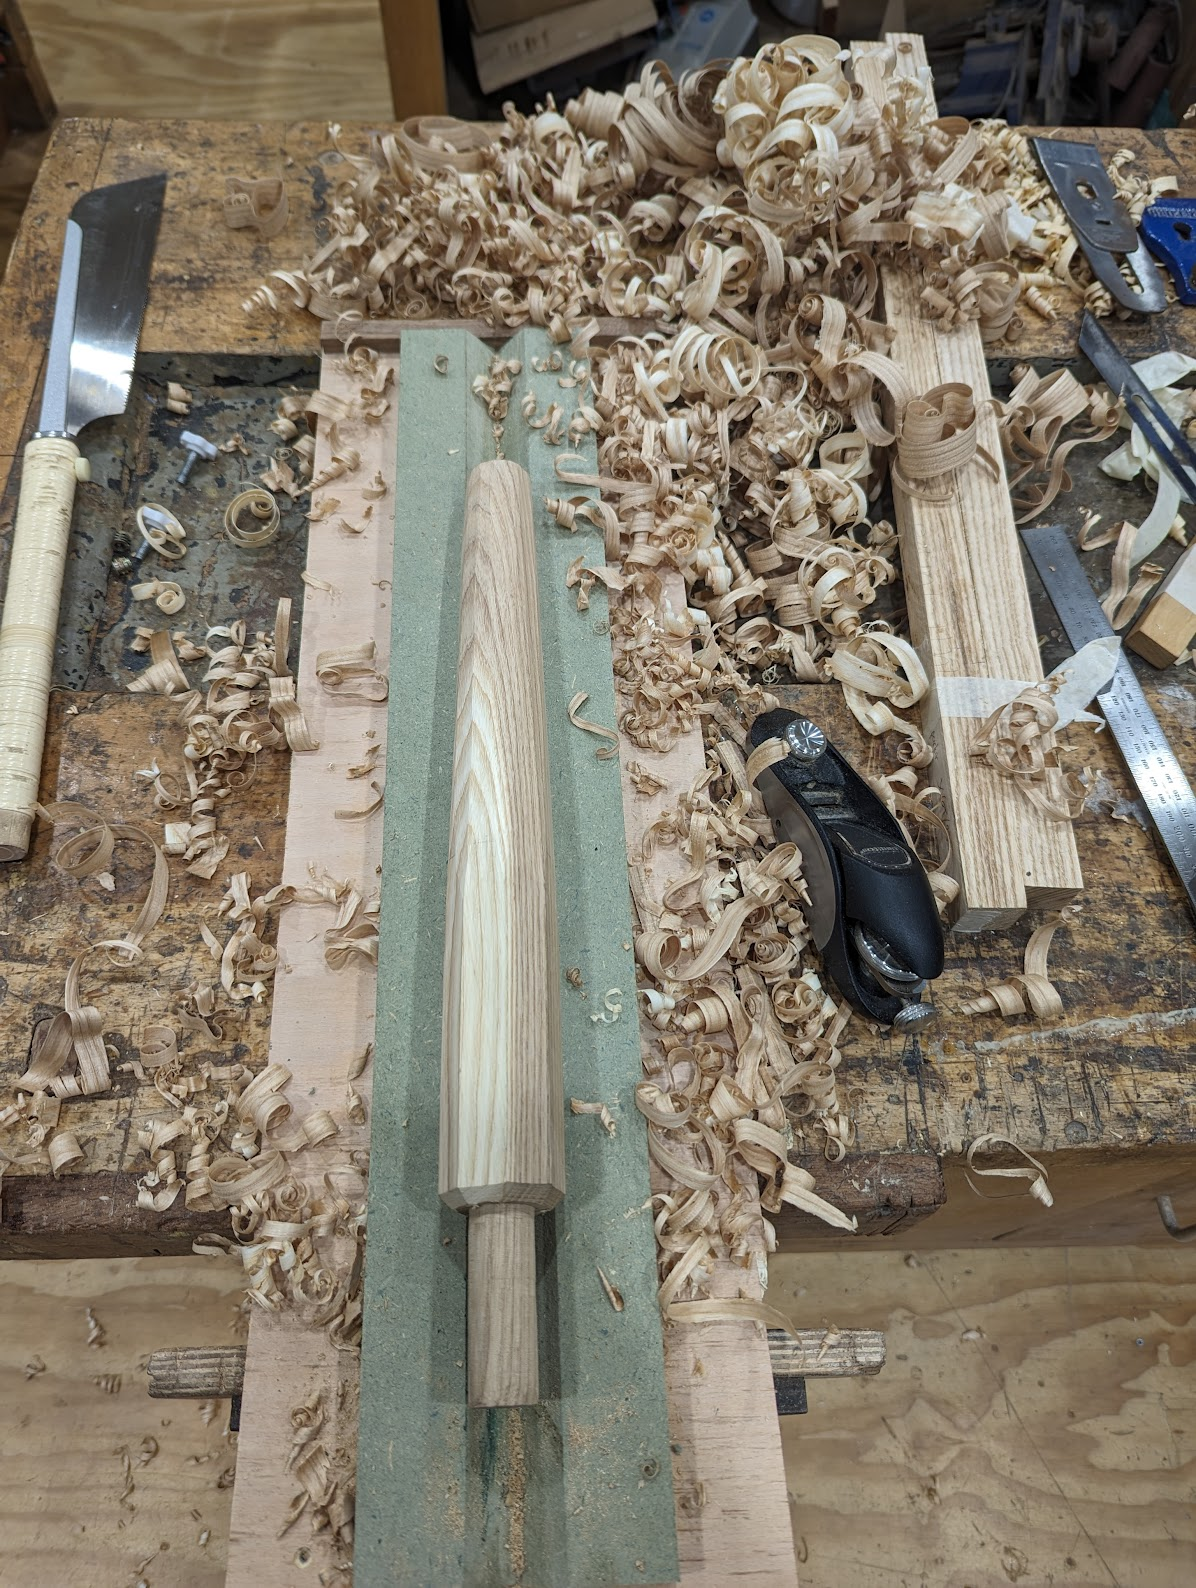
The legs came out of the same plank and started life square in section. I then planed them into octagons with a jack plane before tapering them and rounding them with a combo of the jack plane and block plane. I first rounded the lower part of the leg and liked the transition from octagon to round which couldn’t easily be achieved with another method so I kept this as the final form.
-
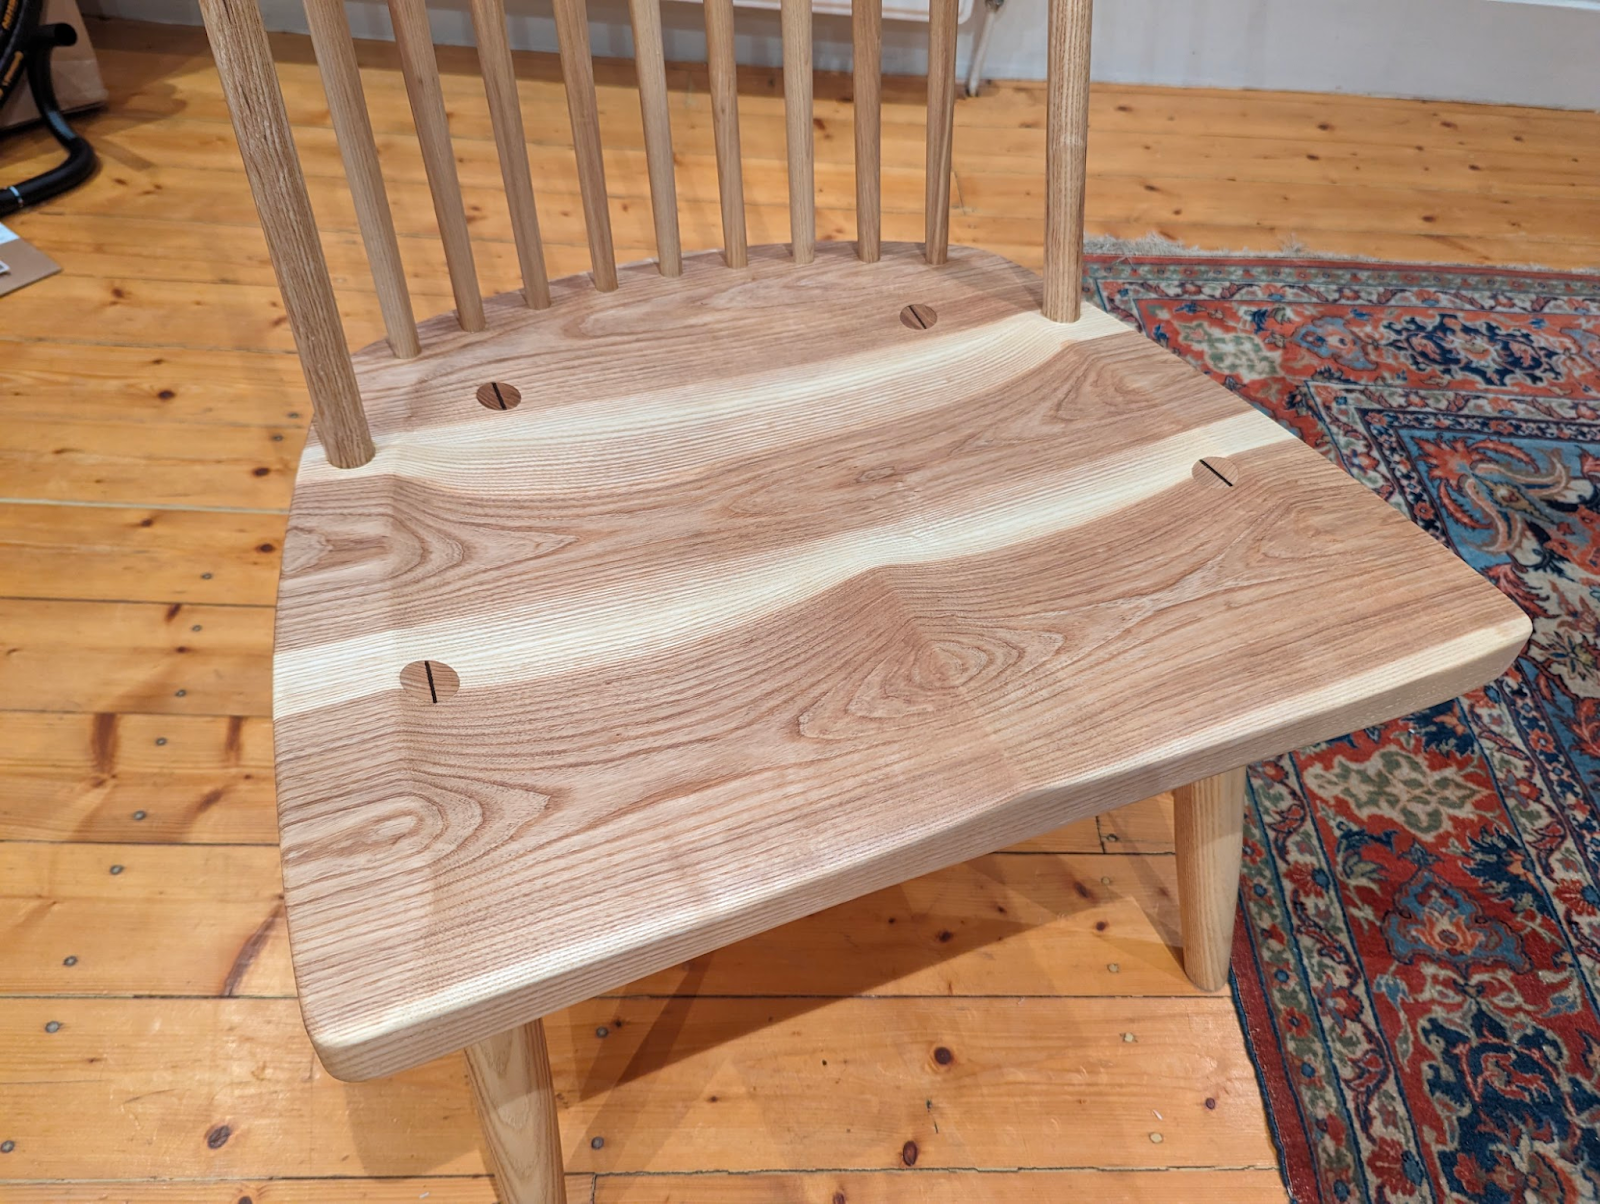
The legs are joined to the seat with straight 25mm round tenons. I made these using a plug cutter. The mortices are made with a spade bit which I ground down slightly for a more precise fit. They are wedged with Wenge for a nice contrast.
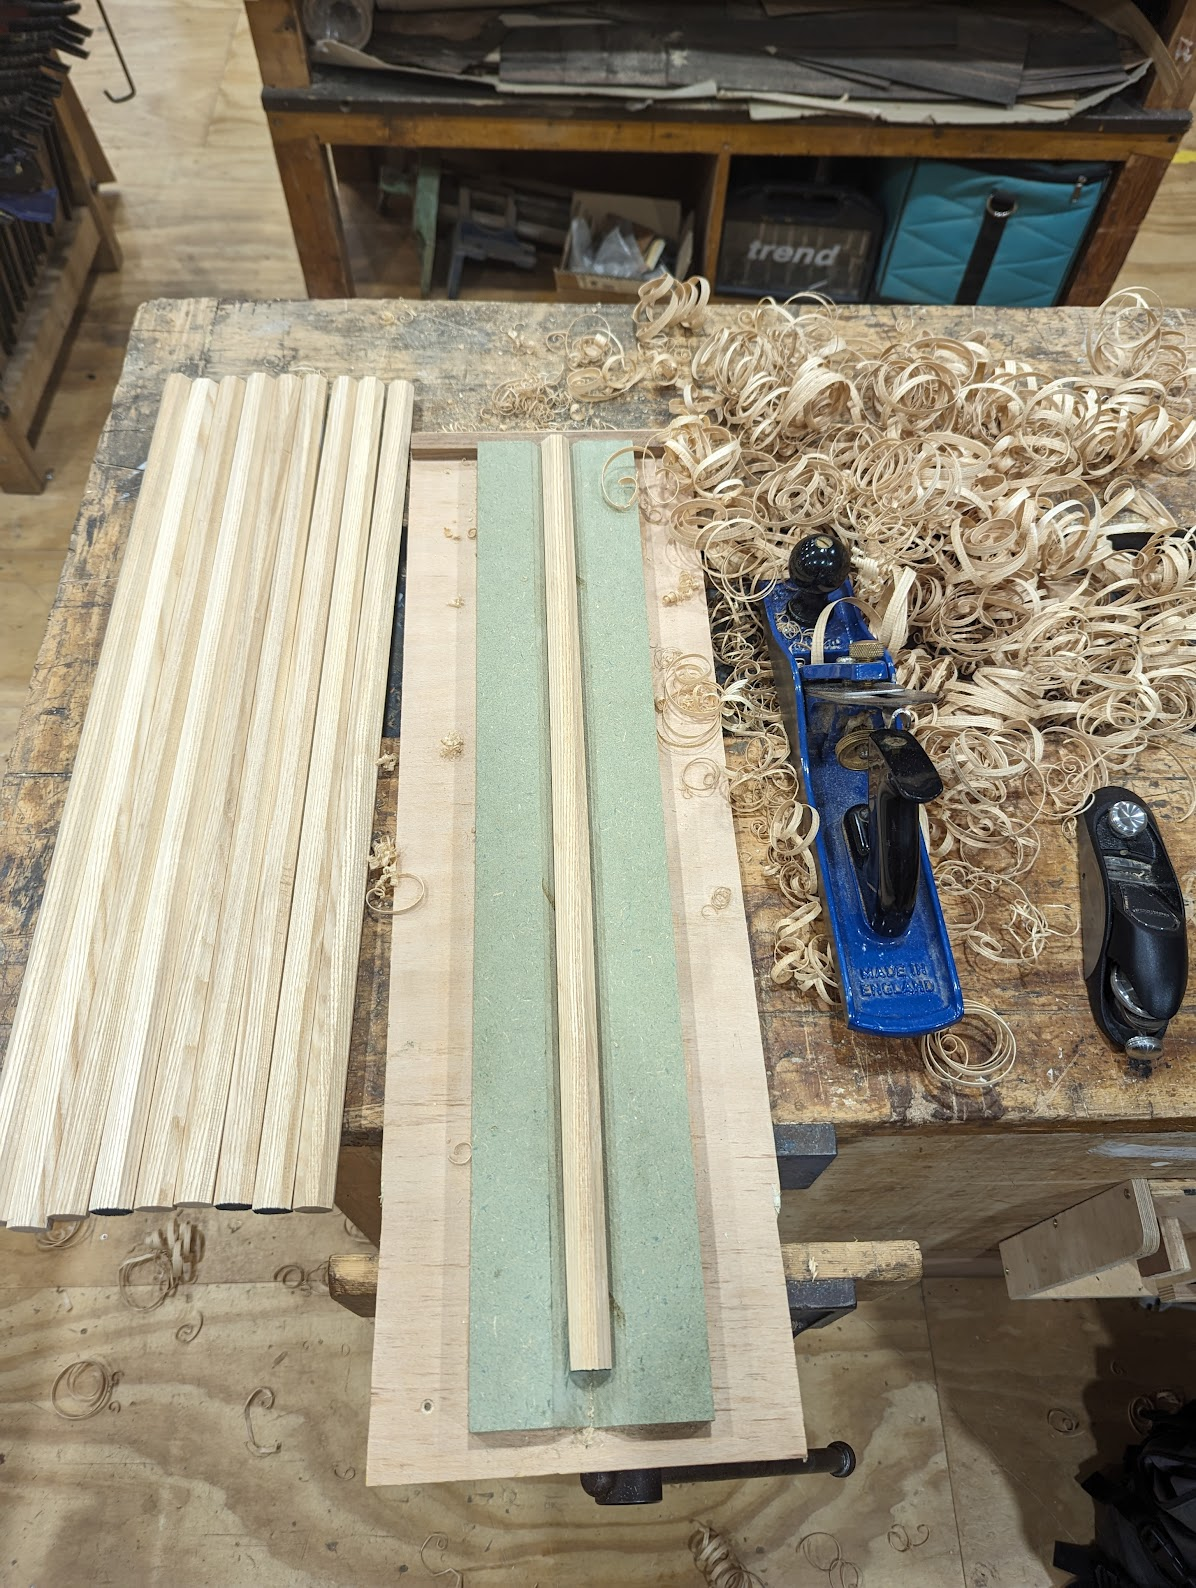
- The back has 11 sticks. 9 thinner at 12 degrees and two outer ones which were thicker and laid back 17 degrees. The thicker sticks have a 25mm tenon on the bottom and taper to 15mm on the top. The thin sticks are 15mm on the bottom, hit a max diameter of around 19mm and then taped down again to 12mm on the top. Making these followed a similar process to the legs. I started with squares, planed them into octagons and then tapered and rounded. Plug cutters and custom ground spade bits here too, although in retrospect I went too tight on the 15mm joints which made assembly a real battle.

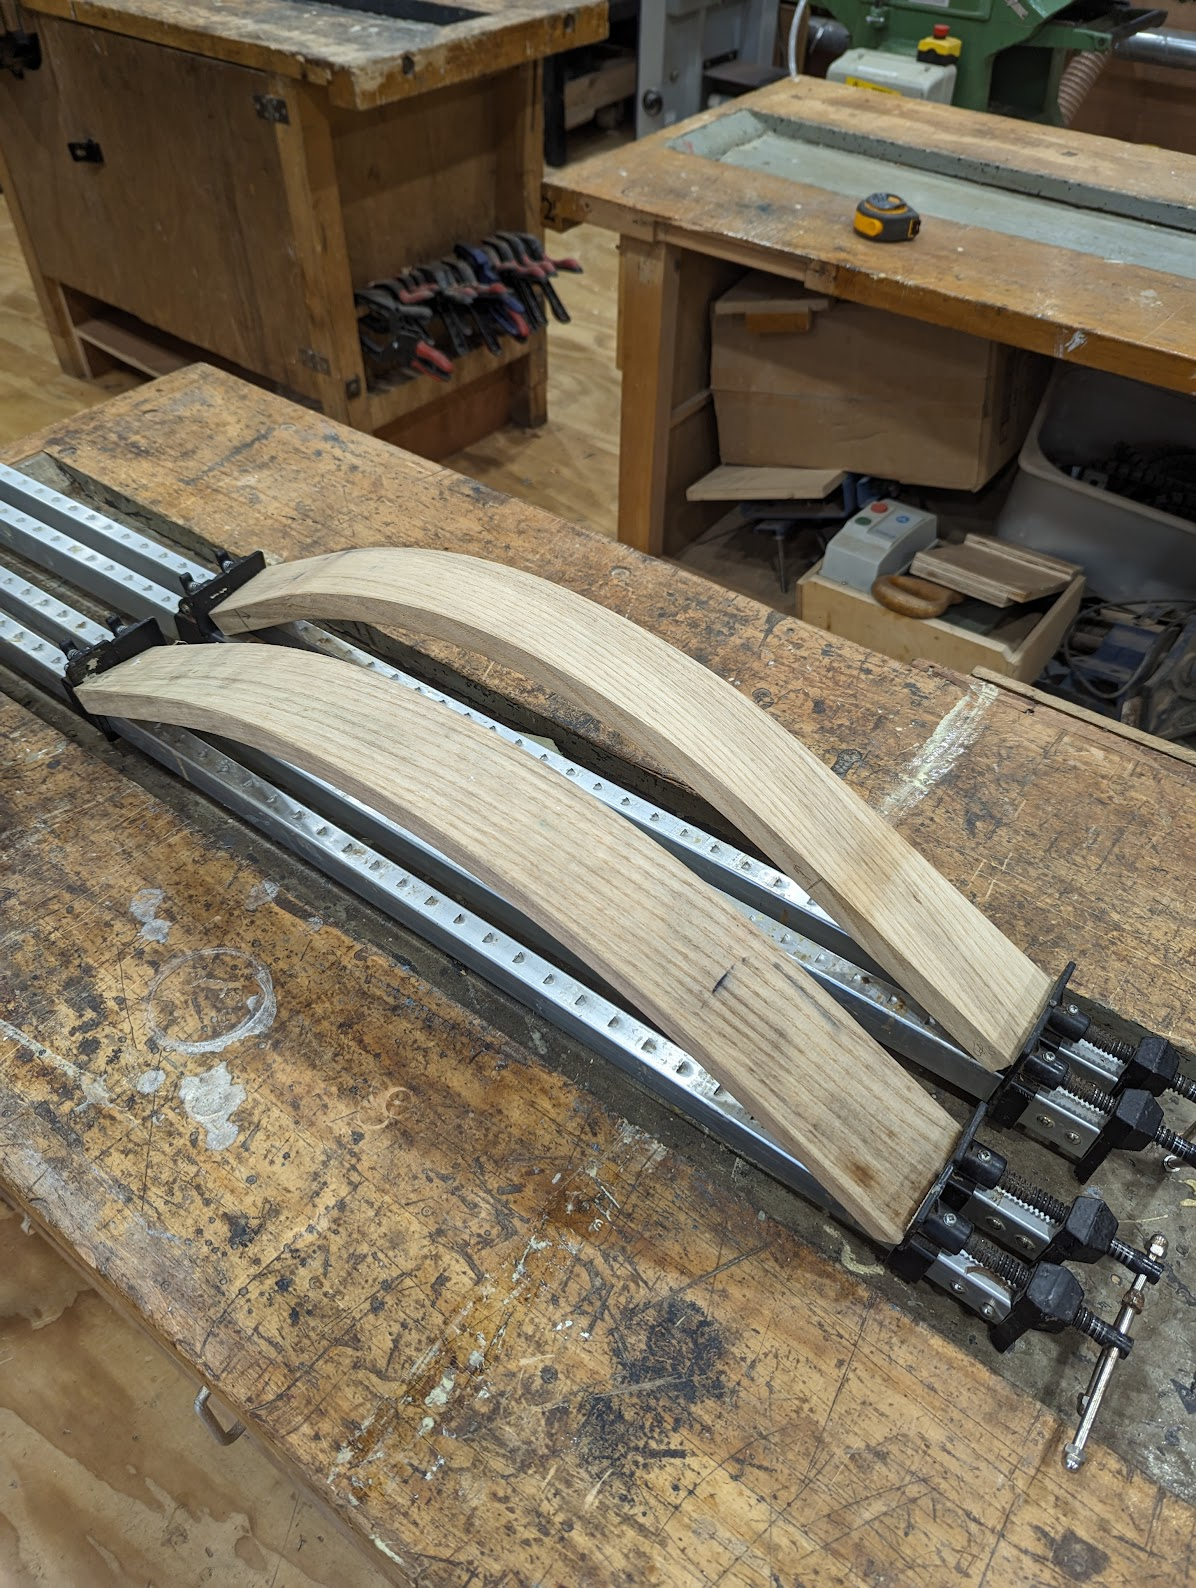
- To top it off there is a crest rail. This was steam bent before lots of shaping and refinement. I was very happy with how this came out in the end.
- It was glued together with liquid hide glue which I went for for the additional open time you get over white/yellow glue. I’ve finished it with Satin Osmo. In some lights this looks a bit shiny, but I’ll see what happens as it wears in.
Overall I found it to be a fun project and I’ve already bought some wood to allow me to make a couple more. I learnt a lot and imagine the next one will be a lot quicker. Now I’m just waiting for a design idea and I’ll get going