Problem
We are lucky enough to have a little garden, unfortunately we don’t have a water tap to connect the hose. This was a bit annoying over the summer last year when I had to carry bucket of water to fill Kira mini swimming pool. So I searched and found a screw mixer tap connector (Hozelock) the closest tap for us was in the kitchen. And to my disappointment it did not fit my mixer tap and trying to over-tighten using multiple seal didn’t help and it broke. Yep that summer I kept on carrying bucket of water. Never settling up on failure my mind started to wonder about how to design and 3D print version of this apparatus.
Design
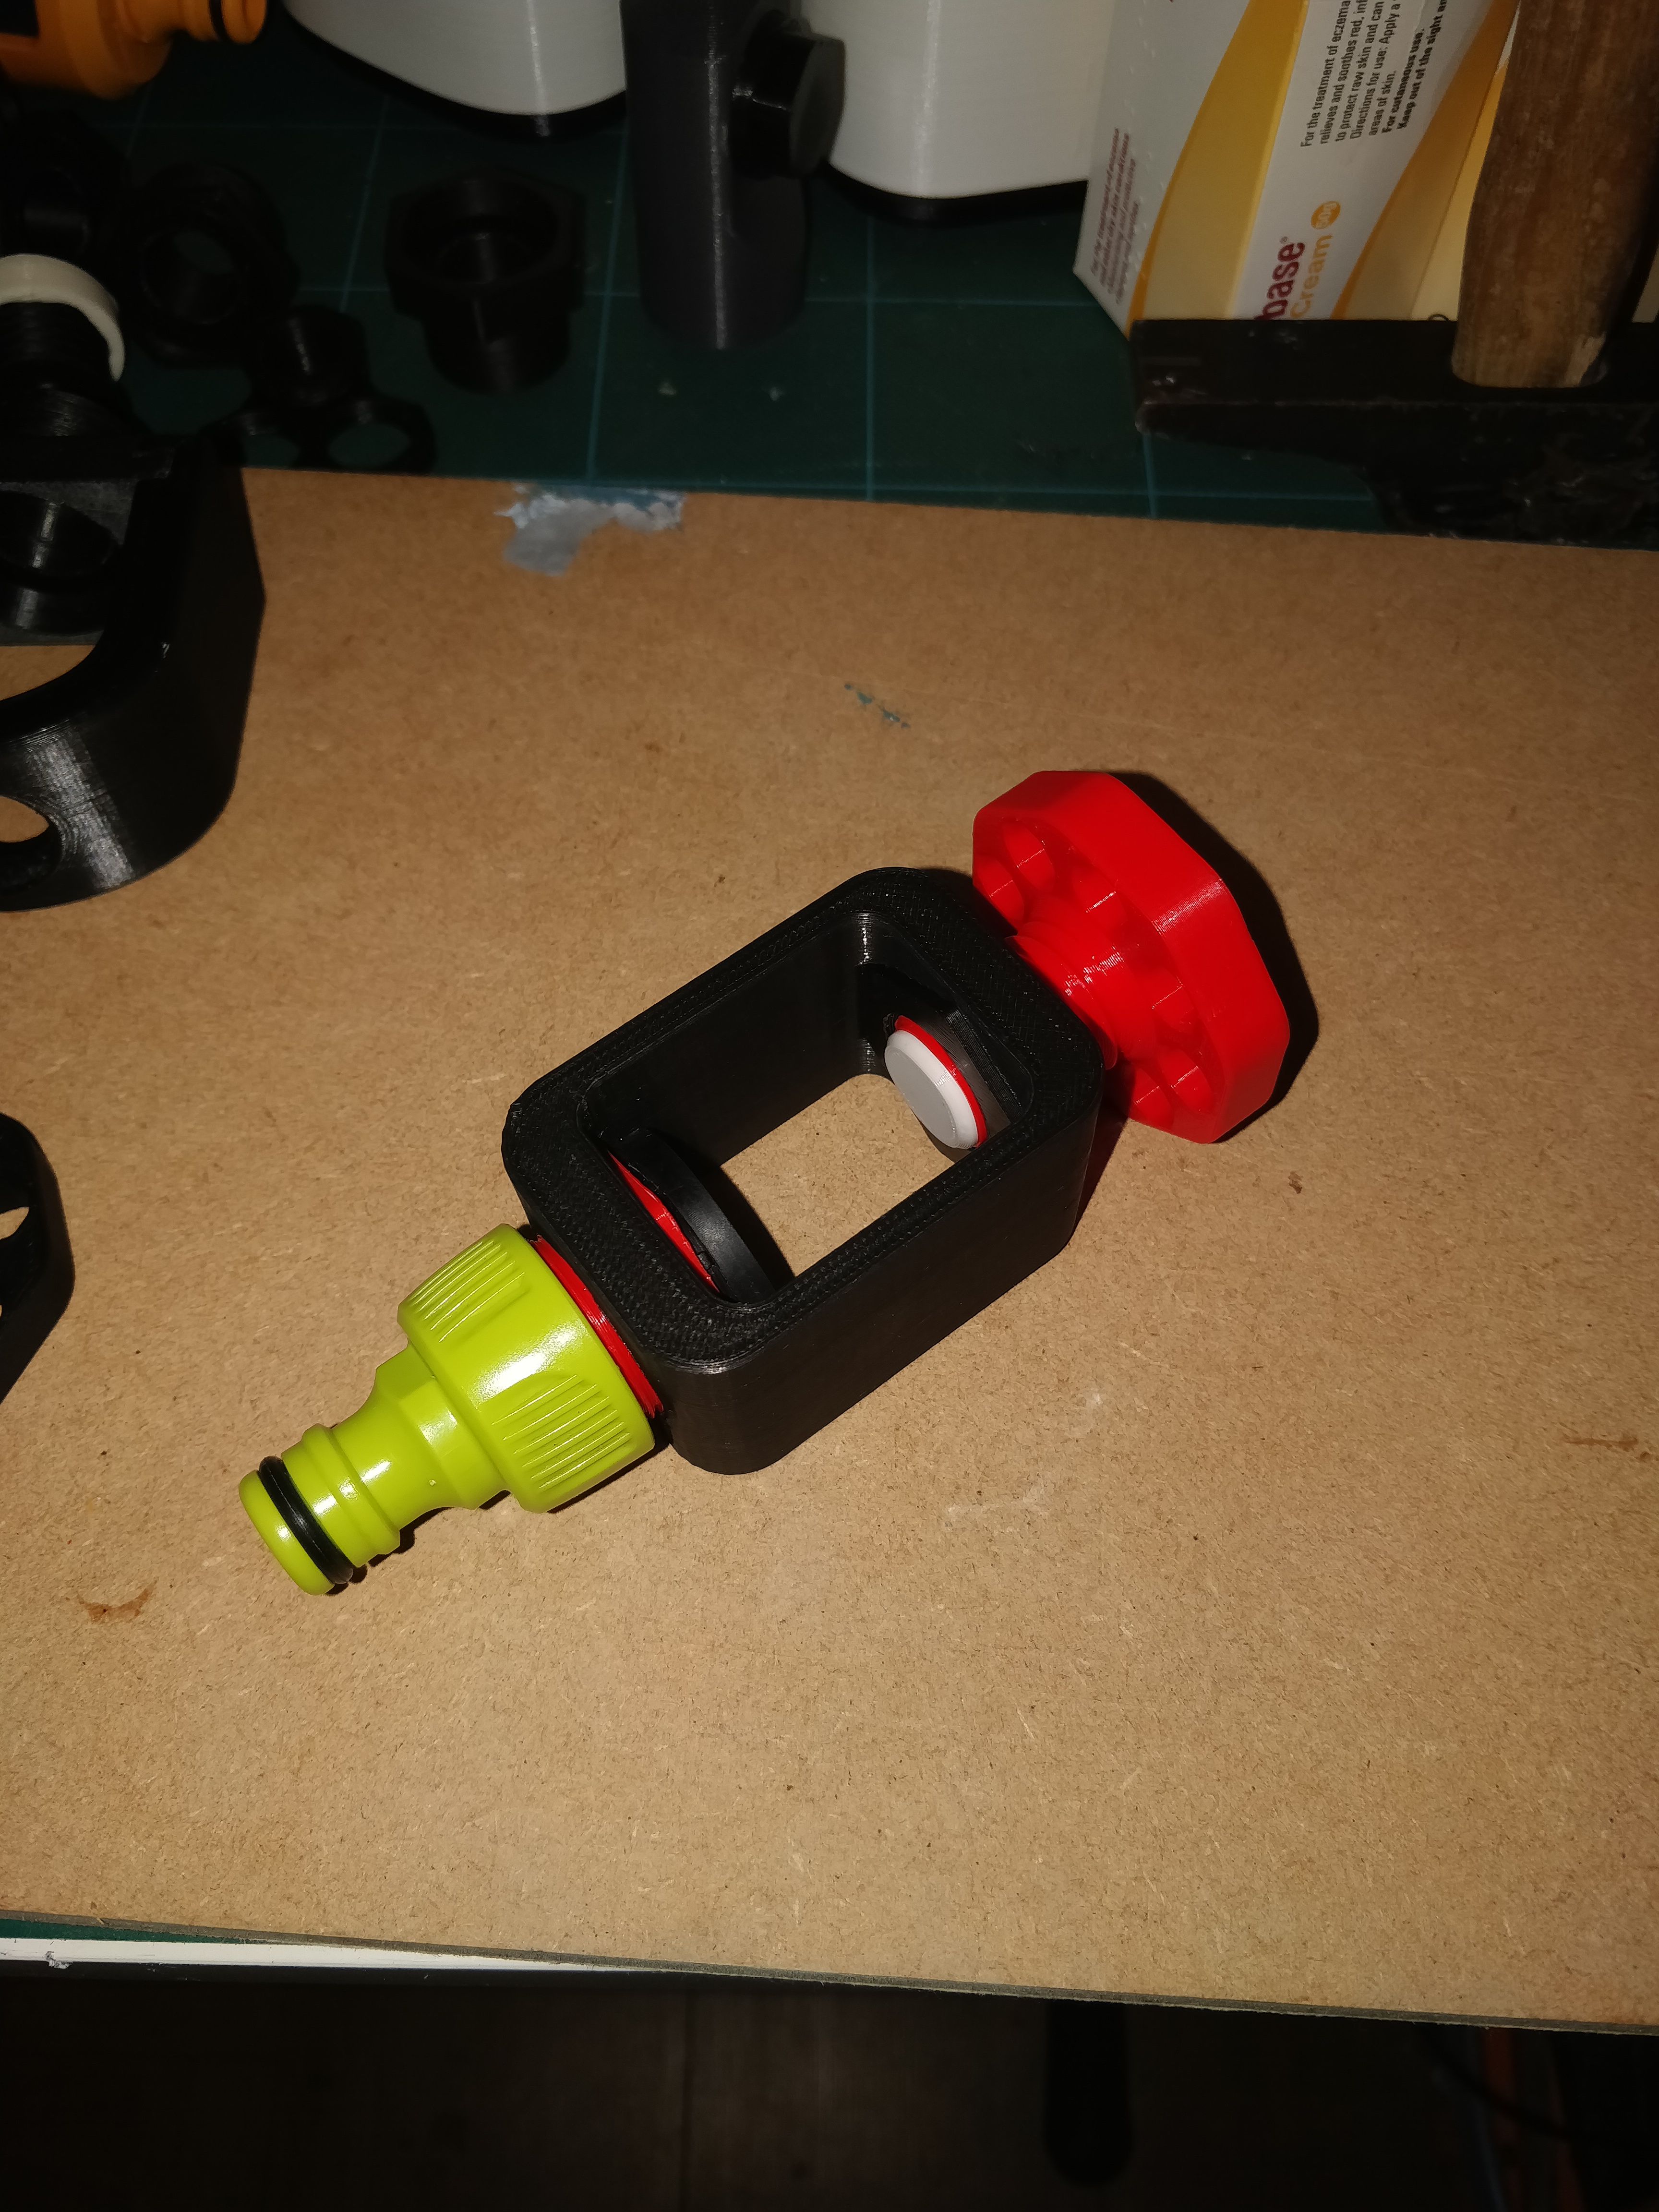
For the design I took obvious inspiration from the failed Hozelock a wrap around and a tightening screw pushing the tap onto a rubber seal. For the connection to the hose I simply bought a standard garden tap connector or alternative.
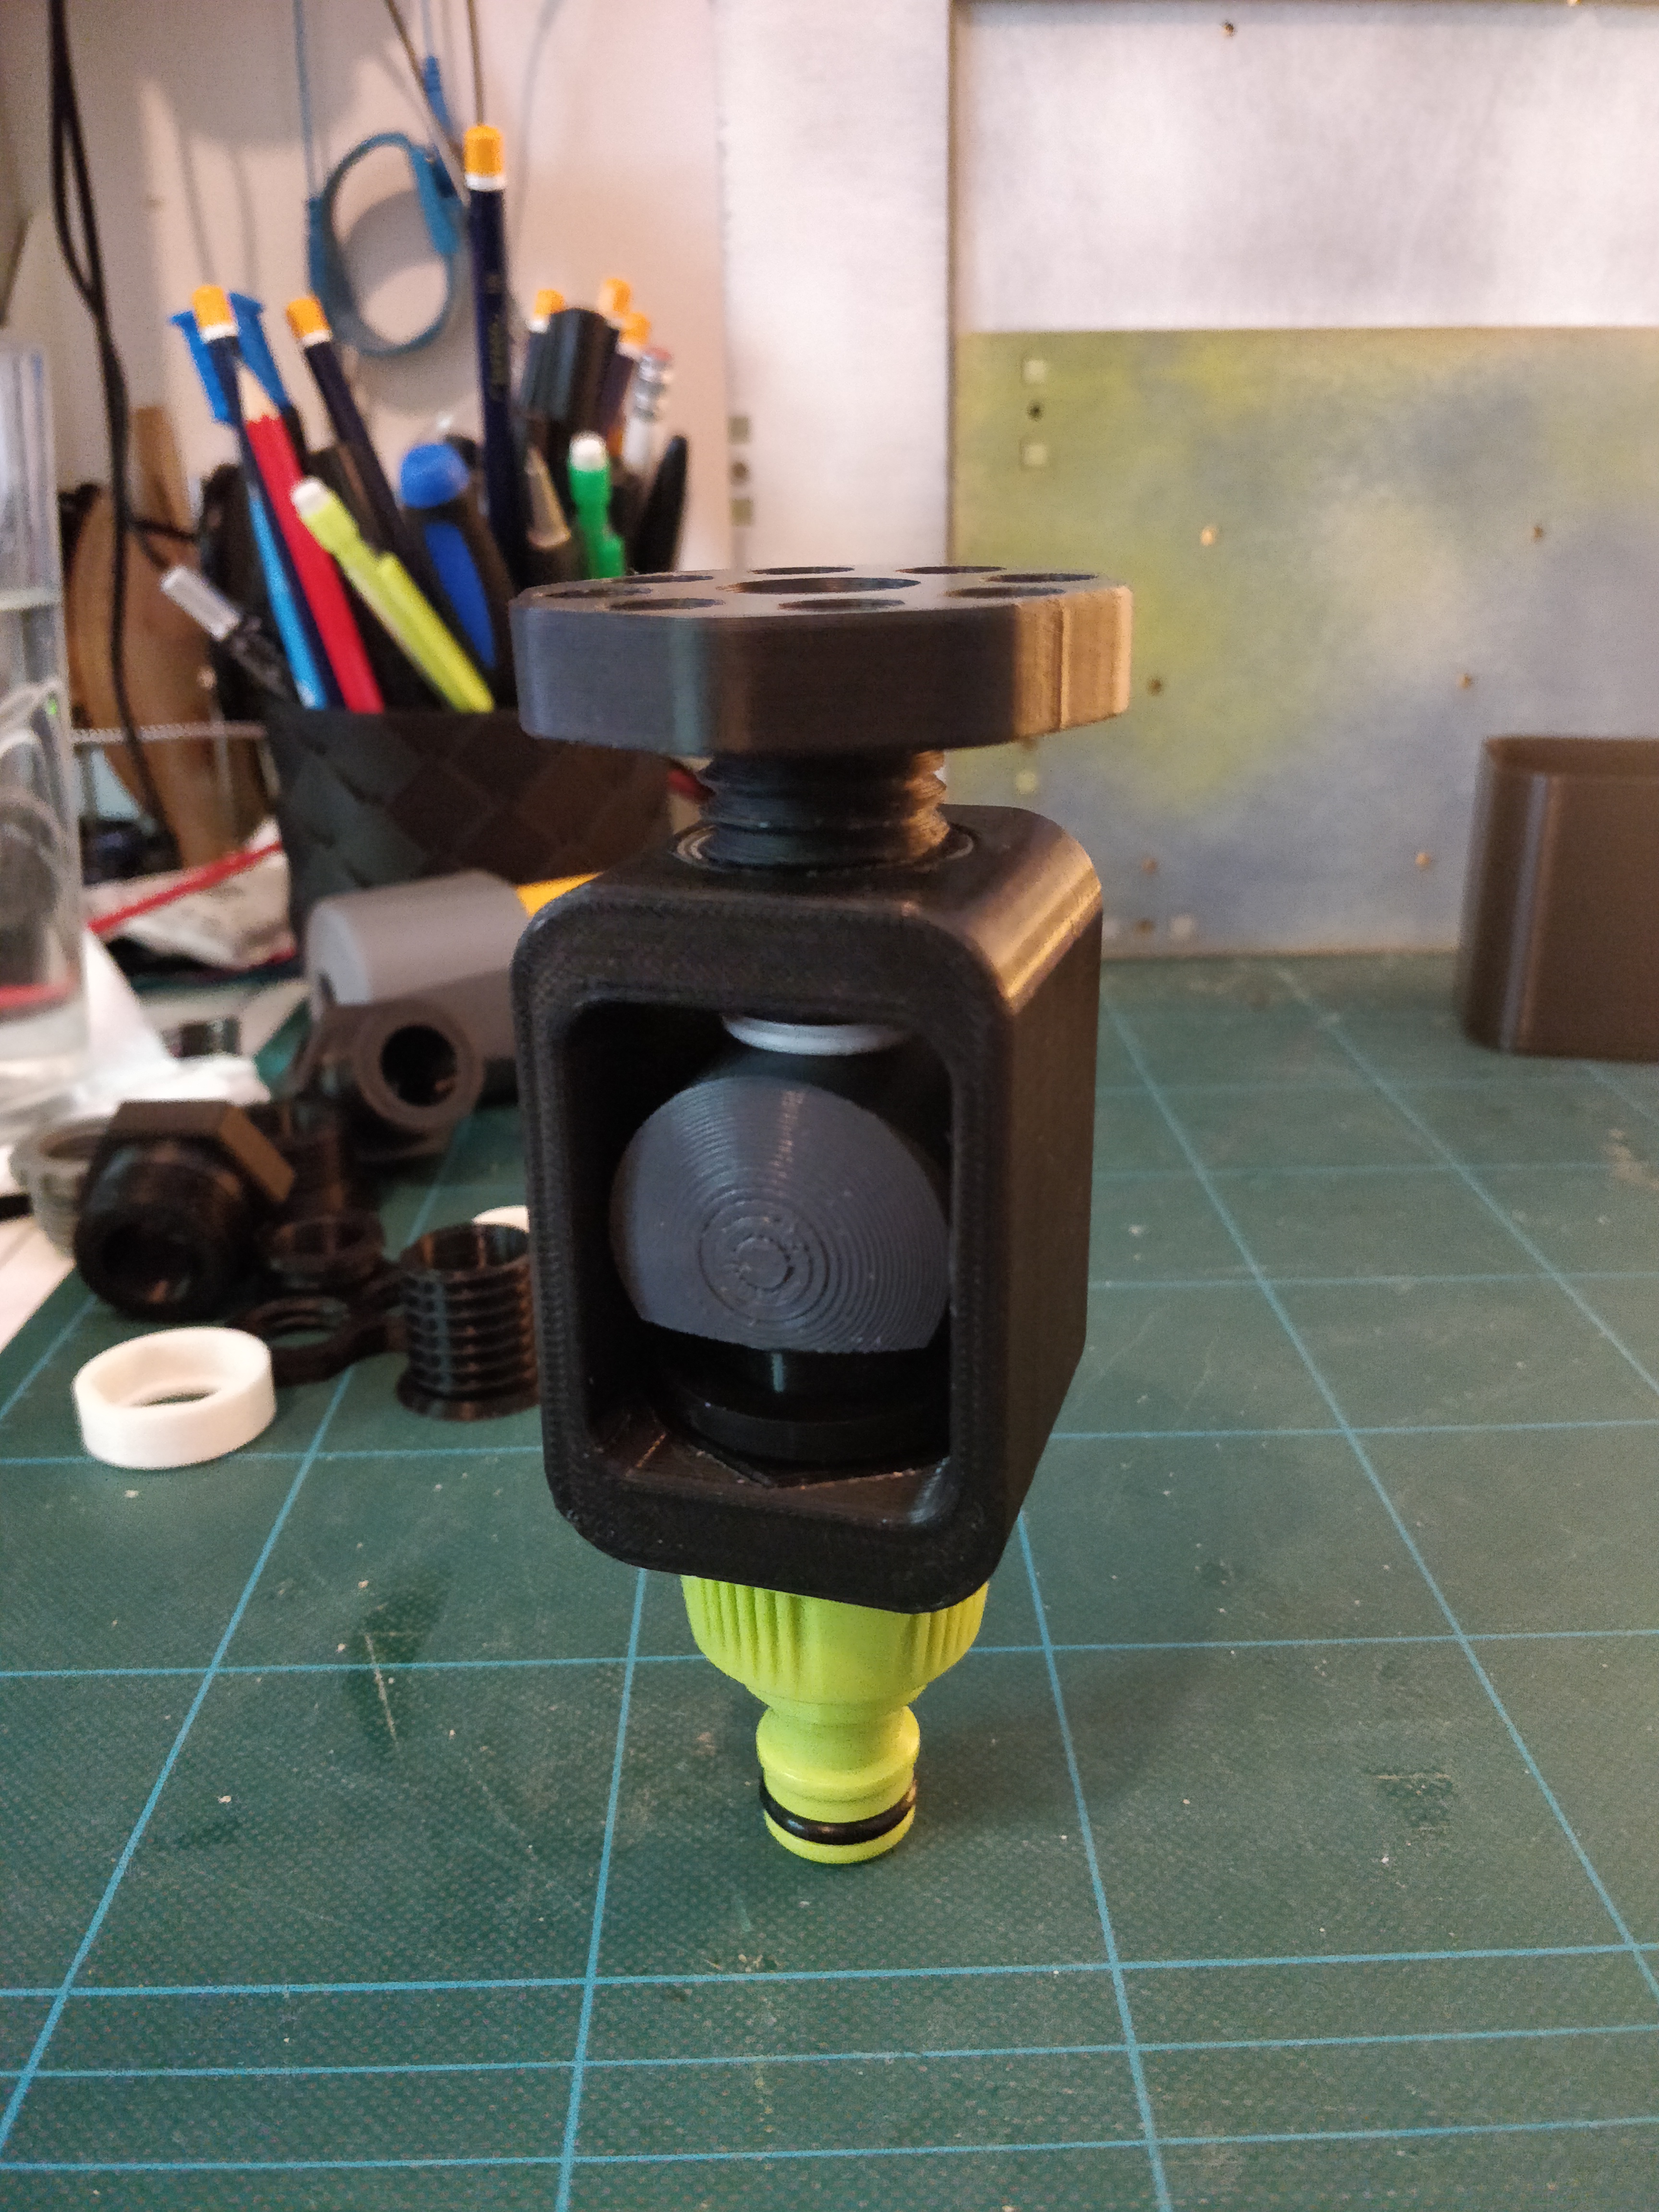
Finished design
The design is modular and allow to iterate quickly and improve small parts without re-printing everything every-time the design is tweaked. This is actually pretty important when designing part that include thread because the orientation and quality of which such part are printed will determine how smoothly your thread fit together (more described below).
Implementation
First I’ve modeled the kitchen mixer tap from a couple of pictures (1, 2) and printed it
I did a bit of reading about thread as I needed to find a match for threaded tap connector. This was much easier than I thought as I’ve just needed to select “1 inch GB Pipe thread” in Fusion360 and voila https://www.dropbox.com/s/5j4fxxzzsbhkyvs/2018-05-19%2013.26.47.jpg?dl=0
I tried to 3D print the seal between the mixer and bottom thread but was unfortunately unsuccessful to get a proper seal so for now I just use the rubber seal that came with the Hozelock. I believe the failure come from the shape of the seal I’ve made and not the material shoreness so further test would be required before giving up.
Now that I modeled the tap, knew the thread type and dimension, I made a first prototype but the massive mistake was to integrate the thread into the body part this is where I had to review the whole design and decide to make it modular. Each part is independent allowing me to print all thread in the proper orientation and also use a finer resolution
The next version and almost final was that one.
While integrating thread into the design I’ve learn a lot about how thread work in Fusion360 and selecting the appropriate type is paramount when 3D printing so my advice is to select the ISO Metric thread profile (this is the one with the widest range of diameter and pitch) and modify it following the tips from that video. Leaving the sharp edge of the ISO metric will give poor result when 3d printed
- Thread design tips
-
Thread printing tips
Try to have the thread as parallel from the bed as you can
Layer height must be under 0.2mm for successful print at this resolution with a properly calibrated printer no more than
0.2mm to 0.3mm clearance is required between the inside and outside of the thread. -
Water tight printing tips
Go a bit higher on the printing temp it help improve proper bonding between layer.
Put at least 3 to 4 wall/shell and 100% infill help as well but he thicker the shell the better
Dry filament is a must
Conclusions
I’m glad to says that my connector leak less than a standard garden fitting so in the end this is massive win. My wife is really happy and Kira ecstatic that we can fill her swimming pool (we do reuse the water on flower bed and vegetable patch)
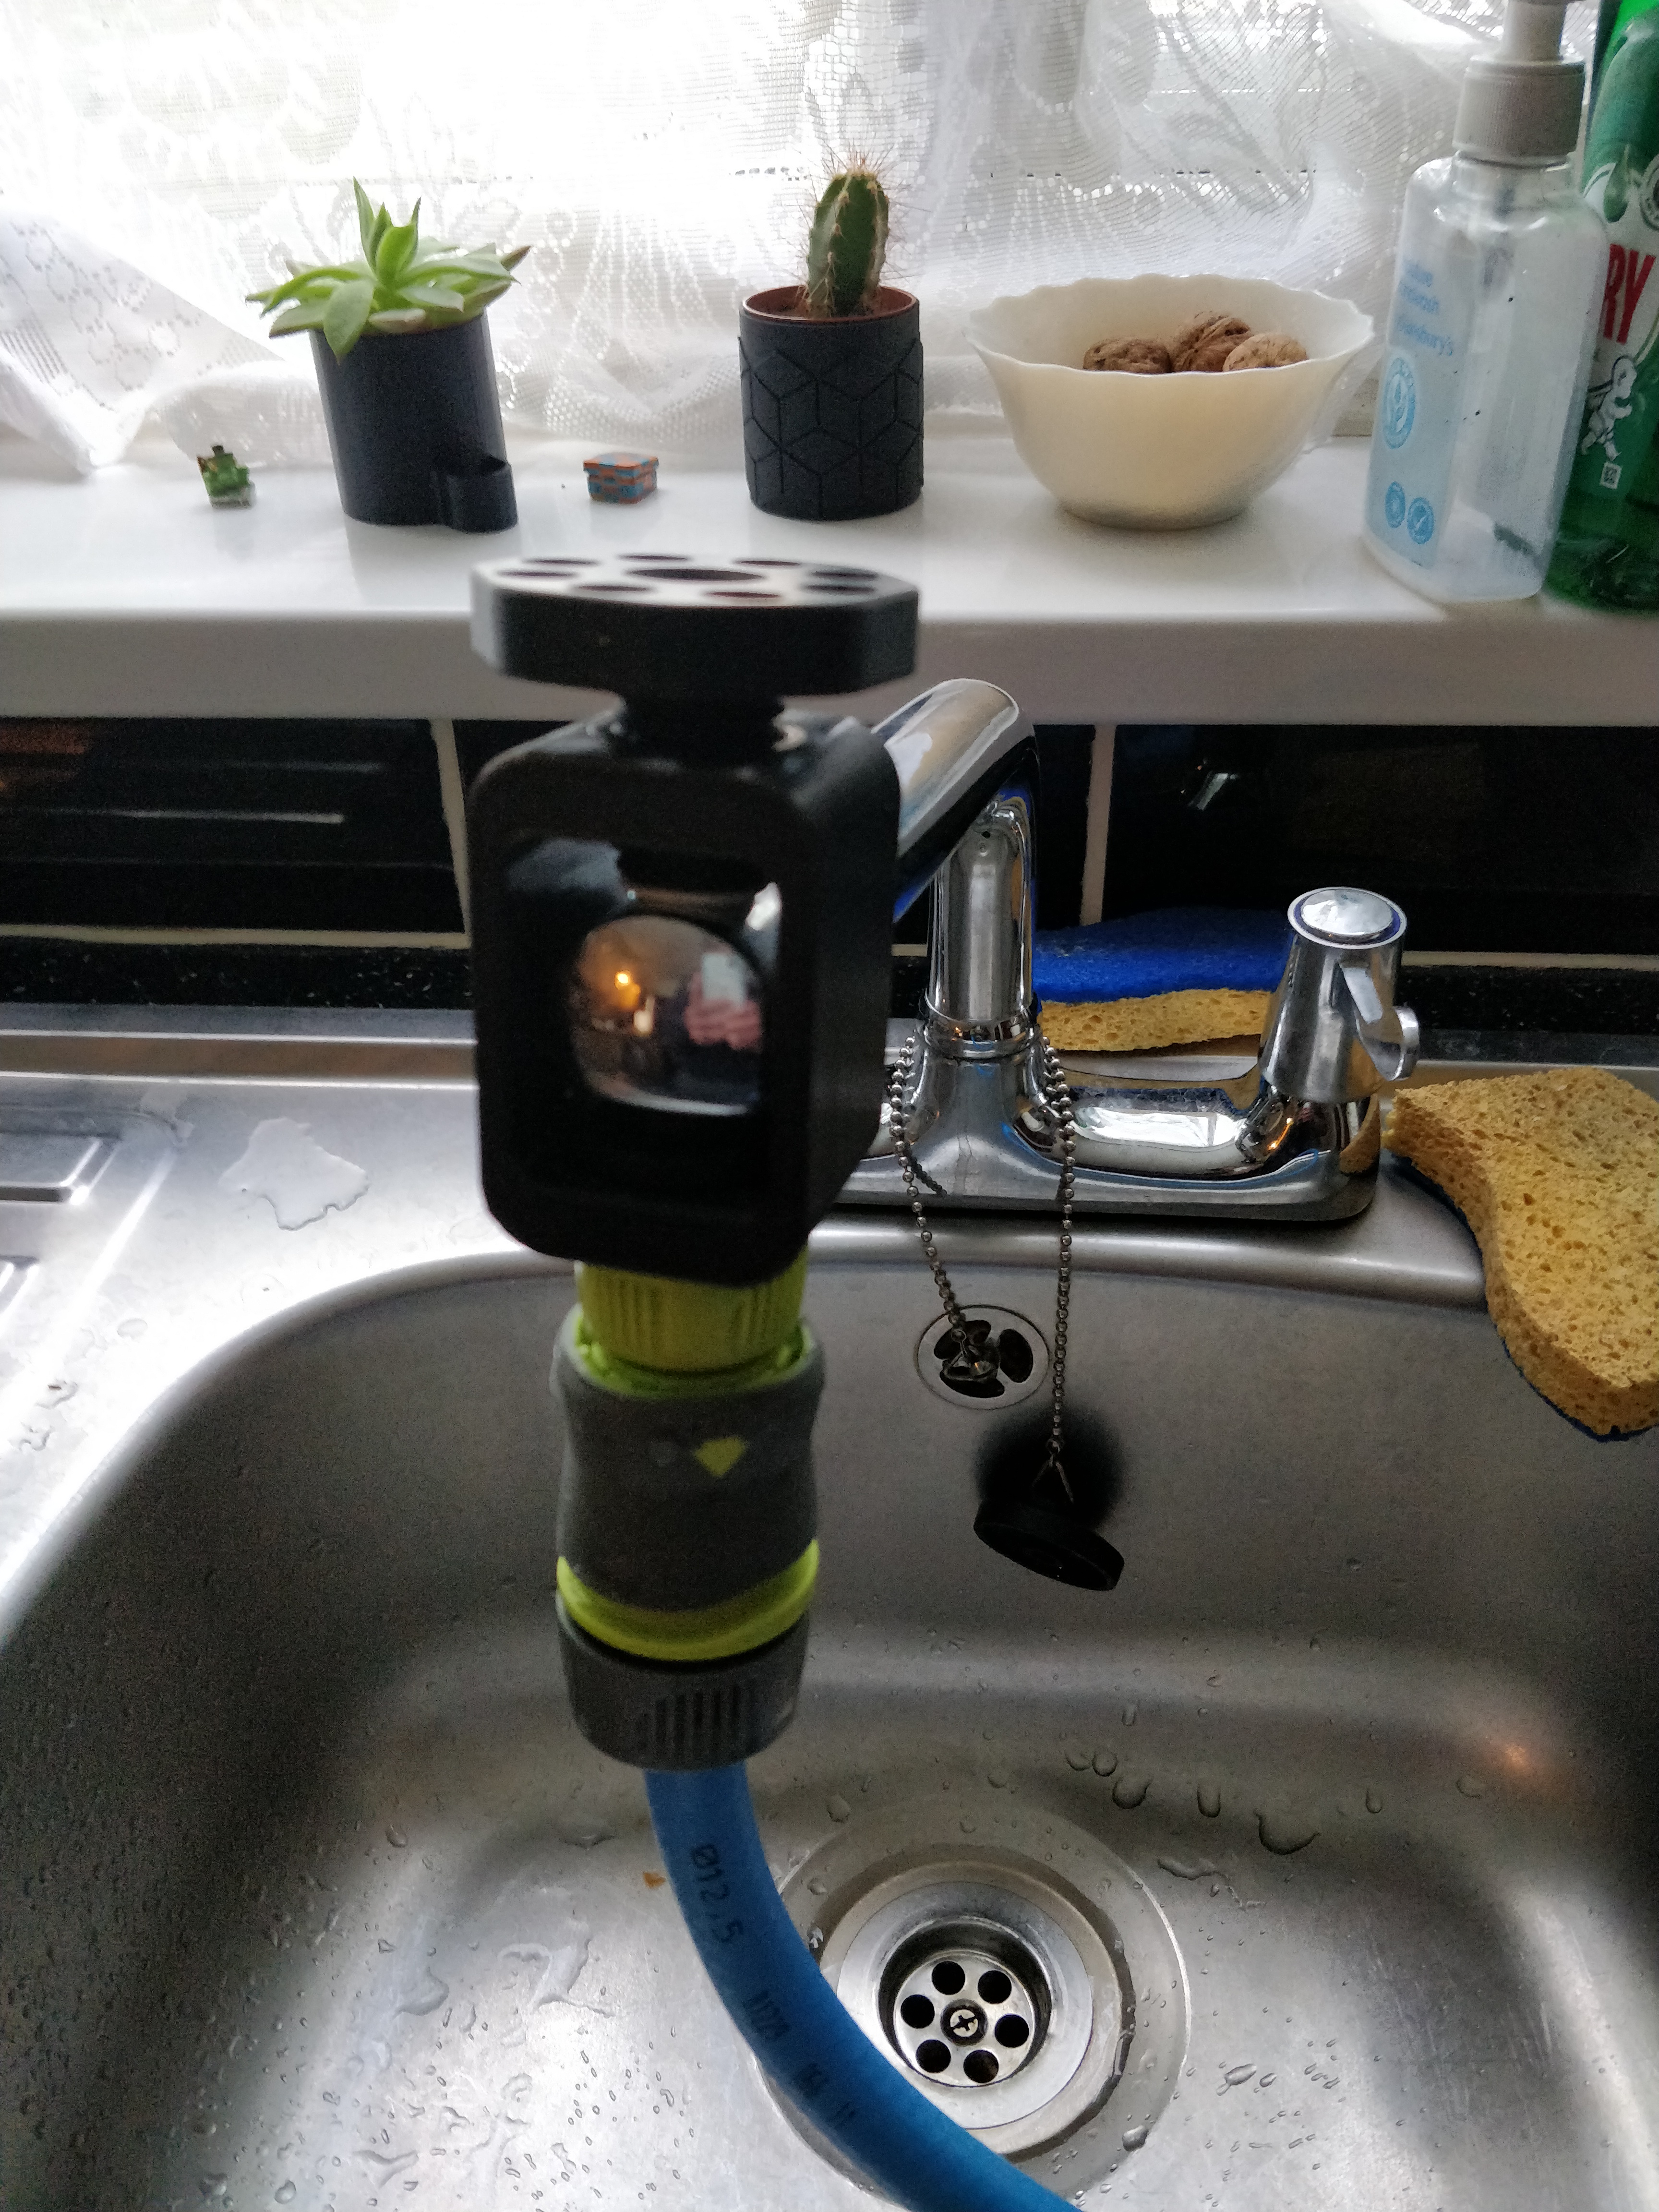
I’m a bit disappointed that I didn’t managed to print the seal with TPU flexible material and I had to use one of the rubber seal I had lying around. I’ve learned an enormous amount about designing 3d printing threads
Materials
This was printed almost entirely of PLA from 3D filaprint remember the space got a discount code 
The flexible filament is from BotFeeder
Please feel free to ask any question or point to any mistake I might have miss in that project post I’ll happily listen to constructive feedback.
Now onto the cheap prusa project post coming up shortly