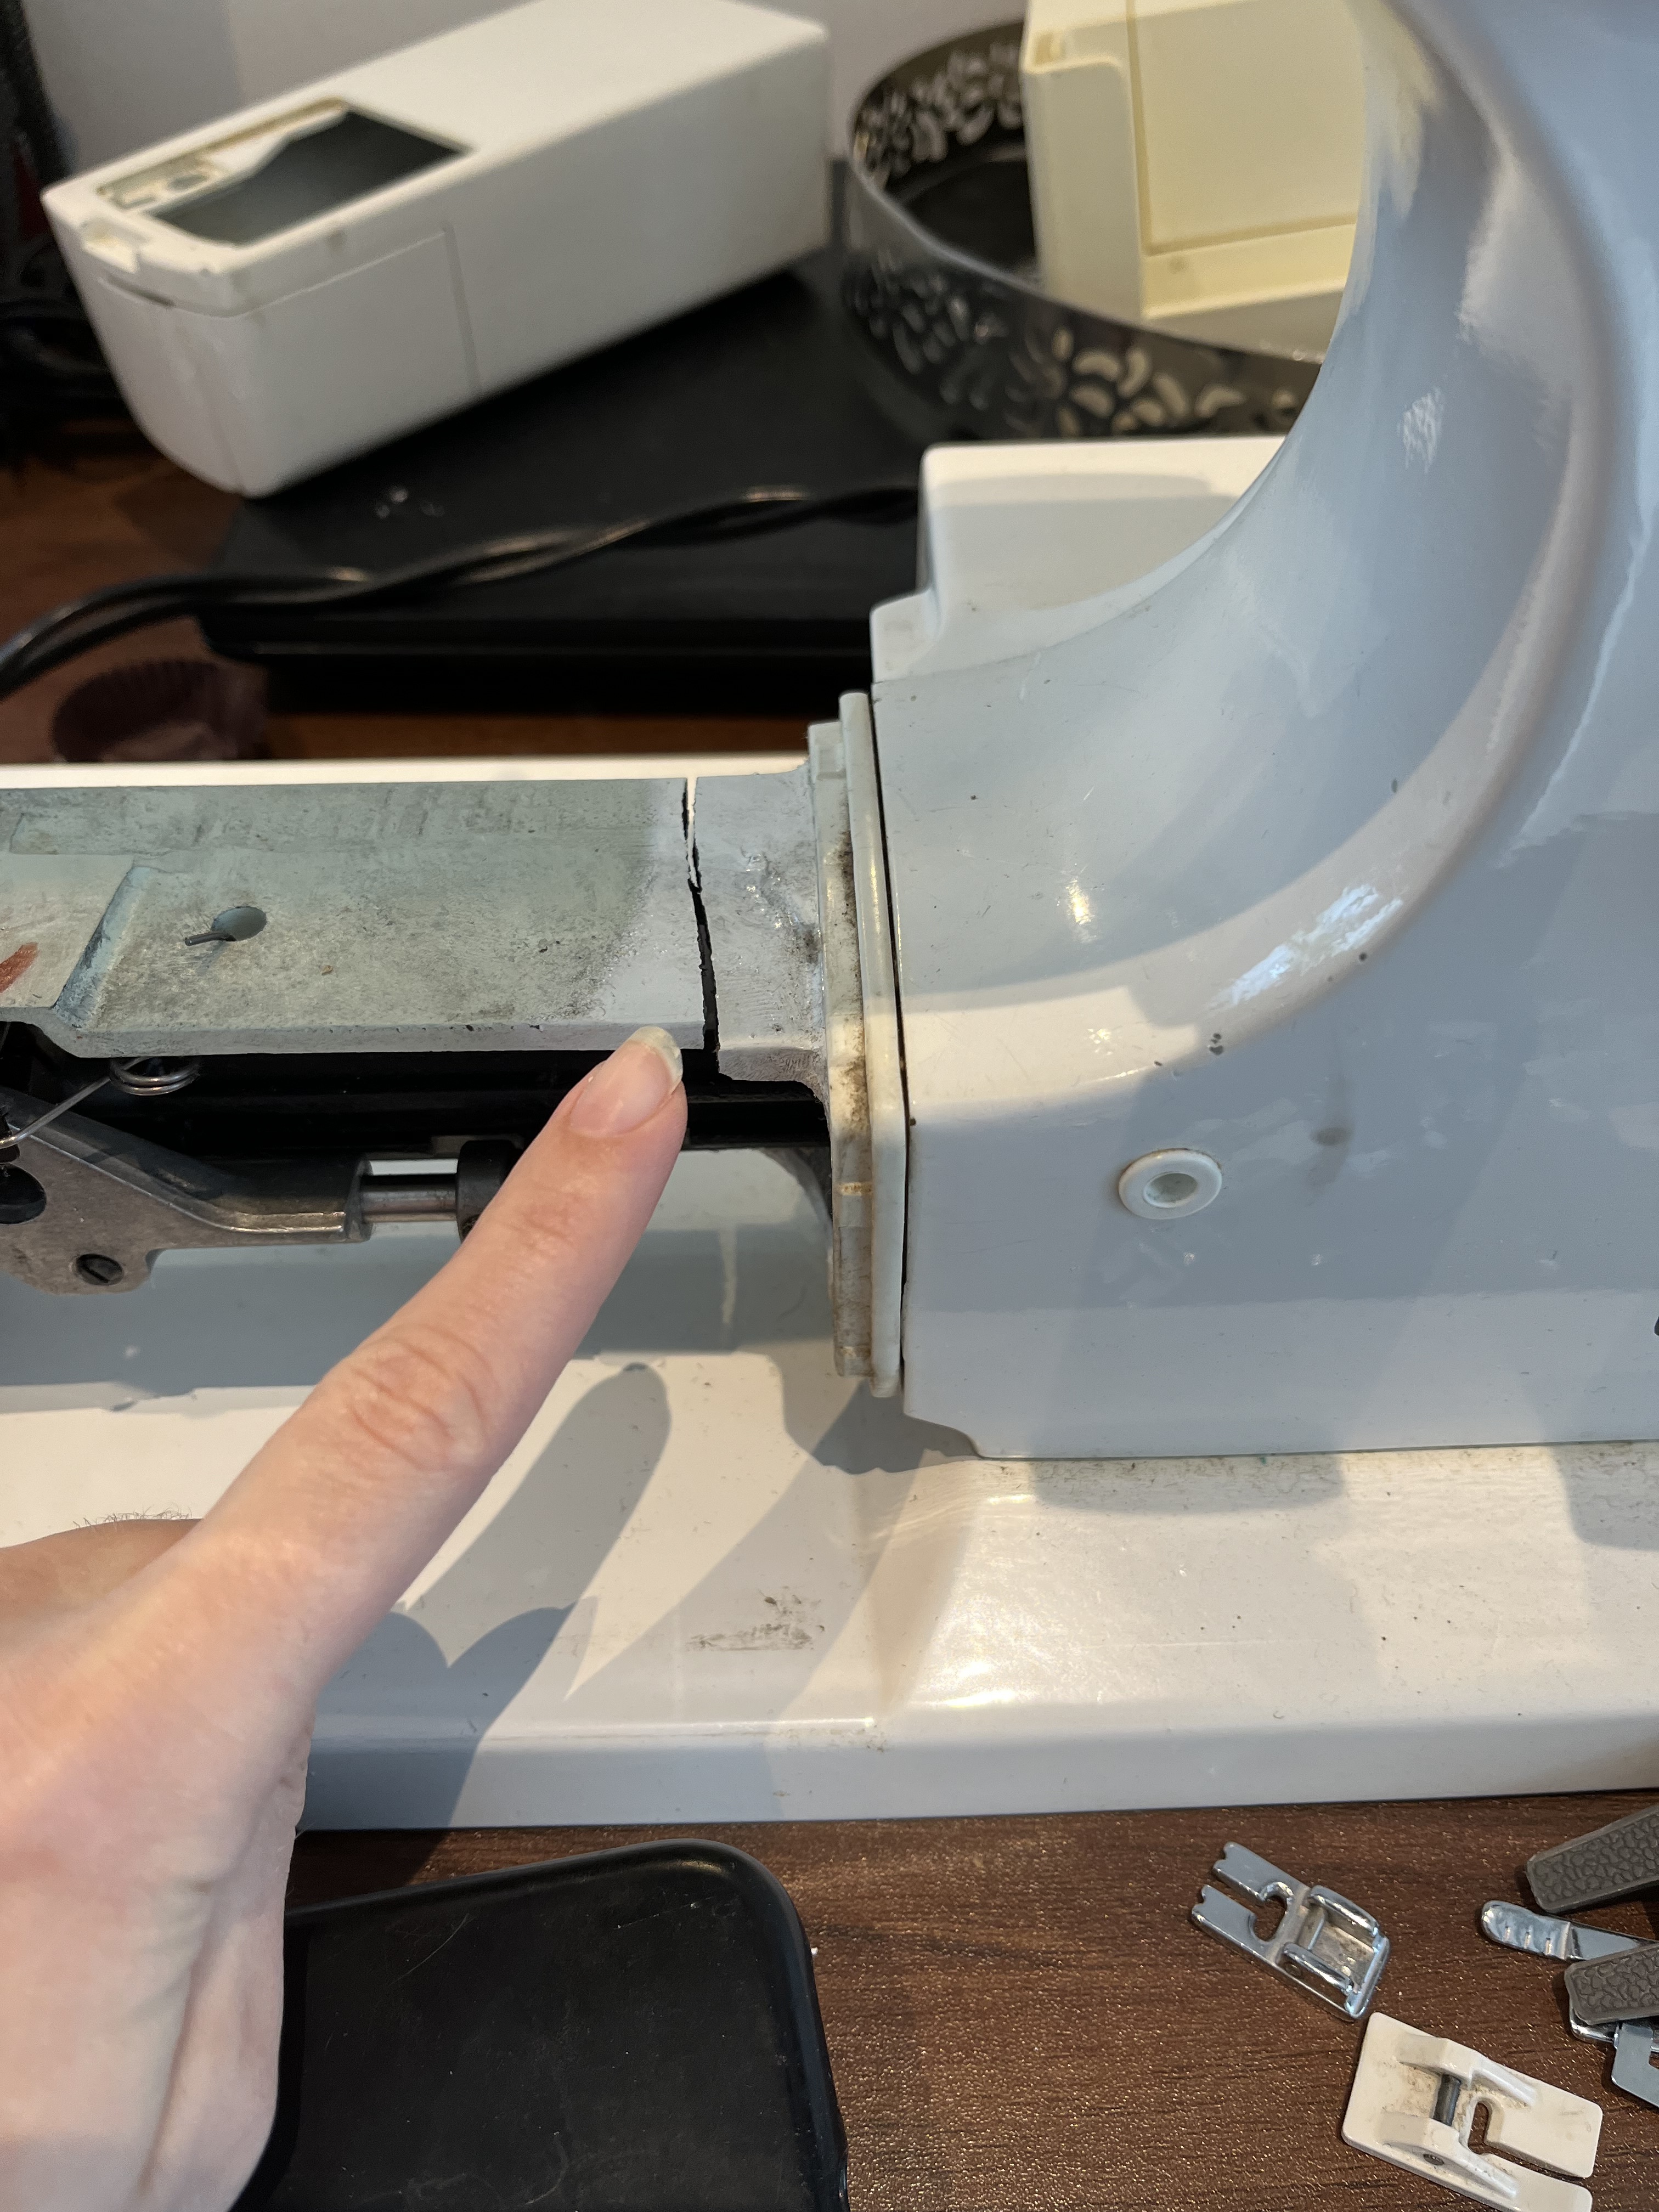
I recently purchased a second hand sewing machine (Husqvarna Viking 6440) but unfortunately it was dropped by DPD during delivery causing some serious damage to the frame.
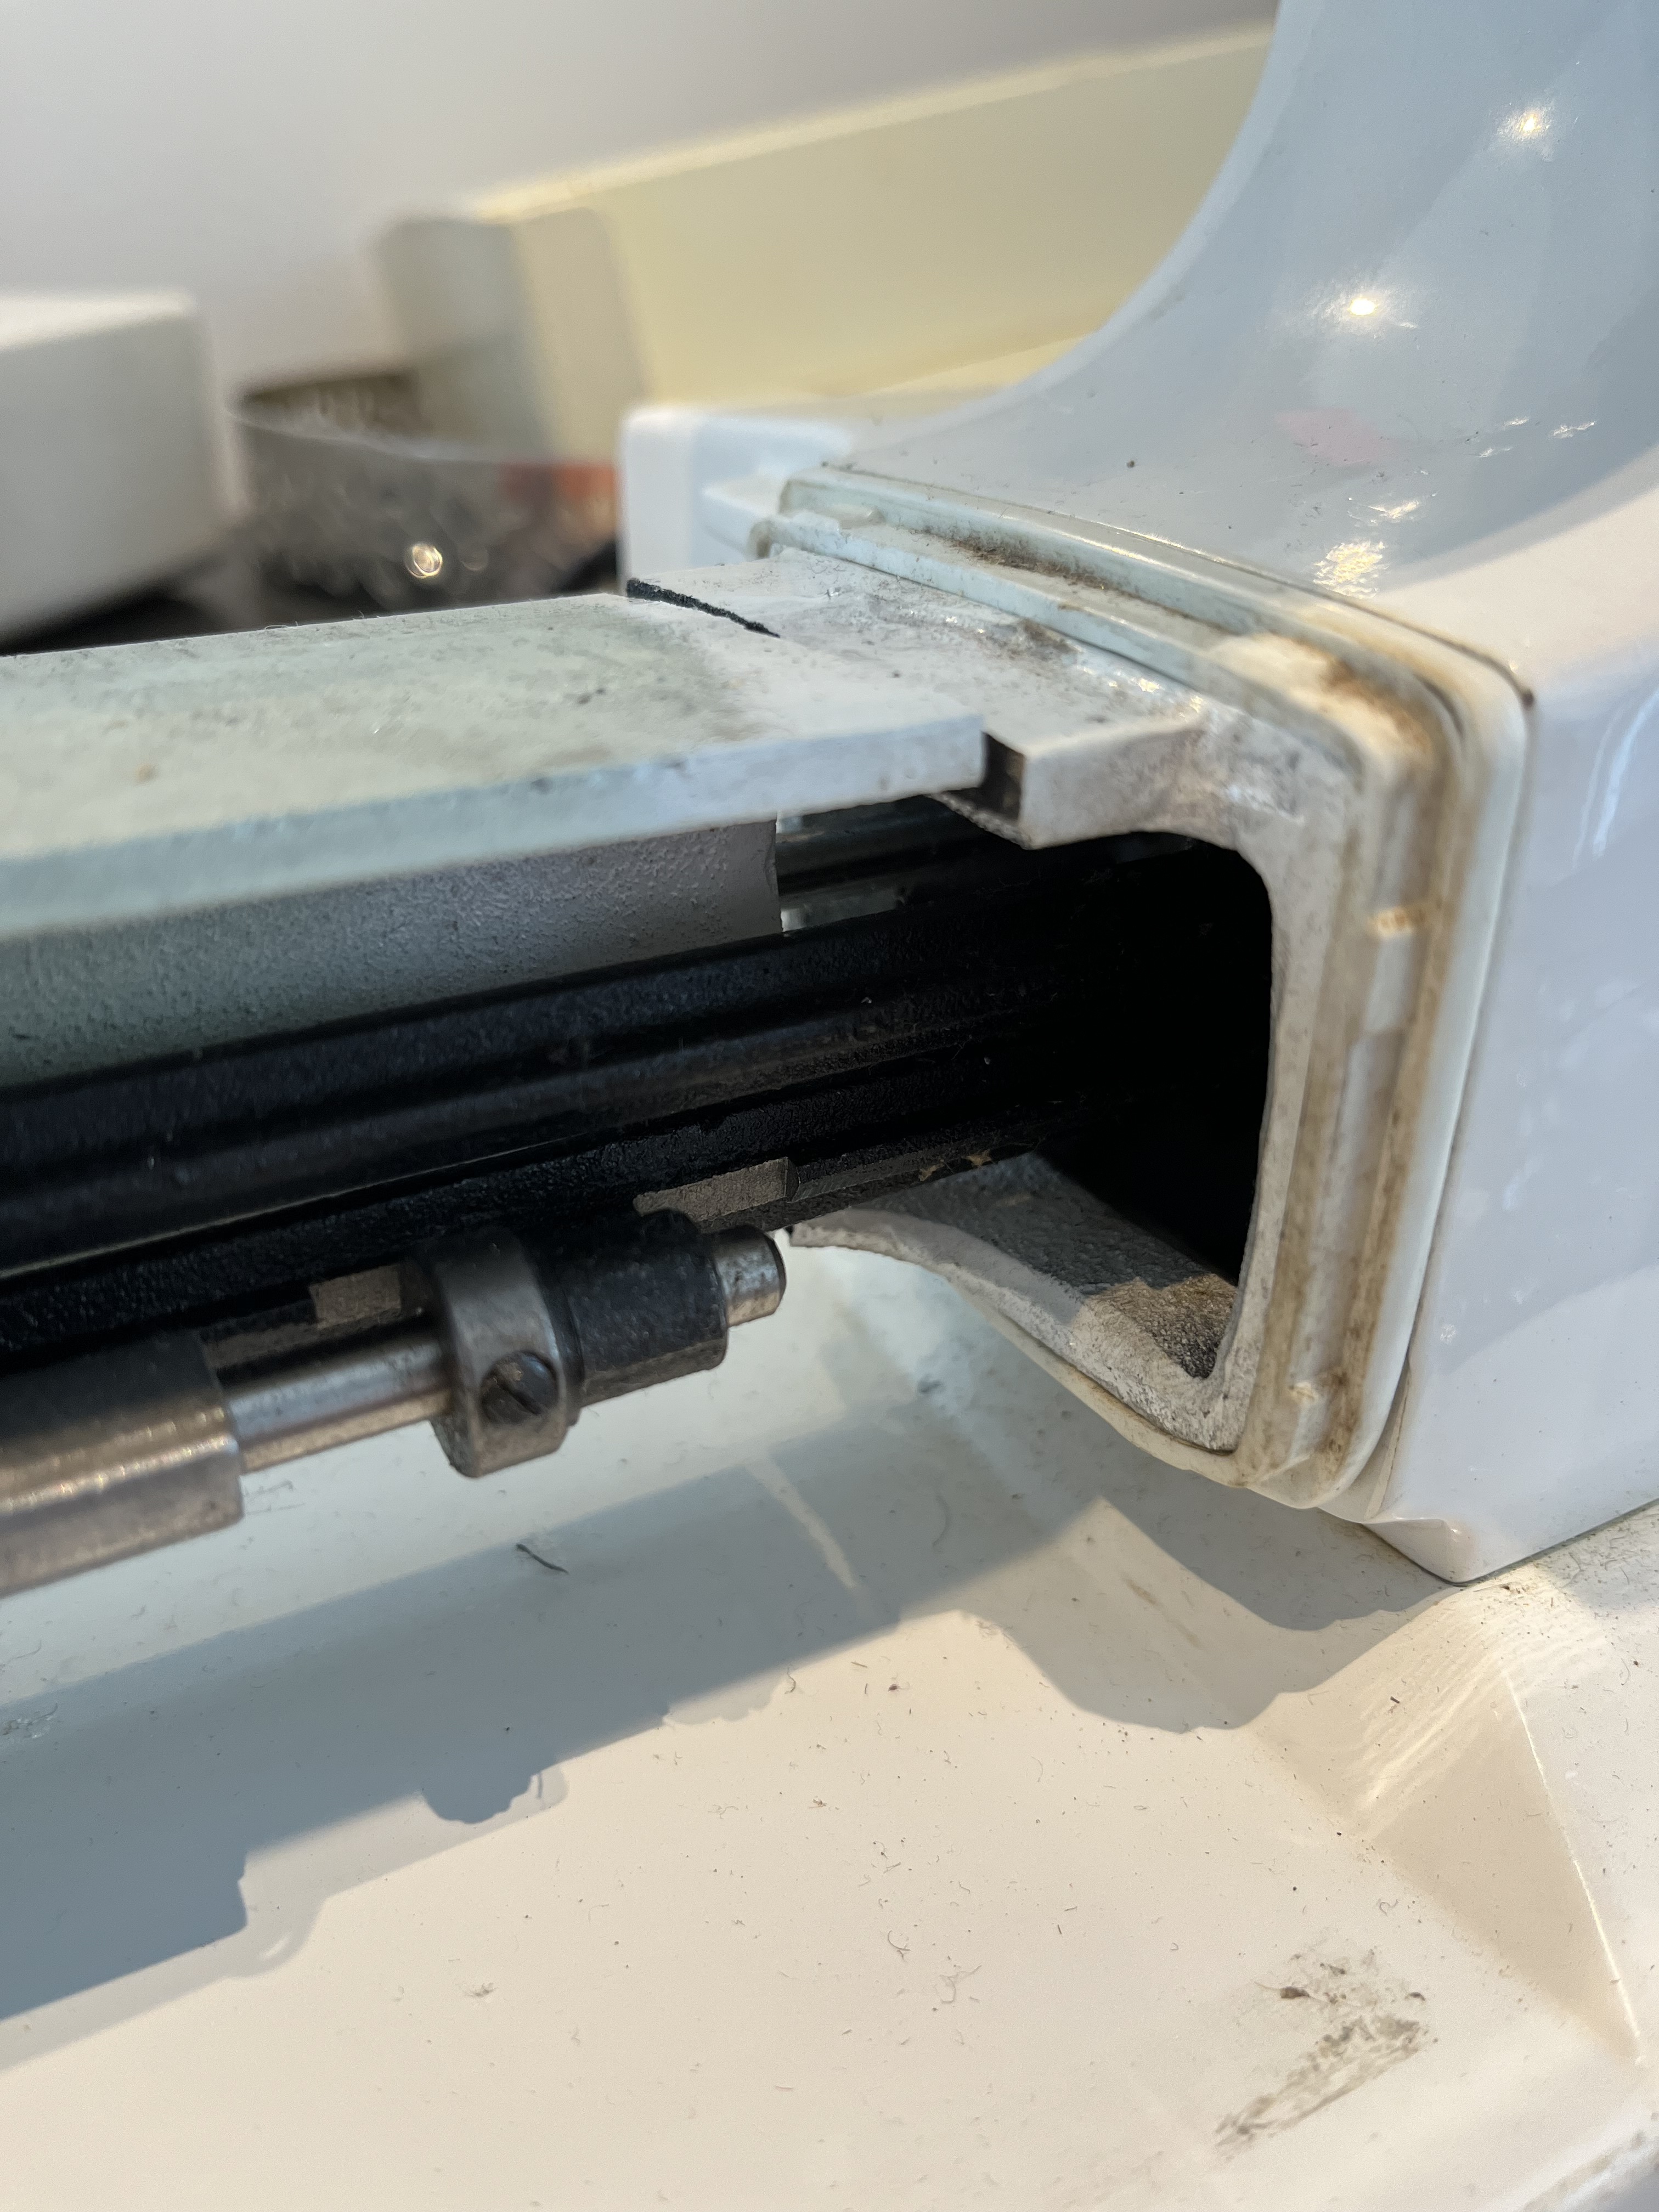
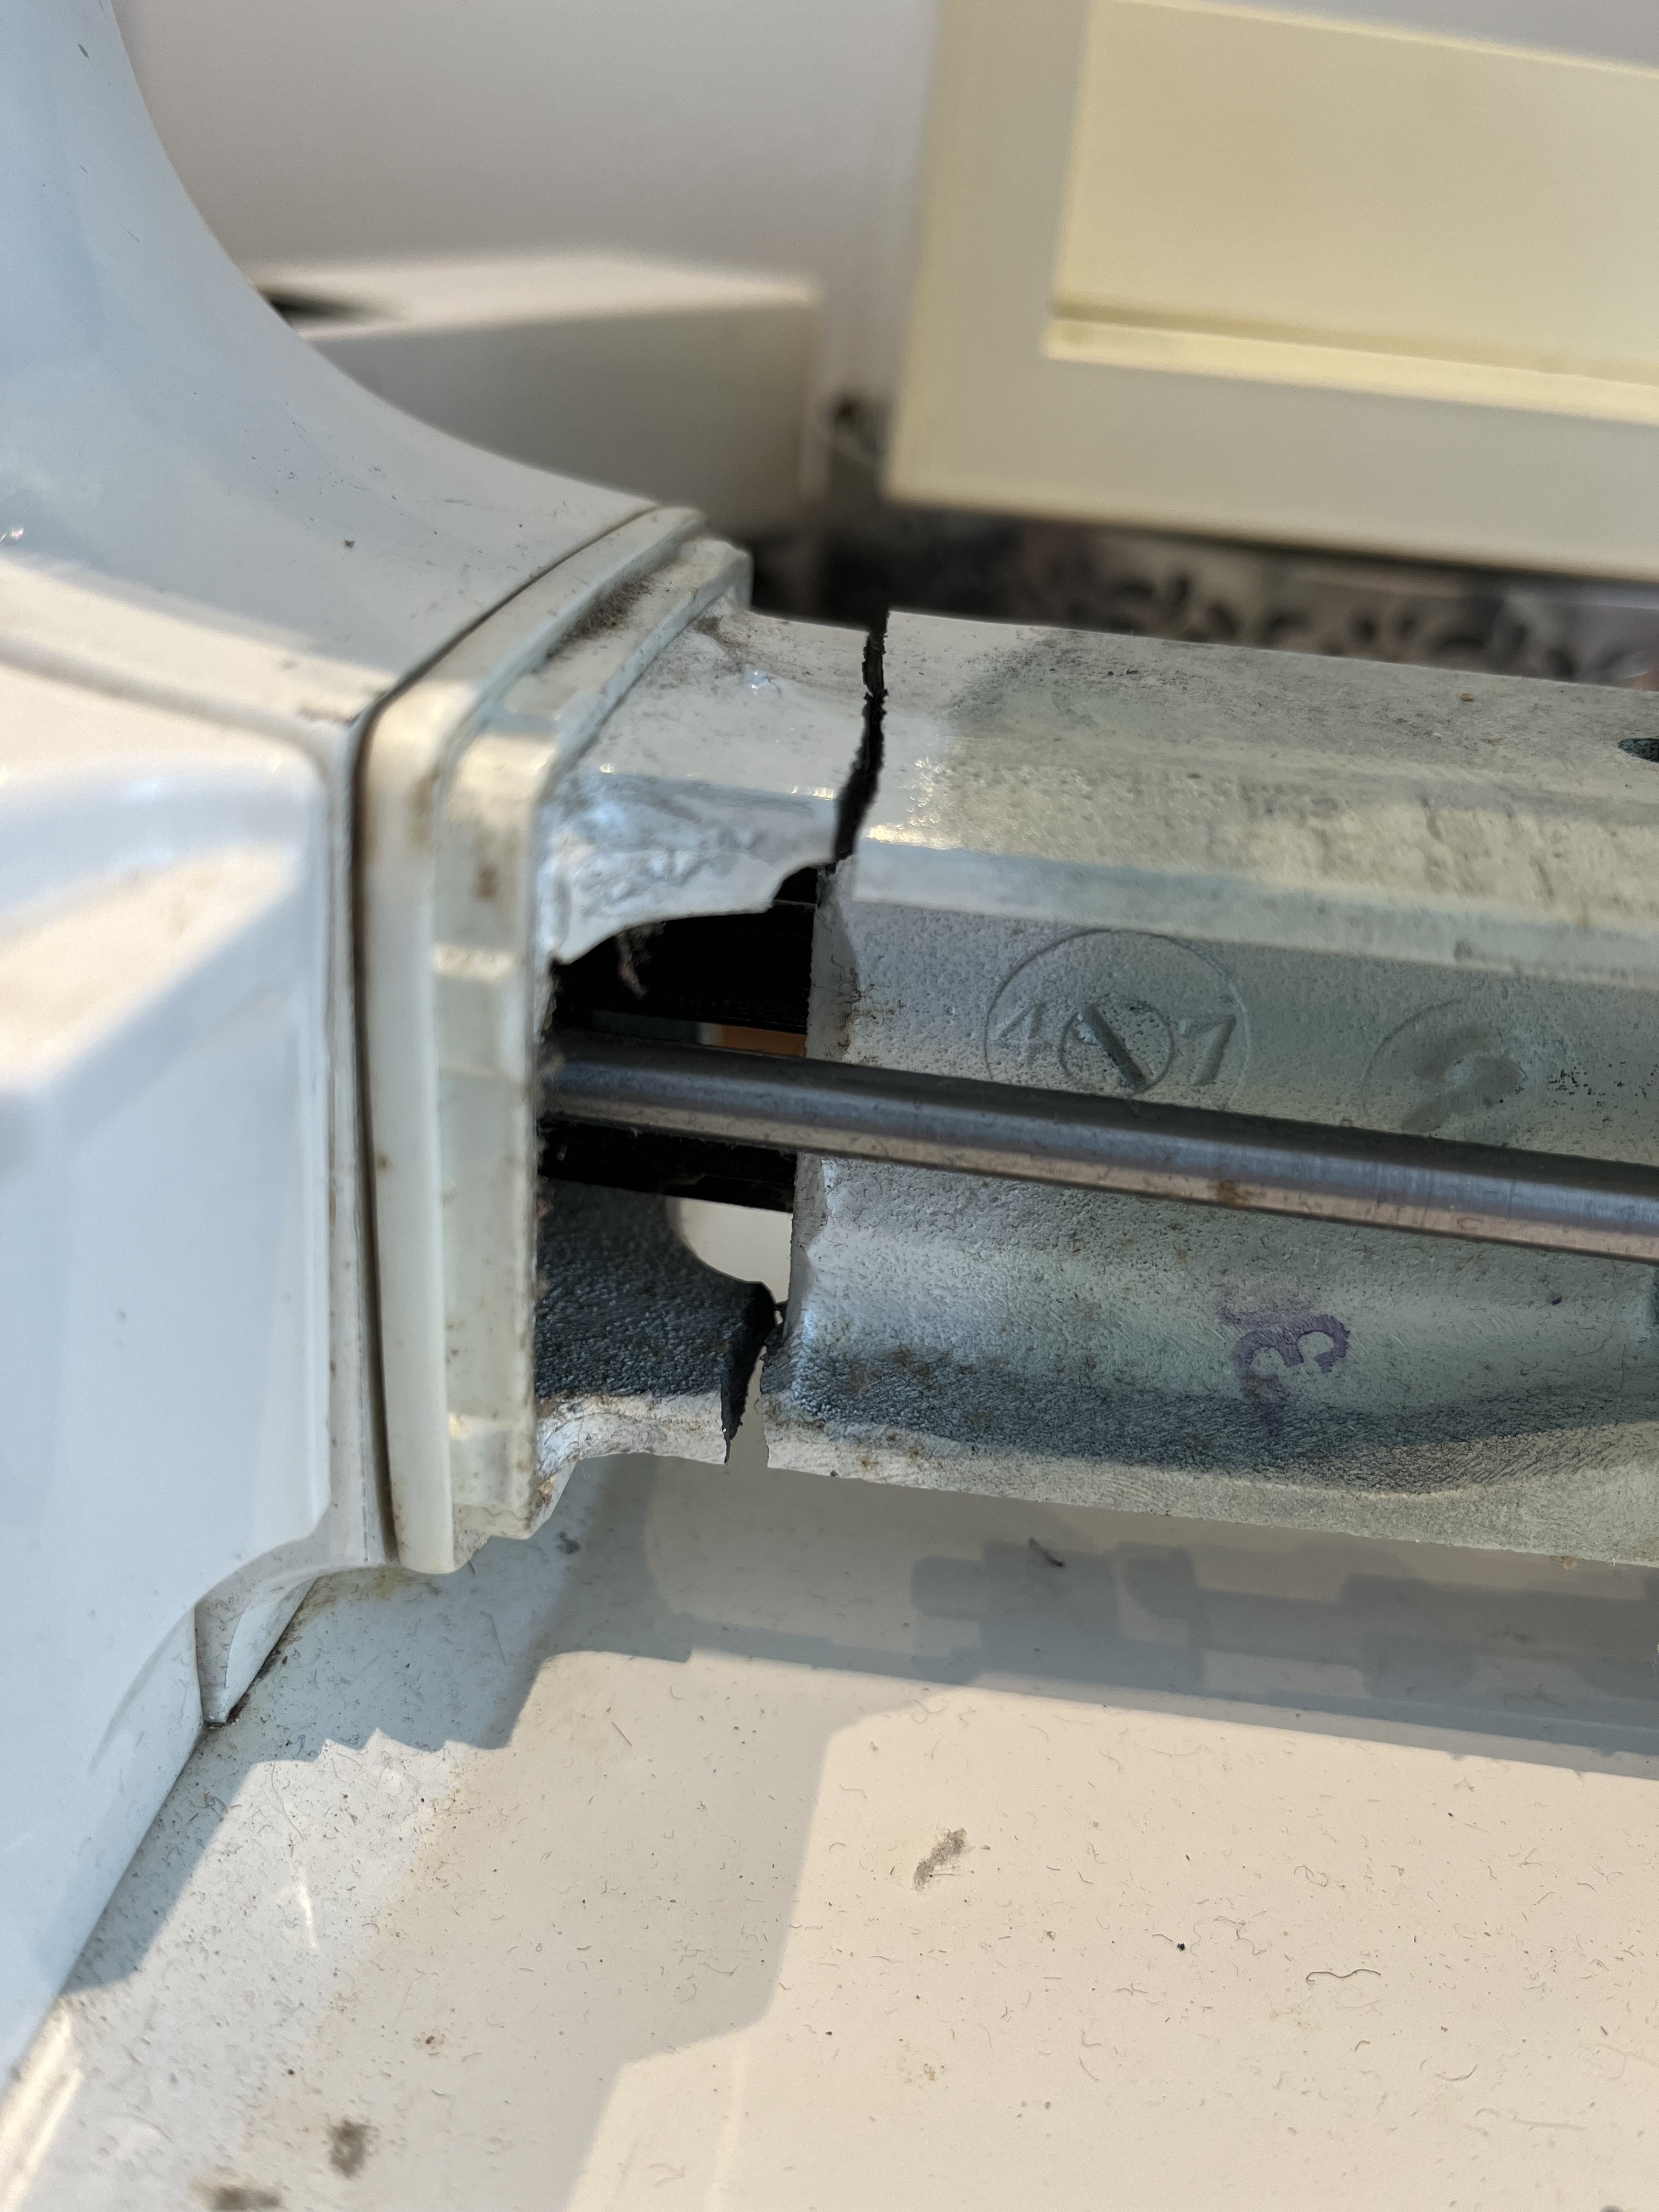
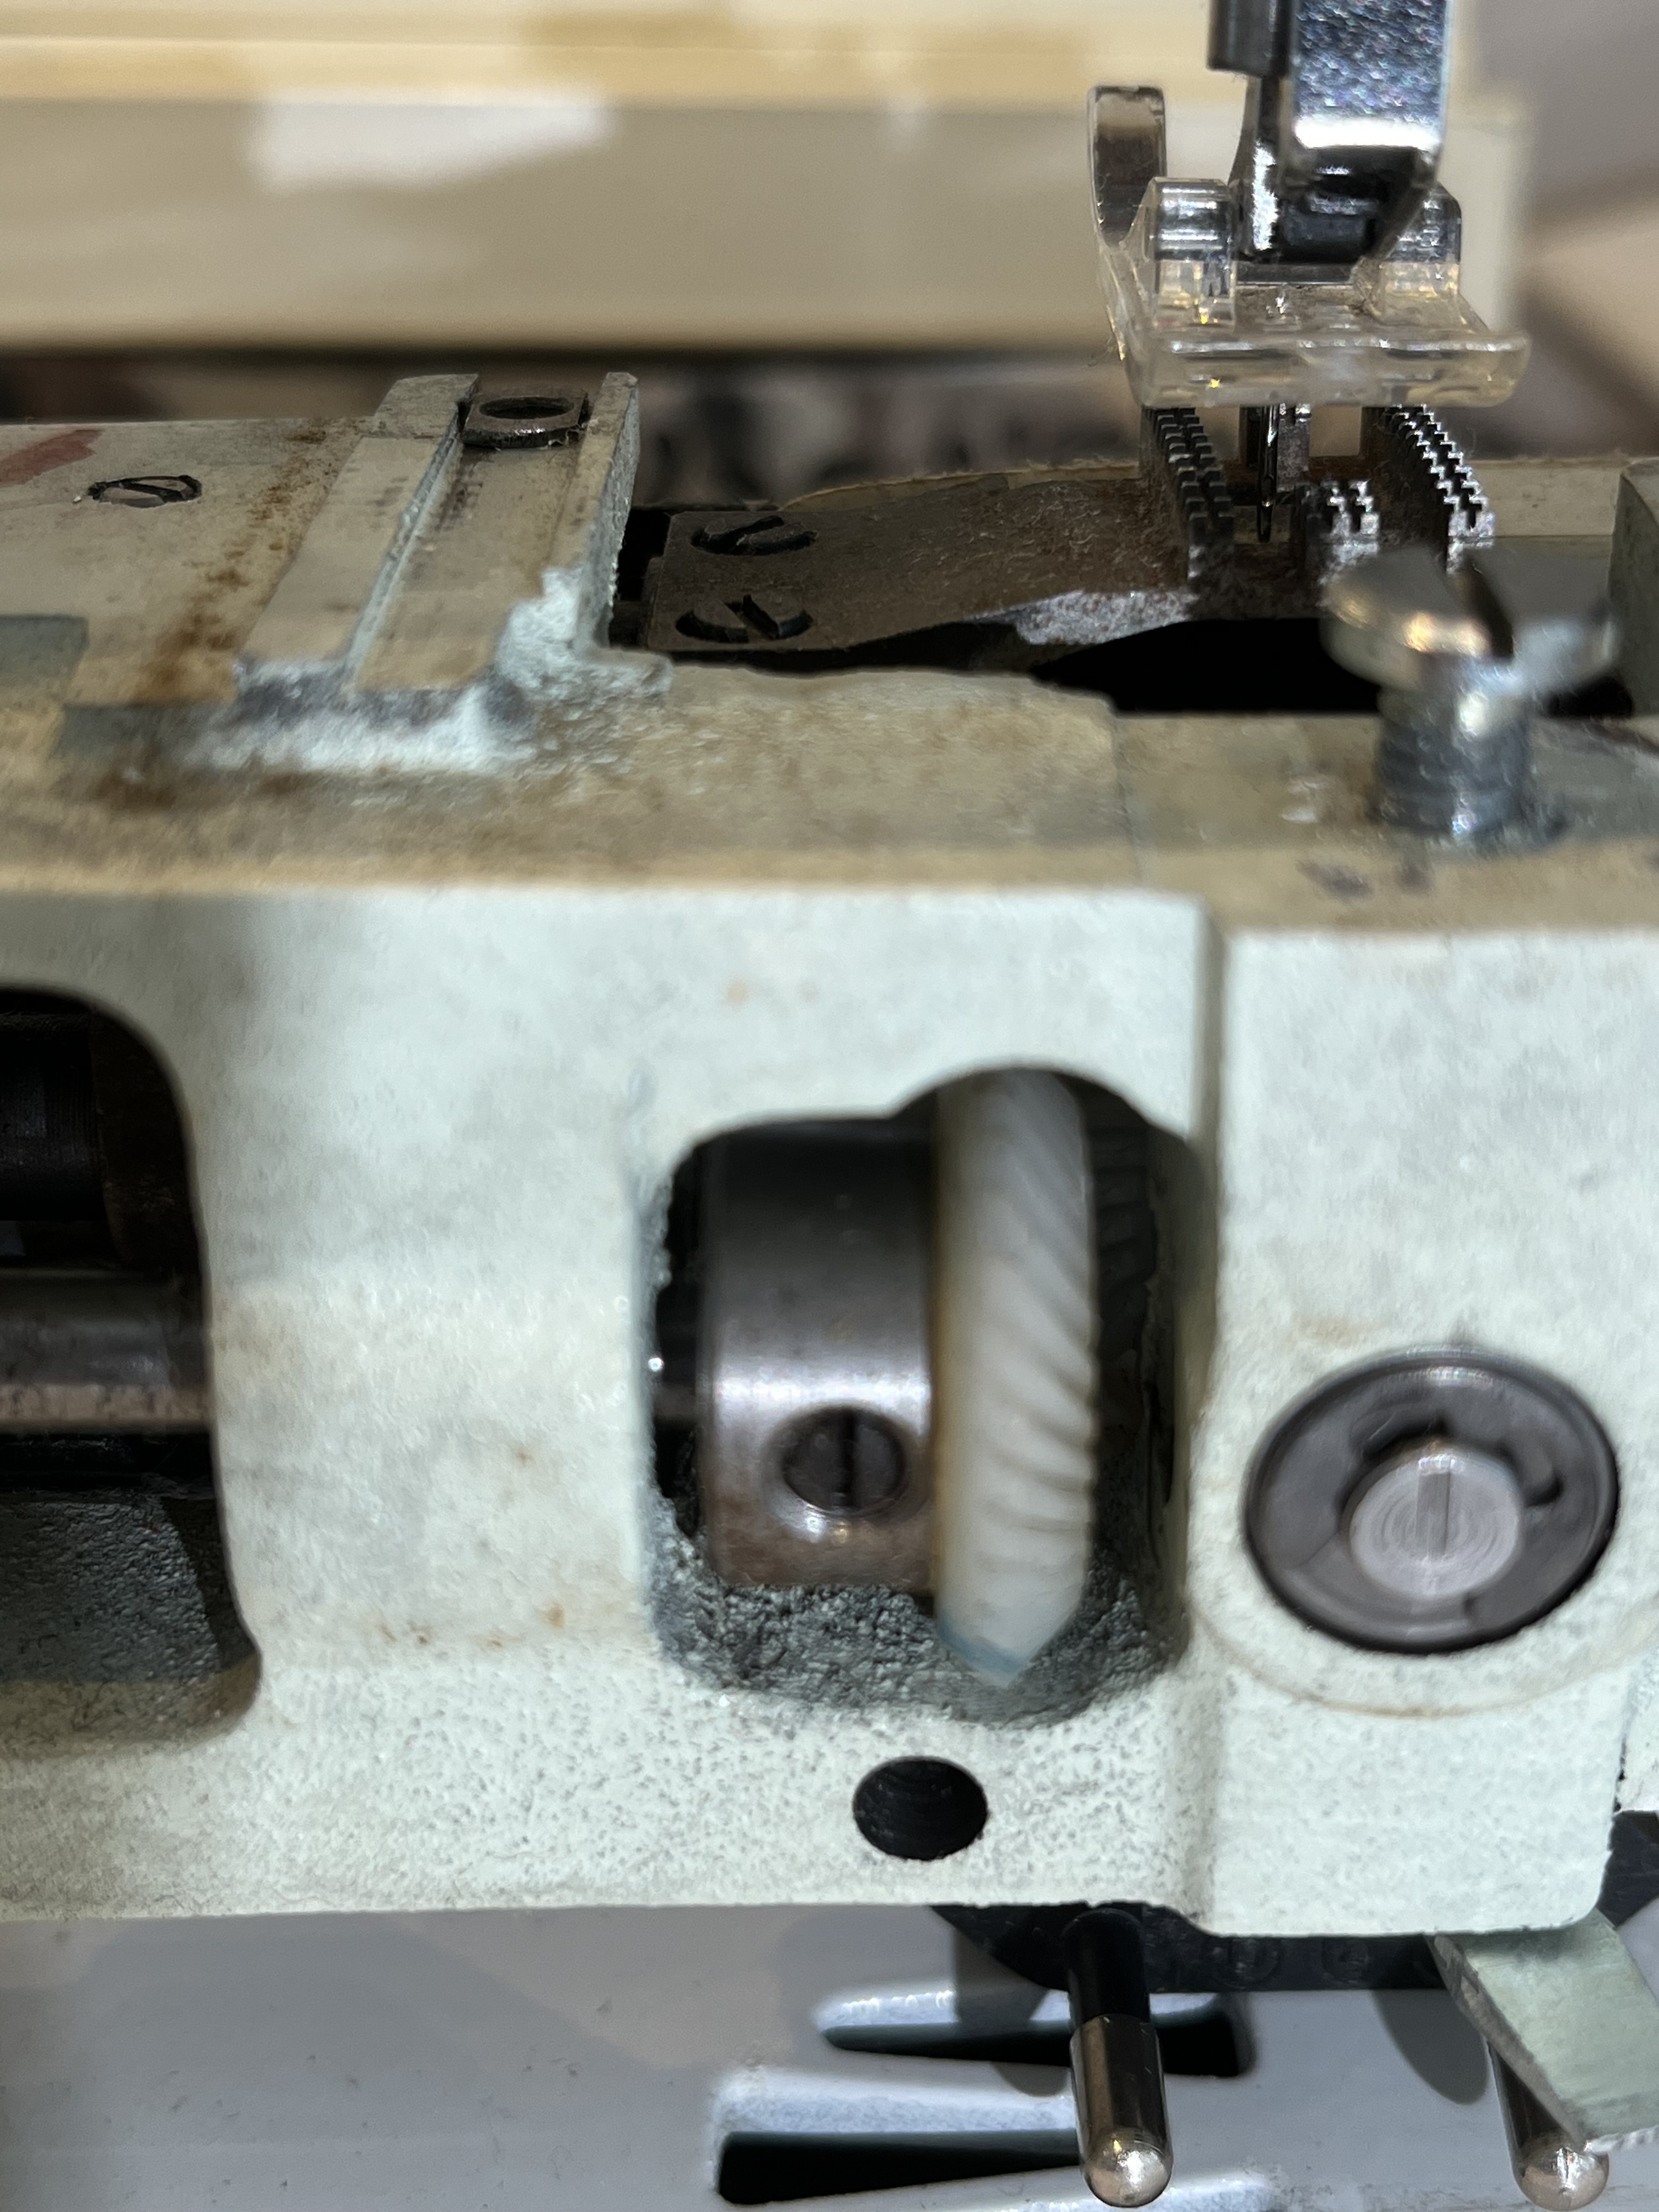
The bottom arm just broke clean off. That being said the mechanism still works. The foot still operates and there seems to be a lack of contact between the gears for the bobbin but they don’t actually look damaged. I am holding out hope that if the frame can be repaired then everything else can be reassembled to match any potential difference to the original measurements.
From the looks of it, the frame if cast Aluminium and might require TIG welding based on what the manual says about the material (page 12). Does anyone here have that kind of skillset and equipment who is willing to help?
I might misremember but because aluminium has a low melting temperature you can solder parts together if you heat up aluminium rods with a hand held blow torch.
I have Tig welded aluminium, but not for a very long time, too long to want to admit to!
I’m not sure that our Tig welder is operational, there’s no risk assessment online and we’d also need a bottle of pure argon to weld aluminium.
Found this online:
“You can weld most of the casting just fine. However, if you hit a gas pocket, the weld will spit, sputter, and it may even blow out at you. If this happens, all you can do is grind out the porosity and reweld it. This may require two or three repair cycles to obtain an acceptable weld.”
Heat cycling / welding may well warp the casting so that things don’t line up like they should/did.
To be honest, I don’t think it looks like a viable repair, judging by the list of faults. I’d return it / get the seller to make a claim against DPD / make a claim against DPD. I’d be very happy to be proven wrong though.
It would be incredibly difficult to weld this back together and have the machine function normally.
Sewing machines have an incredibly high tolerance between the upper and lower mechanisms. The needle has to meet the hook and bobbin at exactly the right time and in exactly the right place or else things go wrong. It’s why they are made out of cast metal, instead of plastic or formed metal.
I’d get onto DPD and make them pay up.
I would be curious to know if it had been dropped before. Wasn’t it packed up properly?
If you absolutely can’t get DPD to pay up (probably your best option) I would look at a strong epoxy for this repair. Some of the adhesives available now would give you a bond strength approaching a weld (especially if it was reinforced) and you avoid the risk of heat distorting the frame, which I know from work is a massive pain.
Sorry this happened - if someone had dropped my machine I’d be pretty pissed off.
Getting cover from DPD is not possible with the type of delivery the seller chose. The seller has offered me a full refund regardless but I am not interested in that because the sowing machine is a great model and otherwise in excellent condition. I wouldn’t want it becoming scrap and also the fixer in me really wants to give it a second chance. “They don’t make them like they used to” comes to mind and this baby has been running since before I was born.
Onto the technical elements:
A) difficult to align and make it work, yes I recognise there is that risk but thankfully the connection between the gears with the bobbin is adjustable so I would be able to tune exactly when it meets the needle. There is a slight risk if the depth of where the needle hits changes that it might not work but my hope is that because of the break type that it would be very hard to misalign on that axis.
B) heat damage risk: I don’t know too much about welding so would need to understand how much of the surface around the weld might be heated and to what degree. (I have some soldering experience but I can’t extrapolate that so if someone could give an estimate, 5cm around? On the other side of the material? And what temperatures as well. There is an iron rod acting as the shaft that transfers the rotation inside which would have a higher melting temperature and is what is currently keeping everything mostly aligned with relatively minor play.
Small area, based on the photos the top part is where a weld would be needed which is in a U shape so I am not sure if there works be enough workplace there but I hope it will. From what I could try out, the bottom does leave a bit of a gap compared to the top which would make welding harder. (Still haven’t managed to loosen some of the screws and waiting to get some WD40 to see if I can align top and bottom at the same time)
C) epoxy suggestion: isn’t that essentially hard plastic when it cures? I am not entirely opposed to the idea but would need to get some security that it would hold to the aluminium and that it would survive the continuous twisting that the area is subject to. Do you have any sarticular brands or experience with something heavy duty like that? + cure time?
Lastly: I would really like to give it my best try to fix the machine and would appreciate anyone willing to tackle this challenge with me. I am willing to do additional research and definitely wouldn’t want to rush into it + still looking for ideas and feedback if anything I am saying doesn’t sound right.
Definitely agree it is not an easy task by any means. I have left a slightly longer comment with why I think it is possible to achieve based on current observations but am aware that it might not work out.
I’d accept the refund from the seller but agree not to return the item. To be honest they are extremely unlikely to want it back. Then you’d have the machine and your money.
Then I’d try and find some something scrap made of cast aluminium for welding practice. Either for you or someone else I’d be happy to have a go, but would much prefer some scrap to practice on.
If the practice welds work out, try welding the machine.
If not, start researching modern glues and adhesives - with added support - carbon fiber rods come to mind.
I can give you some additional insight on heat and epoxy stuff. For reference I’m a mechanical engineer and I’ve spent quite a bit of time doing aluminium weld repairs on difficult components.
The process would be something like:
Complete strip down of the machine so you just have the chassis.
Grind a weld prep onto the area.
Tack welds then full fillet welds.
You’d probably need run on/off plates too plus set up.
The welder I worked with is very skilled and has been doing this kind of work for twenty five years. Even he wouldn’t be able to avoid heat distortion, and I think it would be severe enough to change the gap at the end of the sewing machine arm by 25mm. Even if you get less than that, it’s very likely that the distortion would be uneven leaving you with a twisted frame, and you lose the precision
you need. Tbh if I went and asked the welder to do this kind of job he’d probably tell me not to bother.
A good quality epoxy, applied correctly, is extremely strong. You might have seen on TV they occasionally do an experiment where they make a one inch square on the roof of a car, bond it to a hook with the epoxy and lift the car up using it.
Looking at your photos - is it broken in just the one place, where the lower arm meets the rest of the machine? If I was going to try that repair, I would:
leave the broken surface alone
clean the paint off either side of the break
apply a strong epoxy to the broken surface
fit a small piece of metal to the top to reinforce the gap with a bit more epoxy.
I completely sympathise with wanting to keep it working (this is why I have multiple old sewing machines) but it’s possible that you’ll come out of this without a working one.
The only other suggestion would be taking it to a sewing machine repair shop (or sending them an email with photos). They will probably tell you the repair would cost more than the machine but I might be wrong.
Again, really sorry this happened and I wish I had better suggestions!
That is incredibly helpful. Based on this welding seems to be completely out.
My brother is a civil engineer and he also mentioned some supporting pieces around the gap when I showed him so that seems to be the running recommendation.
Onto epoxi, do you have any idea what brand / type I would need?
I can follow instructions and I have watched plenty of videos online on epoxy, the only issue I have is that I am mostly familiar with things used to make / seal tables so I don’t know anything that would bond well to metal. Any suggestions are welcome.
Something metal filled like JB Weld is your best bet. However, what’s important here is surface preparation, and it would be way better if you’re able to attach supporting pieces mechanically (using bolts/wire/fiberglass?) to the broken part. Think of is as a rebar for epoxy.