I have not been around the makerspace for a while owing to trying to finally complete this degree (which it finally is) and since I didn’t make this at the space I’m not sure if I’m even allowed to post it but let’s see.
That said, I’ve still had the urge to make things and my wallet was recently stolen I decided leather work would be the best thing to do with the limited space and resources of my desk.
So I went to JT Bachelor, a wonderful tannery run by some absolute gentlemen and picked up some 1.5mm veg tan leather, ideally for wallet making you want it a bit thinner, 0.8-1.2mm - but as I was making a card holder and not a billfold the thickness would be a bit more forgiving.
There are loads of free patterns available, and it will defo be something I look into and will enlist the help of the Laser cutter to cut some acrylic patterns but for this I just measured one of my cards and added a few mm on each side to account for the gluing and stitching.
I cut out the leather pieces to shape, 6 pieces total (I still can’t get things square guys I swear I’m cursed) and for the internal pockets I did a process called Skiving, which is essentially thinning out the leather using a blade to make it easier to stitch and reduce overall thickness.
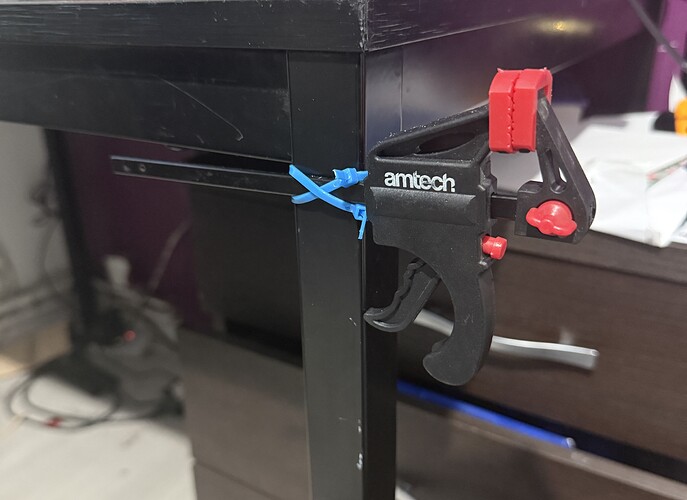
I then stick them together using some leather glue and used a calliper to mark out the stick line and pricking iron to punch the holes. I then used a tiny clamp and some zip ties at home to make a temporary stitching pony, I used a saddle stitch and some brown thread to stitch the leather for reinforcement and aesthetics.
Next I used an edge beveler to round over the edges of the leather, and then used a some sand paper on the edges, working up to finer grits to get it smooth. Then I used a Japanese burnishing gum called Tokonole and a round wooden tool called a sticker to burning the edges. The heat and friction causes the gum to have a shiny smooth hard edge, which some people who are much much better at this than I am can get to a glass like finish.
I then took a massive risk dipped the whole thing in green dye, which actually worked out really well.
The end result is this. I wish I took pics throughout but such is my goldfish brain.
Bonus picture of mini clamp.


