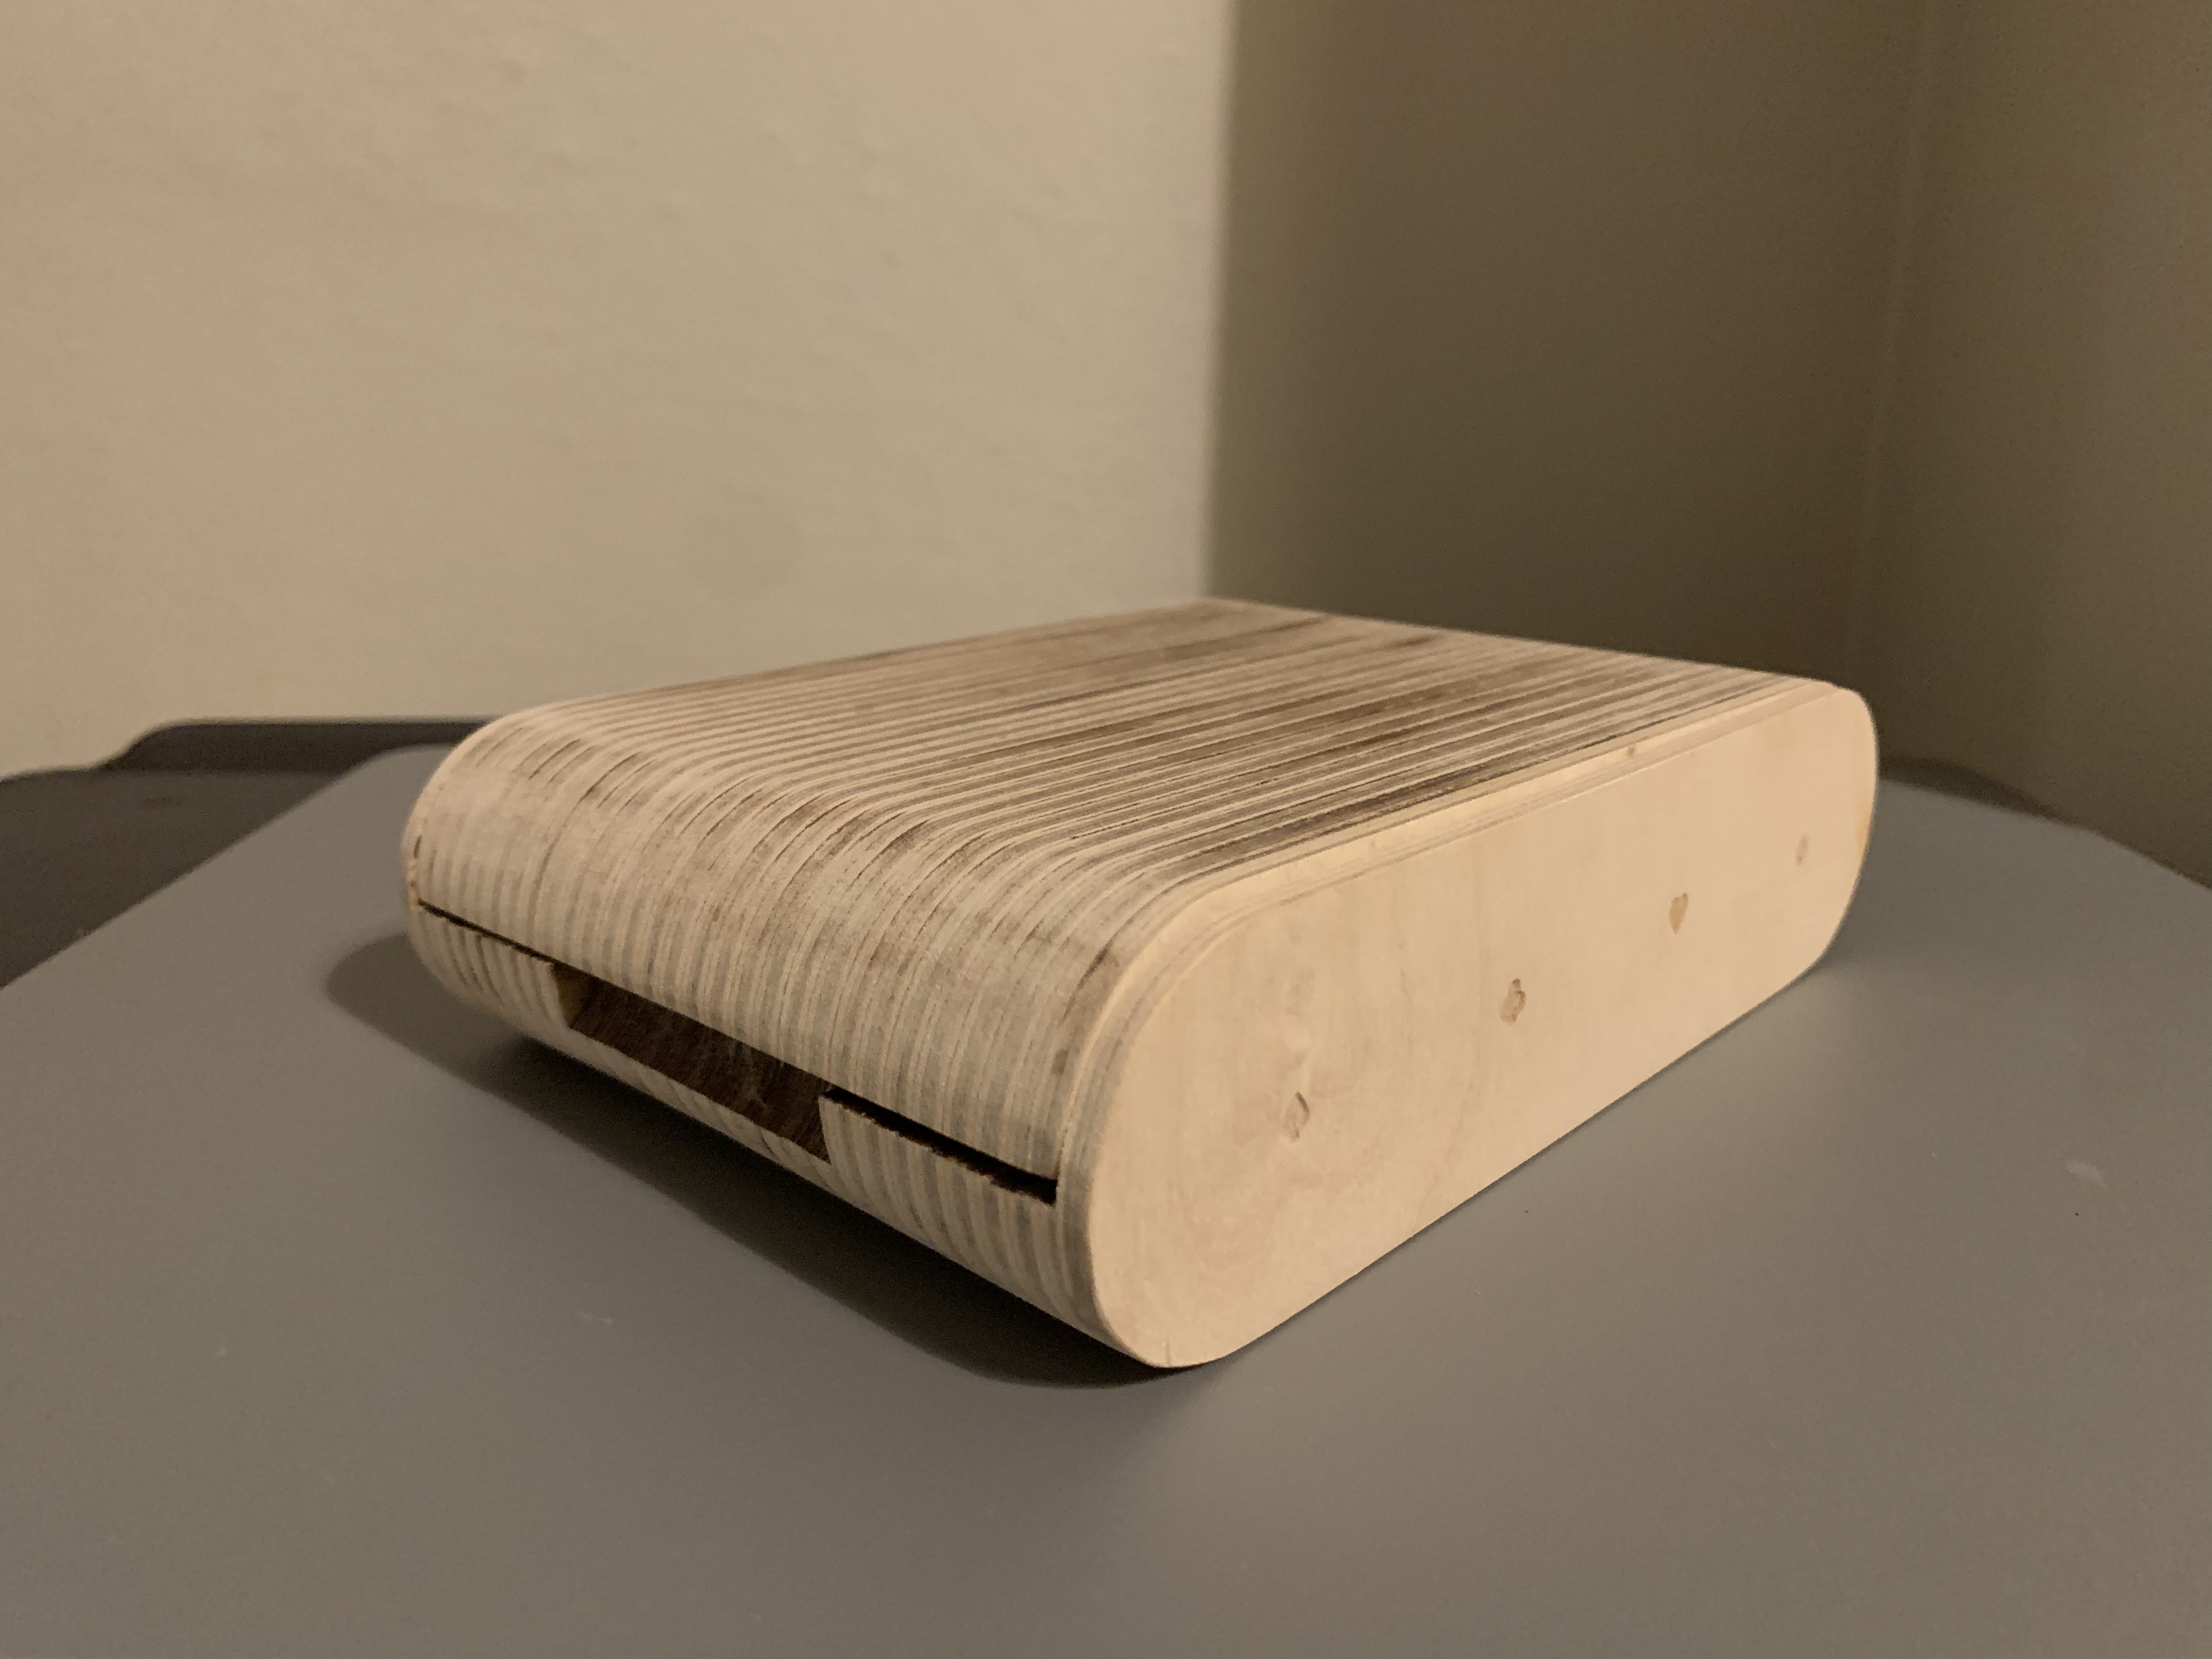
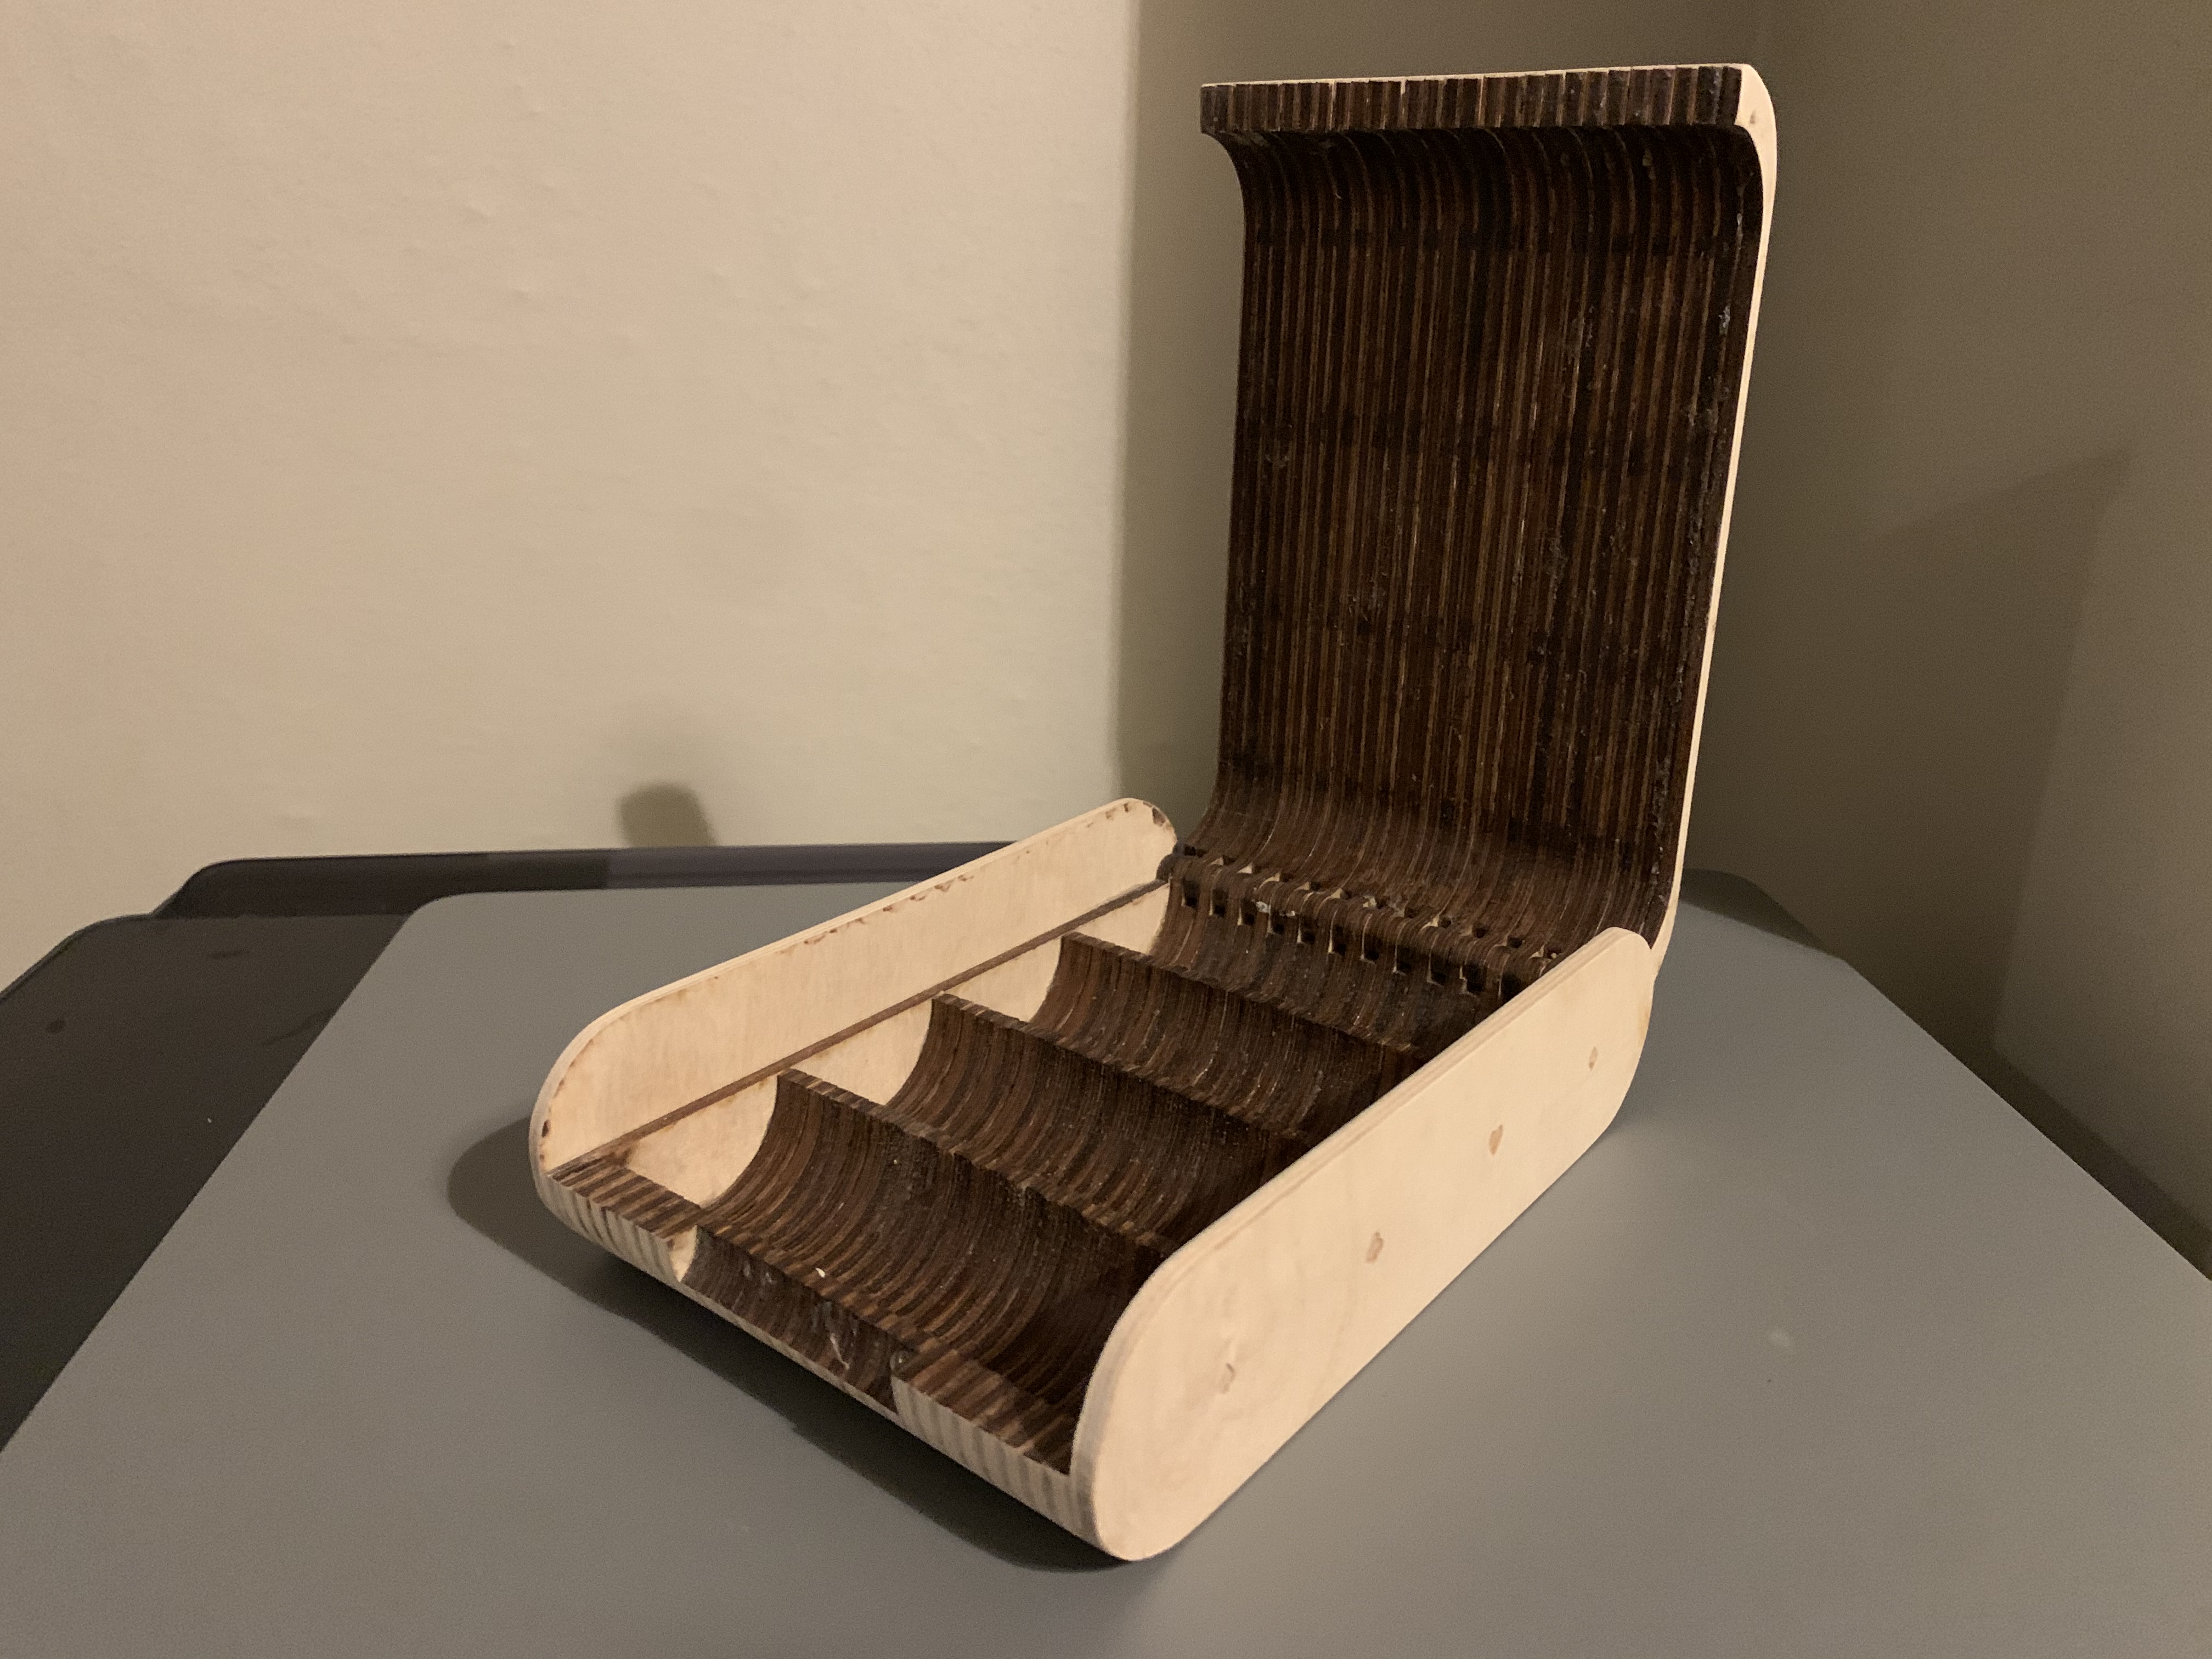
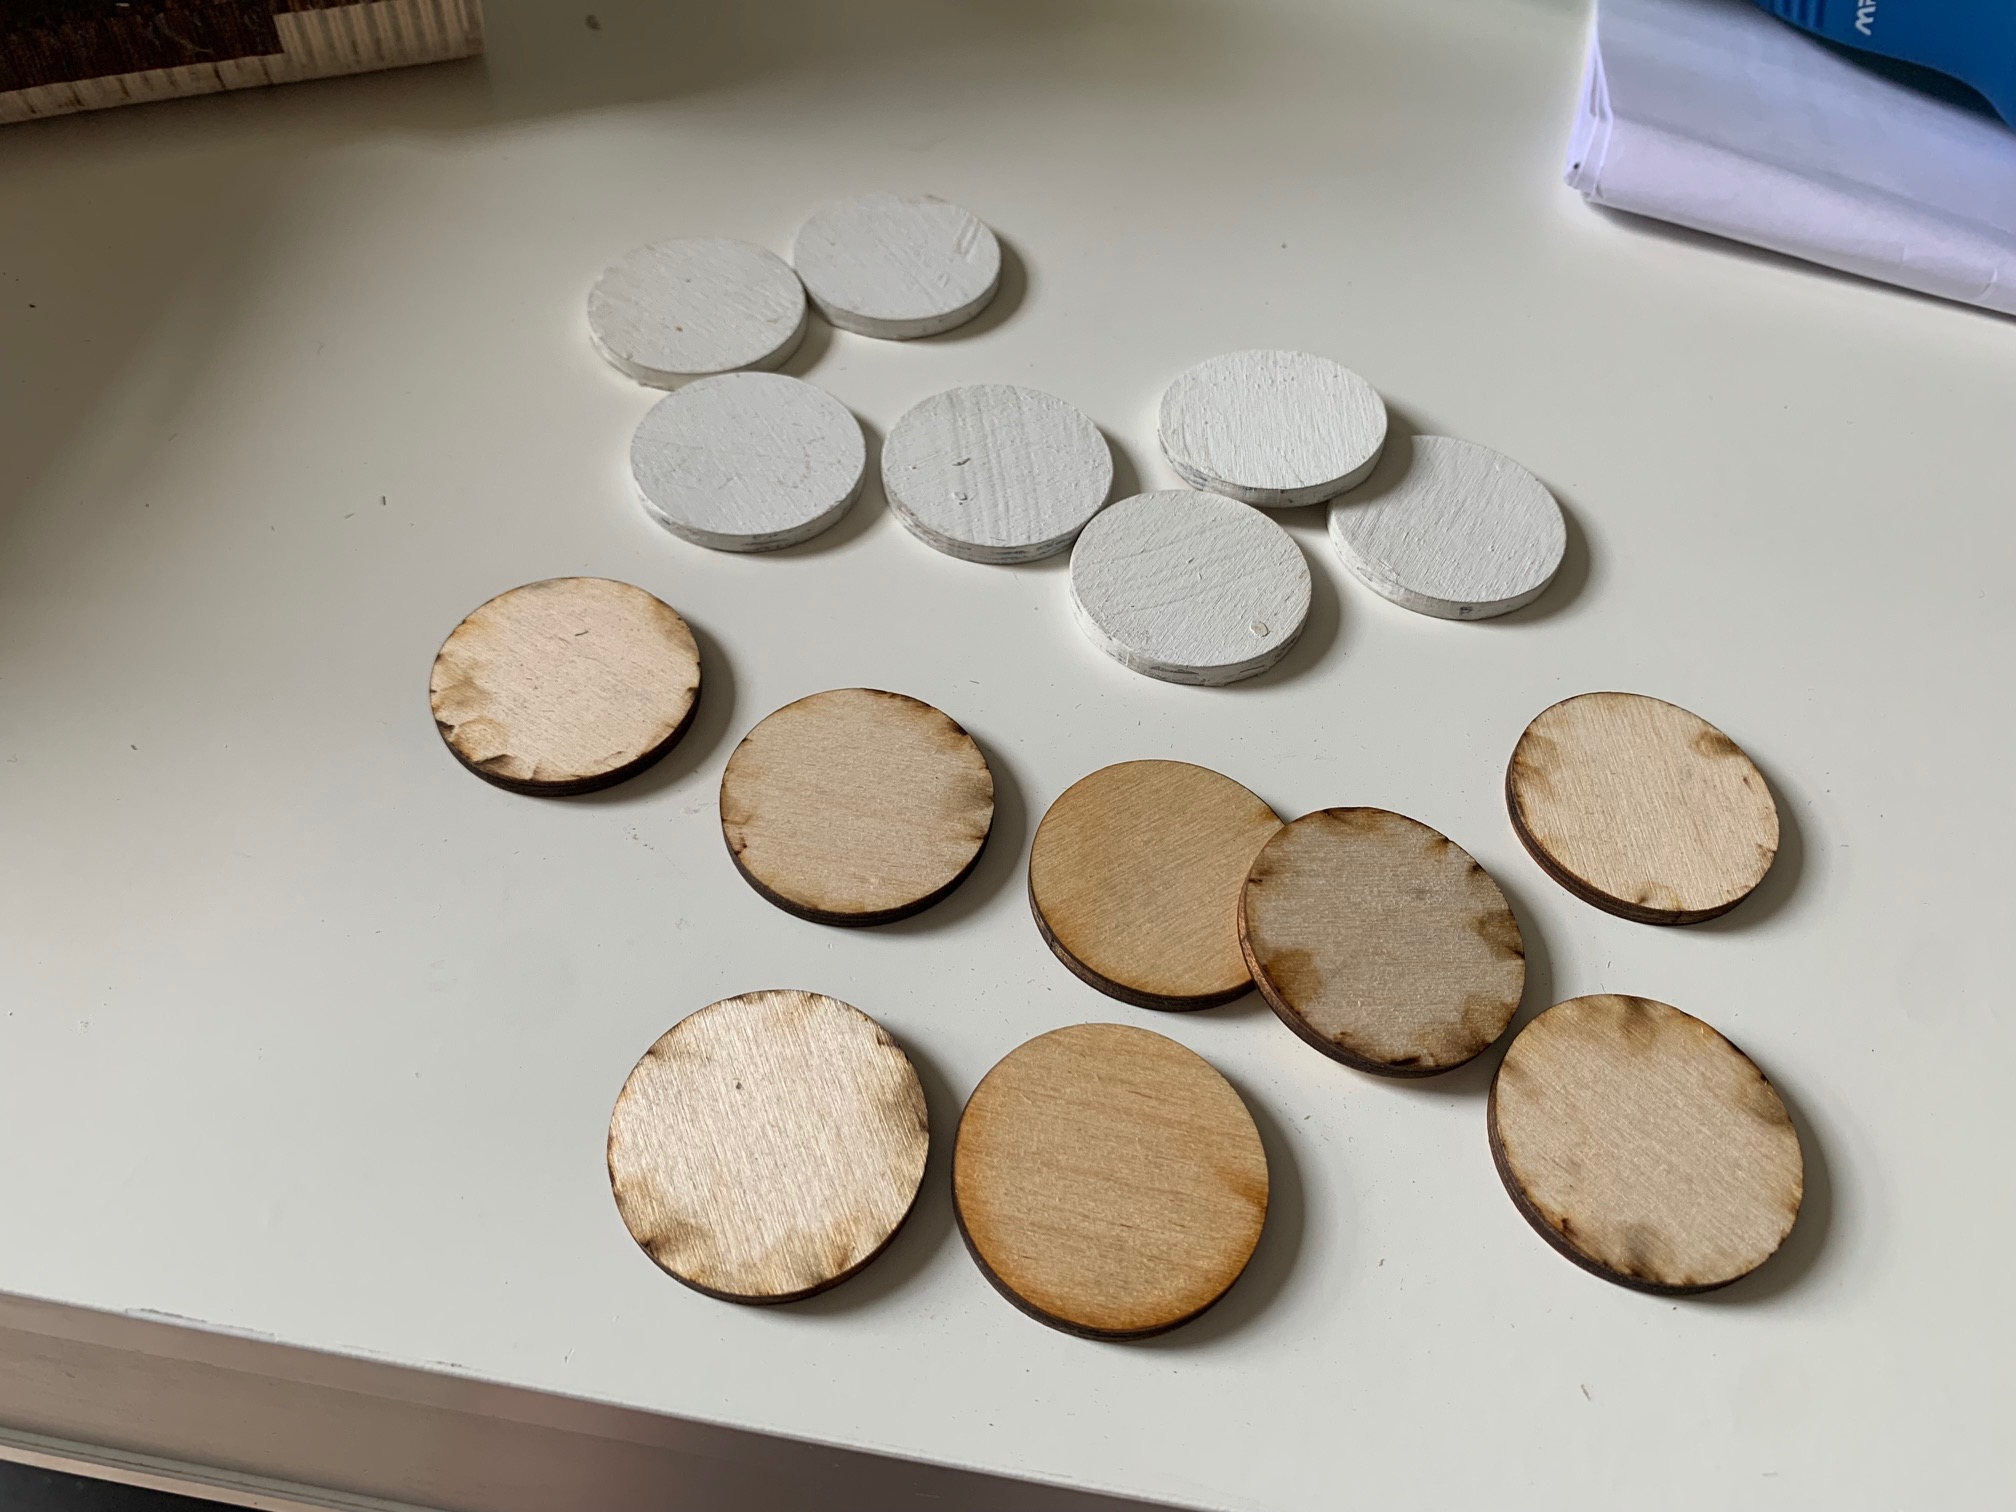
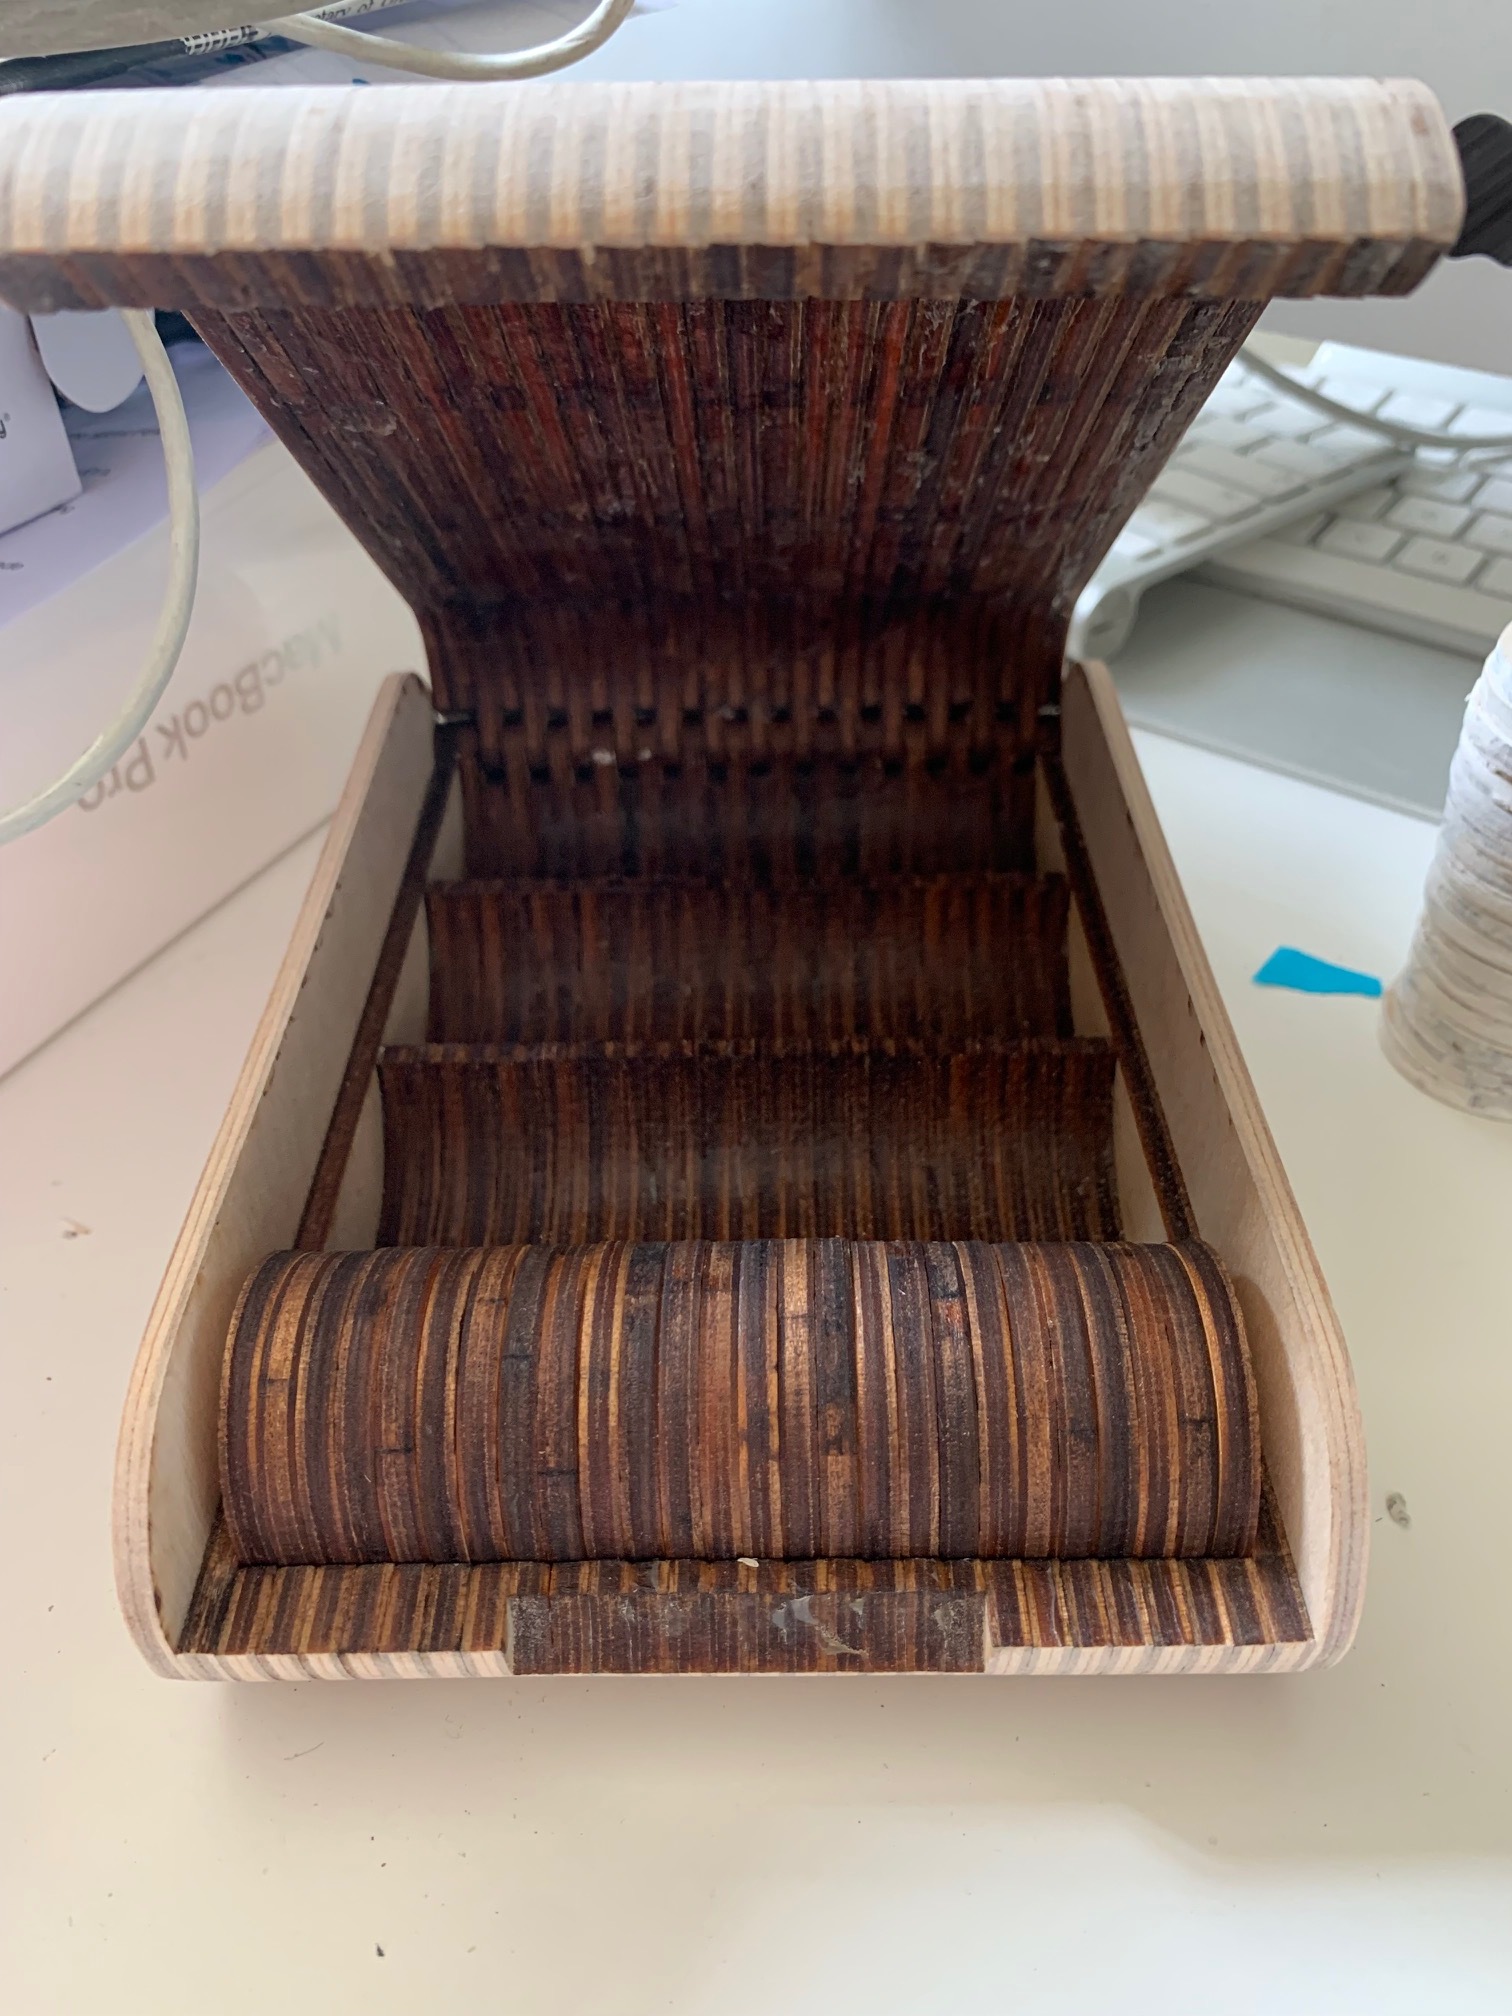
Not quite finished yet but it makes sense at least. I wanted something to consolidate my newly learned skills on the laser cutter, and I’ve been playing a bit of poker recently… so why not. I also liked the idea that if you were to cut out some poker chips, the negative space left could form the chip holder so you have very little waste.
In terms of cementing the laser workflow in ruby, I think I’ve succeeded, especially since I had to have a few attempts to get it right (novice tip: never move the material off the bed until you’re 100% sure it’s cut all the way through…). My main learning there is essentially don’t try to be clever with ruby, even combining multiple shapes within seems to be tricky and it’s easiest just to get your entire layout done in whatever vector programme you use and bring it in.
In terms of the overall product workflow for making these types of things with a laser my main 2 learnings in terms of the process:
I don’t always like the burnt edges and they are much harder to get off than I thought. I wanted a raw ply finish and I still haven’t quite got there despite a lot of sanding, at this relatively small scale, I don’t think I can sand much more without deforming the shape and that to me defeats the object of using such an accurate machine.
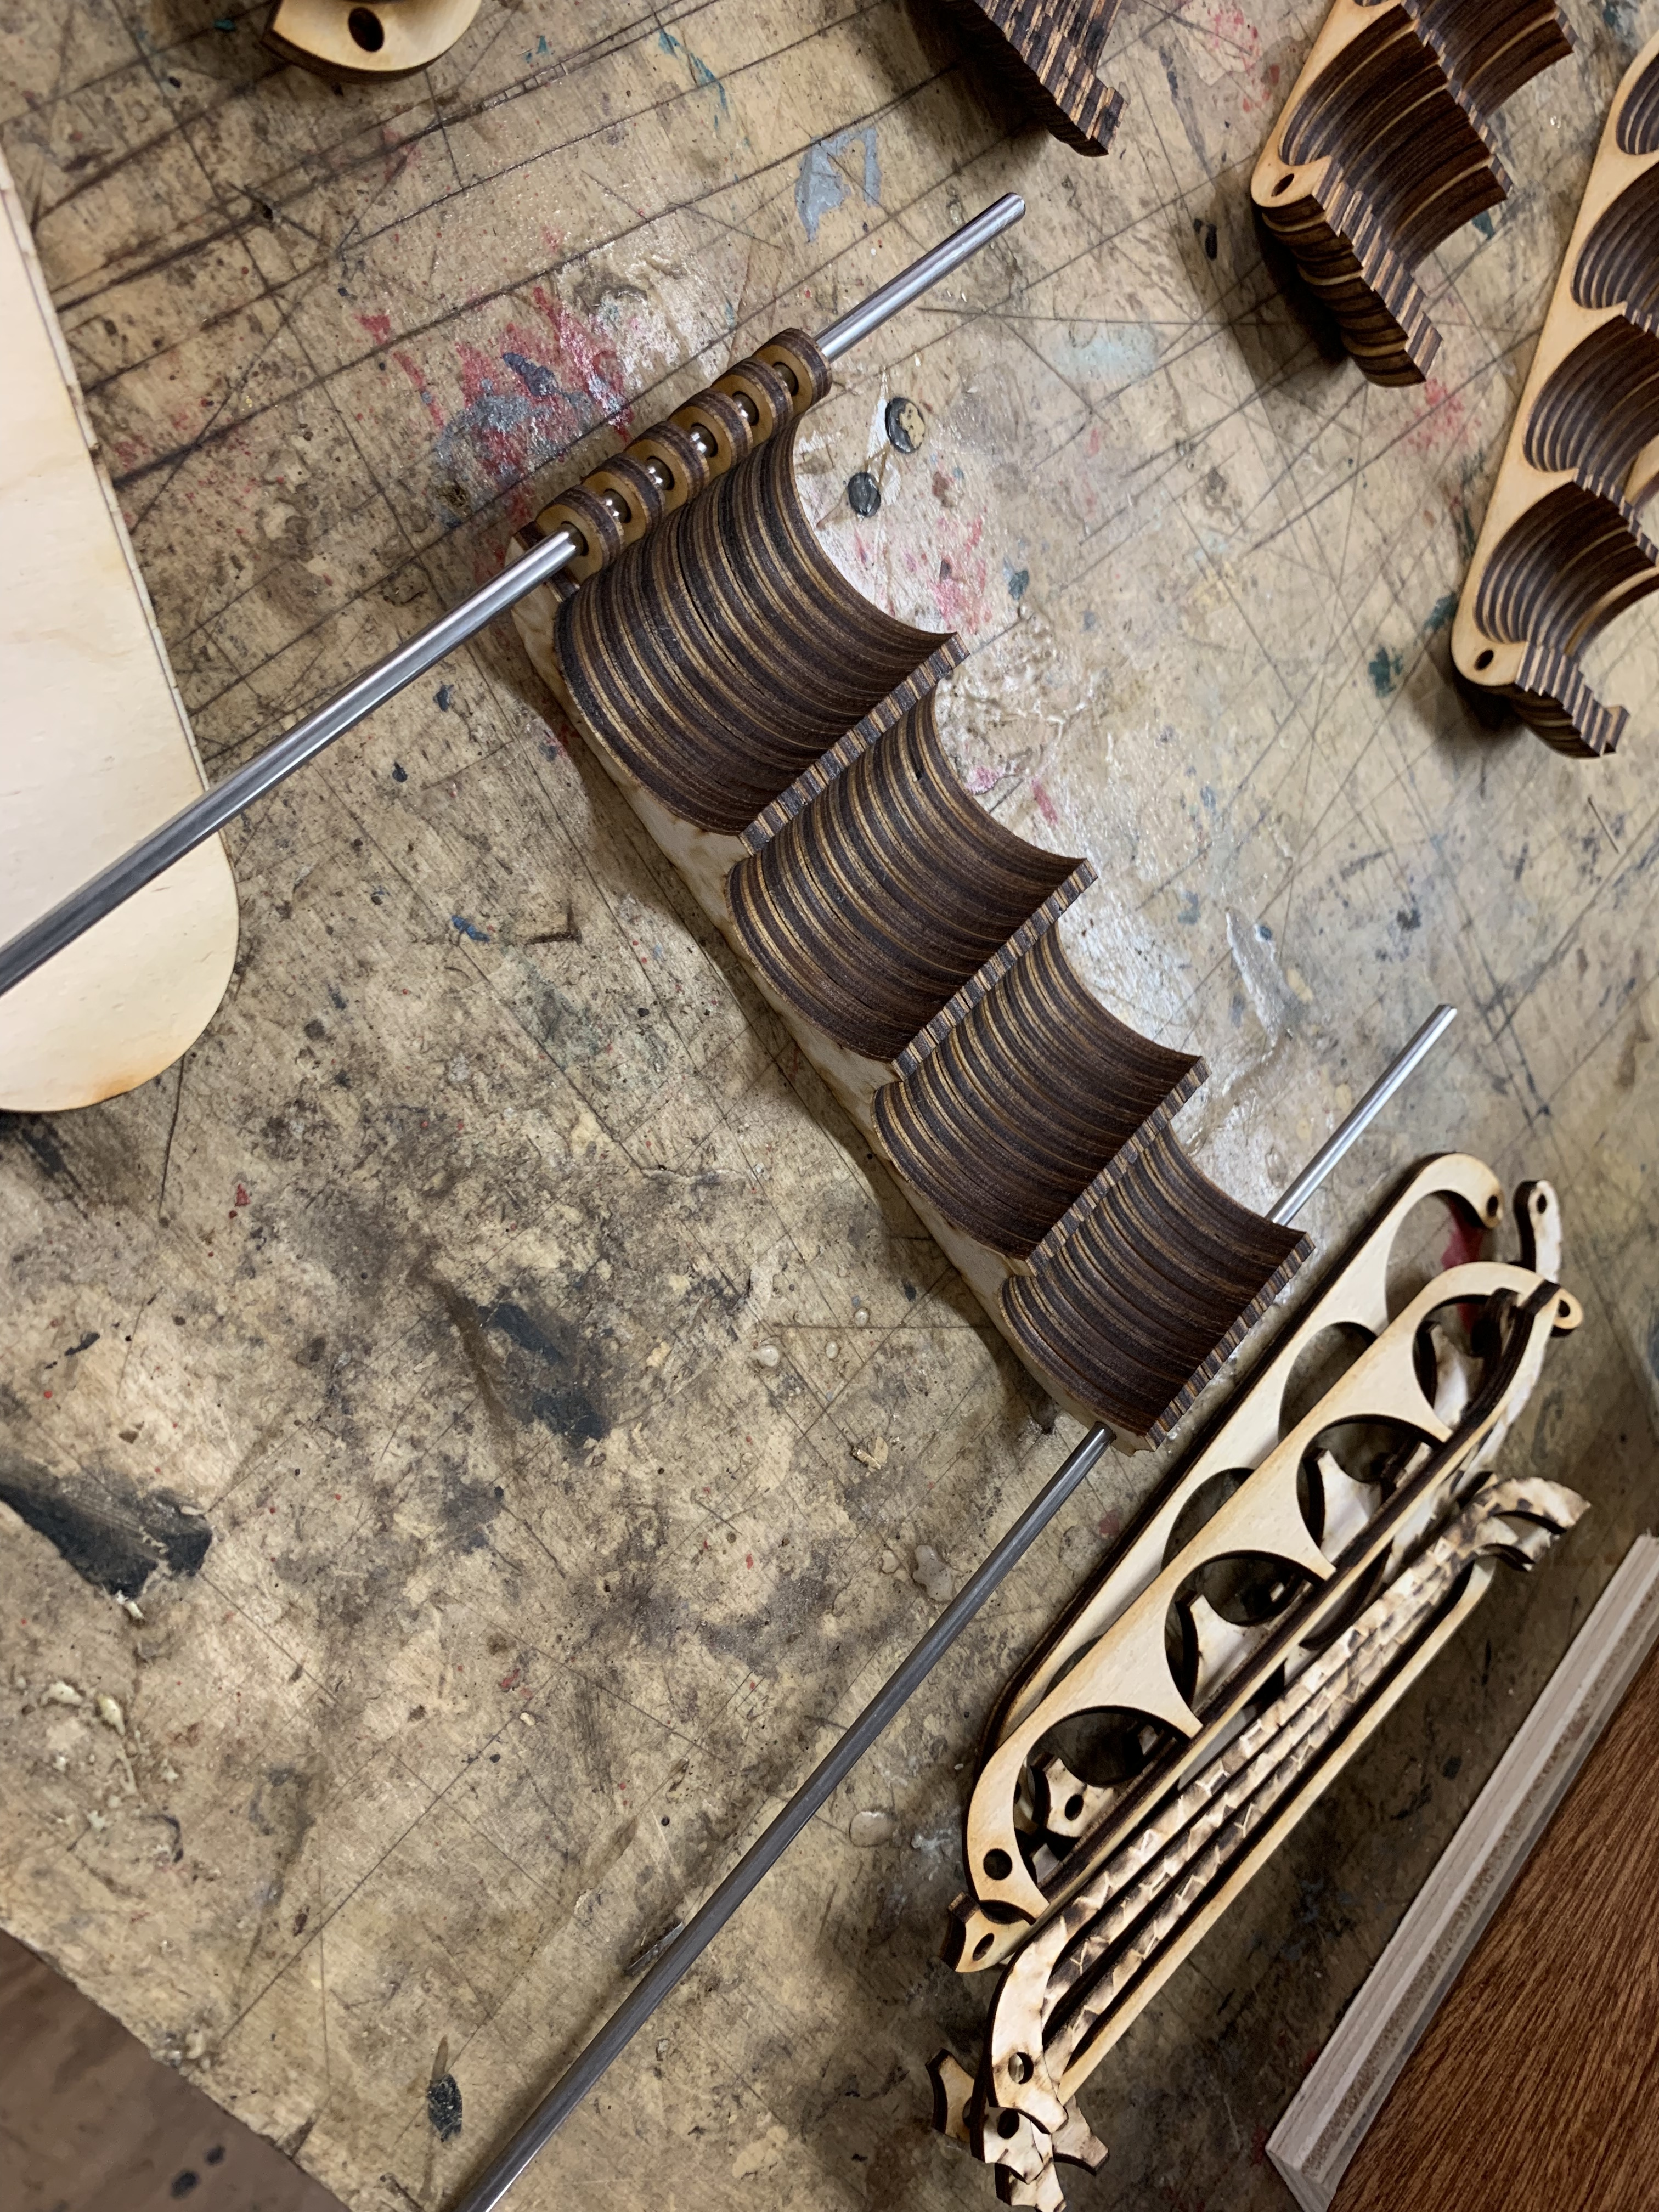
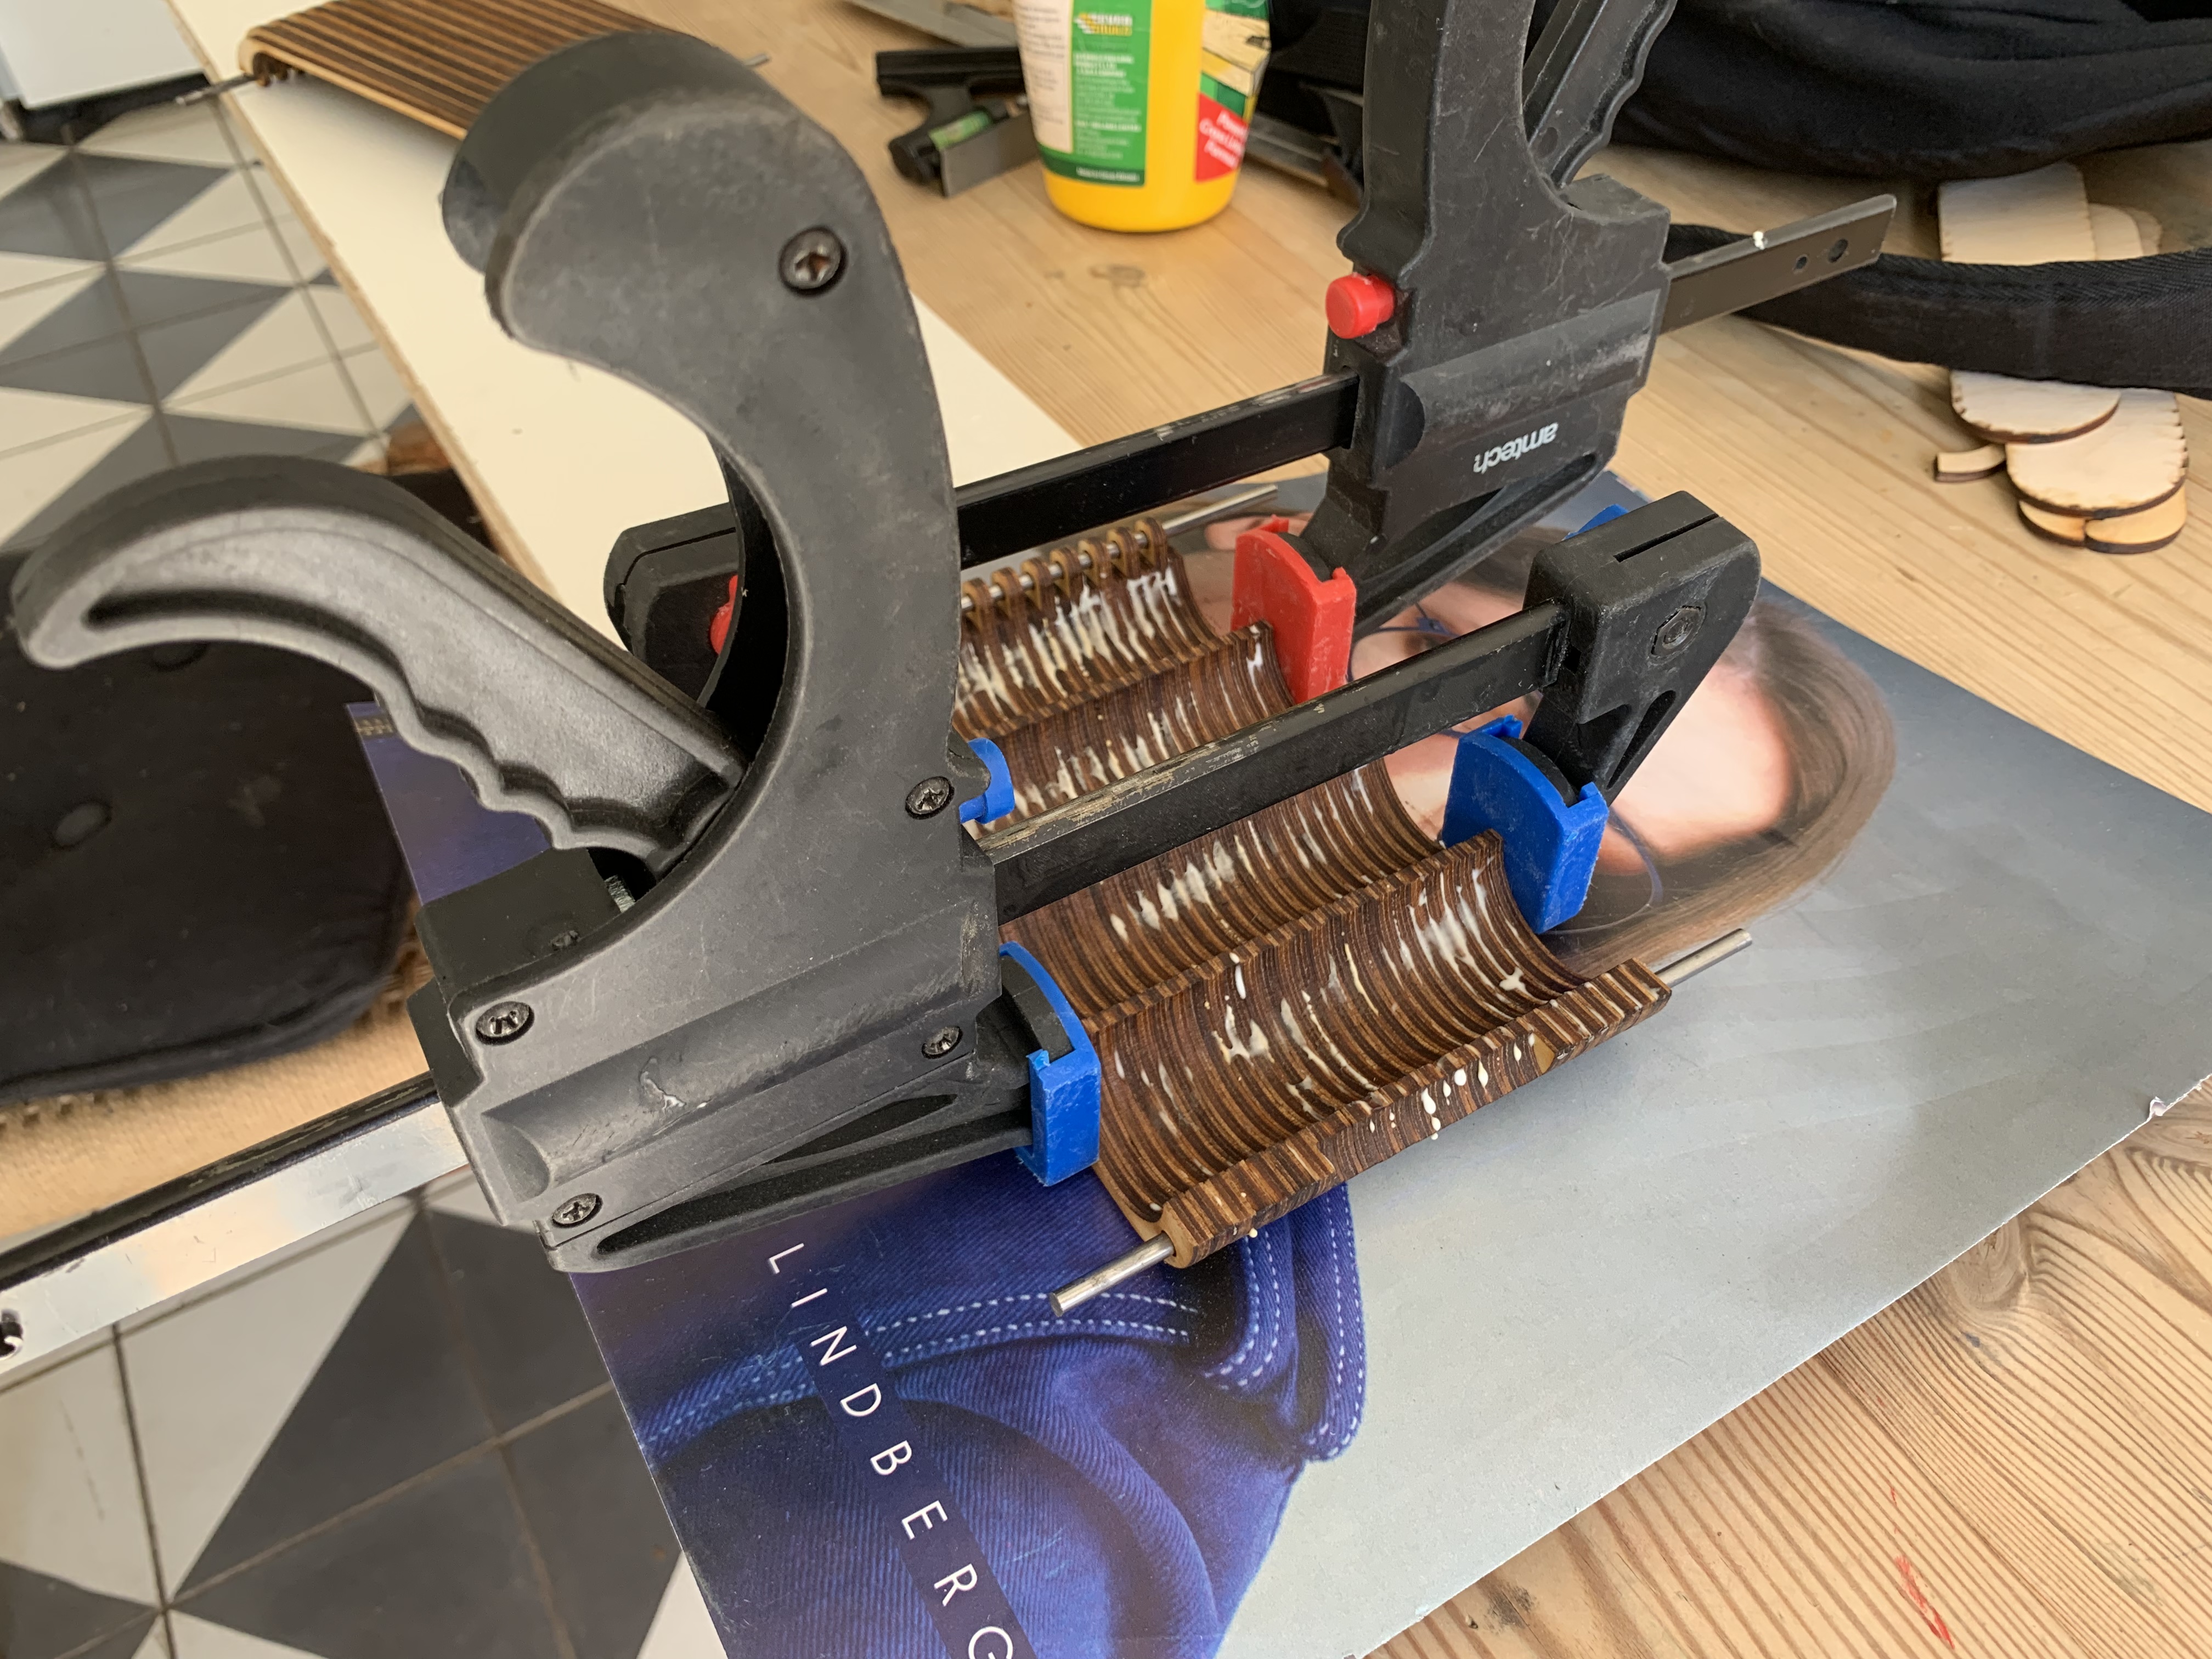
As you can see it is formed by combining lots of layers together, glued together and hinged between the top and bottom. This process was far more fiddly than I anticipated and I ended up with dry glue squeezing out in places that are almost impossible to sand.
Both of the above points to me seem to take away from the power of using a laser cutter. If I end up spending far longer wrestling the result than it takes to cut, almost to the point where I wonder if it would have taken the same time overall to cut with other tools, I’m doing something wrong.
All that to me says if I want to use it I should adjust my expectations about the end result so that they work with the process, rather than against it. I.e. maybe I don’t try to remove the burn entirely and either accept it, make it a feature, or cover it with paint or stain. And maybe glue is not the right way to fix it, maybe some small fixtures or connecting pieces.
Any advice on gluing, treating, post cutting with a laser very welcome.
Anyway, I’ve really enjoyed it and it gives me loads of ideas for future projects. Thanks to @Brendon_Hatcher for the great induction and tips along the way and also to Steve (the @ isn’t working) for help.
that;s really nice, i imagine it smells terribly though, but otherwise very cool.
i wish i could remember the product but there was a spray in an orange color bottle that had a nice scent but could also clear away the burnt edges. i’ll try to see if i can find it.
I like that you cut out all the chips from the same stuff. Poker chips in plywood work perfectly well, but it’s nice to have something with a bit more weight; have you tried adding weights into them? Have you also got any pictures of the chips as well if you made some?
I thought I could just paint them but
a) its fiddly
b) it doesn’t look great in my opinion
c) as you say, on reflection I think they need to have a bit more substance to them, others have made the same comment.
I’m wondering about some kind of lacquer - the only thing is it will end up adding to the overall dimension, as you can see right now they are perfectly snug,
You could make the chips double thickness, where half of it is an “o” shape, and then put a coloured metal disc into the space. Same thickness or less than one ply sheet.
Might end up with excessively thick chips though, and yes you’d lose the centre of the o’s. Use the thinnest ply you can and make some stylised lettering out of the holes for the outside of the box?