Right, I am back on the case or box. I just spent an awfully long time getting 12 mm down to 8 mm. I am going to leave it overnight and address any movement tomorrow probably with a scraper. I really didn’t choose an intelligent way of getting to this point but I have learned several lessons, the first of any project is always a steep learning curve.
Desk tidy/ pen box
1 Like
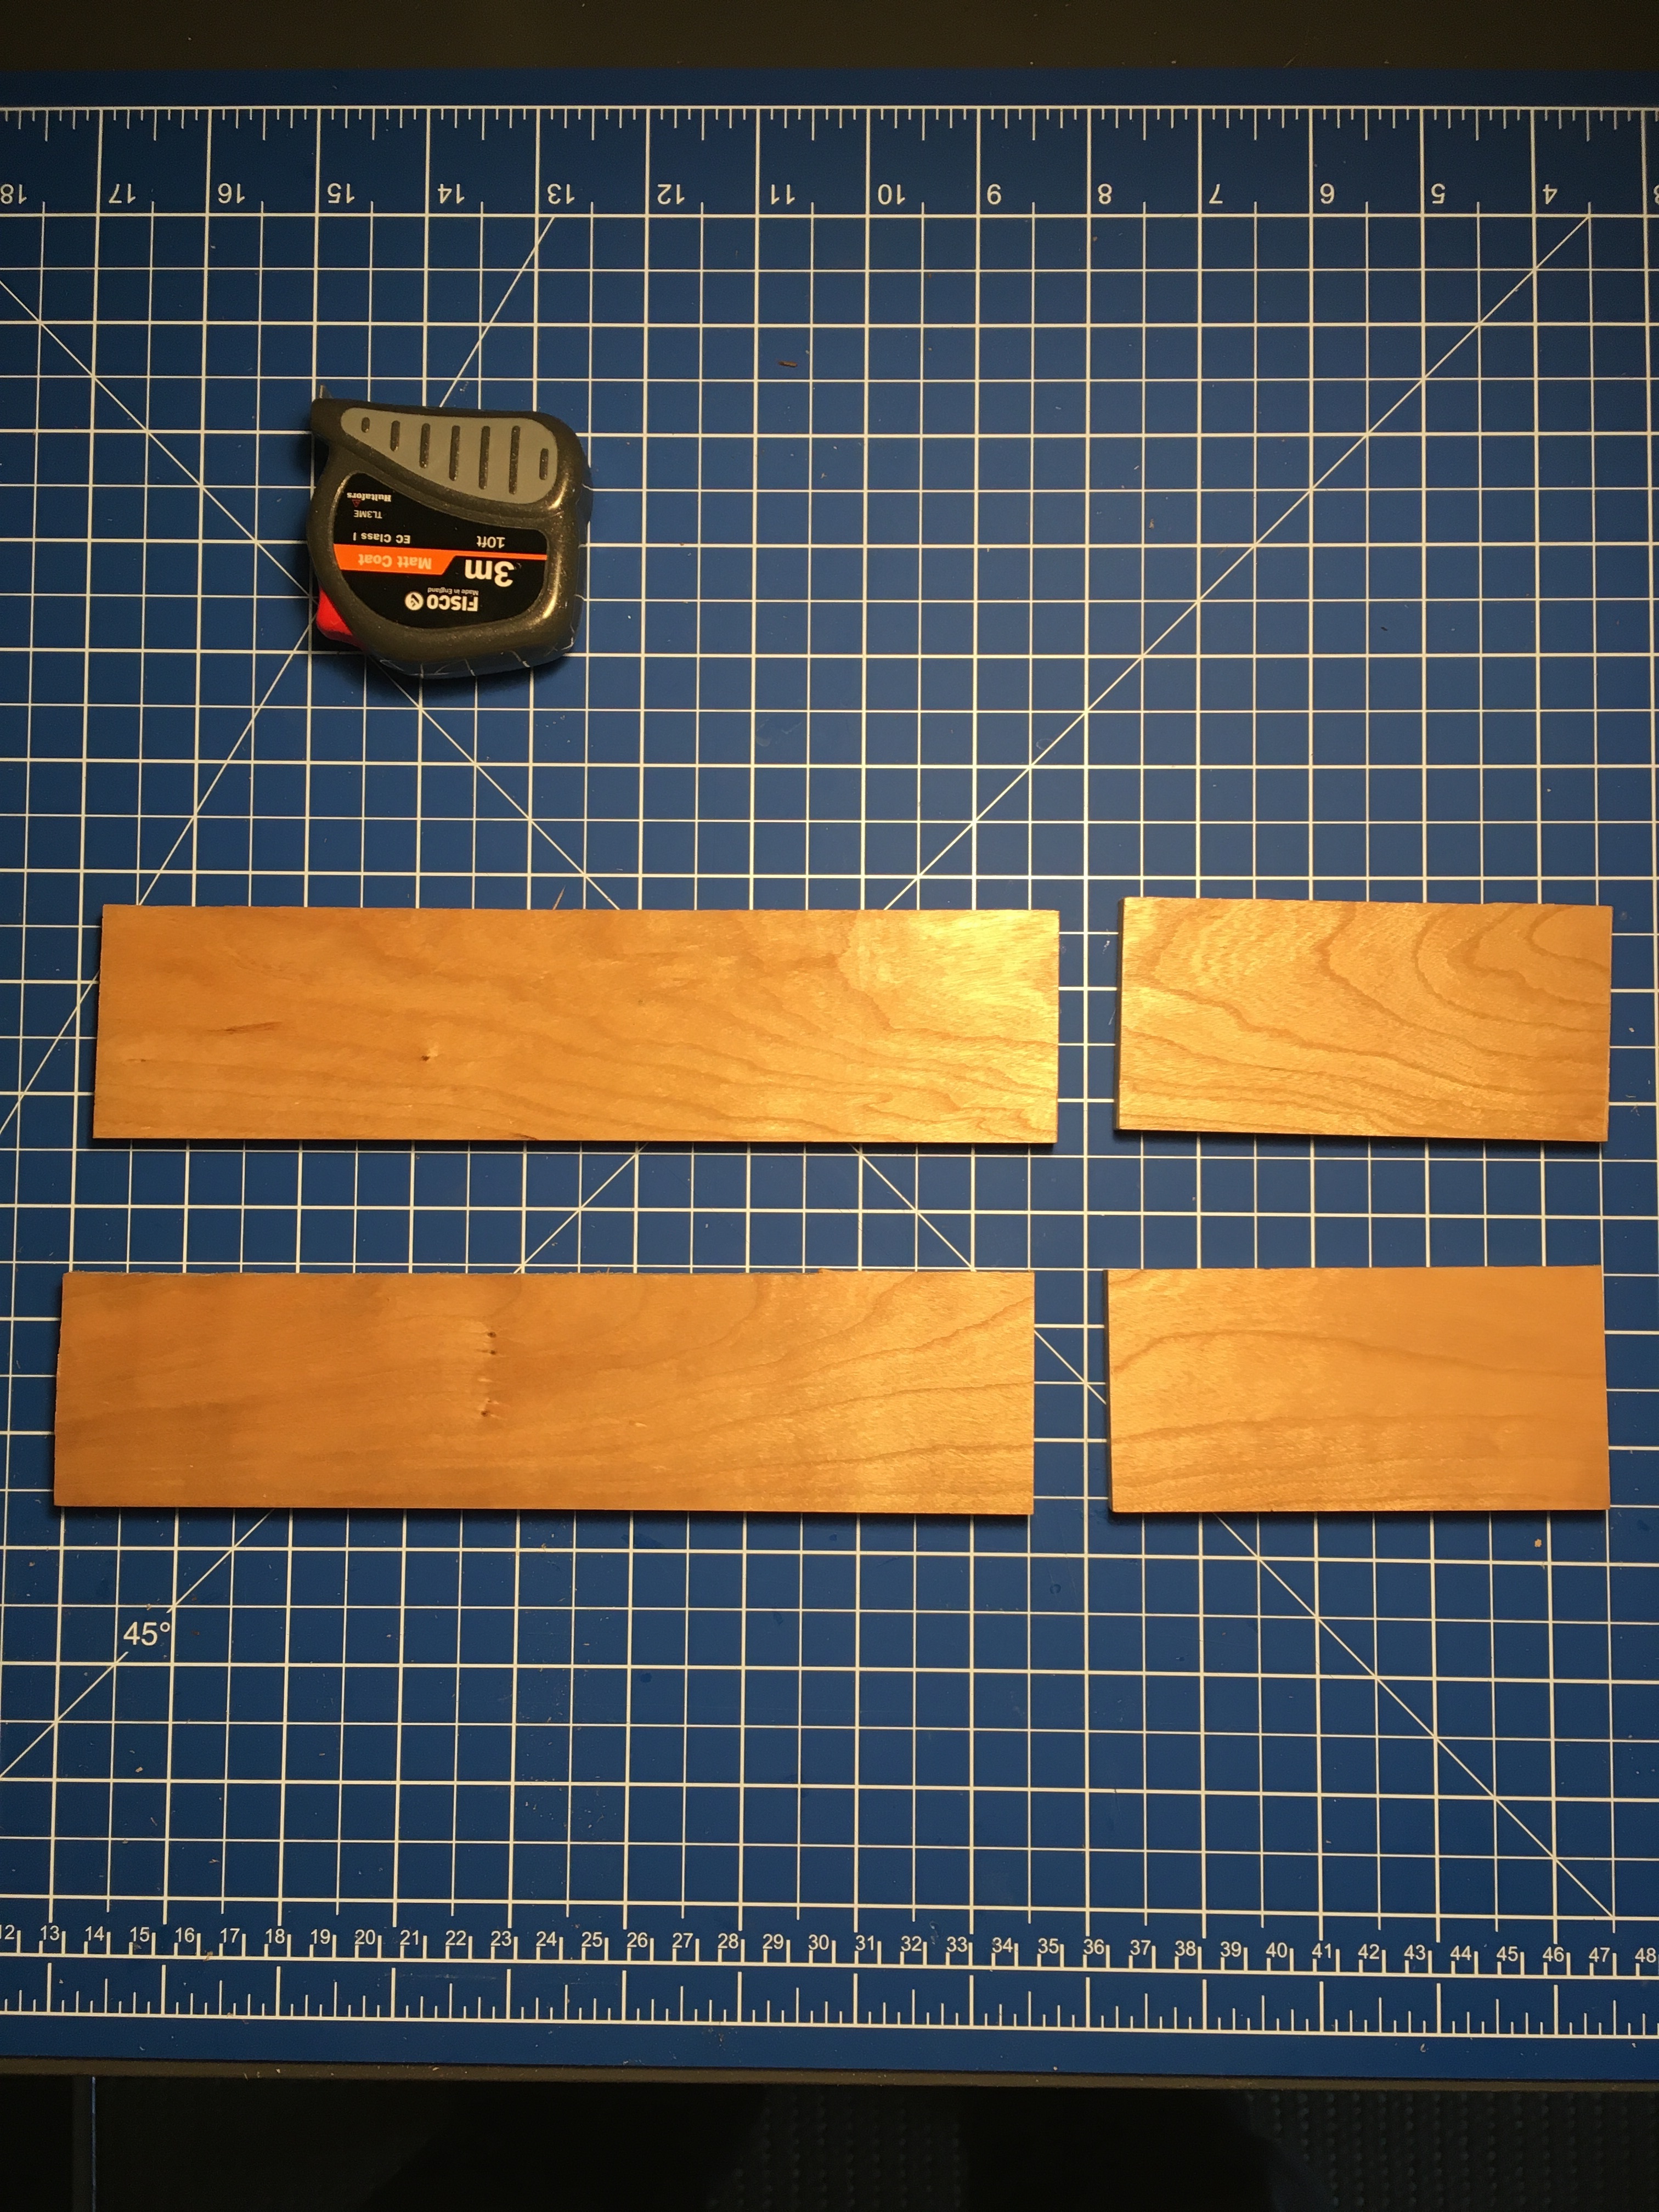
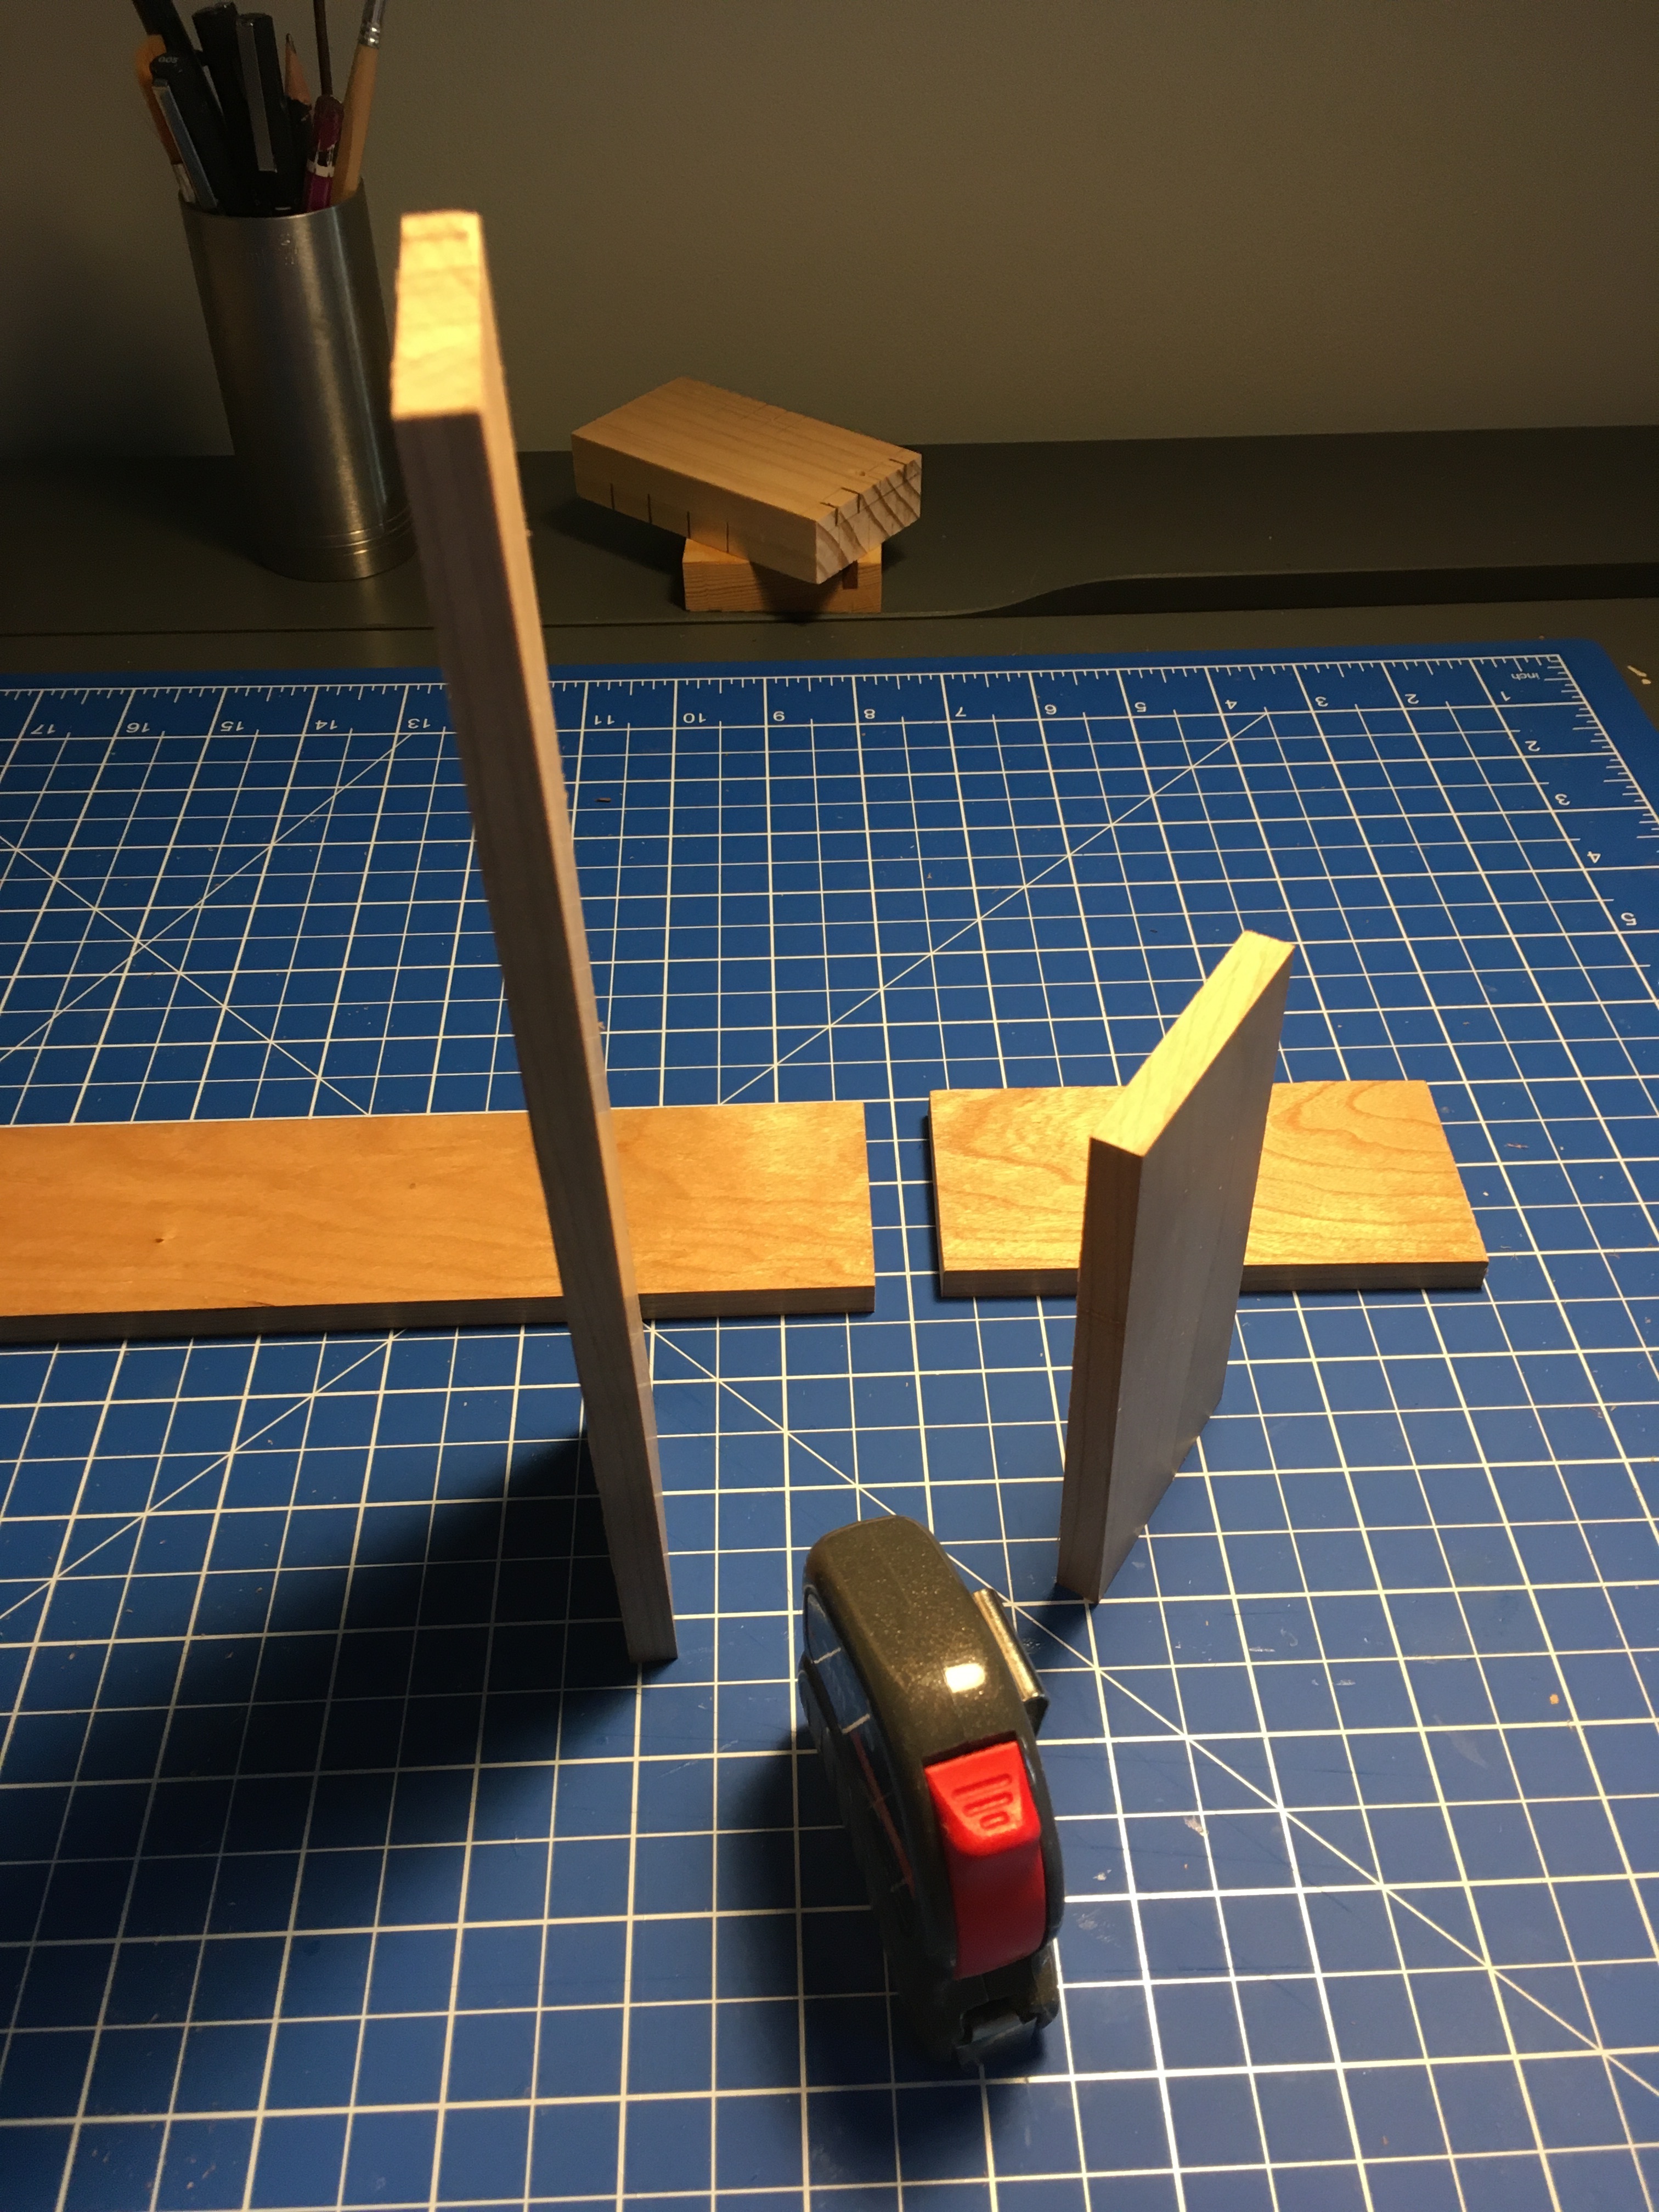
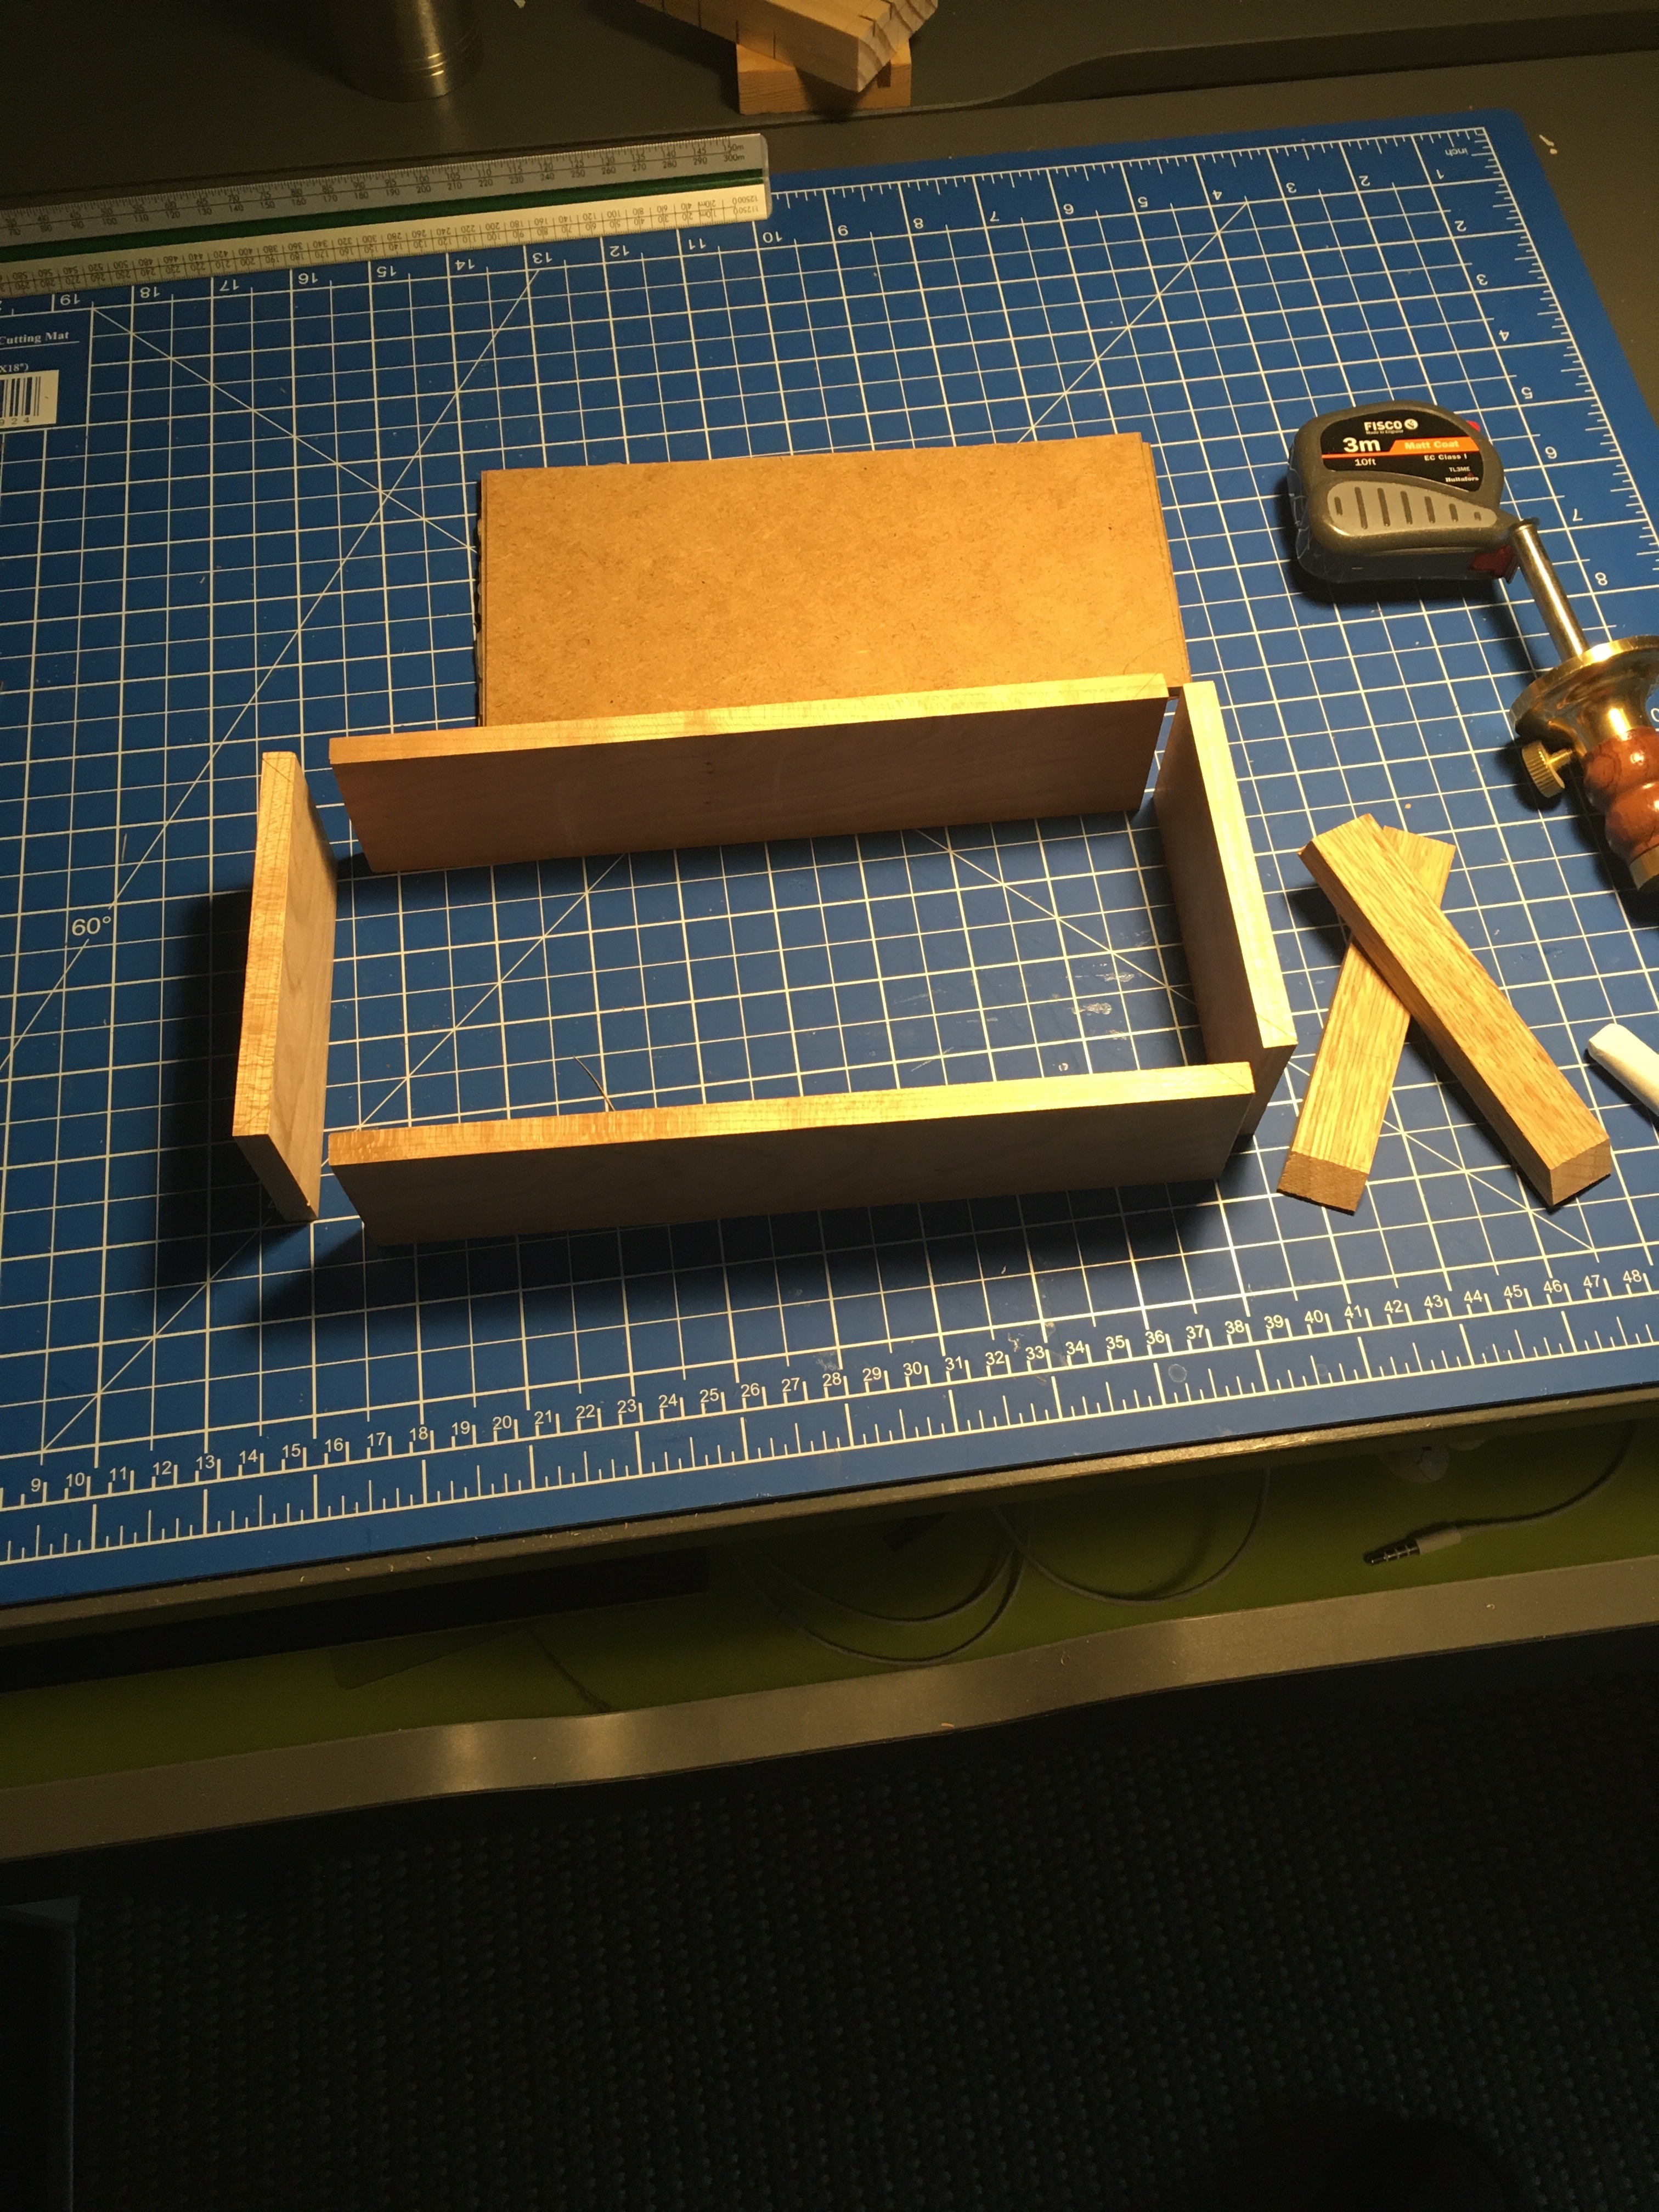
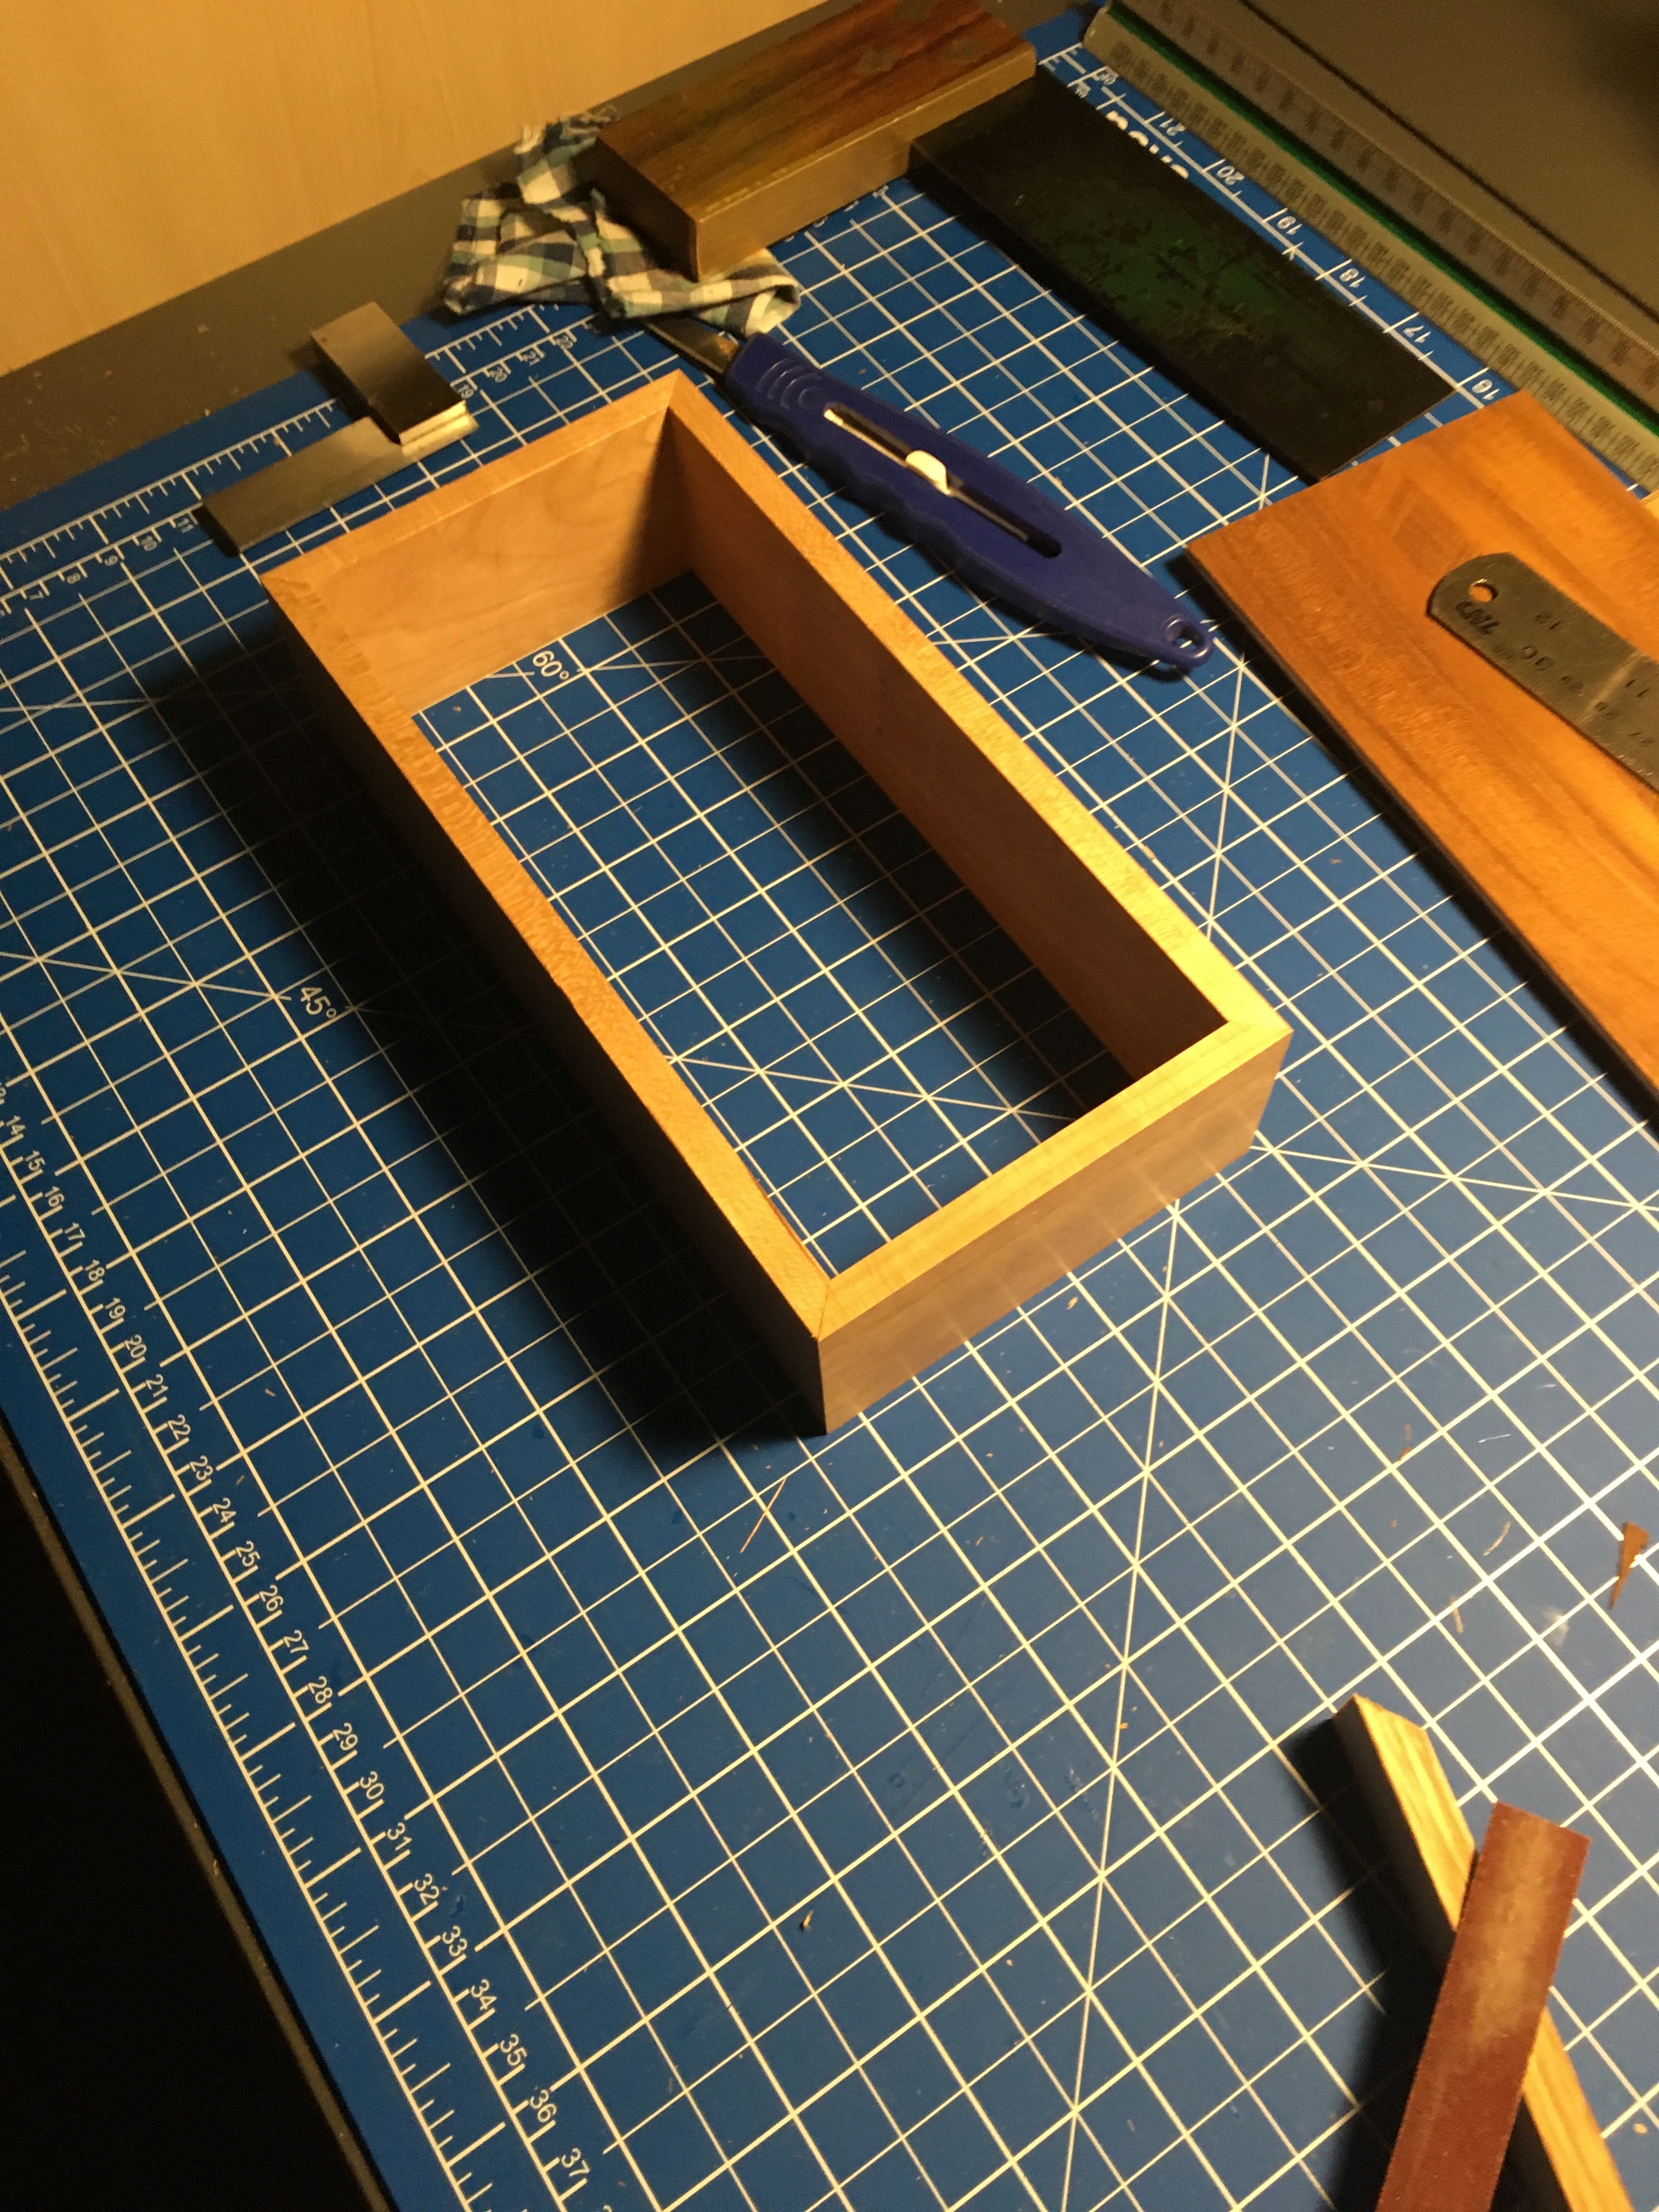
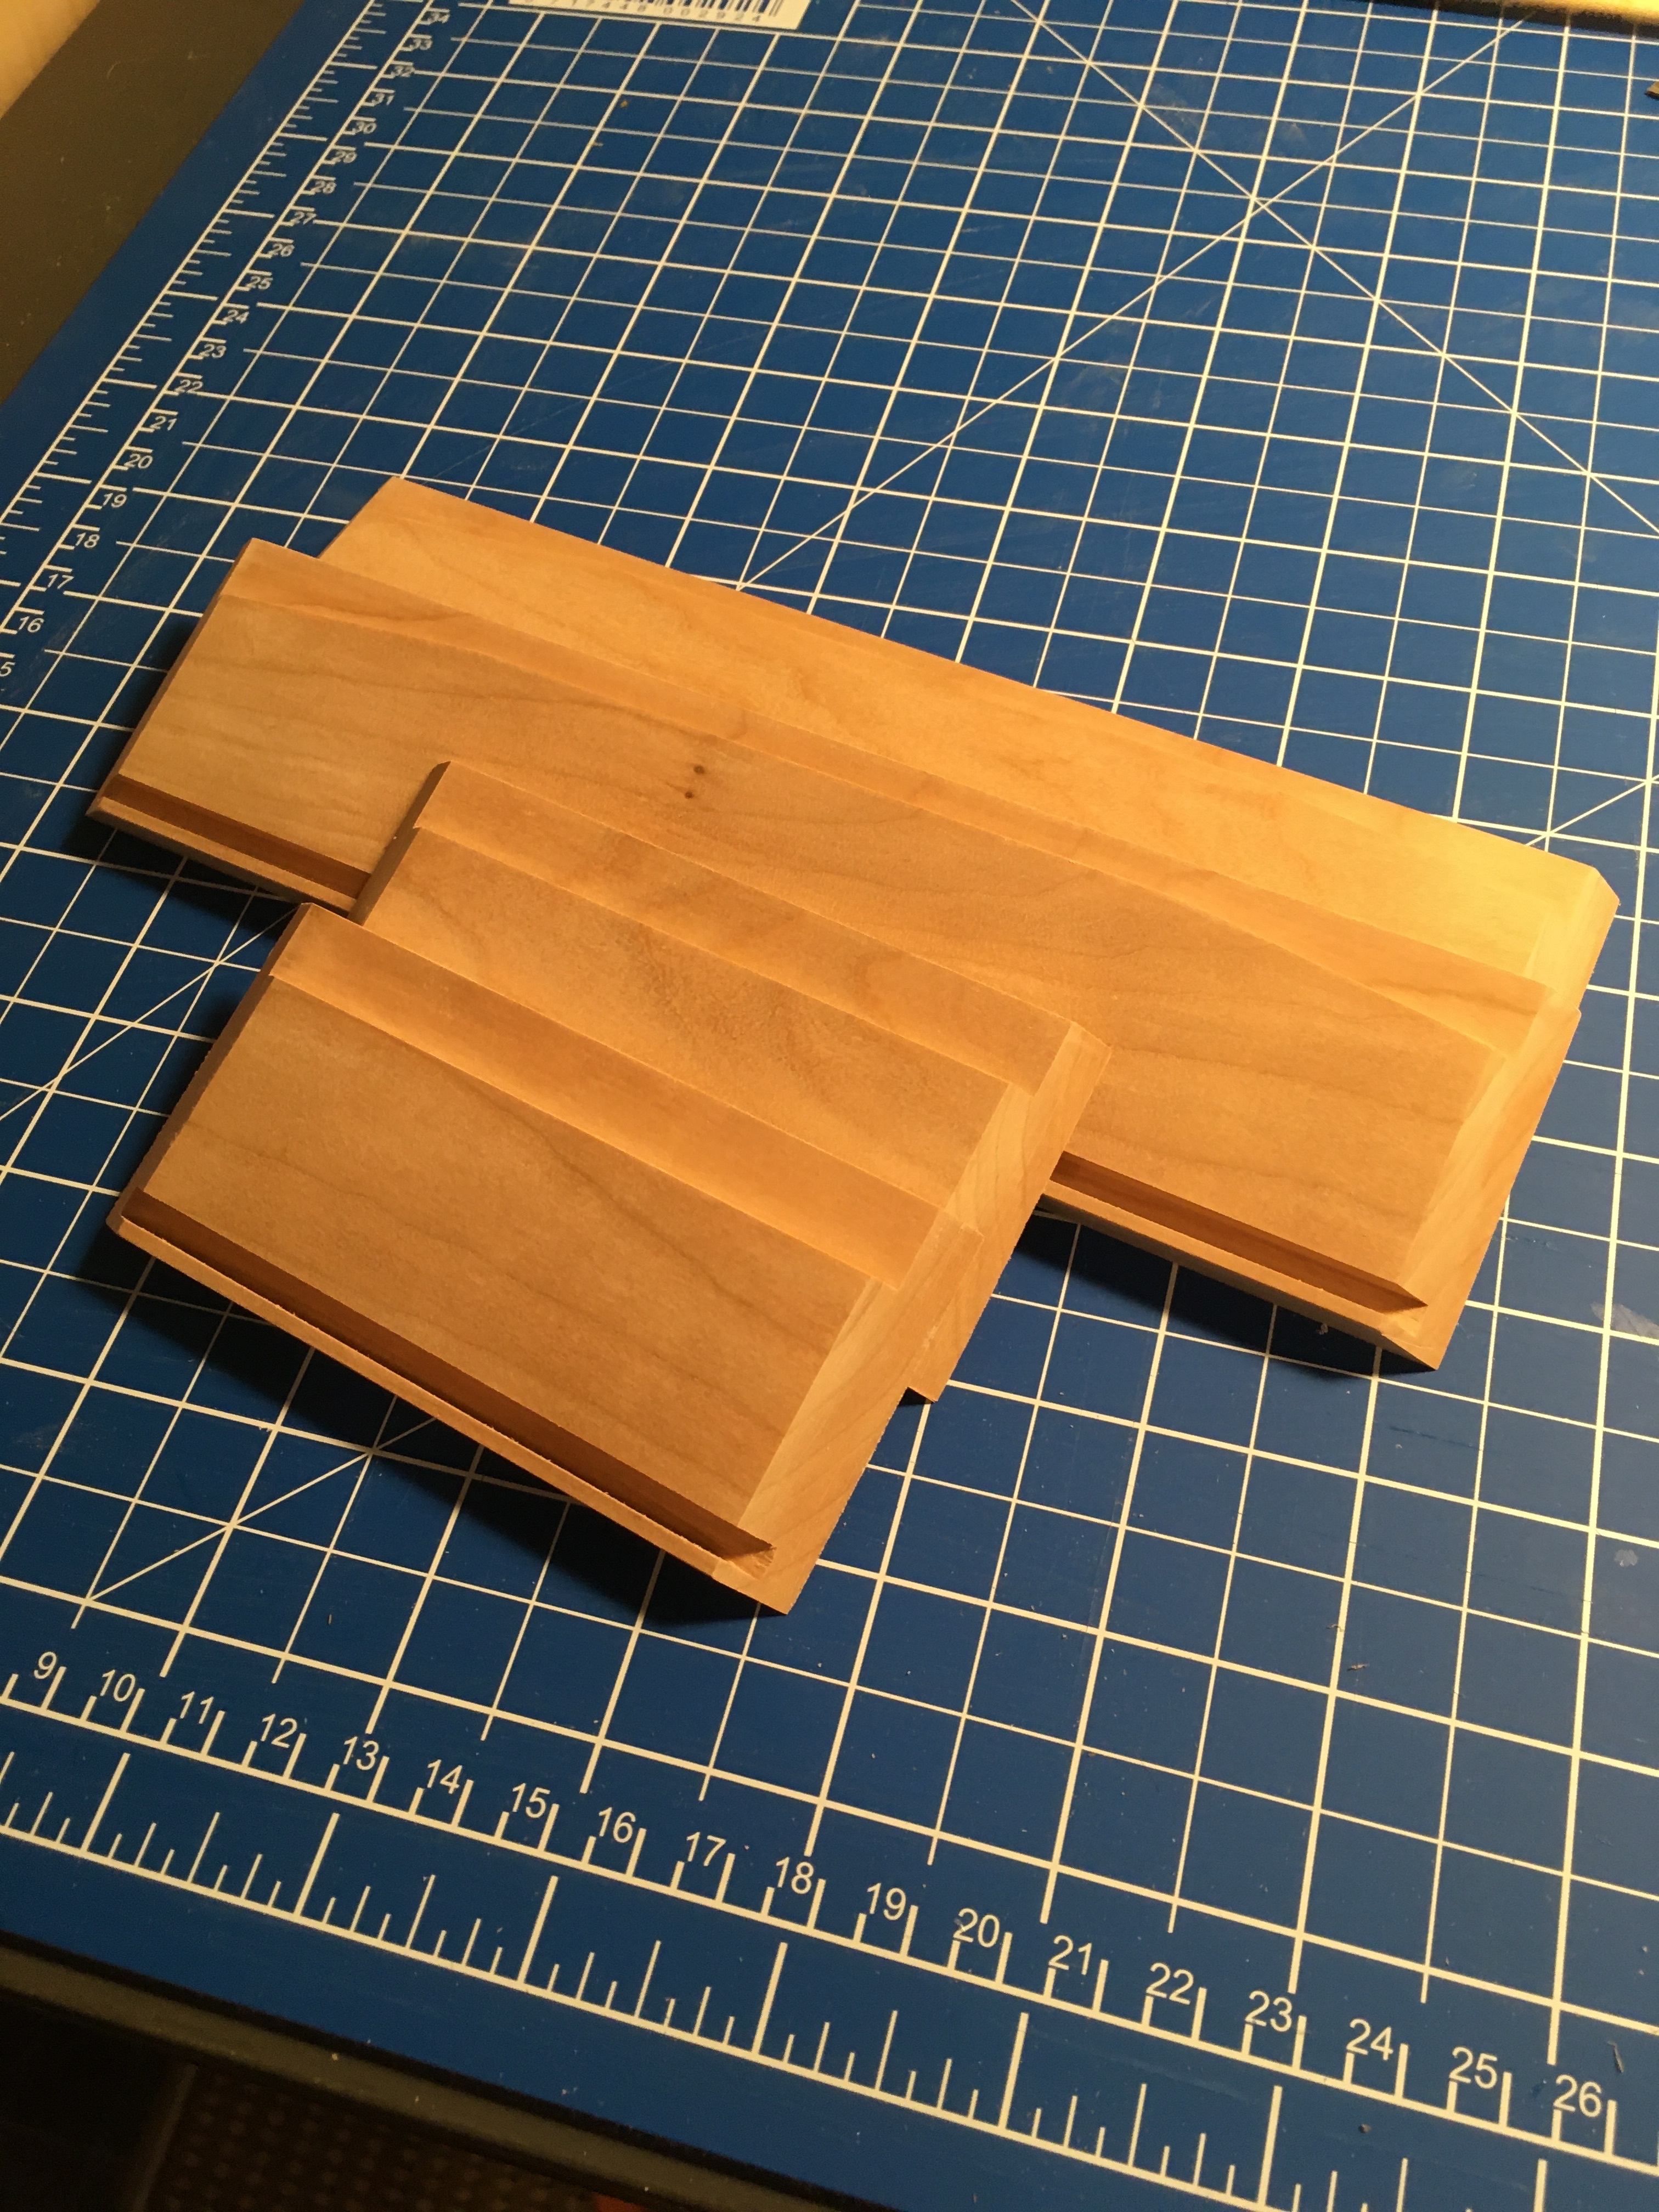
Surprisingly for stock which I reduced the thickness considerably, I didn’t need to make any adjustments. I have got all the pieces to width and marked out the mitres. I don’t have any stock suitable for a mitre box so I am going to pare the bulk of the waste and then use the donkeys ear. I have made a couple of test pieces as each mitre is a pair of joints which have to add up to 90 degrees. I will shoot one half of each mitre then I will shoot the corresponding test piece, adjusting the lateral adjustment of the blade until I get a 90. At which point all the pairs of mitres will be ready to attempt. The lid is going to be a piece of veneered 4 mm mdf which I have made from two pieces of 2 mm mdf. Laminating makes it stiffer, I had originally thought to use solid cherry but I didn’t fancy the planing for a component which could easily cup over time. I am definitely becoming fond of veneer.
I sawed the bulk of the waste away, very roughly, staying away from the lines. I also decided to check my shooting plane. Something which I can’t explain had occurred. Both sides of the plane will be used on the donkeys ear so I wanted to true up both sides and check for wind. There was definitely no wind after I made the plane on the sole or the sides. I agonised over the accuracy and used winding sticks and a very very flat glass plate. Well the side of the plane which is not usually used was wound, so surely the whole plane should have been wound? I have corrected it all. I am happy to say that as expected the sole of the plane has hollowed out slightly which is what I planned for when orienting the grain of the body. Props to me, sometimes wood behaves predictably. Shooting mitres next and then some router work.

1 Like
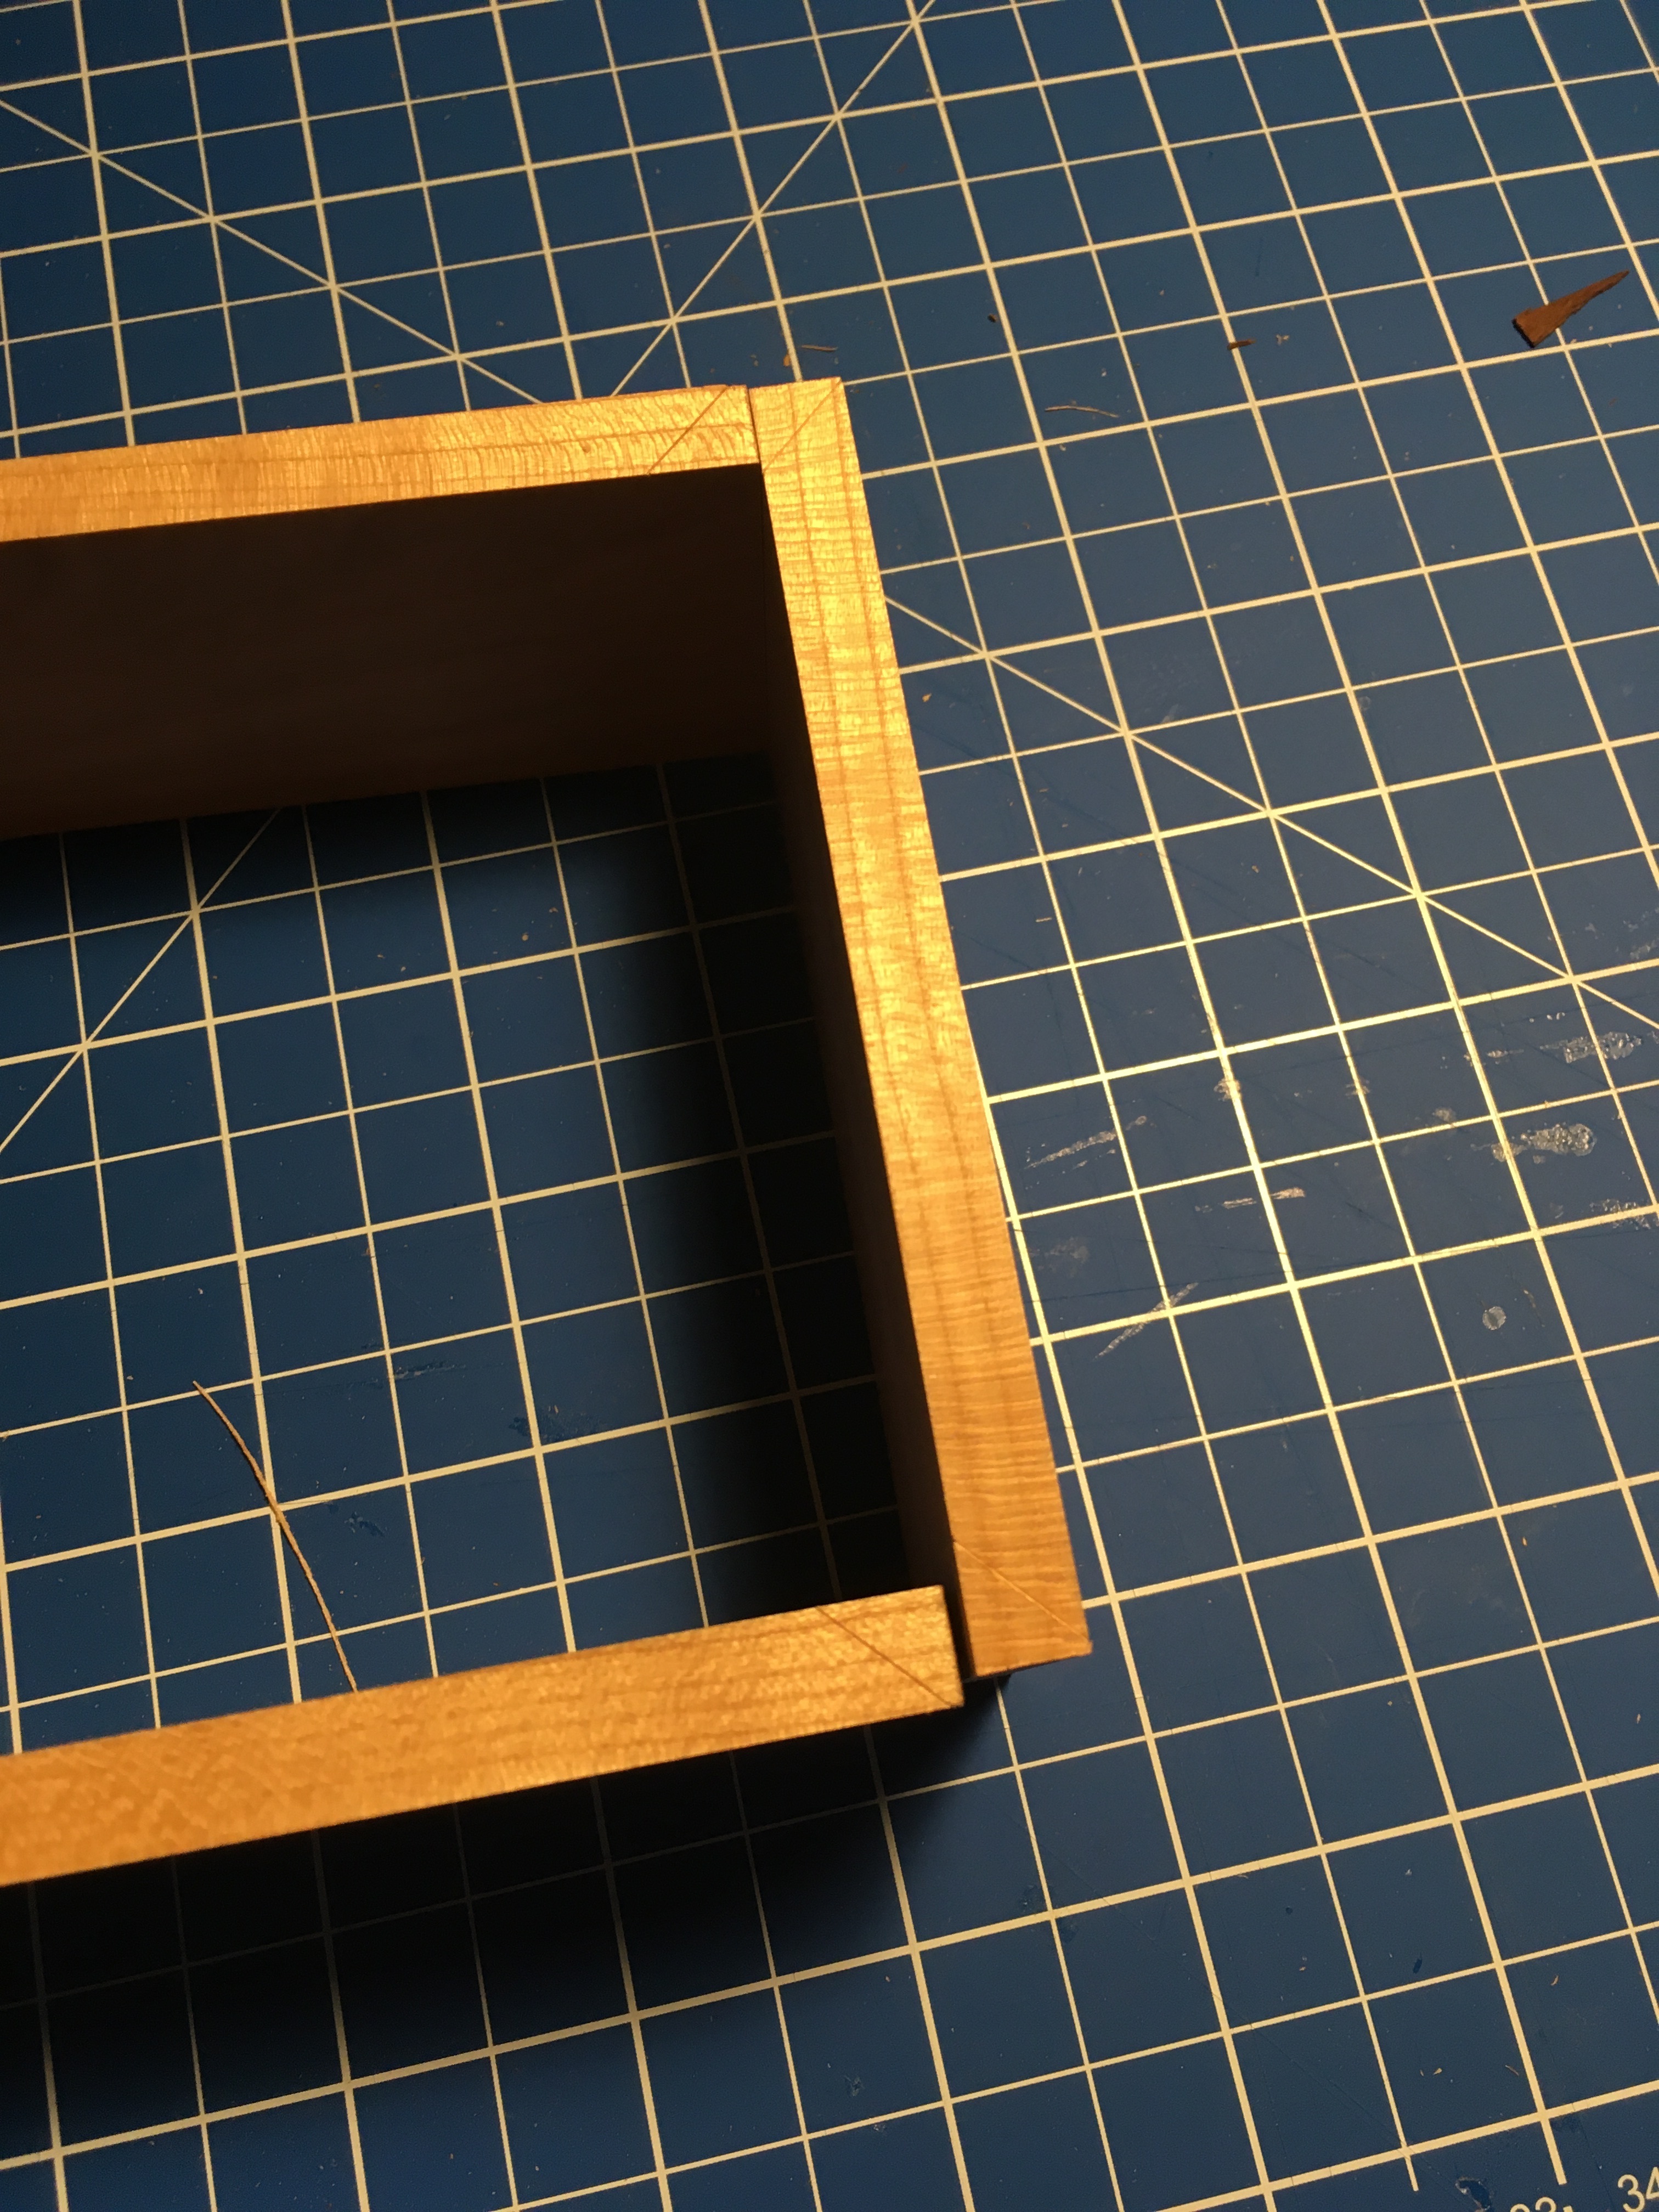
I have completed the mitres. What a palava, a gap the size of my smallest feeler gauge would be noticeable. I am fairly happy, I am going to make some similar style boxes and I won’t be using mitres. If you look at antique furniture do you see a lot of wide, visible mitres? I don’t think so. As I suspected, hand cutting mitres across the width of even a narrow piece of wood is difficult. Framing is totally different of course and much easier to accomplish and subsequently fine tune with hand tools. Of course if you have a properly dialled in table saw, or a proper ten inch disc sander, it would make sense, but for me, I can cut dovetails so much more easily and they suit hand tools. Rebates are a good joint if pegged and visible in millions of pieces of furniture through history. I prefer simplicity every time, always have, always will.
1 Like
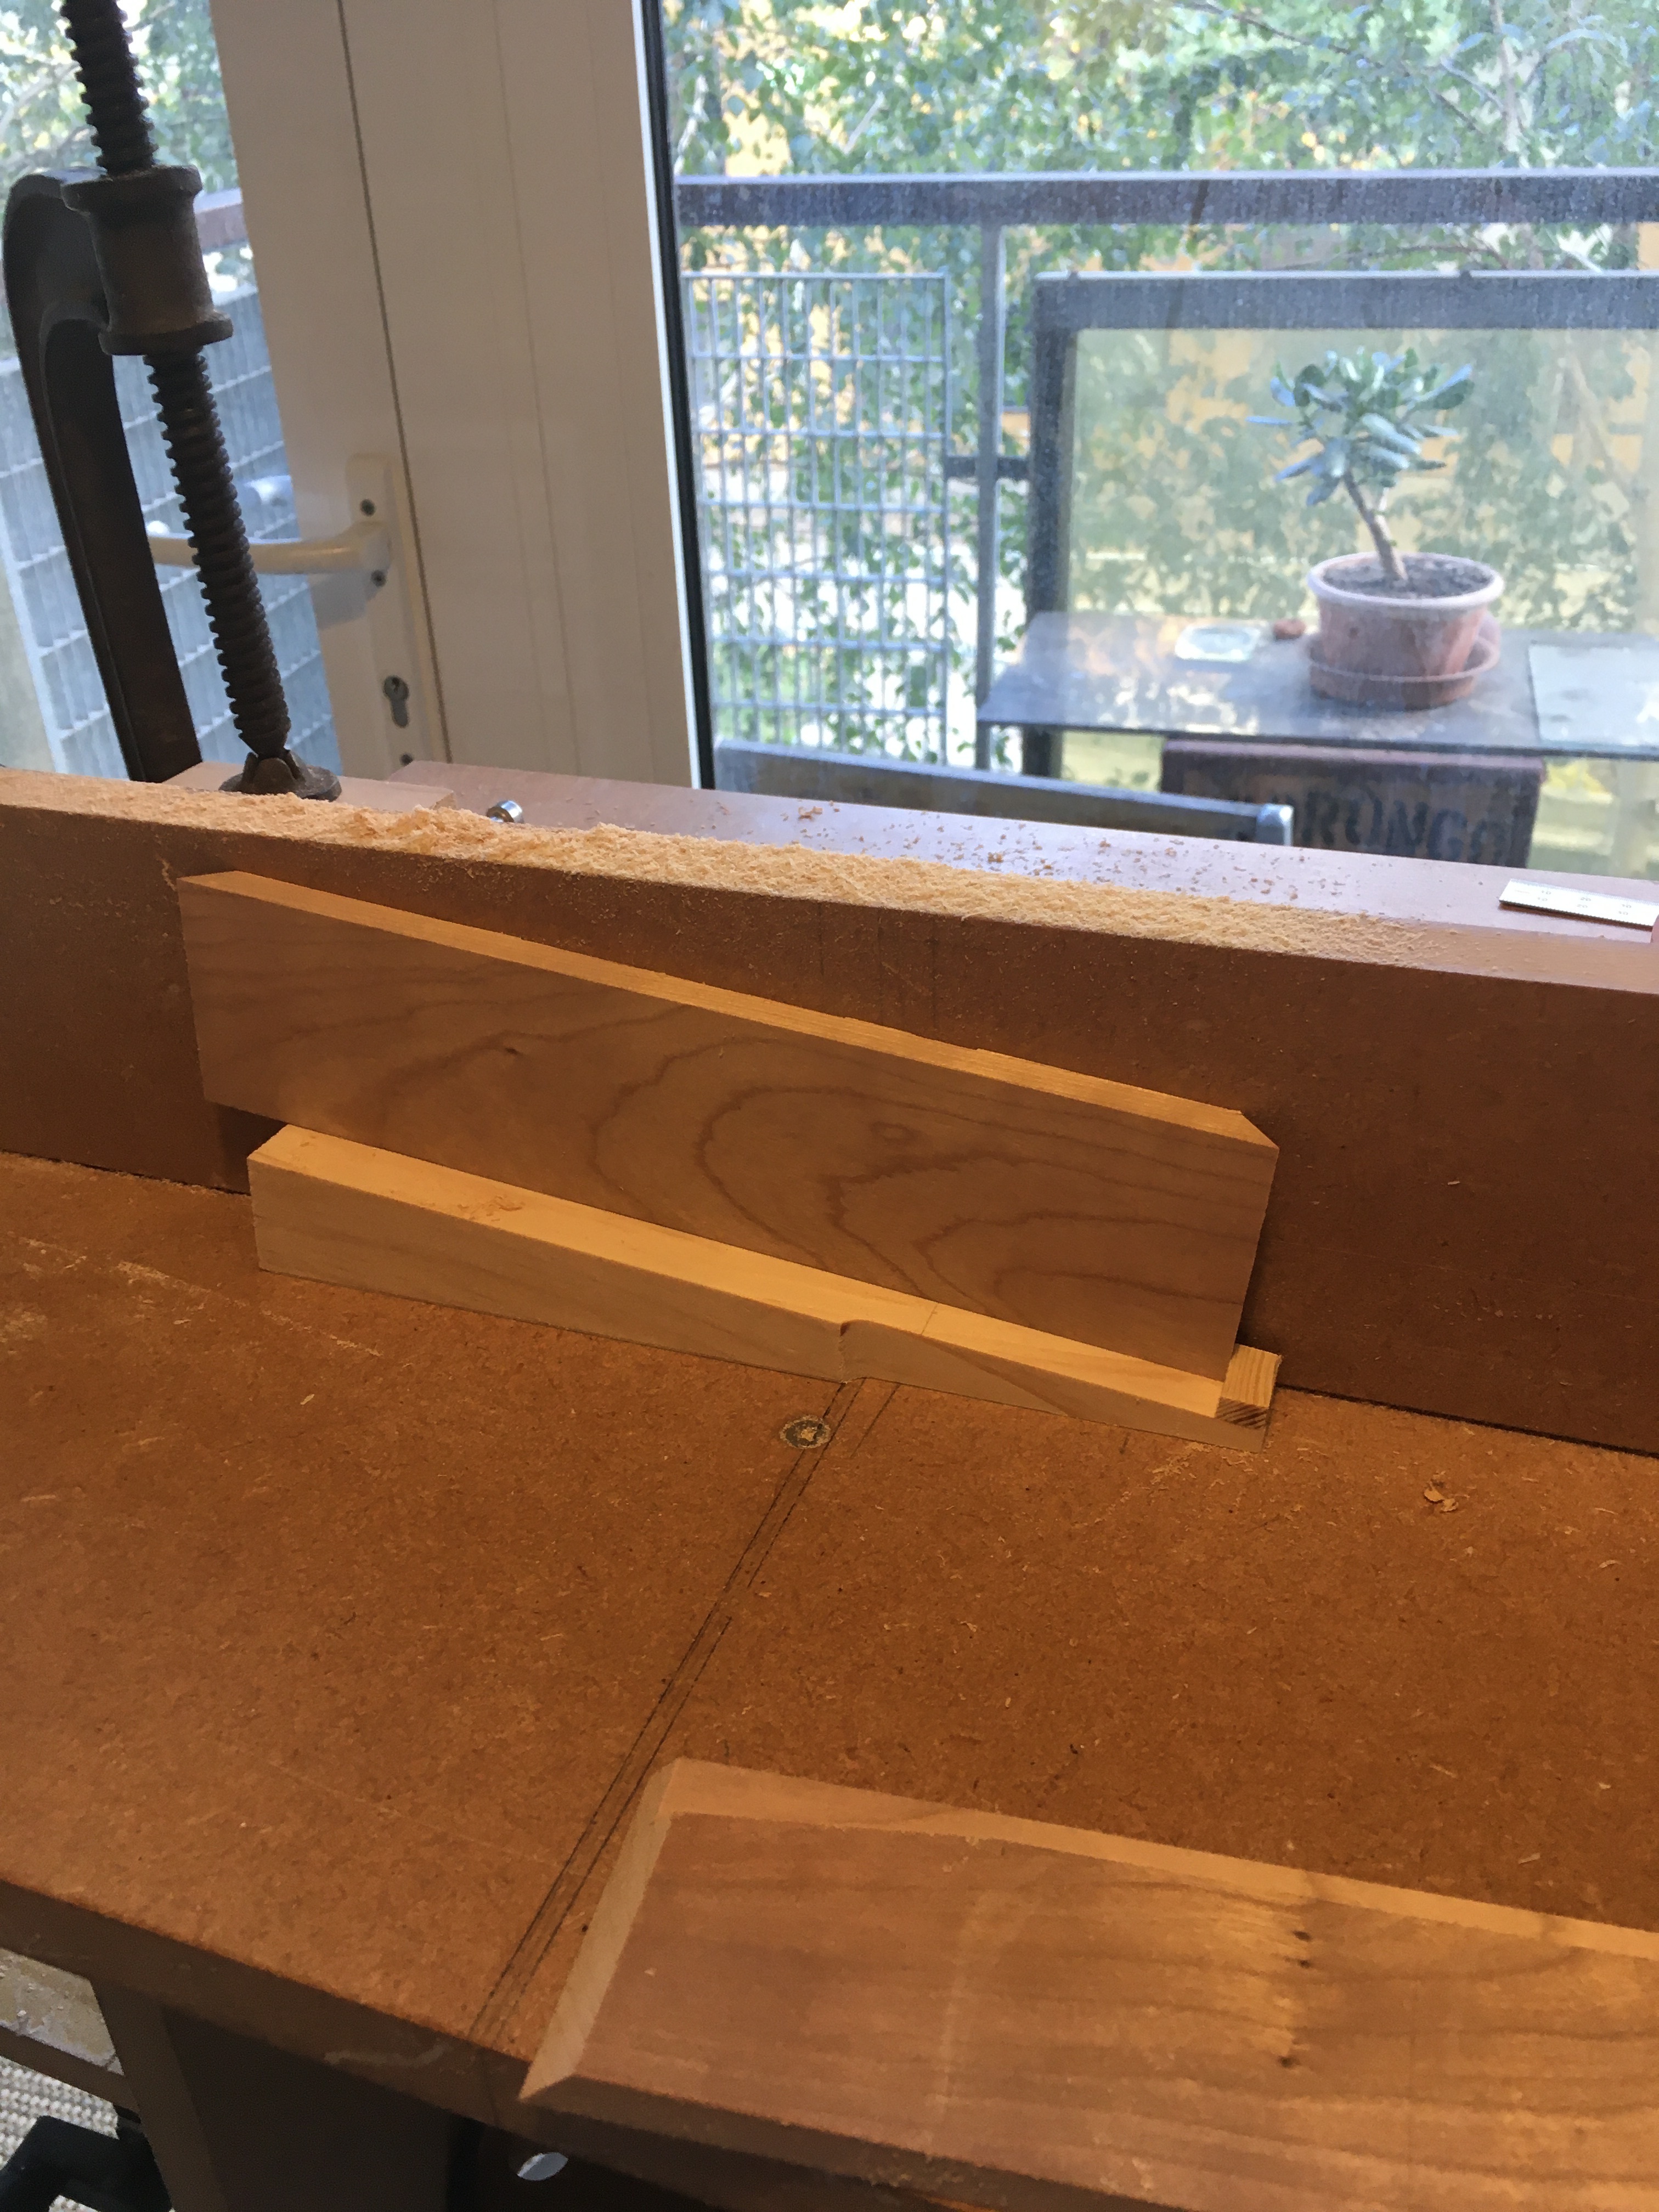
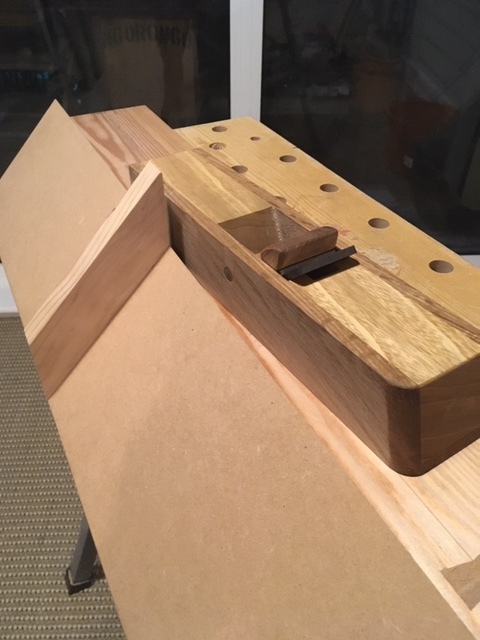
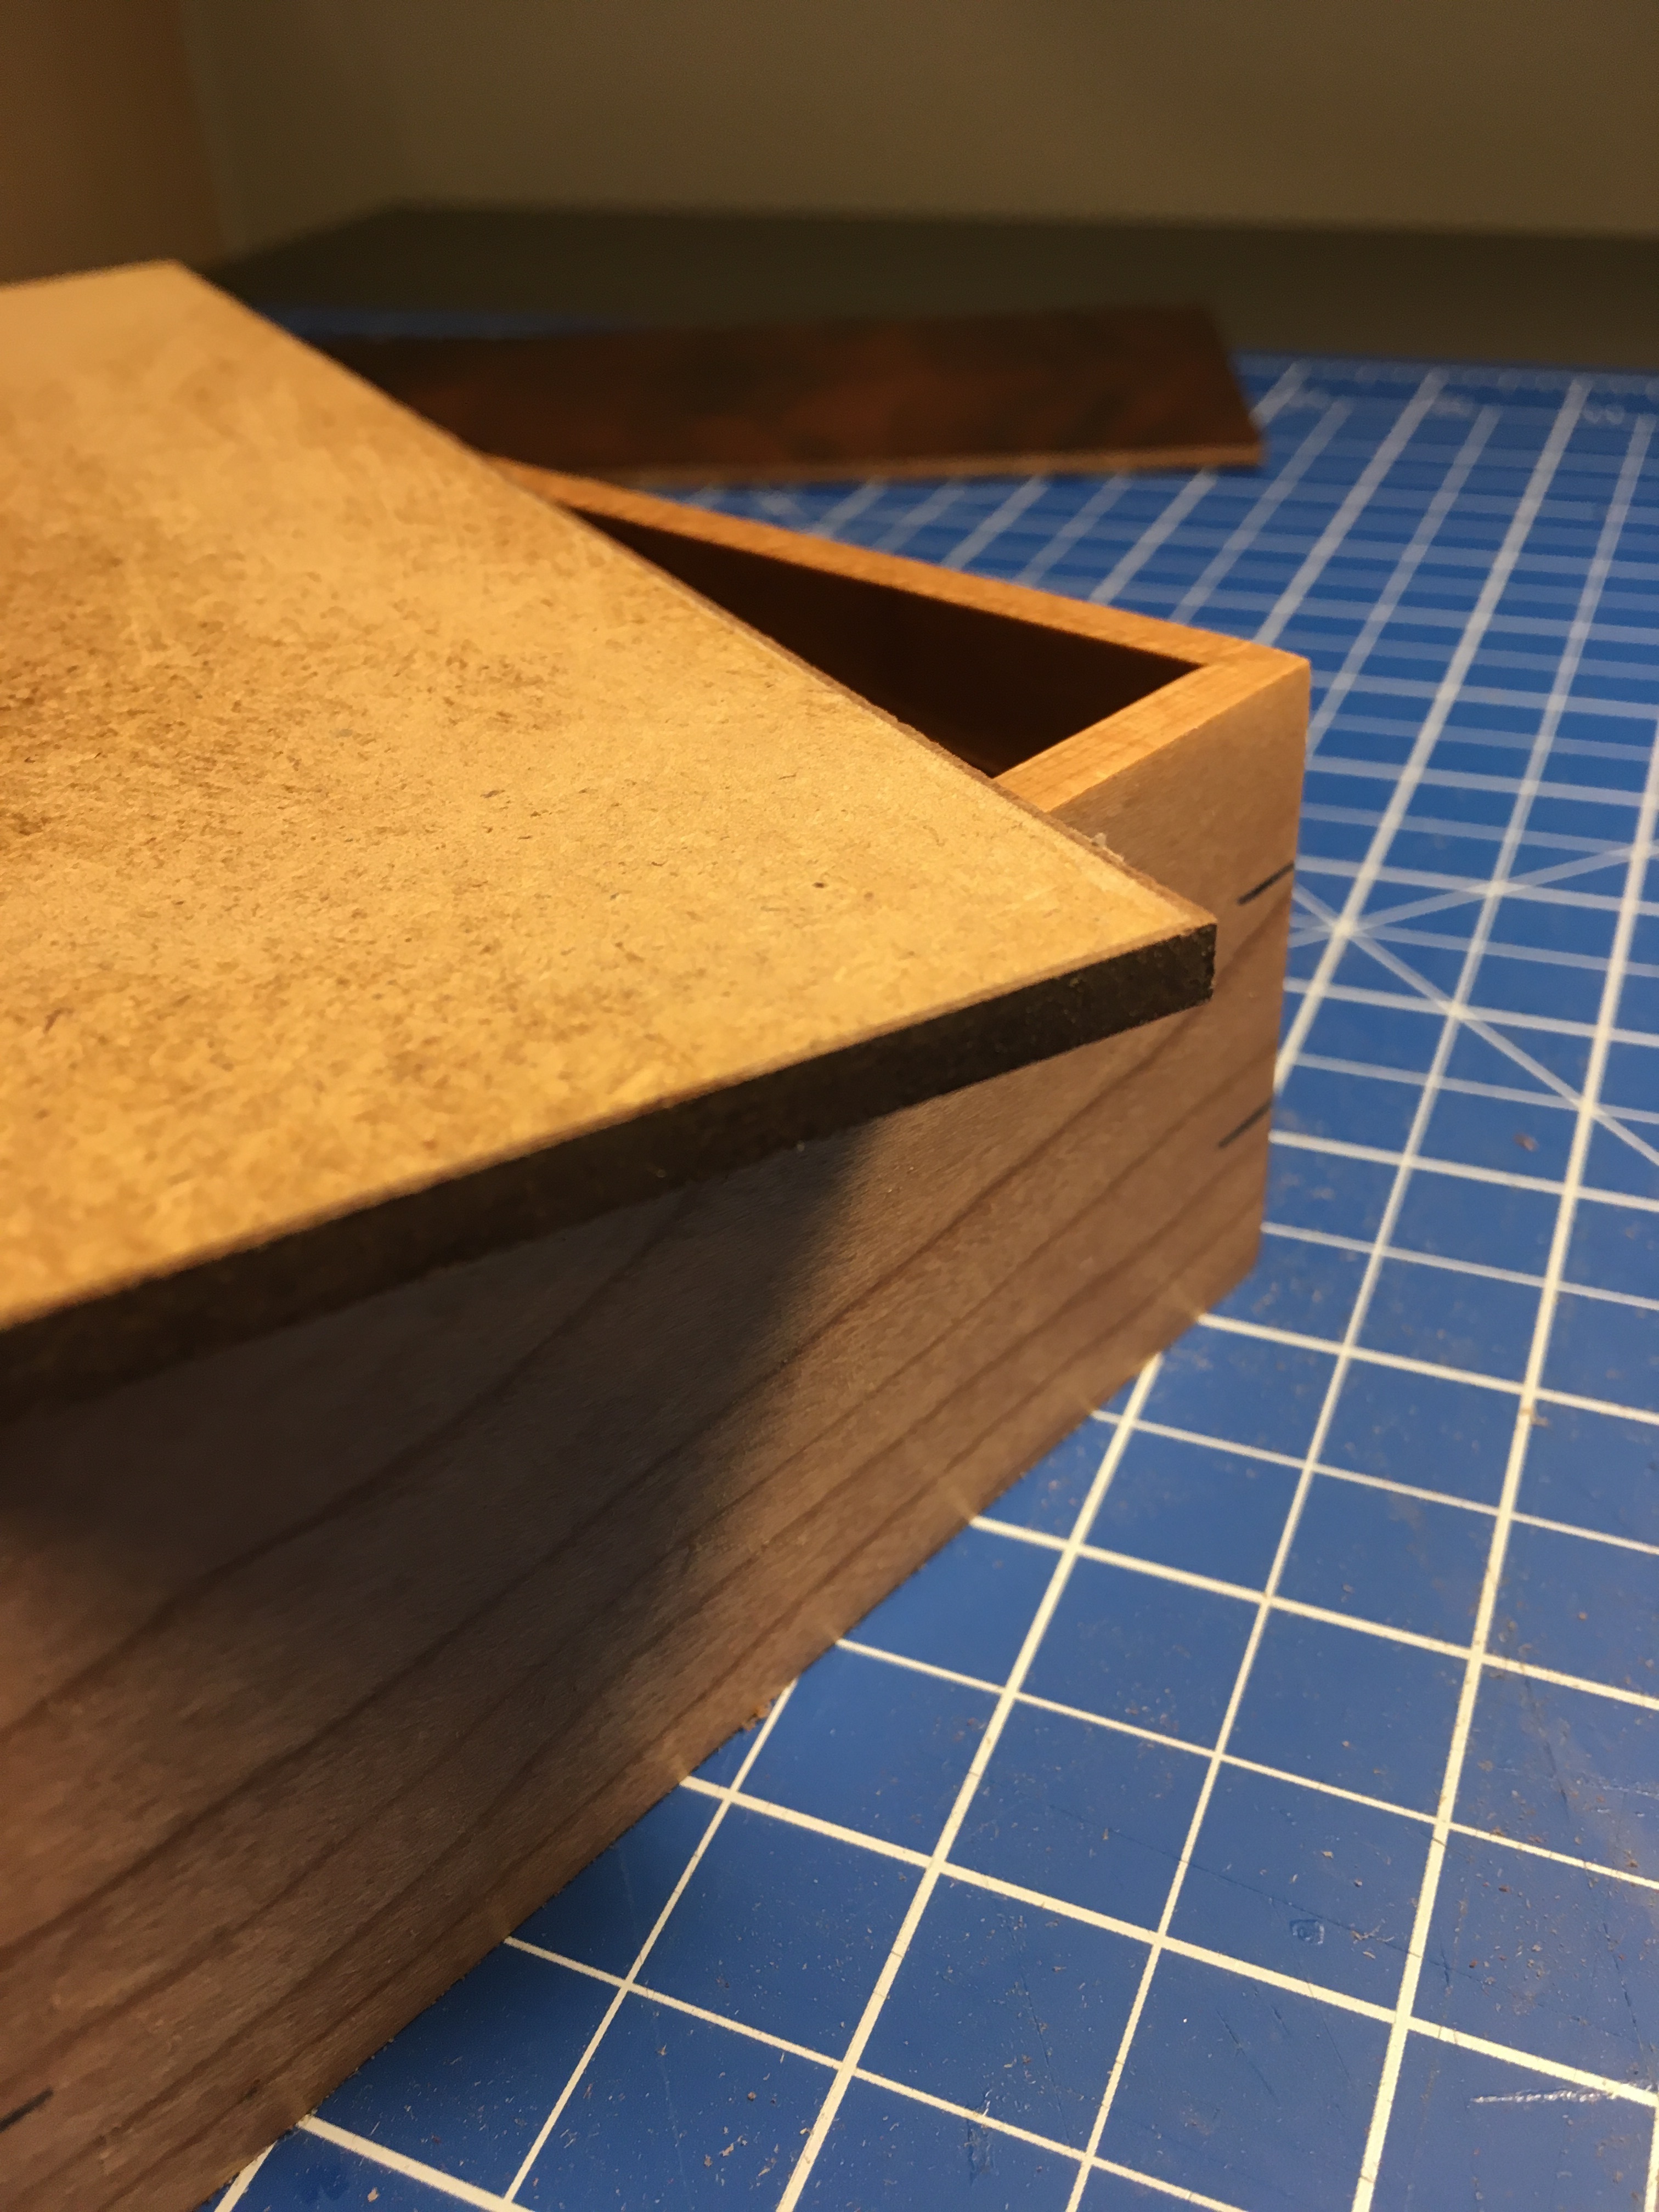
Routing the sloping part of the lid mechanism was interesting or scary. I had to position the bit by looking through the back of the fence and positioning in the rebate !

1 Like
According to Mr Paul Sellers, you can barely call the use of an electric router, woodcraft. That’s right, you just pick your knuckles up, off the floor, aim the piece of wood in the general direction of the router and turn it on. What a numb nut!

2 Likes
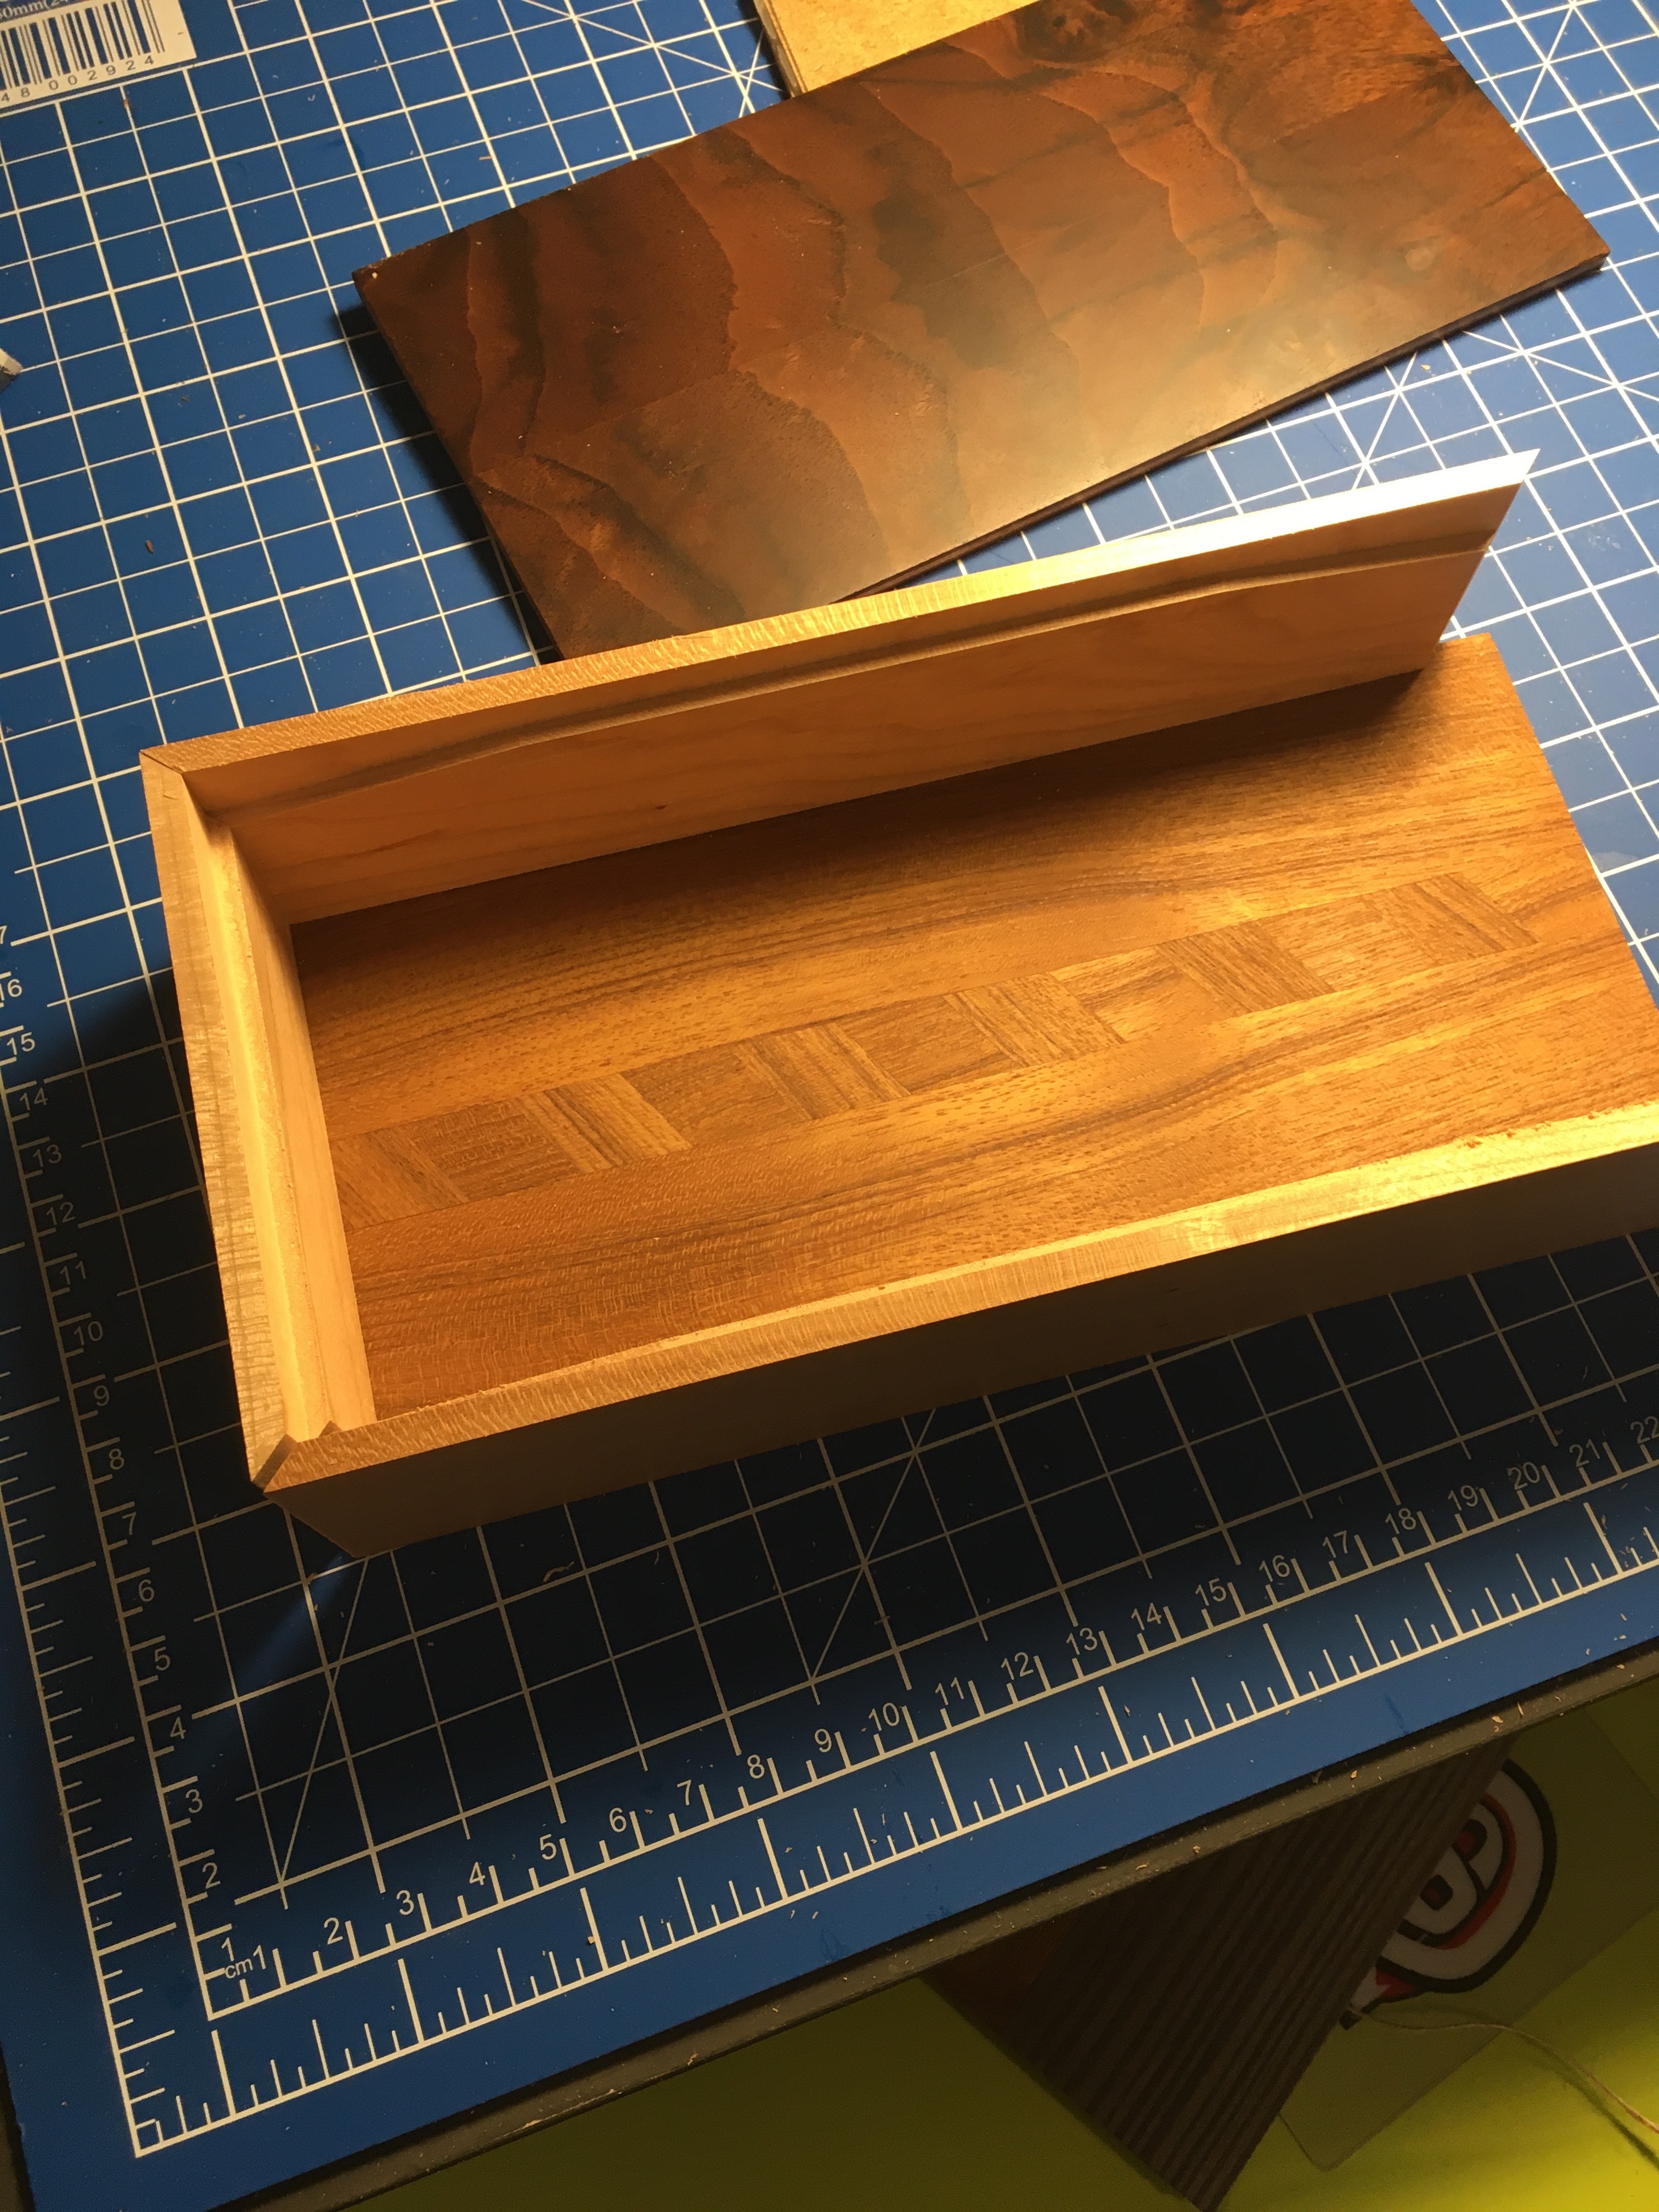
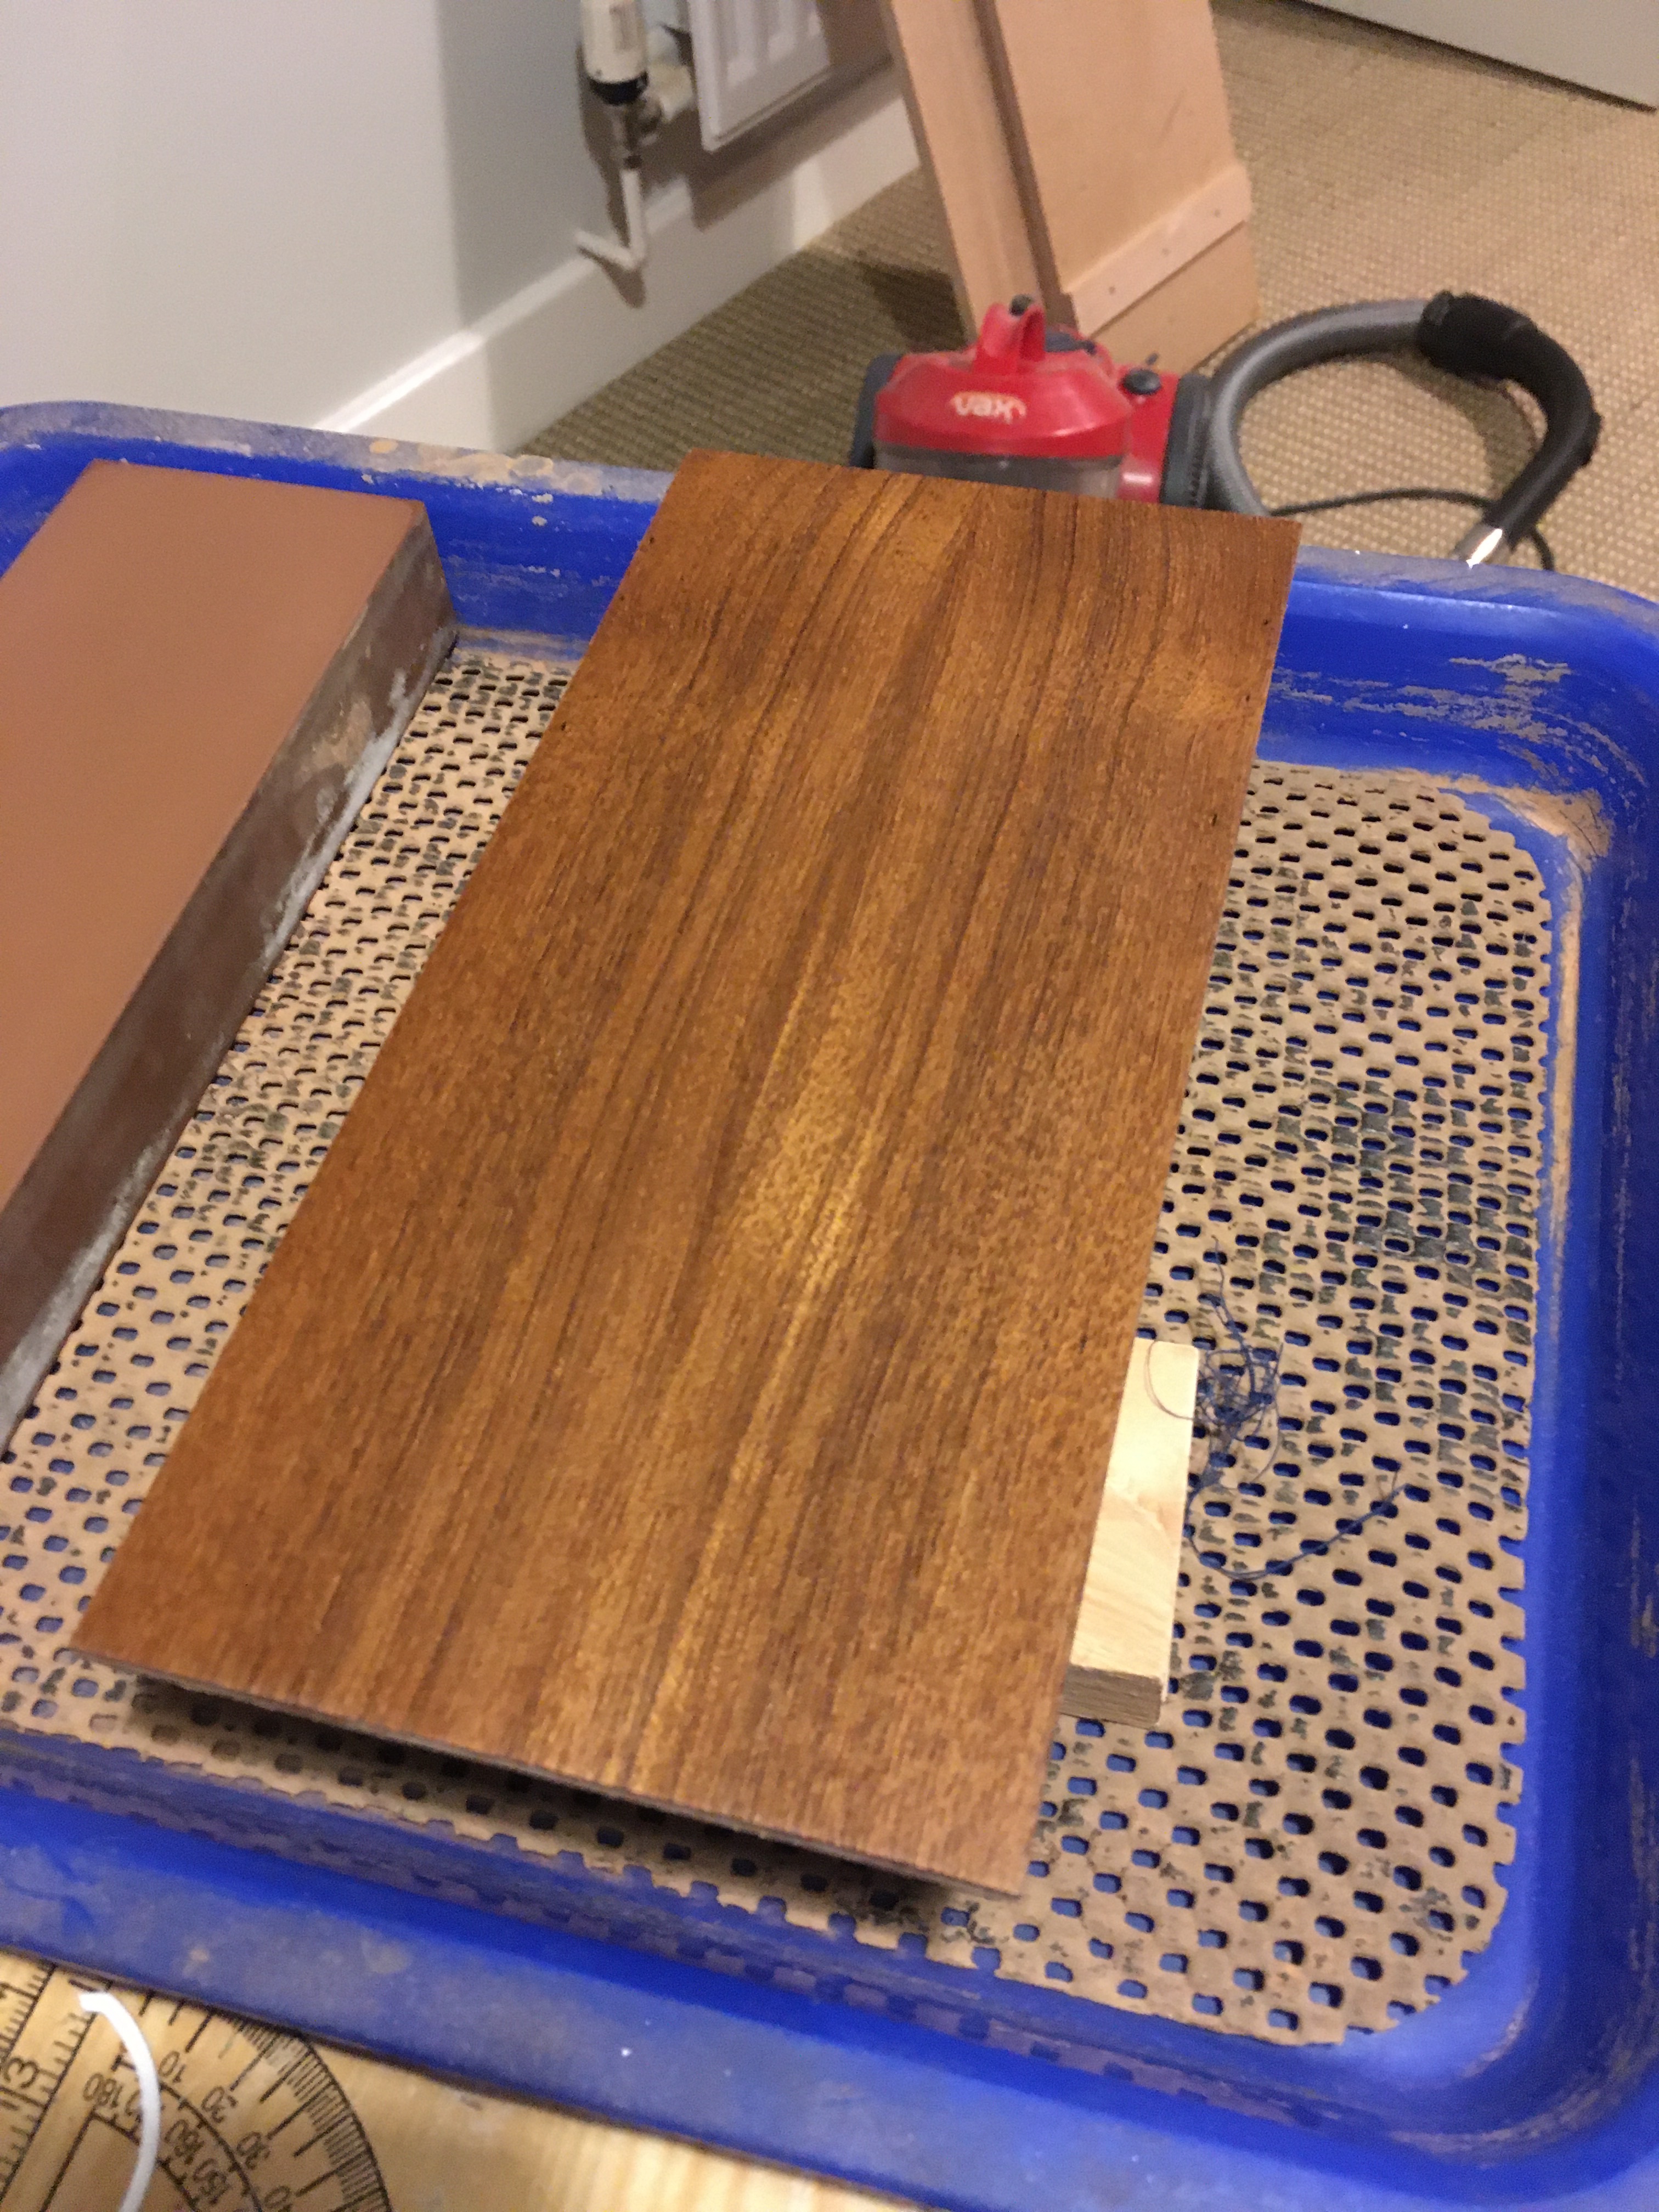
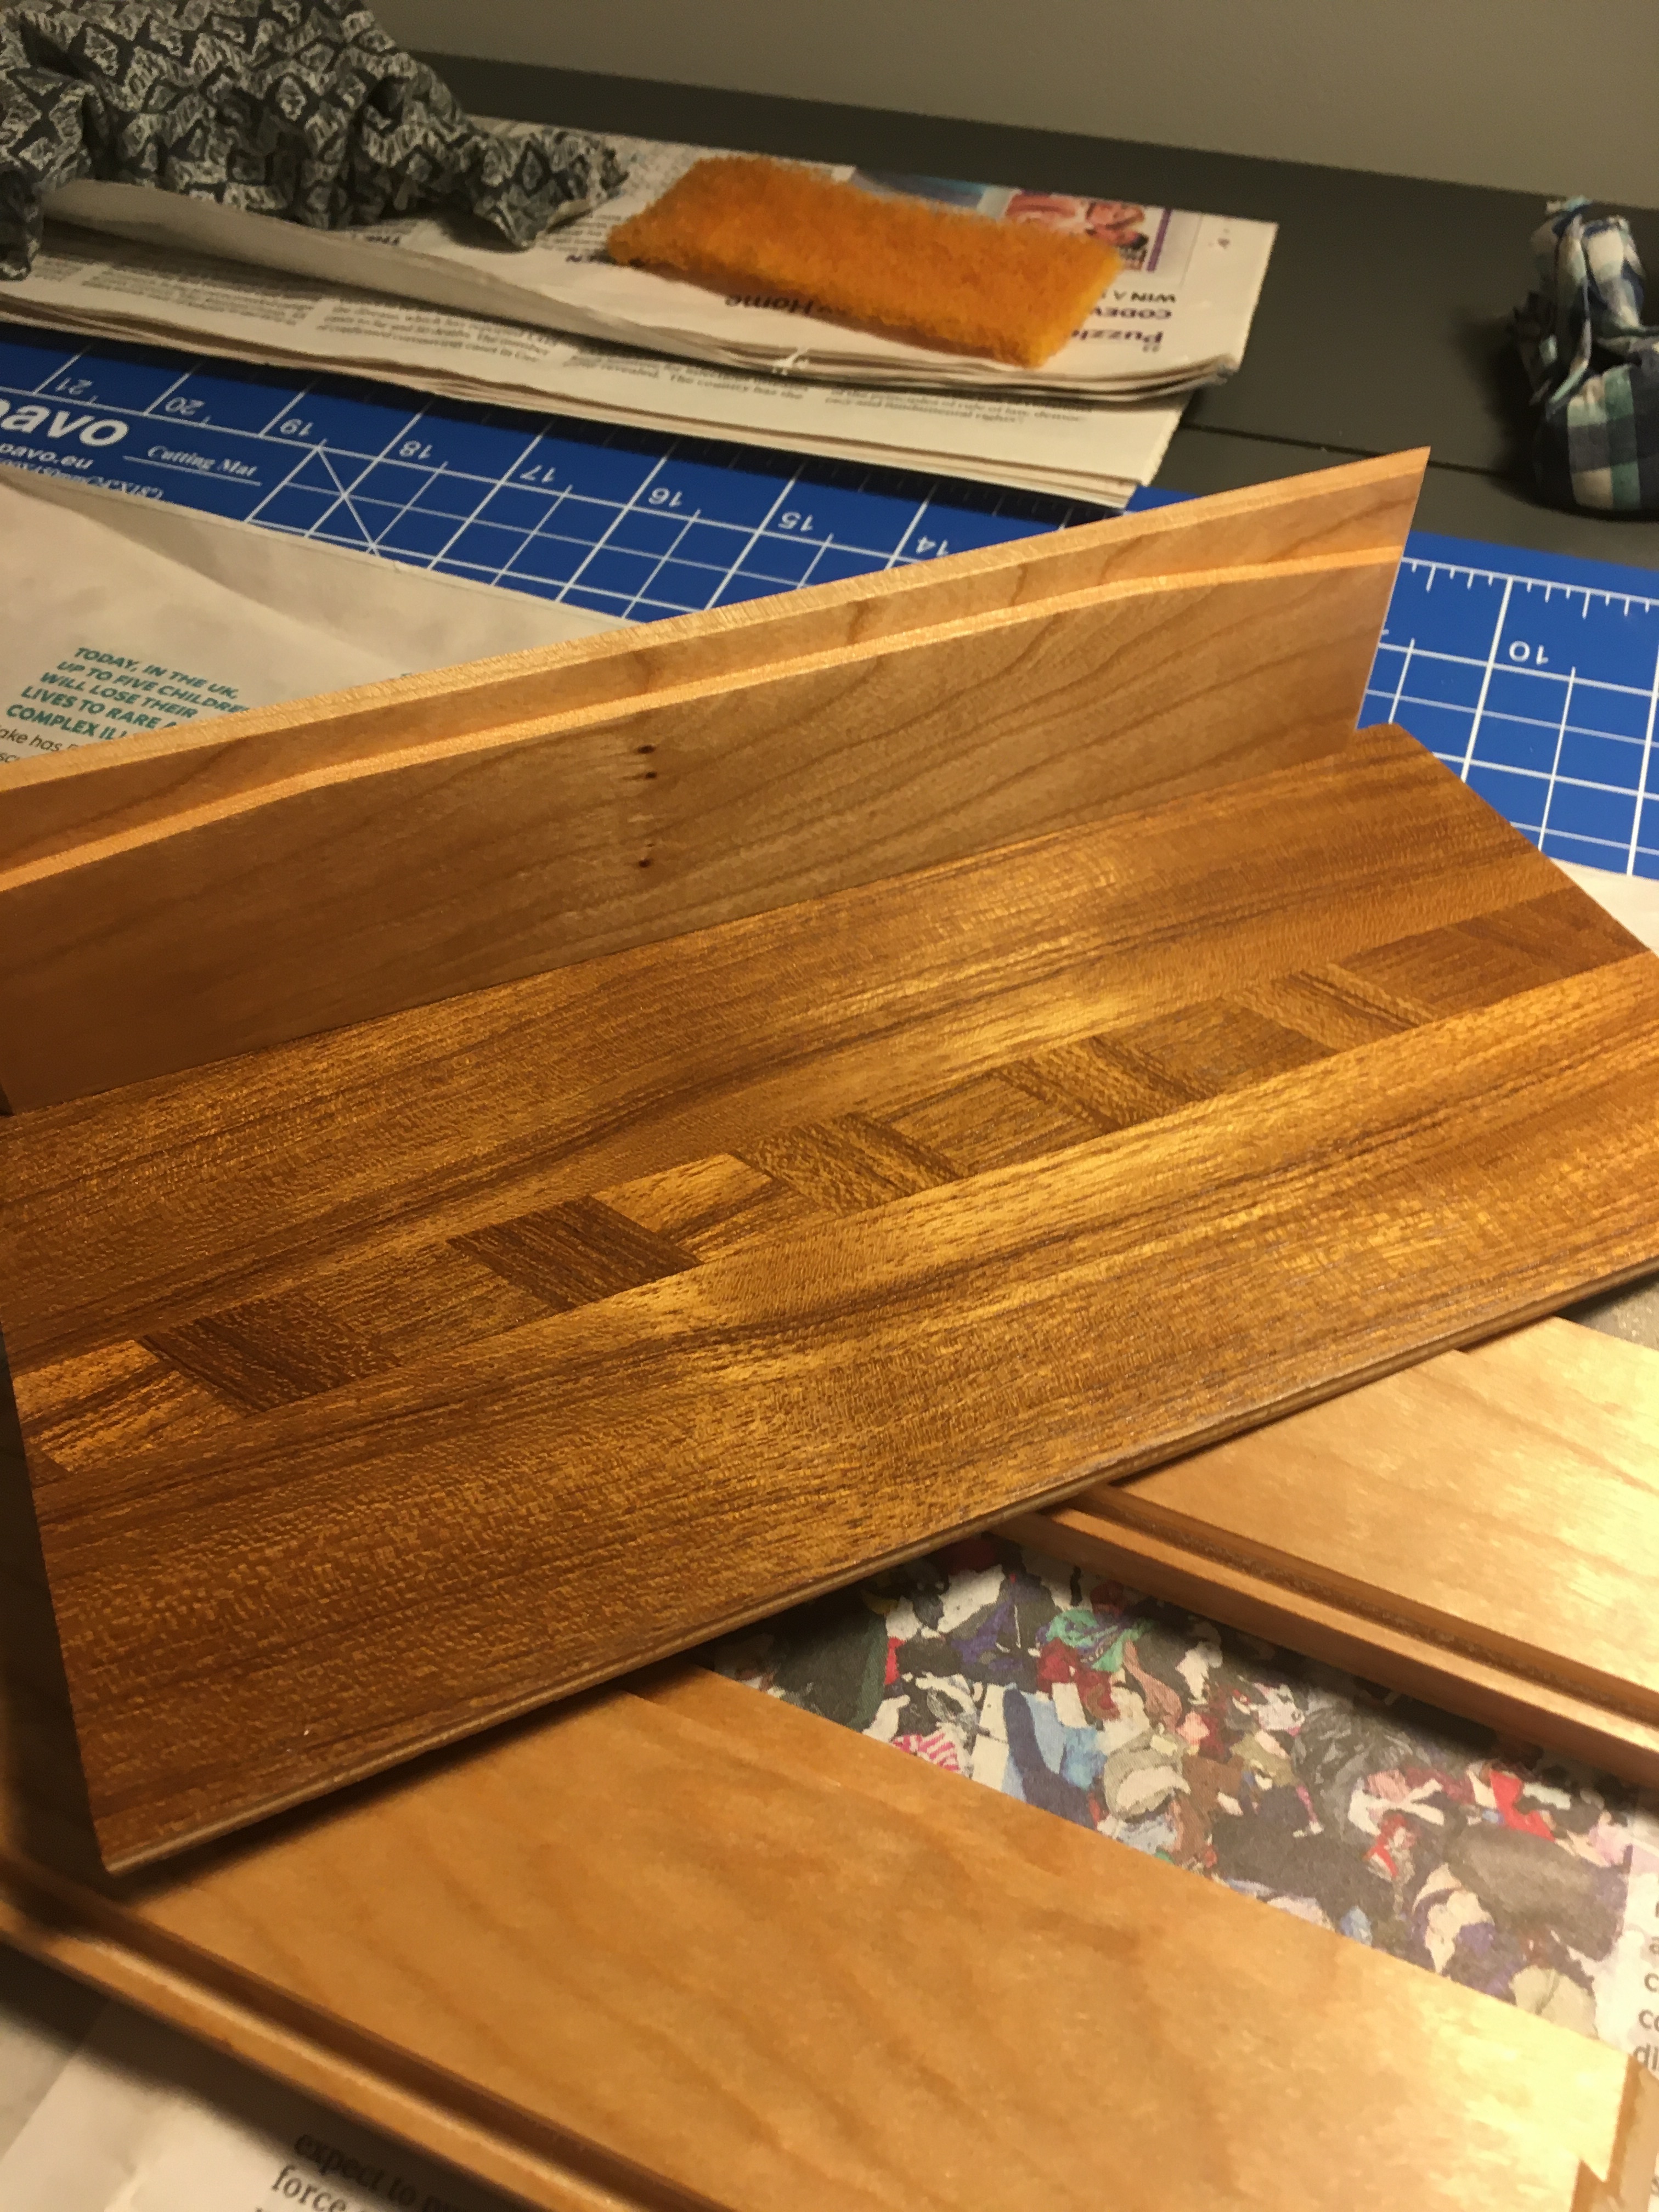
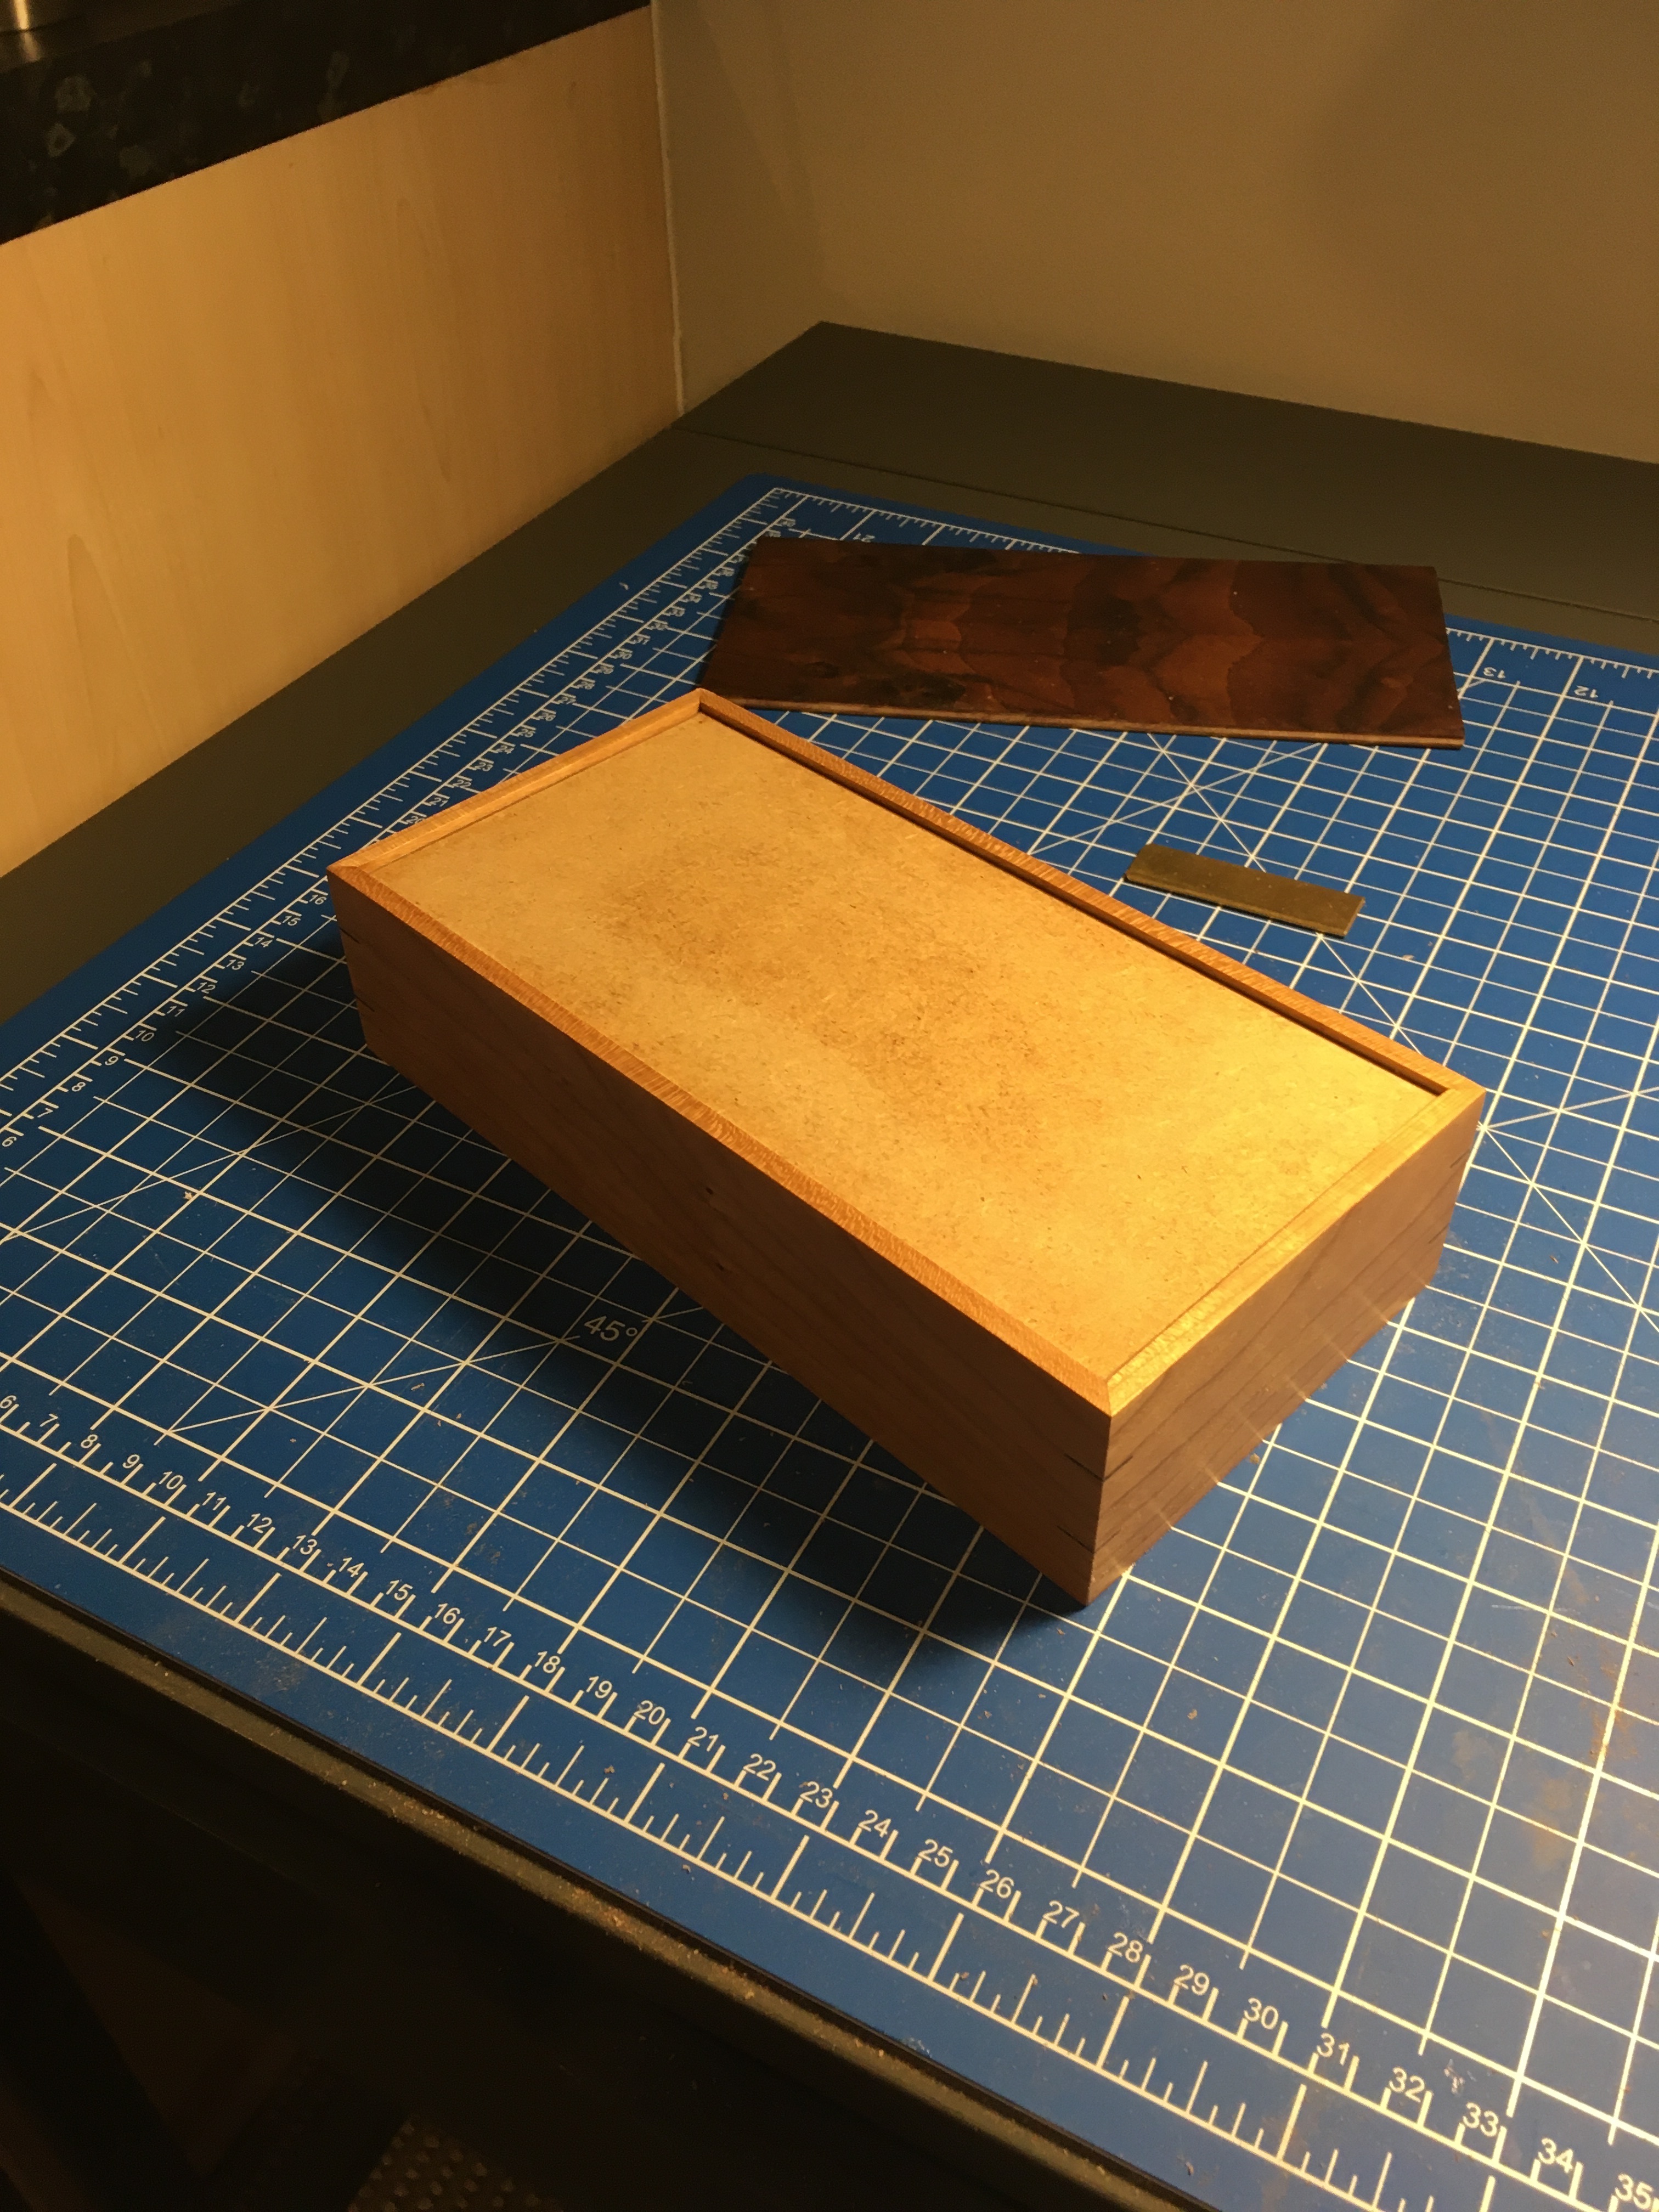
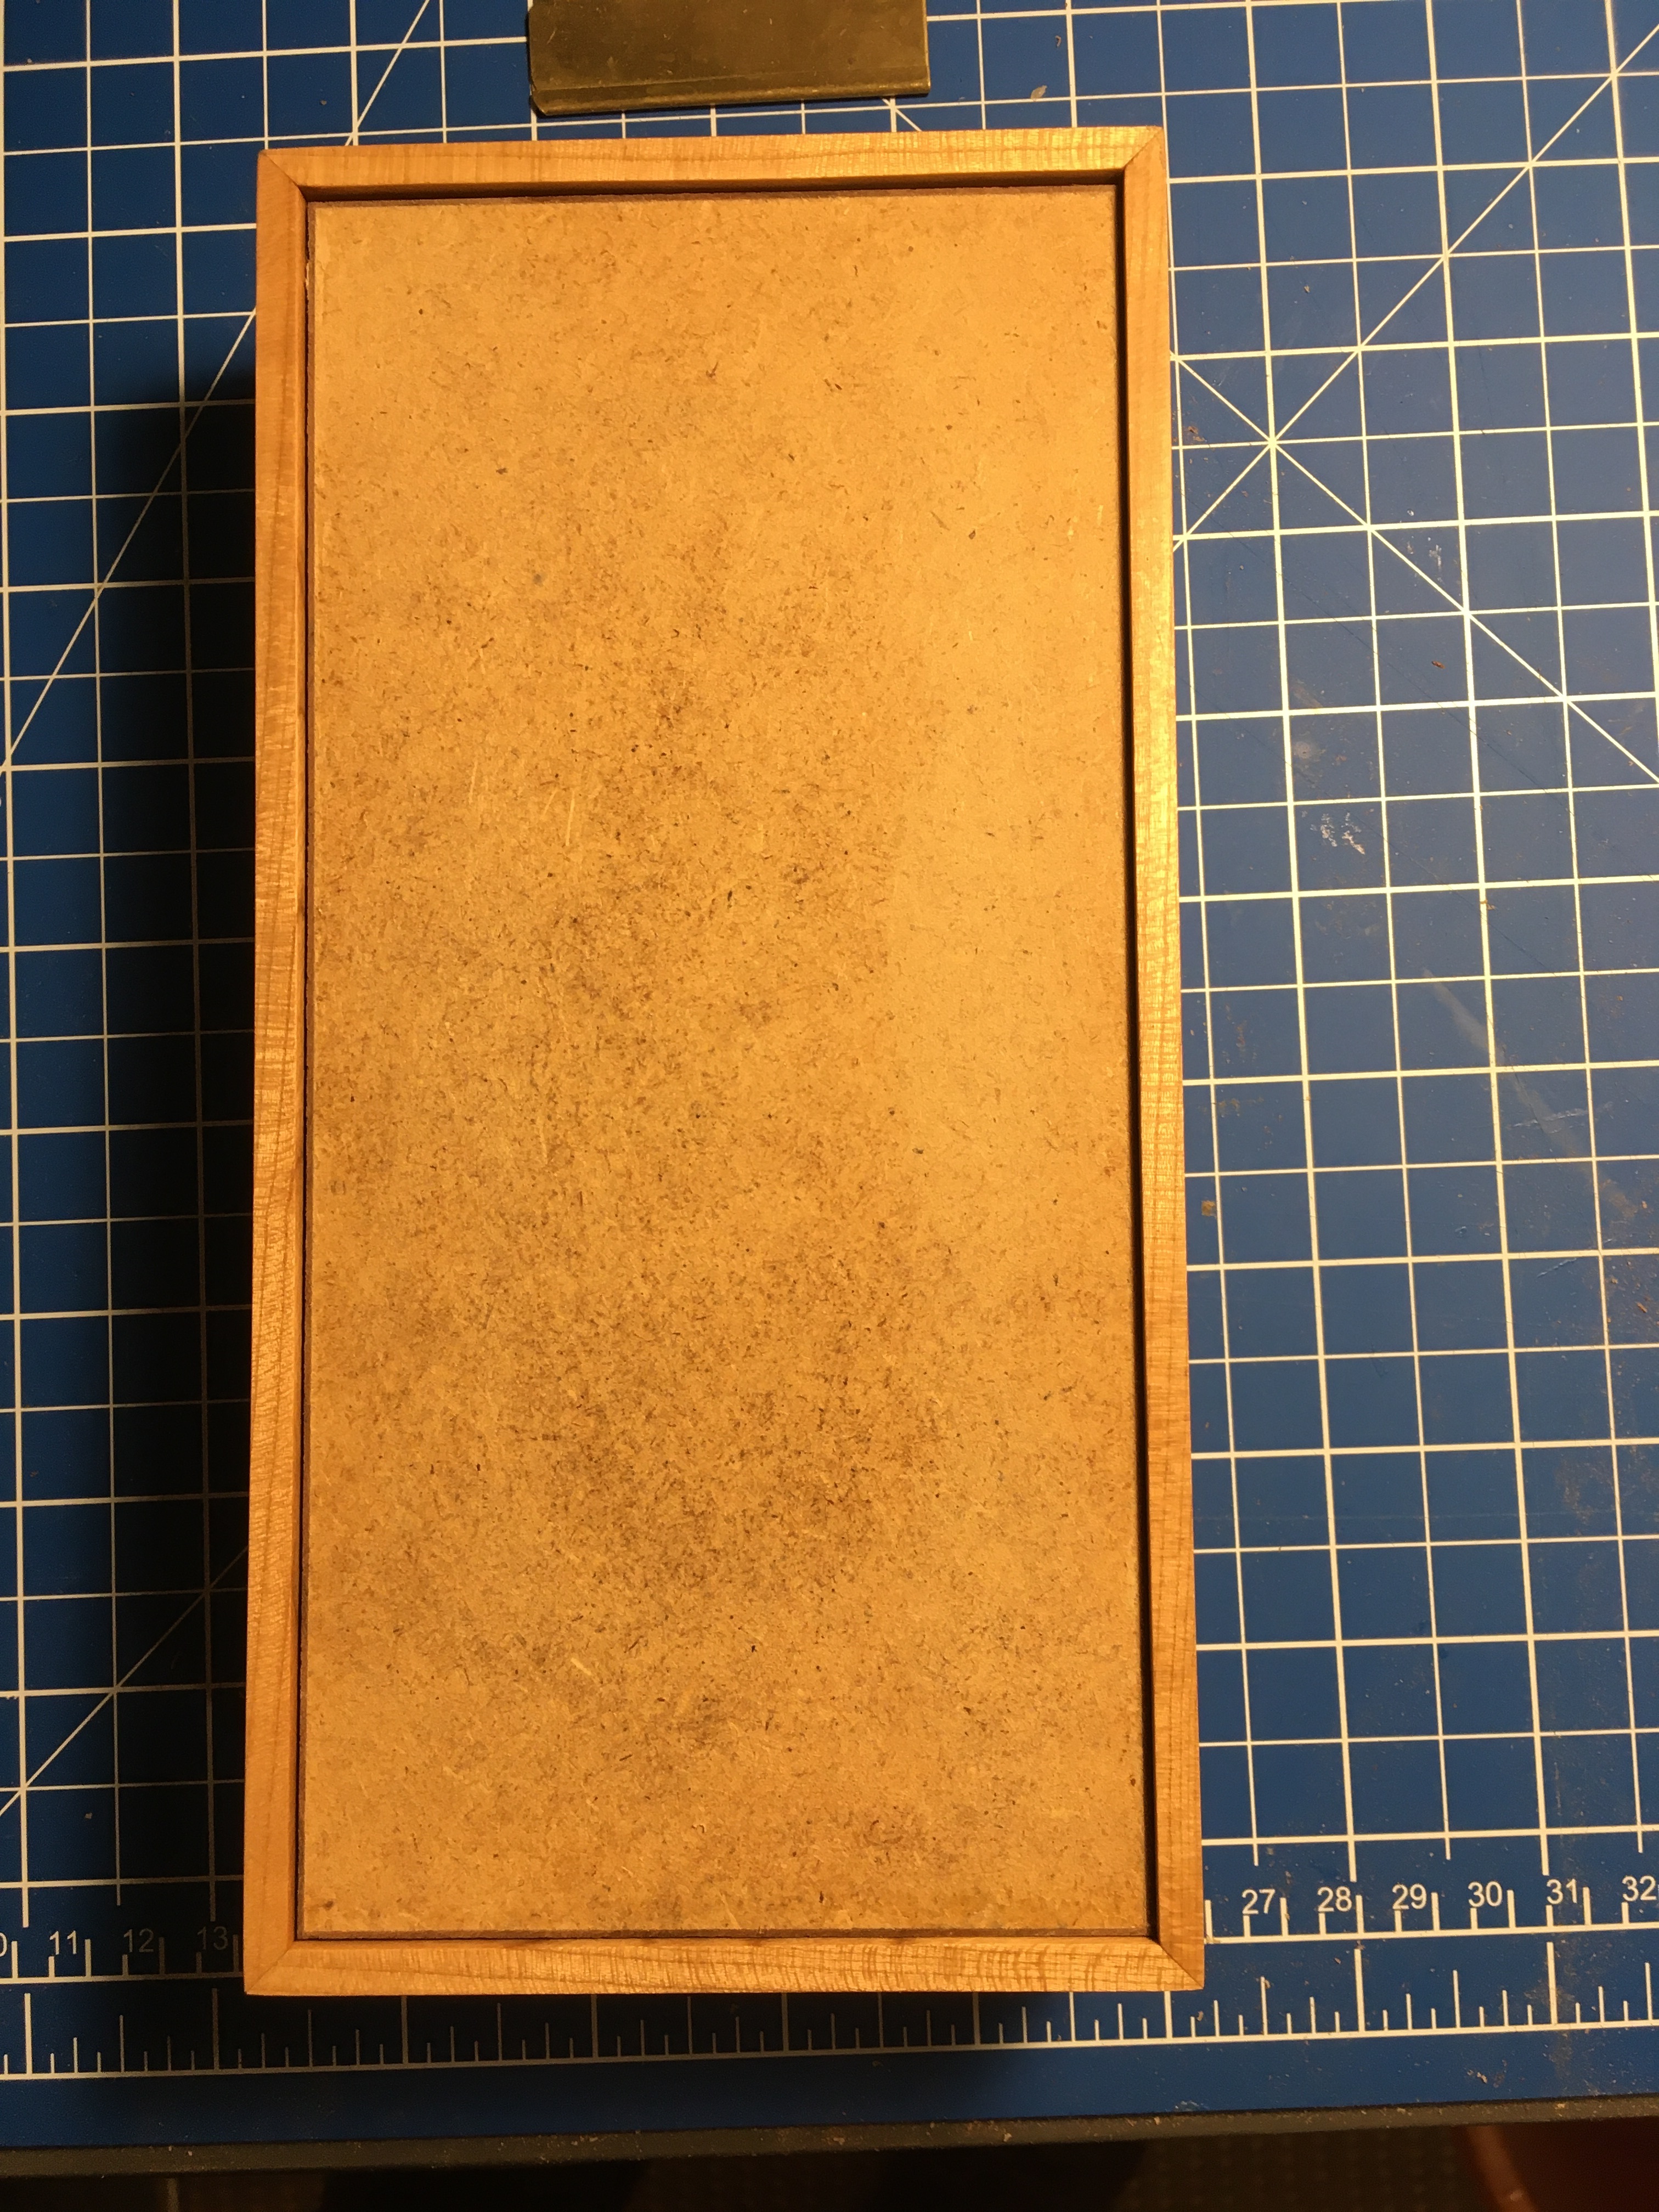
I surprised myself with my choice of bottom. I really like the teak. The walnut bookmatch looks great but glue made it’s way through the veneer and in the right light it’s visible. I will use less glue for walnut and use a mix of tape and superglue to plug obvious holes etc. I have a walnut book match prepared but I may go with a teak lid. I was just reading about complimentary versus contrasting colours in design.
1 Like
This is really interesting, thanks for sharing. I would be interested to see a pic of your donkey’s ear shooting board - I’ve not had much success with mitre joints using hand tools.
1 Like
Hi
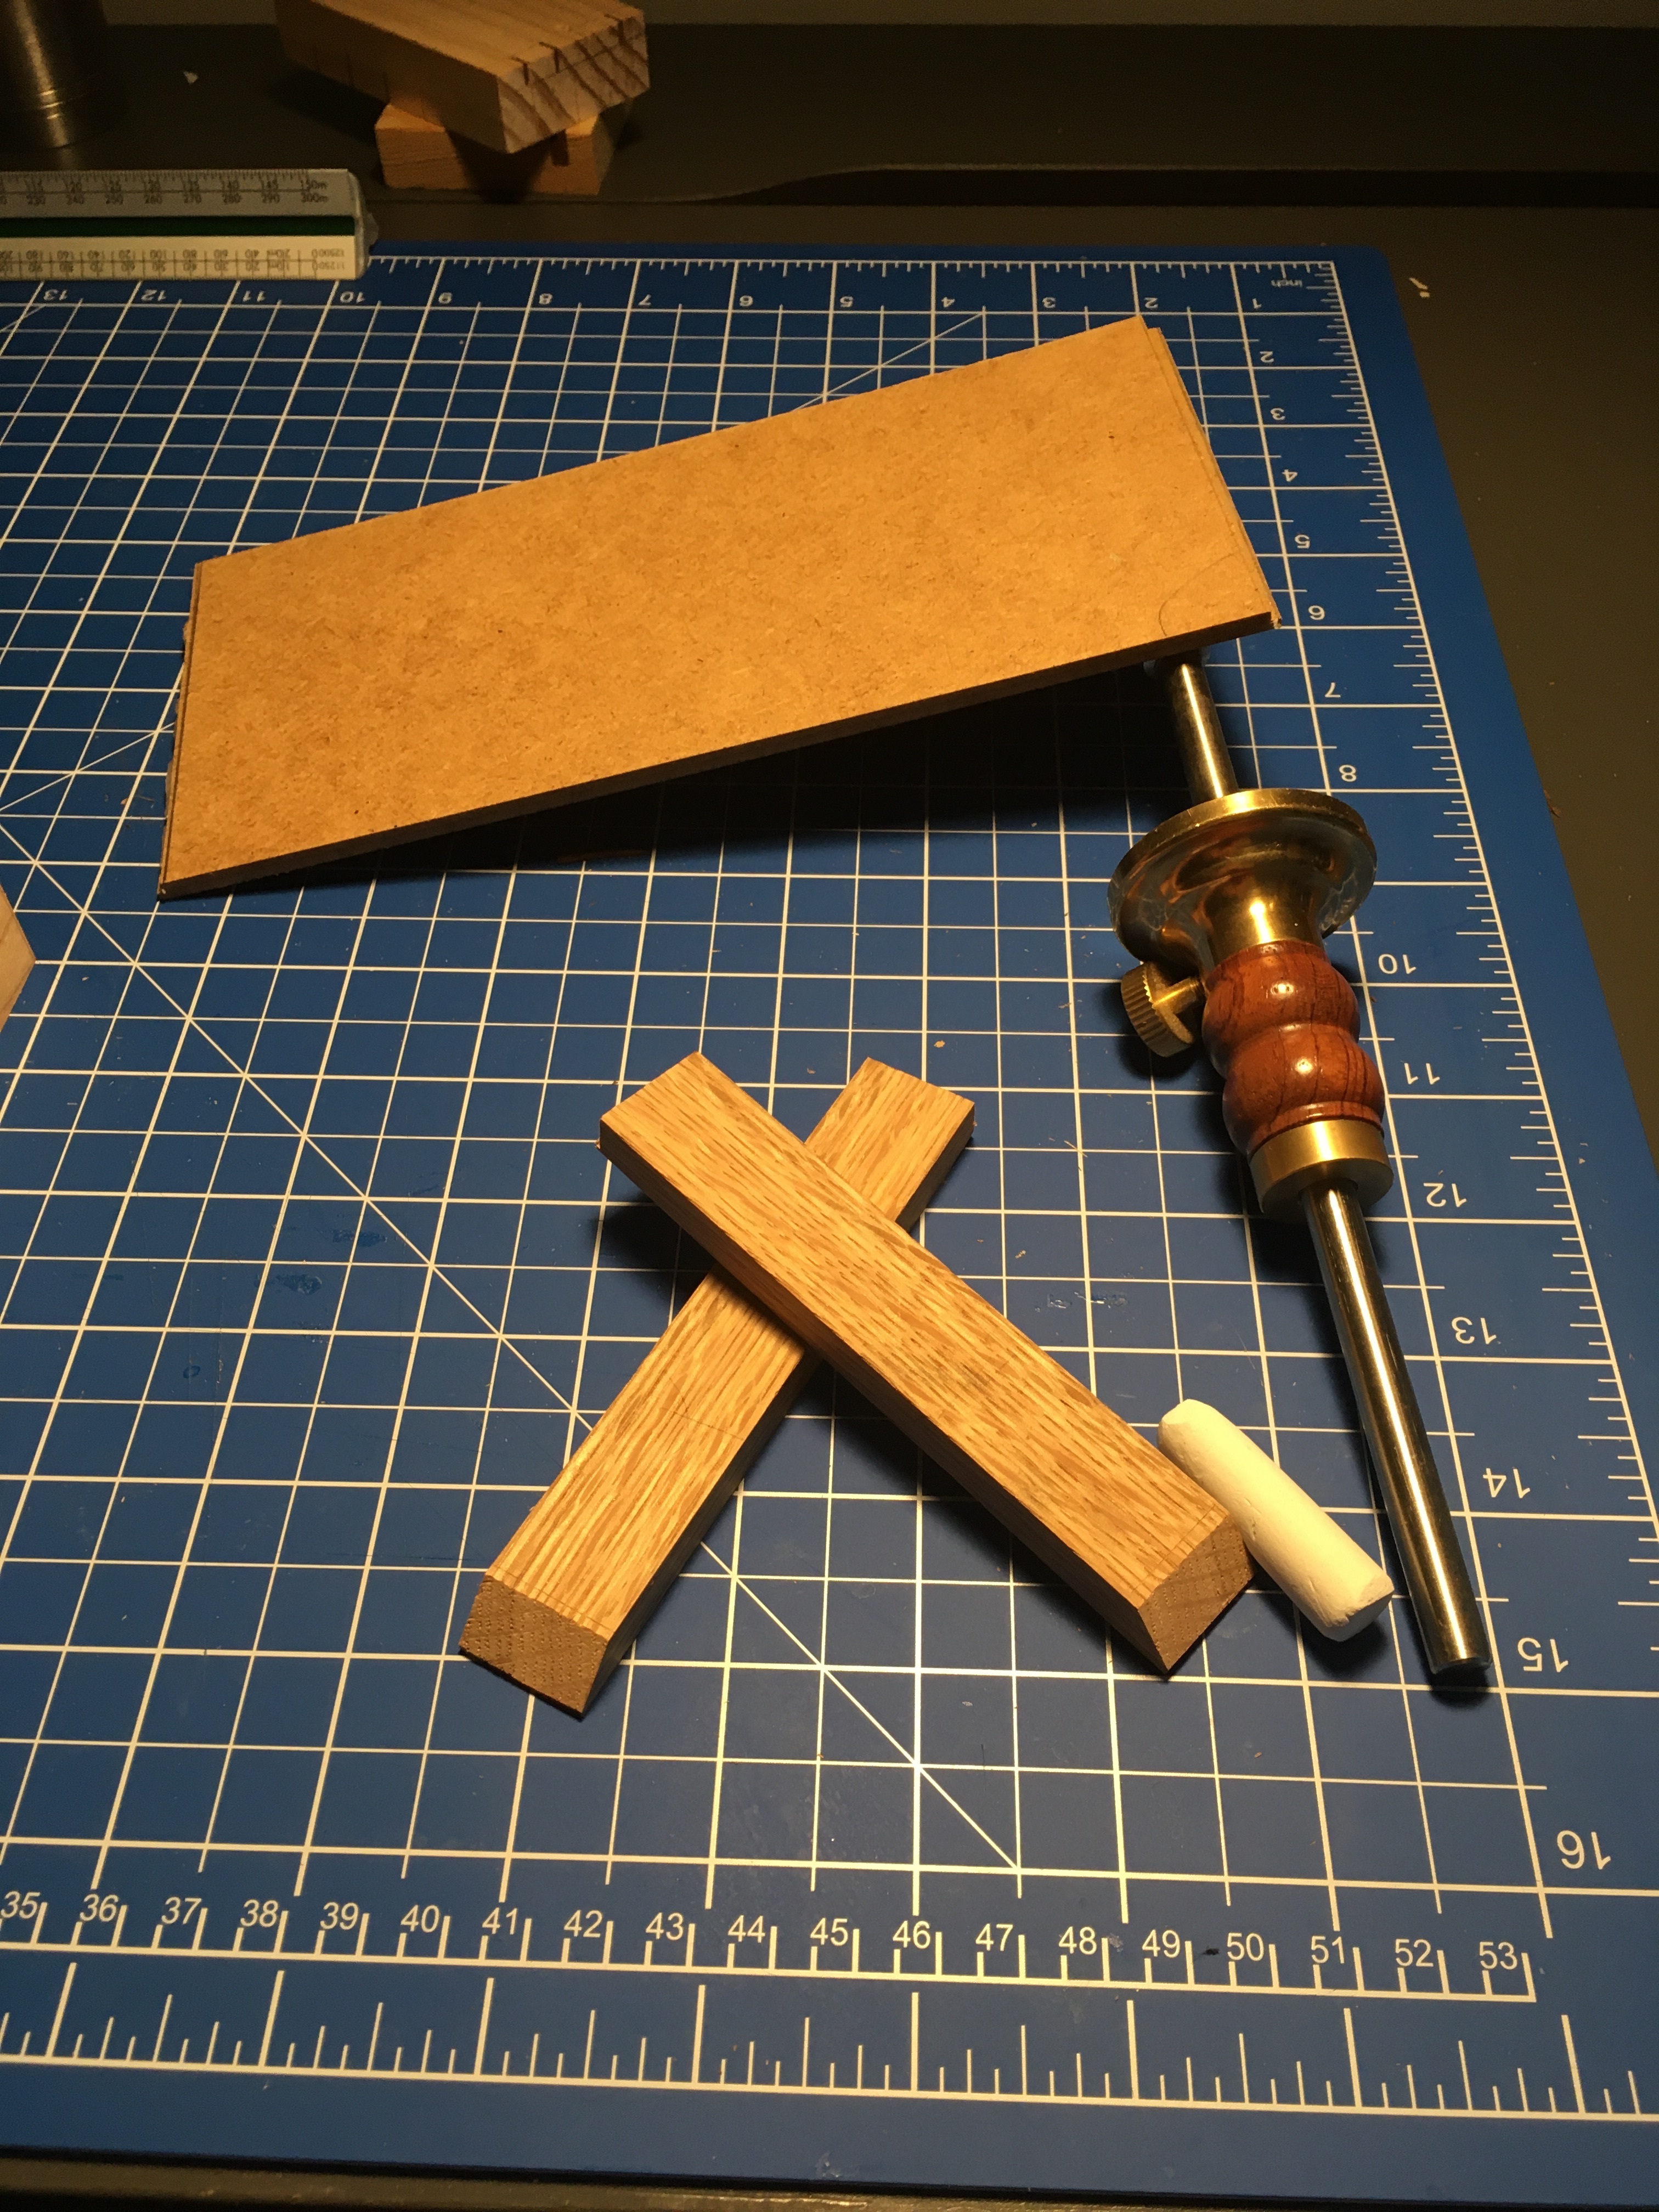
I posted the making of the donkeys ear in the project section. I think the title is donkeys ear. There are photos. I also made this plane specifically for shooting to go with my shooting boards. Unlike a lot of people who make wooden planes, I use it on every project. It’s a difficult joint to achieve, no doubt. The same level of error, in a dovetail, would yield a perfect result. A long mitre with exactly the same level of error and it may show.
1 Like
I also posted making the plane with photos.
I also posted making the plane with photos.
Sent from my iPhone
Hi
I posted the making of the donkeys ear in the project section. I think the title is donkeys ear. There are photos. I also made this plane specifically for shooting to go with my shooting boards. Unlike a lot of people who make wooden planes, I use it on every project. It’s a difficult joint to achieve, no doubt. The same level of error, in a dovetail, would yield a perfect result. A long mitre with exactly the same level of error and it may show.
<image3.jpeg>
Sent from my iPhone
mikekelly
Member1 OctoberThis is really interesting, thanks for sharing. I would be interested to see a pic of your donkey’s ear shooting board - I’ve not had much success with mitre joints using hand tools.
Visit Topic or reply to this email to respond.
To unsubscribe from these emails, click here.
Oh great, thanks I’ll take a look at the other thread.
I sanded everything with 240 grit. I didn’t need to work through the grits as the planed surface was good. It still took an hour. I have put the final coat of oil on the base. I wanted both sides of the bottom to have a good finish. I am trying to make something jewel like, so it all has to look good. I am going to use two coats of sanding sealer on the box sides. Then a layer of wax. This should make things easy, regarding squeeze out. I am using tape to bring the box together, I think that trying to manage the squeeze out is a better option than trying to wipe it away. Definitely where the inside is concerned.
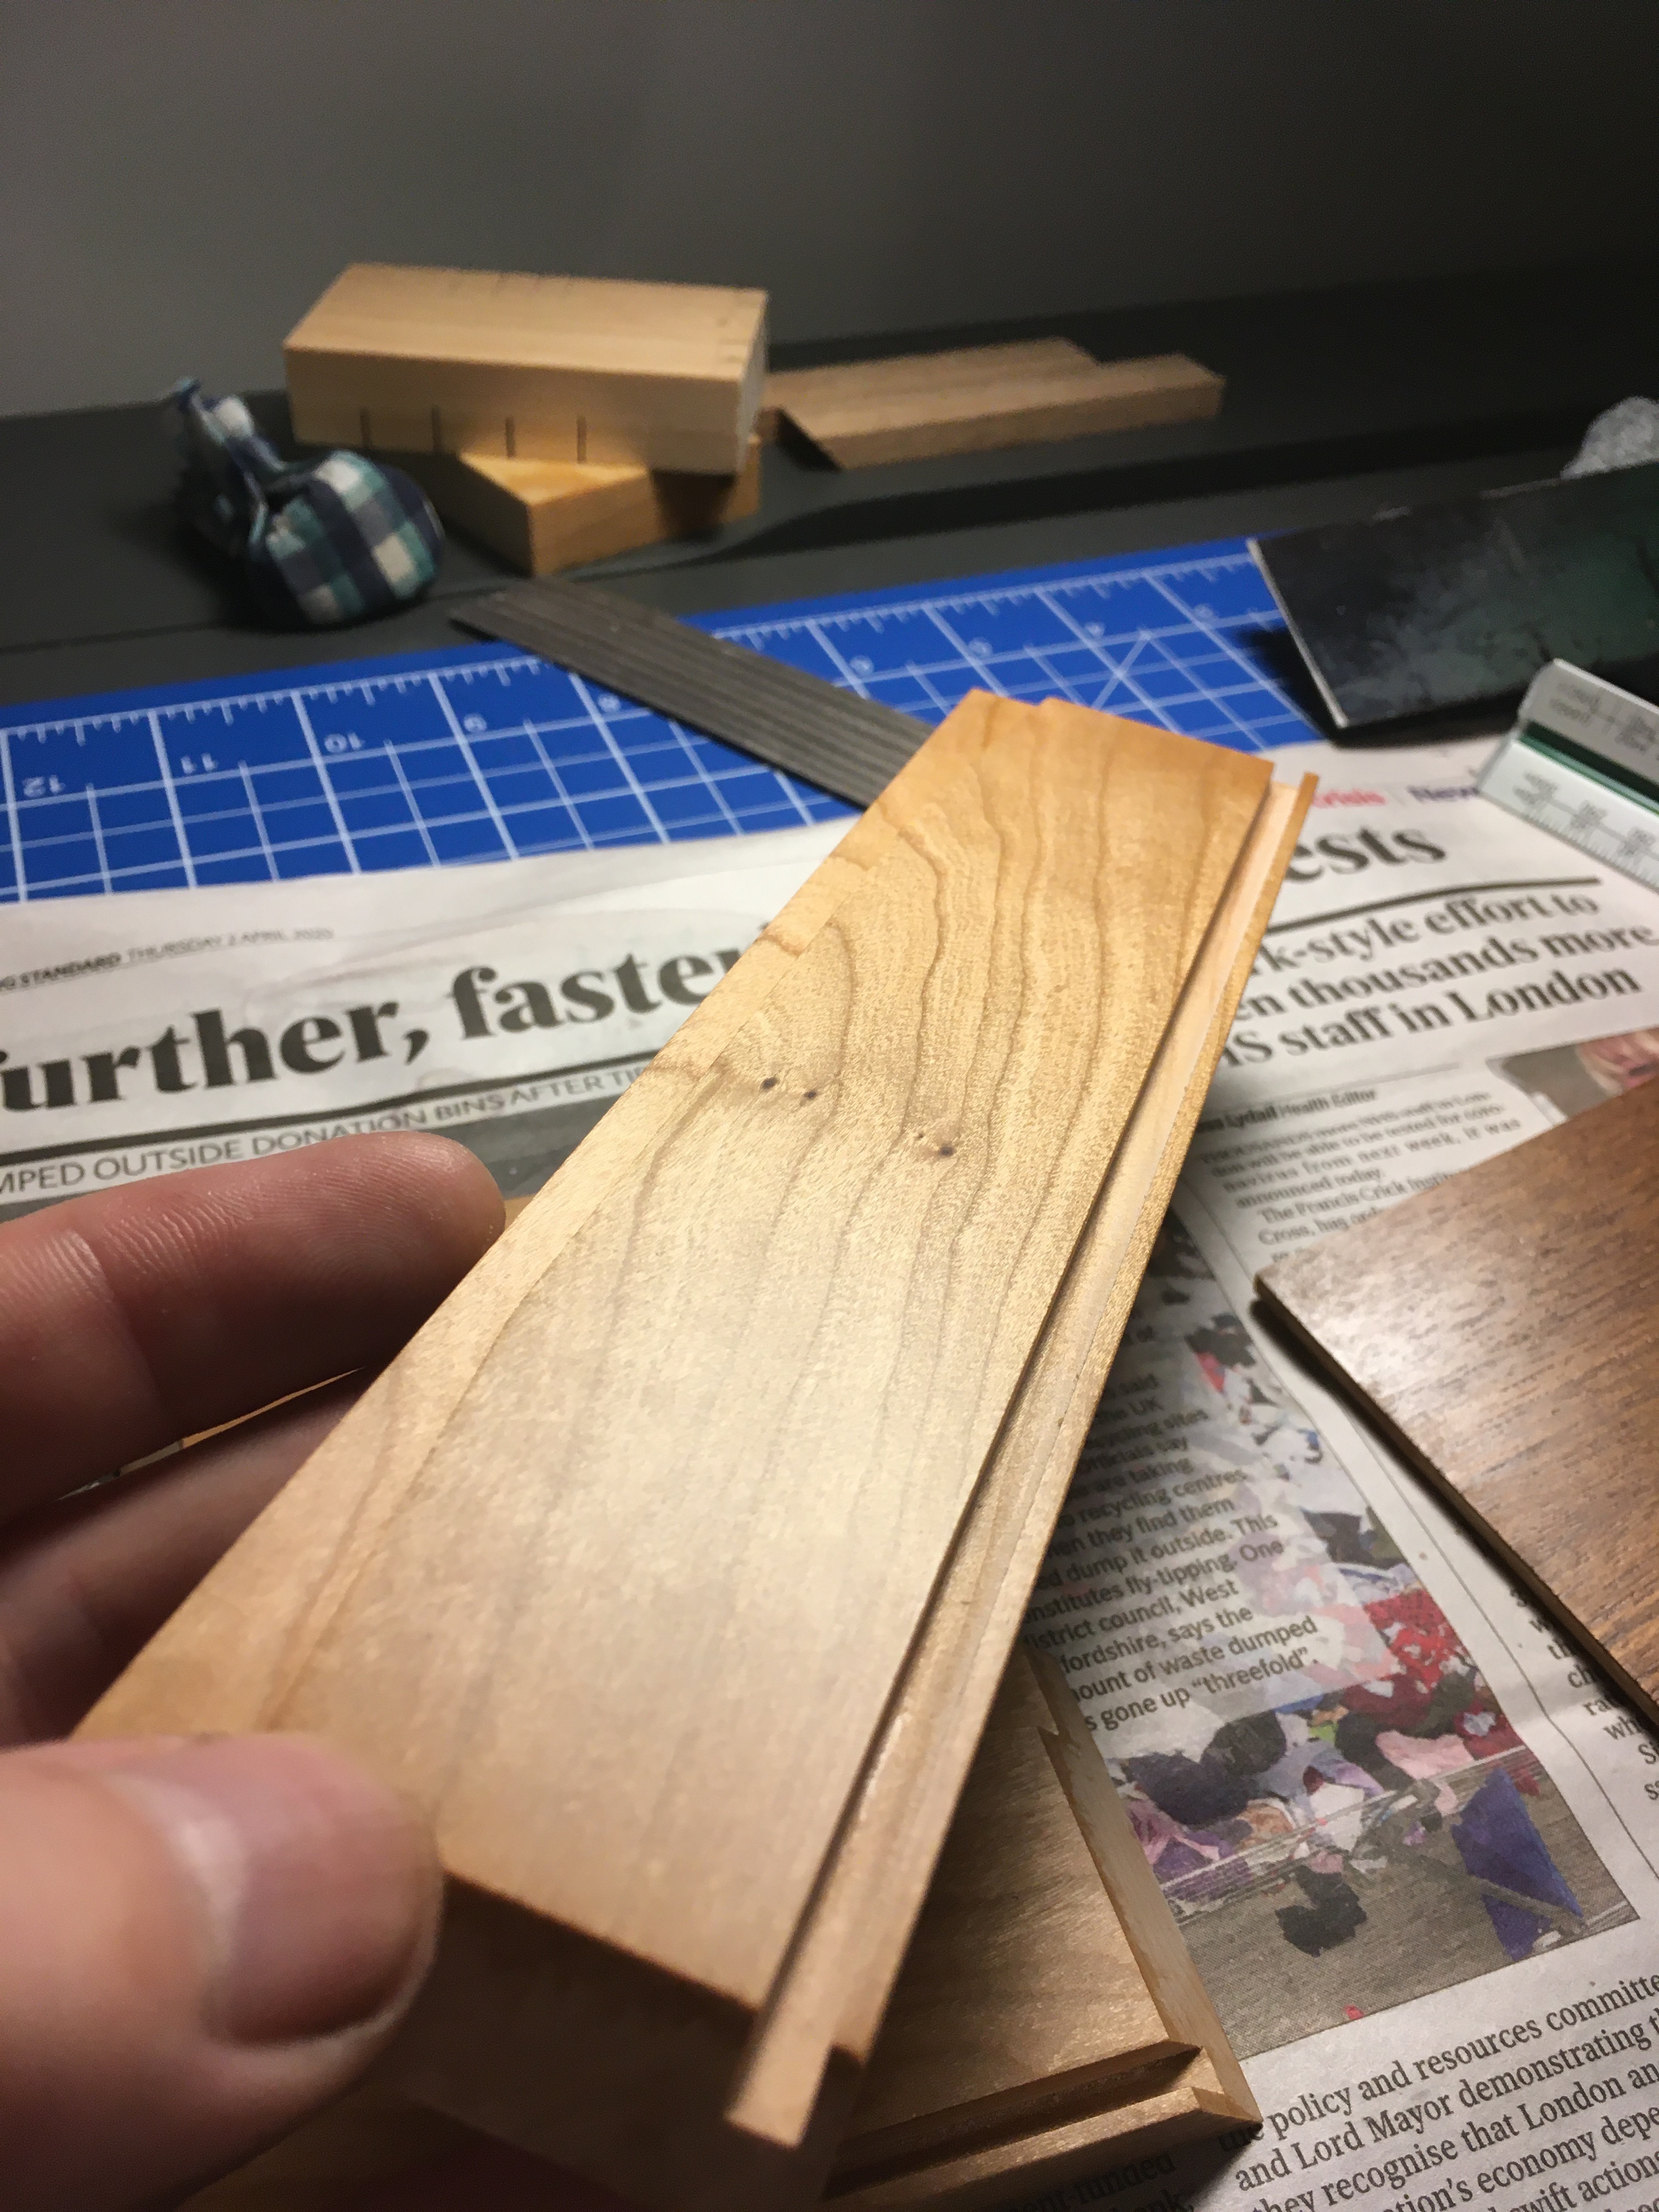
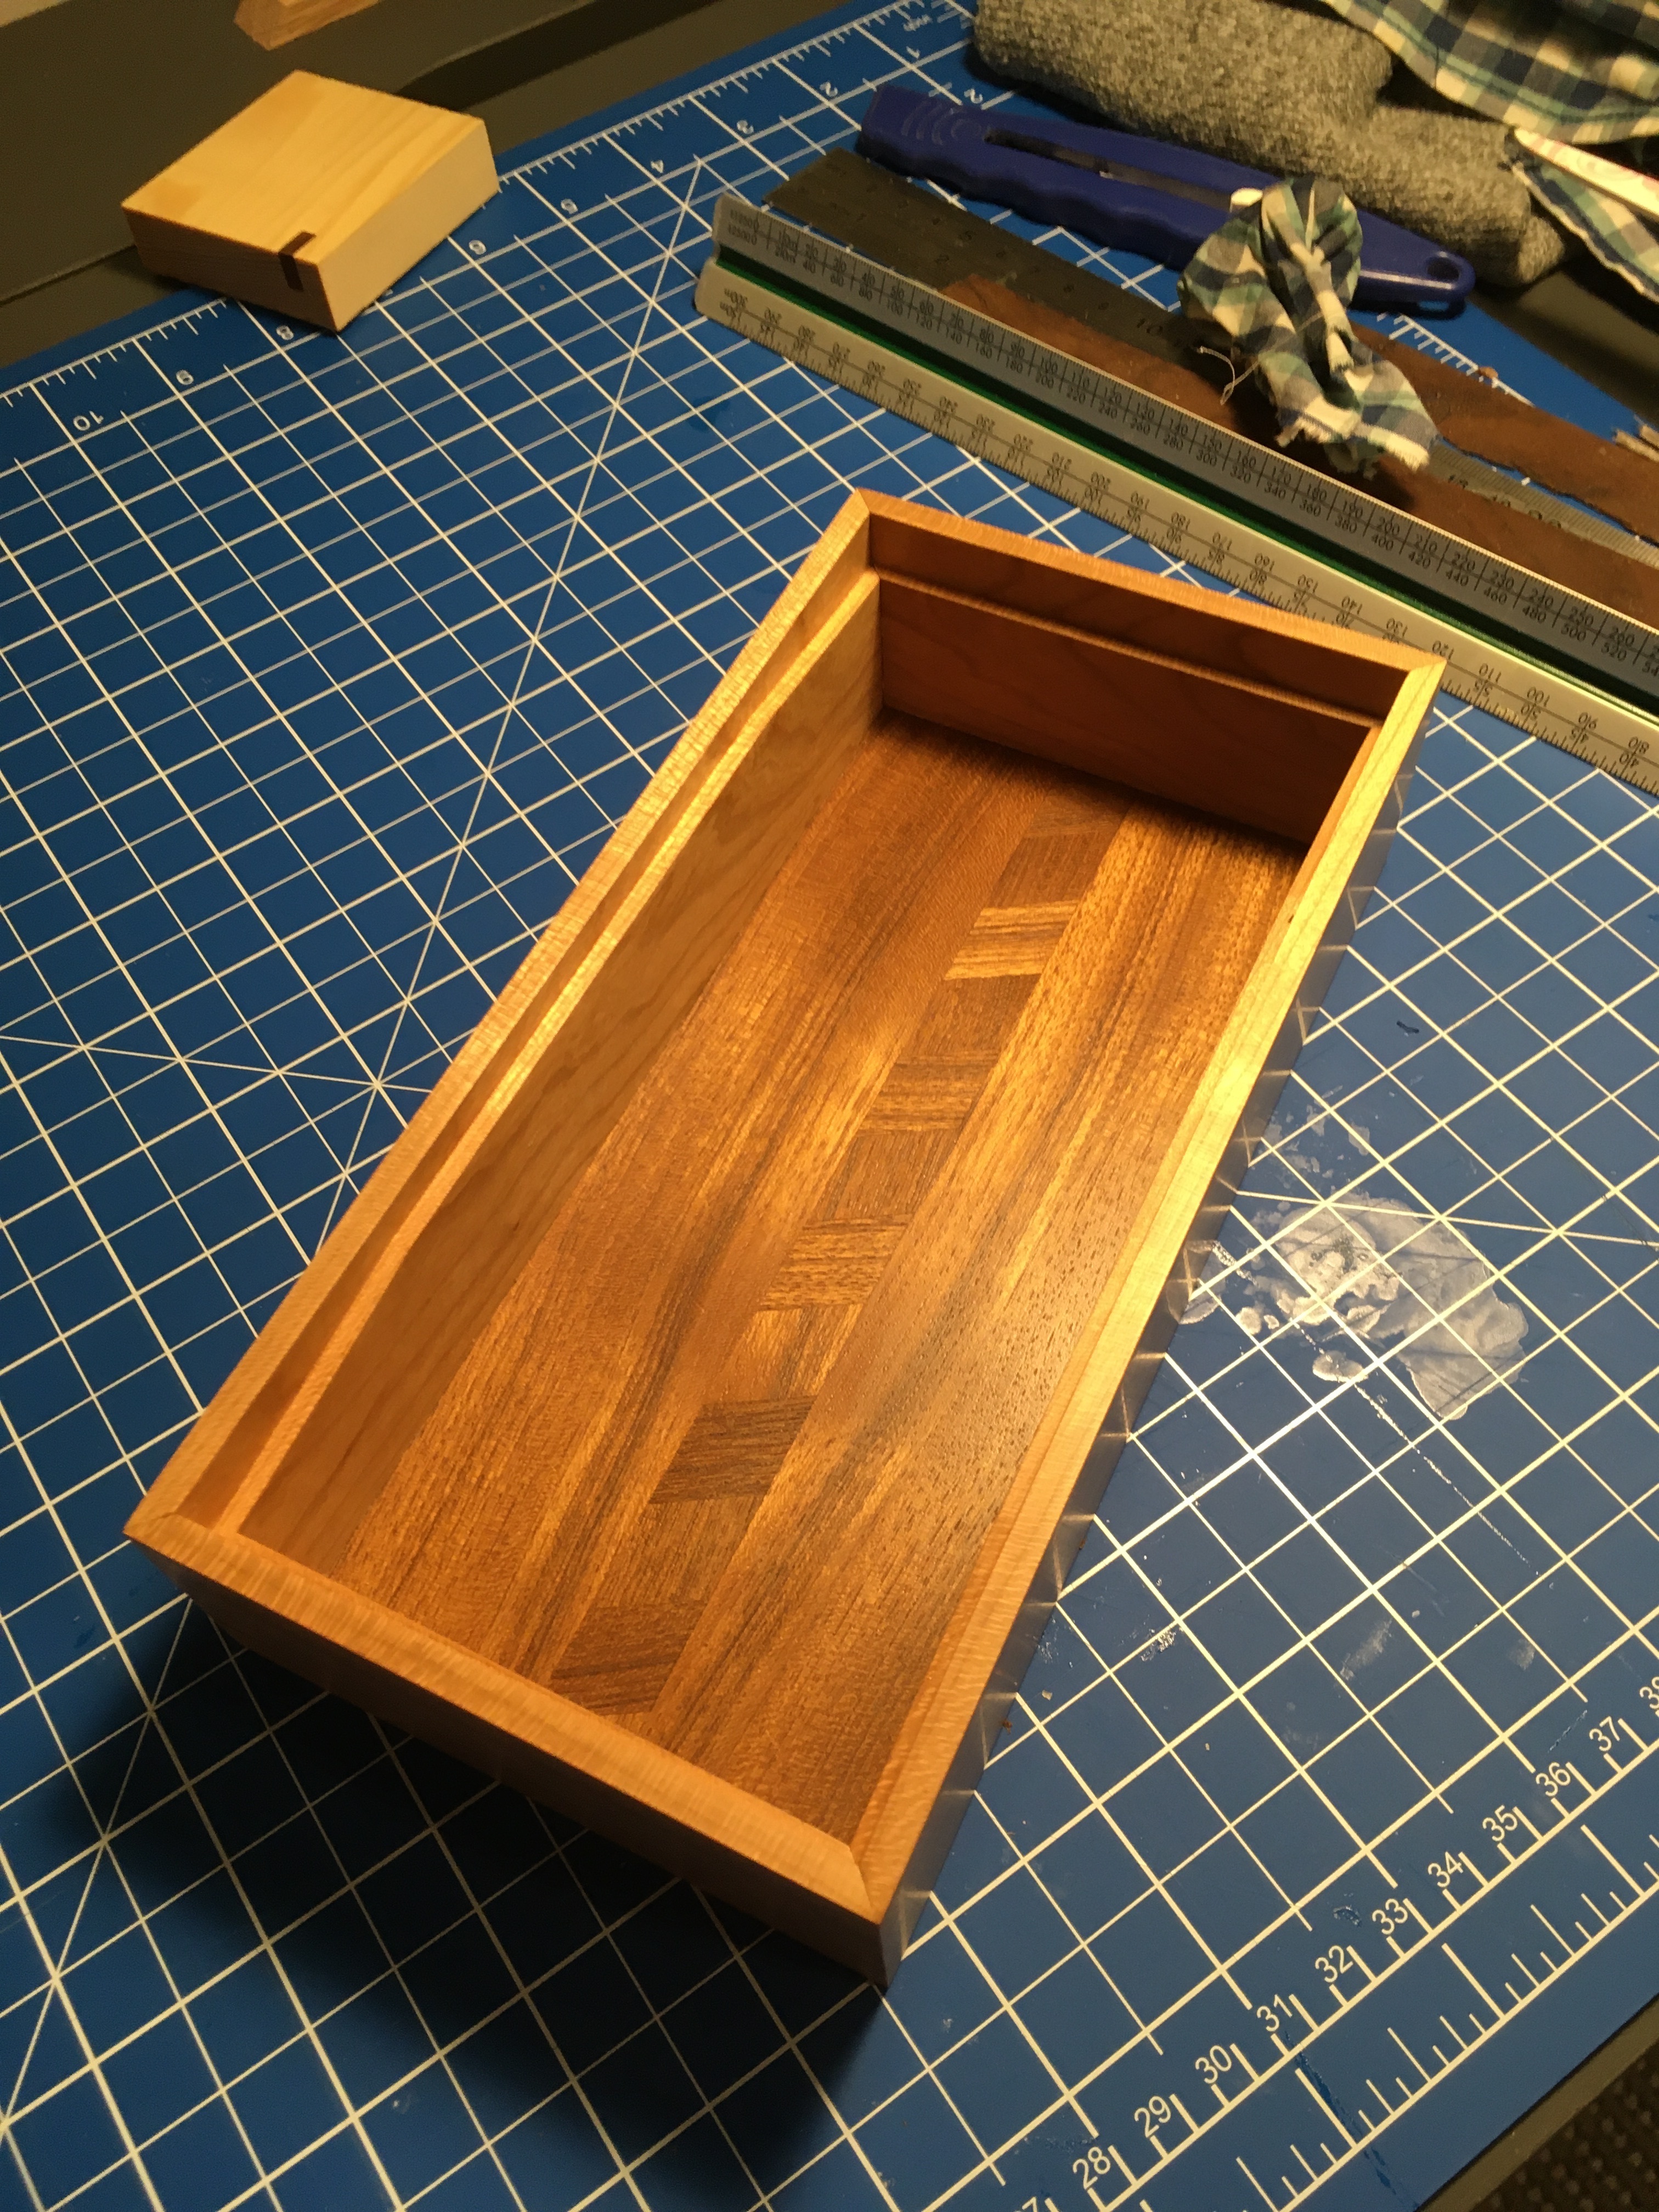
Okay, I used sanding sealer on the inside and outside of the box. I have put a coat of wax on that. This should prevent any squeeze out being an issue, it will peel off easily ( he said, thereby putting the curse on the entire operation) If I possessed some regular French polish I could have used it, the result would have been almost identical. This is one of my favourite finishes, it’s fast because shellac dries fast. Easy to apply with a rag or a brush. Easy to sand flat using just 320 grit lubrasil or any of the finishing papers with the powder lubricant, sterate is what they call it, I think so anyway. Easy to get a decent look with a bit of wax on top and easy to repair or modify. So I really love shellac style finishes and they are now available with various additives to improve their durability. Also it’s possible to add colours to the shellac at any stage. I love it and it’s simple, I hope you can get an idea of the sheen. I didn’t use an oil finish because cherry can suffer from blotches and this particular wood has areas where that would happen. If you look just beyond my thumb in the picture, it’s possible to see two or three areas where an oil finish would have left heavy blotches.So it’s time for trimming and waxing the base then it’s glue up time. Or as I like to think of it, “hammer time “ definitely won’t be using any hammers…

Another nice thing about this project is that I have had to consider a timber match I consider unlikely. Cherry and teak. They are definitely not bling, they are complimentary in a very quiet fashion?
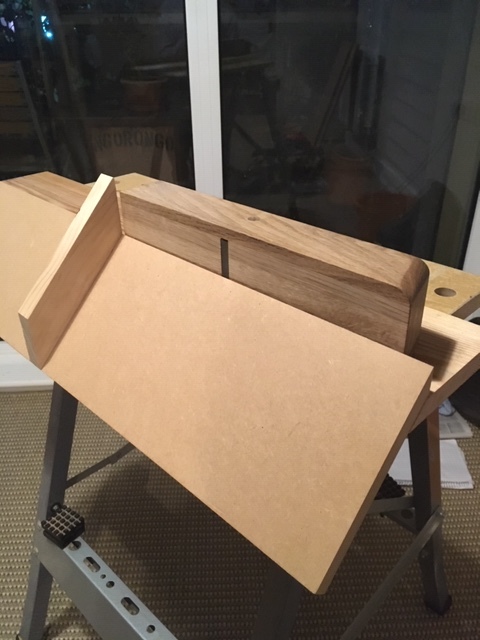
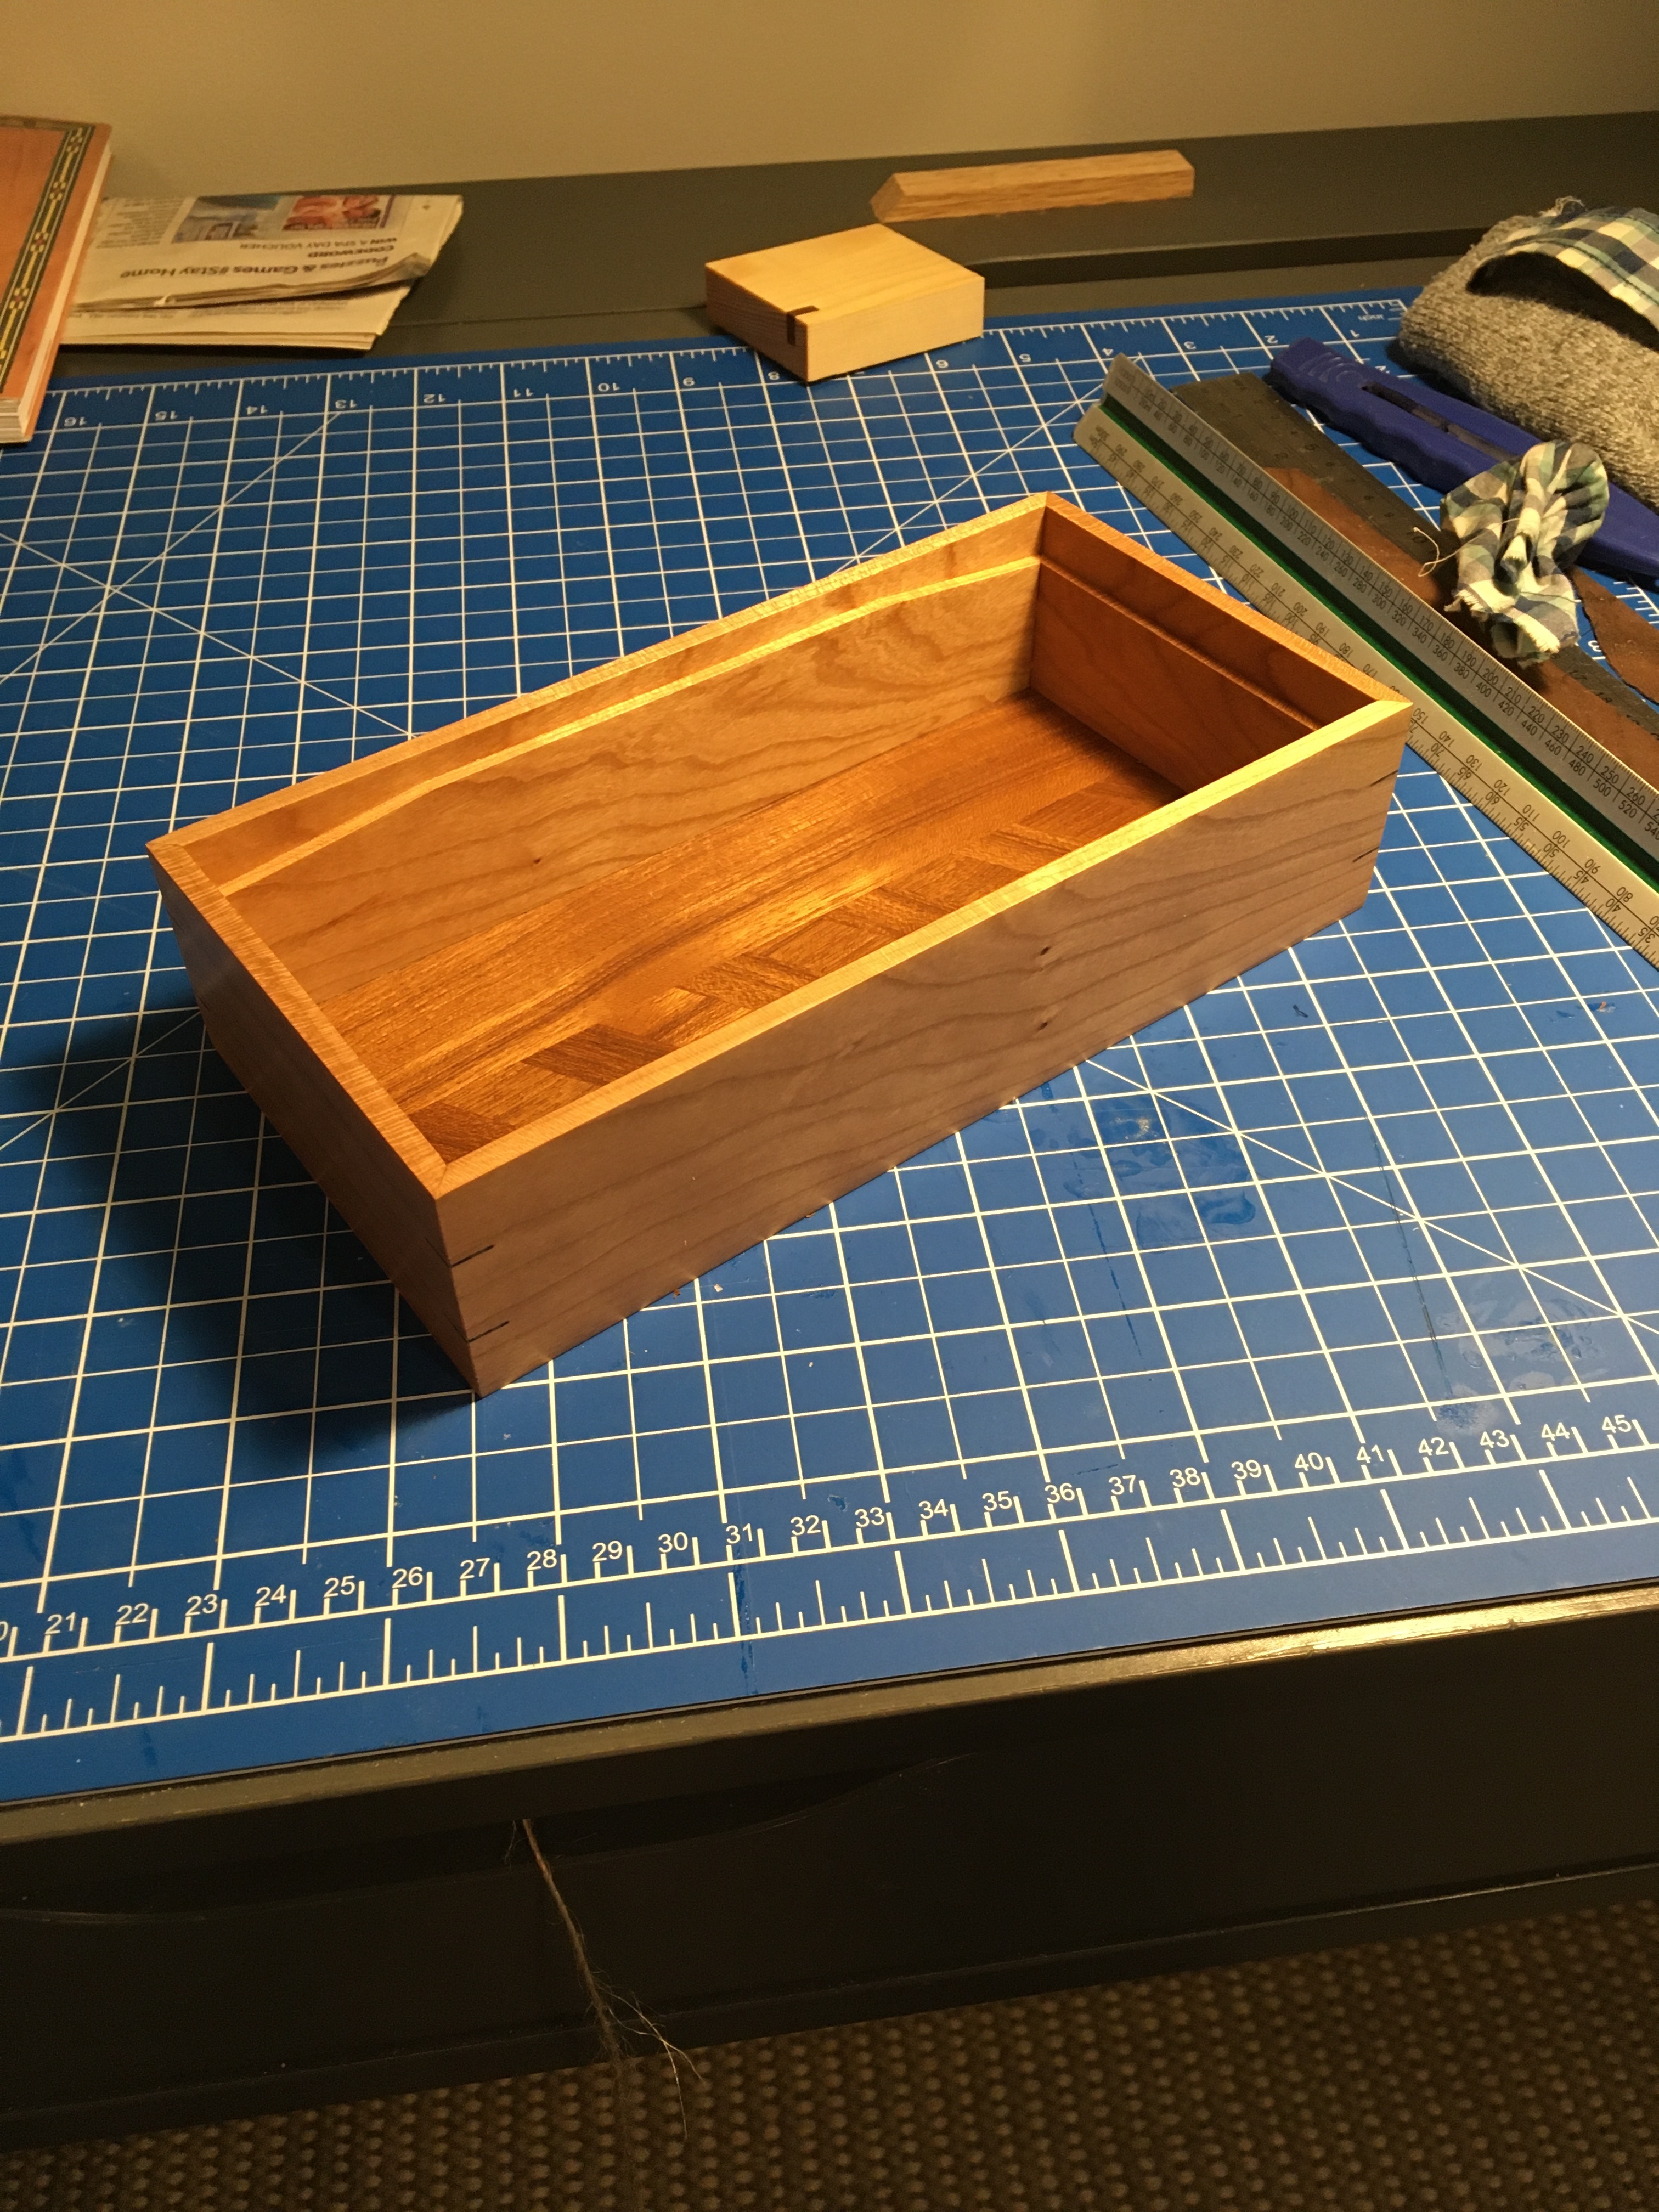
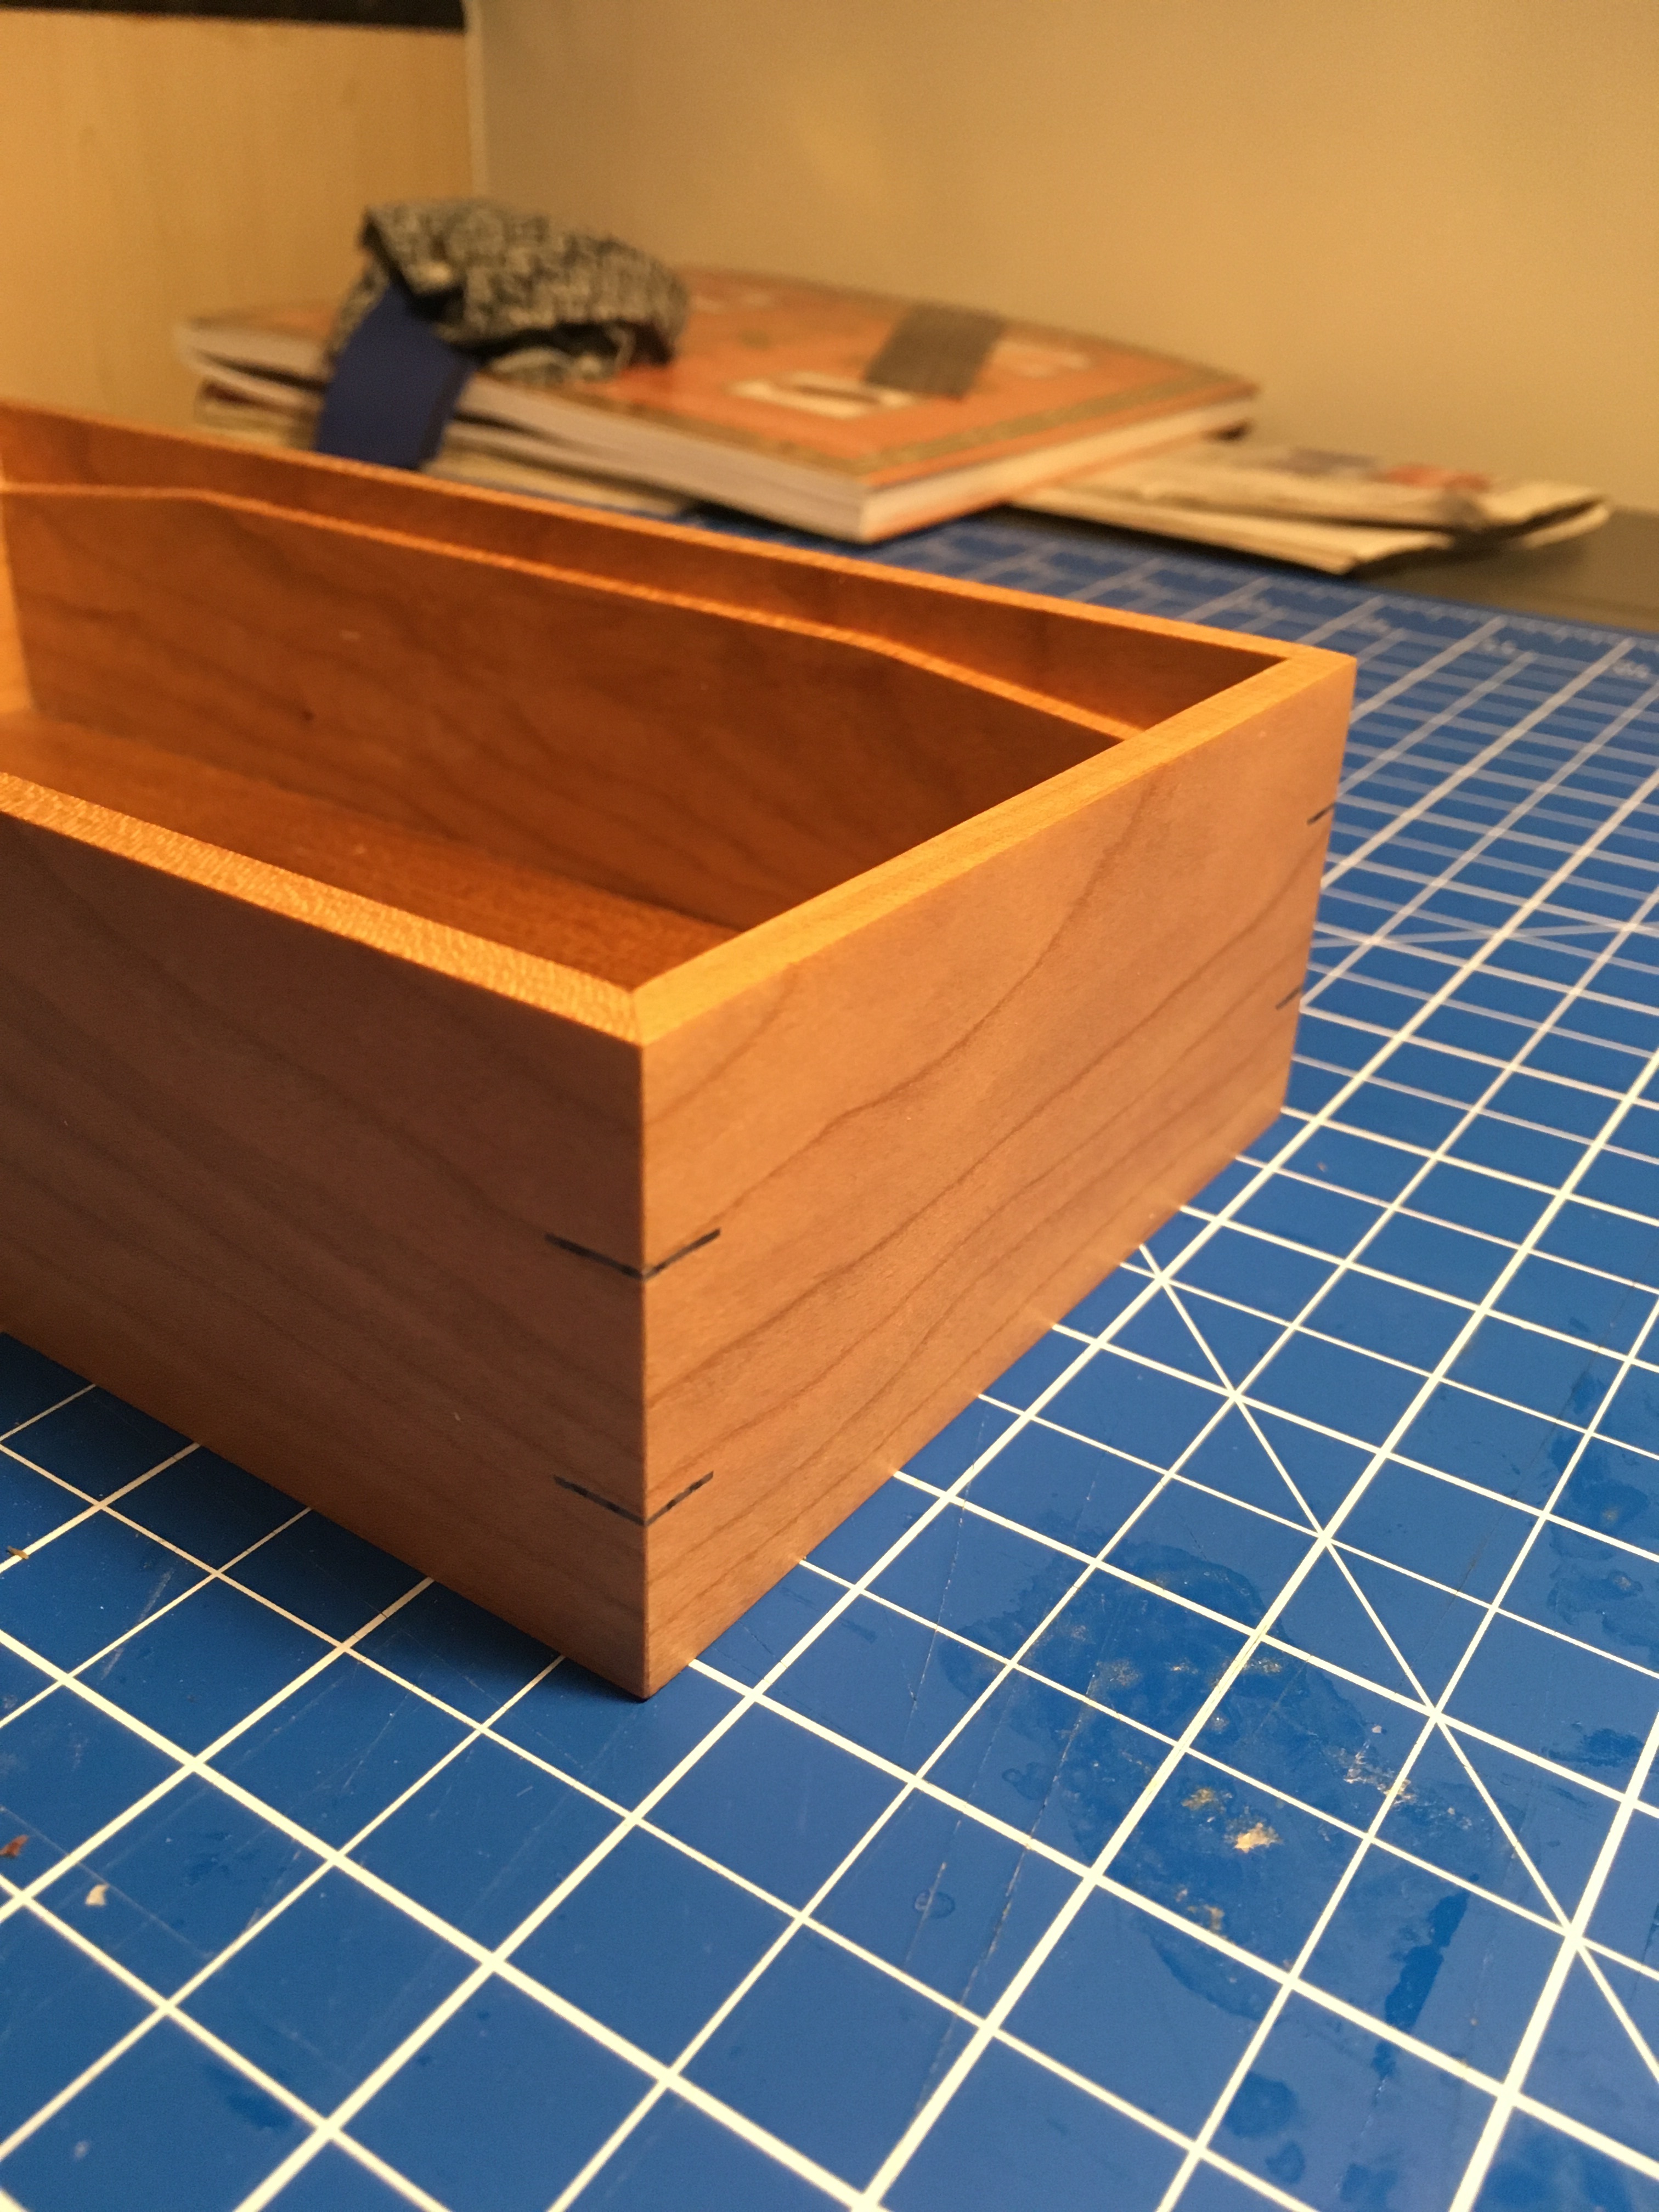
I glued up using tape. Stuck some splines in and gave it some sealer and wax. I don’t rate this as a way of making boxes by hand. Rebates are just as good, a lot less hassle. The slight aesthetic improvement from mitres is just not worth the effort in my opinion and it’s not a very strong joint. Still this was a bit of an exploration. I am really happy with the routing I did though. I expected it would be hard, it was the easiest part and very successful. So that’s a keeper. As is carefully choosing the order of operations. I got impatient with this project. I really like shaker wooden ware, no way would they have used mitres. The top is next.
I thought I could add some stuff which might help others if they chose veneer elements to a project.
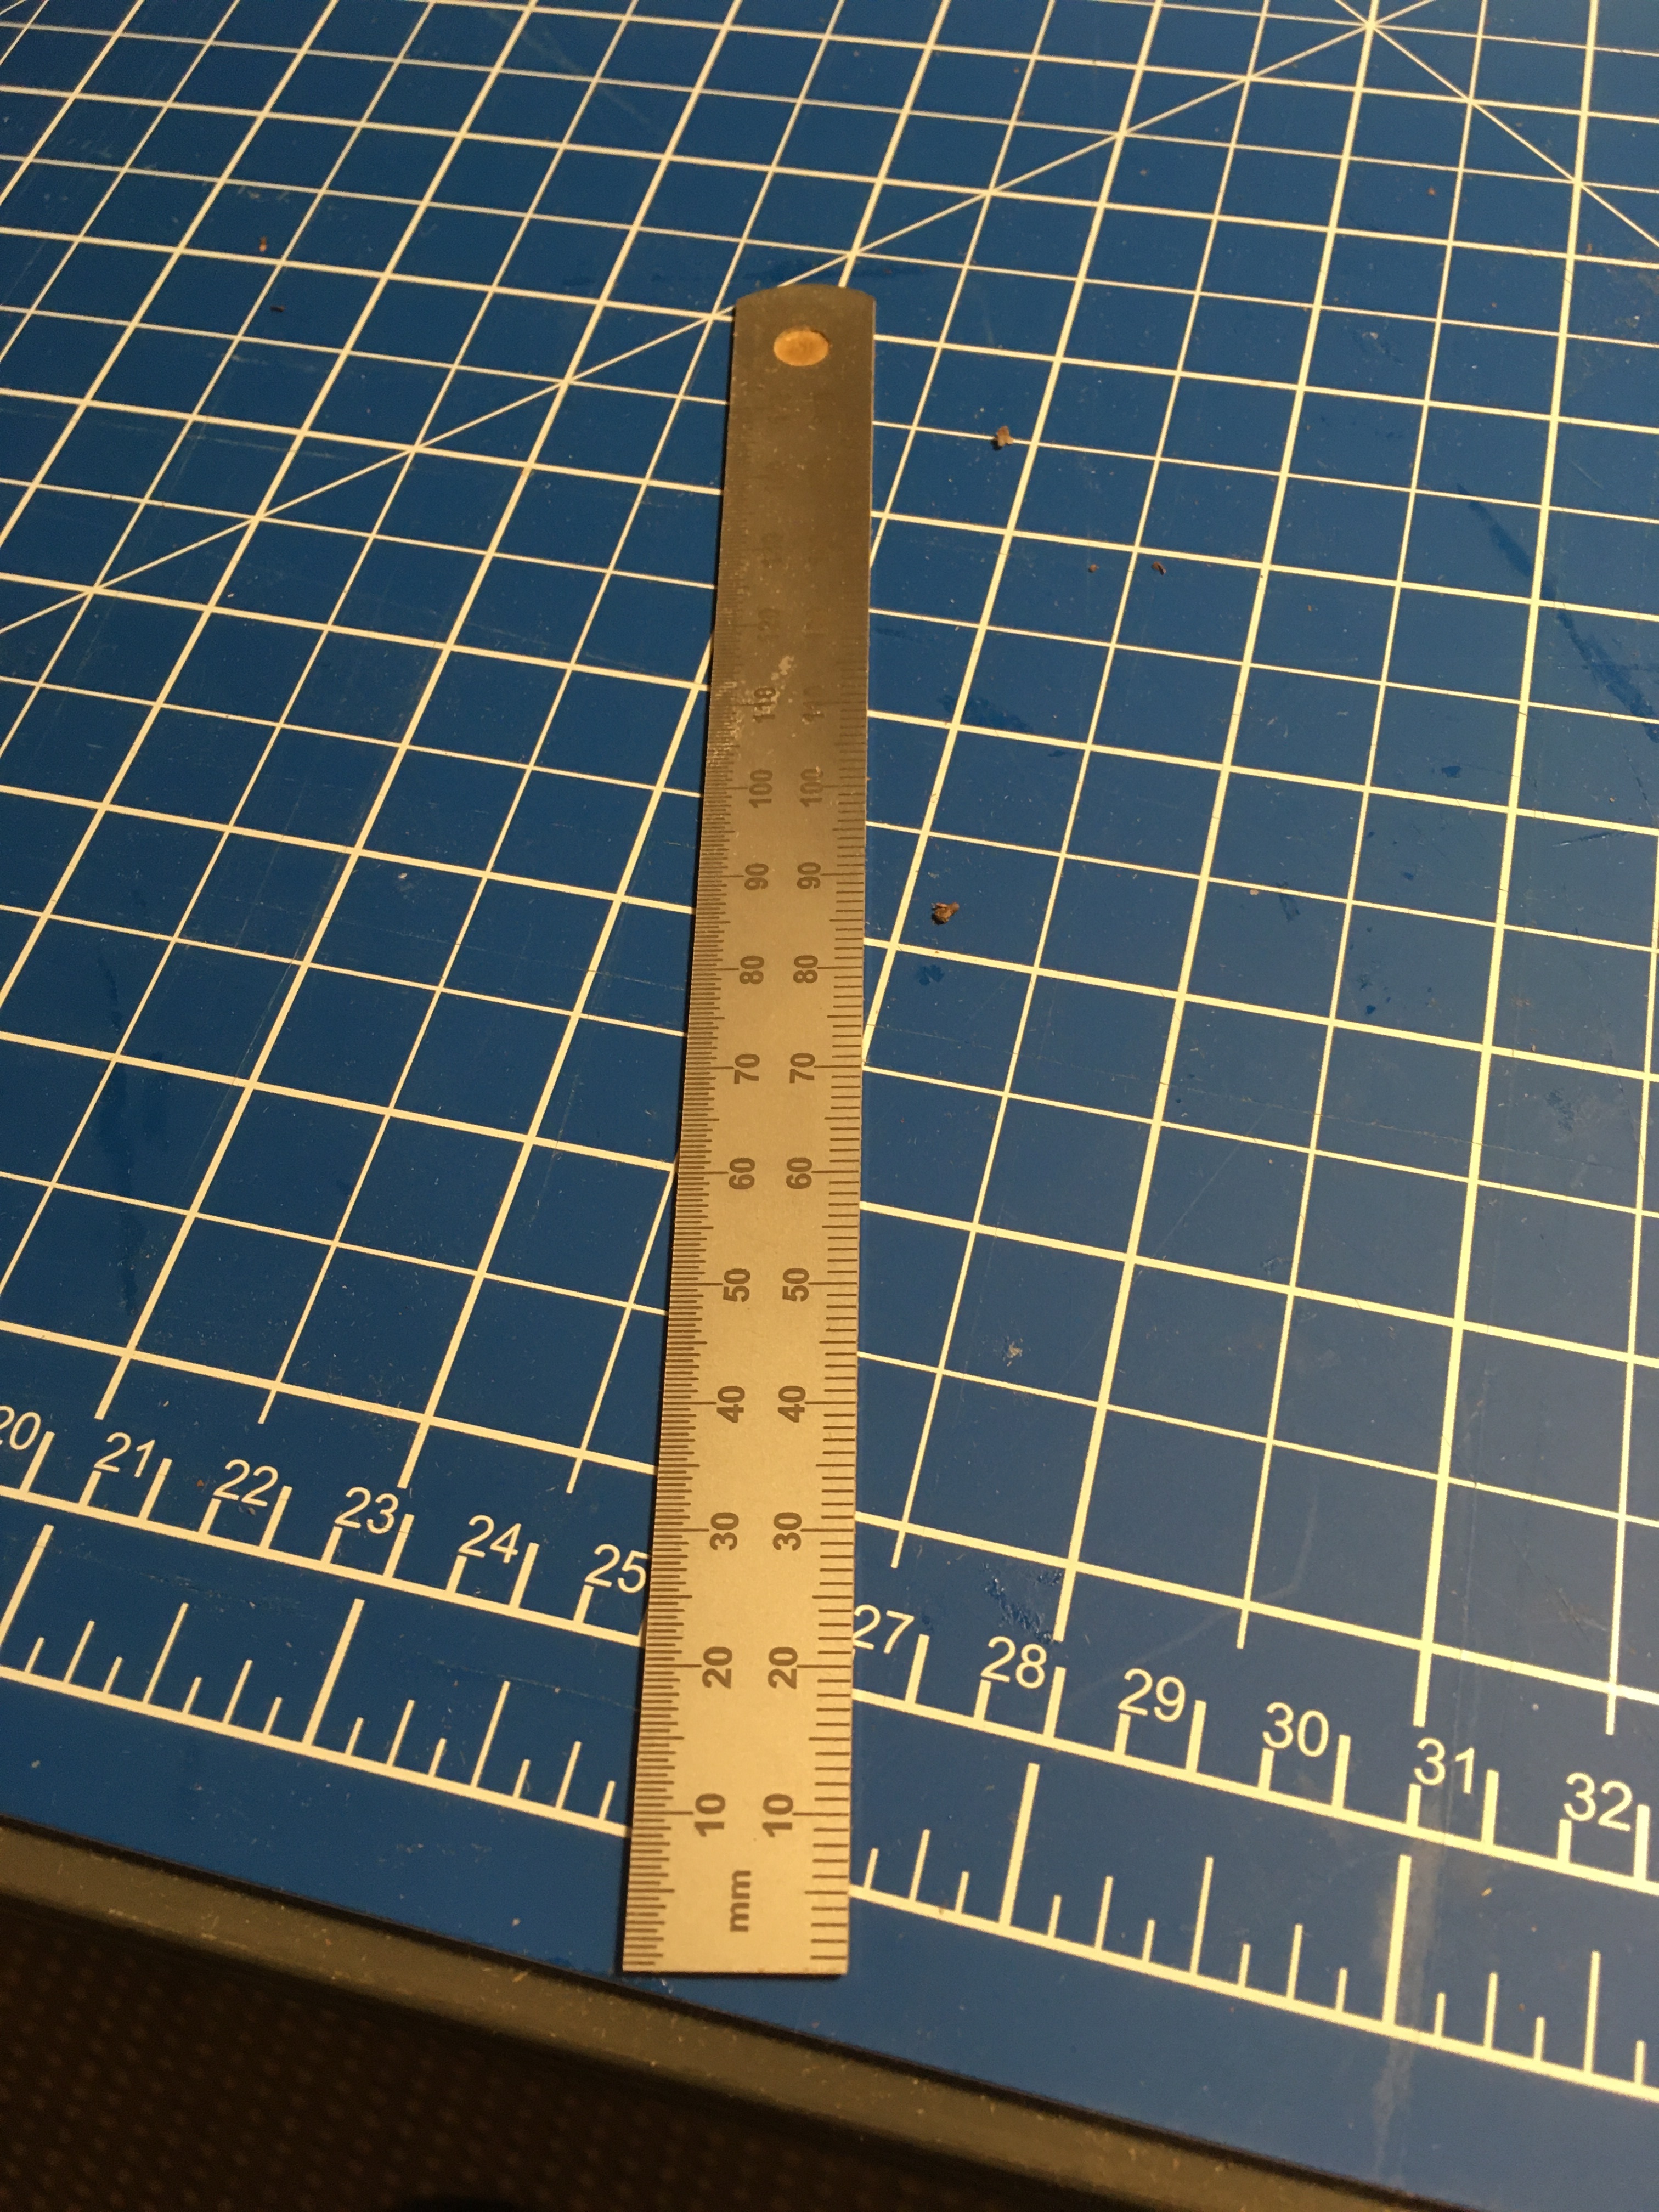
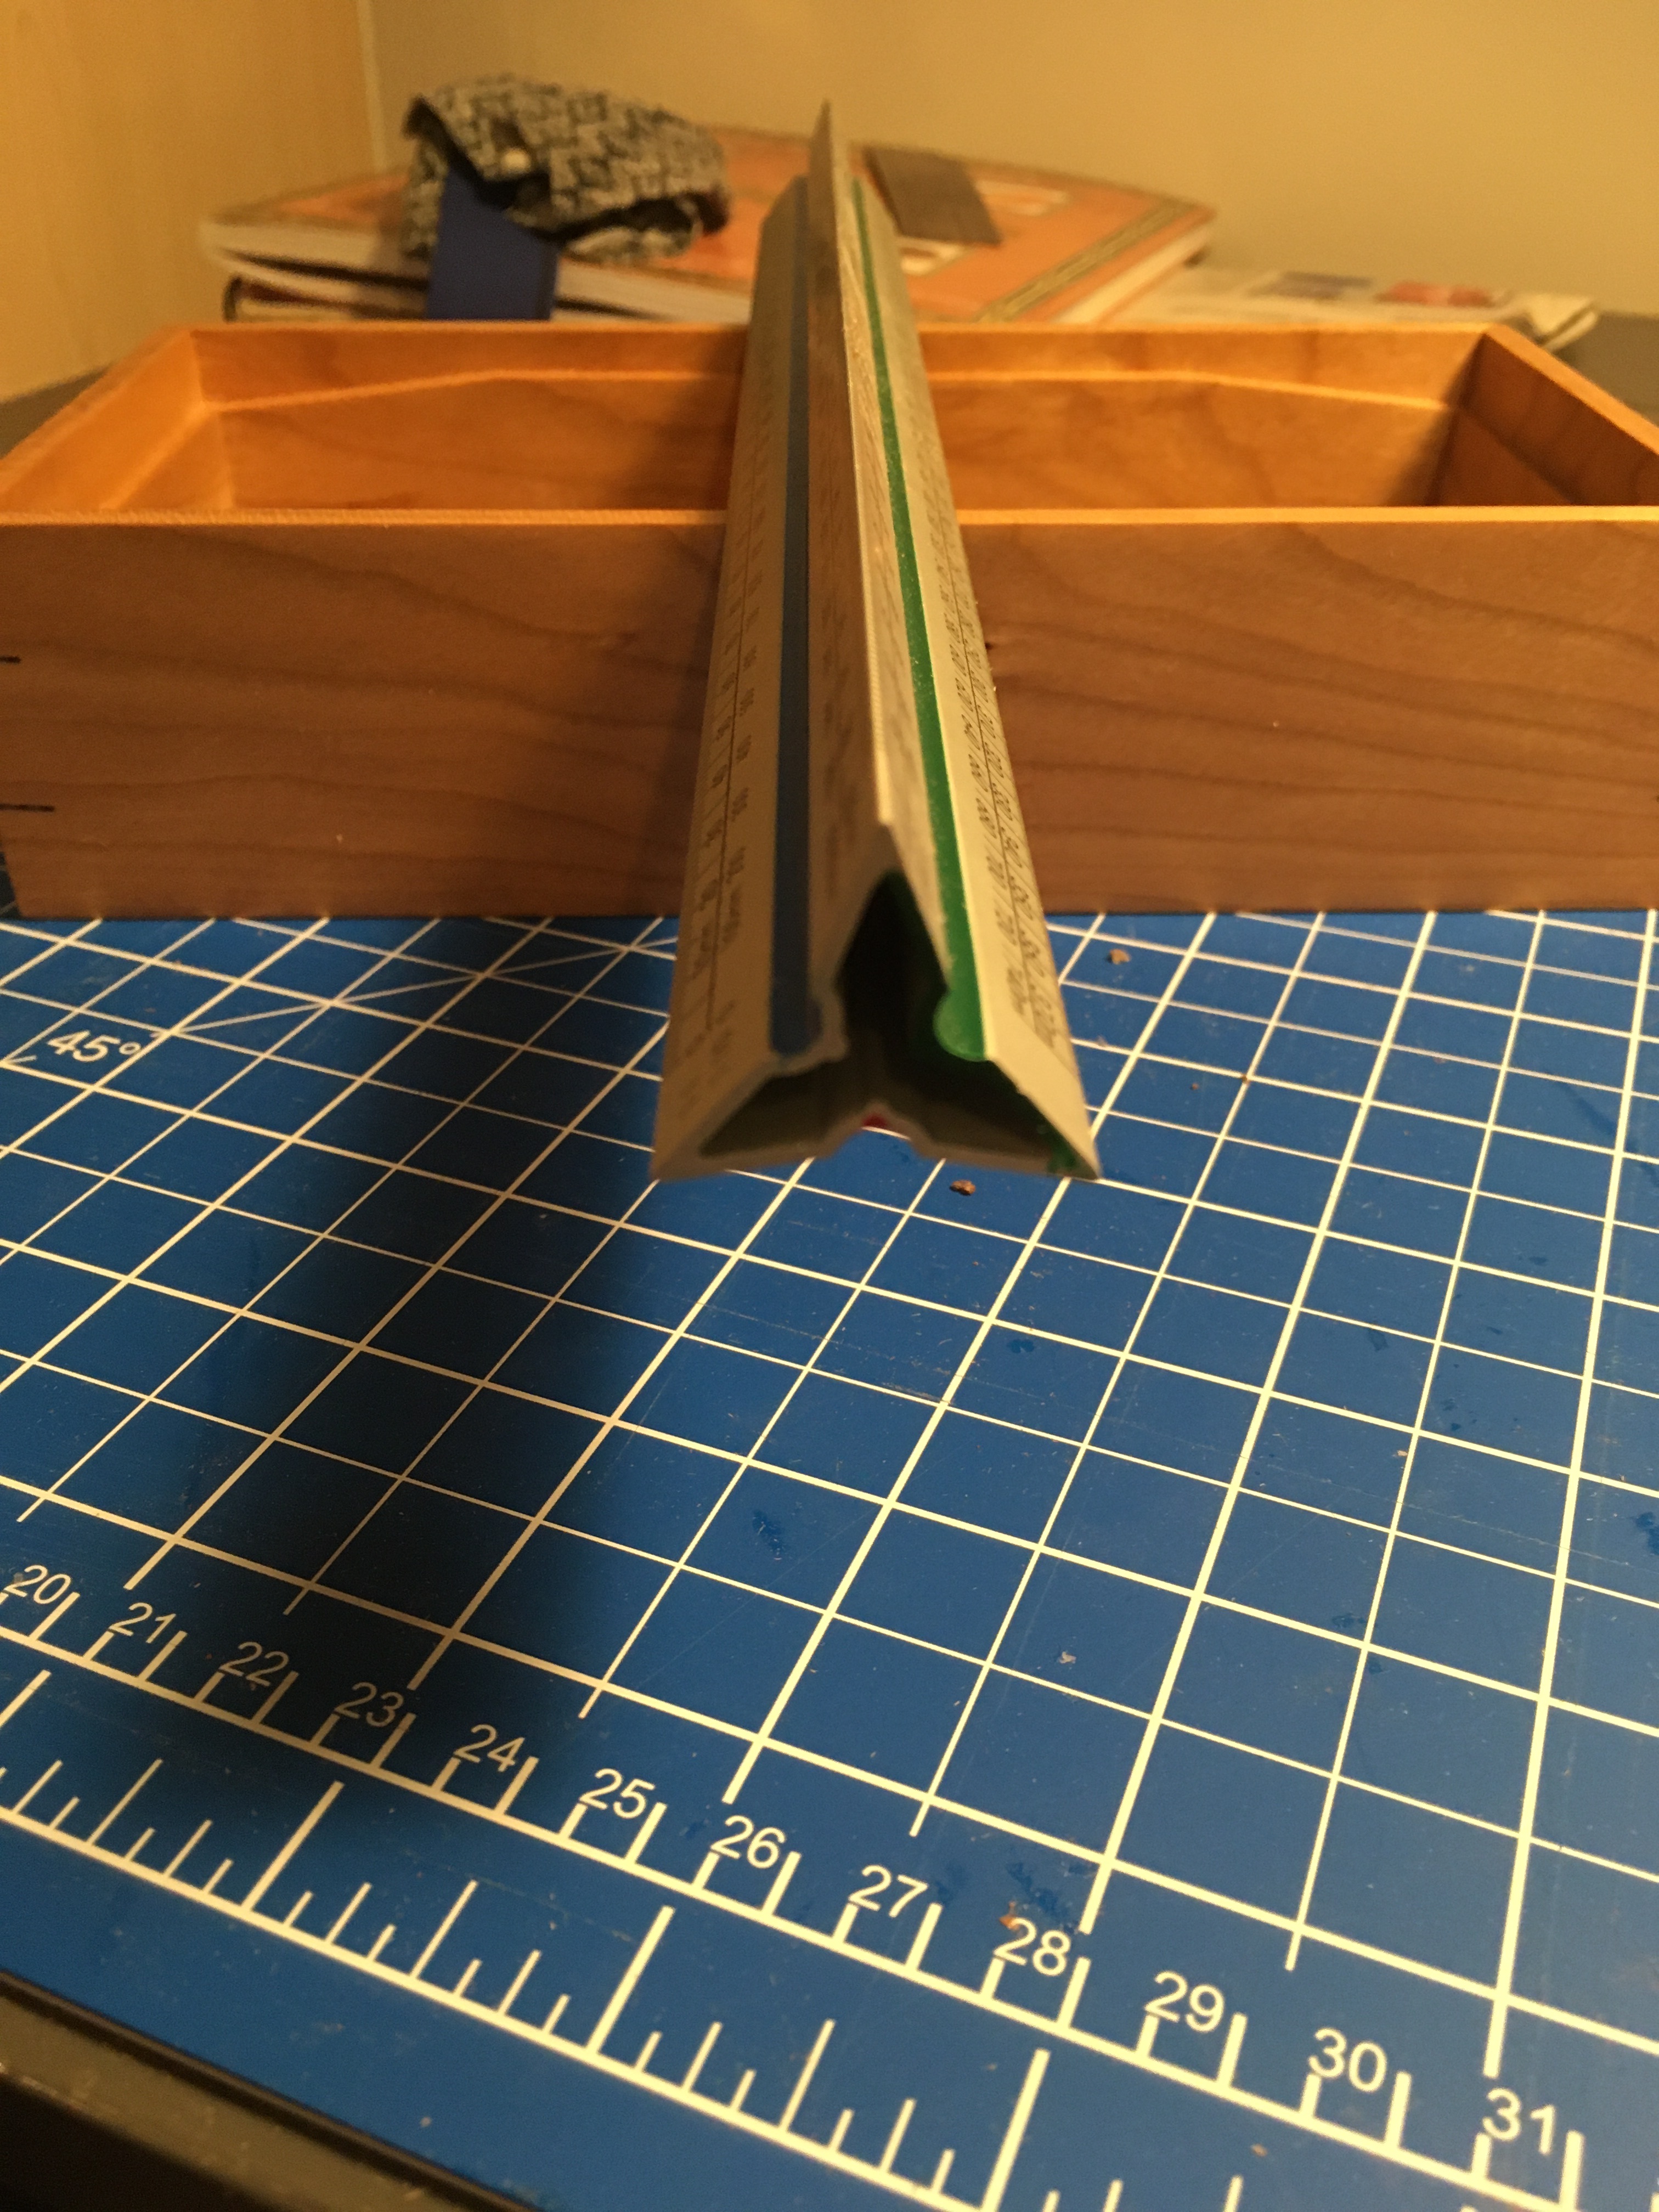
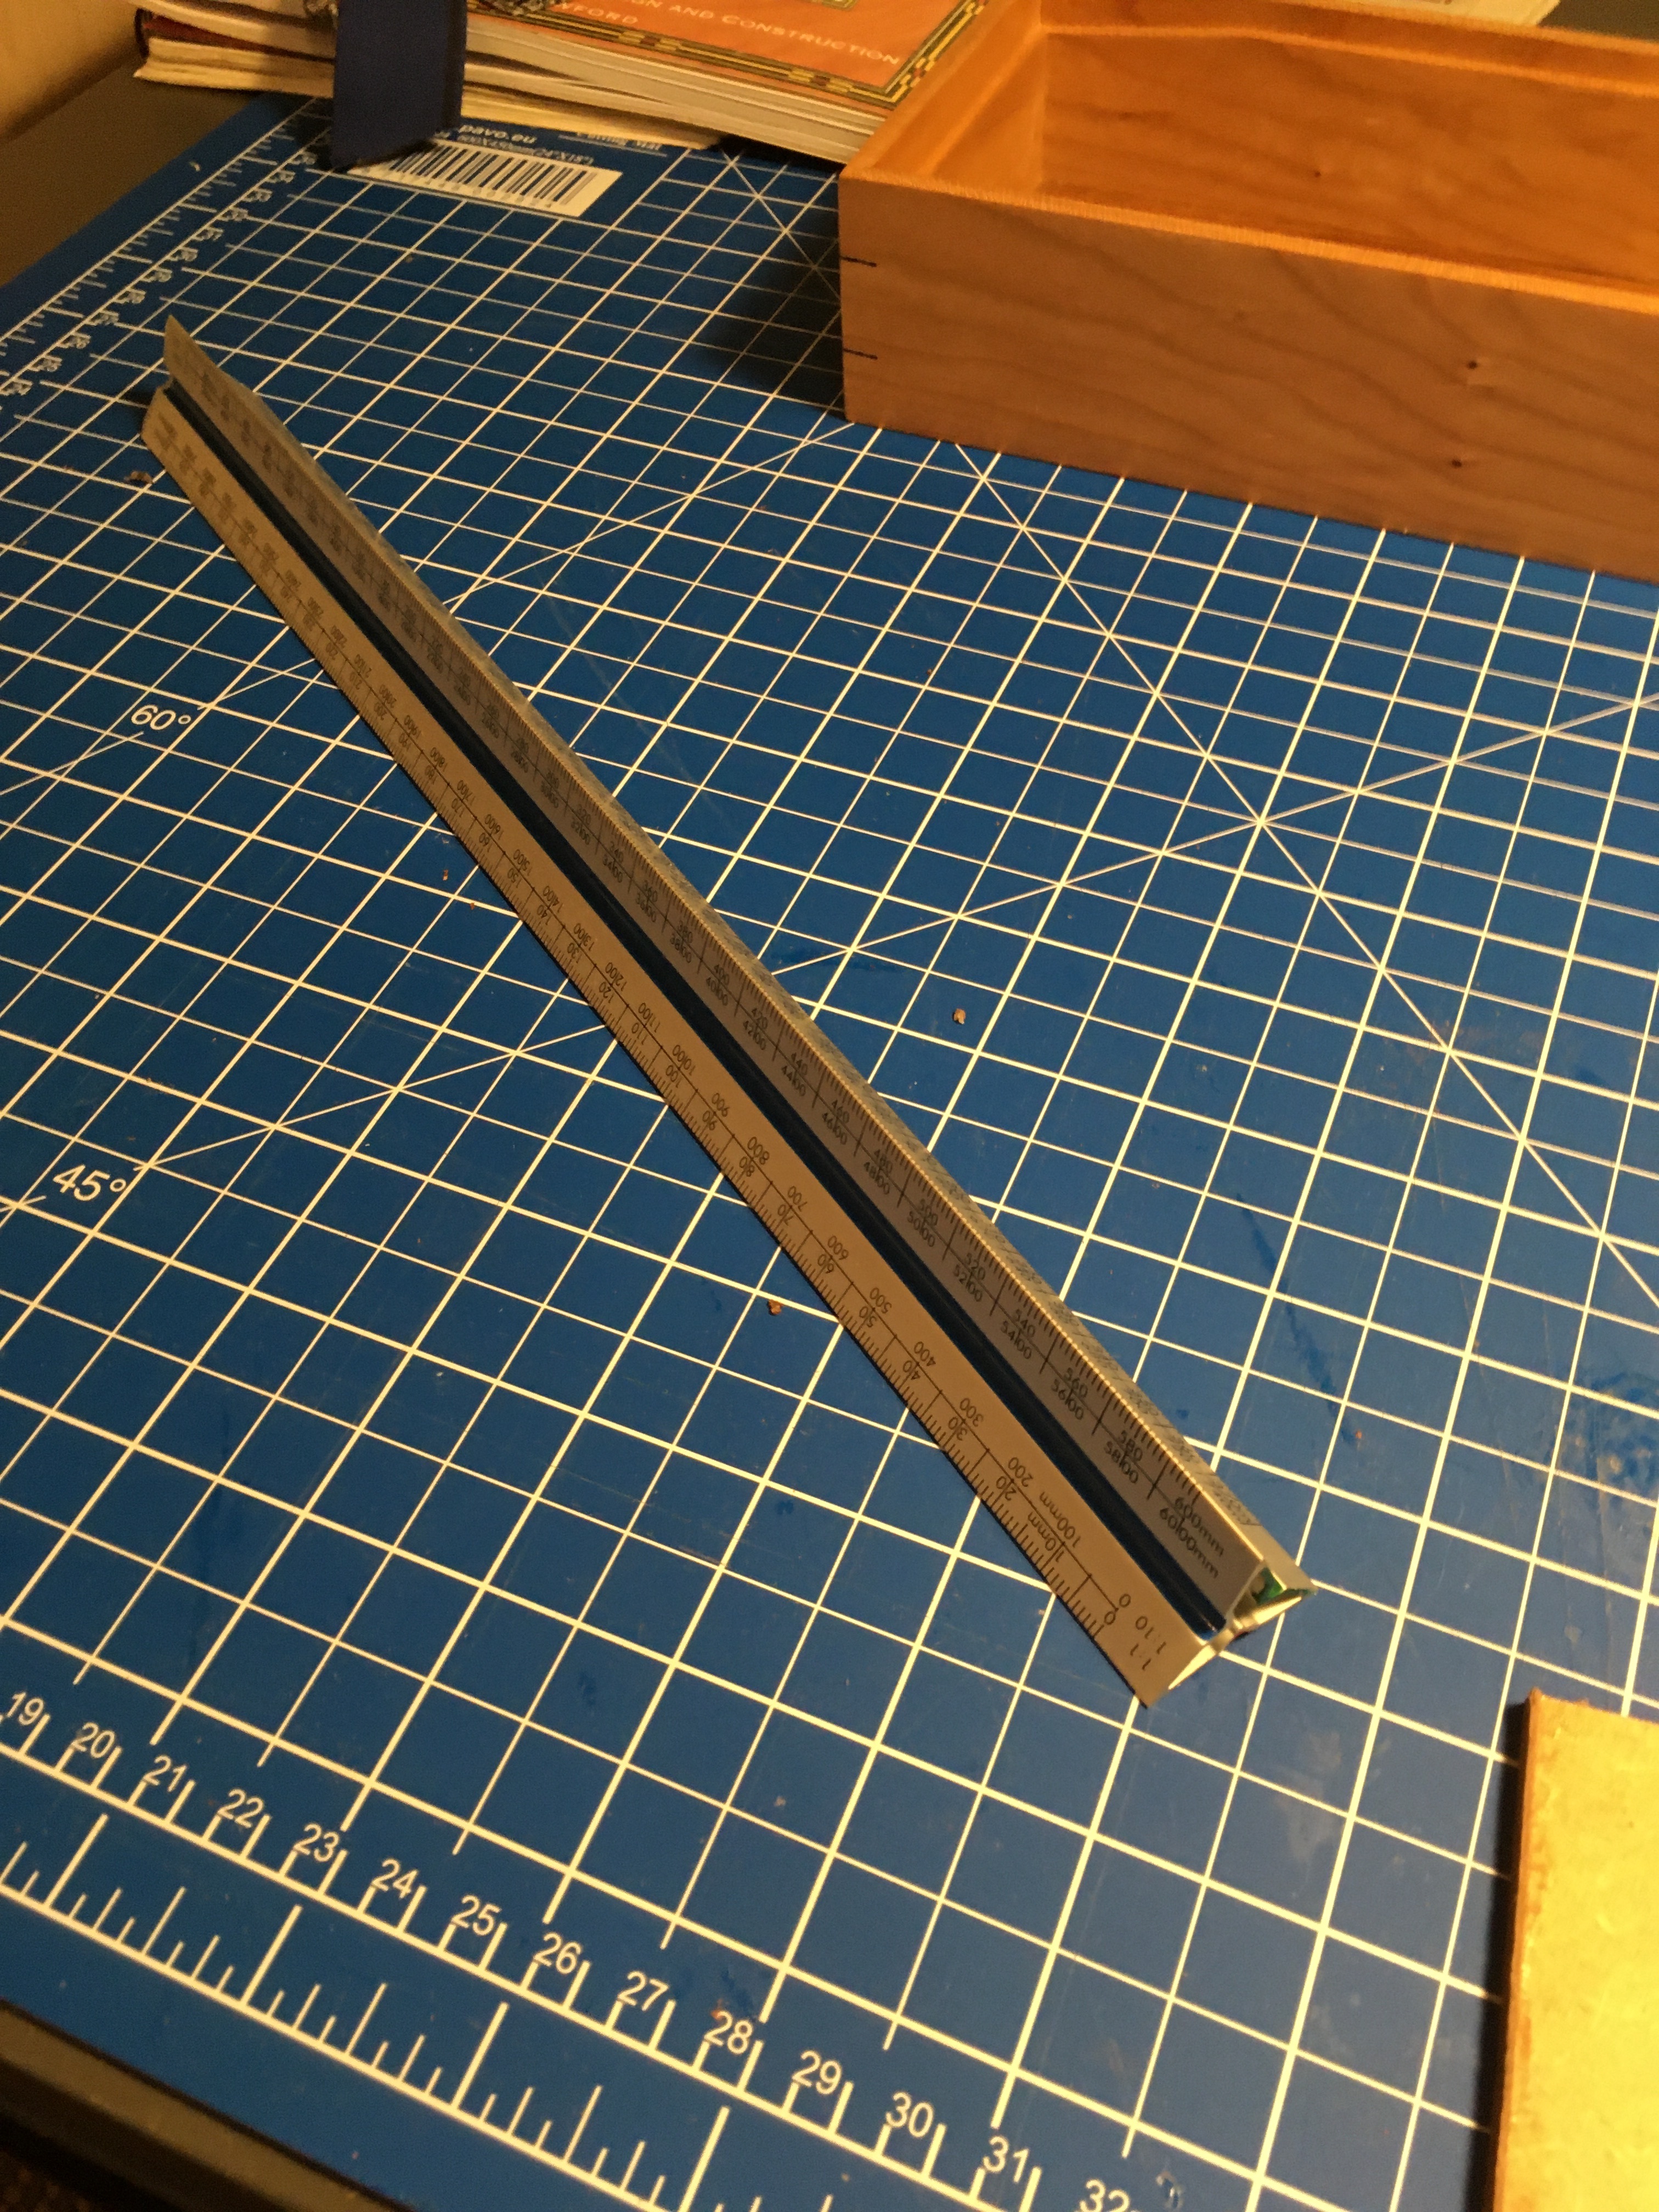
A metal scale rule made of aluminium. Because of the shape, just the two edges contact the veneer when you cut. The result is a very solid platform when cutting. A normal rule wants to move about and it often does.
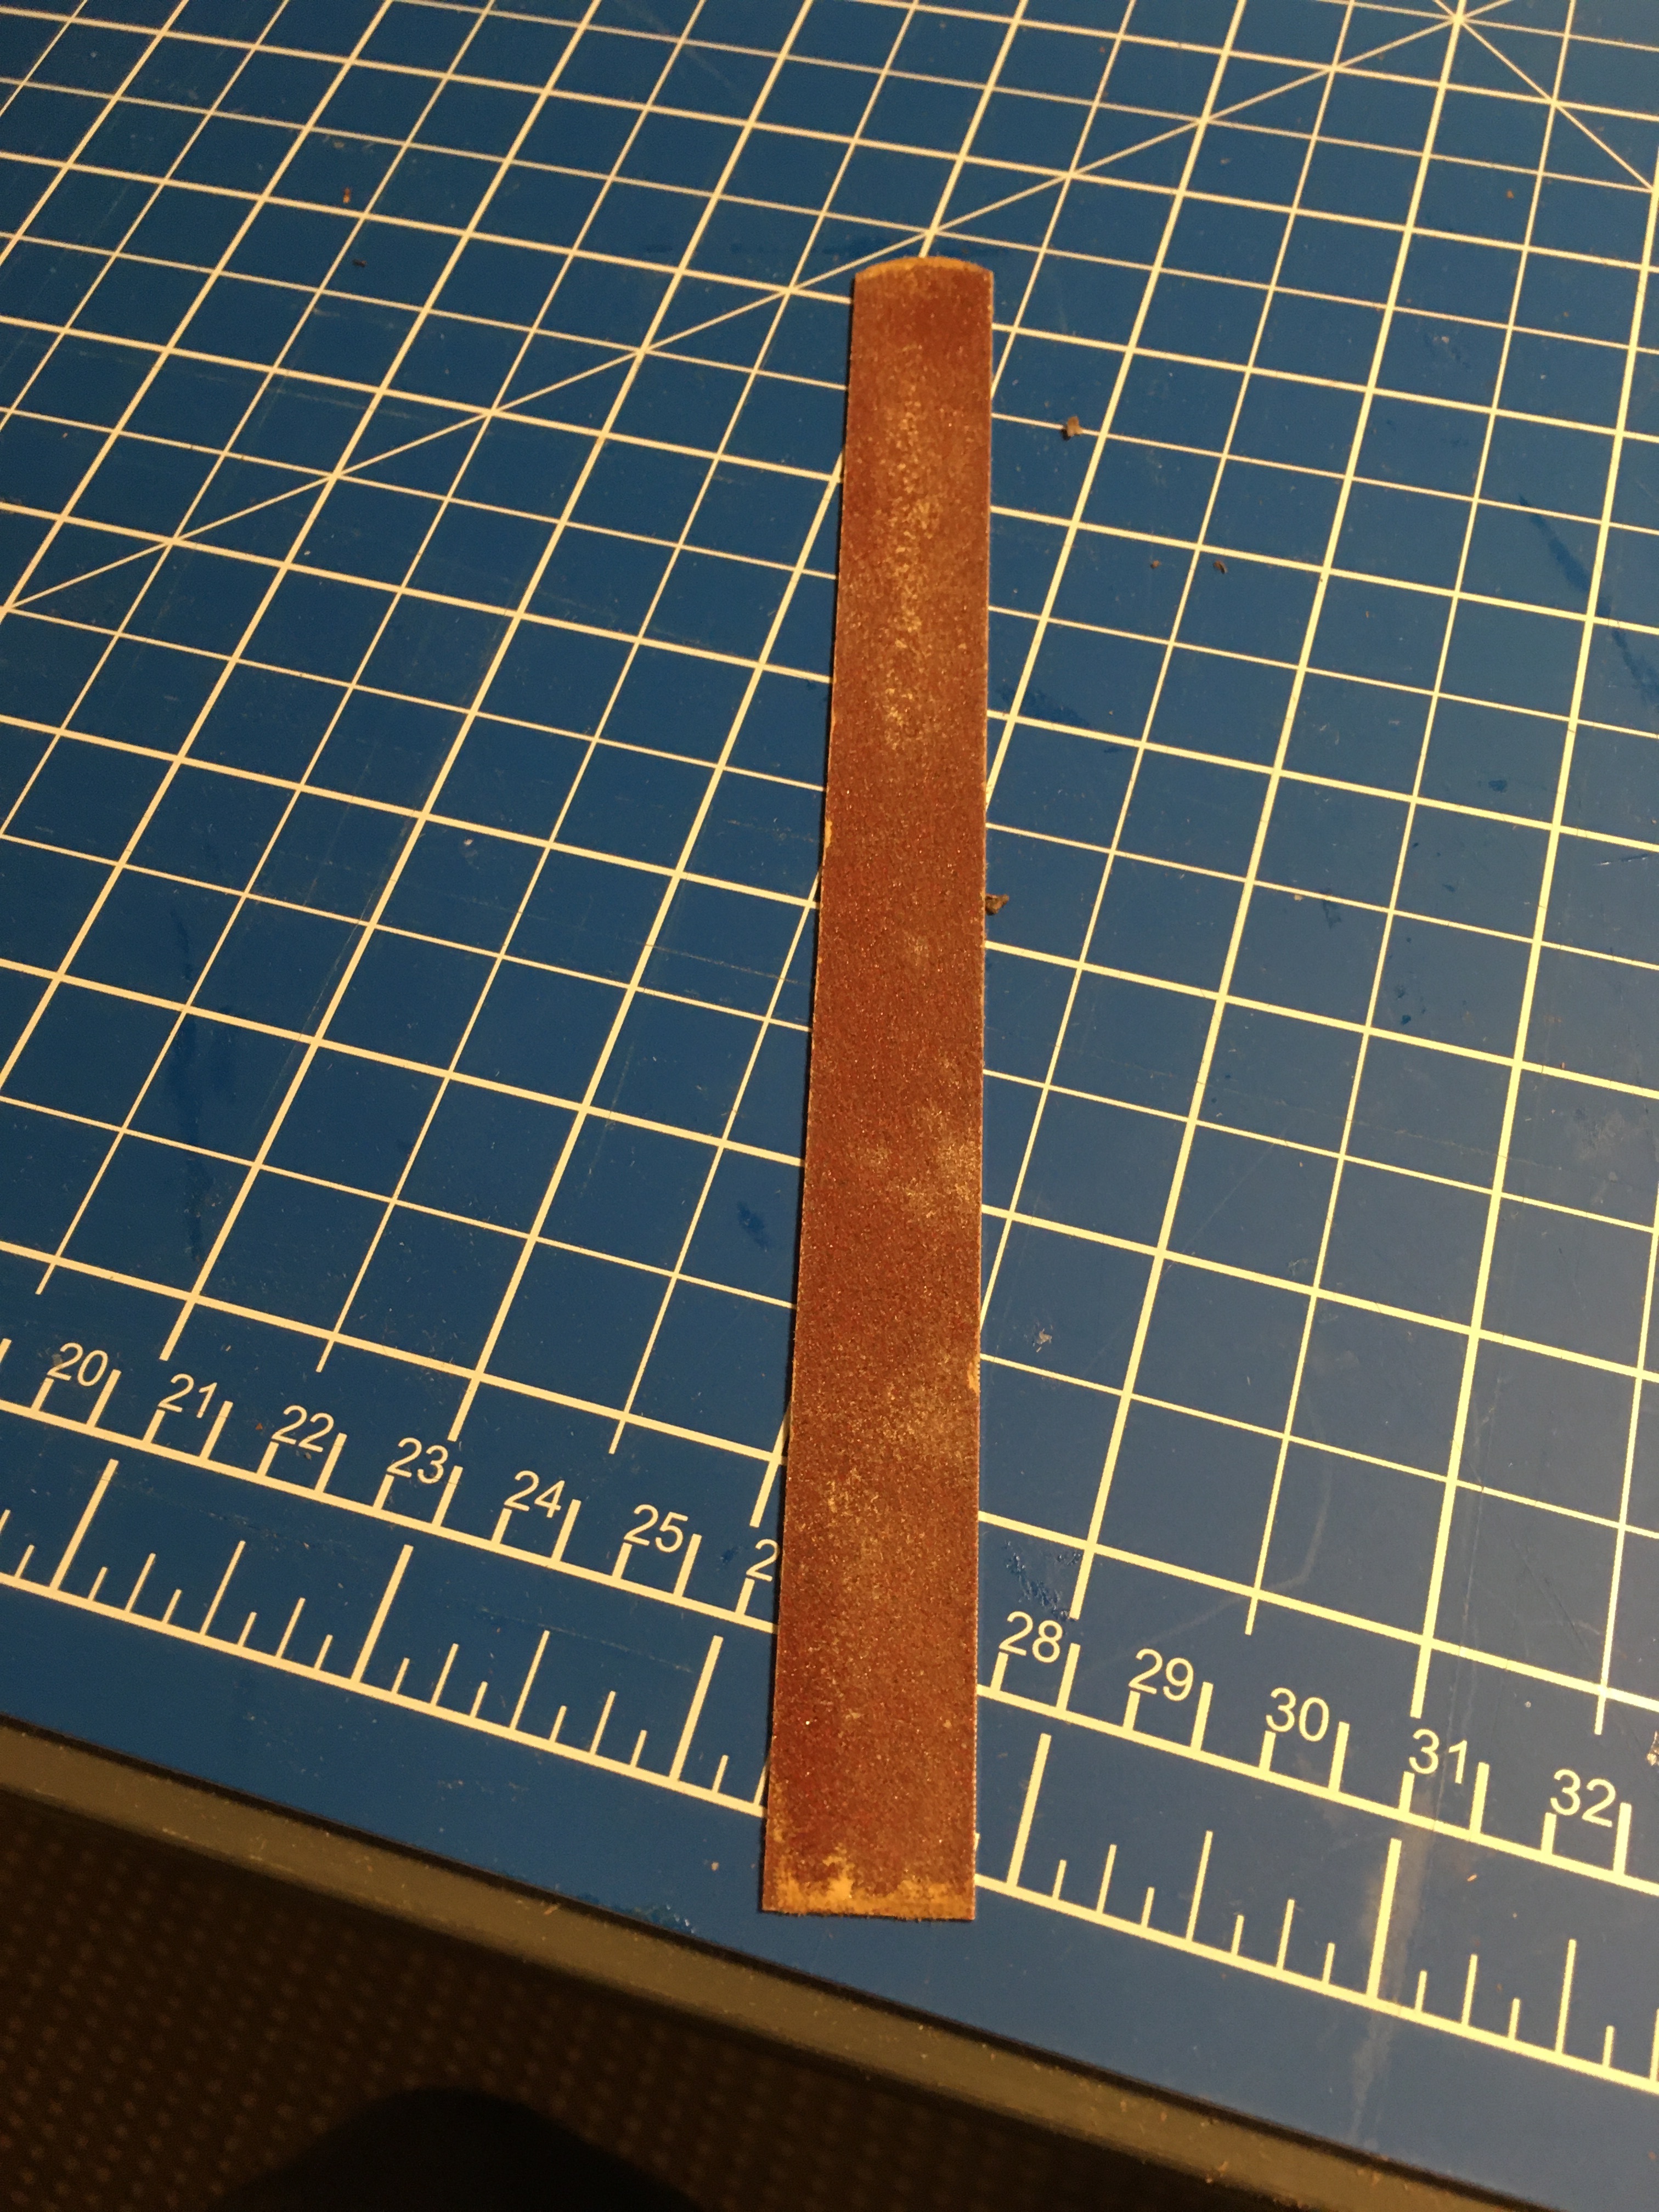
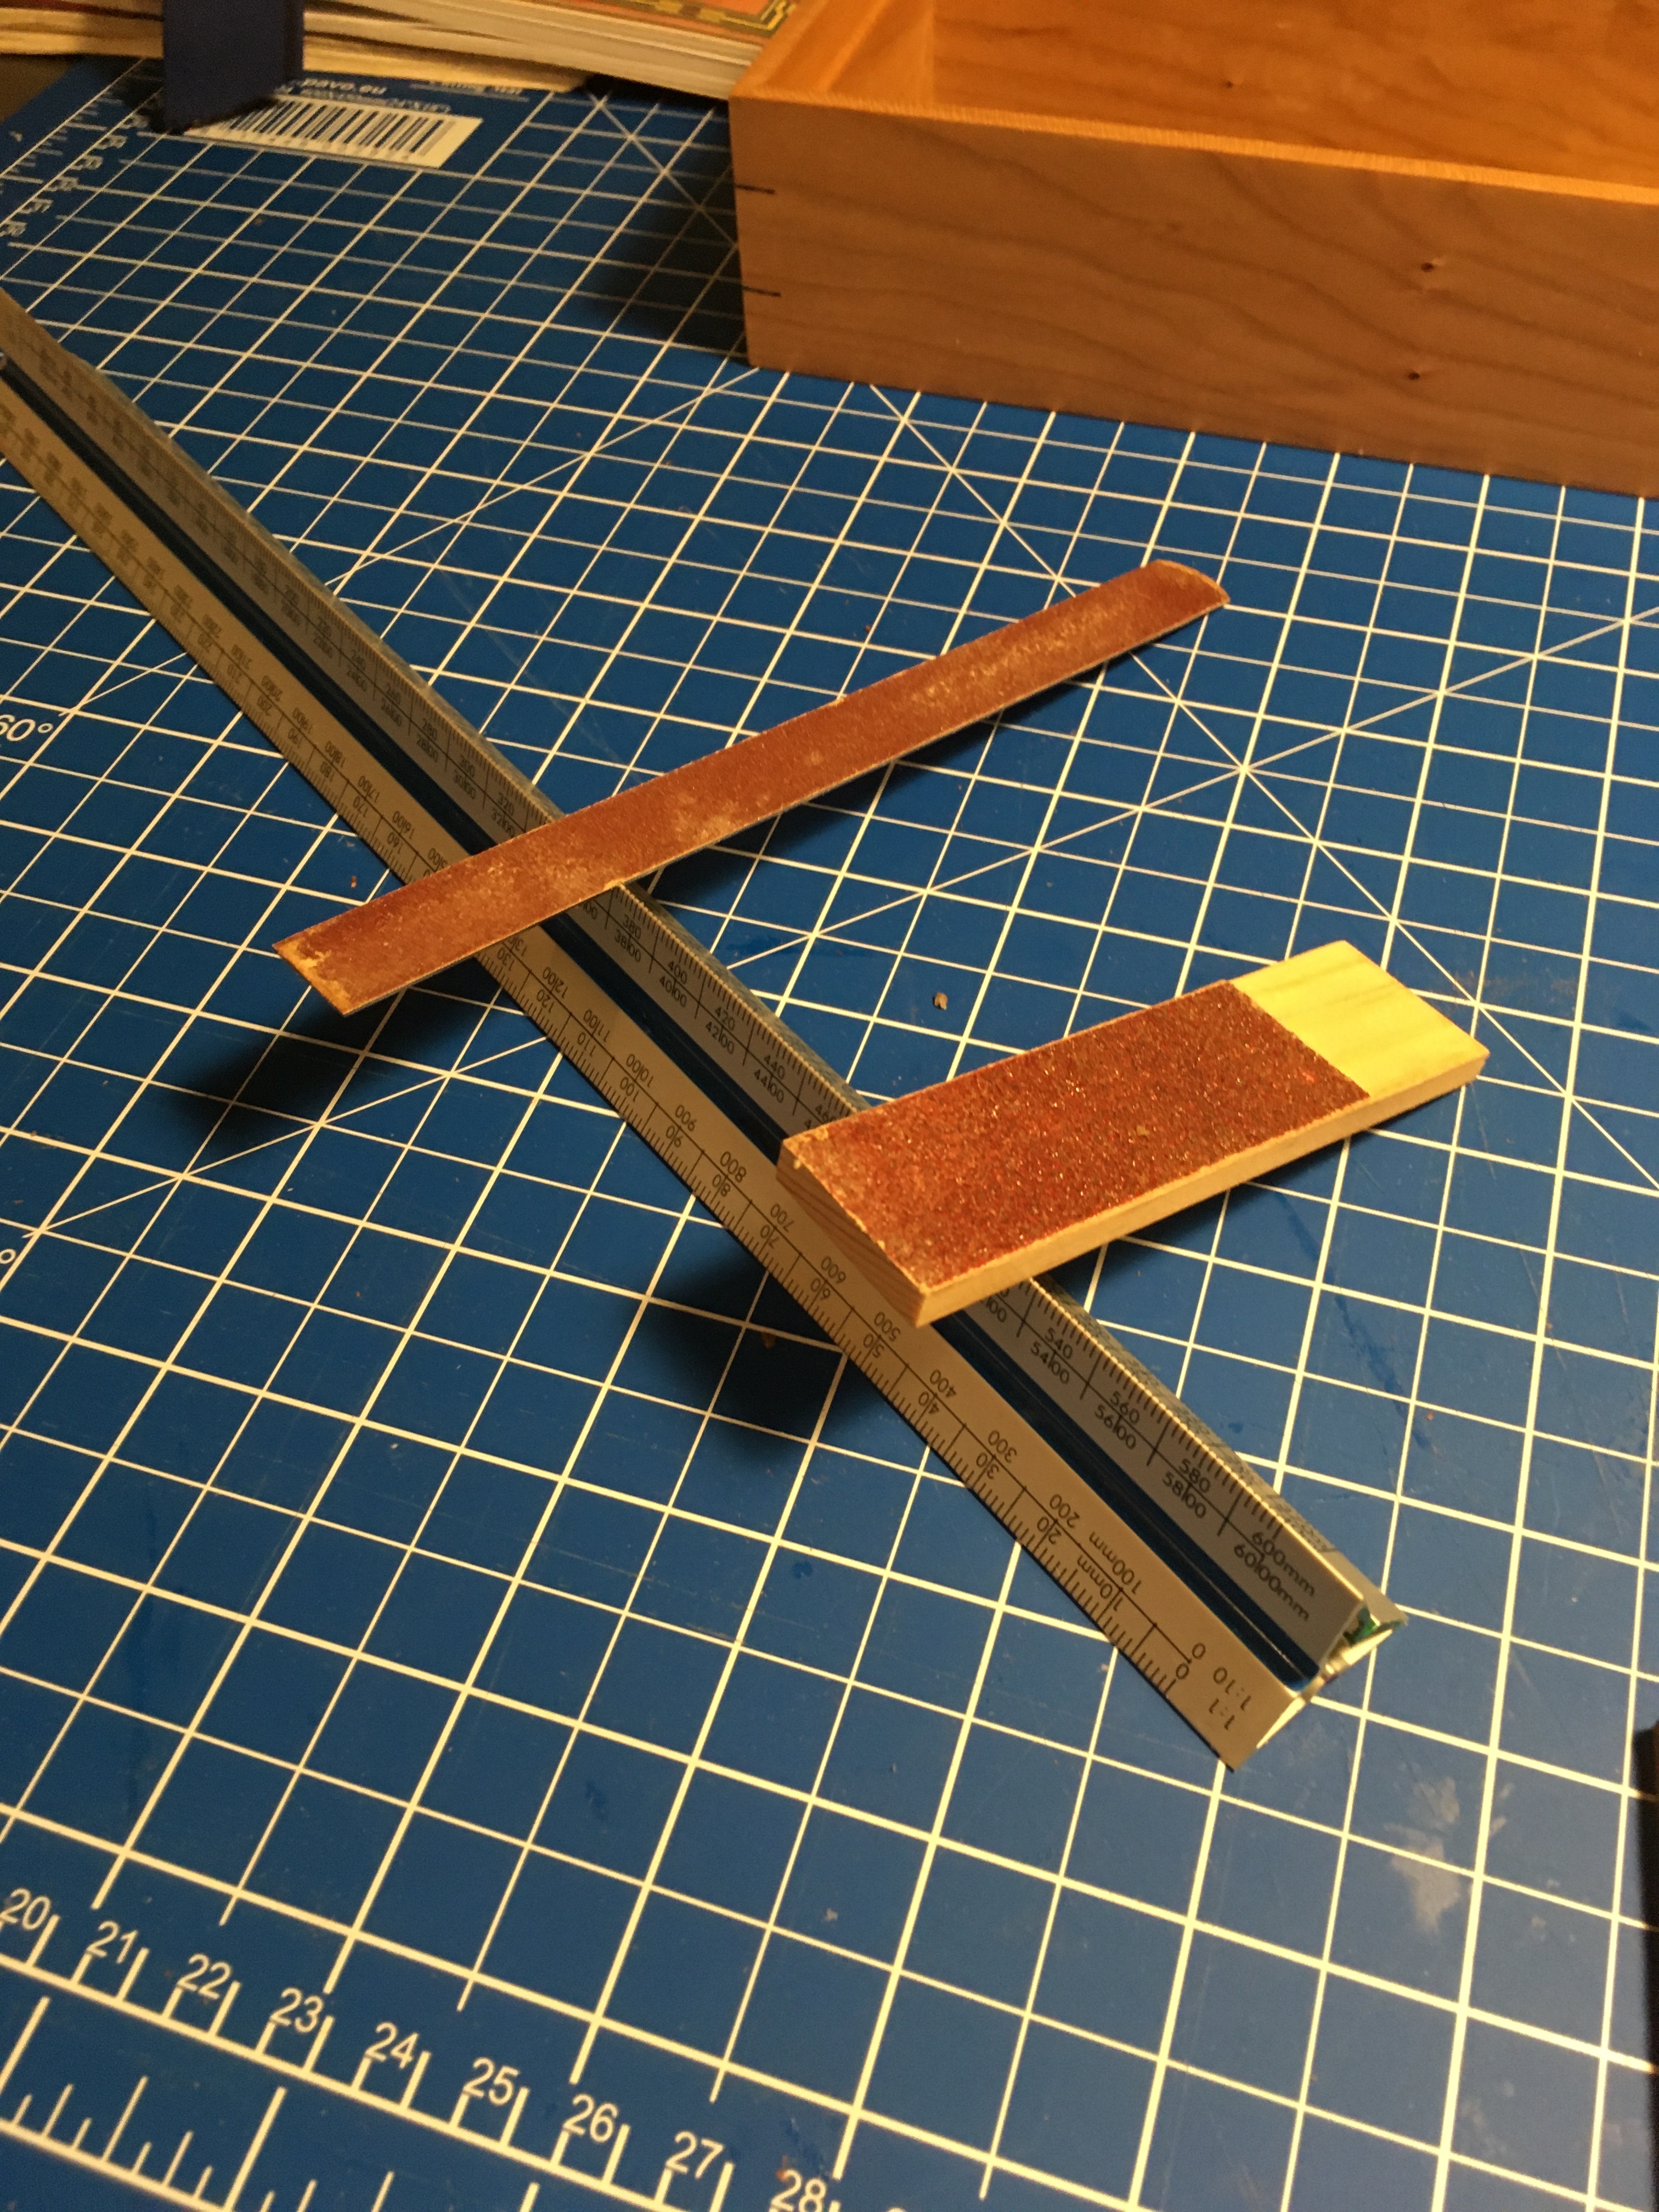
Same issue, different solution. A piece of 120 grit abrasive stuck to the back of a rule is another effective way to stop the rule moving about. I used double sided tape, I can remove the abrasive simply. The bond achieved with double sided tape is very strong, it’s useful for many jobs in my woodwork. It’s the cheap stuff, I can discern no difference in function, compared to expensive tape. A bonus with this rule is that it is perfect for a manicure etc. I am so proud of my nails girlfriend.
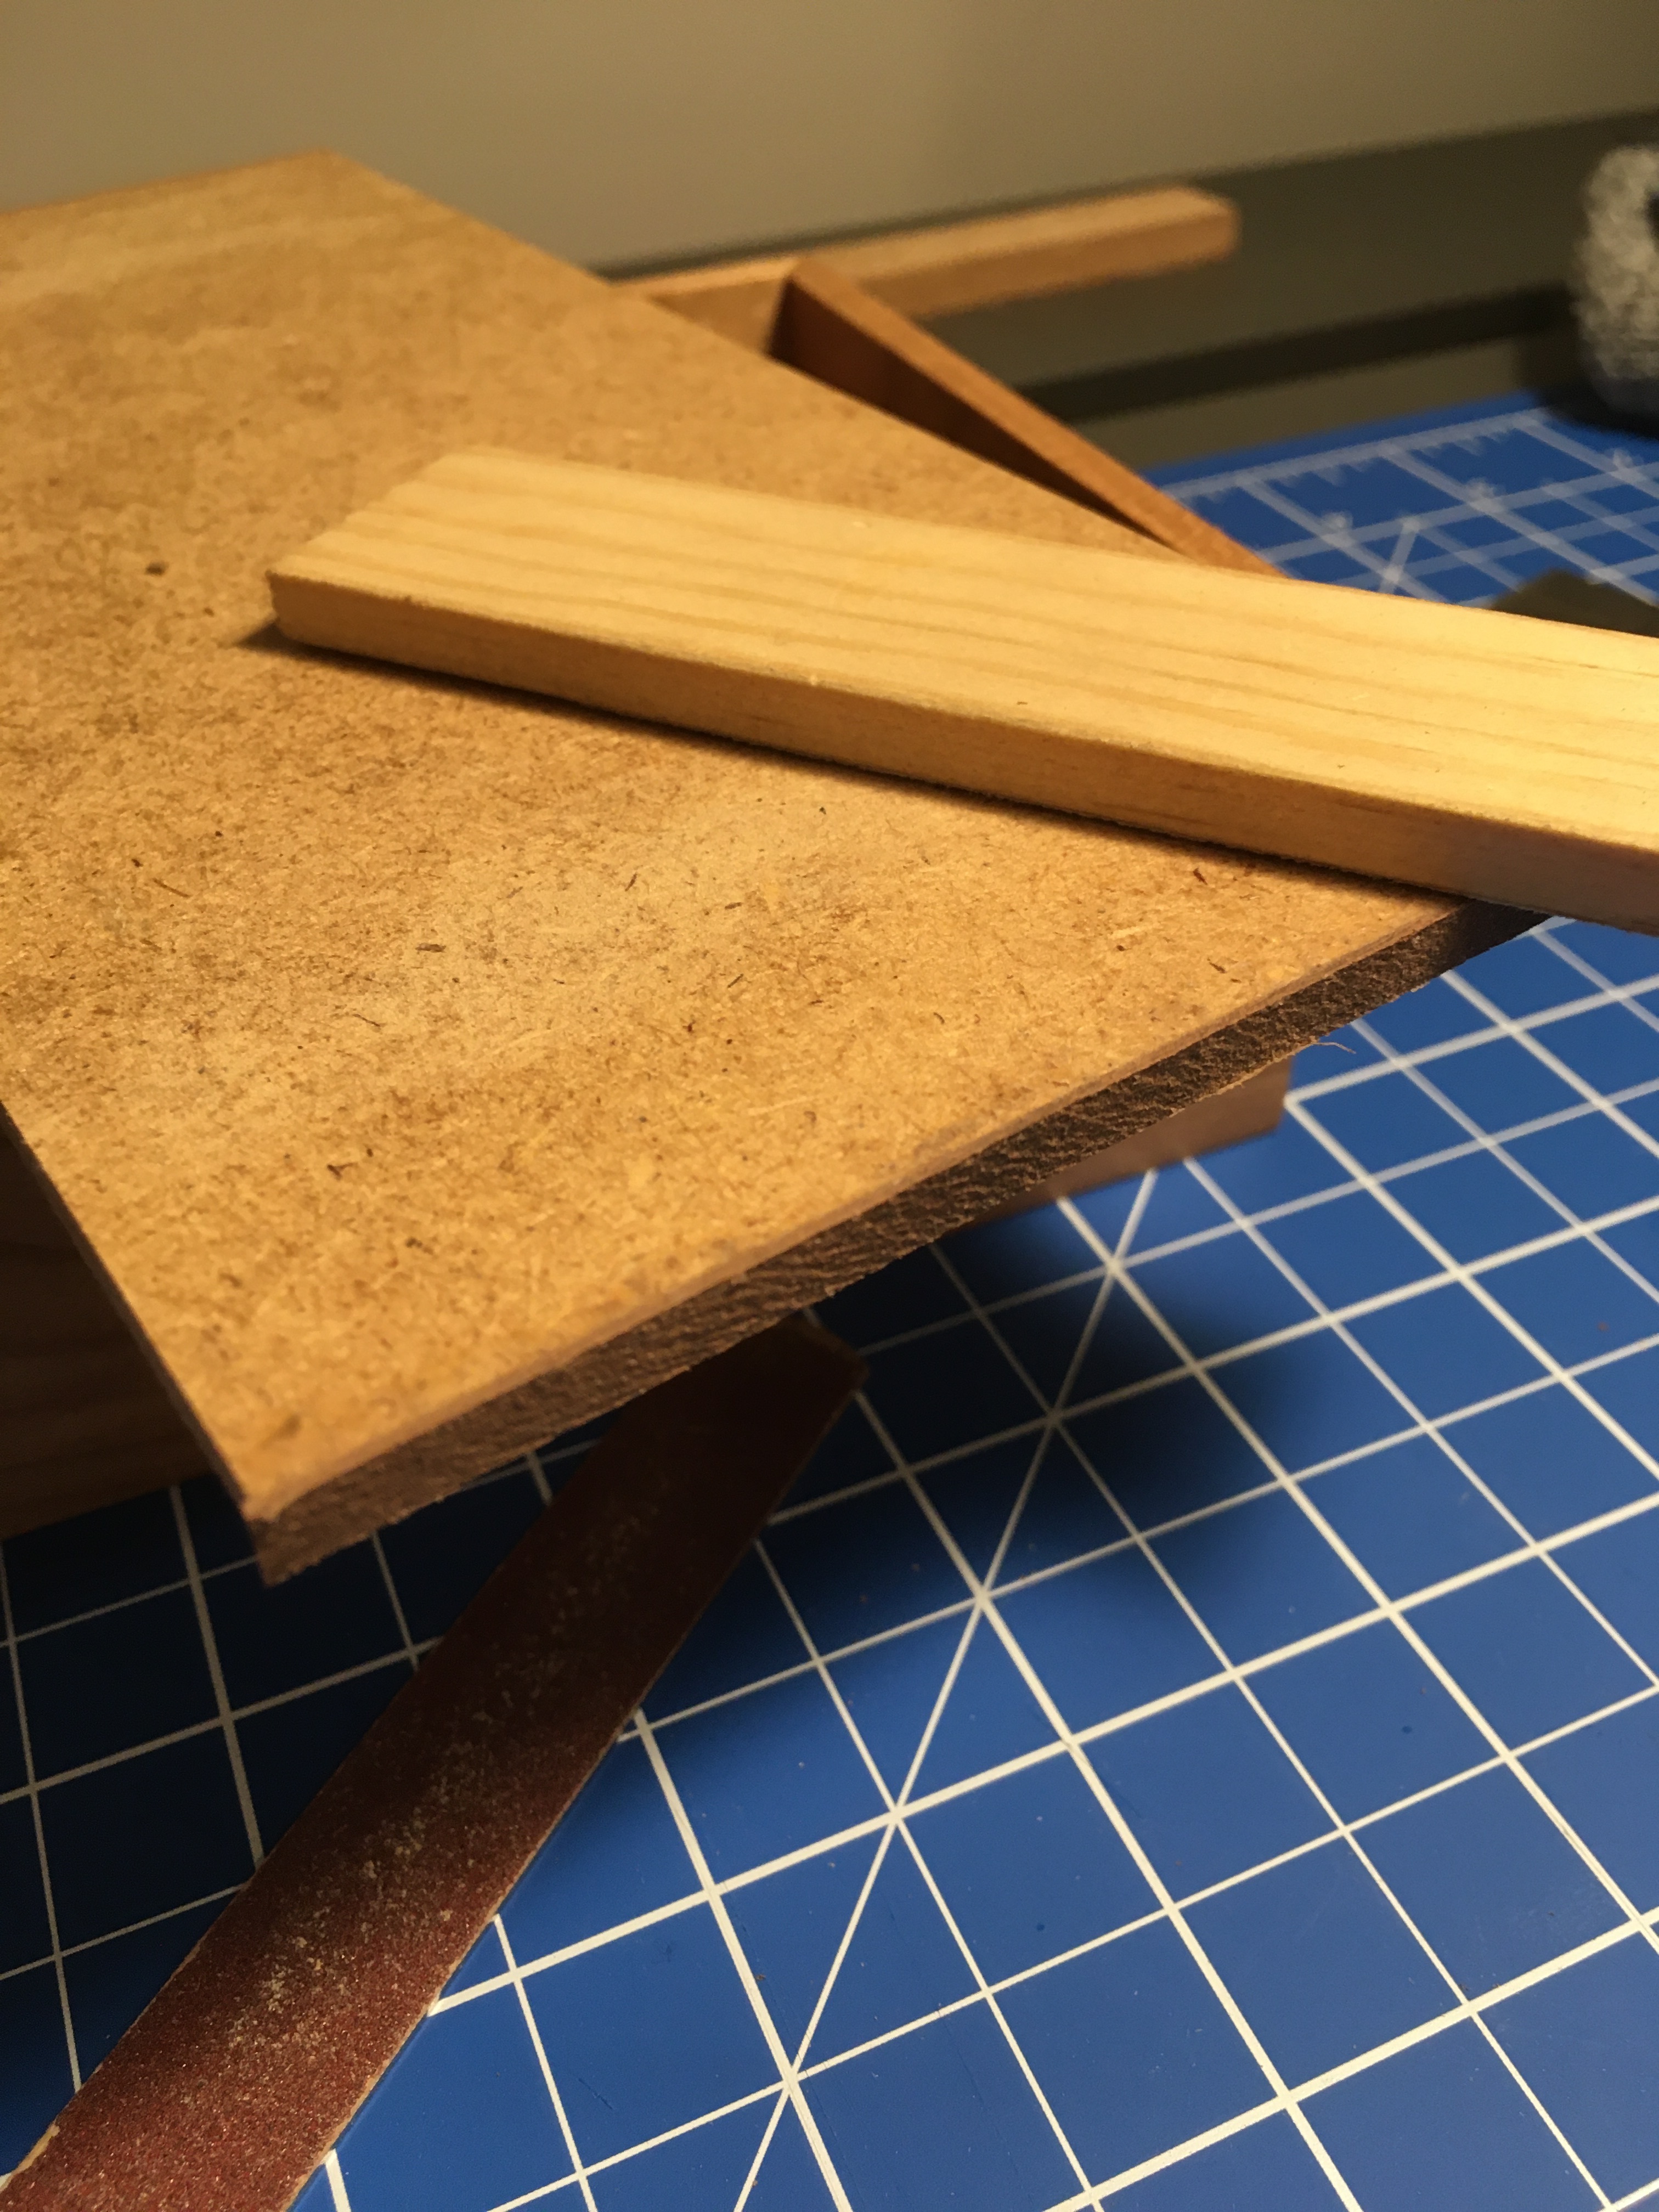
Trimming veneer is important. A flat piece of wood with some 120 grit stuck to some of the length makes a great trimmer for veneer. Resting the wooden end of the tool upon the panel whilst trimming the edge with the abrasive end ensures no over cutting. Ideally leave more wood, less abrasive. I already had this prepared so I used what I had. It still works just great. Obviously the geometry ensures a perfect result. I like simple stuff that works.
A metal scale rule made of aluminium. Because of the shape, just the two edges contact the veneer when you cut. The result is a very solid platform when cutting. A normal rule wants to move about and it often does.
Same issue, different solution. A piece of 120 grit abrasive stuck to the back of a rule is another effective way to stop the rule moving about. I used double sided tape, I can remove the abrasive simply. The bond achieved with double sided tape is very strong, it’s useful for many jobs in my woodwork. It’s the cheap stuff, I can discern no difference in function, compared to expensive tape. A bonus with this rule is that it is perfect for a manicure etc. I am so proud of my nails girlfriend.
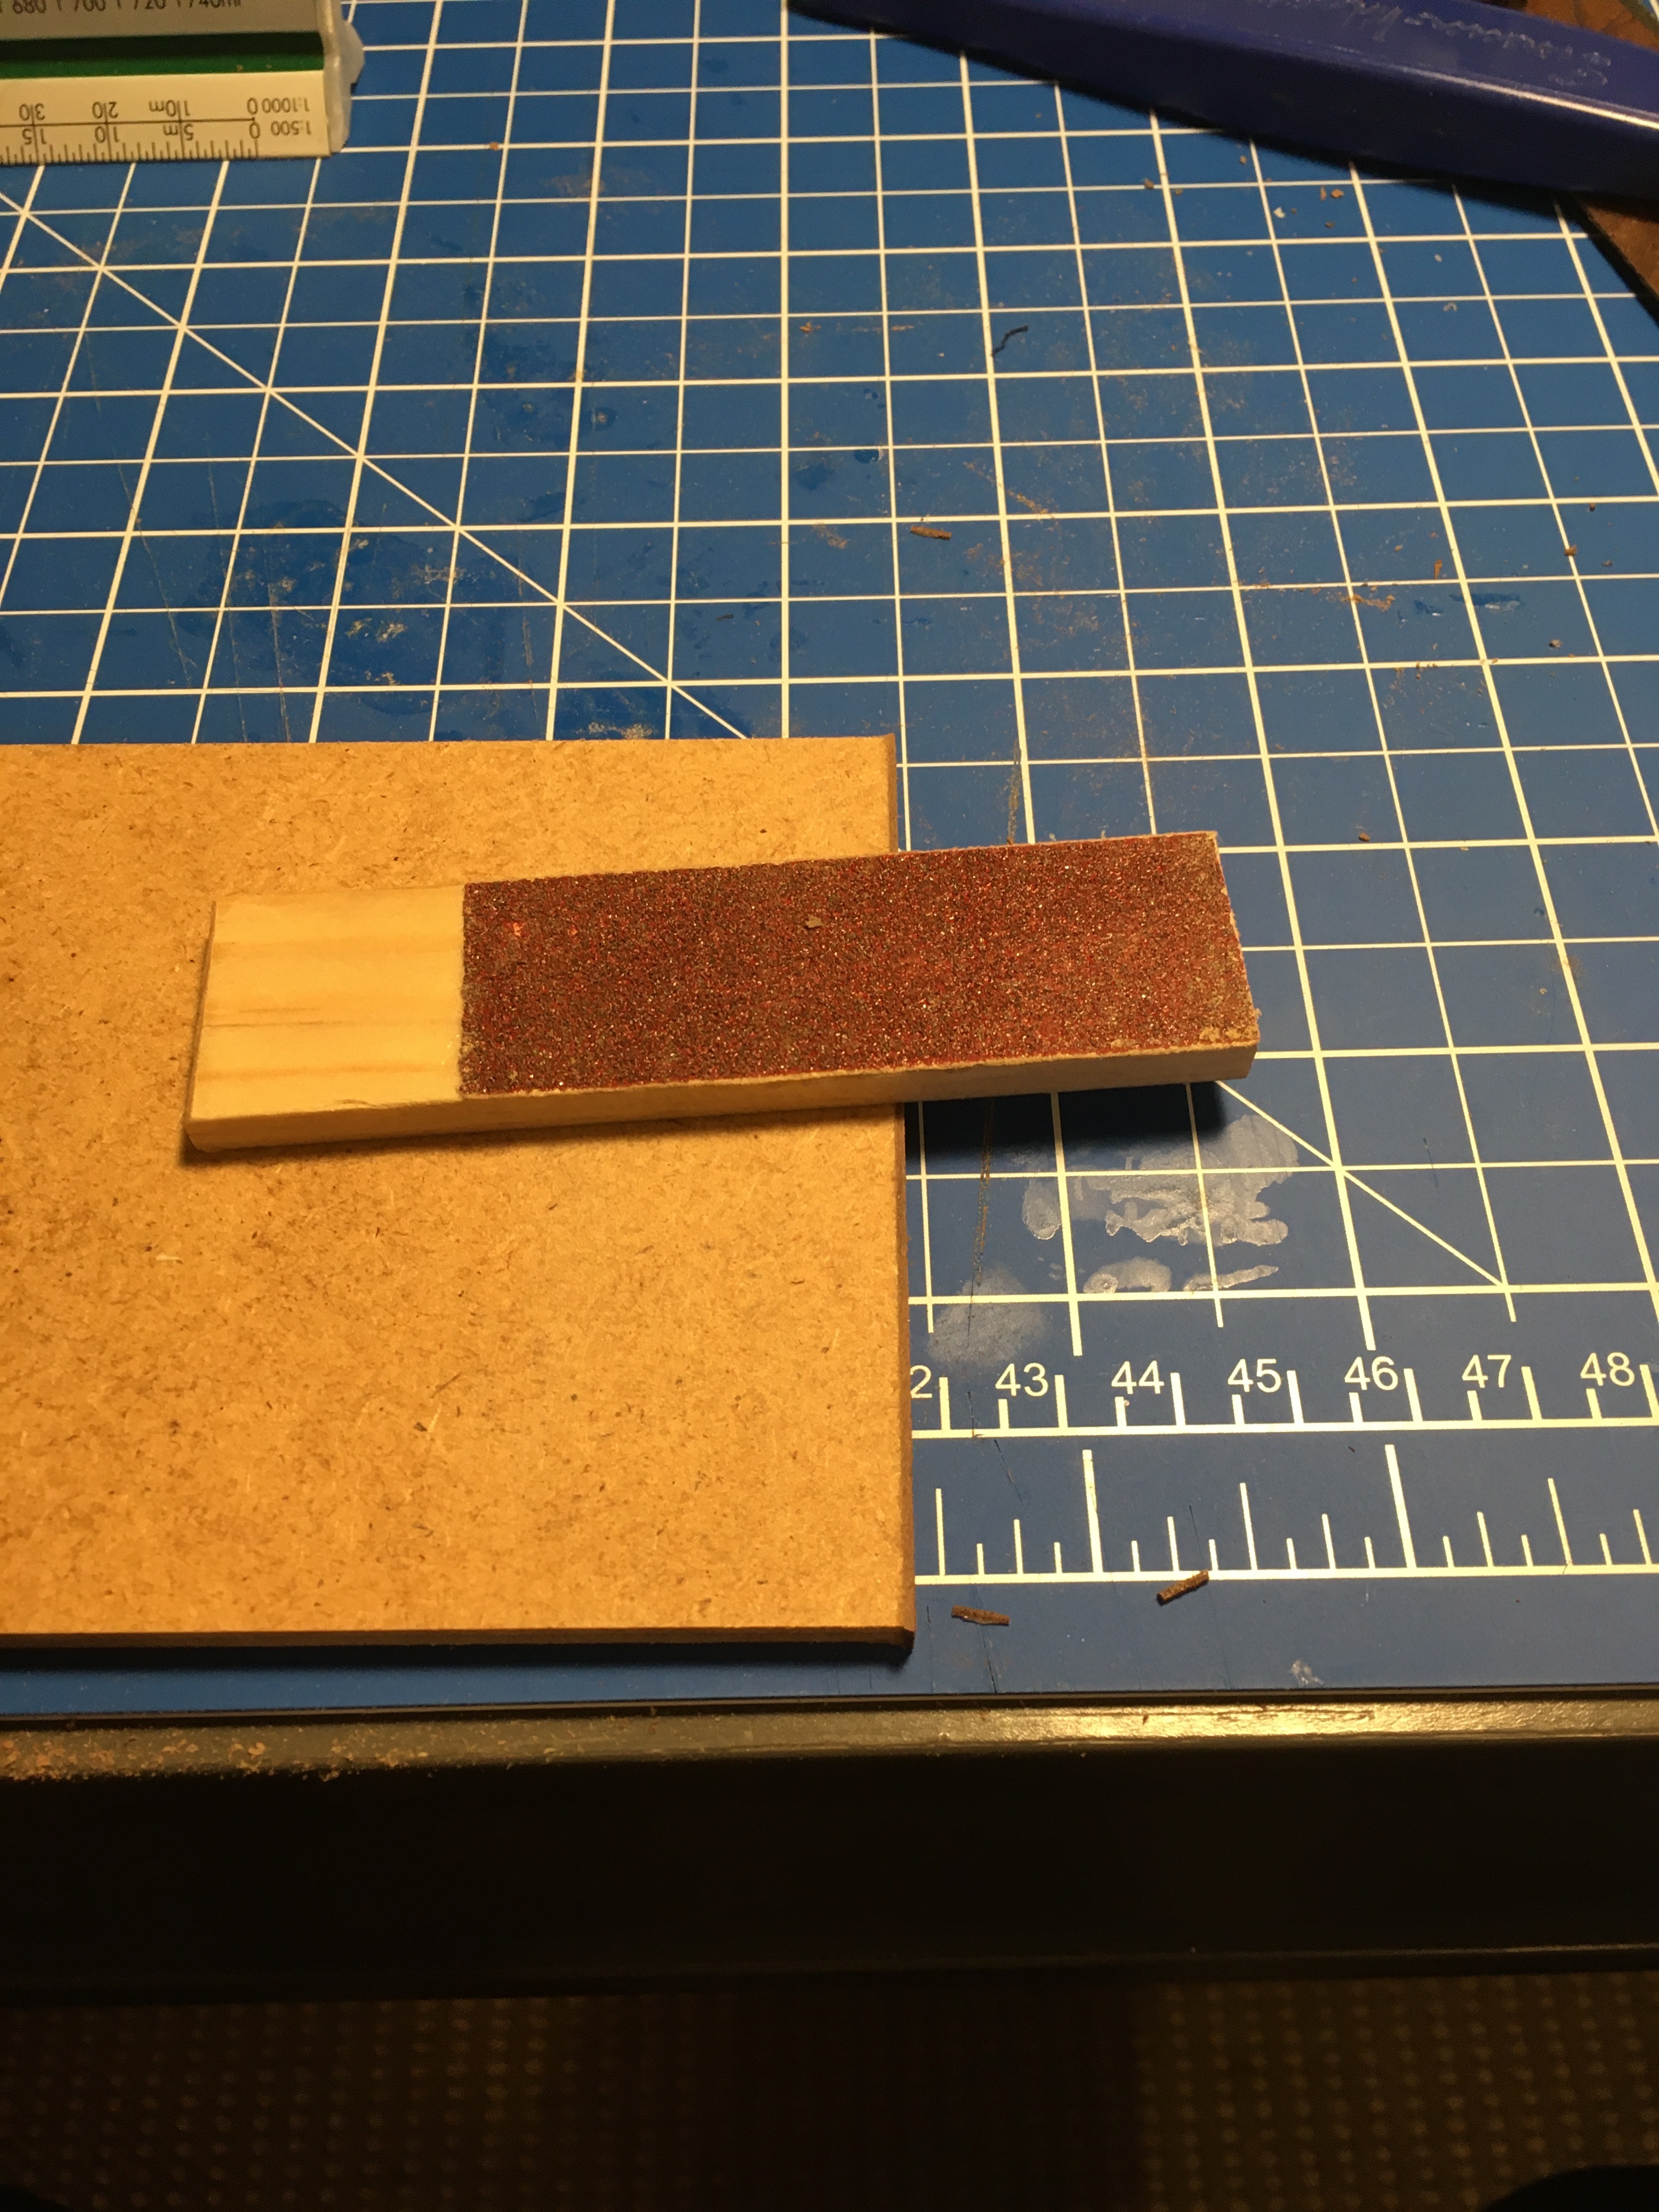
Trimming veneer is important. A flat piece of wood with some 120 grit stuck to some of the length makes a great trimmer for veneer. Resting the wooden end of the tool upon the panel whilst trimming the edge with the abrasive end ensures no over cutting. Ideally leave more wood, less abrasive. I already had this prepared so I used what I had. It still works just great. Obviously the geometry ensures a perfect result. I like simple stuff that works.
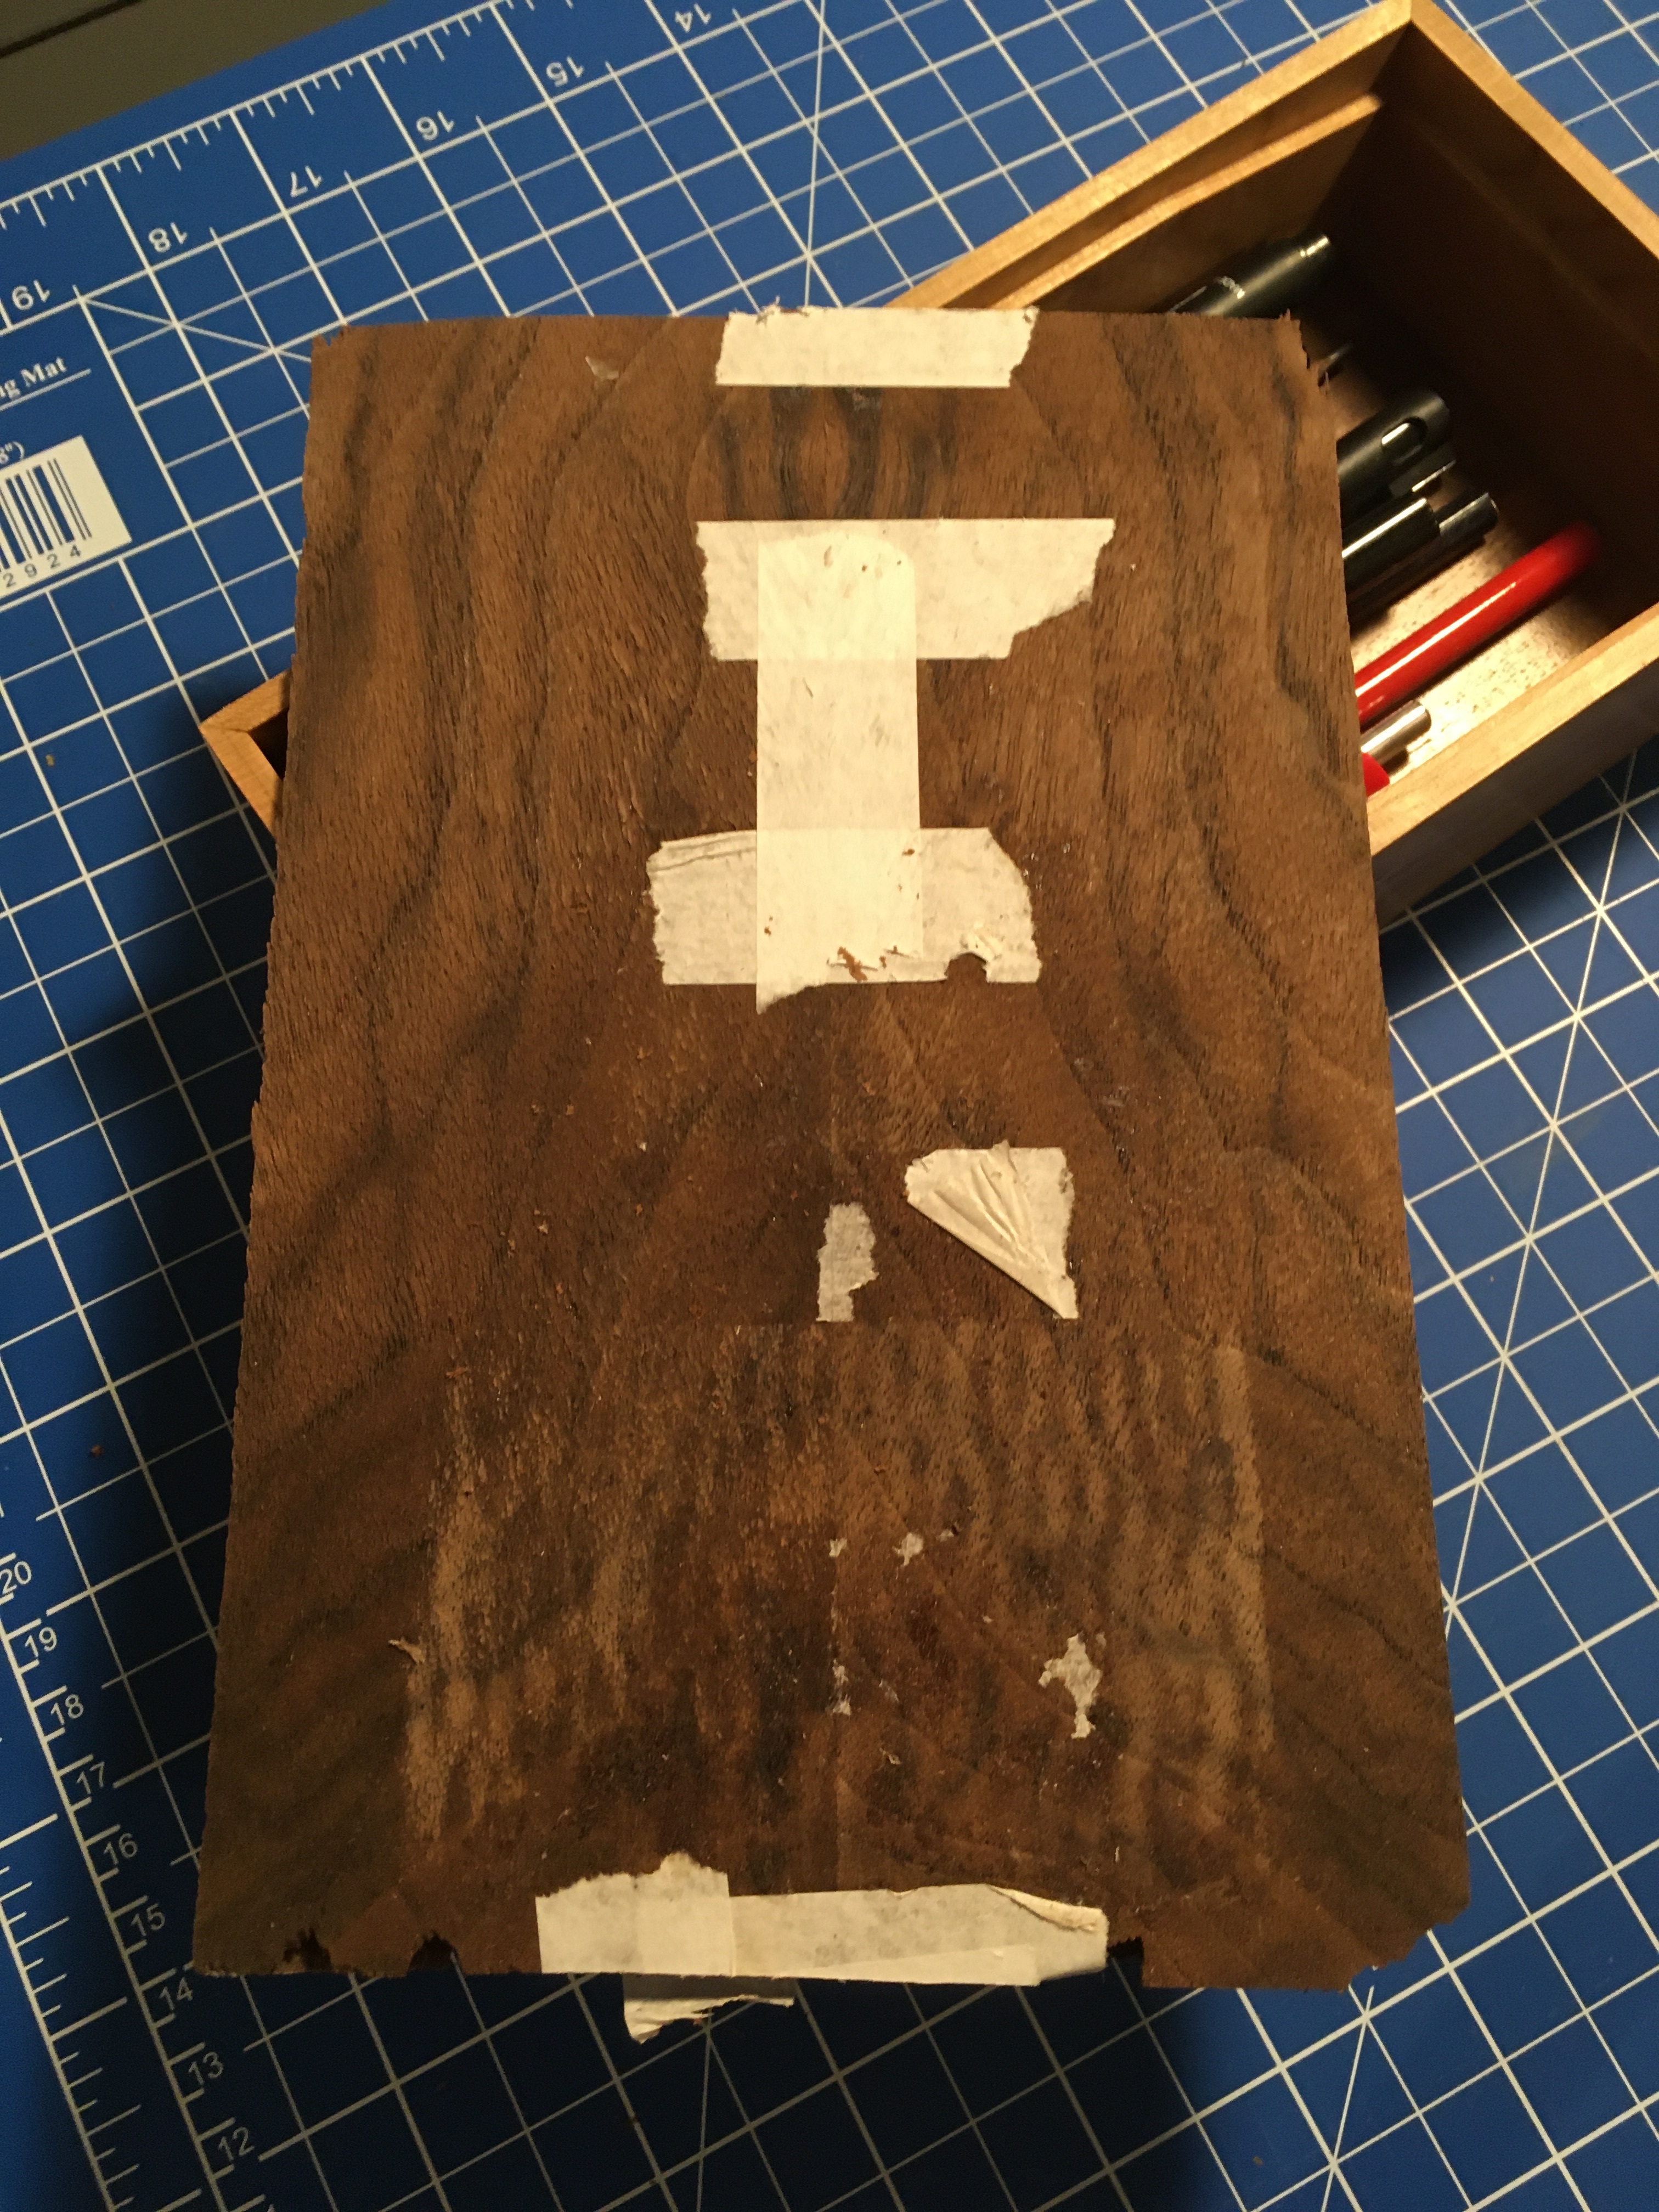
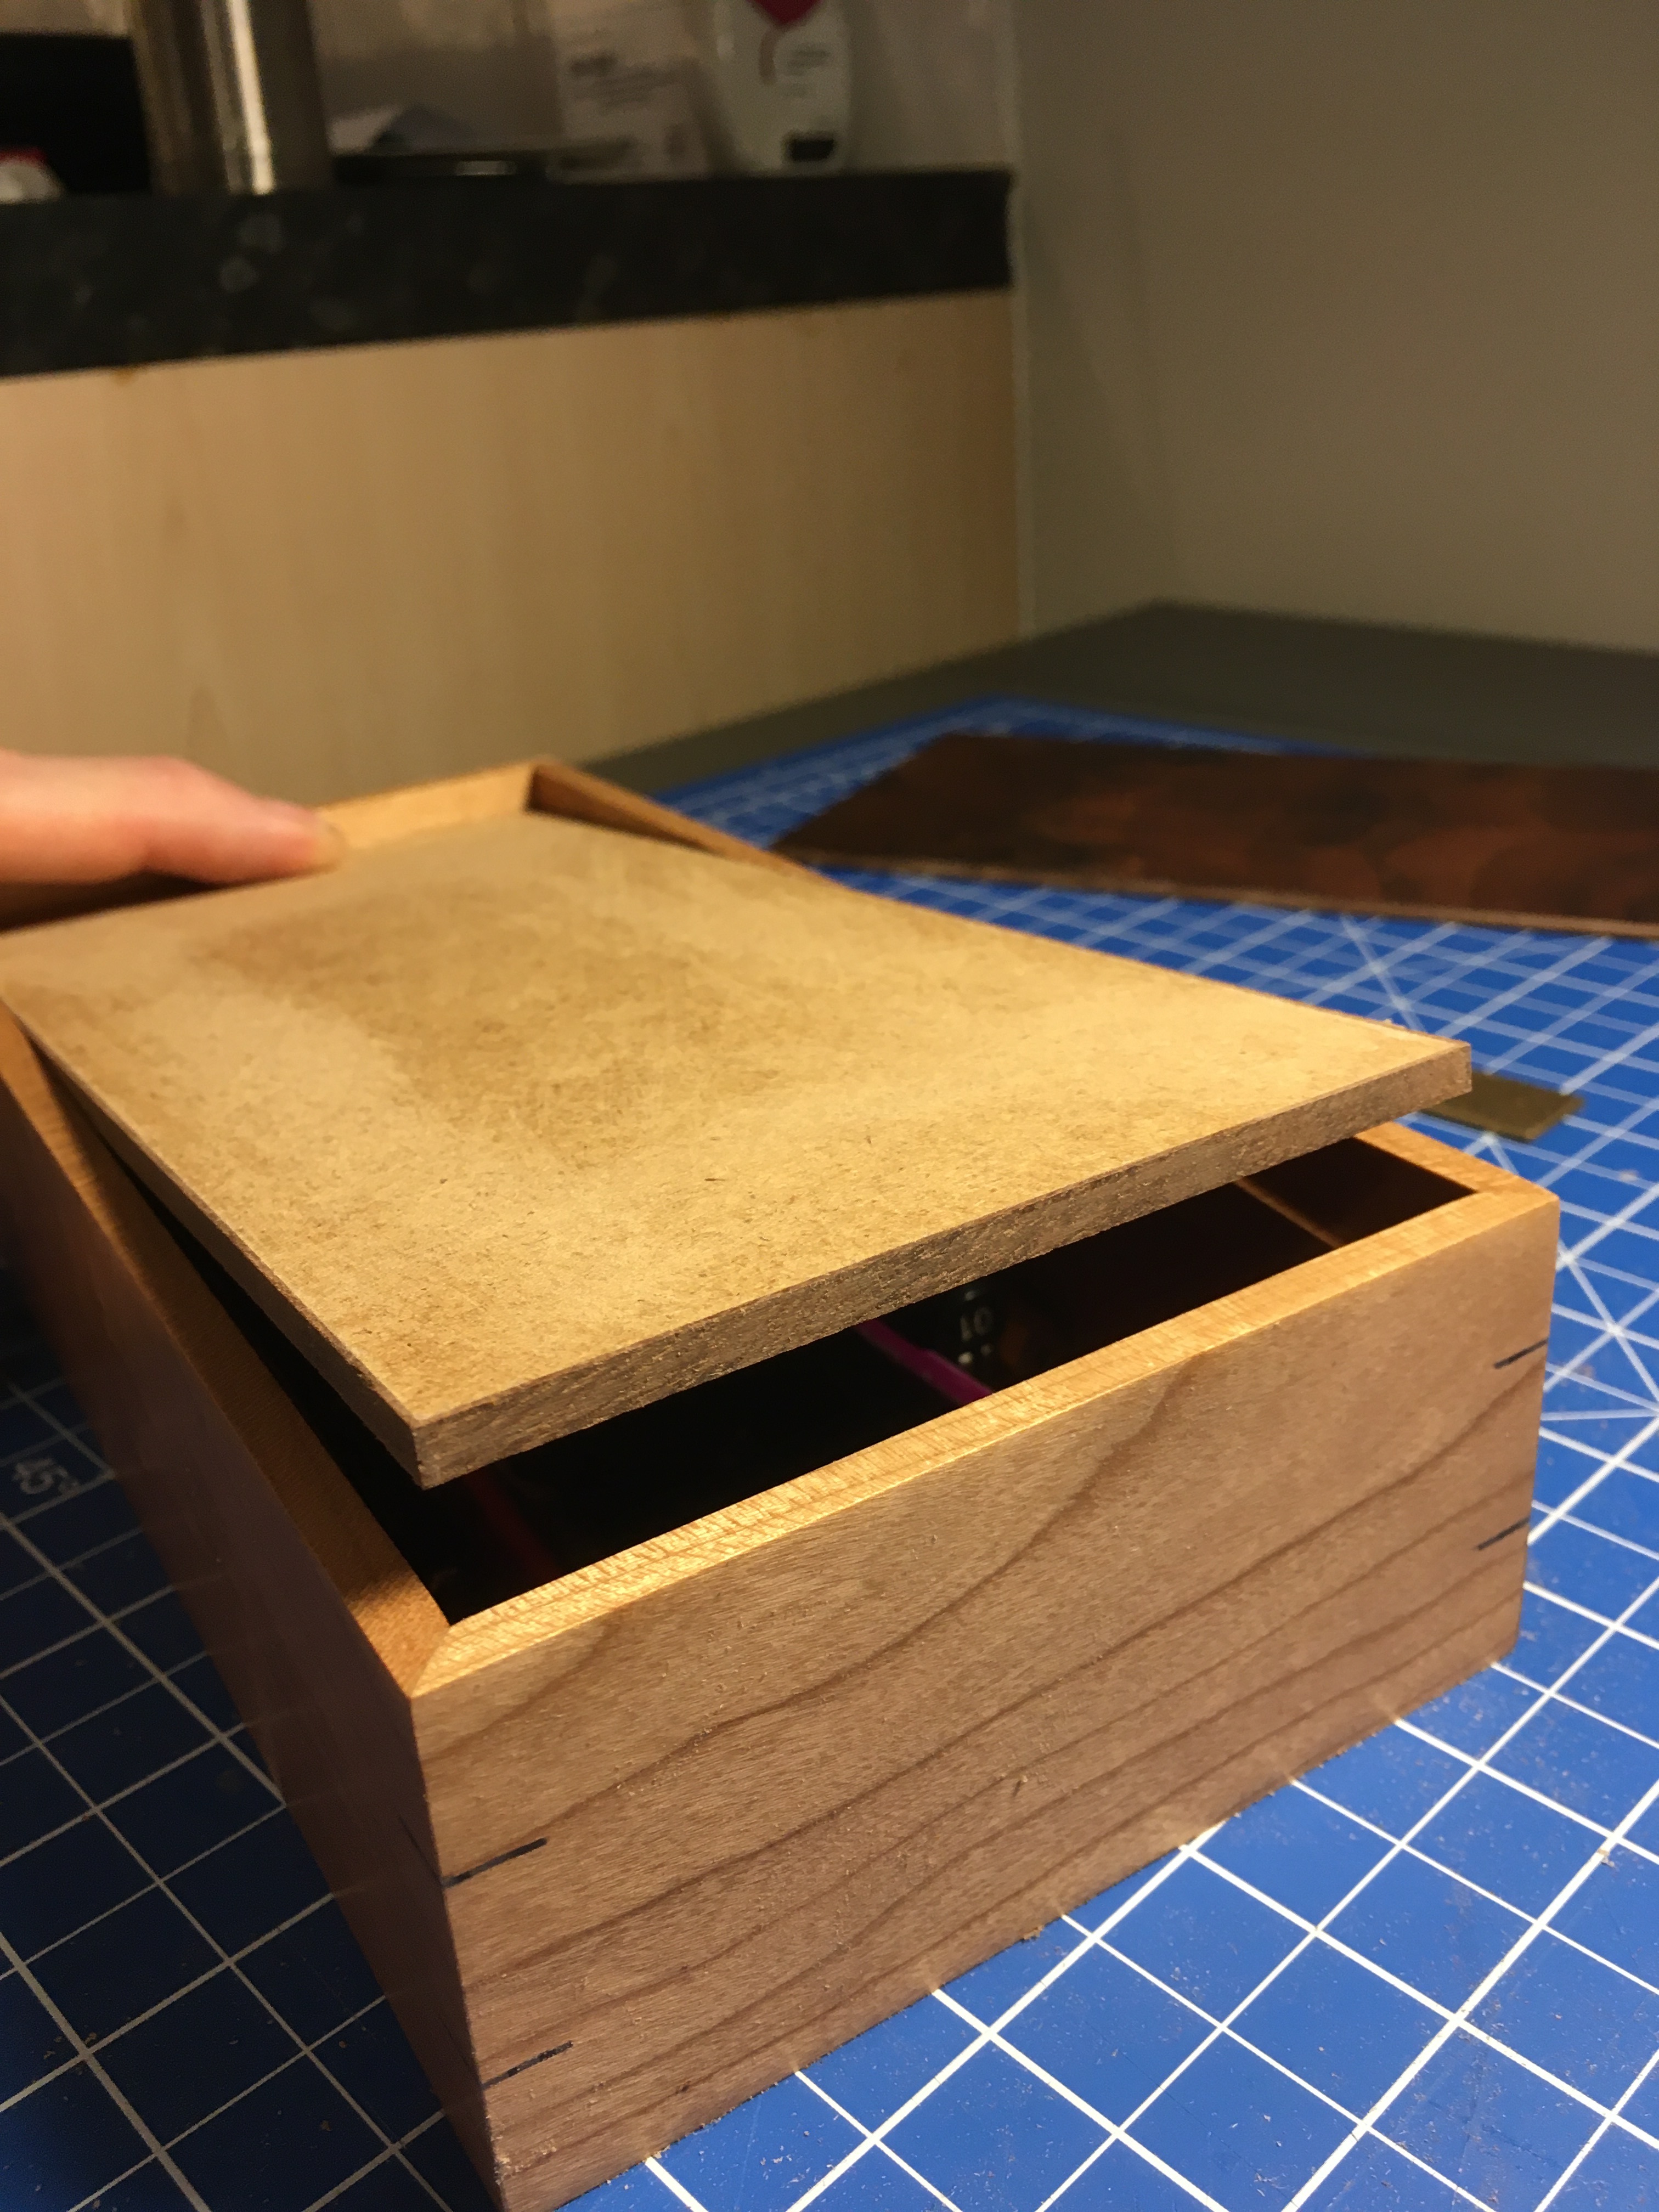
Just finished trimming the lipping on the lid. I am pretty happy with the fit, I didn’t want it too tight, I designed to get a fingers worth of gap, when the lid is depressed. There is a great article in fine woodworking, anxiety and depression in lids and doors, well worth a read. I spent ages trying to come up with a way to veneer the lid without getting glue embedded in the edge veneer. I didn’t want to use white glue even though the clean up is easier because of the problem of slippage. I have to center the veneer as it’s a book match. Anyway I was thinking oh maybe use glue film, use white glue and try to be really careful, take the lid out of the clamps after it’s grabbed and clean up the squeeze out, iron on white glue! I spent ages and I couldn’t see a simple way to use cascamite without getting glue in the edge and then having to live with the slight difference in the finish. It’s so simple, I can just mask the edge with painters tape/ masking tape etc. I spent days thinking about it, it’s so simple I couldn’t see the simplicity. So, I can use cascamite and I don’t have to worry about the veneer slipping. Cascamite is great like that, if I had a vacuum press it would be a lot easier to use white glue but with cauls I have found white glue slides around. This box is not an avenue I will be exploring more. Long mitres are best left for machine woodwork, in the main. I will be making a similar box using hand tool appropriate construction. I like simple stuff and I see nothing wrong with exposed, simple joints. I have learned the direction I want to travel, from a project I consider a dead end for my mainly hand tool approach, so it’s all good stuff.
1 Like
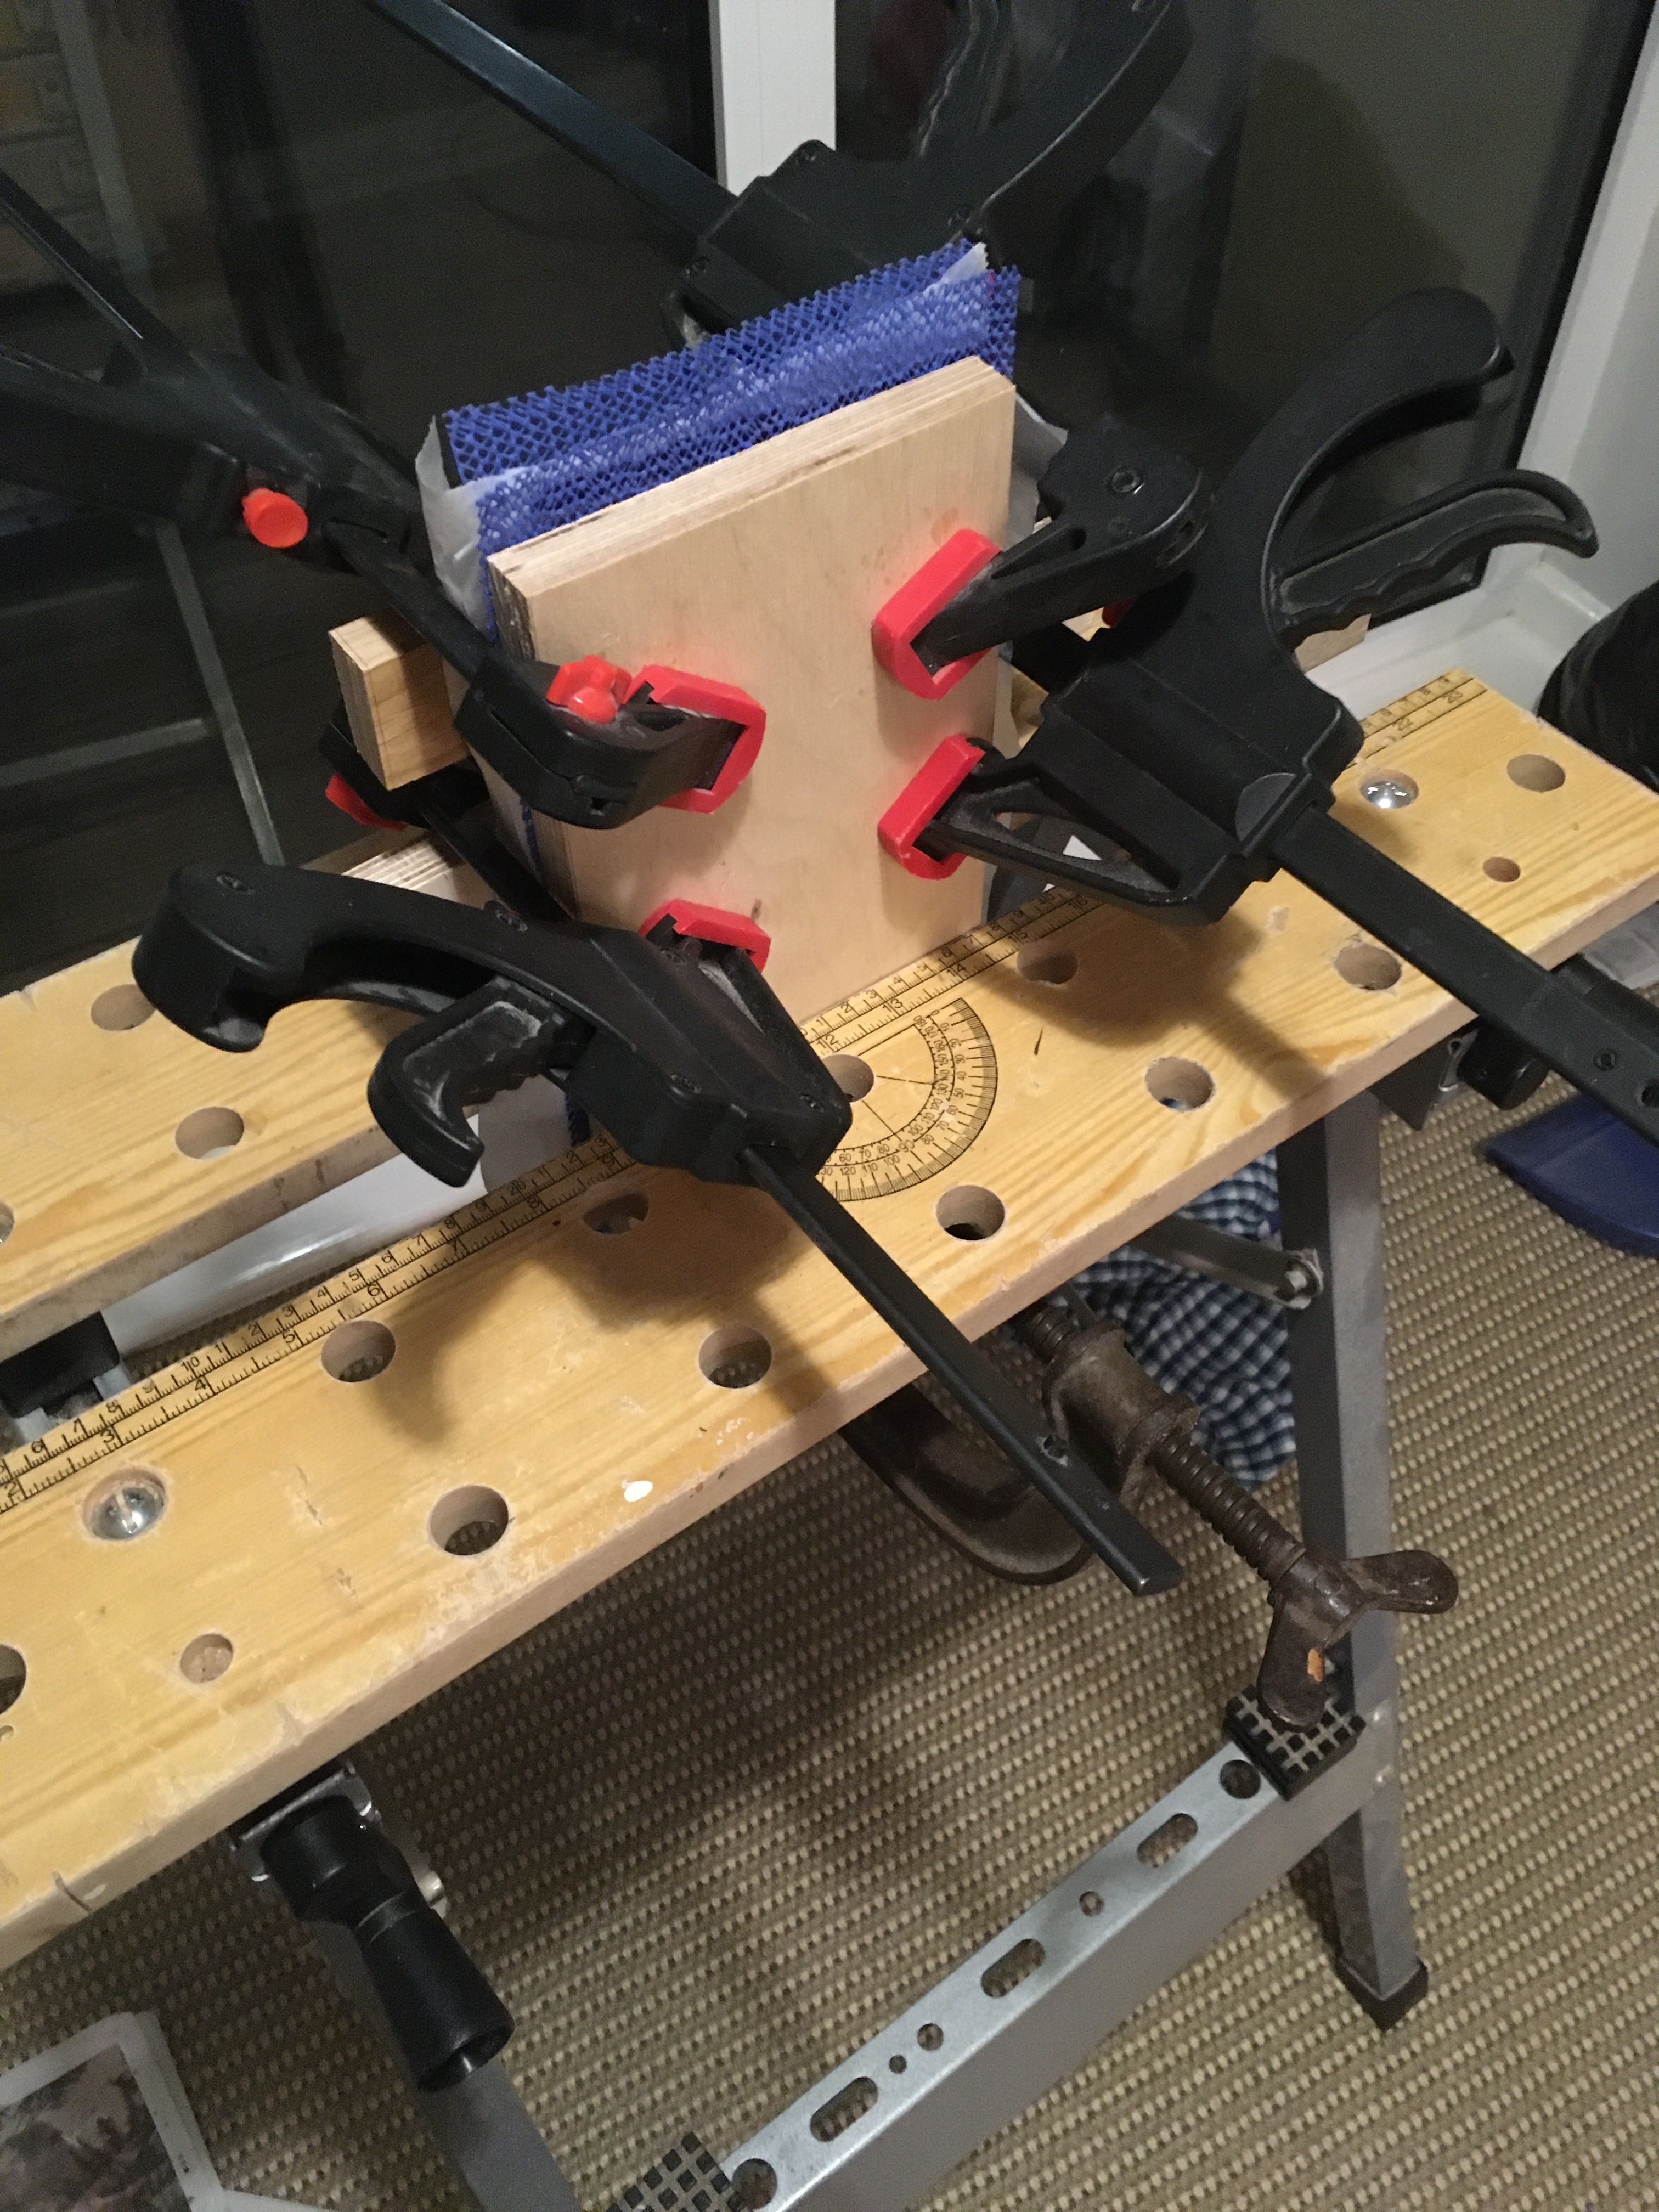
I just put the lid in the clamps. I am quite nervous about it because it’s a book match and it needs to stay put. I have not had any issues with cascamite but there is always a first time. I won’t know until morning, fingers crossed.