Finally finished the box I was working on and delivered it last night.
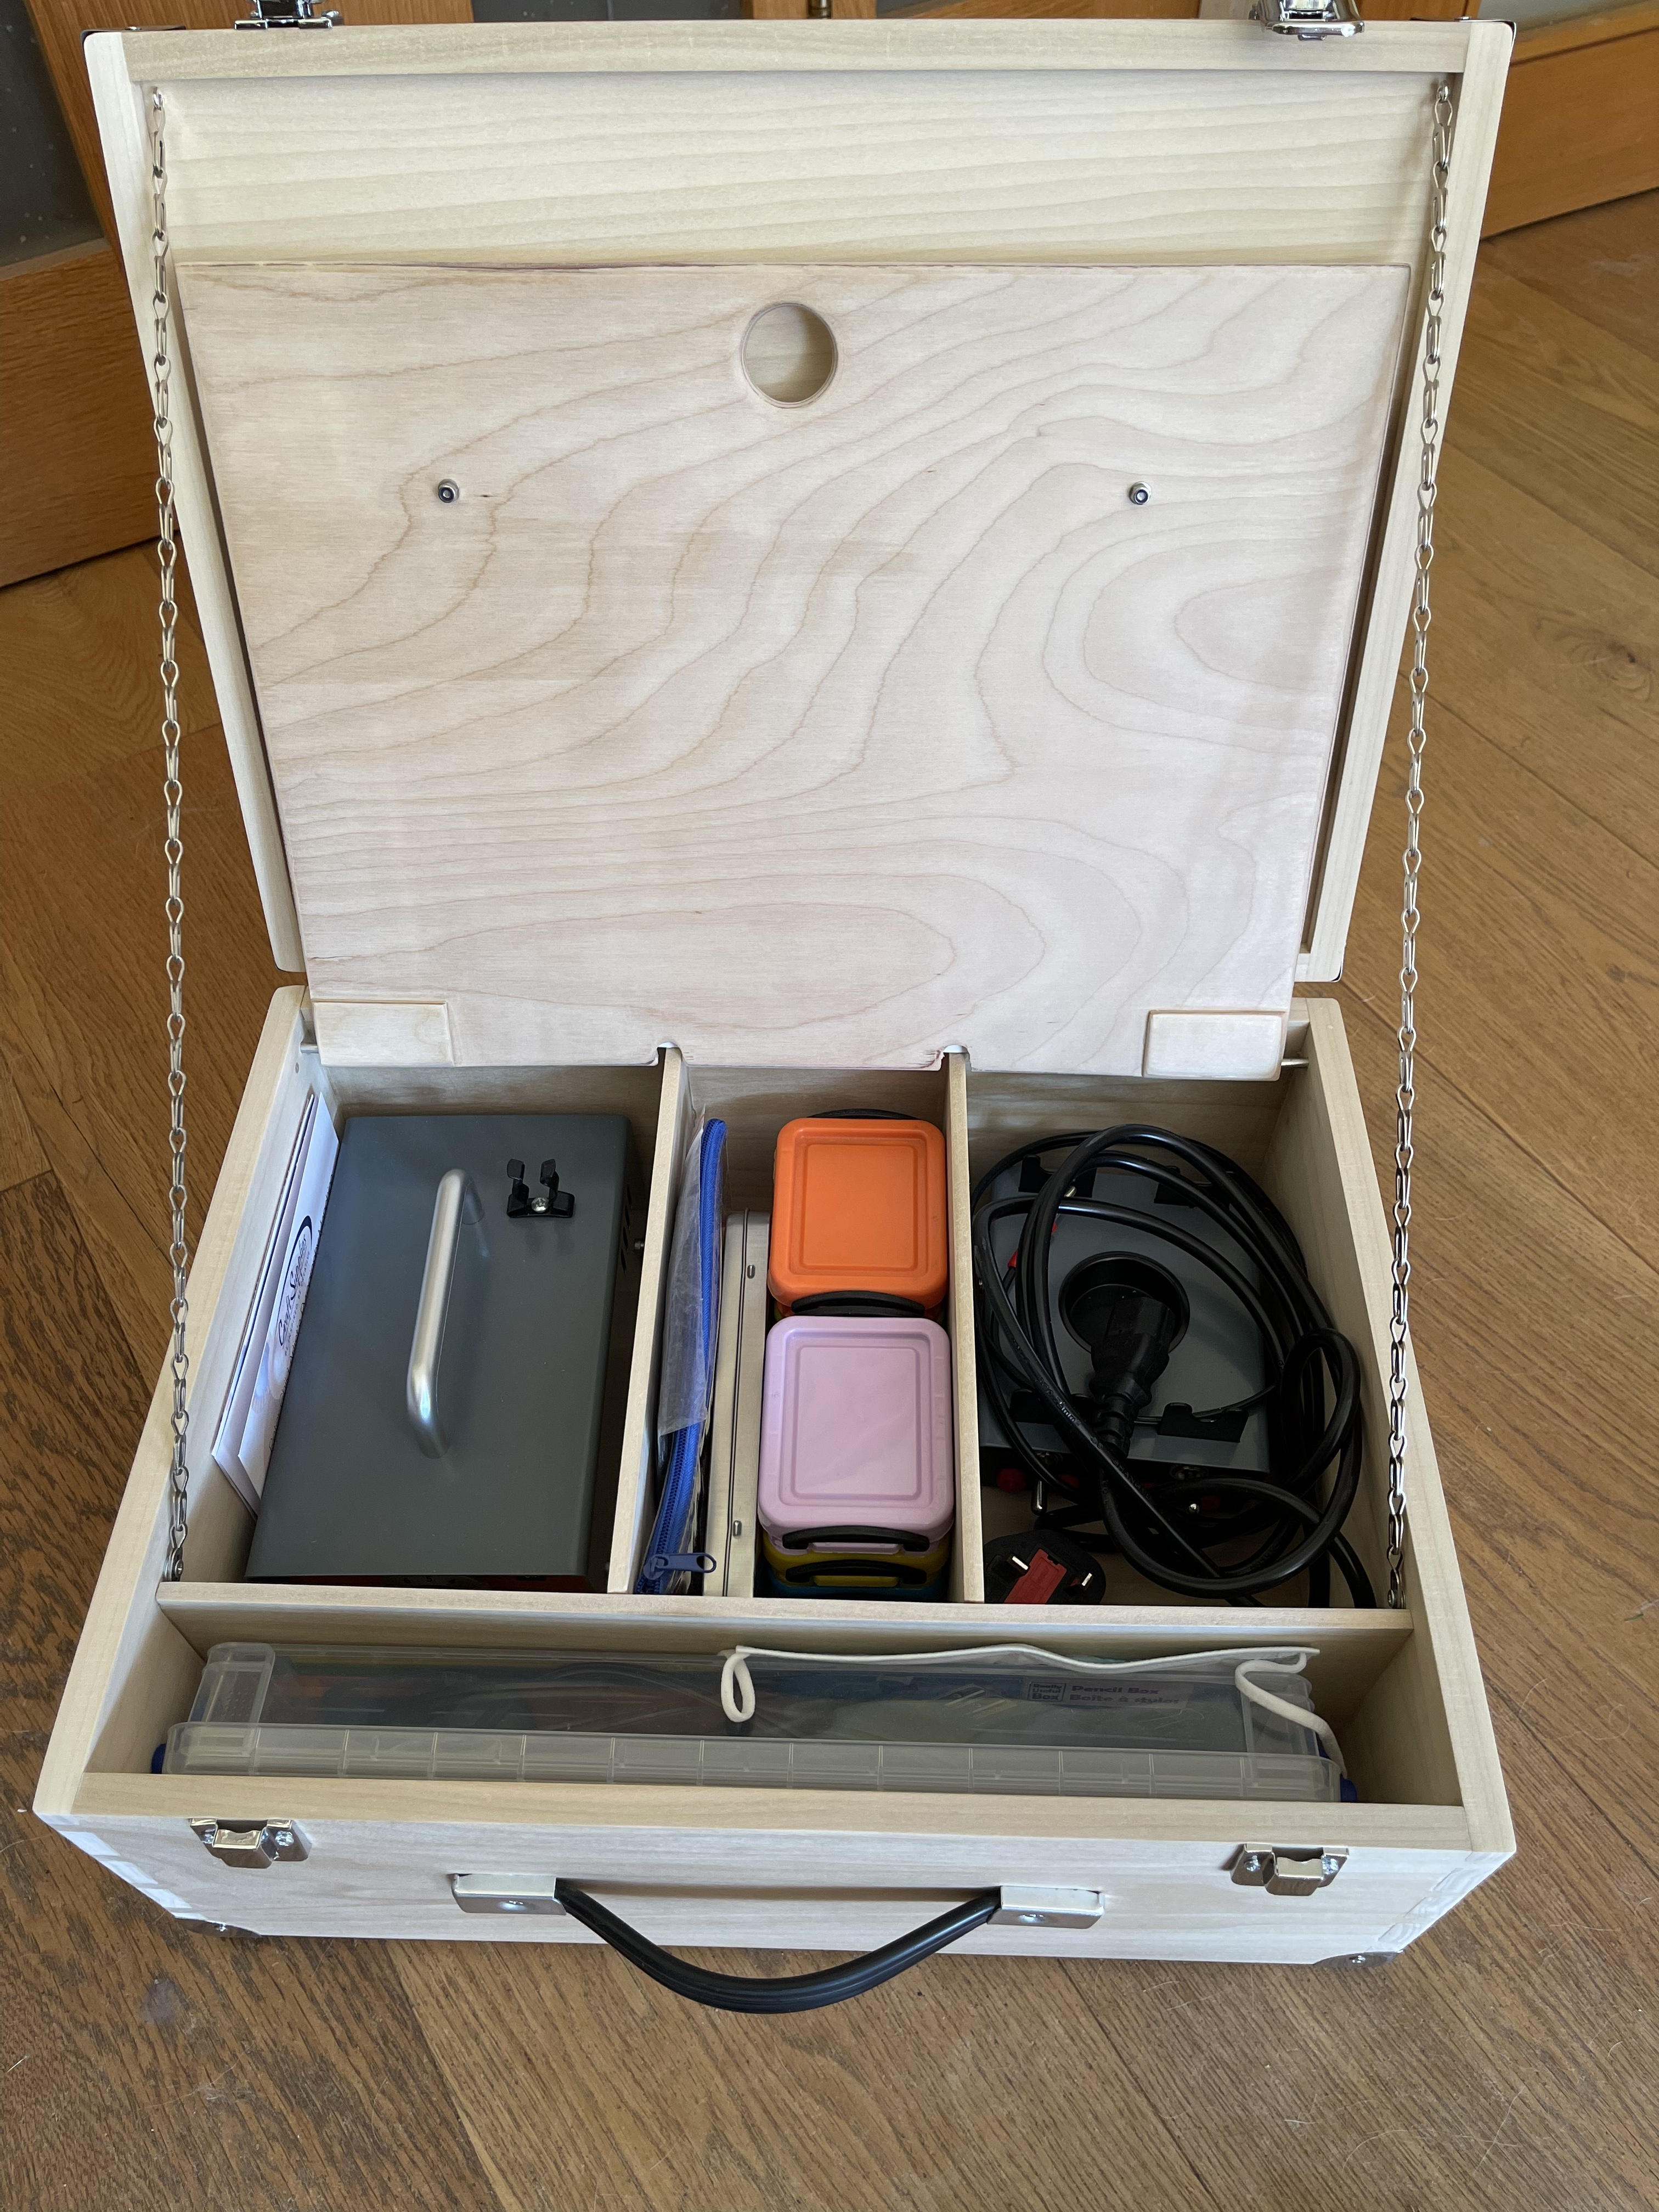
It is a custom made design to accommodate a friend’s pyrography kit in one place, rather than across a couple of cardboard boxes.
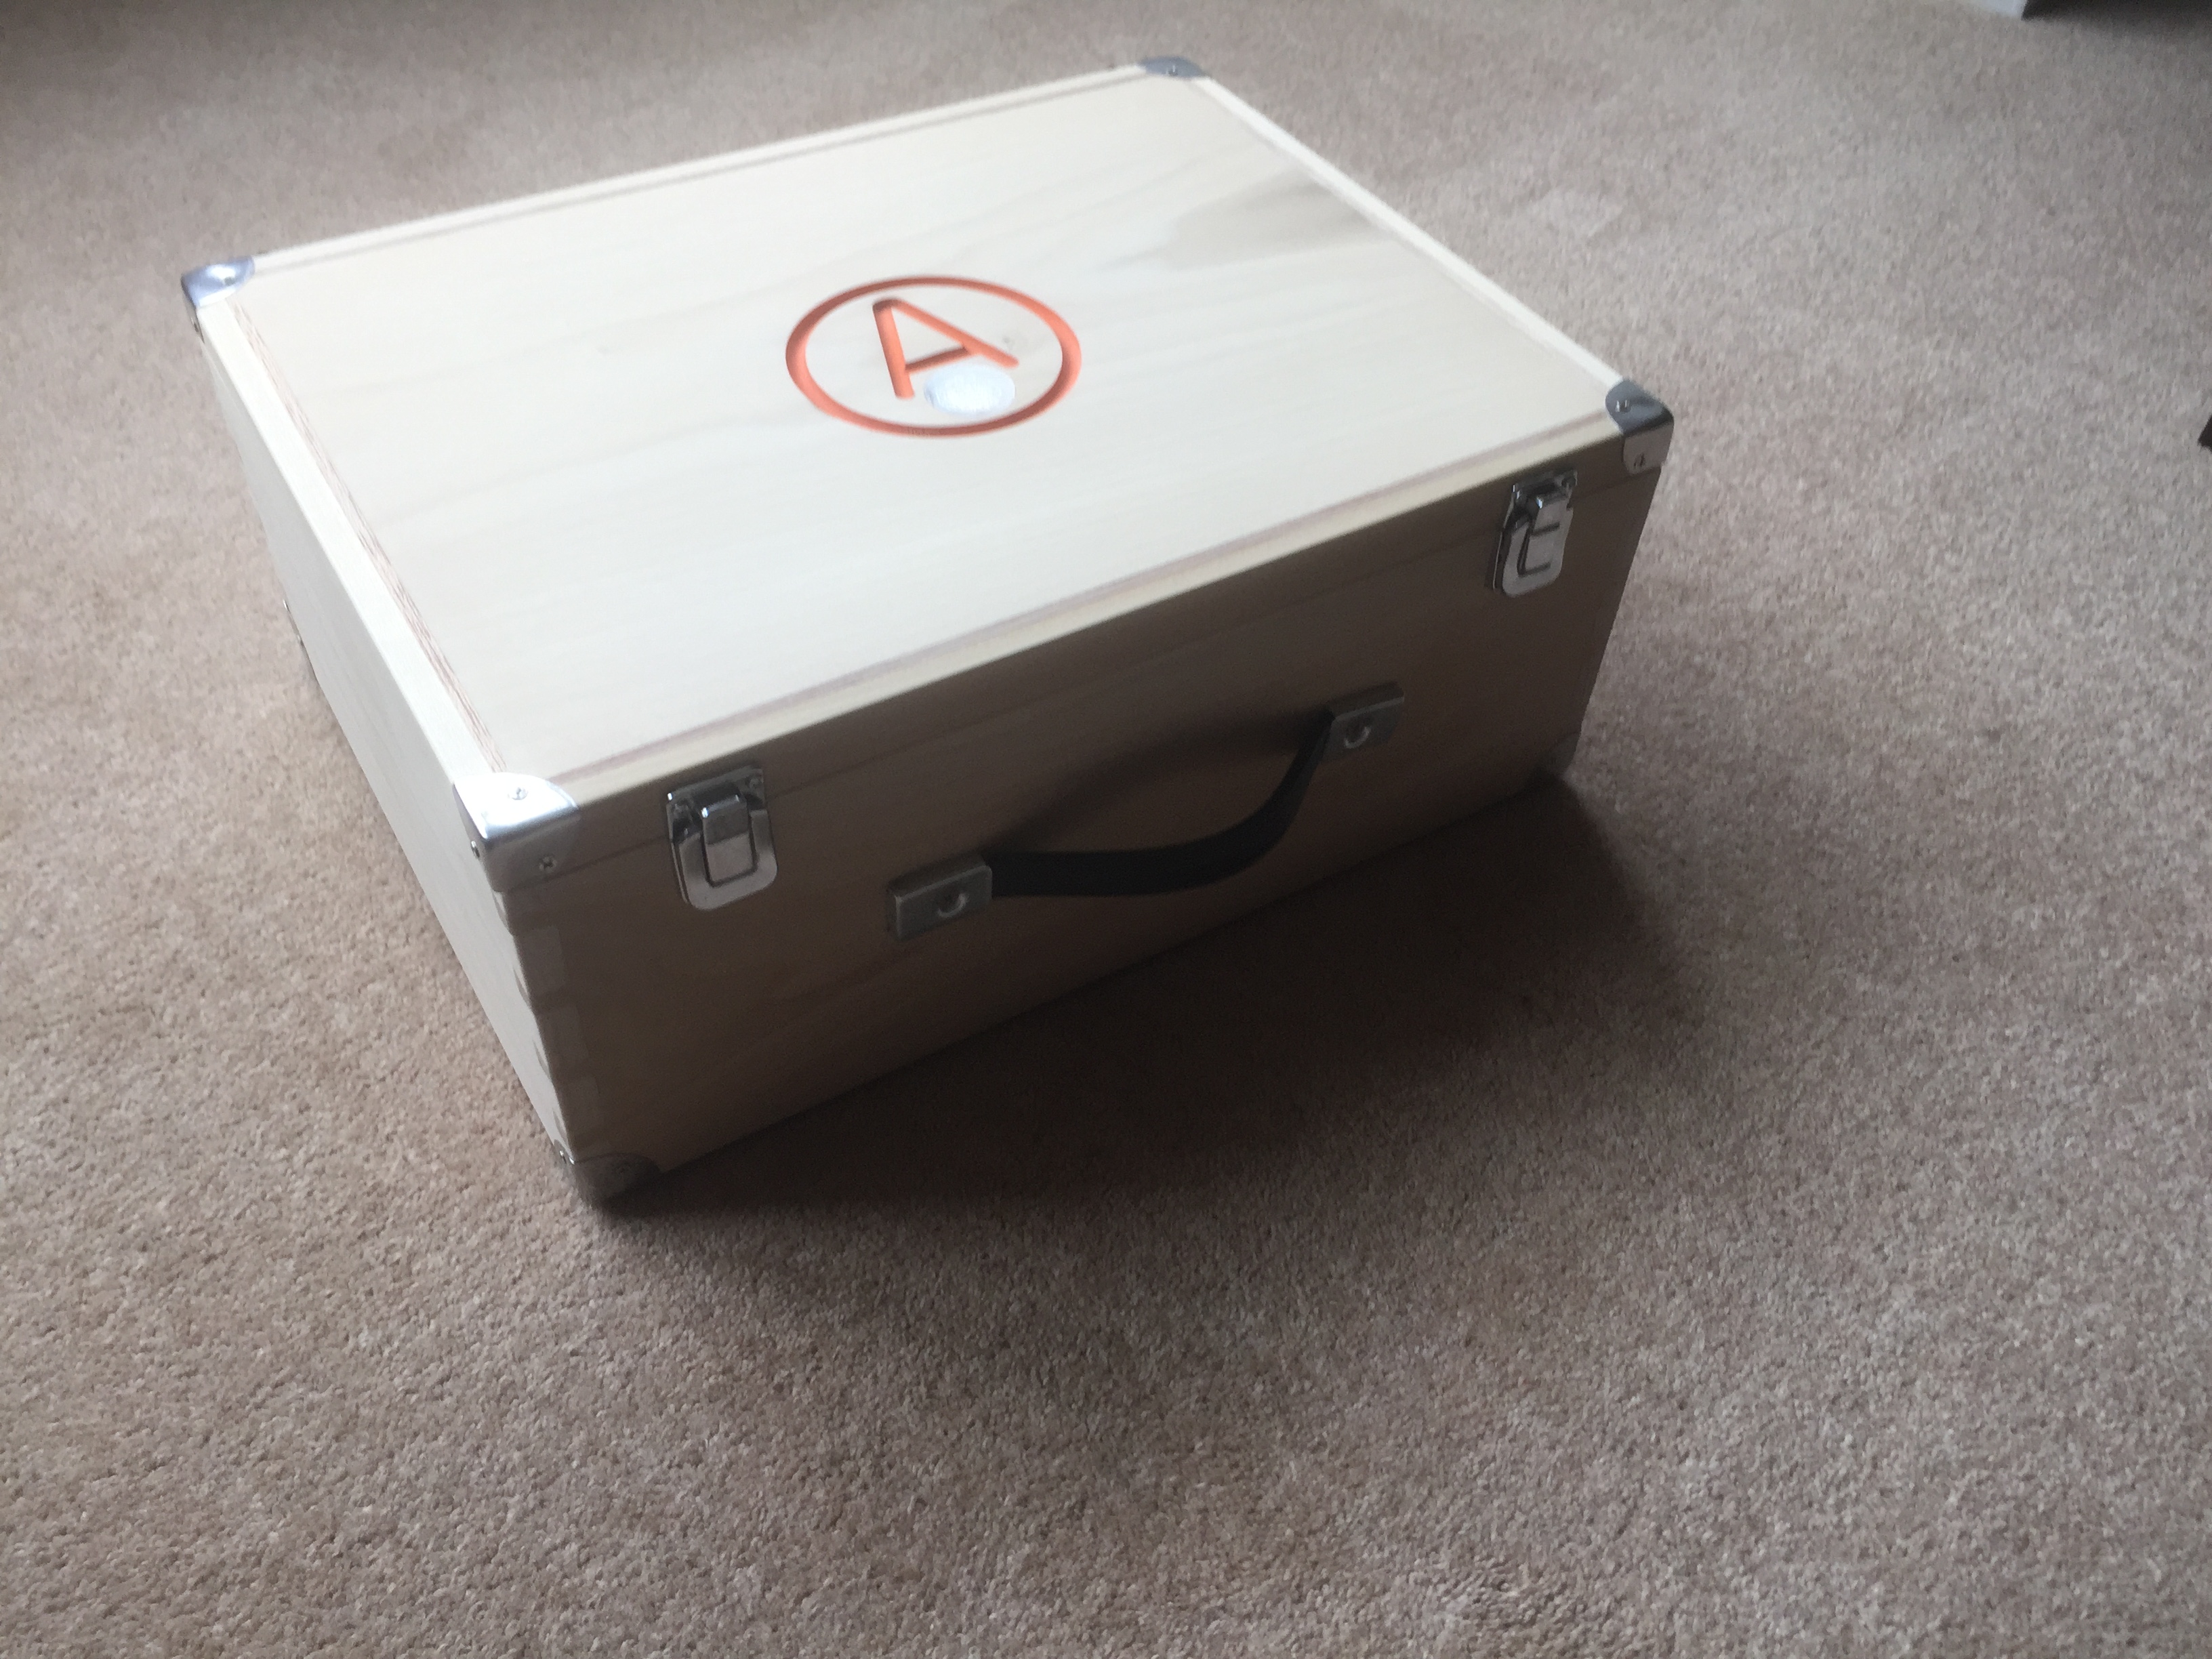
The concept was that it was made from poplar/ tulipwood which is a popular pyrography wood so she could decorate it, but it seems she is so pleased with it she doesn’t want to spoil it, certainly not the outside anyway ! She found it very tactile last night (it is sanded to 800 grit, so very smooooth !).
I’m waiting for a picture with the content included so will add that once received.
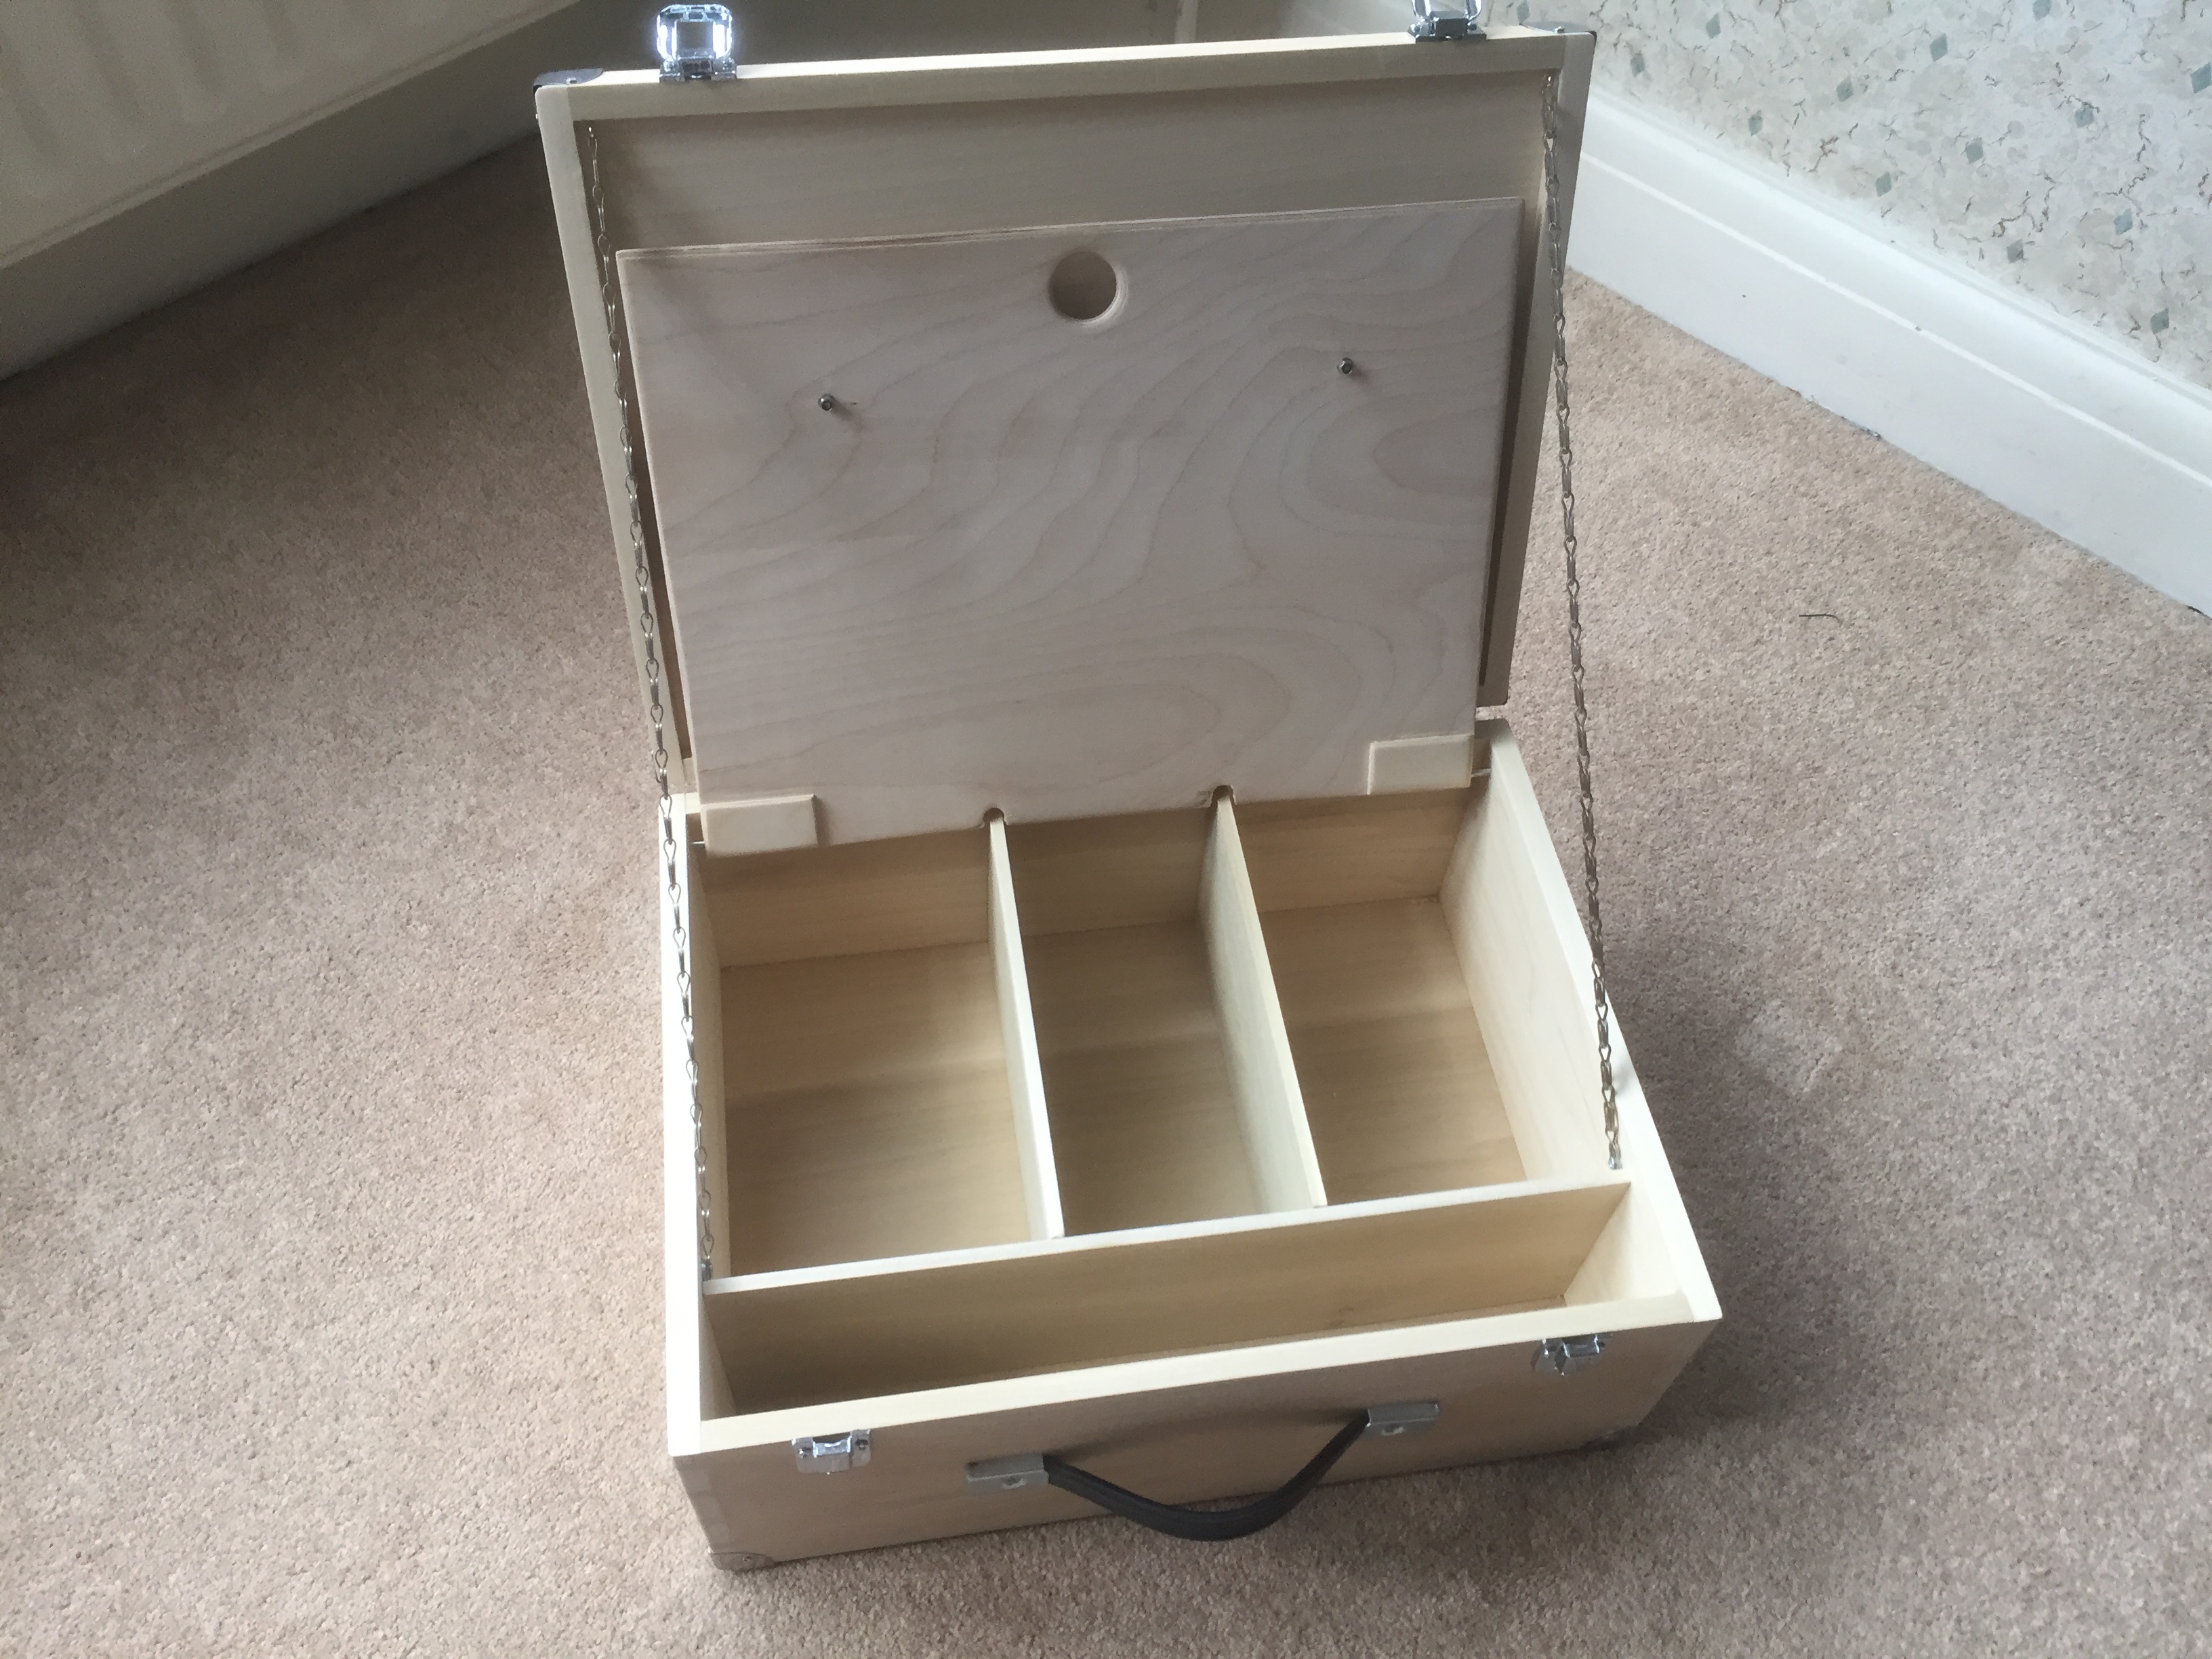
The box is approx 400mm x 300mm x 200mm deep
The carcass is in 12mm poplar, dovetailed on a Trend DC400 jig.
The dividers in the box are 6mm poplar slotted into routed rebates.
Flap is 6mm birch ply using two 6mm steel pins as pivot points so it opens.
The hold-down latches are off cuts from the internal 6mm poplar dividers which lock into a slot cut into the front piece behind the handle.
There is a thin strip of 4mm inlaid meranti on the lid (and the bottom) to add a bit of character and contrast.
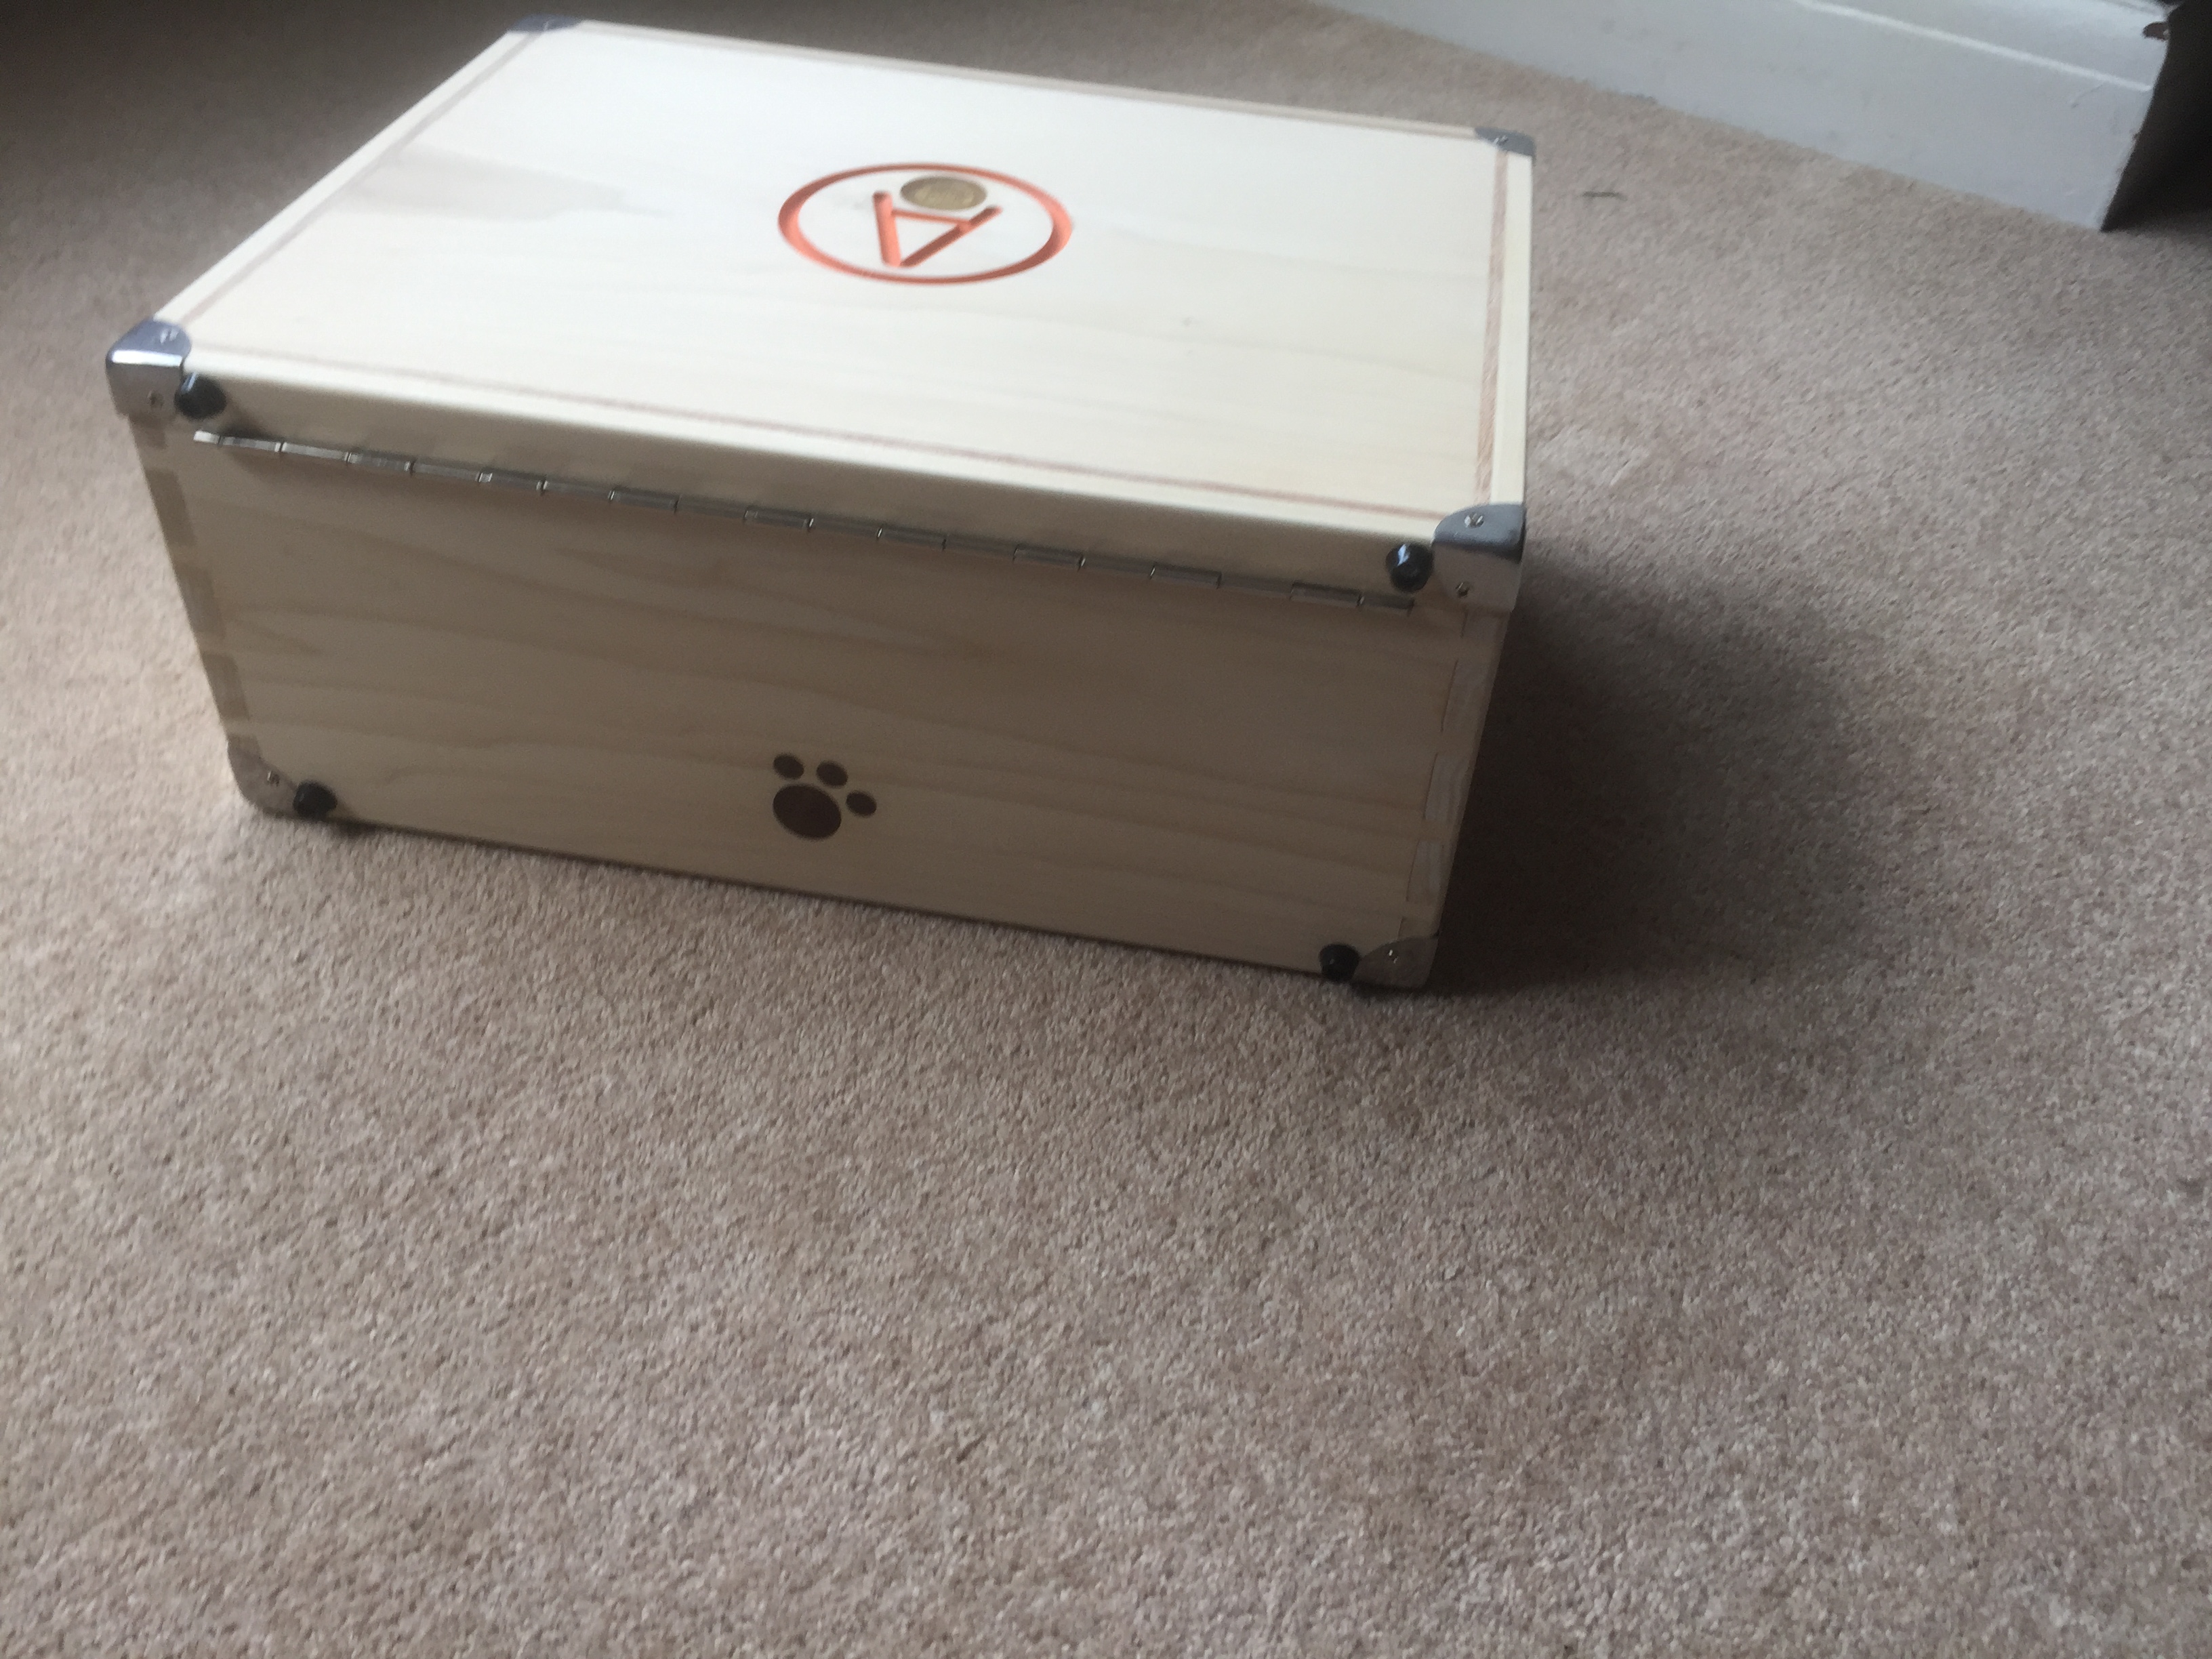
The paw print on the back is my maker’s mark that I add to most projects I make somewhere - it is inlaid walnut.
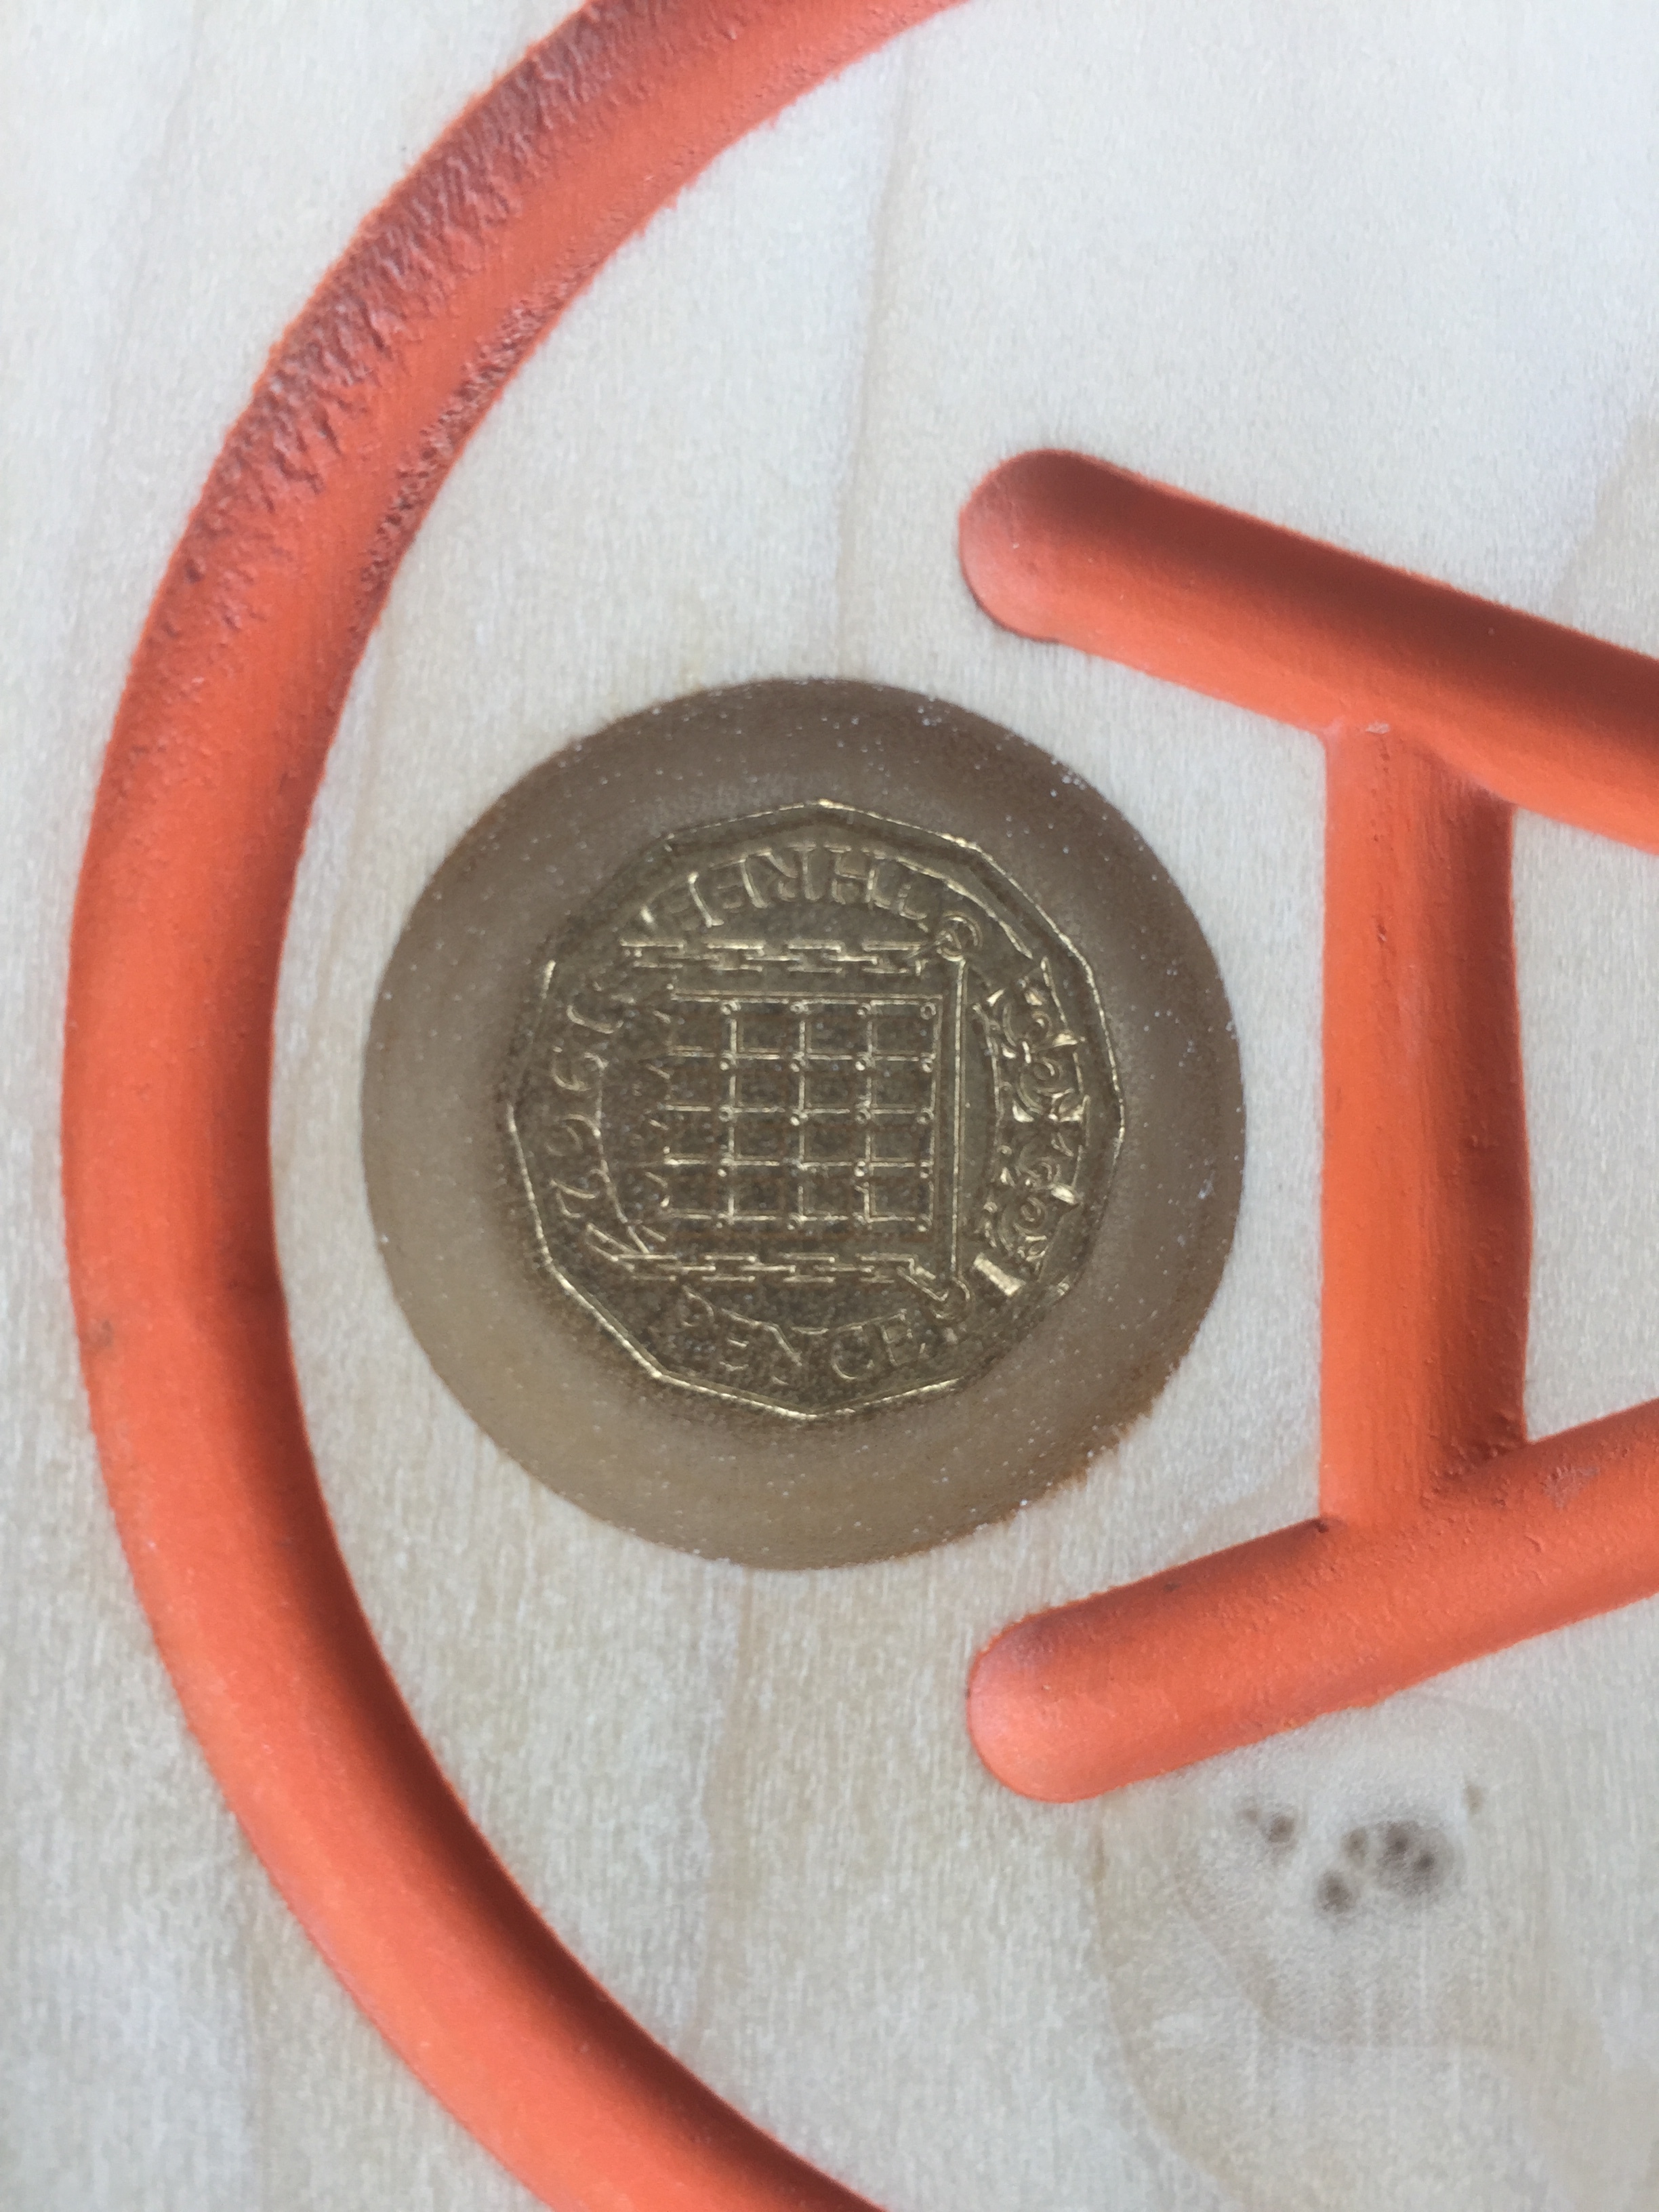
This was my first solo small scale attempt at using resin to embed a 1962 thro’penny bit in the lid (the box was a 60th birthday present which should have been delivered last year !). Certainly not perfect but it polished up nicely and it has started me off on the resin journey !
Also forgot to say that the carcass was made in one go with the lid cut off once I had got my dimensions sorted for how high the dividers needed to be.
Aha, that would be a trick taught to me by my first college tutor about 25 years ago !
Cover your surface with acrylic sanding sealer, wait for it to dry, then paint how ever many coats required. When that is dry sand off the excess paint around the design for perfect edges ! Works every time, looks like you have a very steady hand (not ! , don’t tell anyone…)
That’s really lovely, Sally; what a nice project and a great result.
I like the inset thrup’ny bit (even if I don’t know why it’s there) is the date significant, perhaps?
I used a bandsaw with a 1/4 inch 14tpi blade - think I measured the guide fence an inordinate number of times before committing to the first cut, and even then everything was crossed for the cuts on each of the four sides and tested between each to make sure it hadn’t moved !,
Just thought I maybe wasn’t clear that the lid sections were separated from the sides before I glued up, as opposed to slicing off the completed lid after the outer carcass was glued. (I have glued a box and sliced the lid off before, at least college tutor sliced it off with the writhing knife removed from an exposed table saw blade - OMG that was a stressful lesson !)
I think if I ever did make a box with a view to slicing a lid off, I might go down the route of using a router with a slotting blade (like you would use if you were creating biscuit slot with a router). At least the machine would have a stable base to rest on as you moved around the box - just a thought, no plans to do that at all and not advocating it for anyone else to try.
Is it just the blade thickness that prompted the use of the bandsaw?
I’ve always done 4 passes on the table saw set just below the wood thickness then finished with a knife by hand to seperate. Far less stressful but you do have to account for the loss of the height in wood on the blade thickness.
For less critical work you can cut right through but the last cut you have to be careful, and ideally have a pusher with a right angle covering both lid and base.
I also take this approach making “matched” drawers.
Knockup a box, mark the mid line, four passes on the table saw and you have two equal size draws with mirrored grain. Perfect for either side of under a desk etc.
I’m happy to hear why this is a terrible idea and I shouldn’t ever do it again but it’s always worked in the past.
Quite simply I have the easy use of a bandsaw at home. Agreed a table saw would have probably been a more accurate answer but that would have required the excavation of the back corner of the shed to get it out to use ! Second issue was yes, I was conscious of the blade kerf and wanted to remove the minimum waste possible and keep the integrity of the wood grain.
Implication of what you are saying is that you are using a table saw without a writhing knife in place to allow multiple passes which the MakerSpace does not allow as far as I am aware ?
Thanks for the feedback. That was one of the reasons I asked about the bandsaw. Access to tools if often a real factor for what people use. Personally I don’t have access to a bandsaw (I’m not using the workspace yet) so I wondered if there was a specific advantage to that approach.
Just a point about the riving knife. I know that many protrude above the top of the blade but they don’t need to. They should also be wider than the blade but thinner than the kerf. With a riving knife lower than or the same as the blade height you can easily cut the channels in the box sides safely. The main advantage of the table saw is it can work for boxes or draws that are too large to fit through the bandsaw.
The downside is the kerf is larger so for fine grain you can see the gap created.
It clear there are benefits to each, but more important… Use what you have access to.

 , don’t tell anyone…)