Hi all. I do work for my local community garden, and I found a need to make this shelving unit from C Grade Beech timbers (good spot Joe) that I found and was once was a high quality bed.
Theres a sticker on the beech that has delivery notes to an adress in New Jersey NY State, USA, so I decided to leave that sticker on showing the timbers history.
Quite proud of this piece. Took around four full days… mostly staring and thinking about how to do each stage. I love using the router, and was honing my skills with the palm router and really enjoying the MFT!
Beech timbers were at my home bundled tight and drying out over a year. They were soaking wet when I found them.
I chopped them to length at the garden to make the pieces small enough to get on a bus.
I then started preparing the half lap joinery by clamping the timbers together and using the router on the timbers ends.
I made a jig that let’s me see middle mark and edges of the half lap for the uprights. I put a clamp either side of my jig and then remove the jig because the roofing squares I clamp either side of my jig now becomes my fence for my palm router and I am gutted I didn’t take a picture of that process.
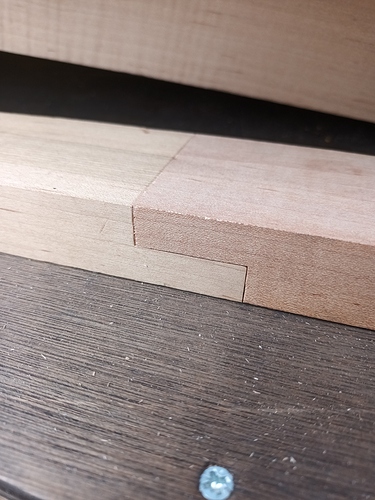
No matter the prep, mistakes are going to happen. So some tidying up with chisel was essential.
It made for a nice tight friction fit but mistakes are gonna happen, I can’t think how I made this mistake but it gets repaired later.
I then proceeded to jigsaw a finger space for pulling the euro crates out. And also clamped the pieces together “Swedish Cut” style, to router out the half lap for the uprights.
Once a template piece was made it was fairly easy to use the bearing bit to cut out the same shape, after jigsawing most of the wood away. So now I got three frames for the uprights and ten identical pieces for bracing the front and back.
I made a 1/2 inch roundover for the finger pullout front and 16th for the back, and 16th for the lip of the shelf.
Then it was fun with the MFT as I tried for stability with plunge router to router out a 9mm channel for 9mm ply shelves to sit flush front and back. I adore the endless possibilities with benchdogs and MFT system. I fiddled about a bit until I came up with this…
…which was a blissful means to an end…
…that’s all the joinery cut, now time to fix the mistakes and fill holes in.
I packed up my collection of 24 clamps and started what was an incredibly fun process of gluing it all together. I did run out of clamps so I was glad to be in workshop to use more than I had. I used one of my fave things in carpentry, my roofers squares to ensure it was all going in the right direction. It was a fun two hours.
I used titebond III so after around five hours glue up time I tentatively took off clamps to make it easy to store overnight in the snug to harden off. I returned next day with 9mm Birch Faced Ply and proceeded to use table saw to fine tune each panel into place. I rushed the top and did a quick cutout to facilitate the four corners uprights but cut the middle ones so the shelf sat flush.
As I said, I am quite proud of this piece, here it is being used in situ. I still have two things to do, and that is put on the 9mm rubber feet I have for it and then lazy way lacquer spray to keep the water elements out!


