Tool carry, dovetails

Tags: #<Tag:0x00007fa495e1a488> #<Tag:0x00007fa495e1a2f8>

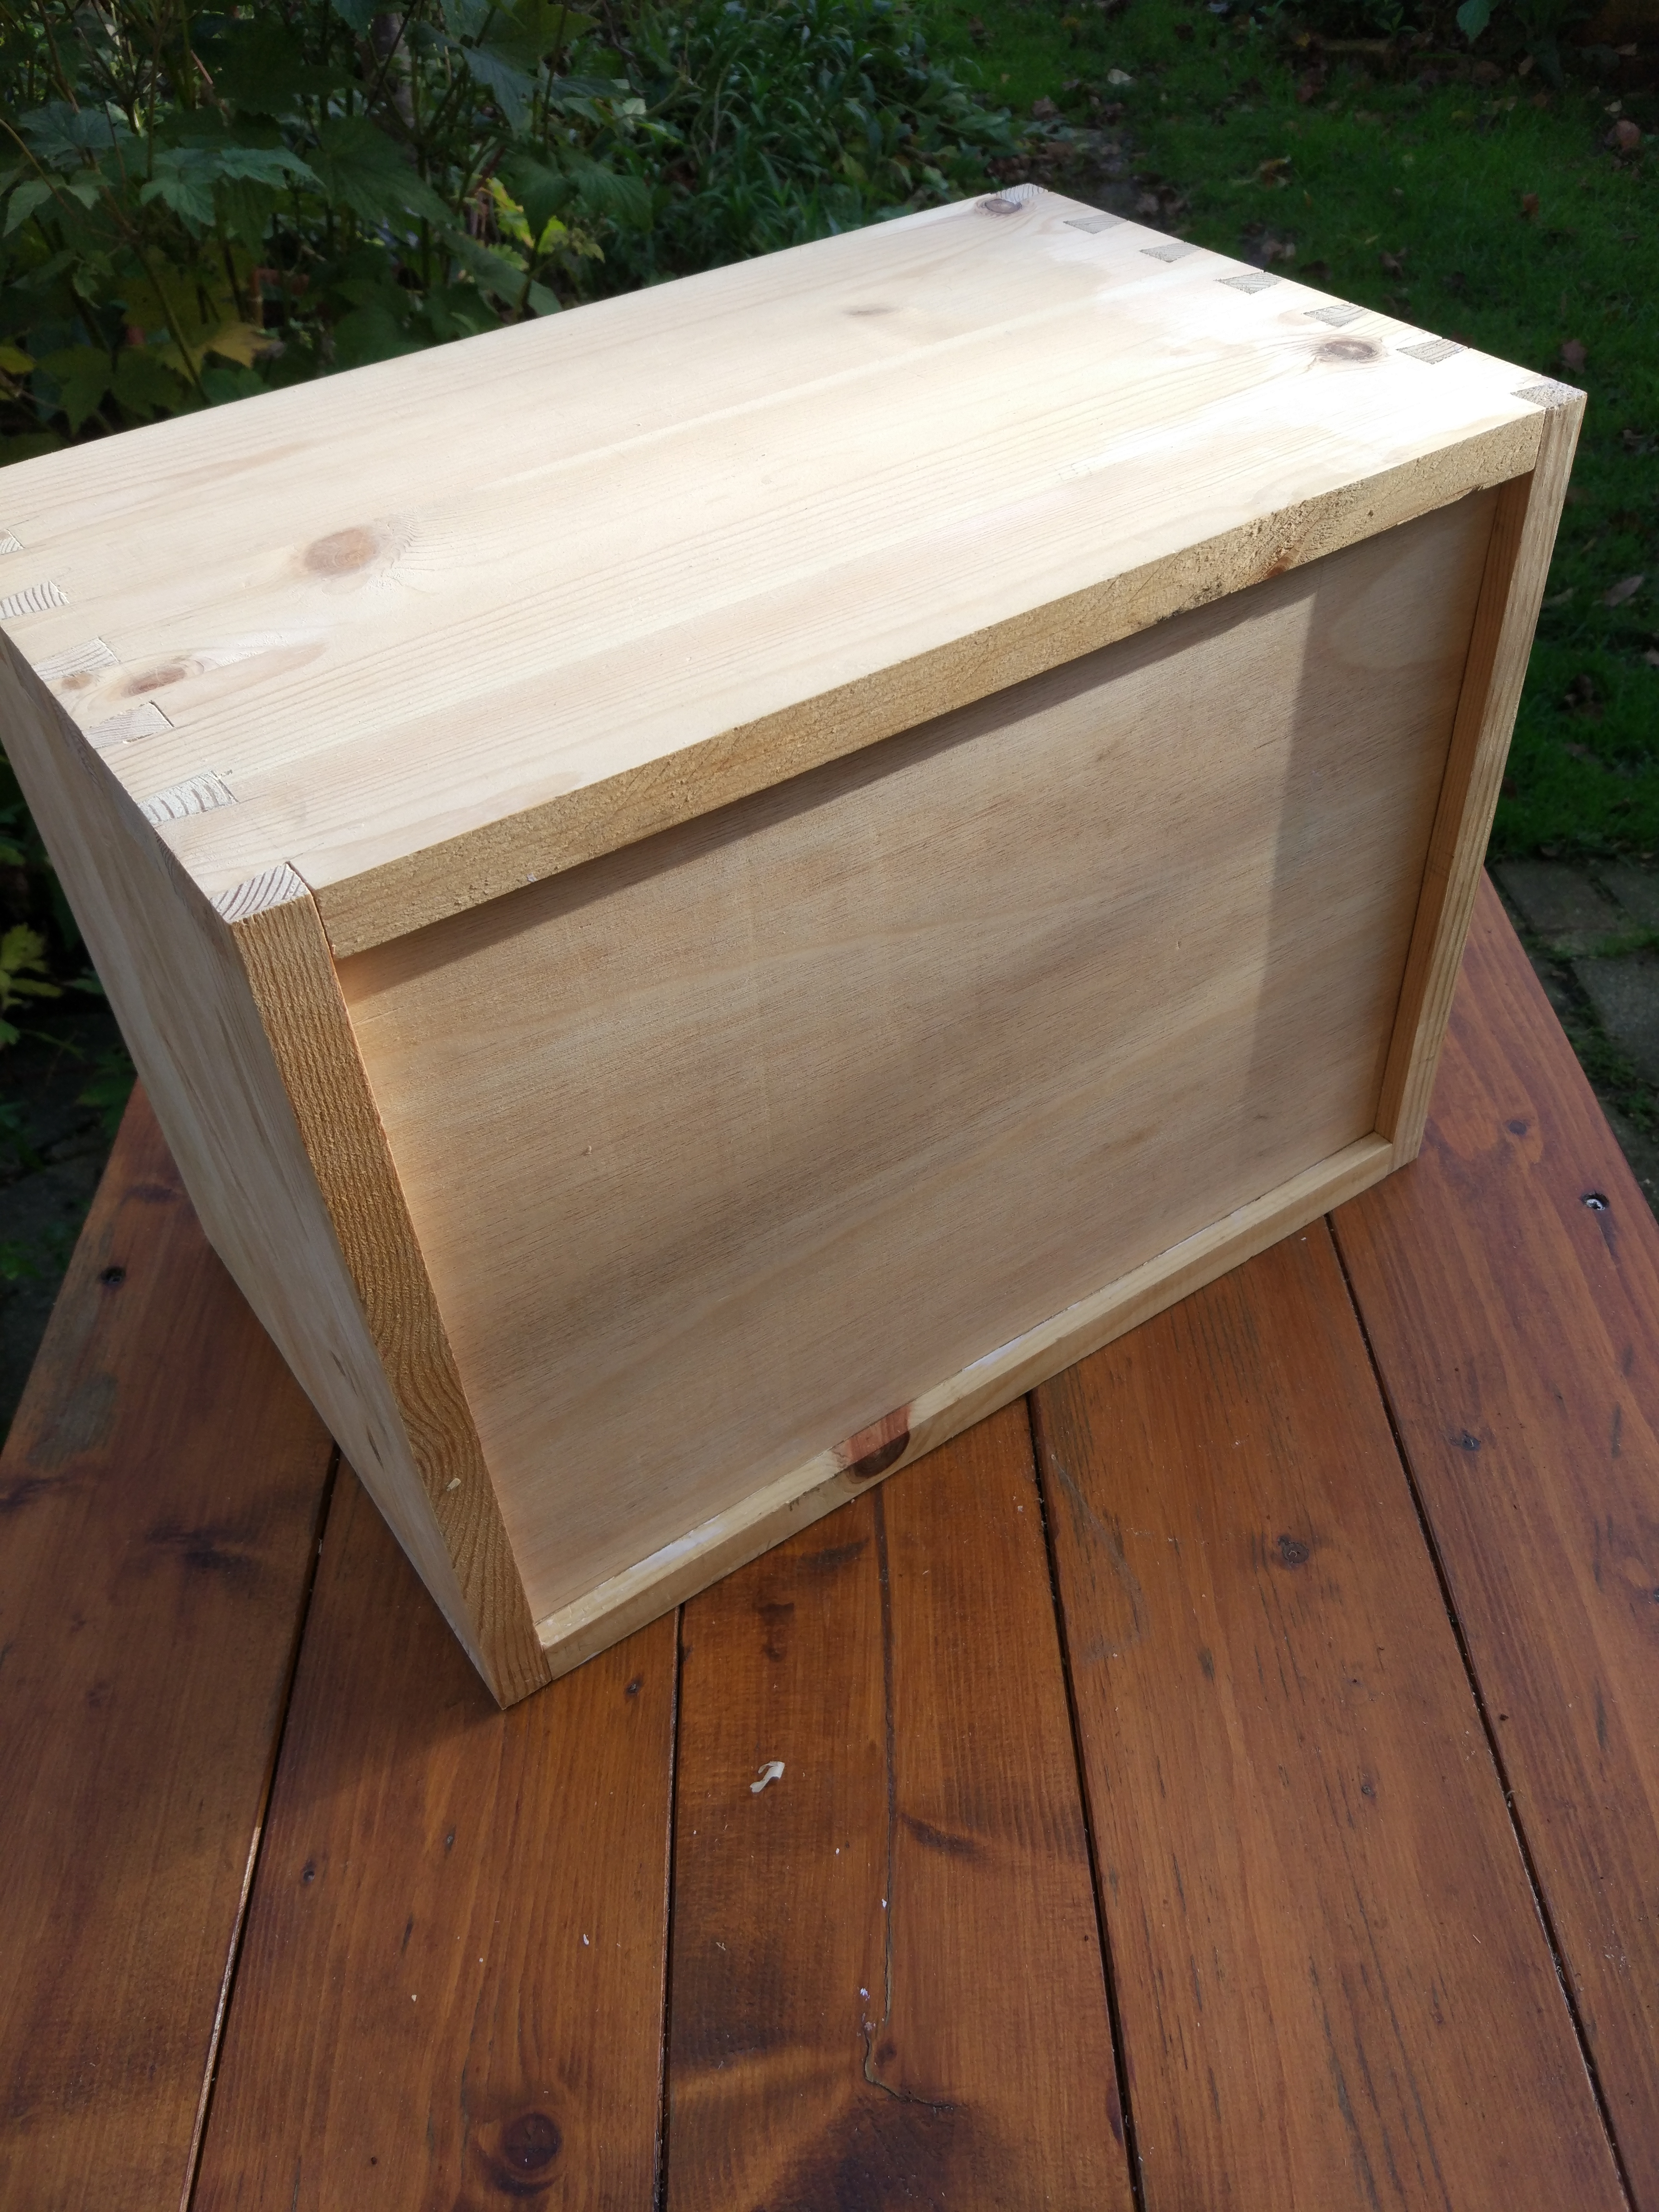
I made a box for storing some tools in and was pleased with how it turned out as it is my first attempt at cutting dovetails. It is a bit rough and ready here and there but I learned a lot from doing it. It is a functional box not a decorative one, so I got very close to what I was aiming for.
One set of joins is a little bit more gappy than the others but I think that is mainly down to me not squaring off the wood 100% - one of the pieces still had a bit of a bow in it. I did the best I could with my hand tools.
As it is in pine, it was quite easy to chip little bits out if not careful.
I would design the handle part differently next time, but there you go. I 3D printed a jig to help shape the handle hole with the router.

I used the Paul Sellers method, and it worked well as long as I made good saw cuts. The only thing was the chiselling out took a looong time.

I’ve since seen this Rob Cosman video and it looks like a good method. Using a coping saw to cut out the waste could speed things up a lot.

I wondered if there was a way to use his method on the cheap without buying his custom saws. He uses a knife with the same blade as the dovetail saw to mark the cutting lines for the pins, before cutting out the waste from his tails. See this bit of the video.

I got one of these saws for my birthday recently so I used that to cut the dovetails. I wondered about using one of these flush cutting saws for the marking knife. It’s the same thickness as the saw but the teeth don’t have the 0.1mm set on either side so it would be 0.2mm out. Probably not accurate enough?

3 Likes

Disclaimer, I’ve only cut dovetails a couple of times… so my only qualification is also the tonne of videos I’ve watched.

I love Rob Cosman videos, amazing to see the quality of his work, but I think he might oversell the importance of things like matching kerfs. Two hypothesis, 1) he’s building stuff that’s going to end up in a museum or selling for $$$$ and this type of business is build of his insane precision - we don’t need this 2) I suspect a decent amount of his income comes from selling his very high end saws, marking knives etc so he is incentivised to say you need them.

If you watch his older videos he made the same quality with the more standard techniques (cut out the tail waste, use a marking knife to mark them onto the pin board).

I think you could use the method of his with plenty enough accuracy with a marking knife which is cheaper and easier. The razor blade type would fit down the kerf:

I’d add that your dovetails look good!

Cheers, yes he does have some very expensive saws to sell, no doubt that’s part of it. Interesting that he just used a normal marking knife before. I will just need to do a test and see how it goes.

i went for the paul sellers knife

1 Like

“Simple spring mechanism enables the blade to be locked securely in the extended position or stored safely within the body.

:astonished:

@mikekelly, did you ever have a go with Rob Cosman’s method? I’ve recently given it a go and quite liked it at first but only got mediocre results. After a couple of trials I think I’ve concluded that its not for me. It seems like unless you’re really really good at sawing so they’re all spot on without any adjustment (and maybe have a mega expensive saw that leaves perfect edges) it’ll leave gaps as there is no step to tidy up your saw cuts and prevent it.

Interesting point. You mean because you’re marking the pin lines before cutting out the tail waste and therefore before you have a chance to tidy up the tails if required?

I haven’t tried the Rob Cosman method yet - I’ve been getting it together to make some box joints. Made a simple router table and a sled jig thing for thicknessing wood with the router. So it will be a while before I get back to dovetails. Unfortunately I don’t have a good indoor space for woodworking and the weather isn’t great for working in the garden at the moment so it’s slow progress.

One thing I would keep from his method is the coping saw for cutting away most of the tail waste. That looks as though it could save a lot of time. I guess I will do some tests at some point and see how I get on.

Yeah so coping saw is a no brainer imo and lots of people advocate for using them, it’s really fast. I also think cutting the shoulders of the tail board in one shot by establishing a wall then cutting down works well.

On the main technique… A couple of issues I’ve found:

  • As you said, you mark the pins before removing the waste and cleaning up and issues (not square, ragged edges from the saw) meaning your pins might not be where you’d ideally want to put them
  • Once you’ve cut your pins, you’ve cut the final surface exactly where it needs to be, so any tweaks you want to make will make the joint looser

Basically if you’re super great at sawing and have a great saw it’s probably great. If either of those isn’t true (neither in my case) and your tails or pins normally need a little chisel work then I think this method just won’t work. I’m sure it could just be me though hence was interested to see if you’d tried. I can see how if it all went to plan perfectly it would be a great method, and some of the tests I did weren’t bad and all would hold up fine, just didn’t feel like it could be made flawless and I guess if you’re bothering to do dovetails it’s to show off a bit.

haha, ok so here is proof that its my sawing technique not the method :stuck_out_tongue: (he does the same thing with a hacksaw and a screwdriver filed to a chisel shape)

Haha, yep I think it shows that his technique is good for someone who has a lot of experience and gets the saw cuts right consistently first time. That isn’t me but I’m still interested to try it out. :slight_smile: