
This document needs to be updated with Ruby instructions. Alternatively, move the software instructions to separate wikis for JobControl and Ruby.
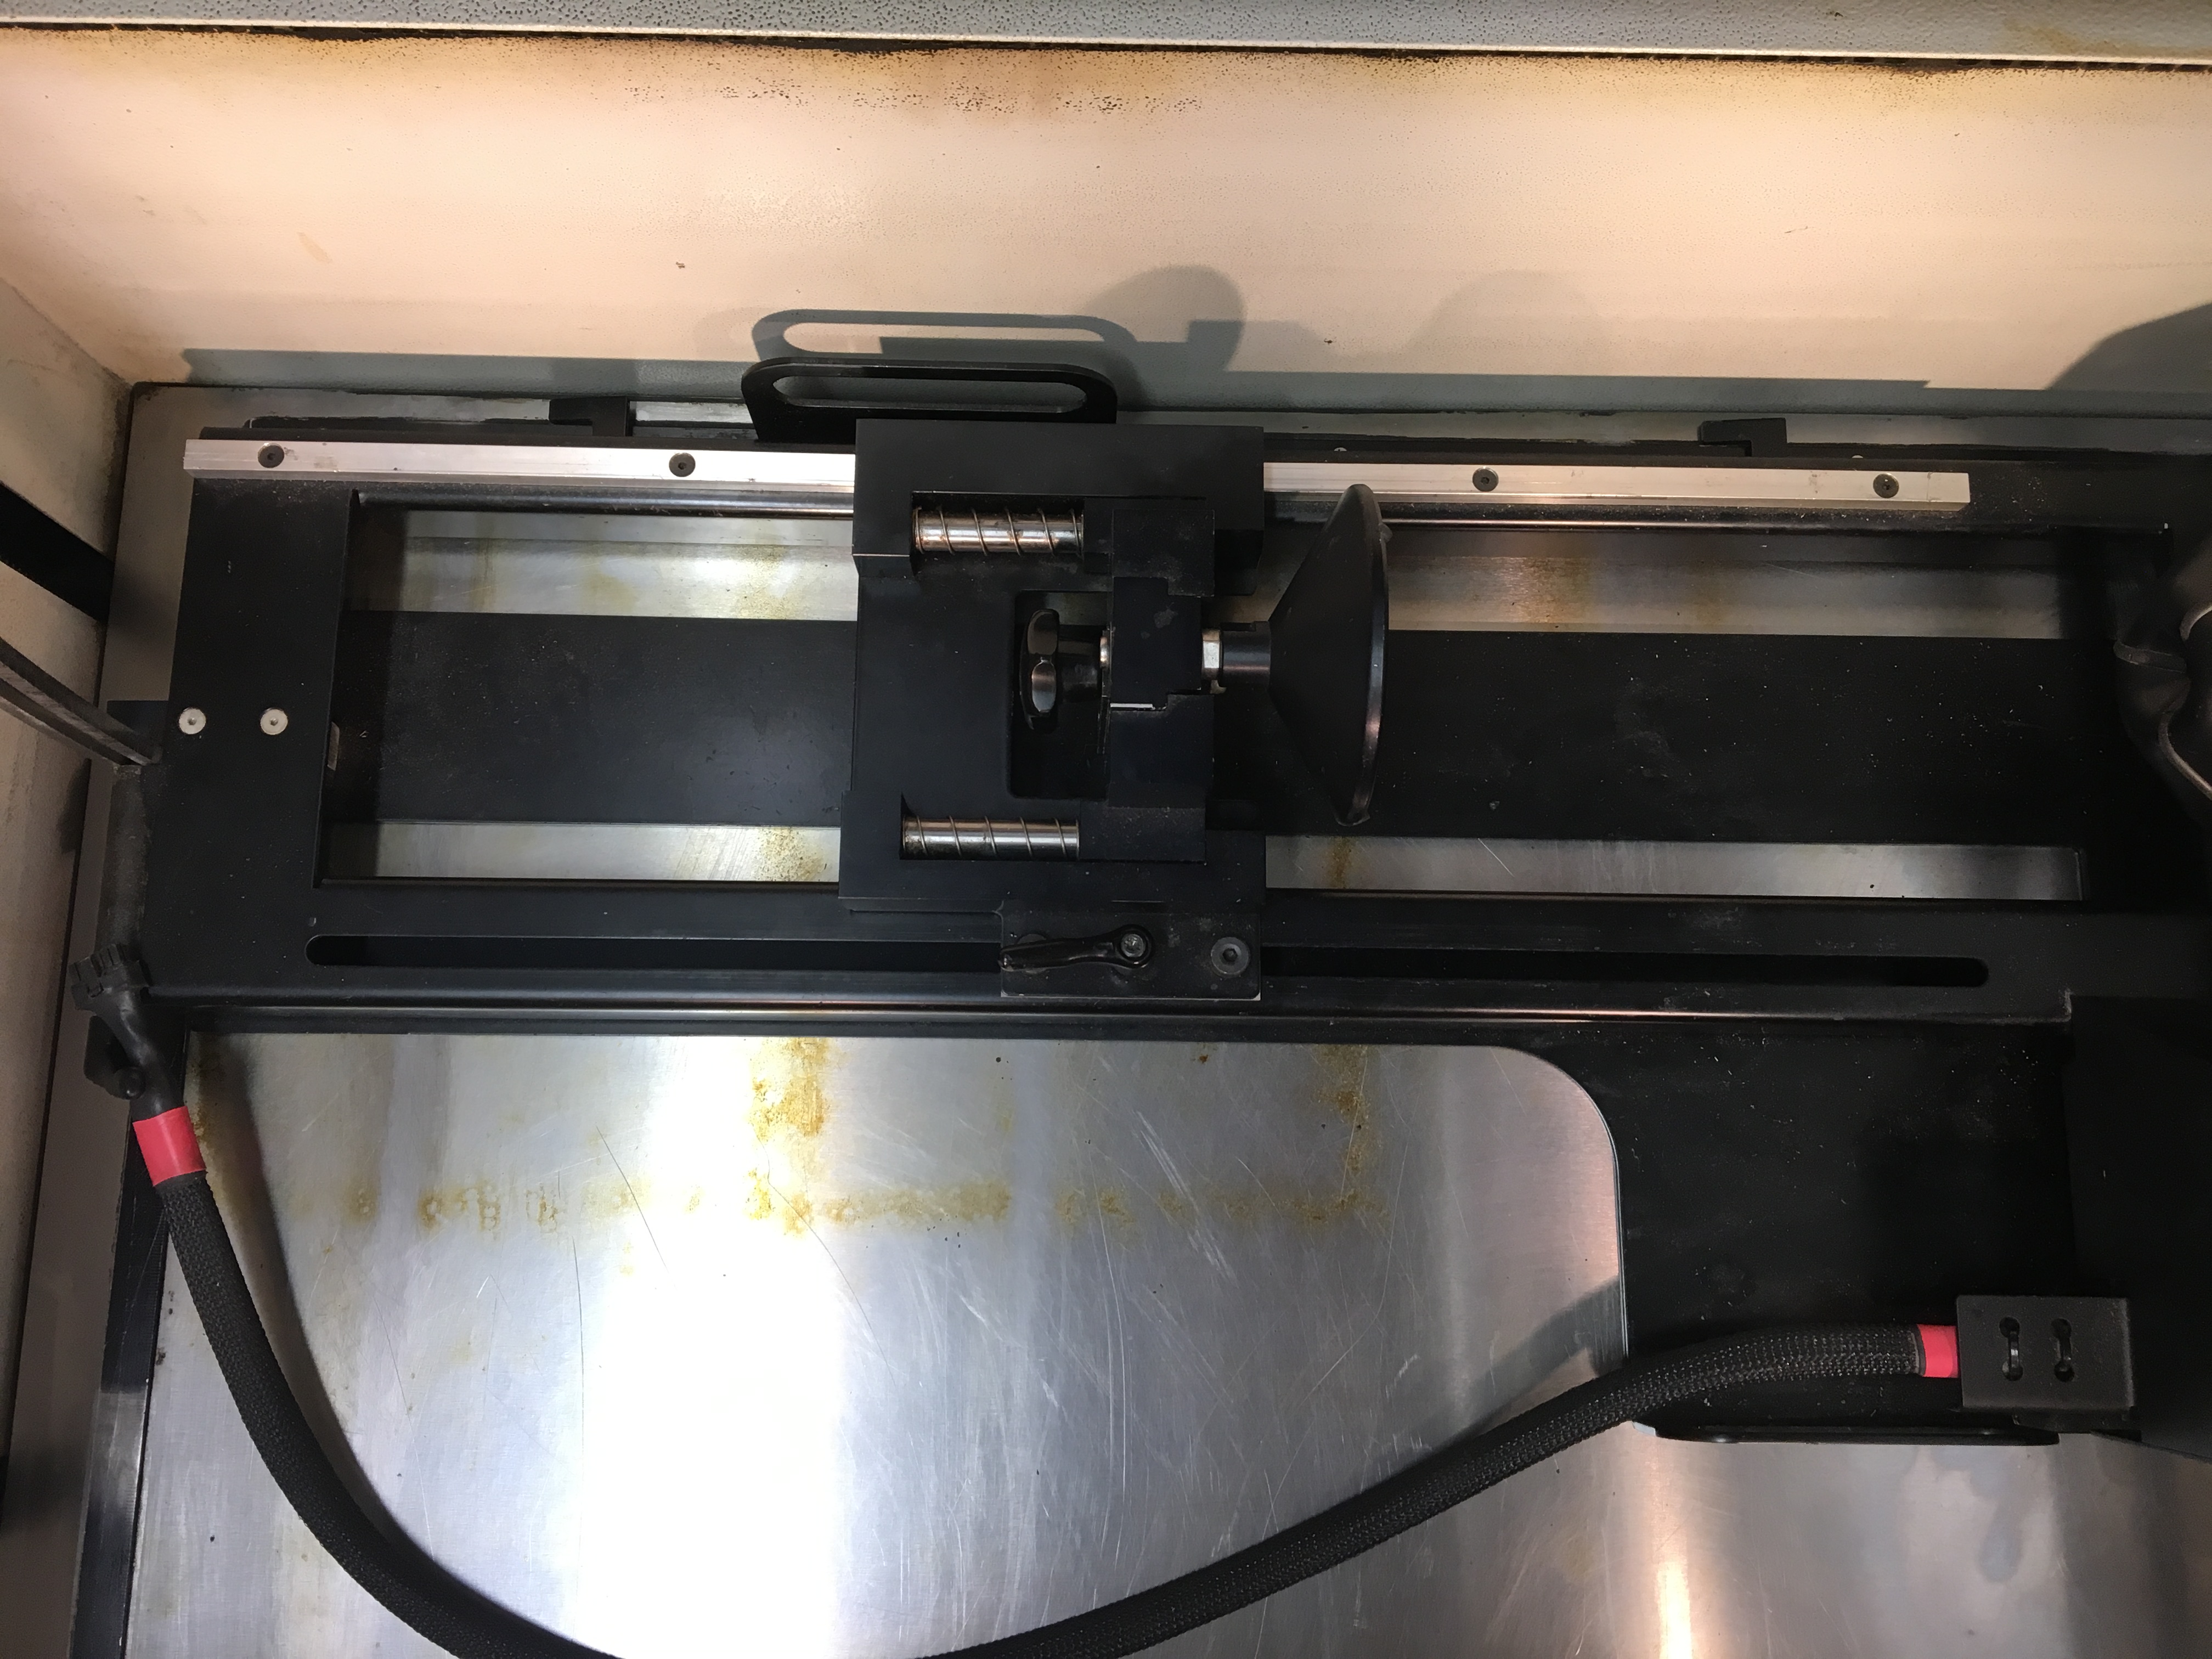
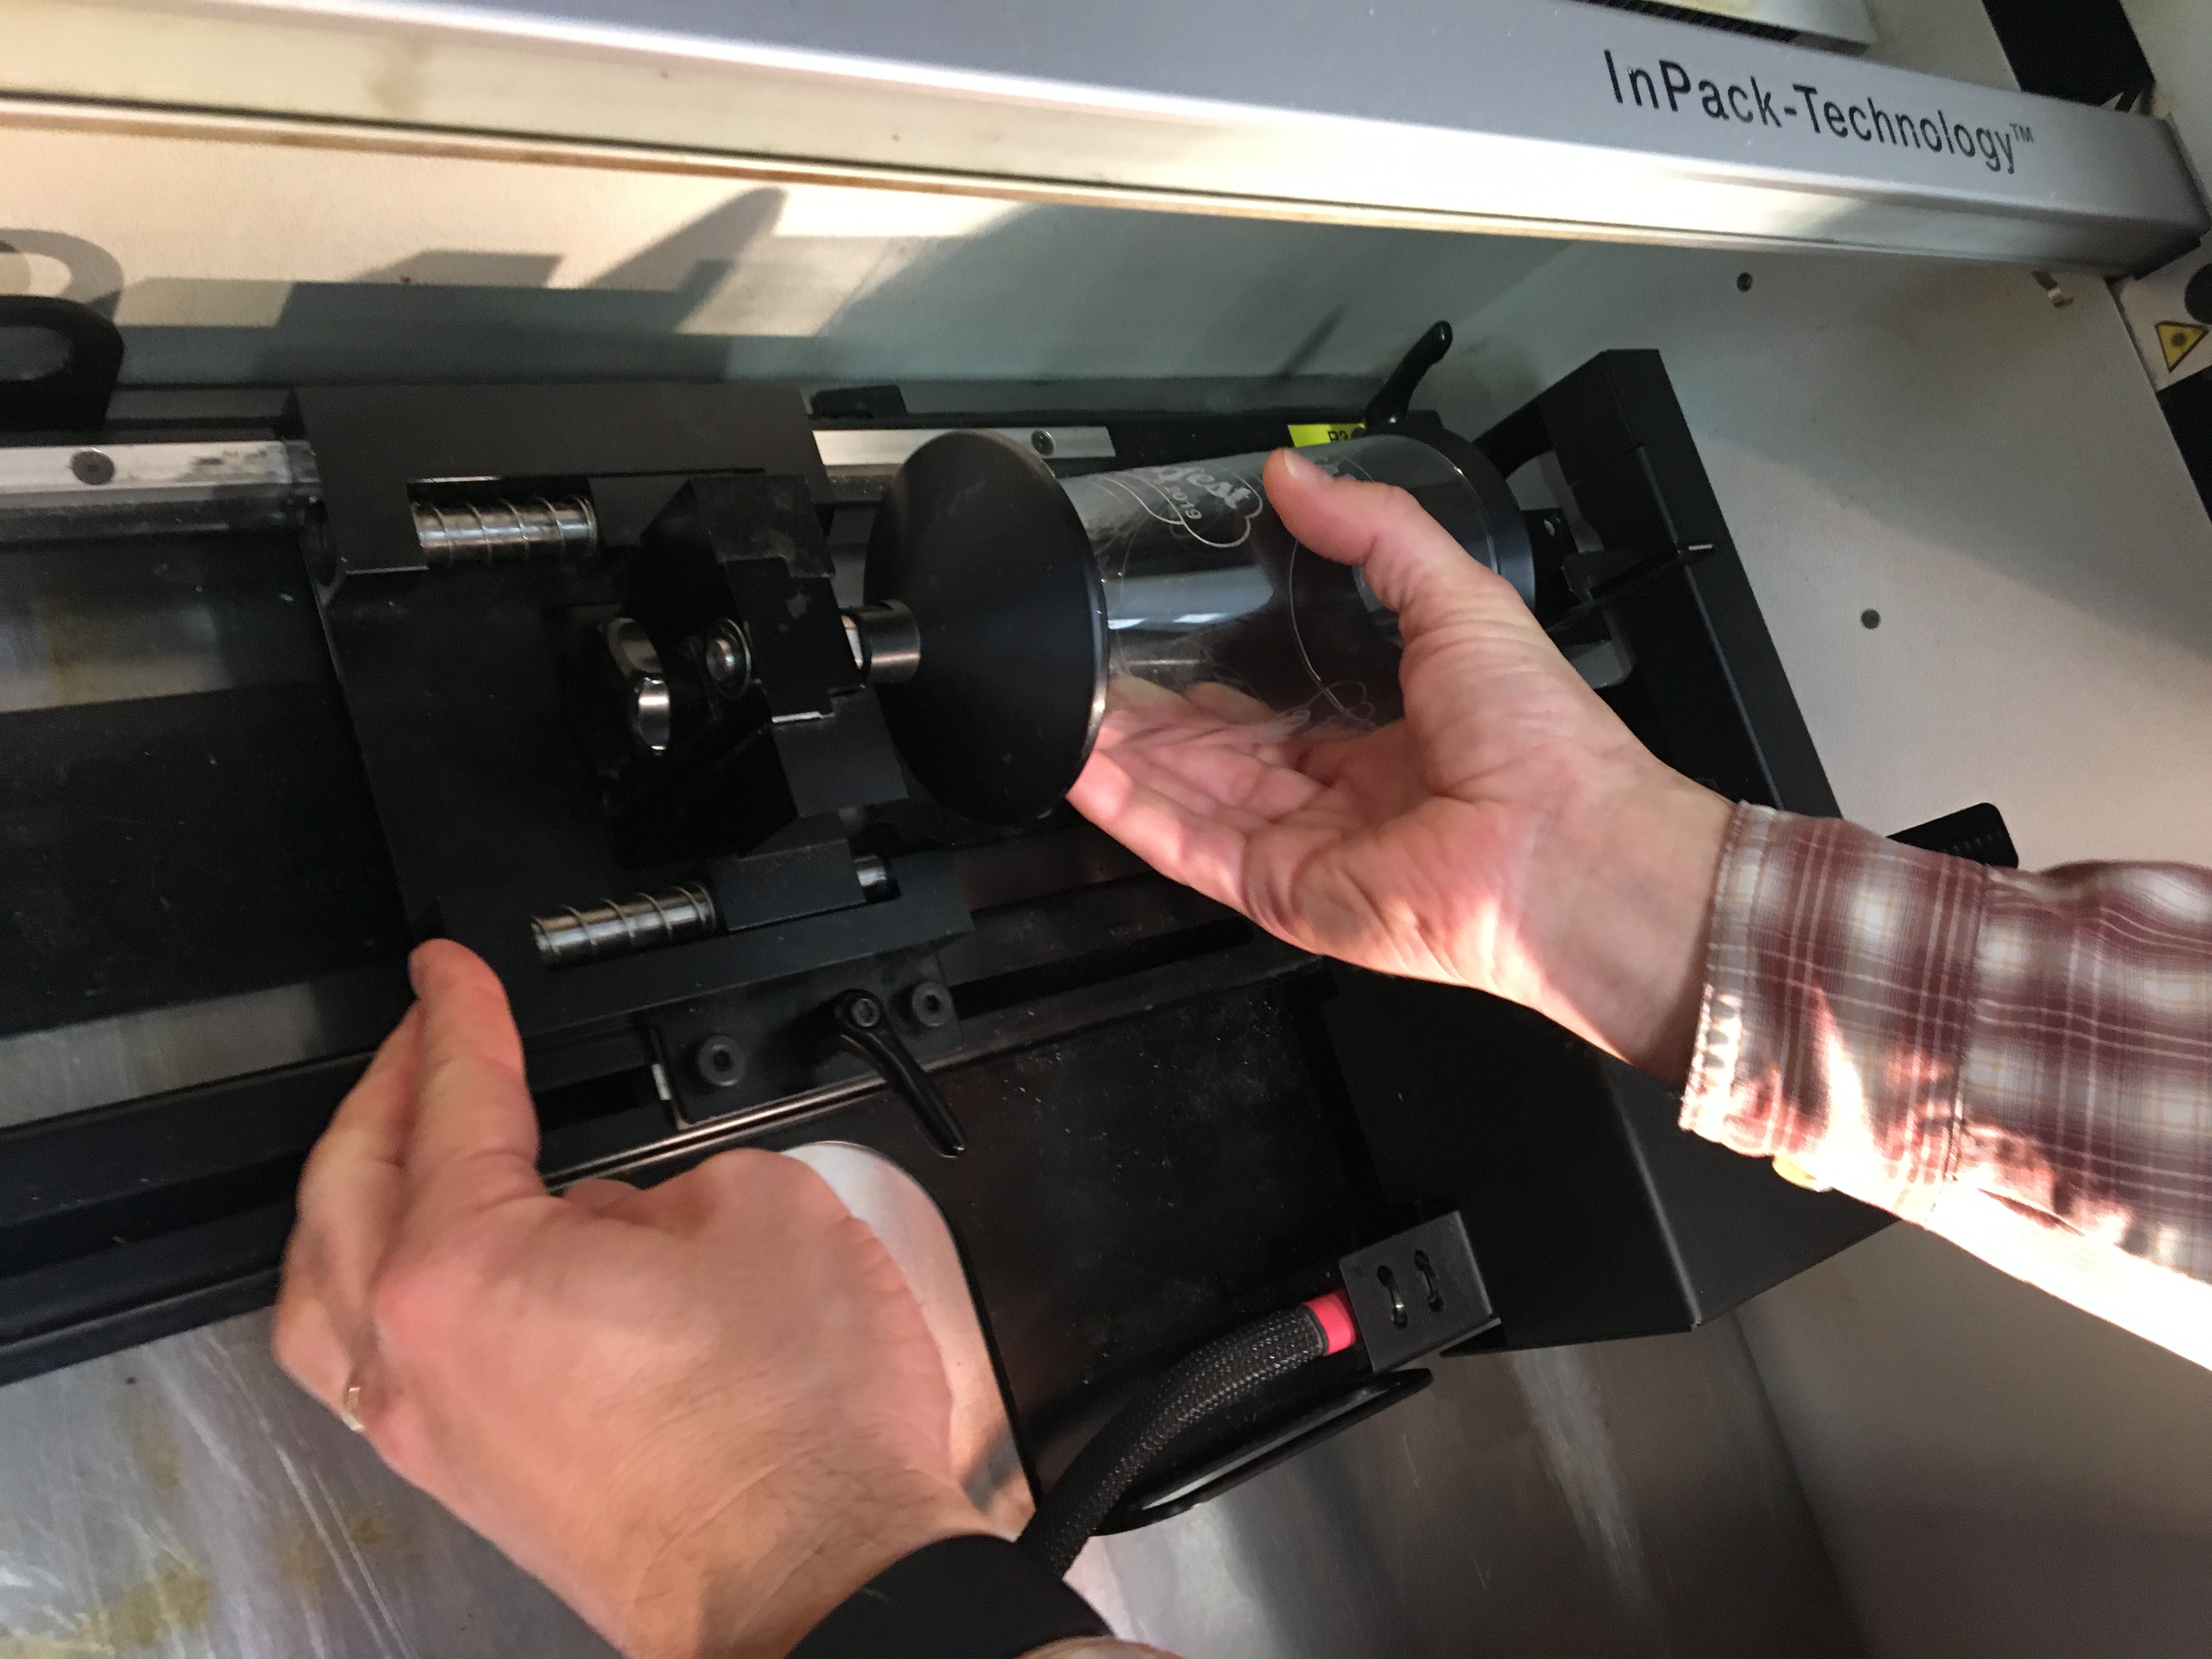
- Get the rotary attachment from the box under the Laser Cutter PC
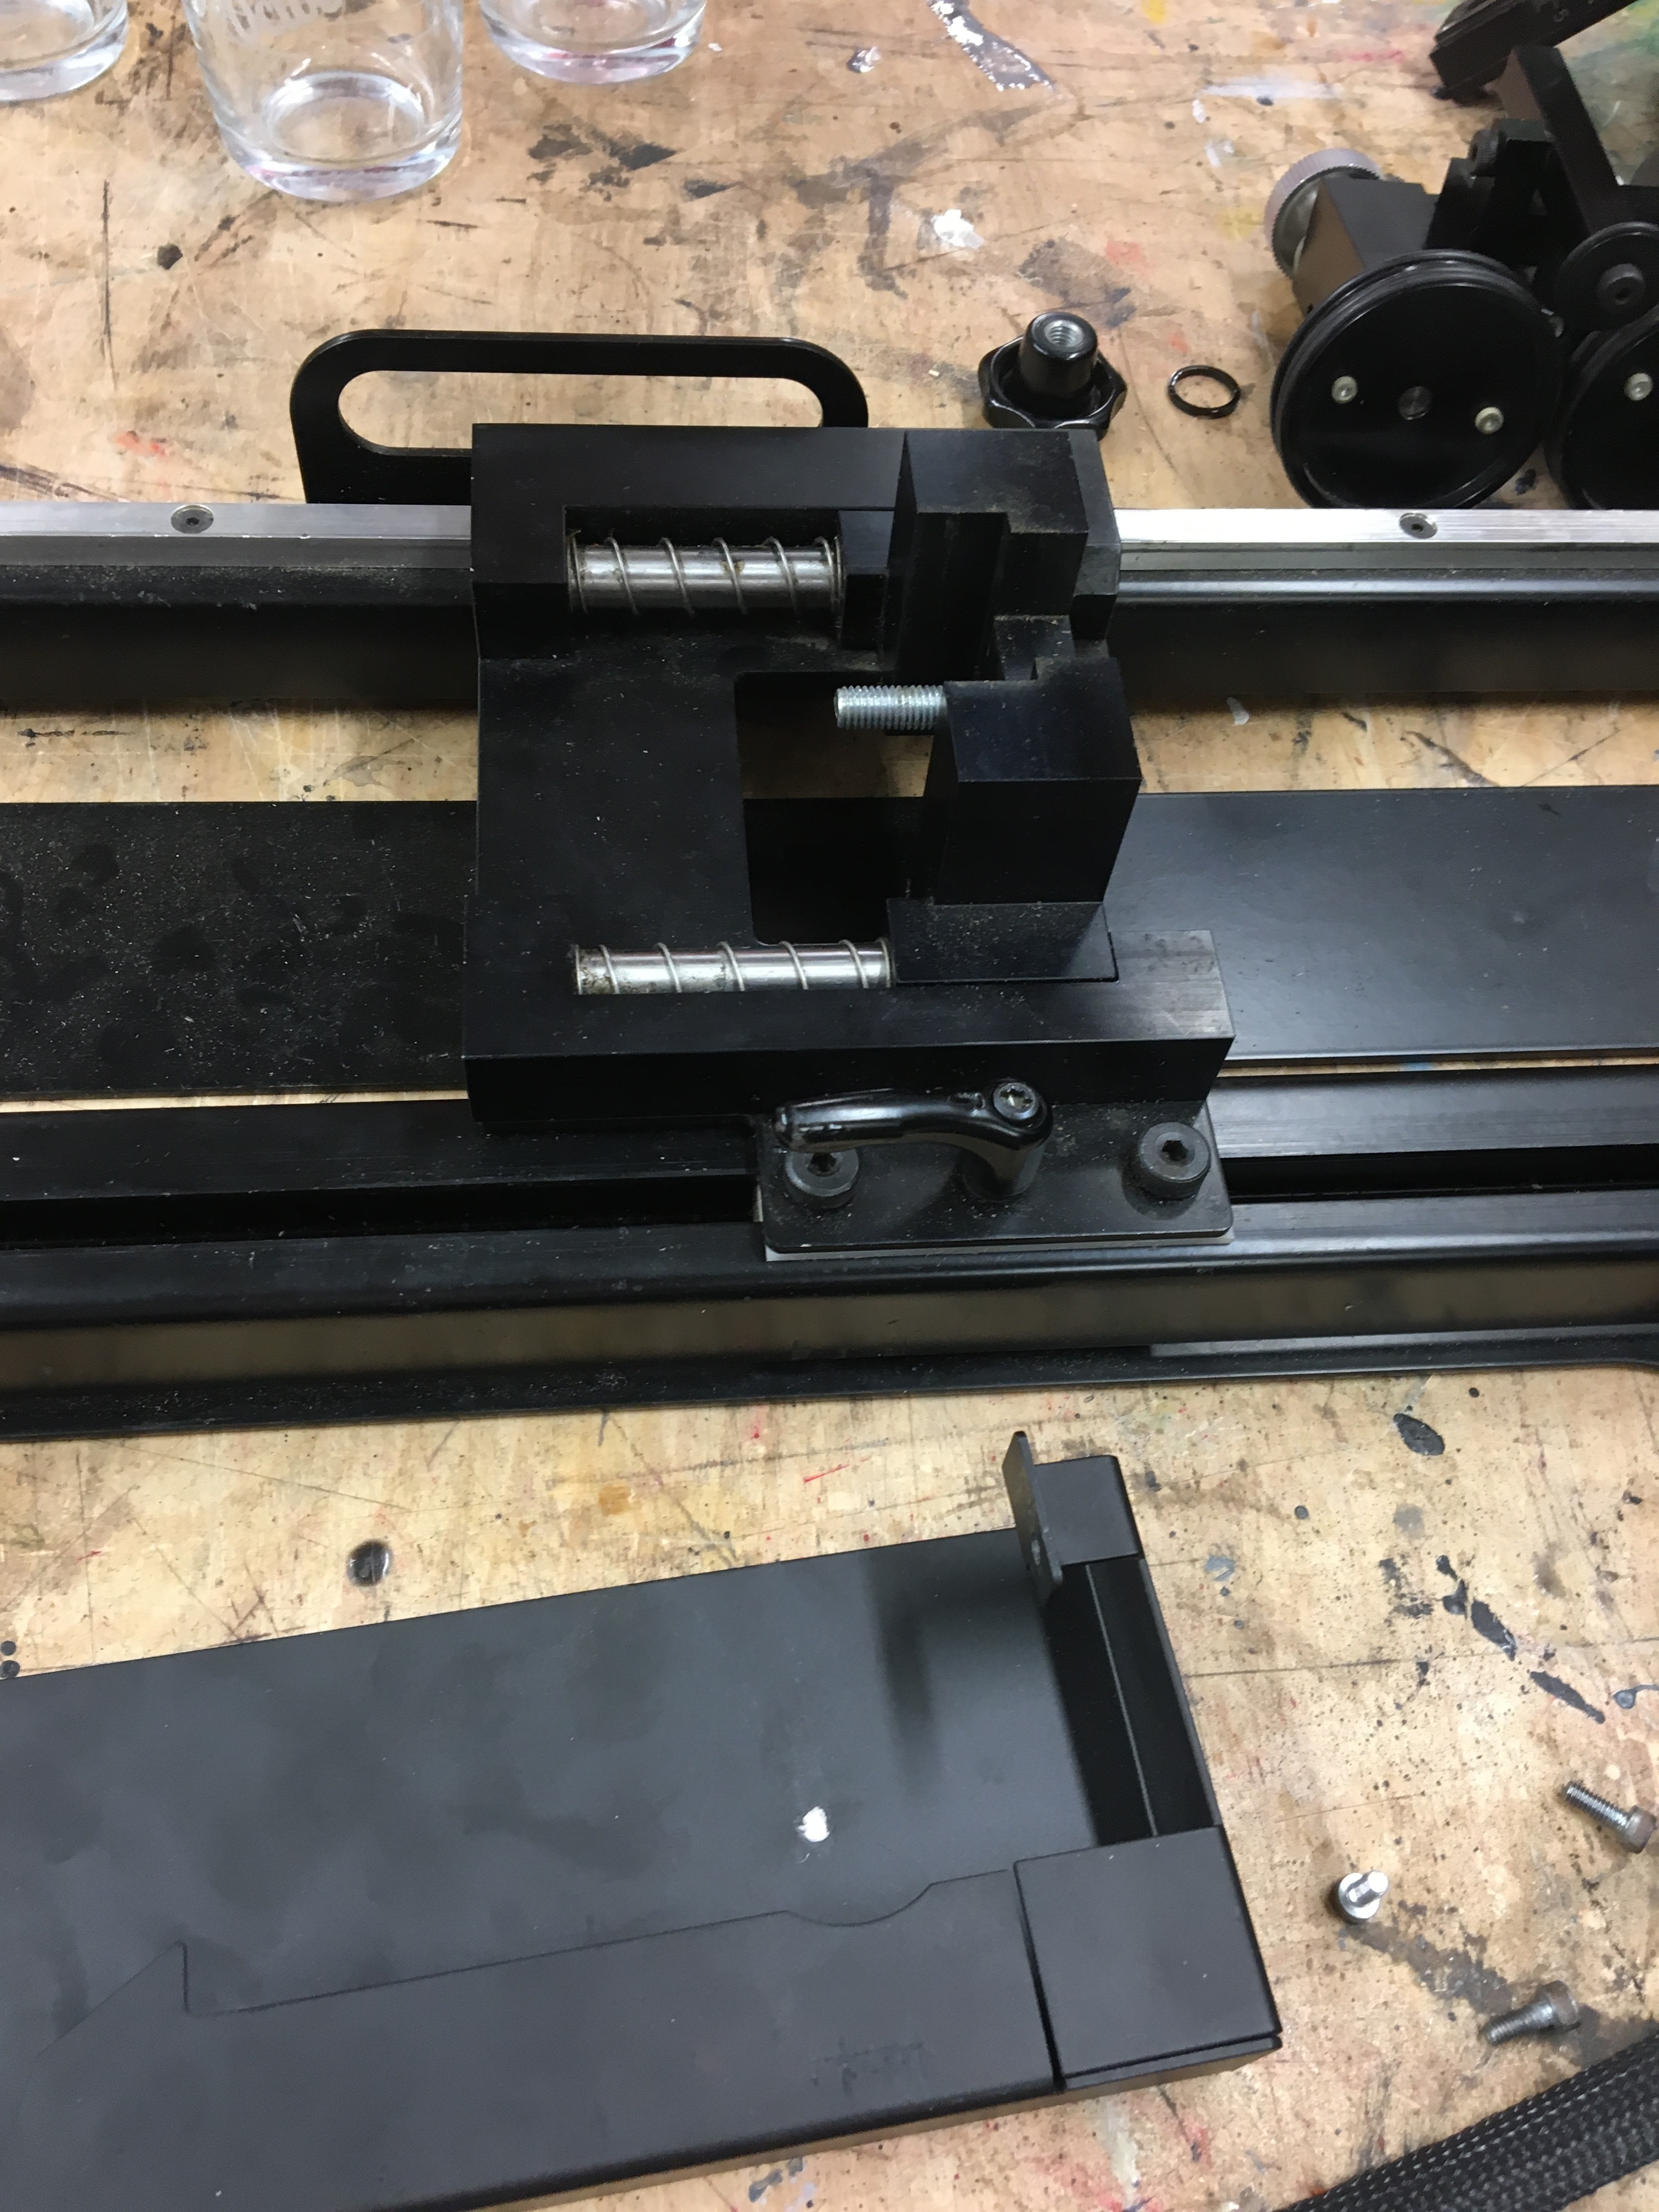
- There are 2 work piece holding options.
Rollers, for working on smaller cylinders/dowel like things.
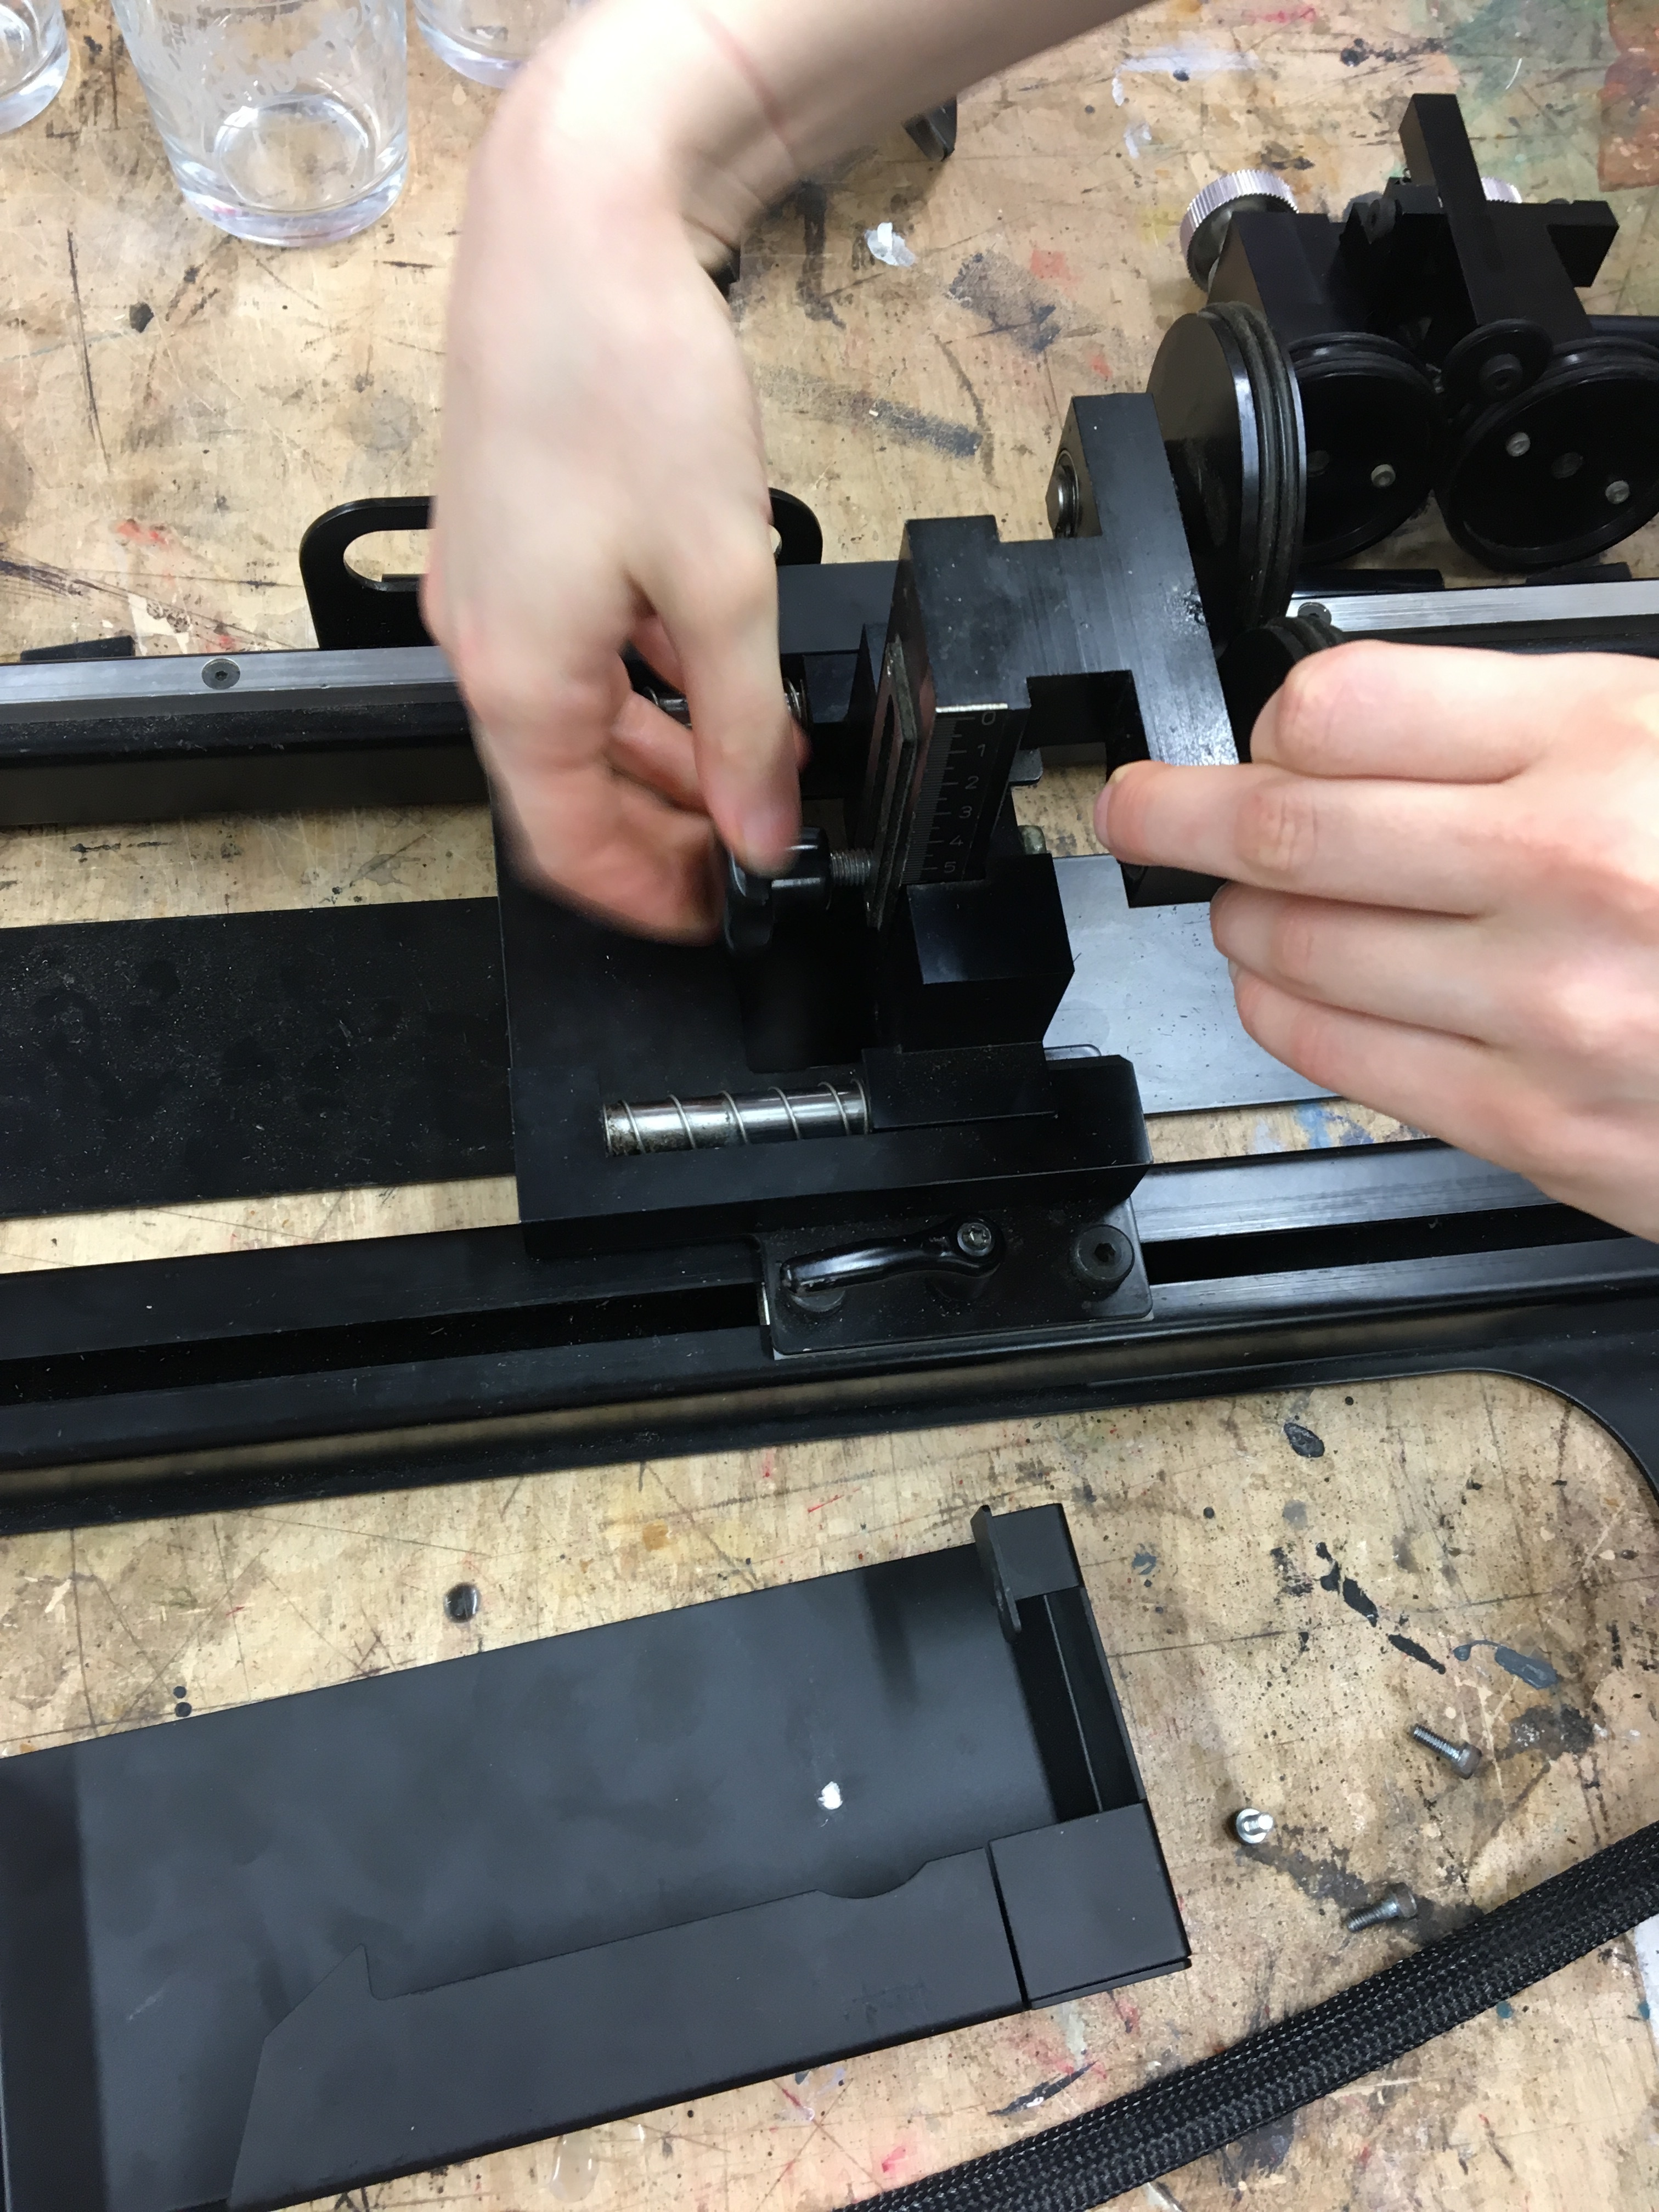
Or conical style clamps for working with larger hollow pieces. - To switch between the 2 there are screws on the top and side of the belt casing which need to be removed.
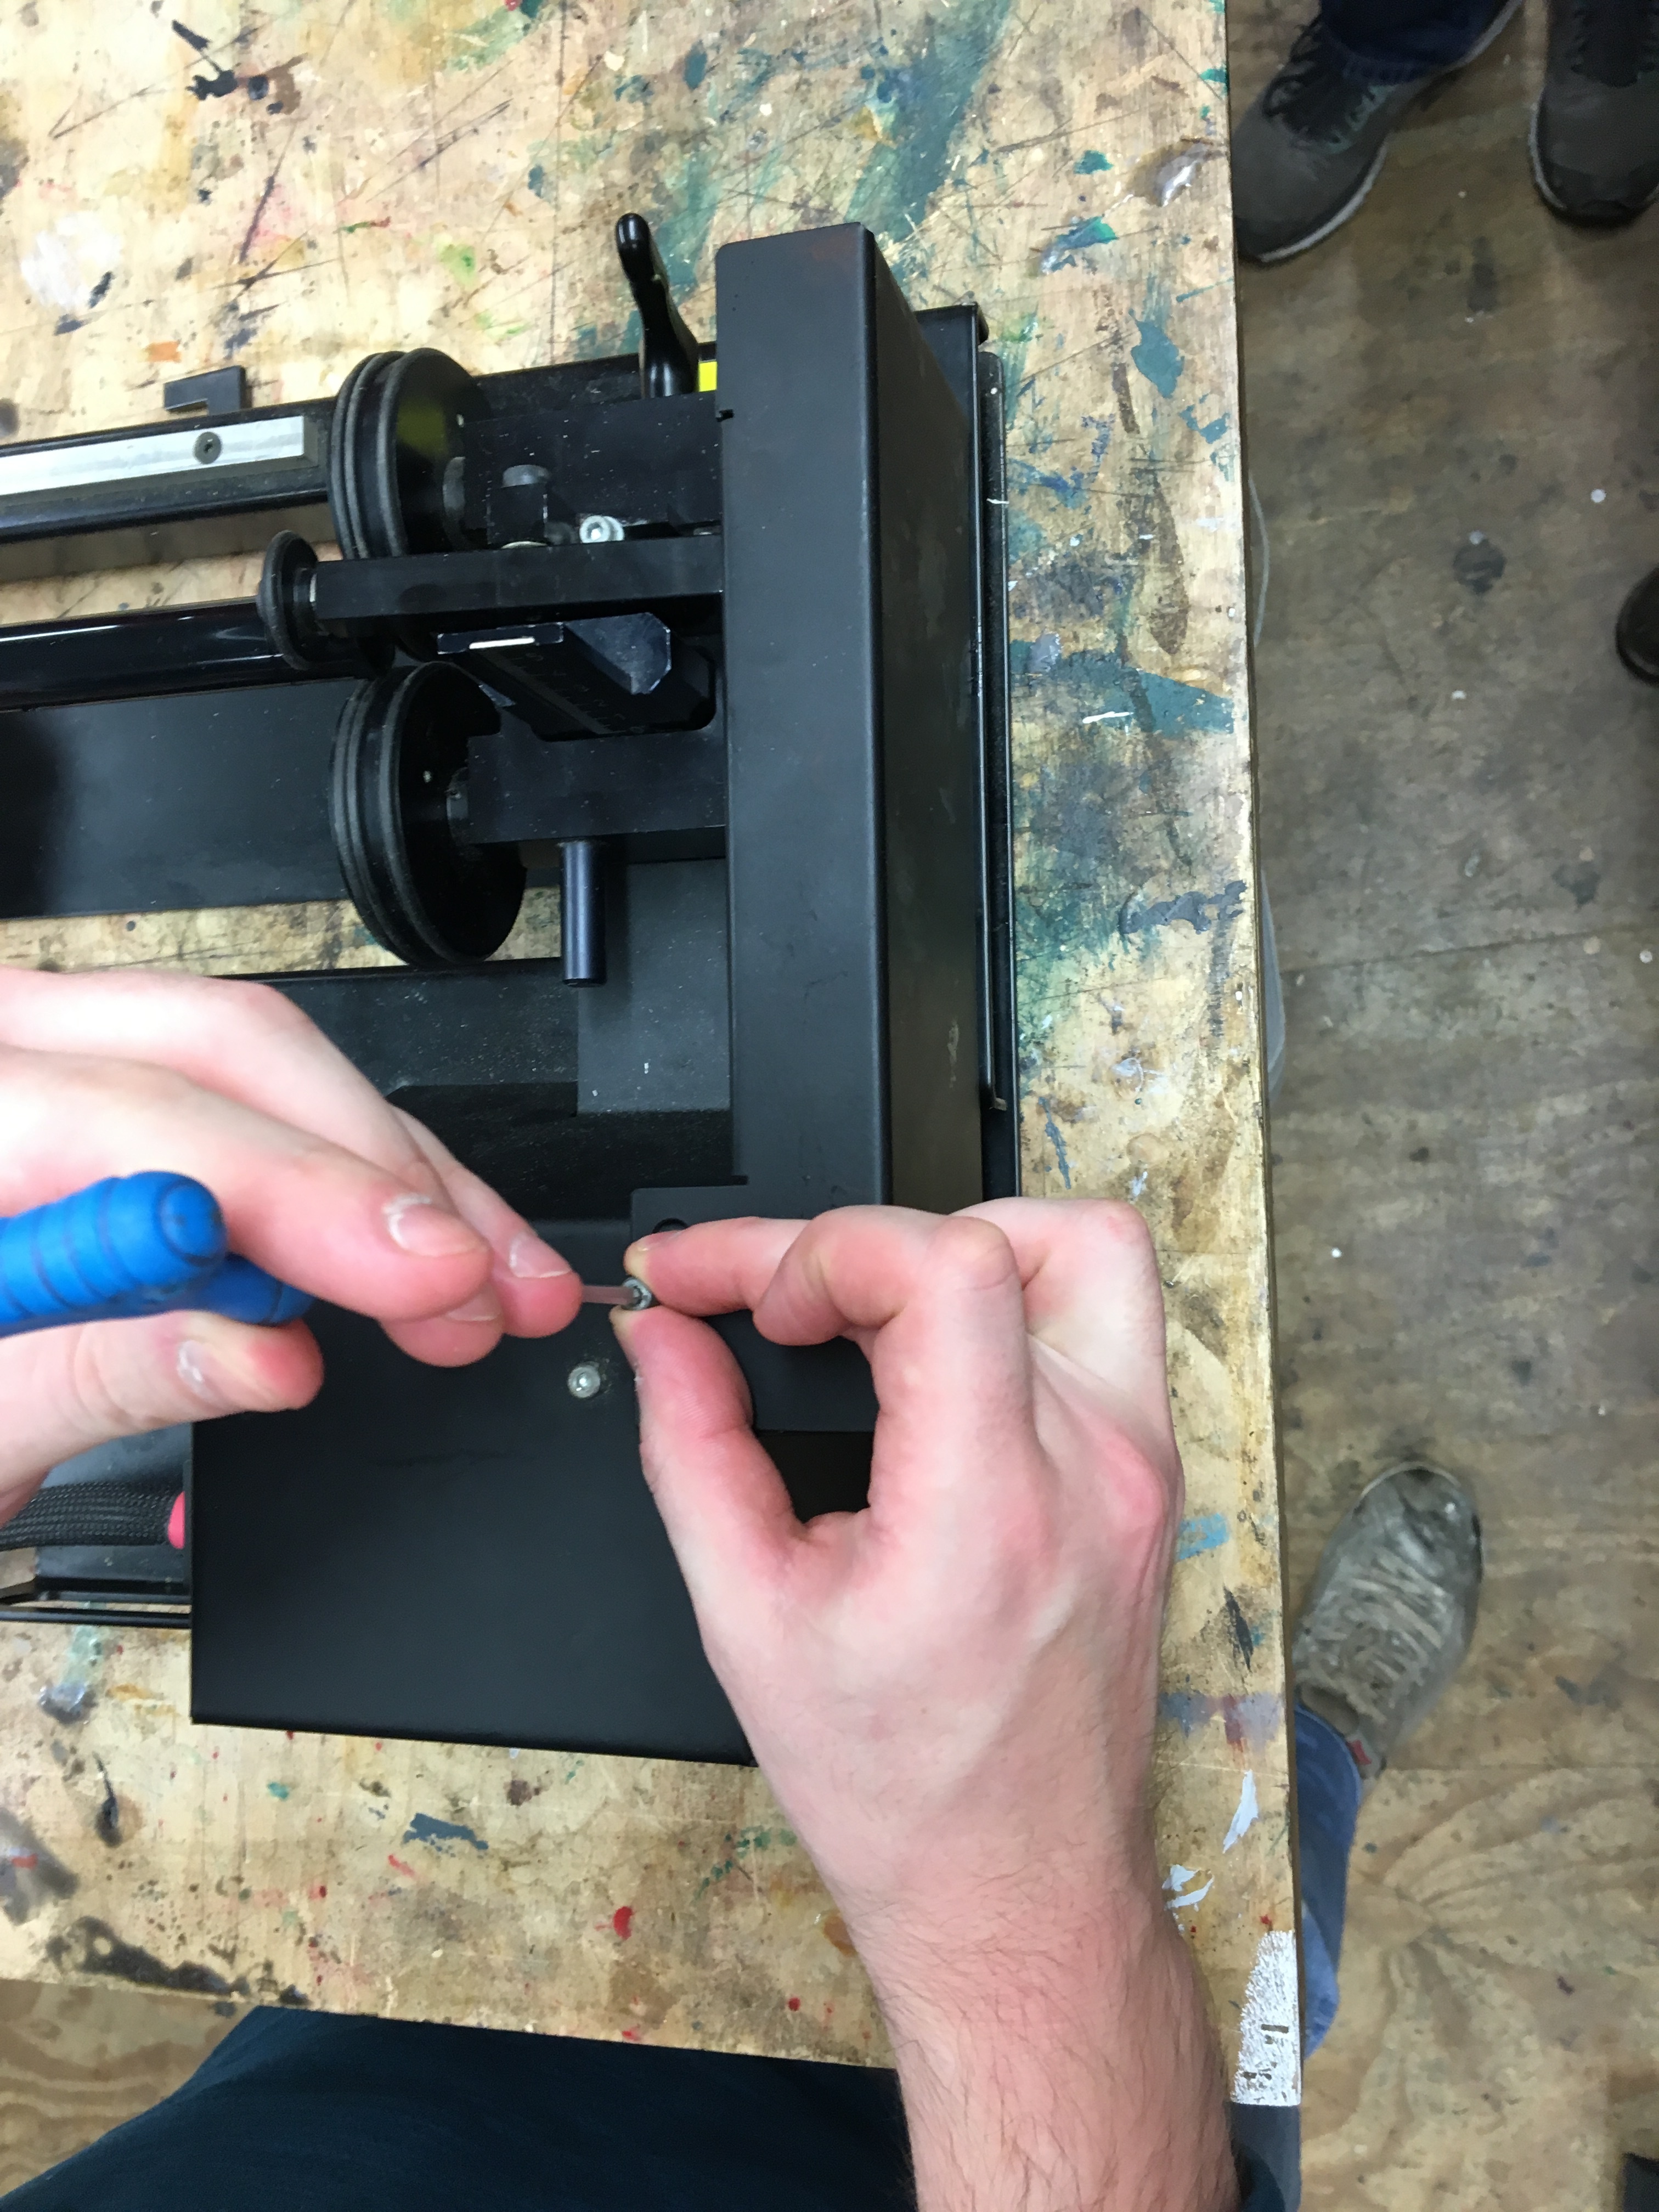

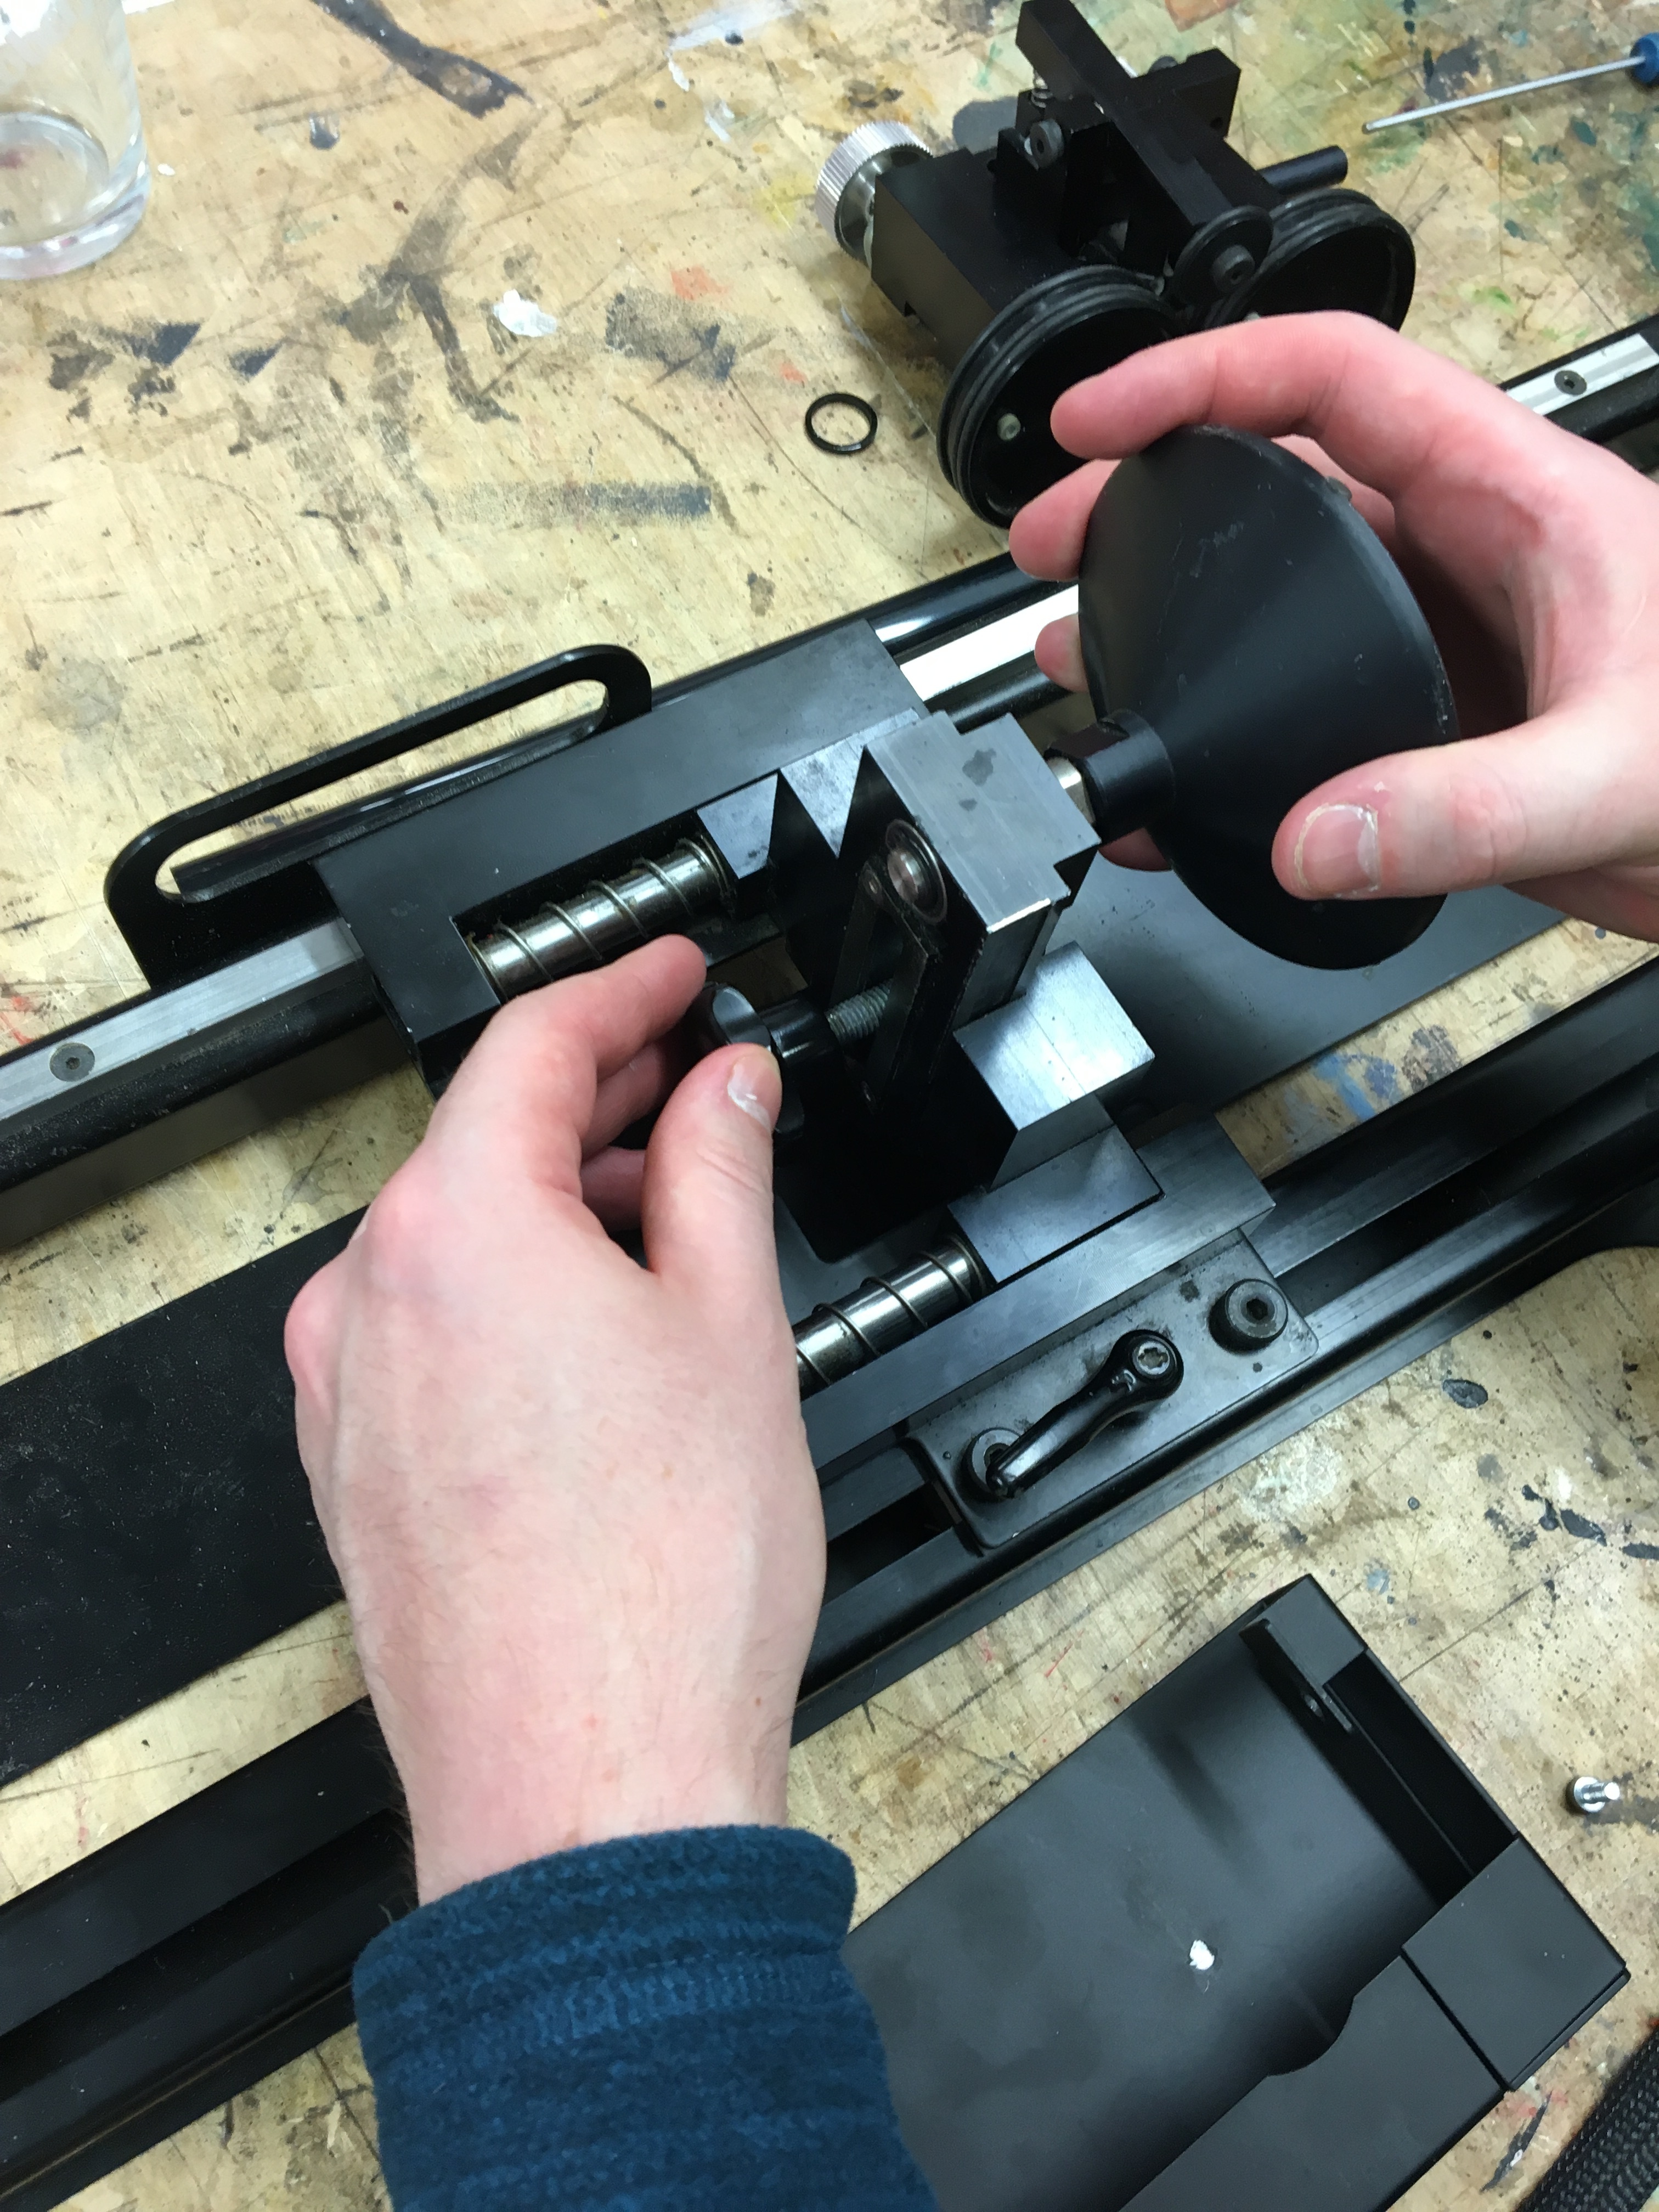
- Remove the screws holding the current attachment down, remove the belt and lift off the attachment (assuming you want to change it)
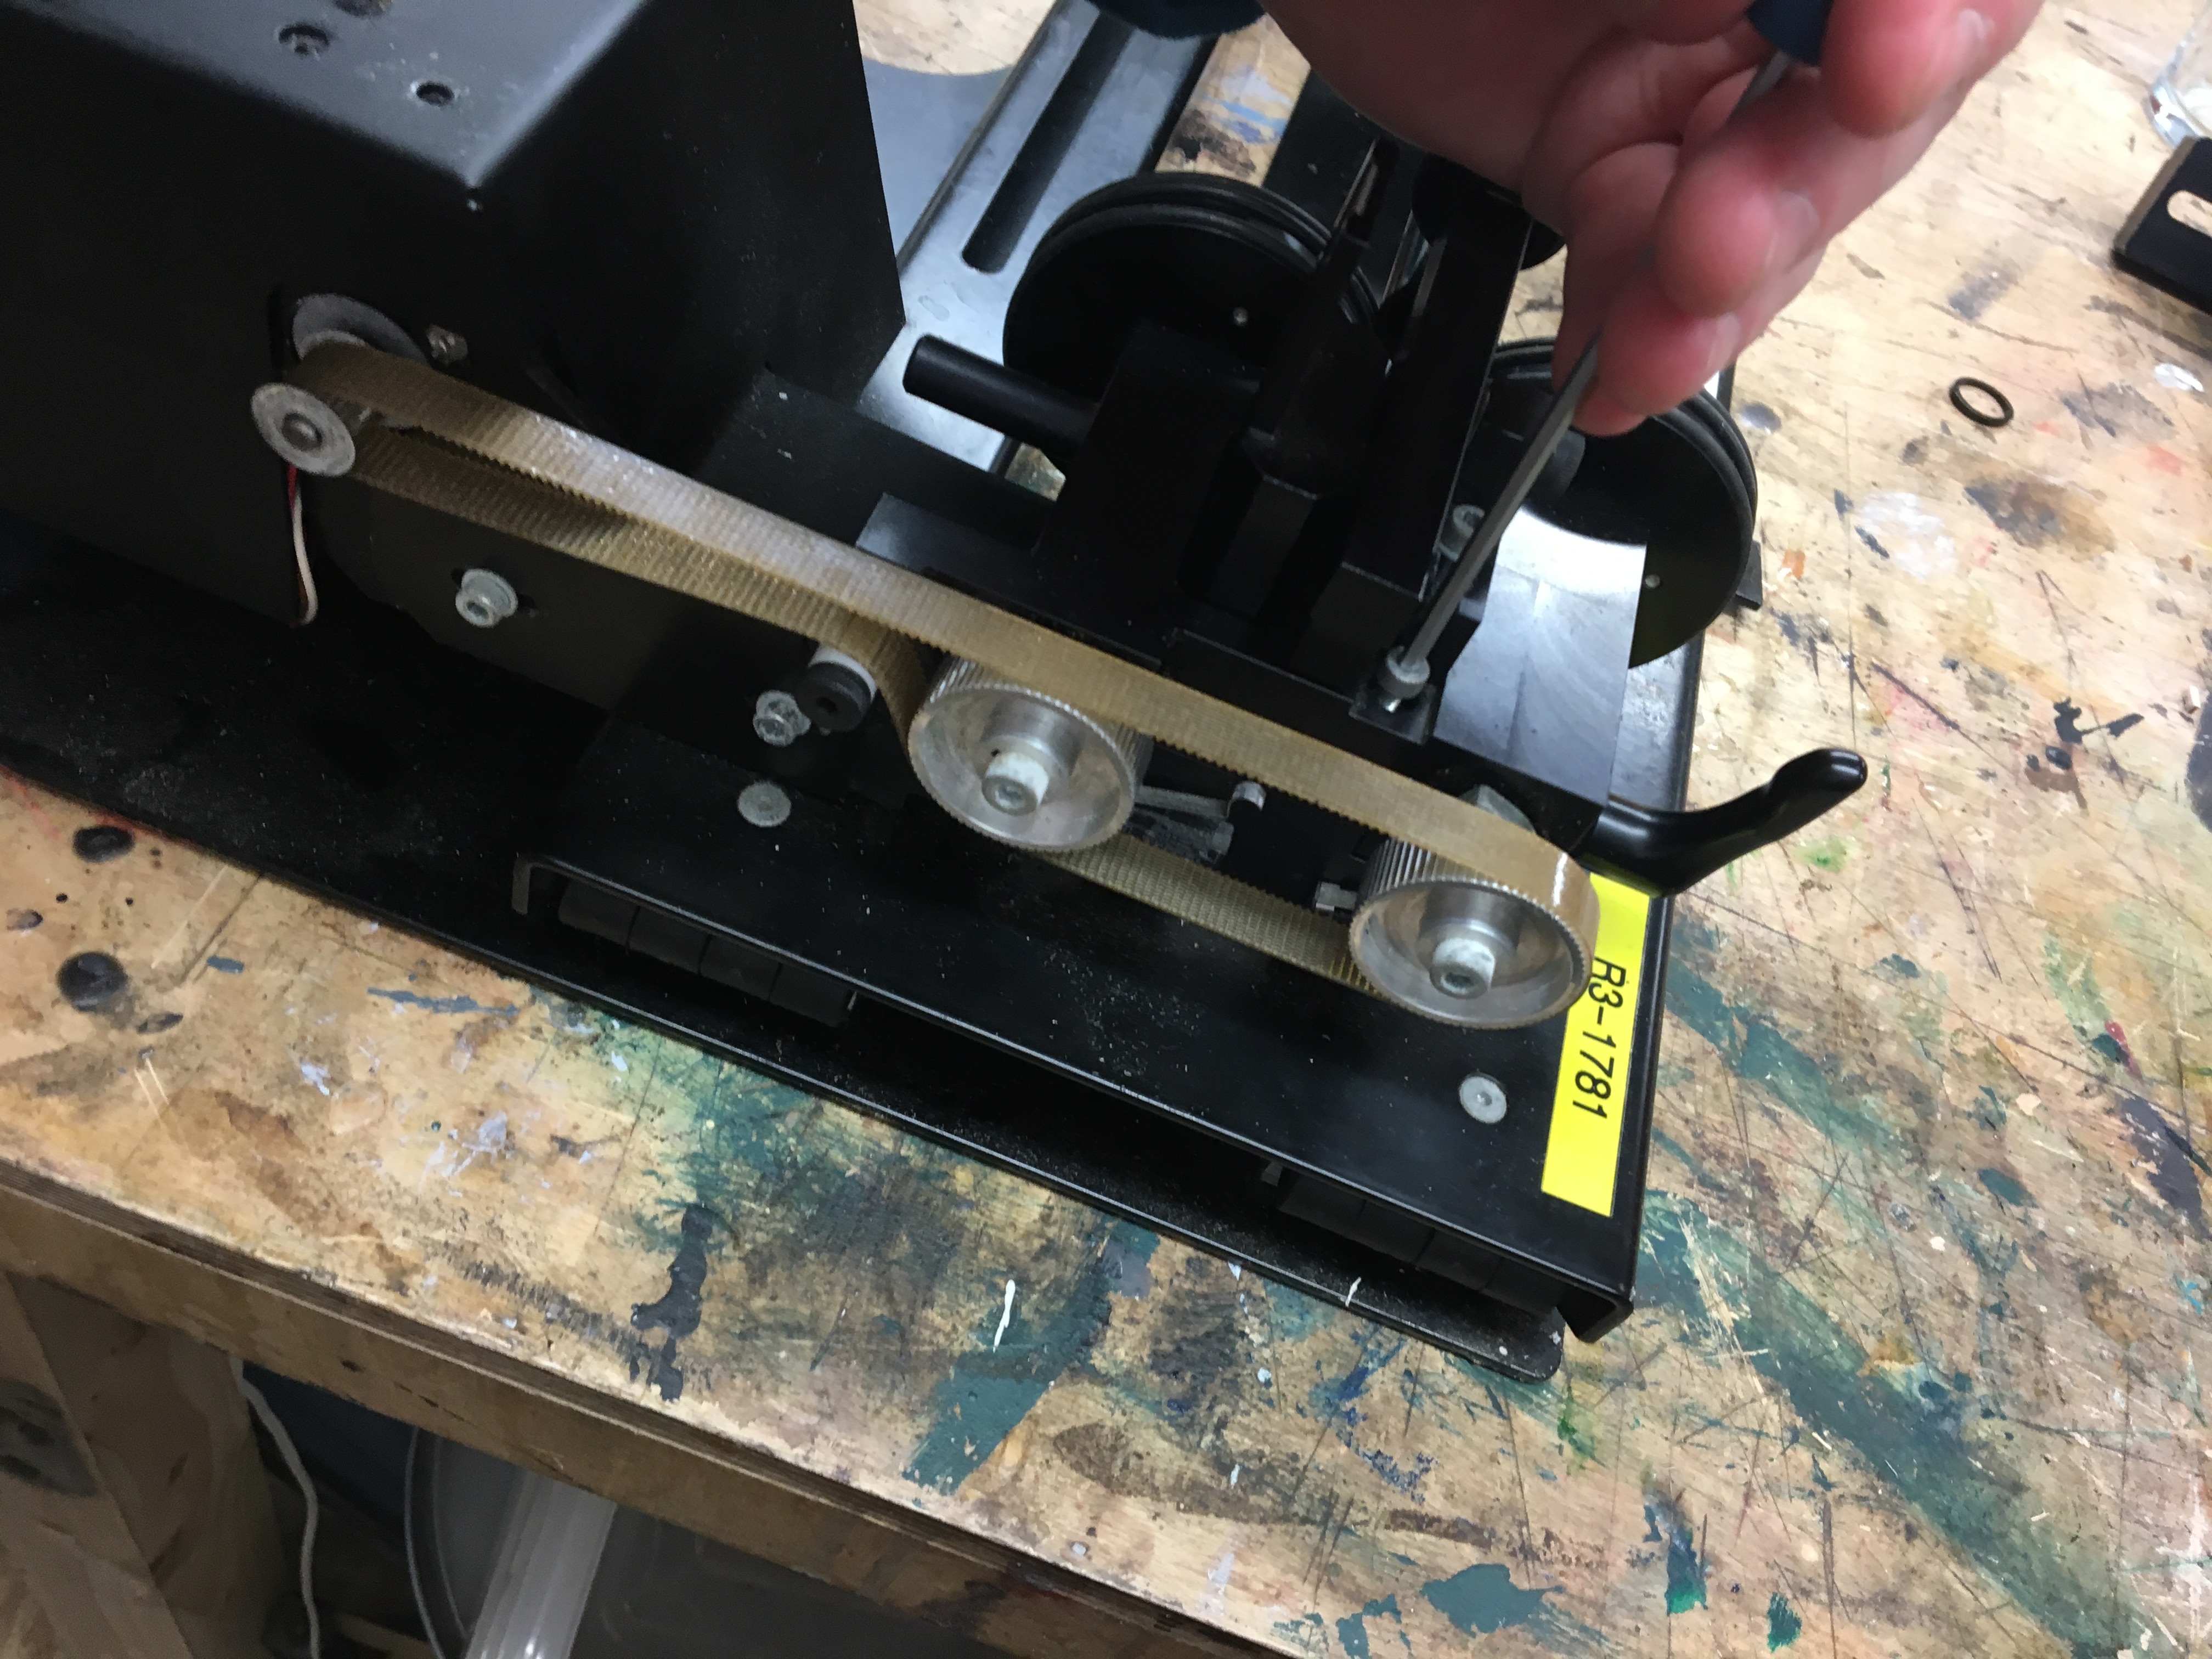
- Slide on the new attachment, replace the screws and re-attach the belt
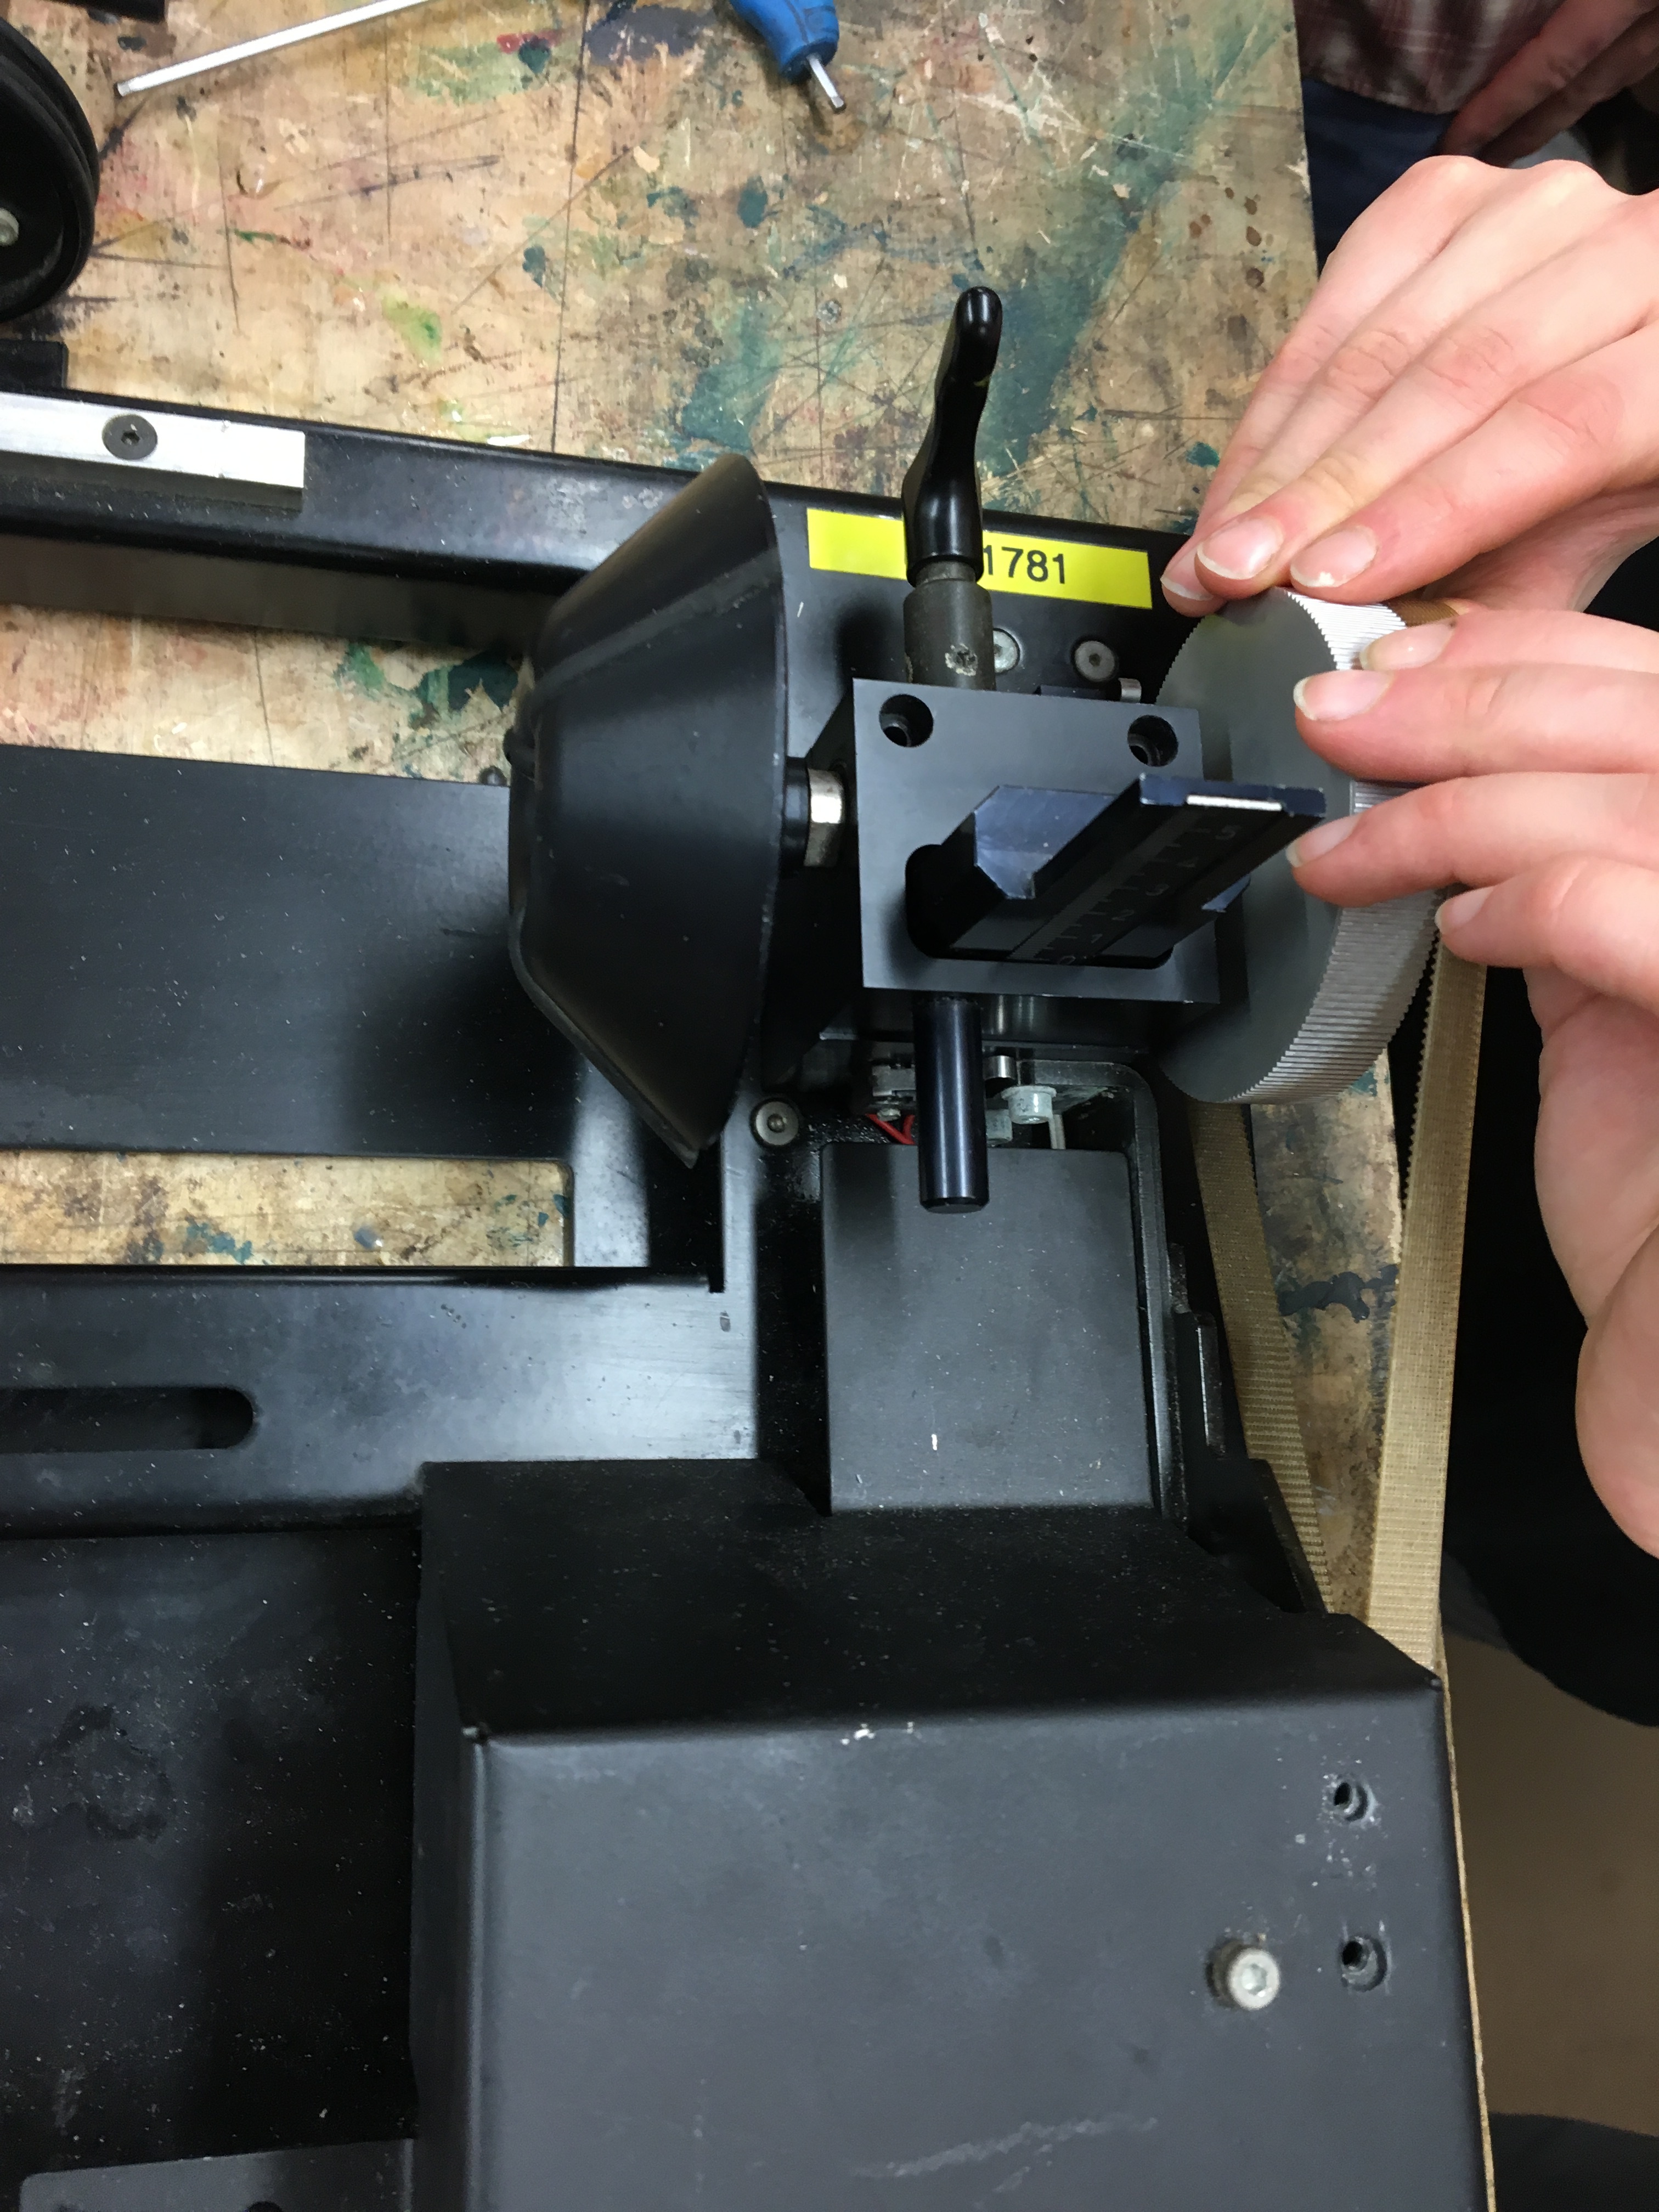

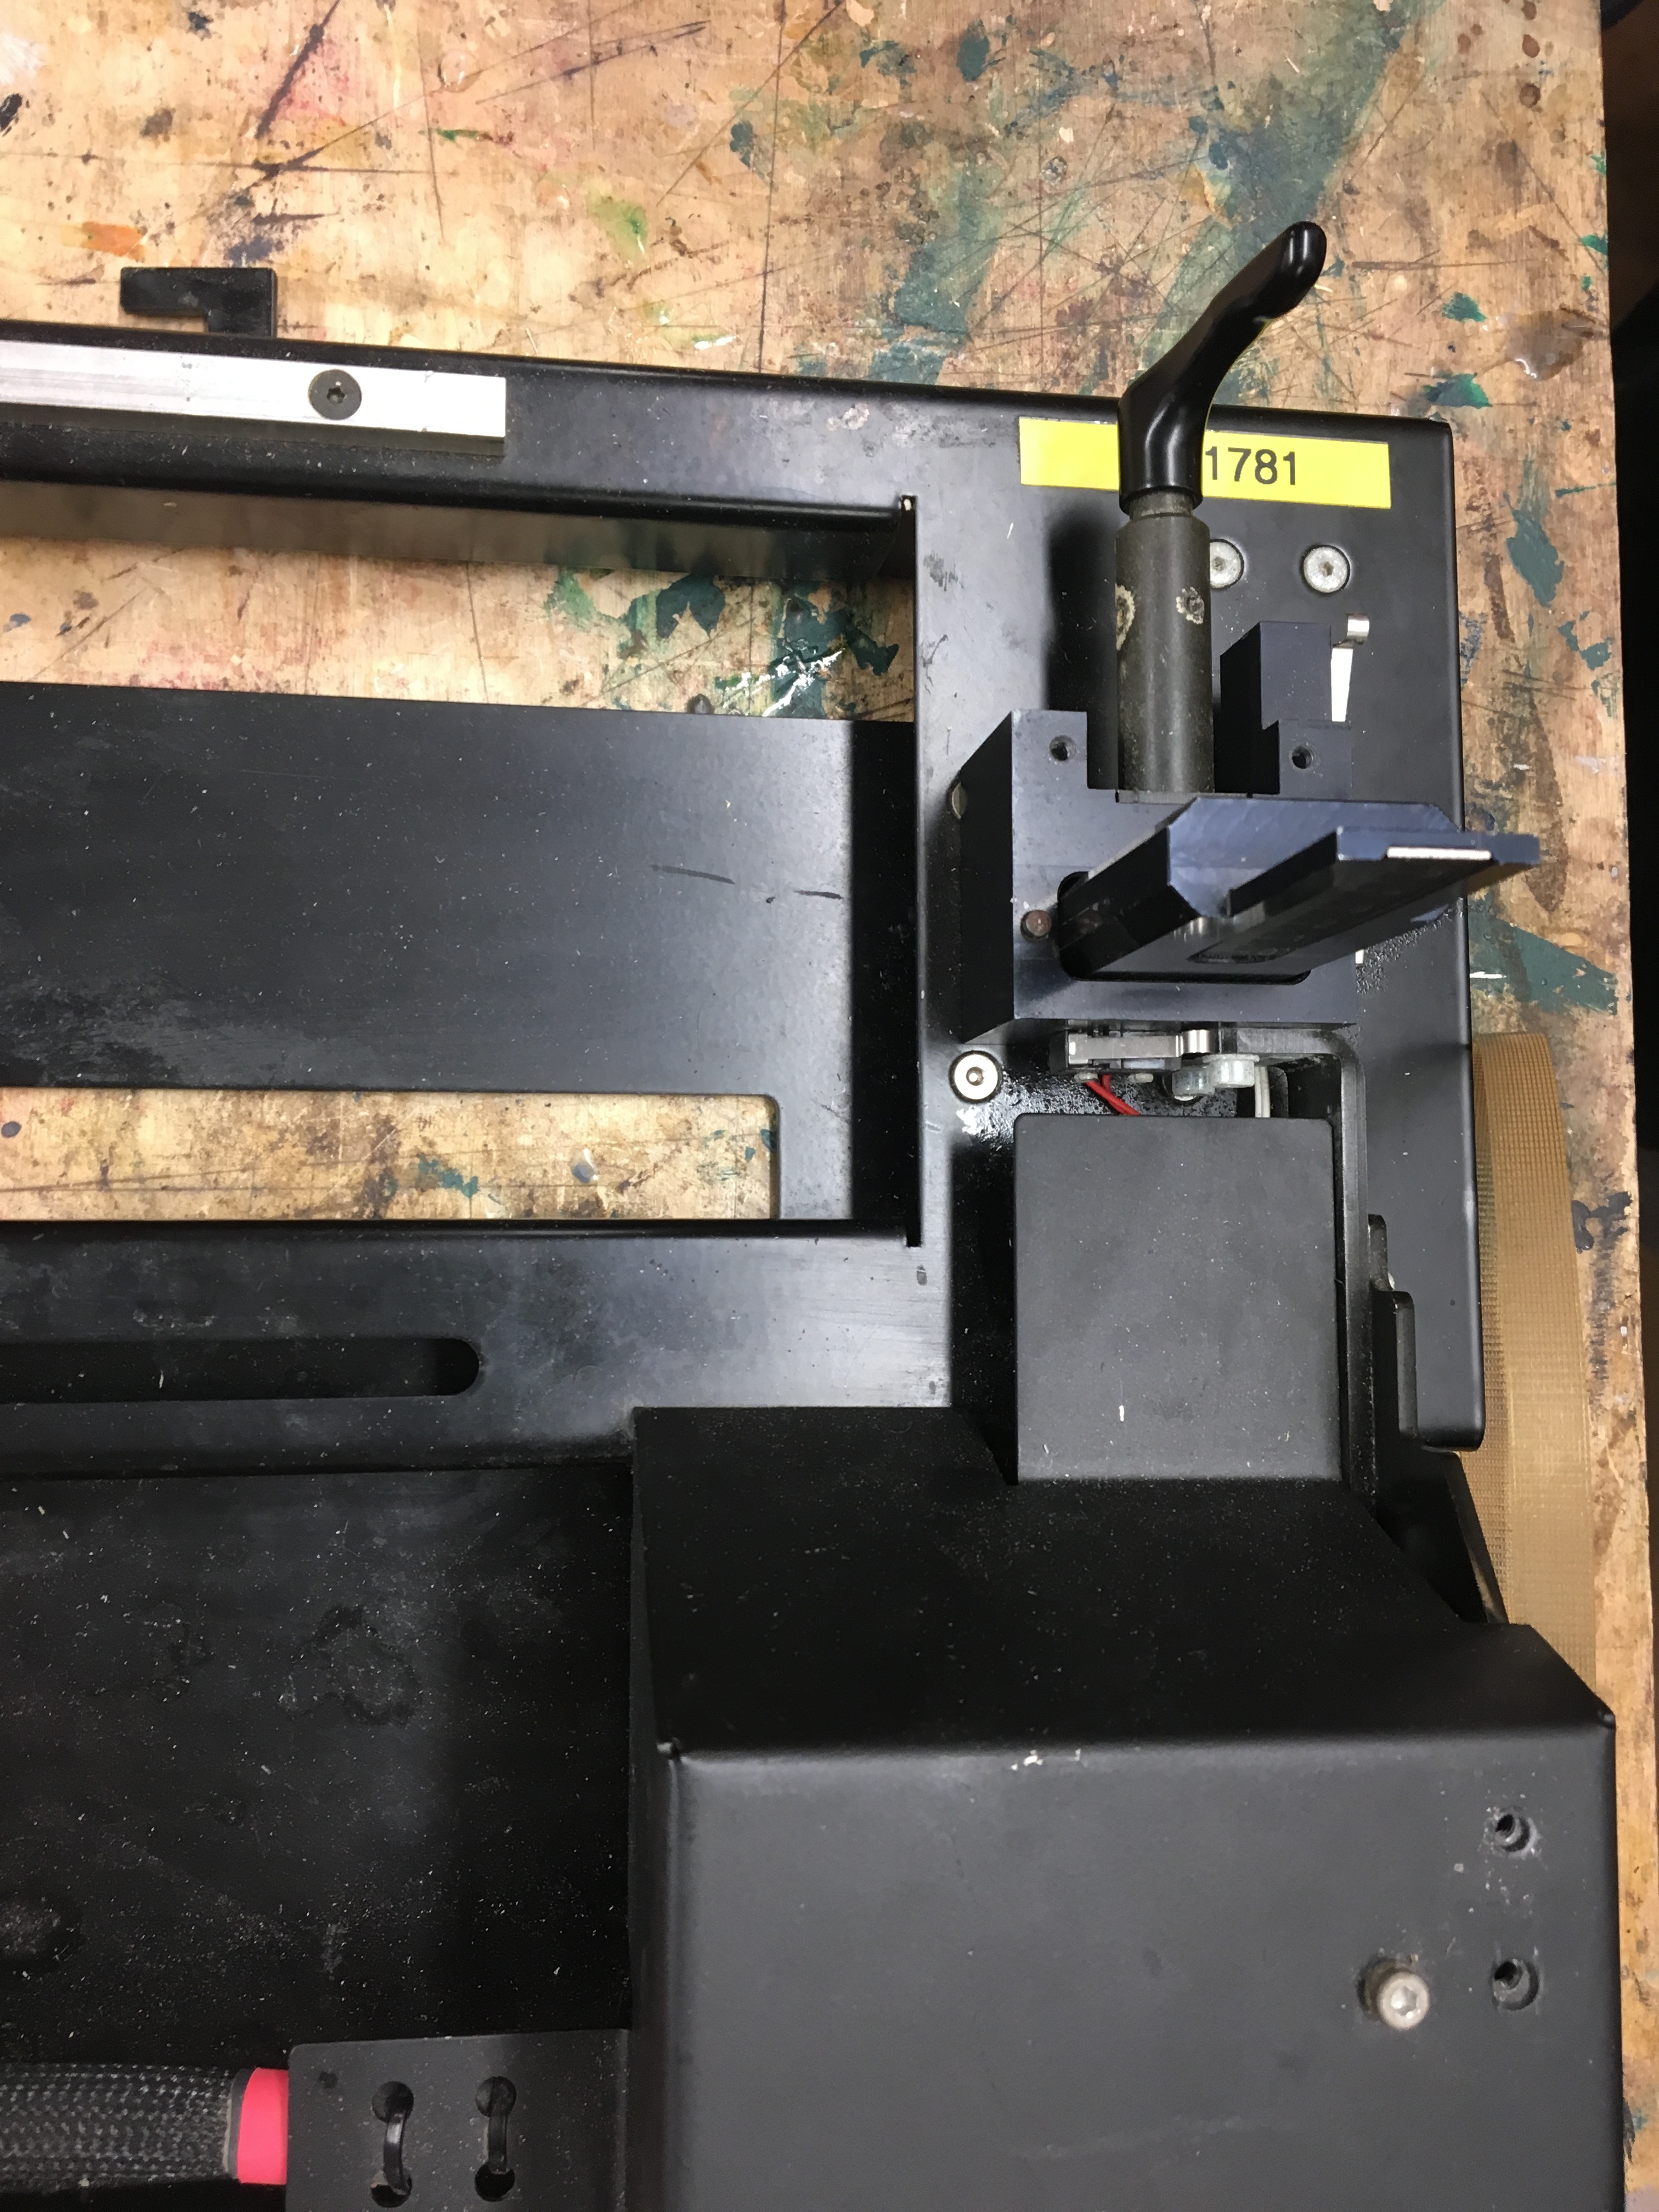
- The other end is simpler. Unscrew by hand, slide out and replace
- Replace the belt casing
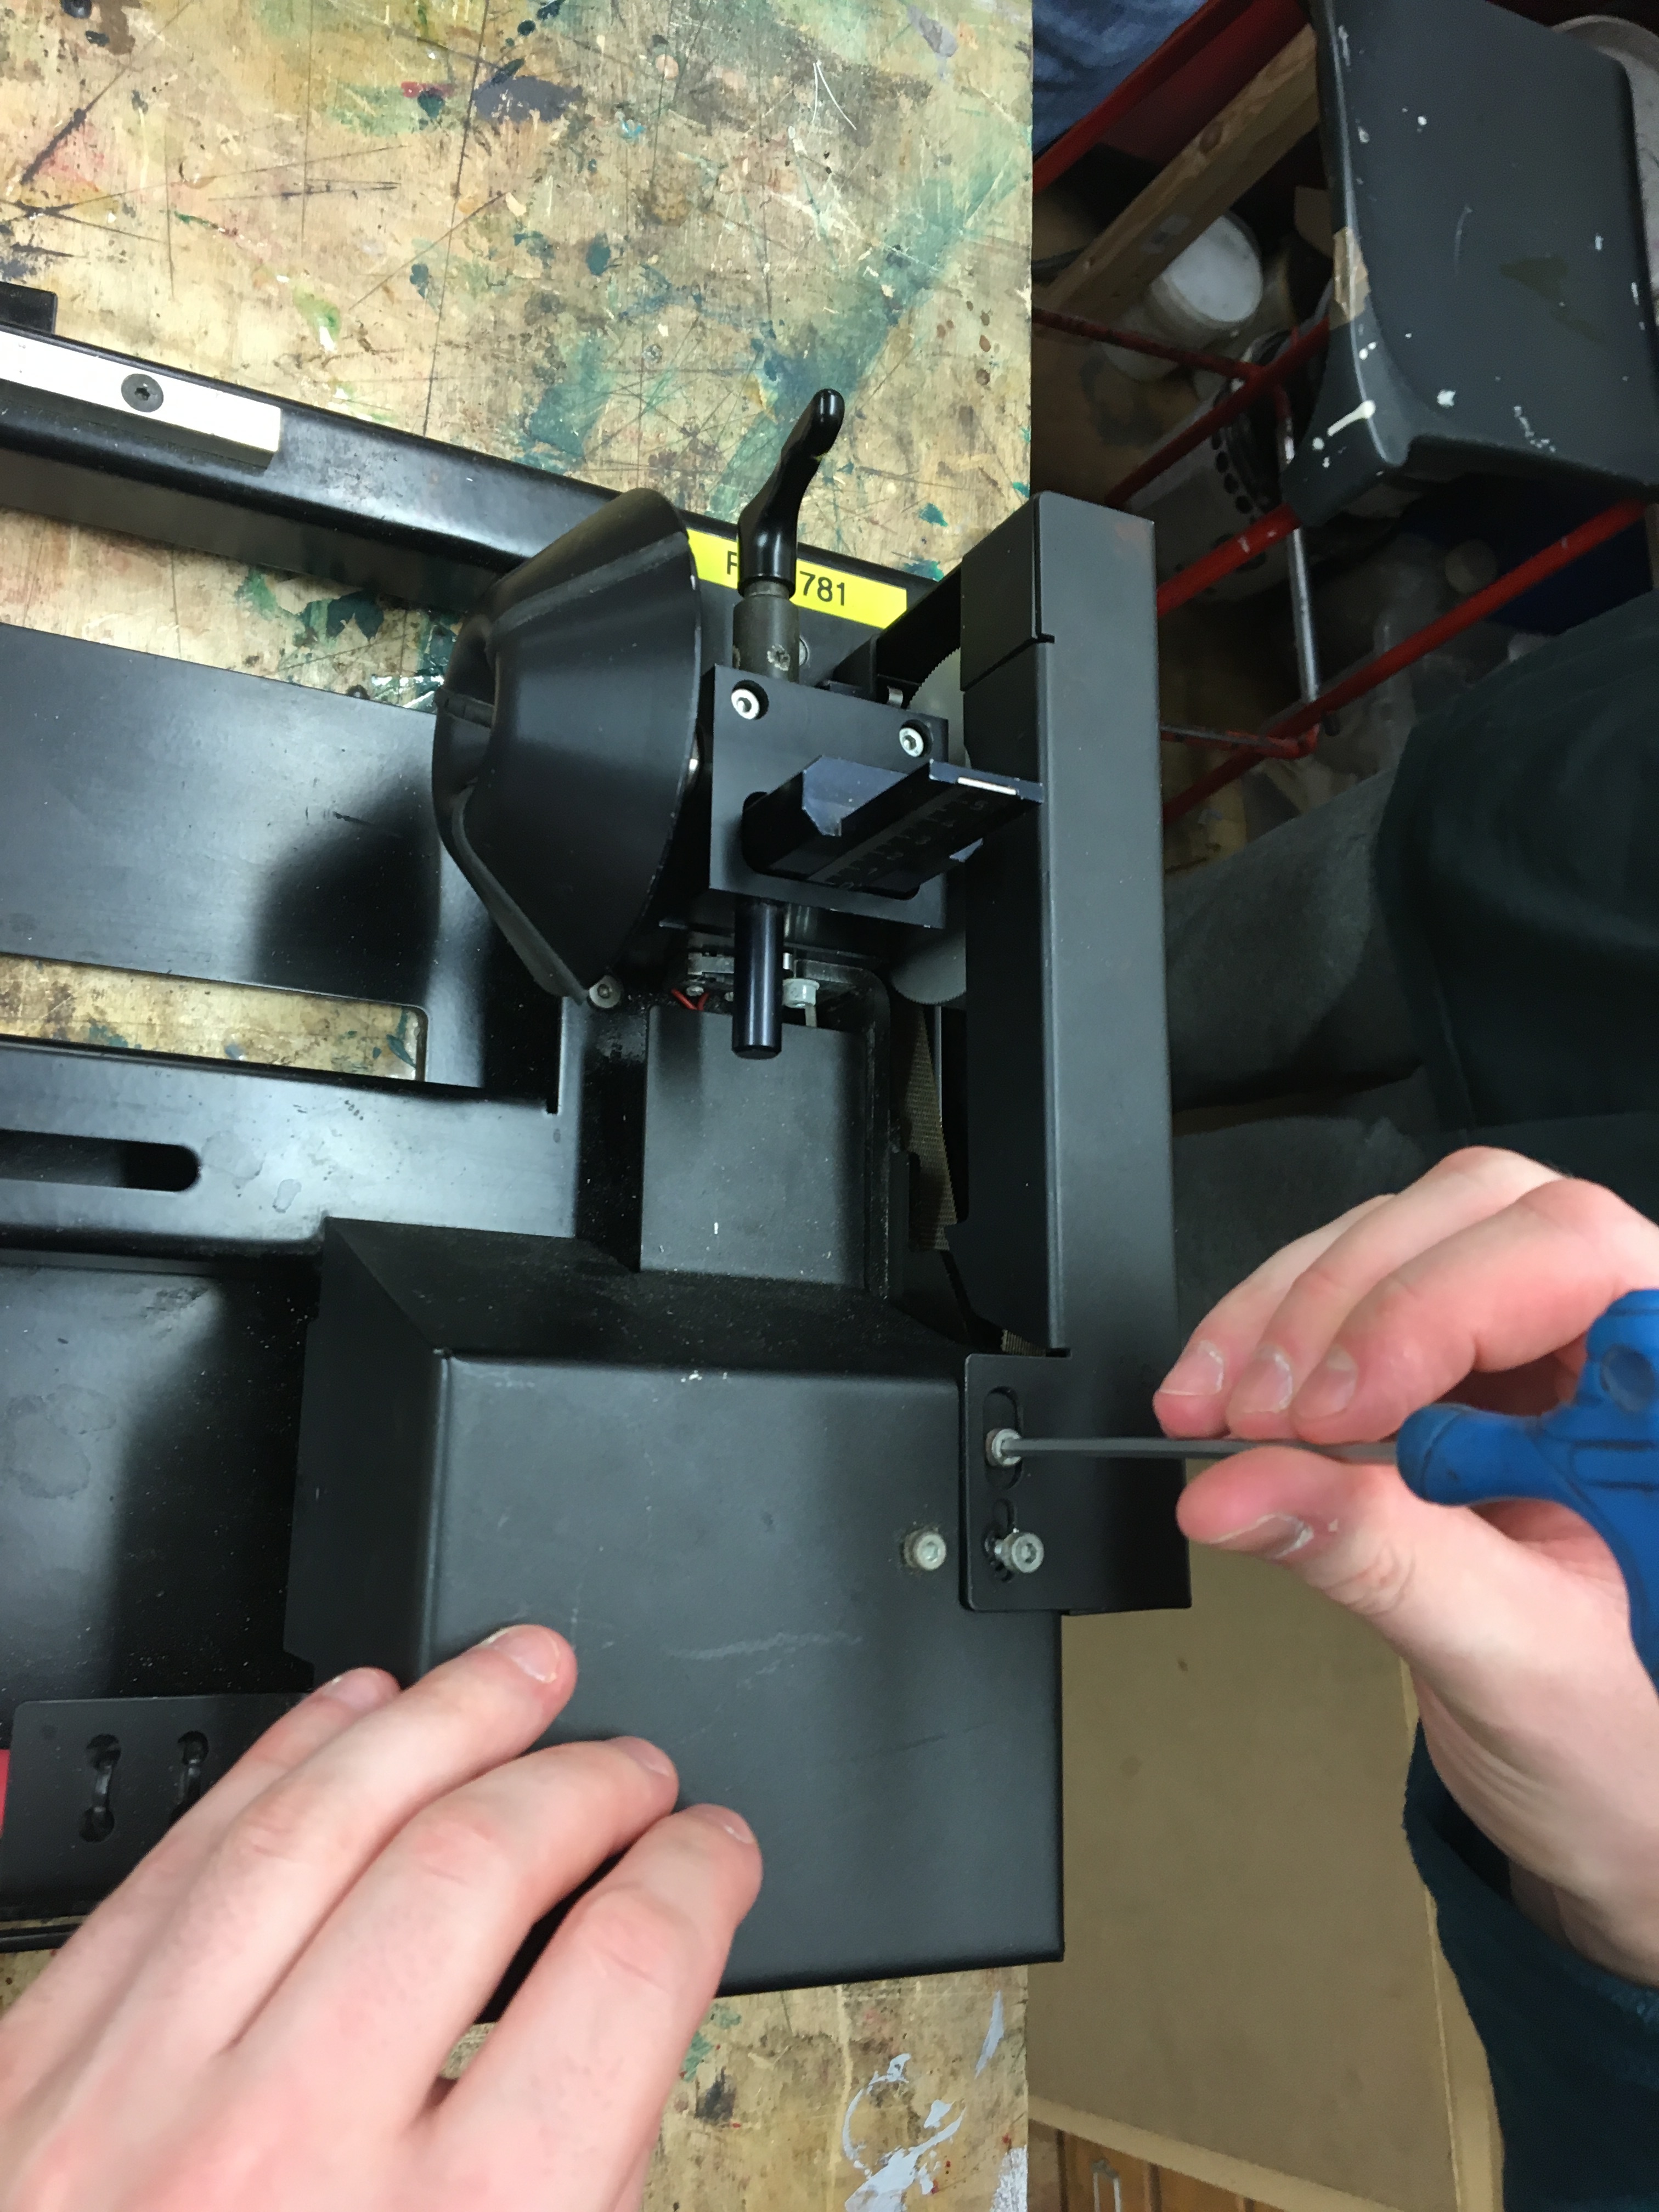
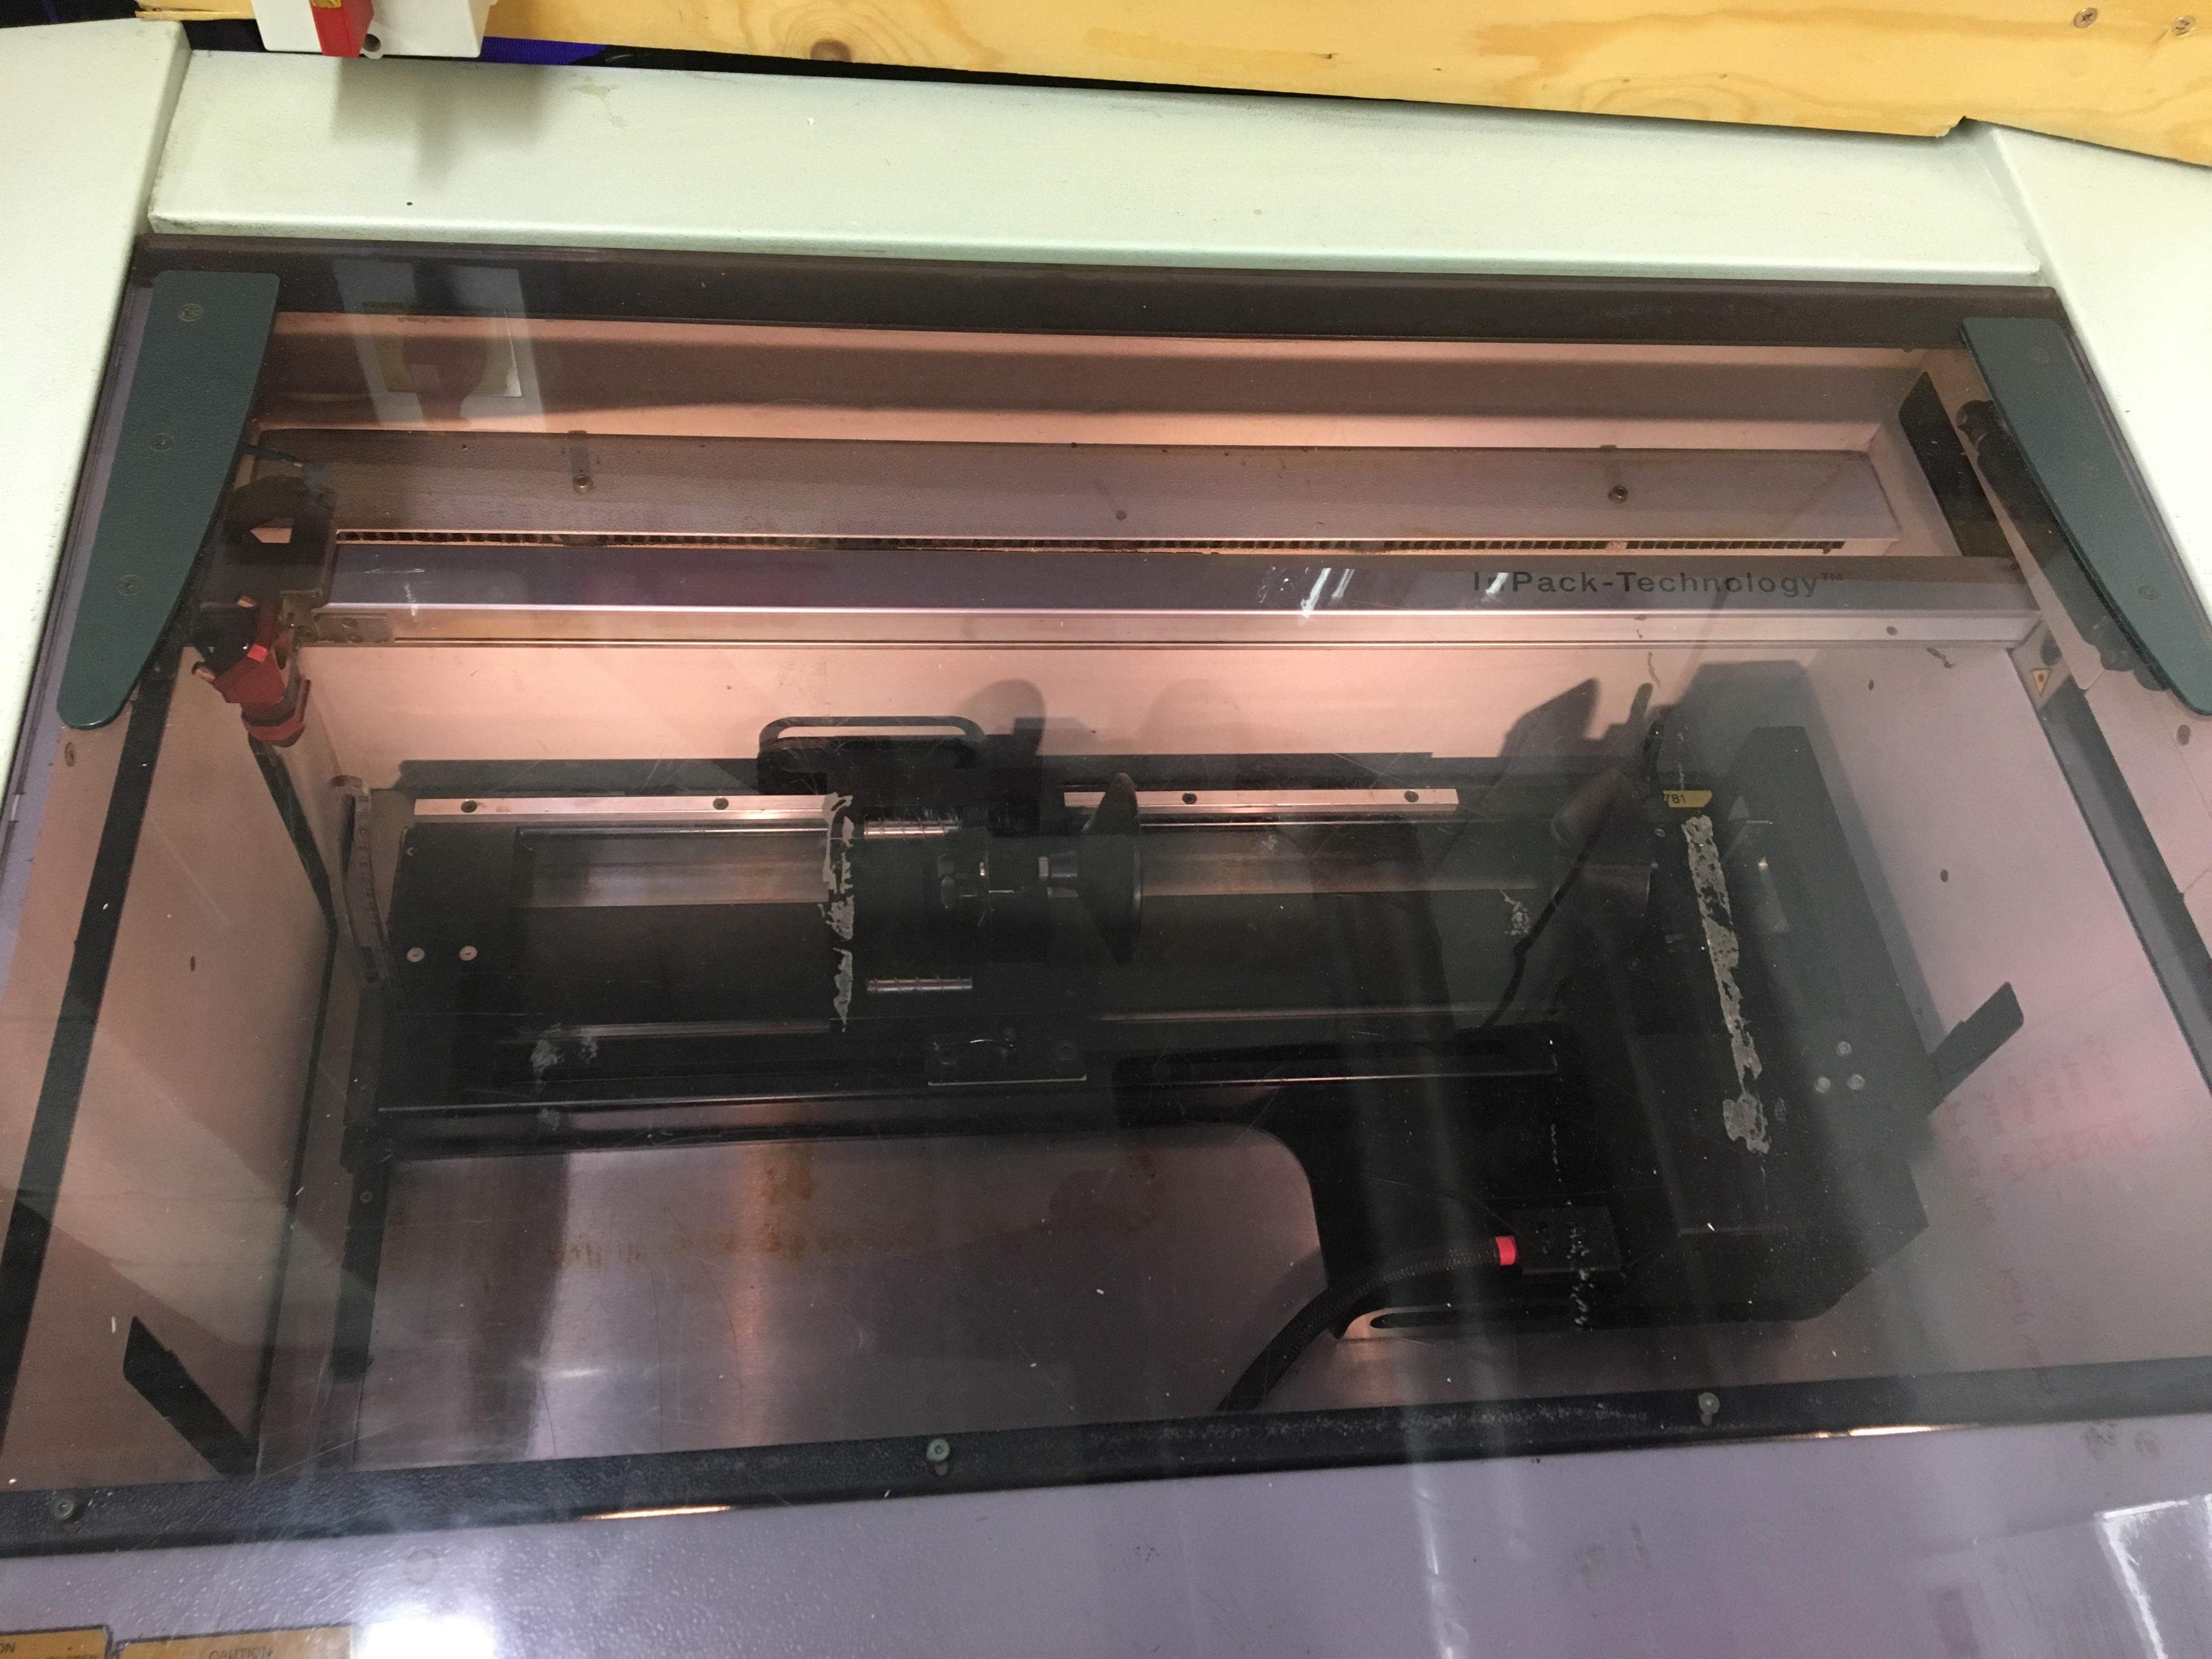
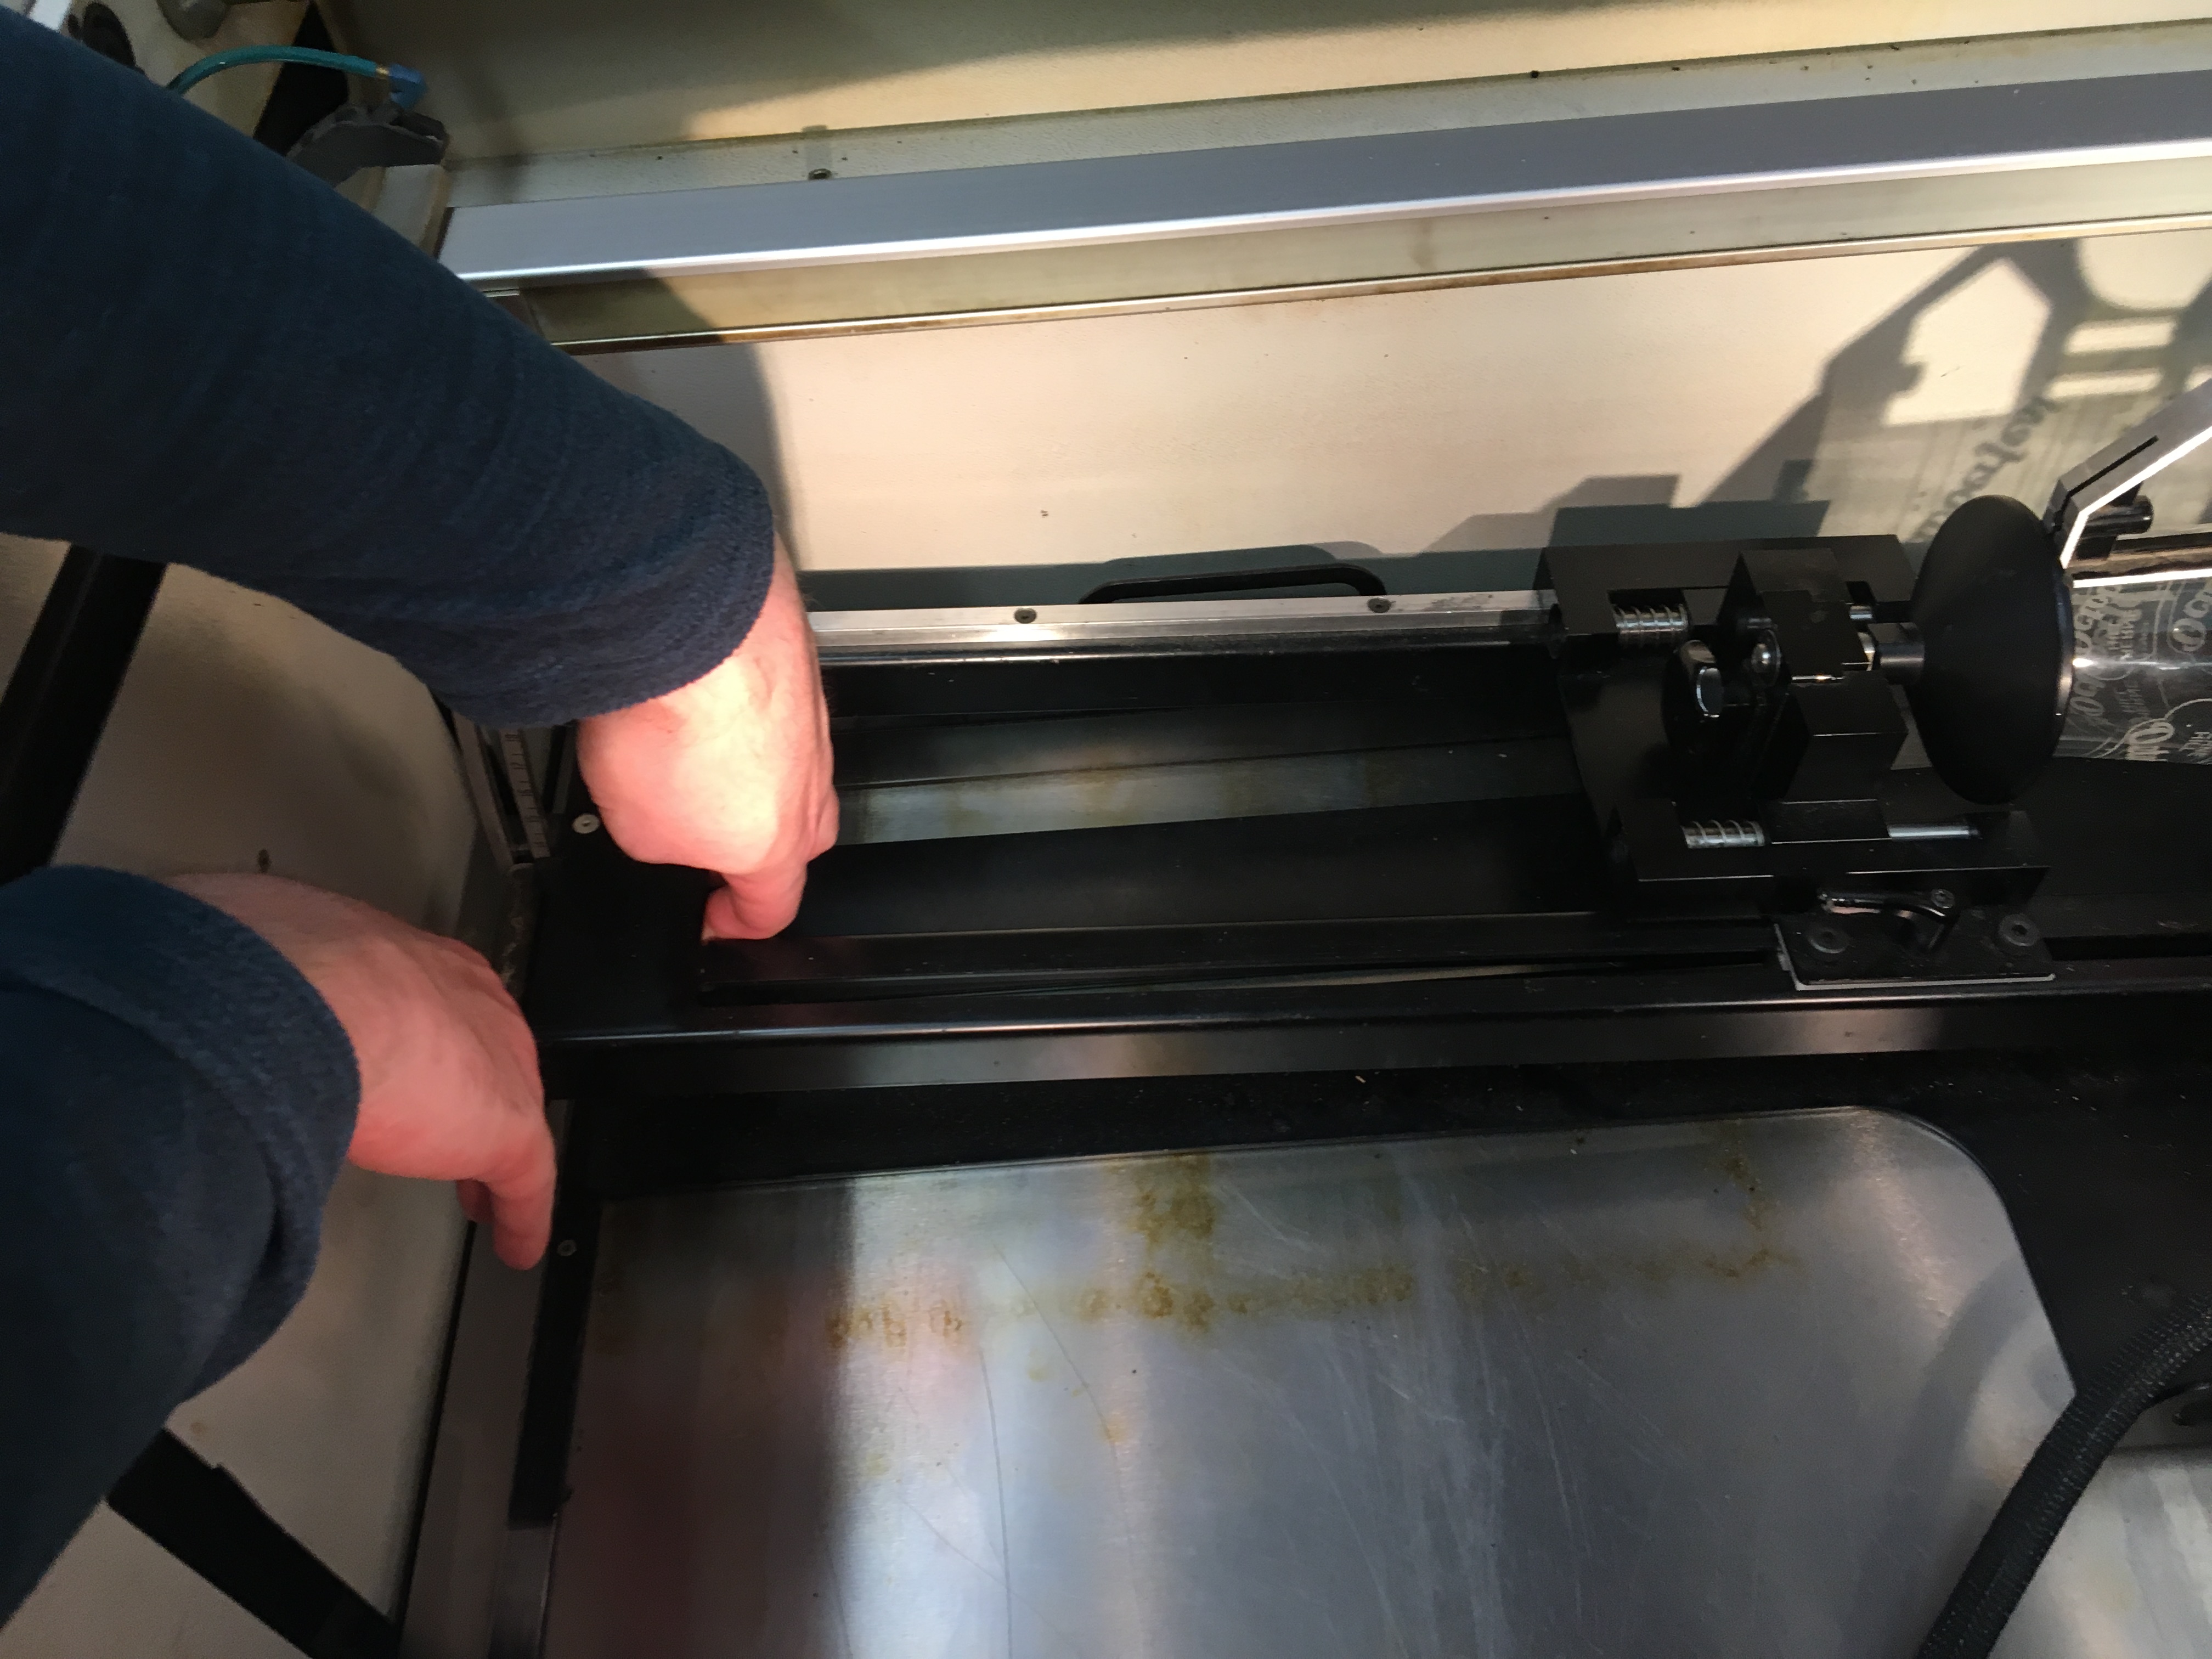
- Remove the honeycomb from the laser cutter, and replace with rotary attachment.
Hooks on the top edge grip in a similar way to the honeycomb. It shouldn’t move.
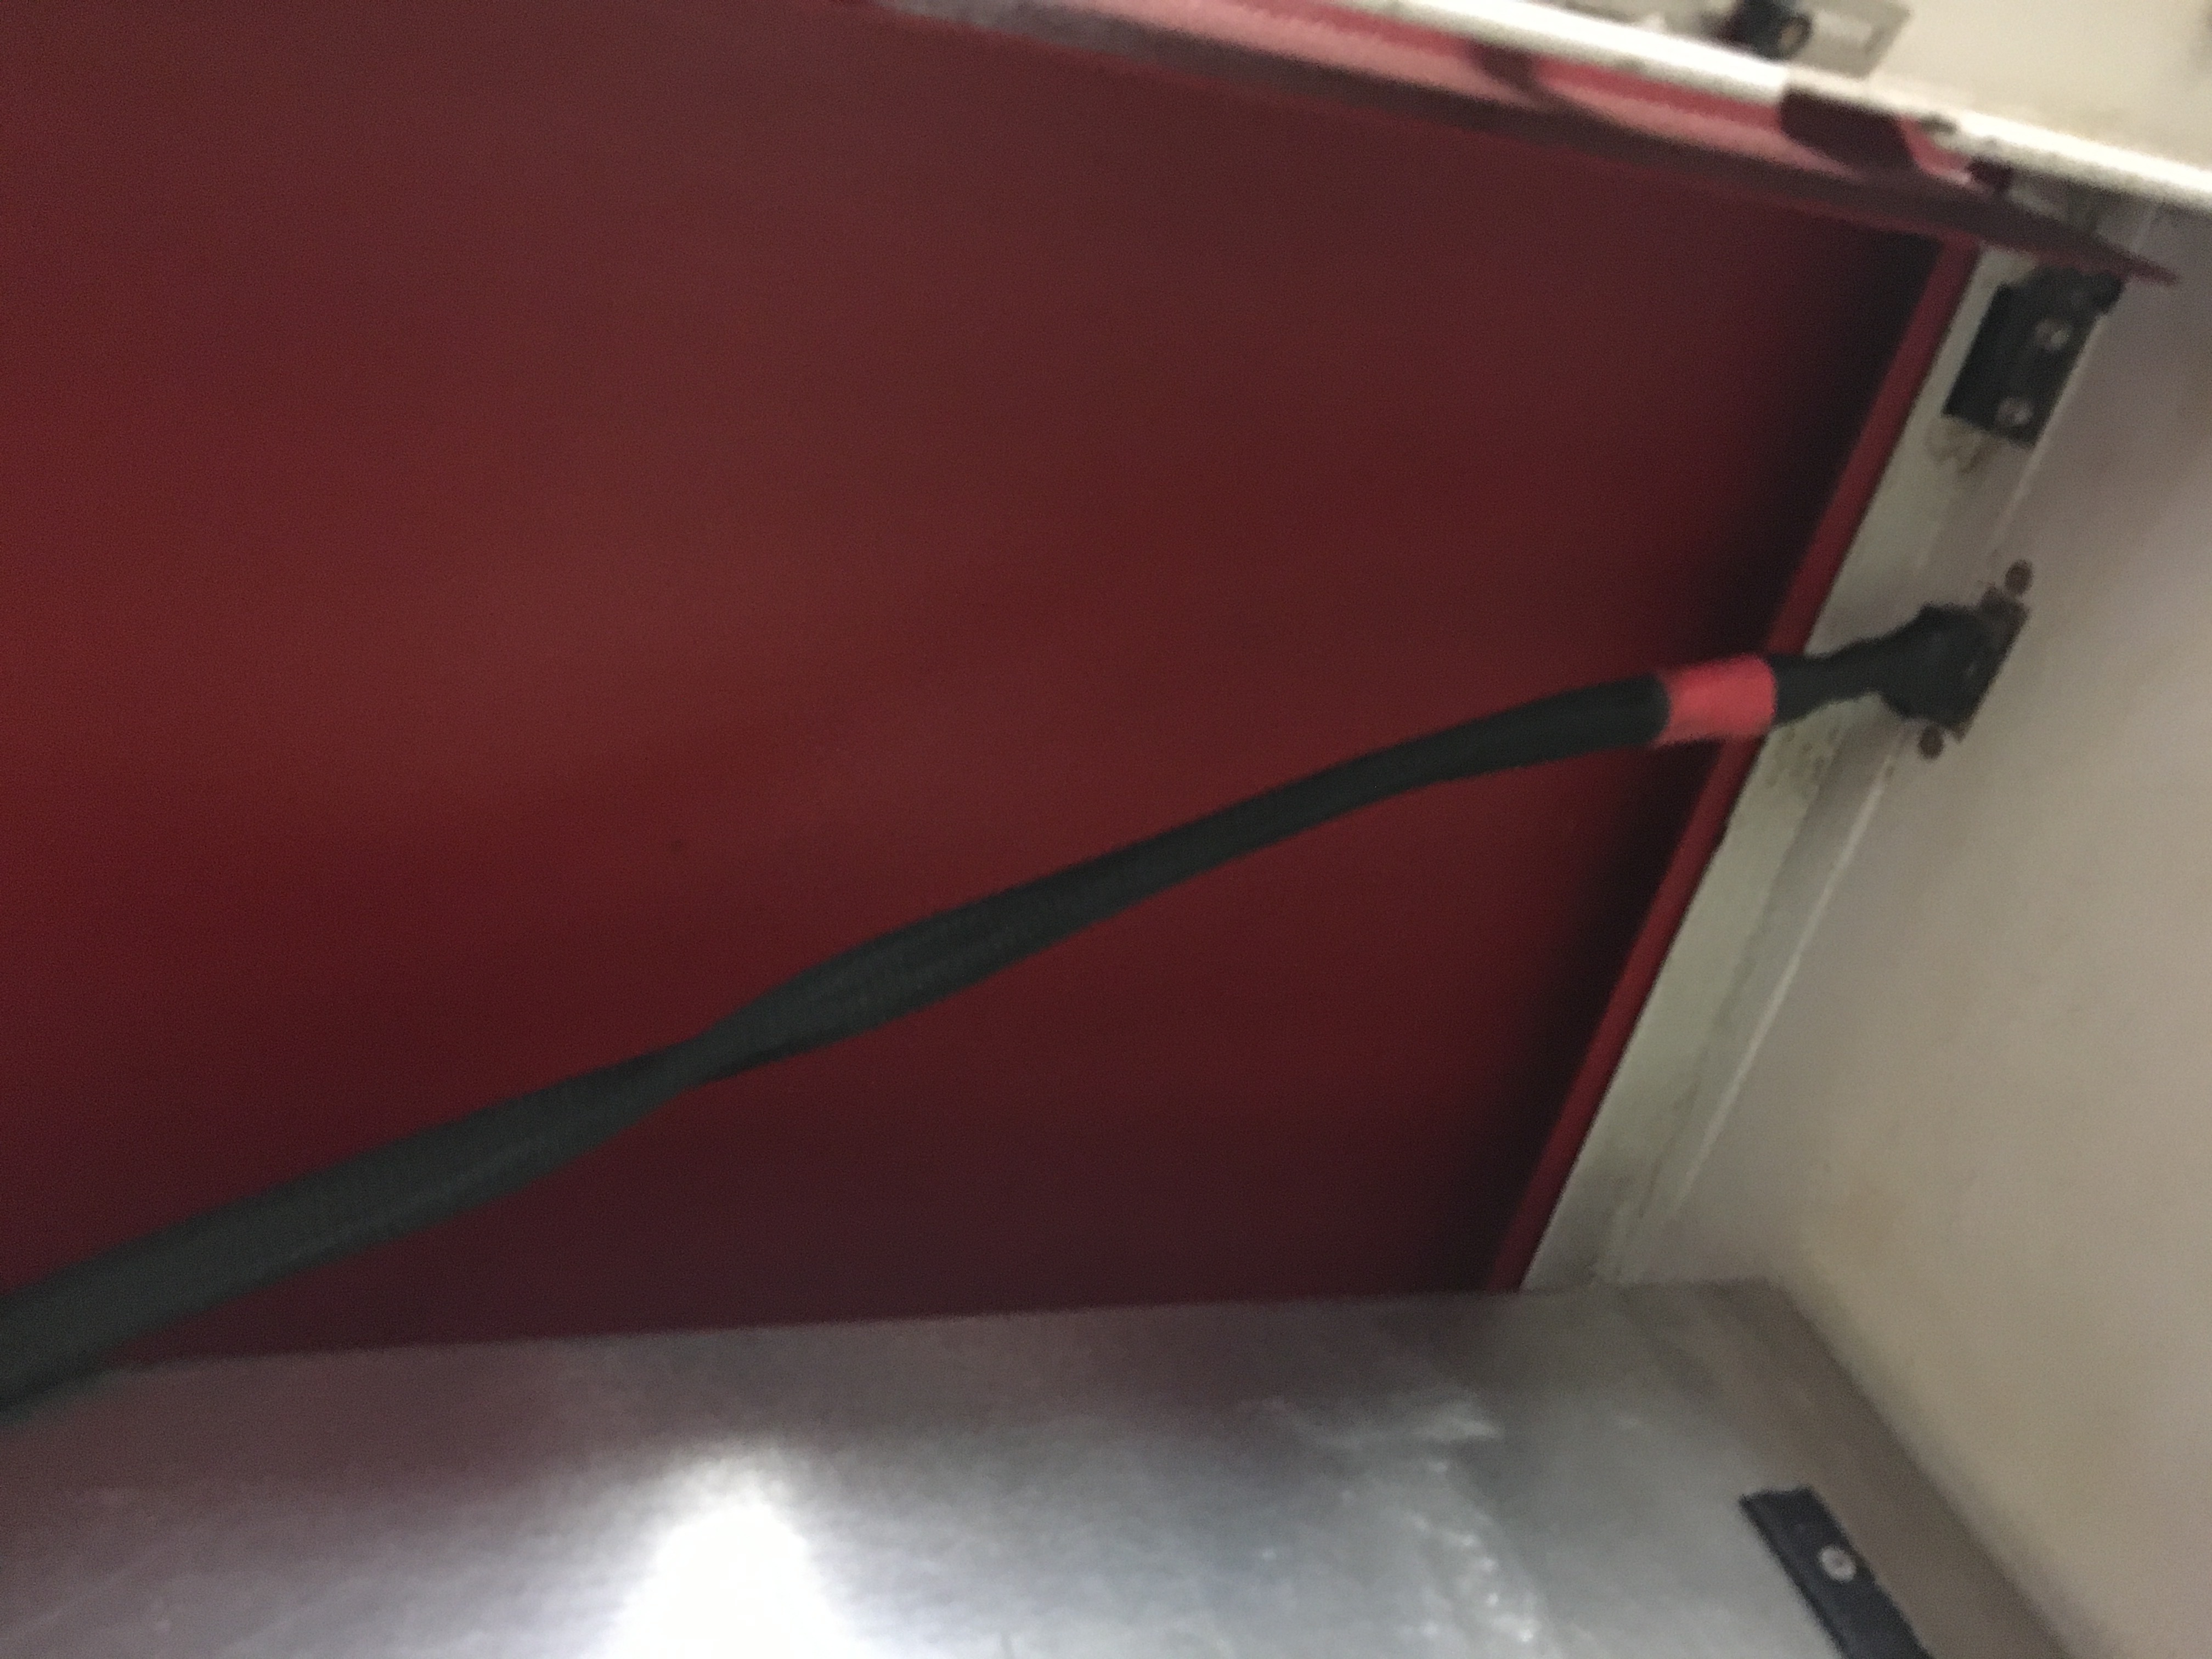
- Attach the control cord to the port on the inside of the laser cutter (by the door)
- Turn on laser cutter. The cutter head should find its new home parallel to the rotary axis.
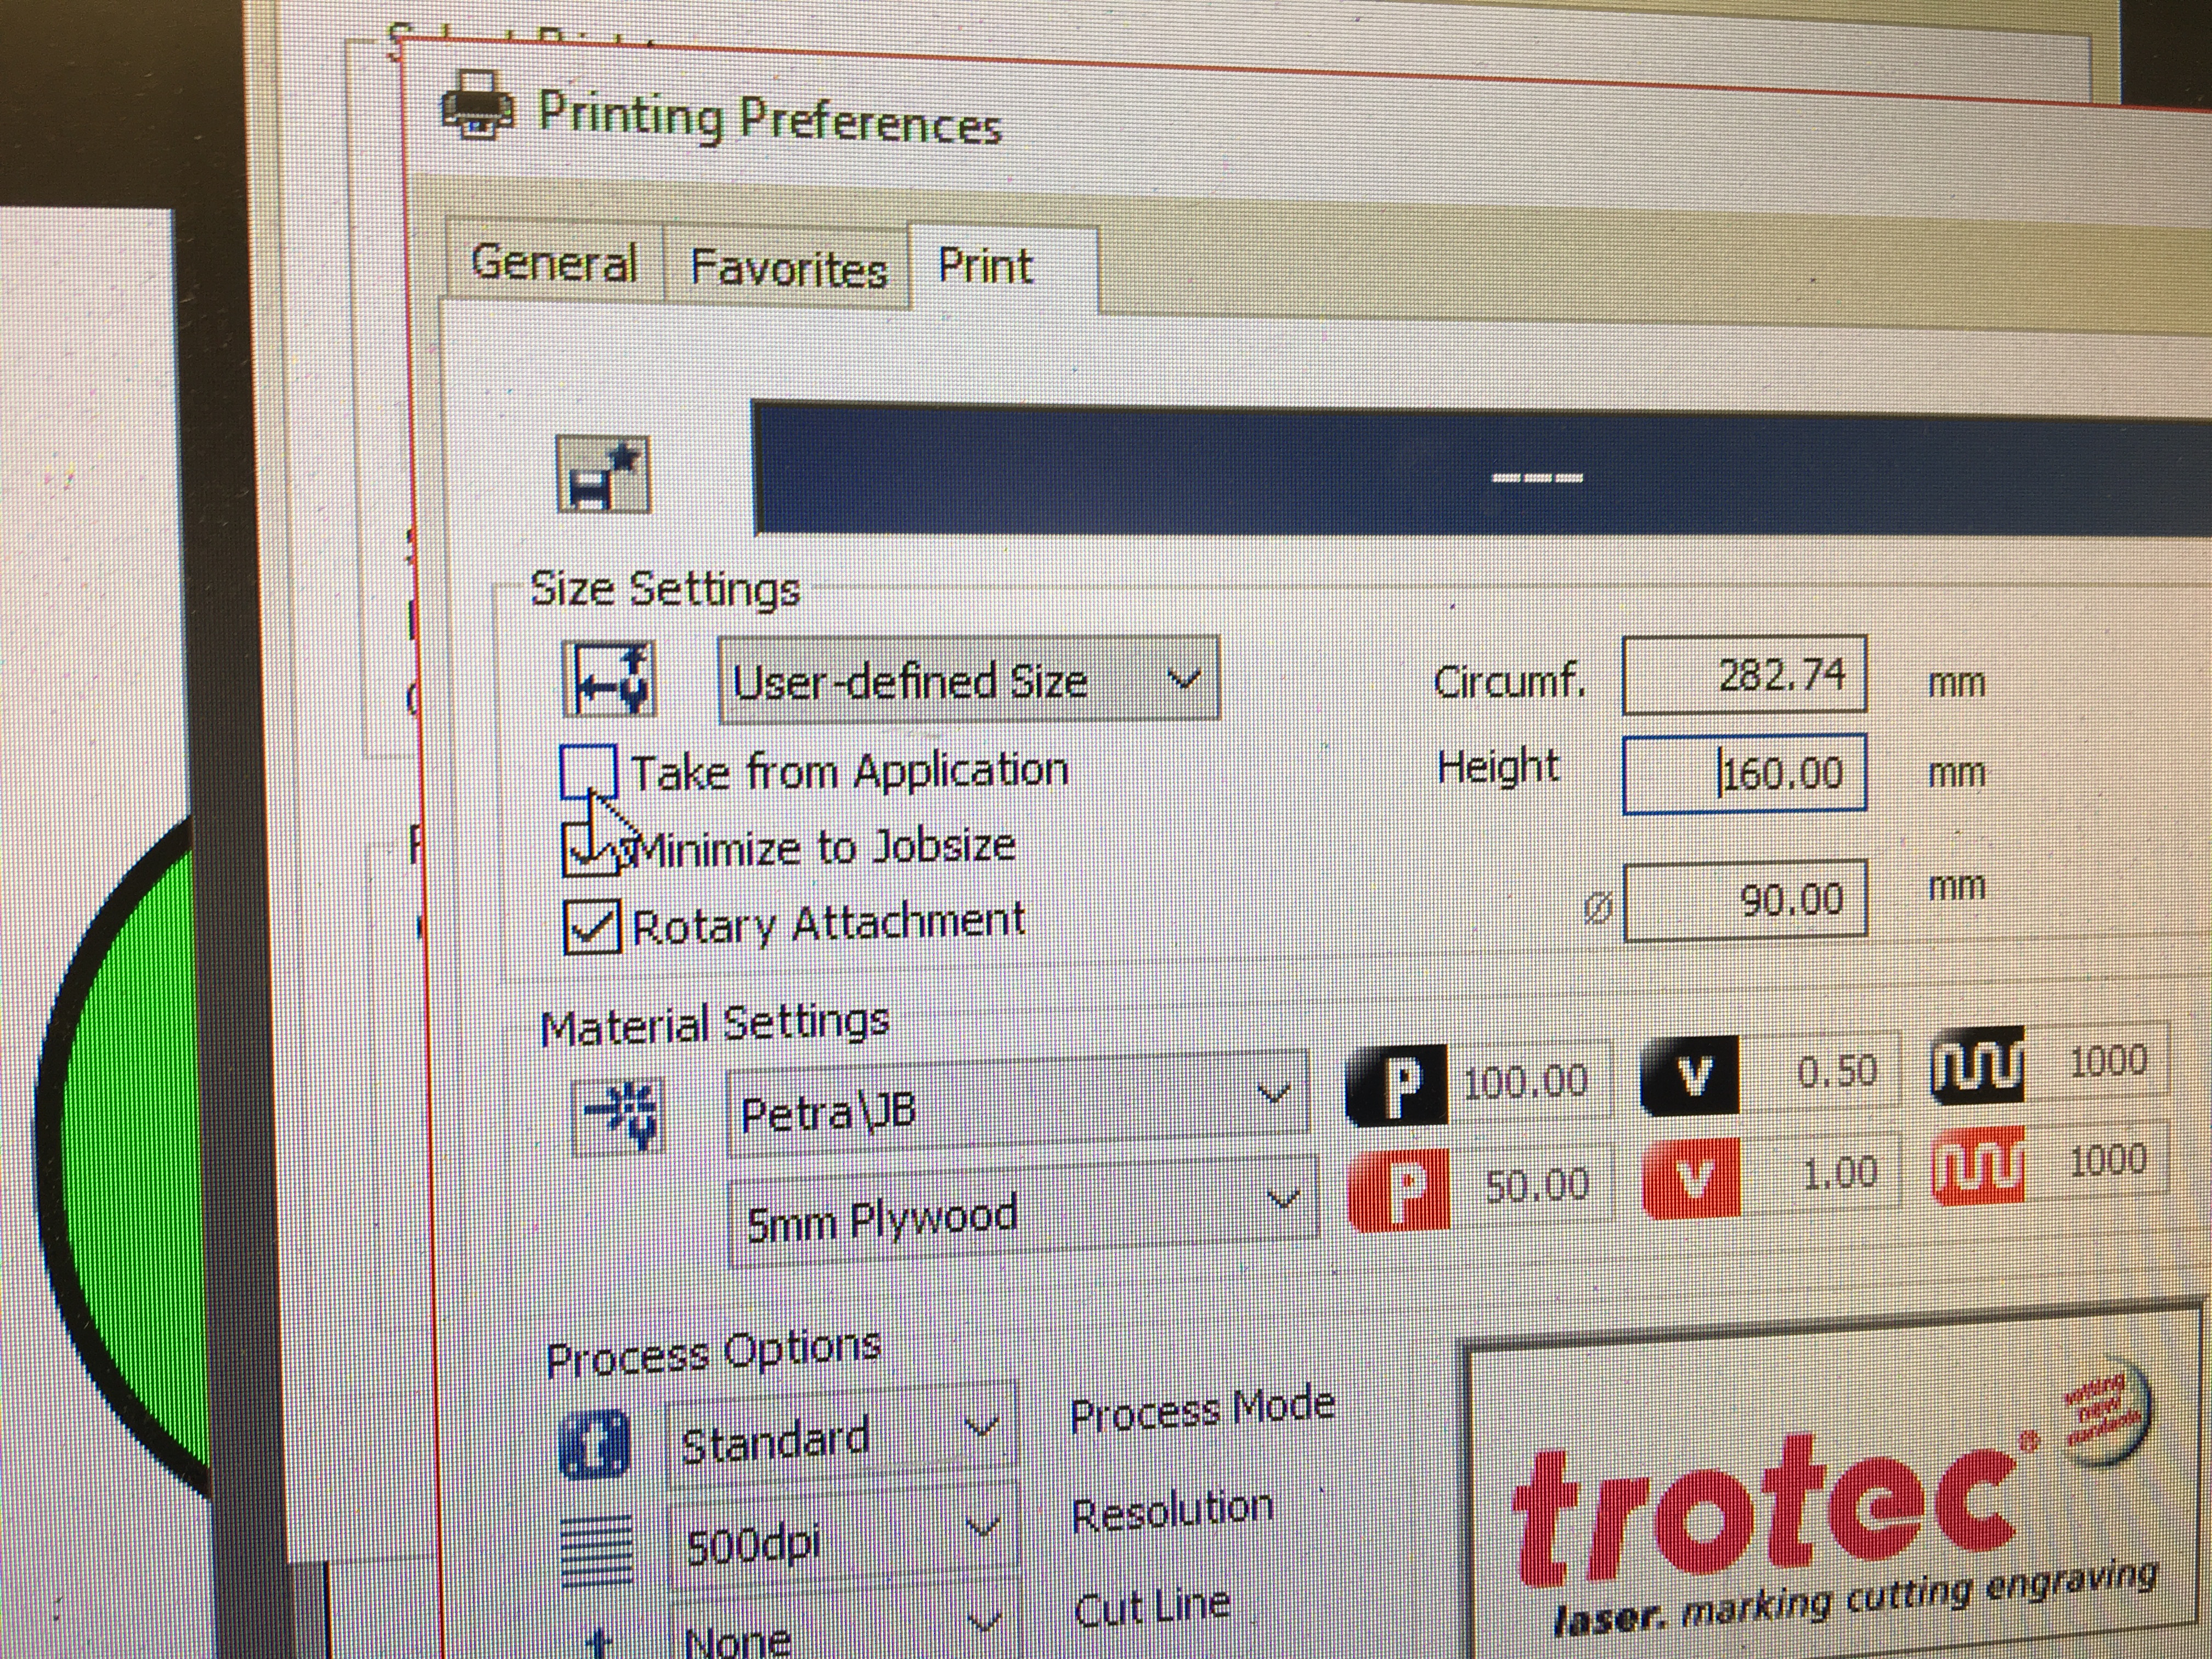
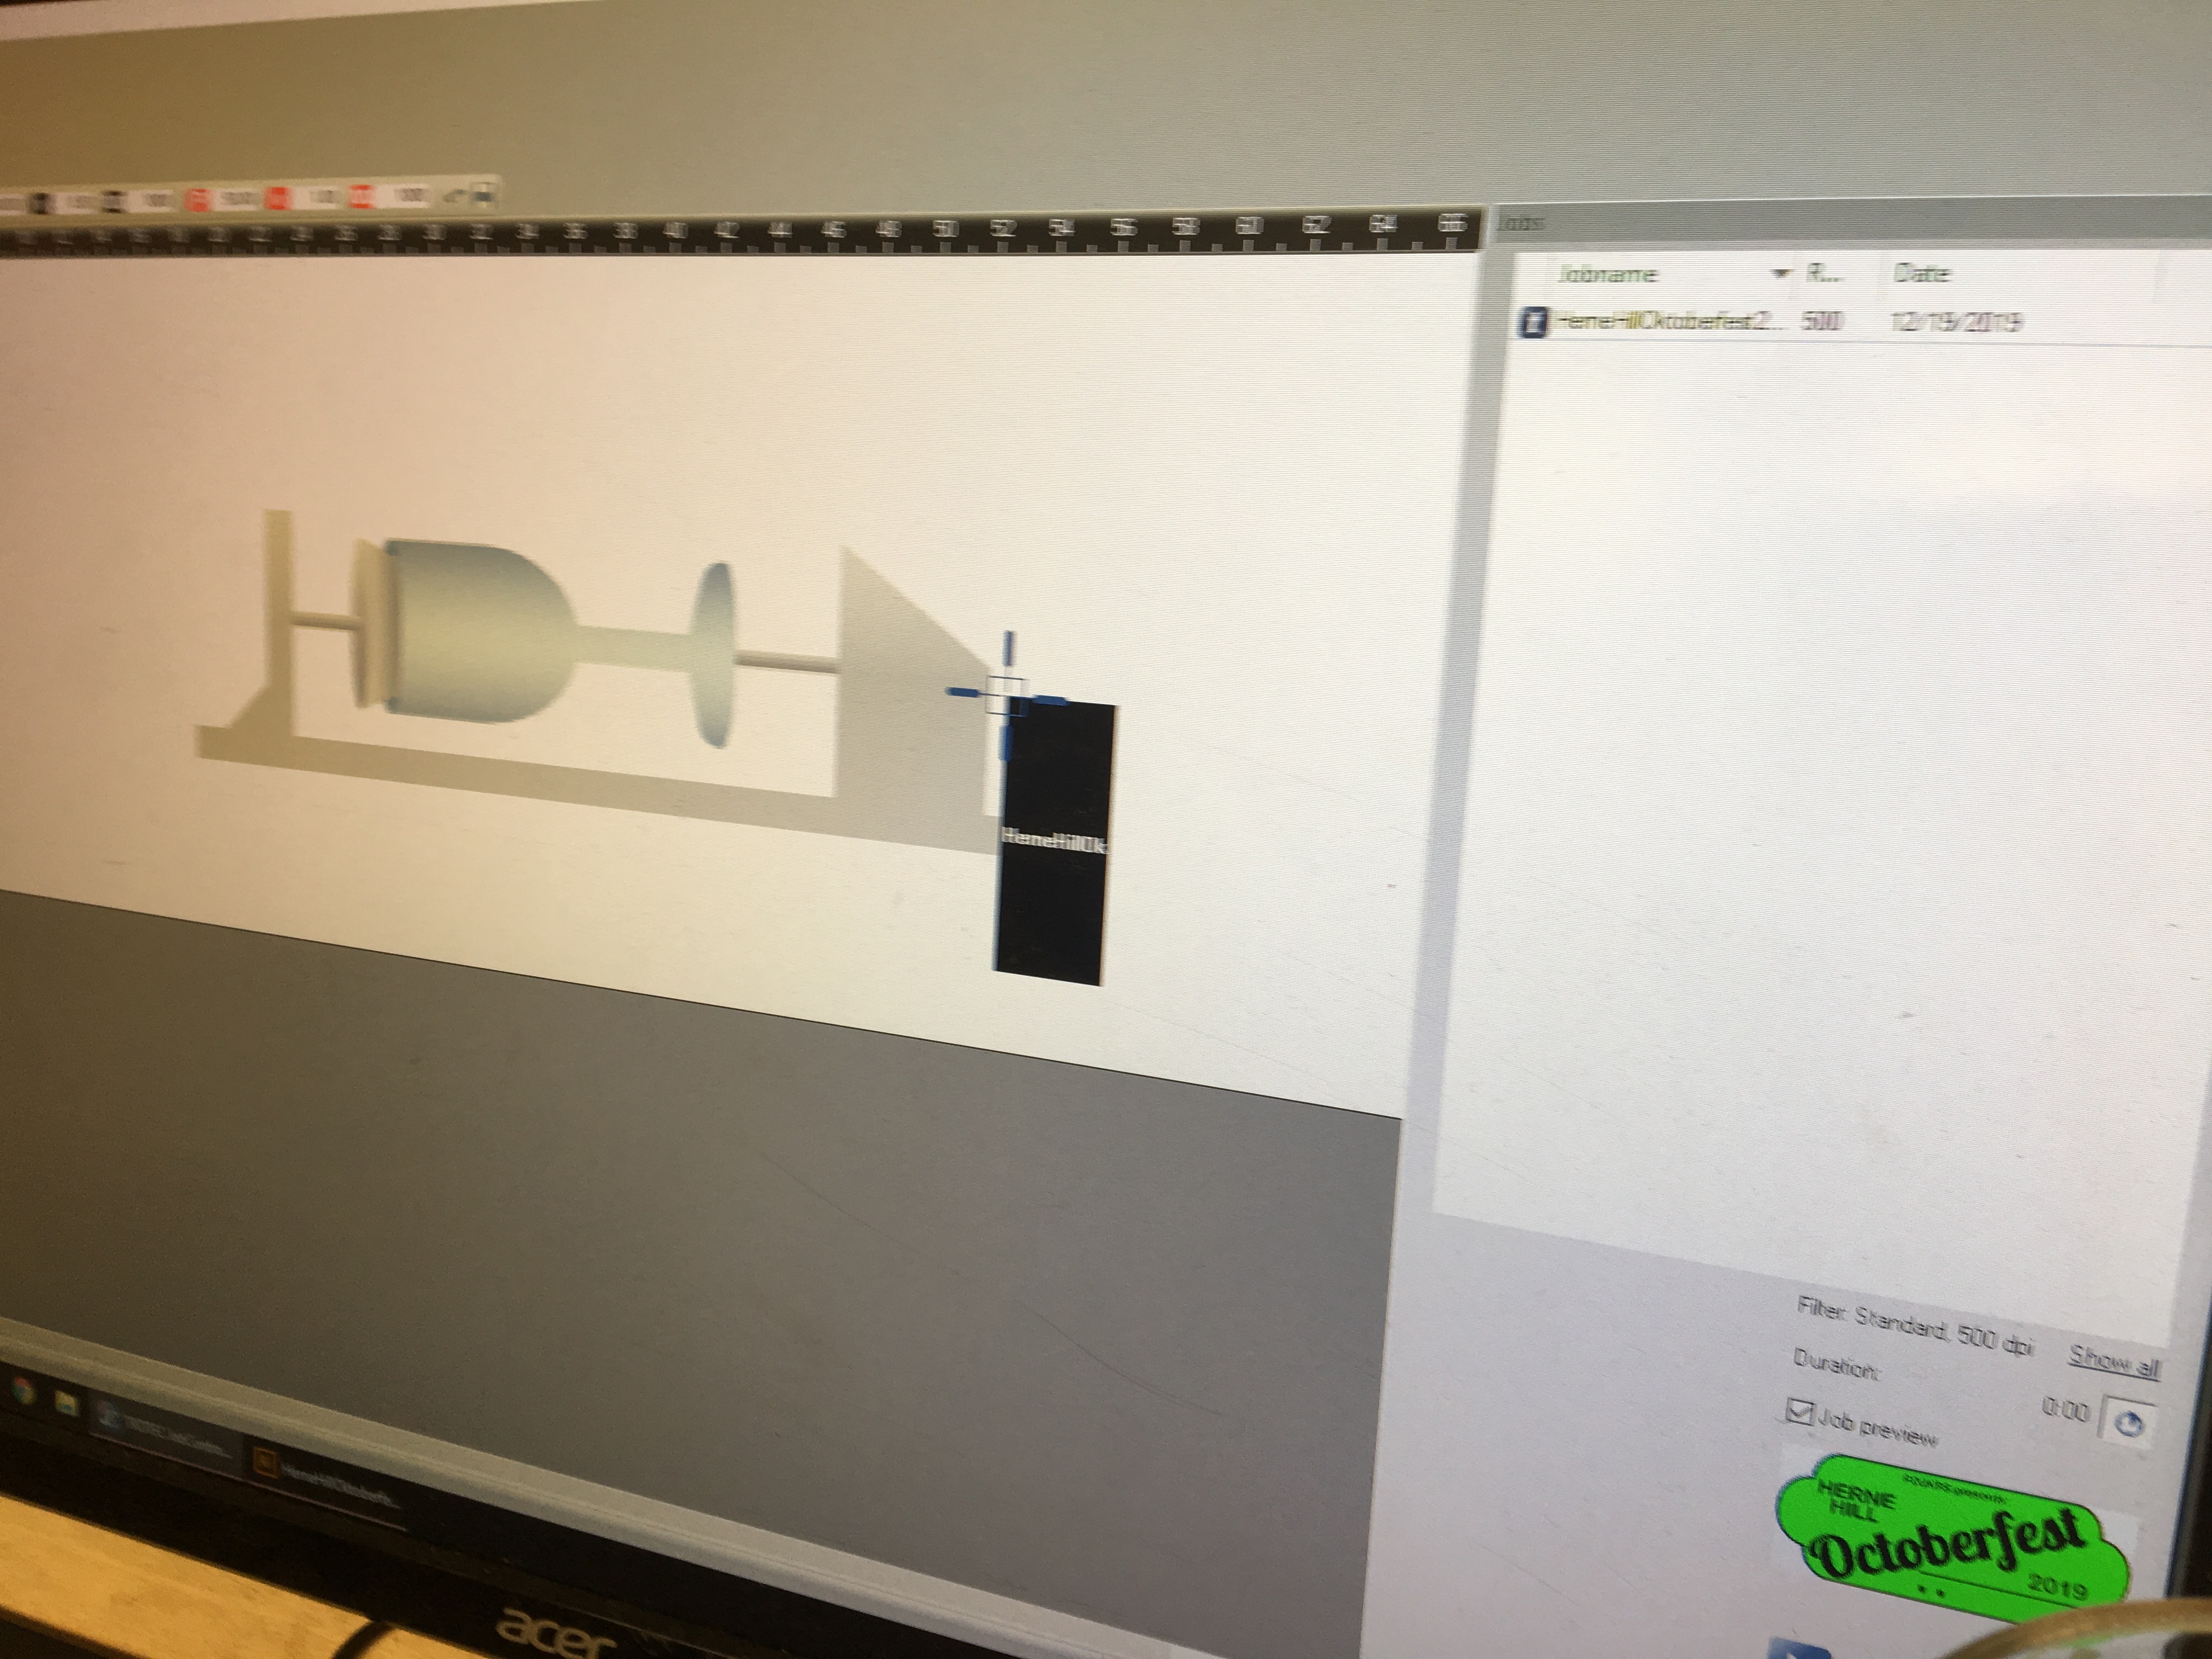
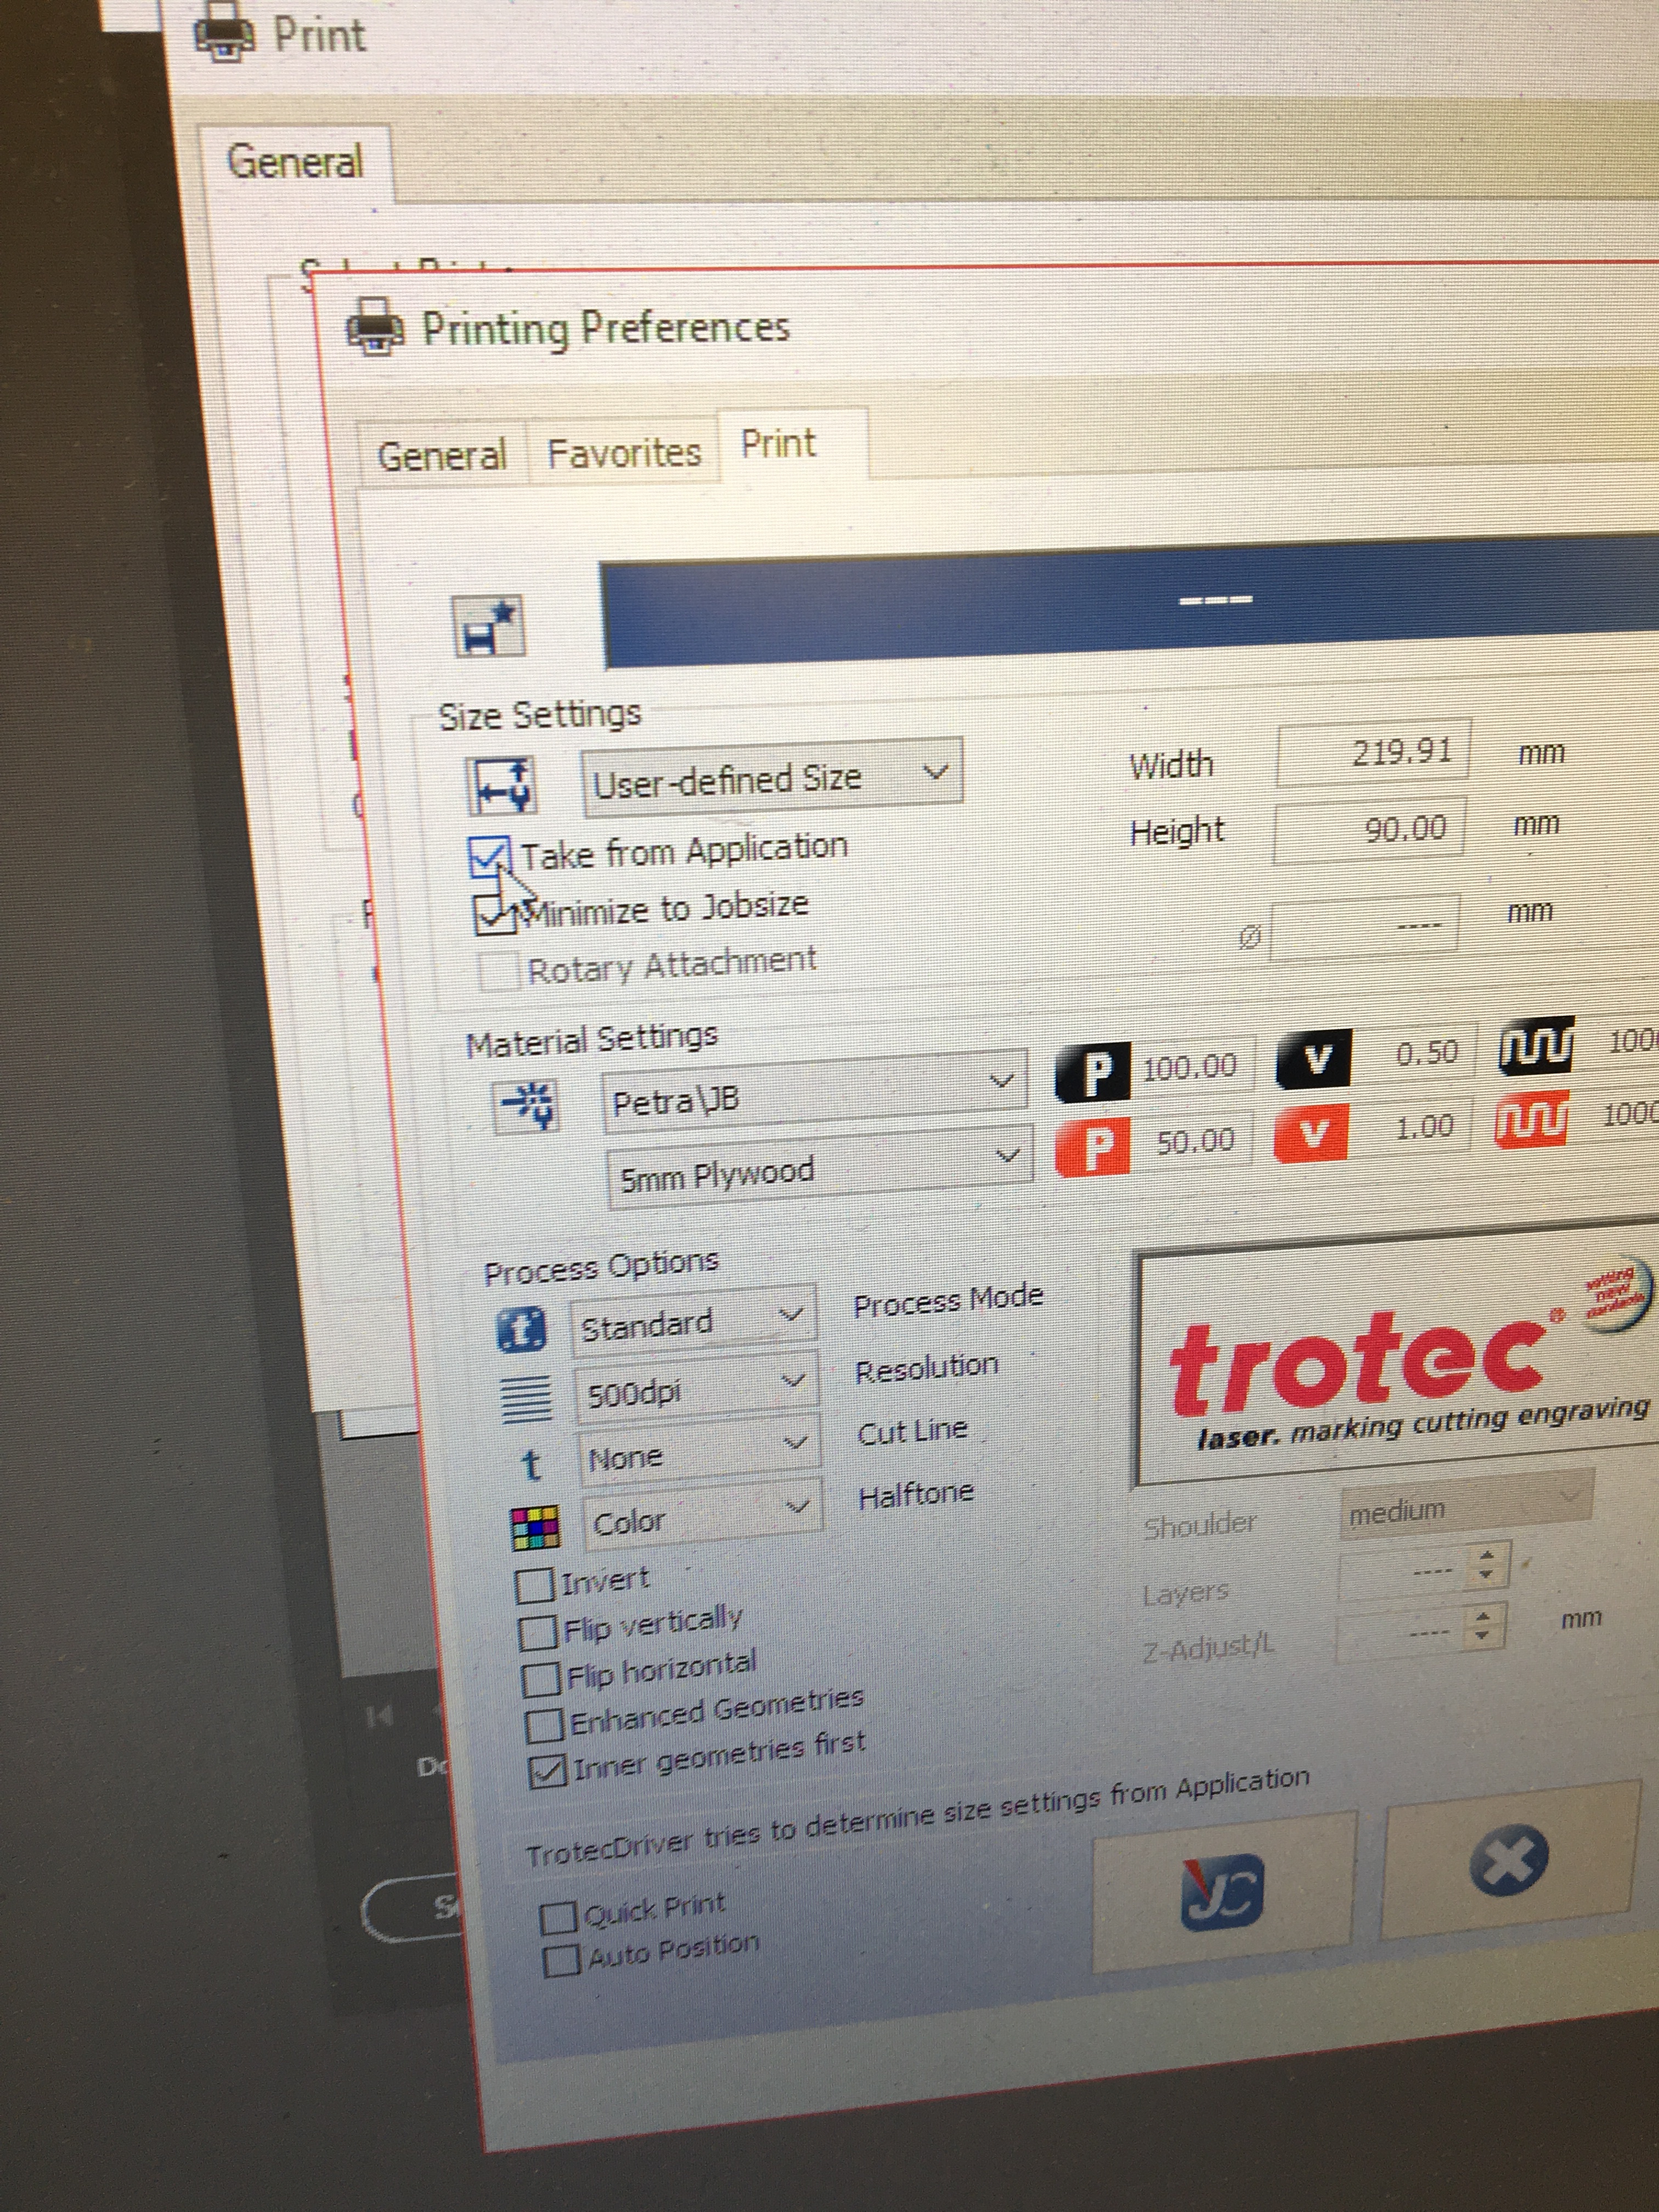
- On the PC in the print setup select the “Rotary Attachement” checkbox
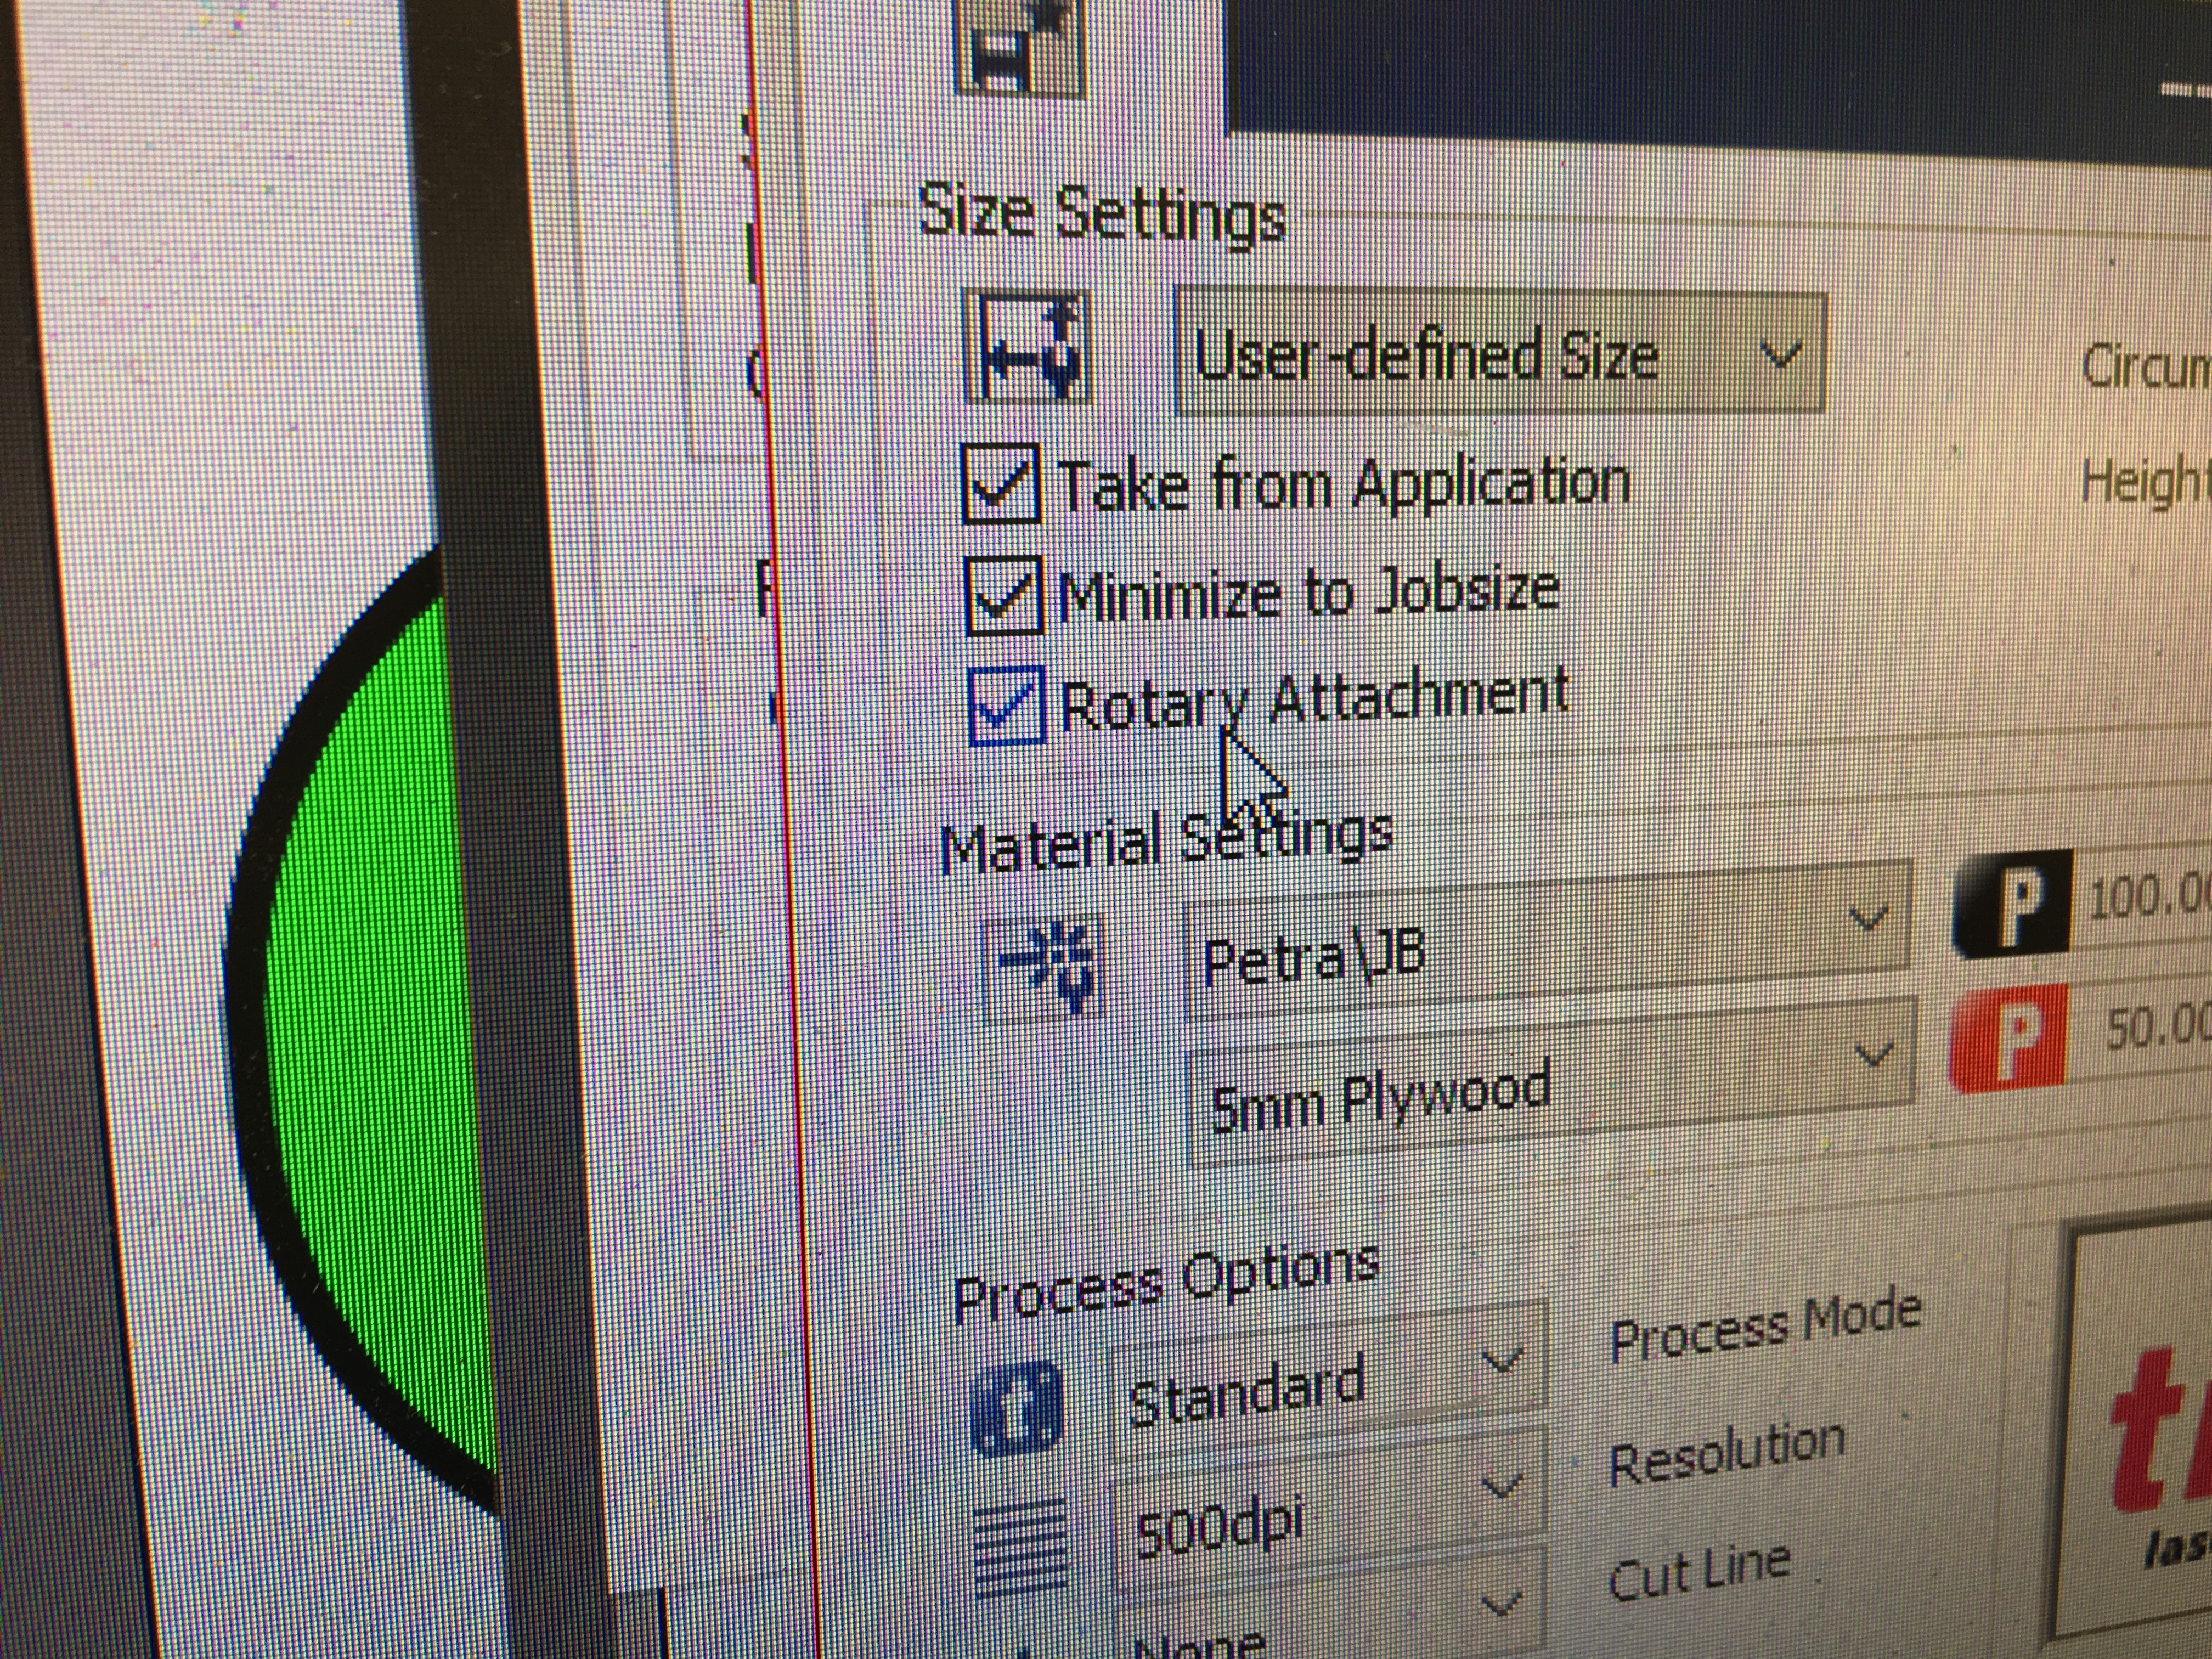
- Input the diameter and height of your piece.
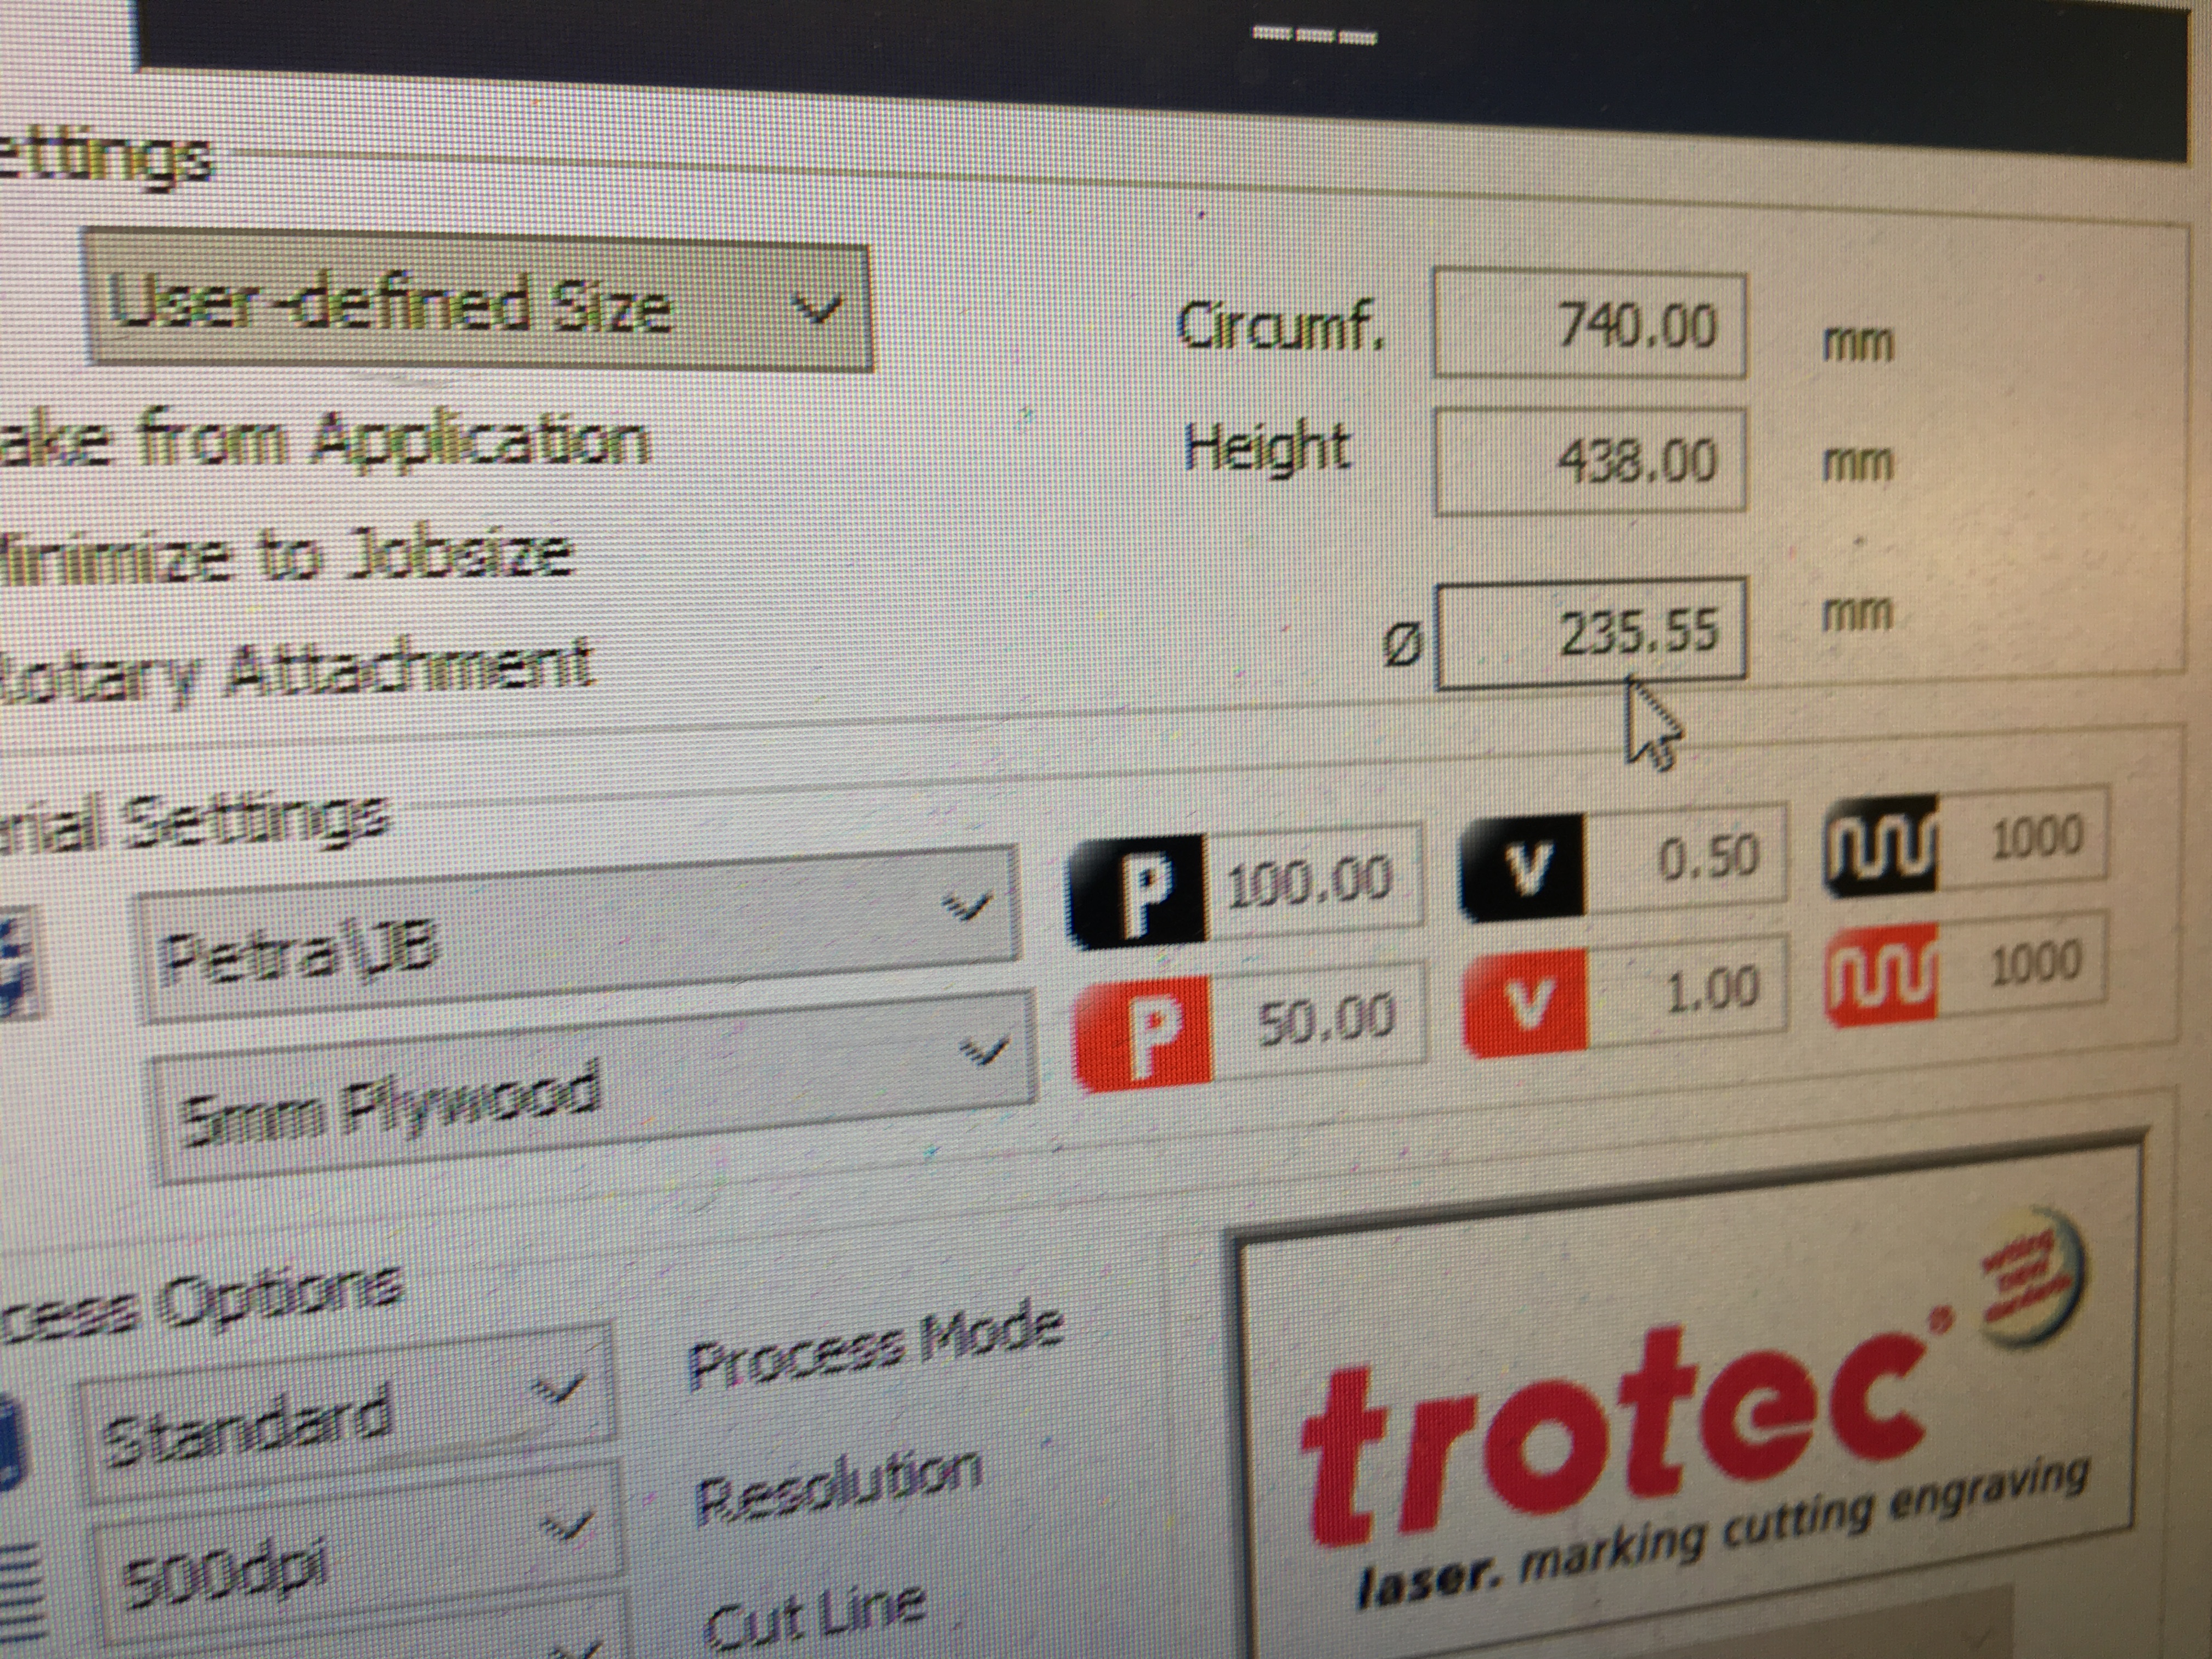
- Remove the "Take from application check box
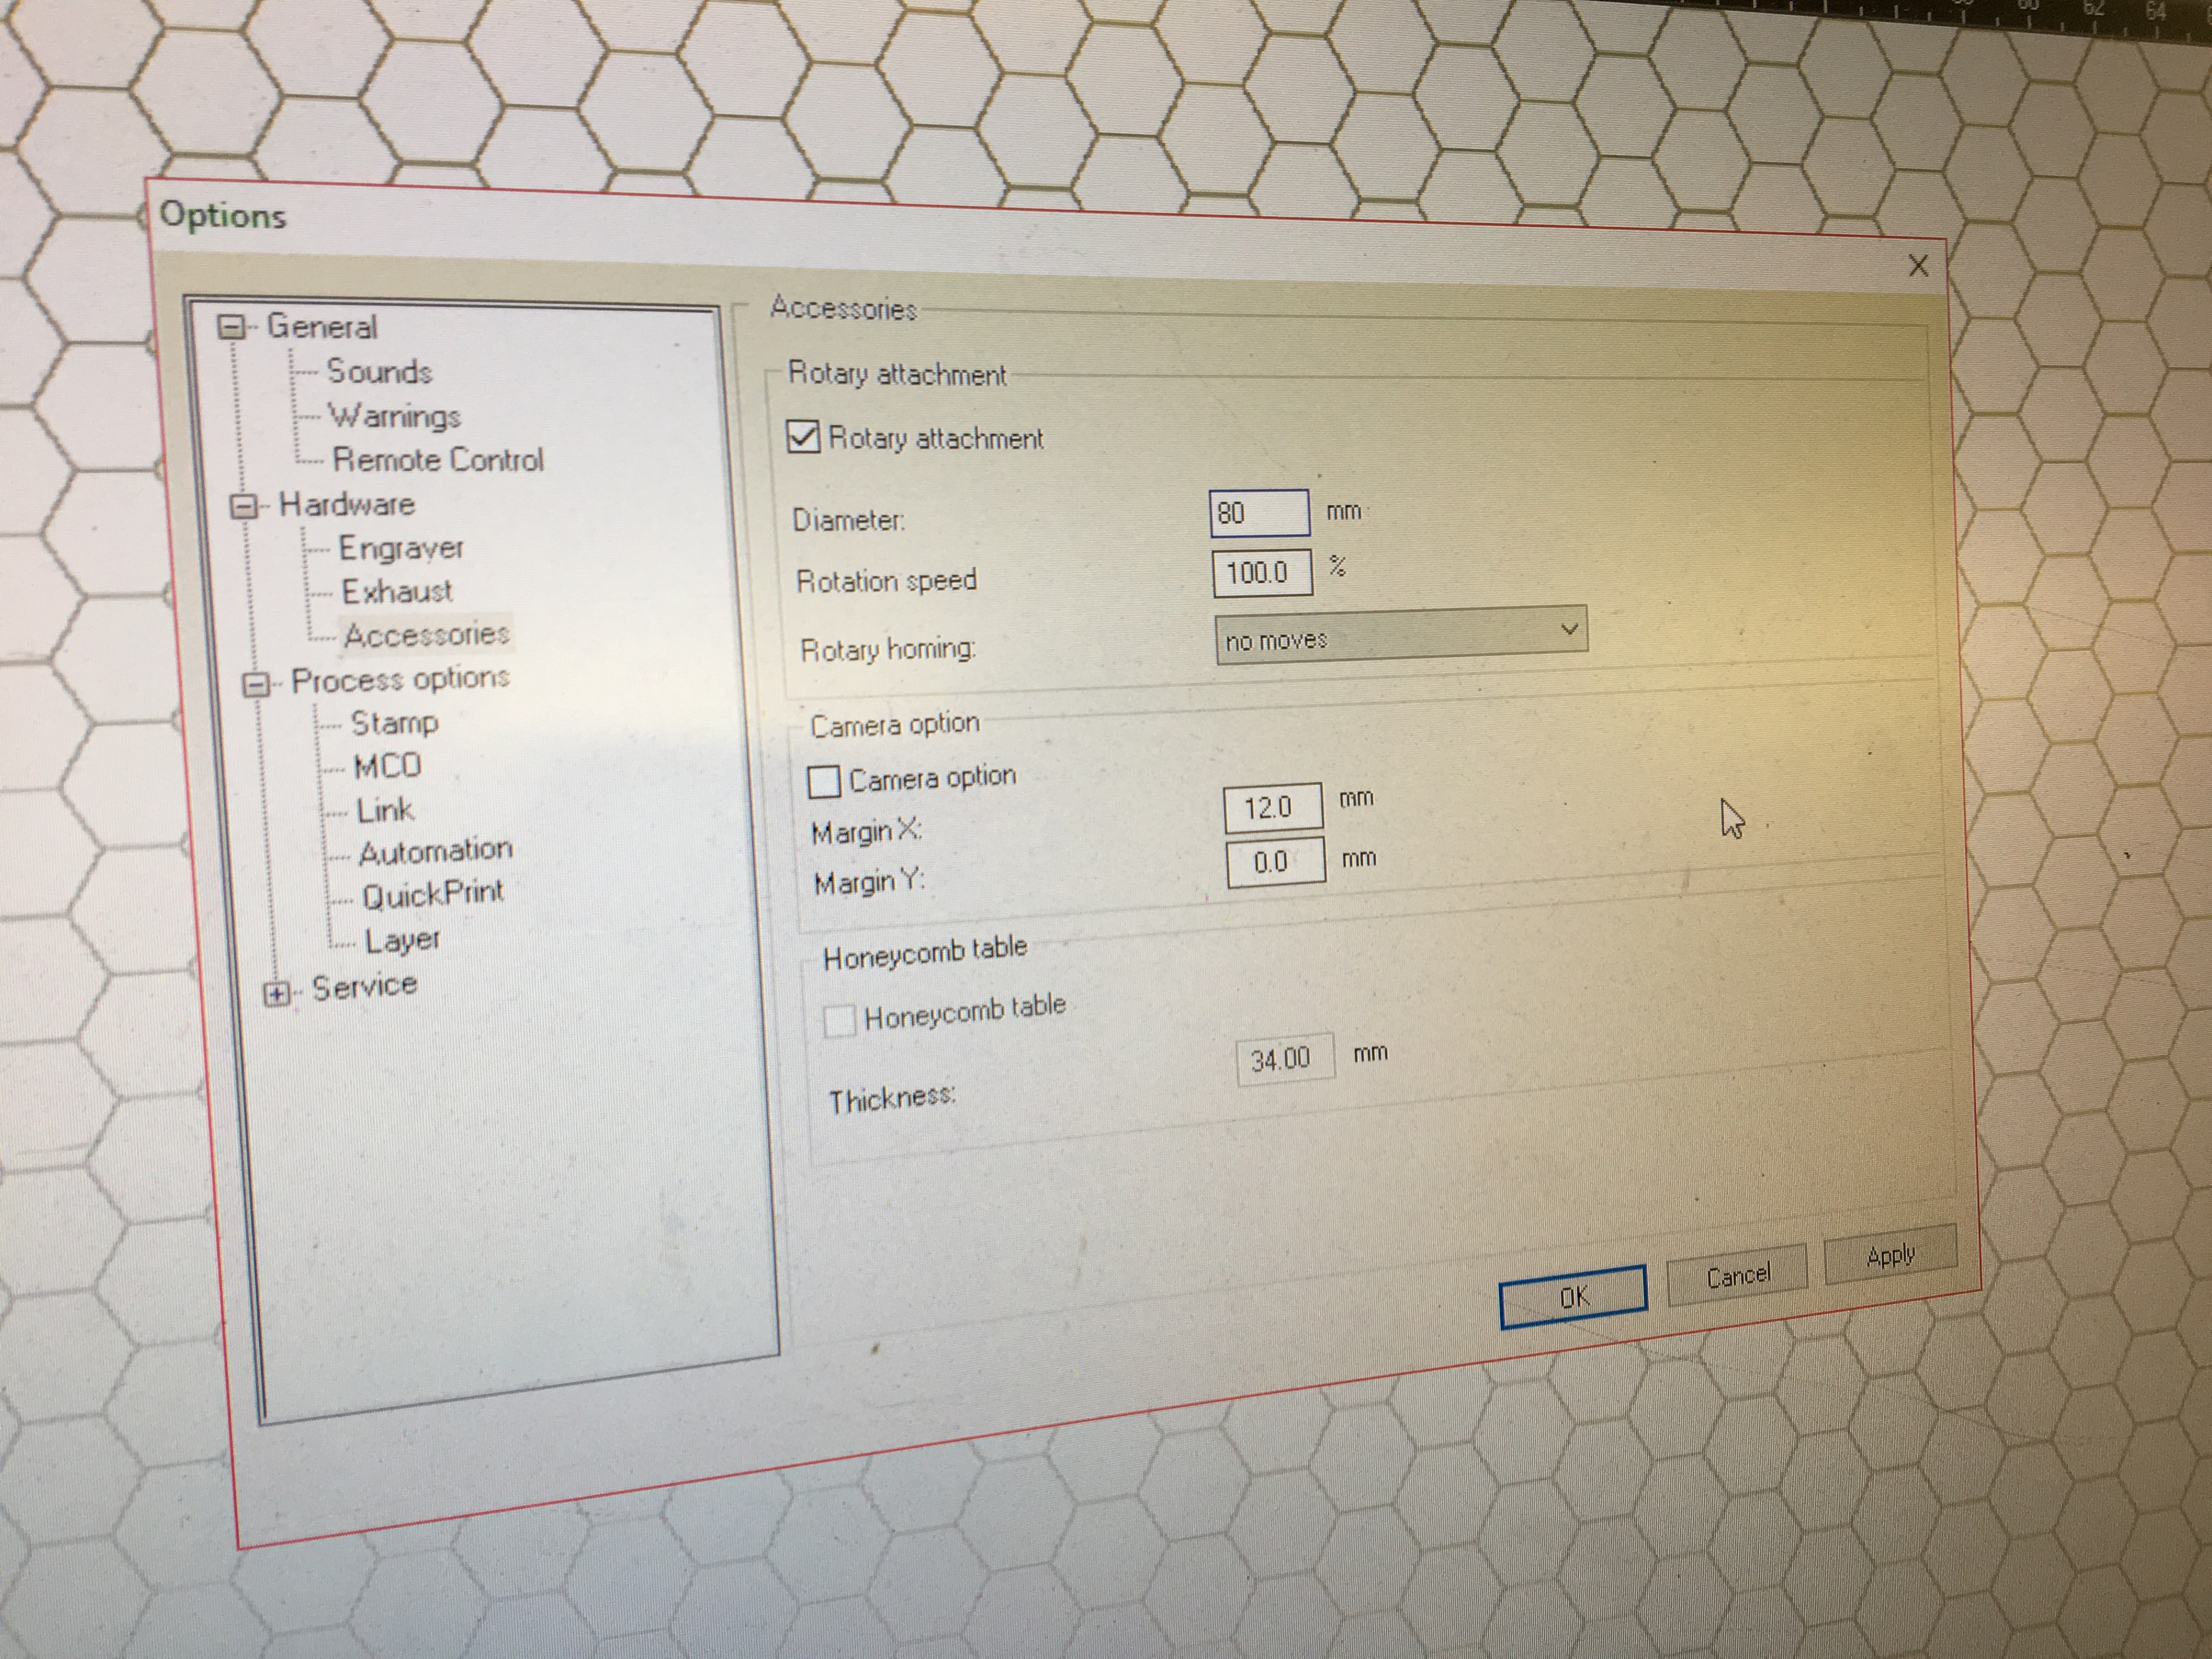
- Open Job Control. Then go into Settings -> Options. Remove the Honeycomb check box.
Add the rotary attachement Check box, and enter the diameter of your piece
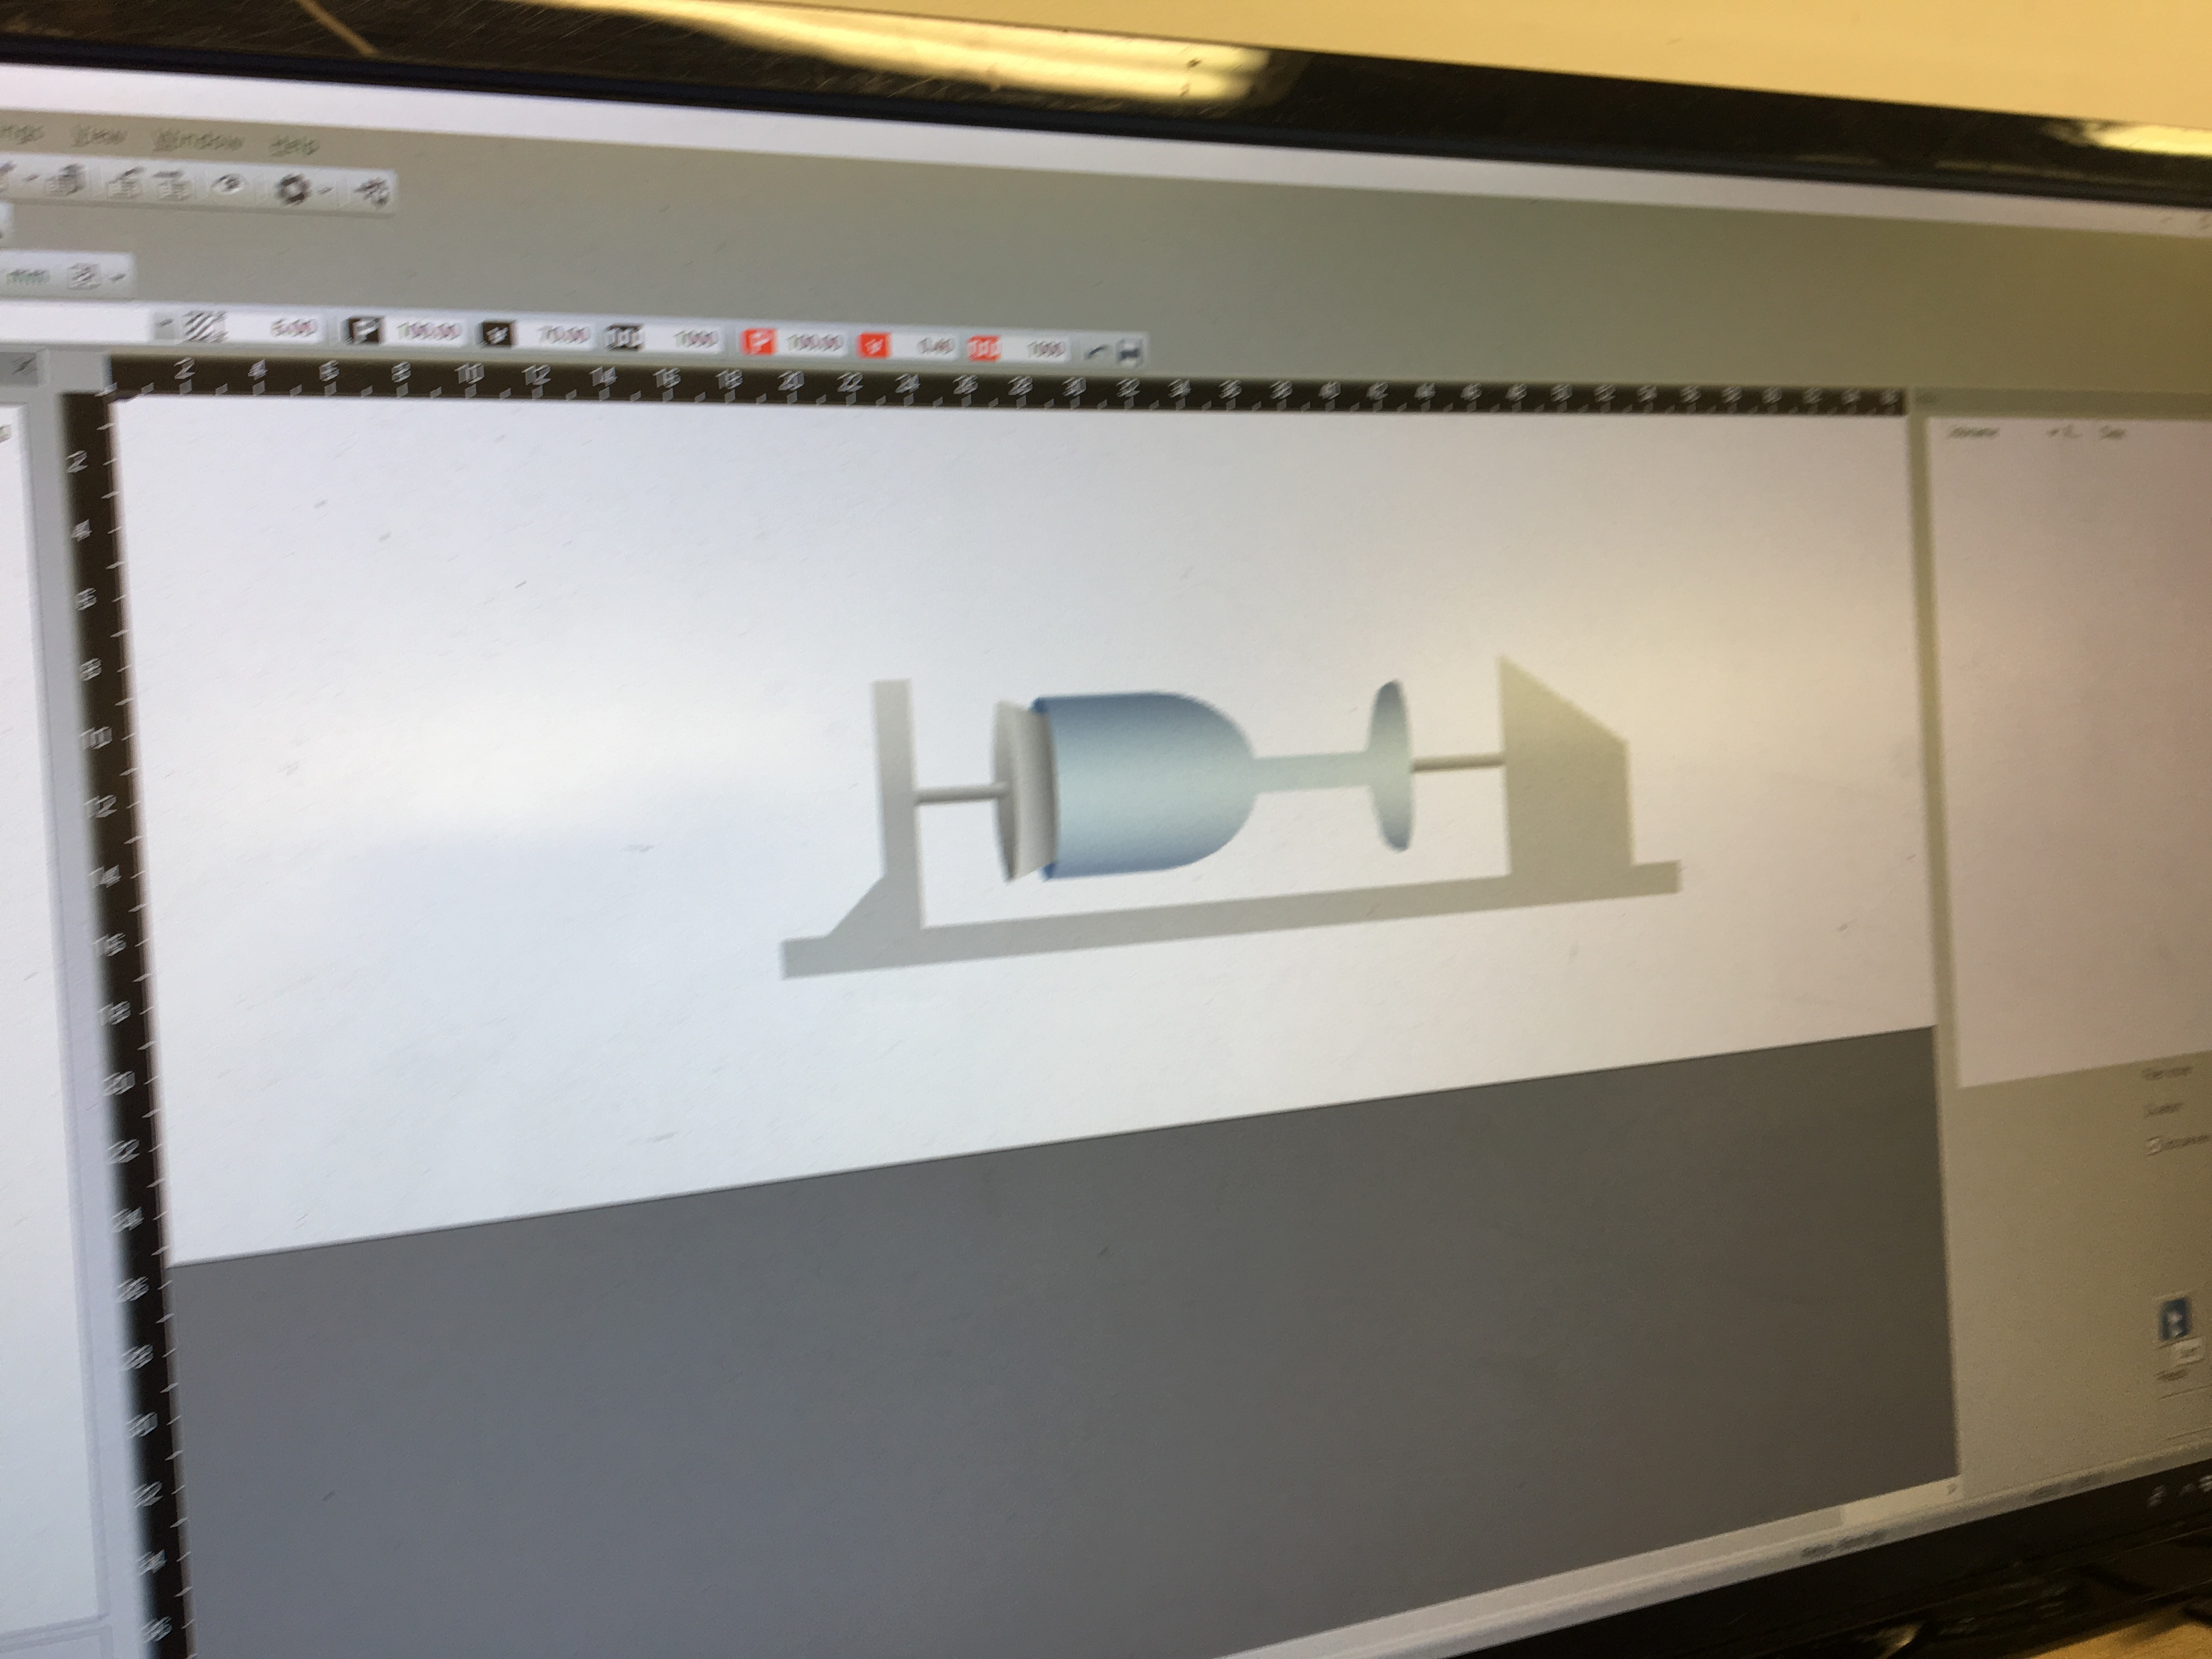
- The Job Control Background will change to a picture of the rotary attachment.
- Clamp your piece in the attachement (or put on rollers)
- If its an angled piece, then adjust the angle of the attachment, so that the surface your are cutting is flat. (Spirit level is helpful)
- Focus in the same way as usual
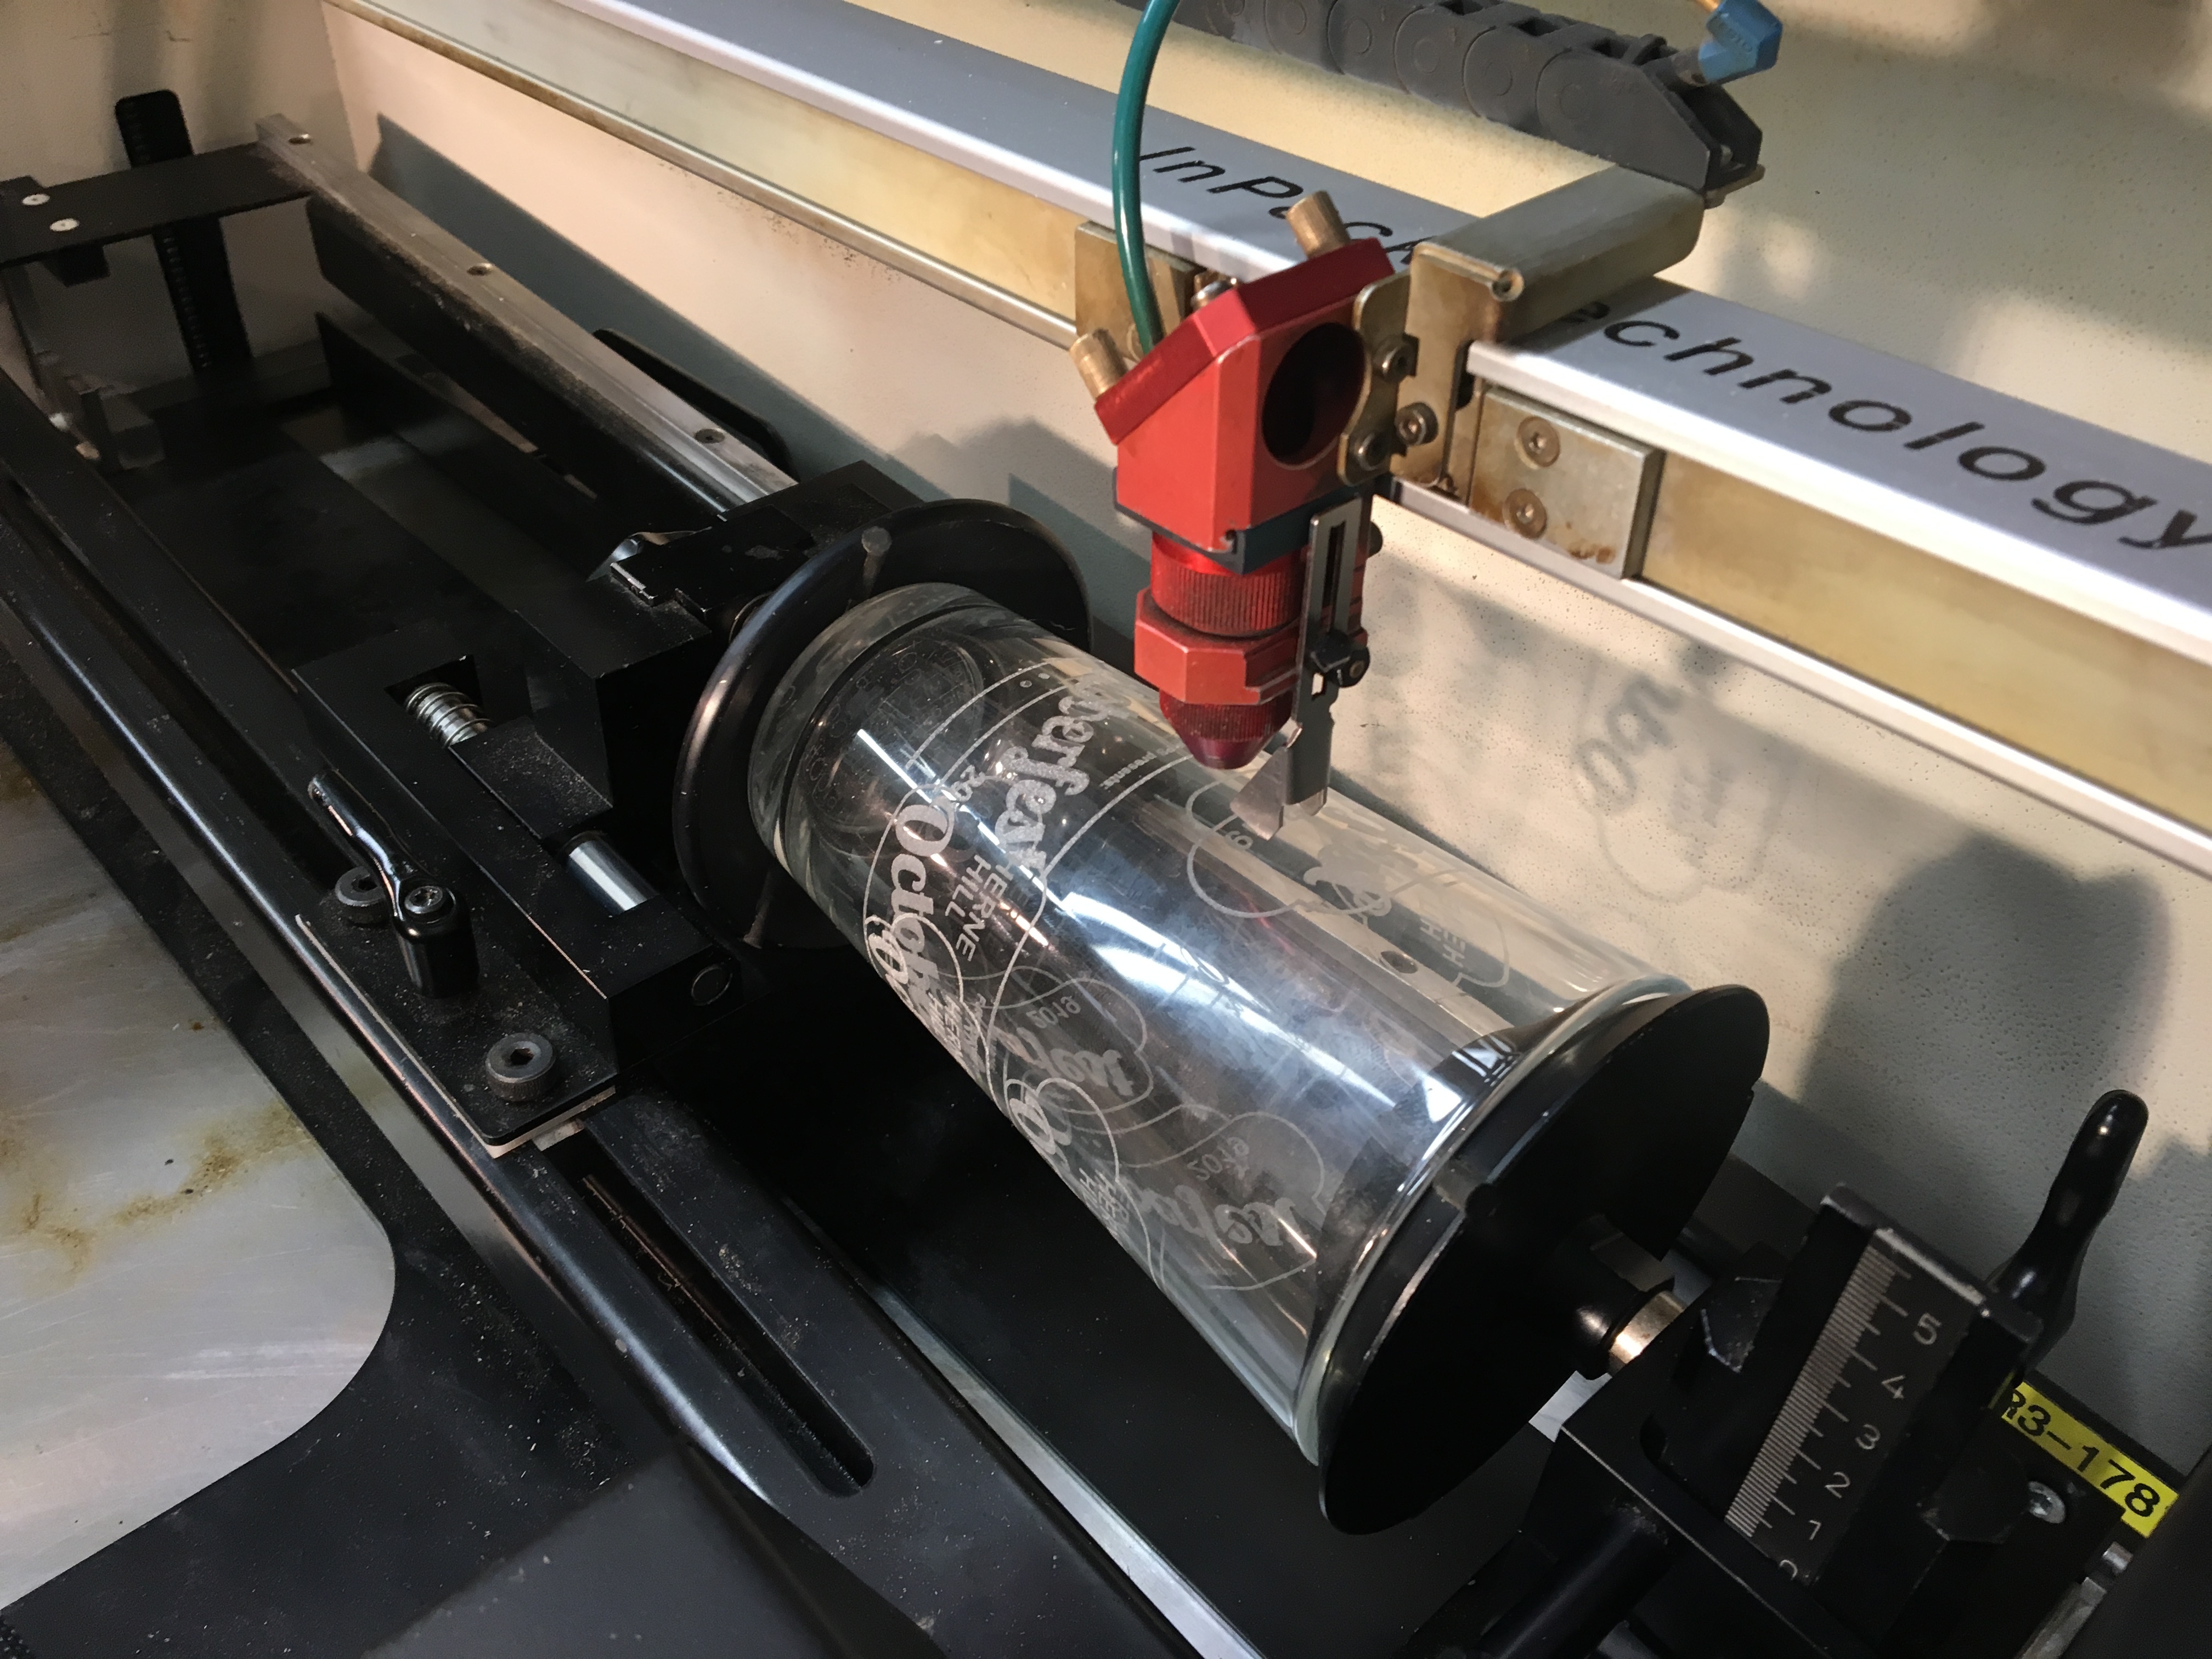
- Make sure when placing your piece the cutter head won’t impact the clamps when cutting, or cut off the price into the clamps
- Configure your material settings. We used Power 100, Speed 40, PPI 500. (Engrave not cut)

- GO!
- To improve quality you could try putting some paper on your piece, lightly stuck with water, ensuring all air bubbles have been removed.
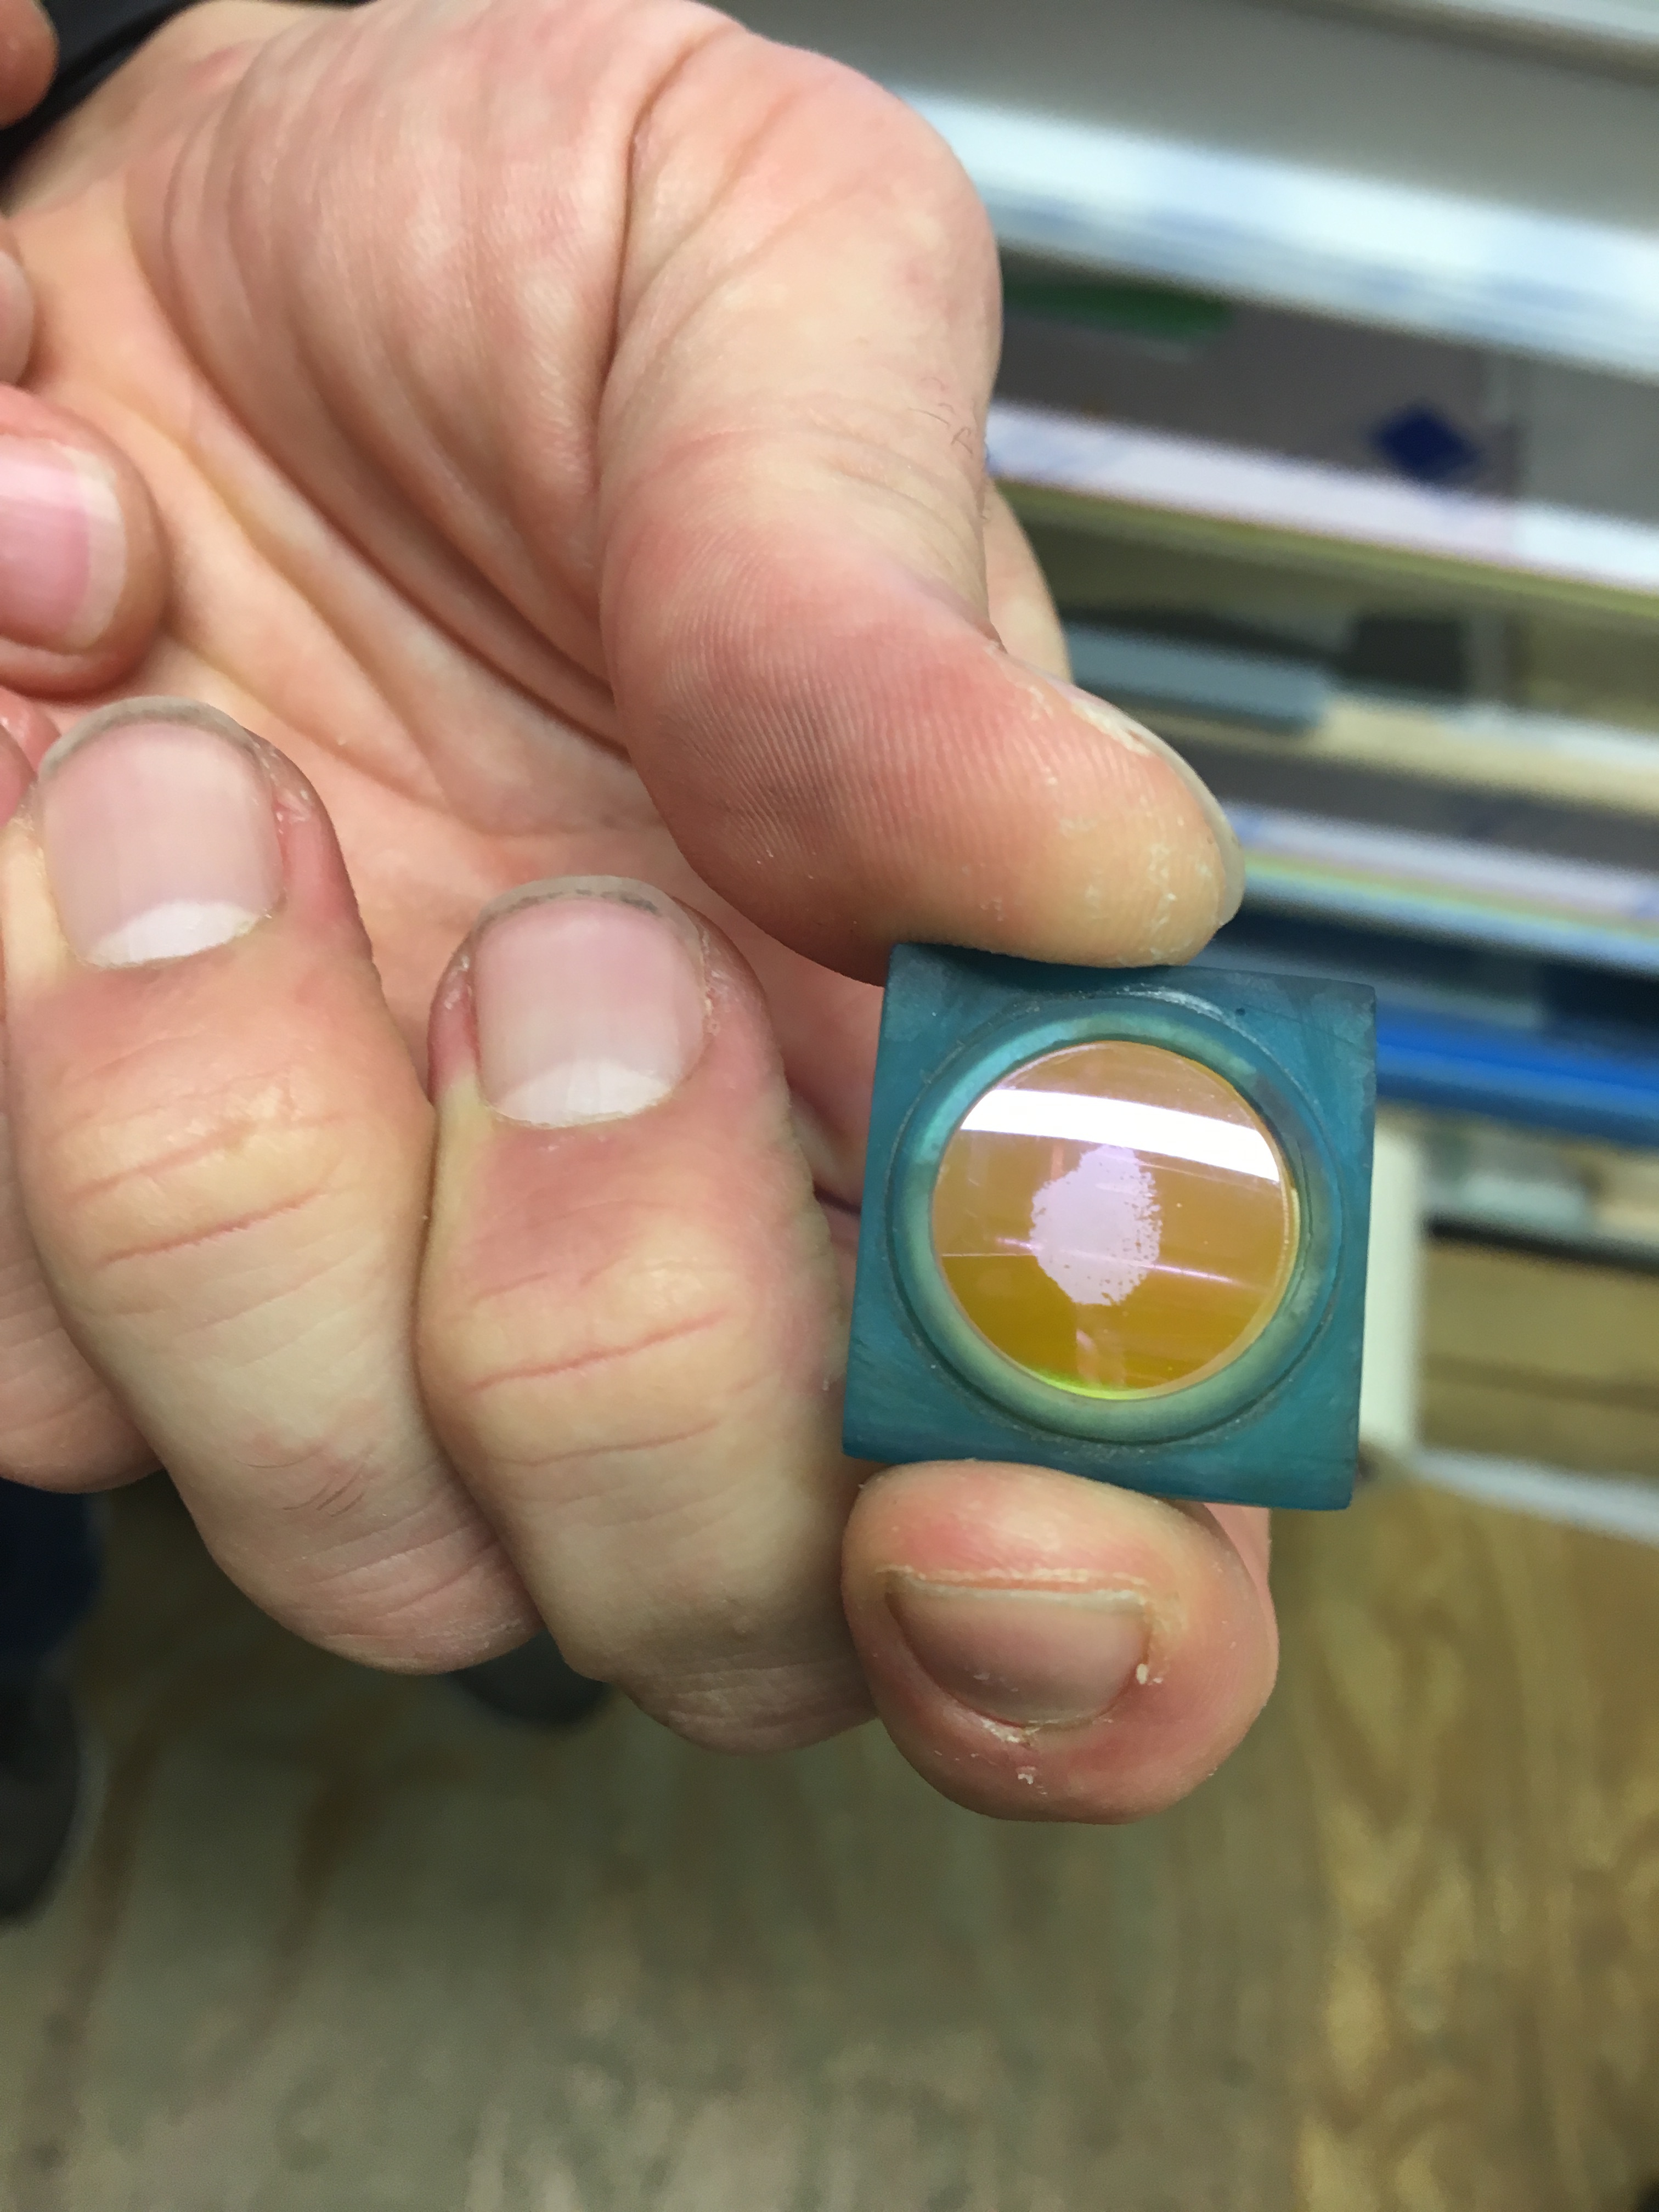
- Remove air Assist if you are doing this as it can blow the paper away
- Also be sure to check the lens periodically. As the glass/paper is more likely to get stuck to it without the air assist.
- When you are finished make sure to change the job control and print settings back to honey comb so the next users don’t get confused!

- If you are doing something with a handle, make sure it rotates away from the cuter head.