
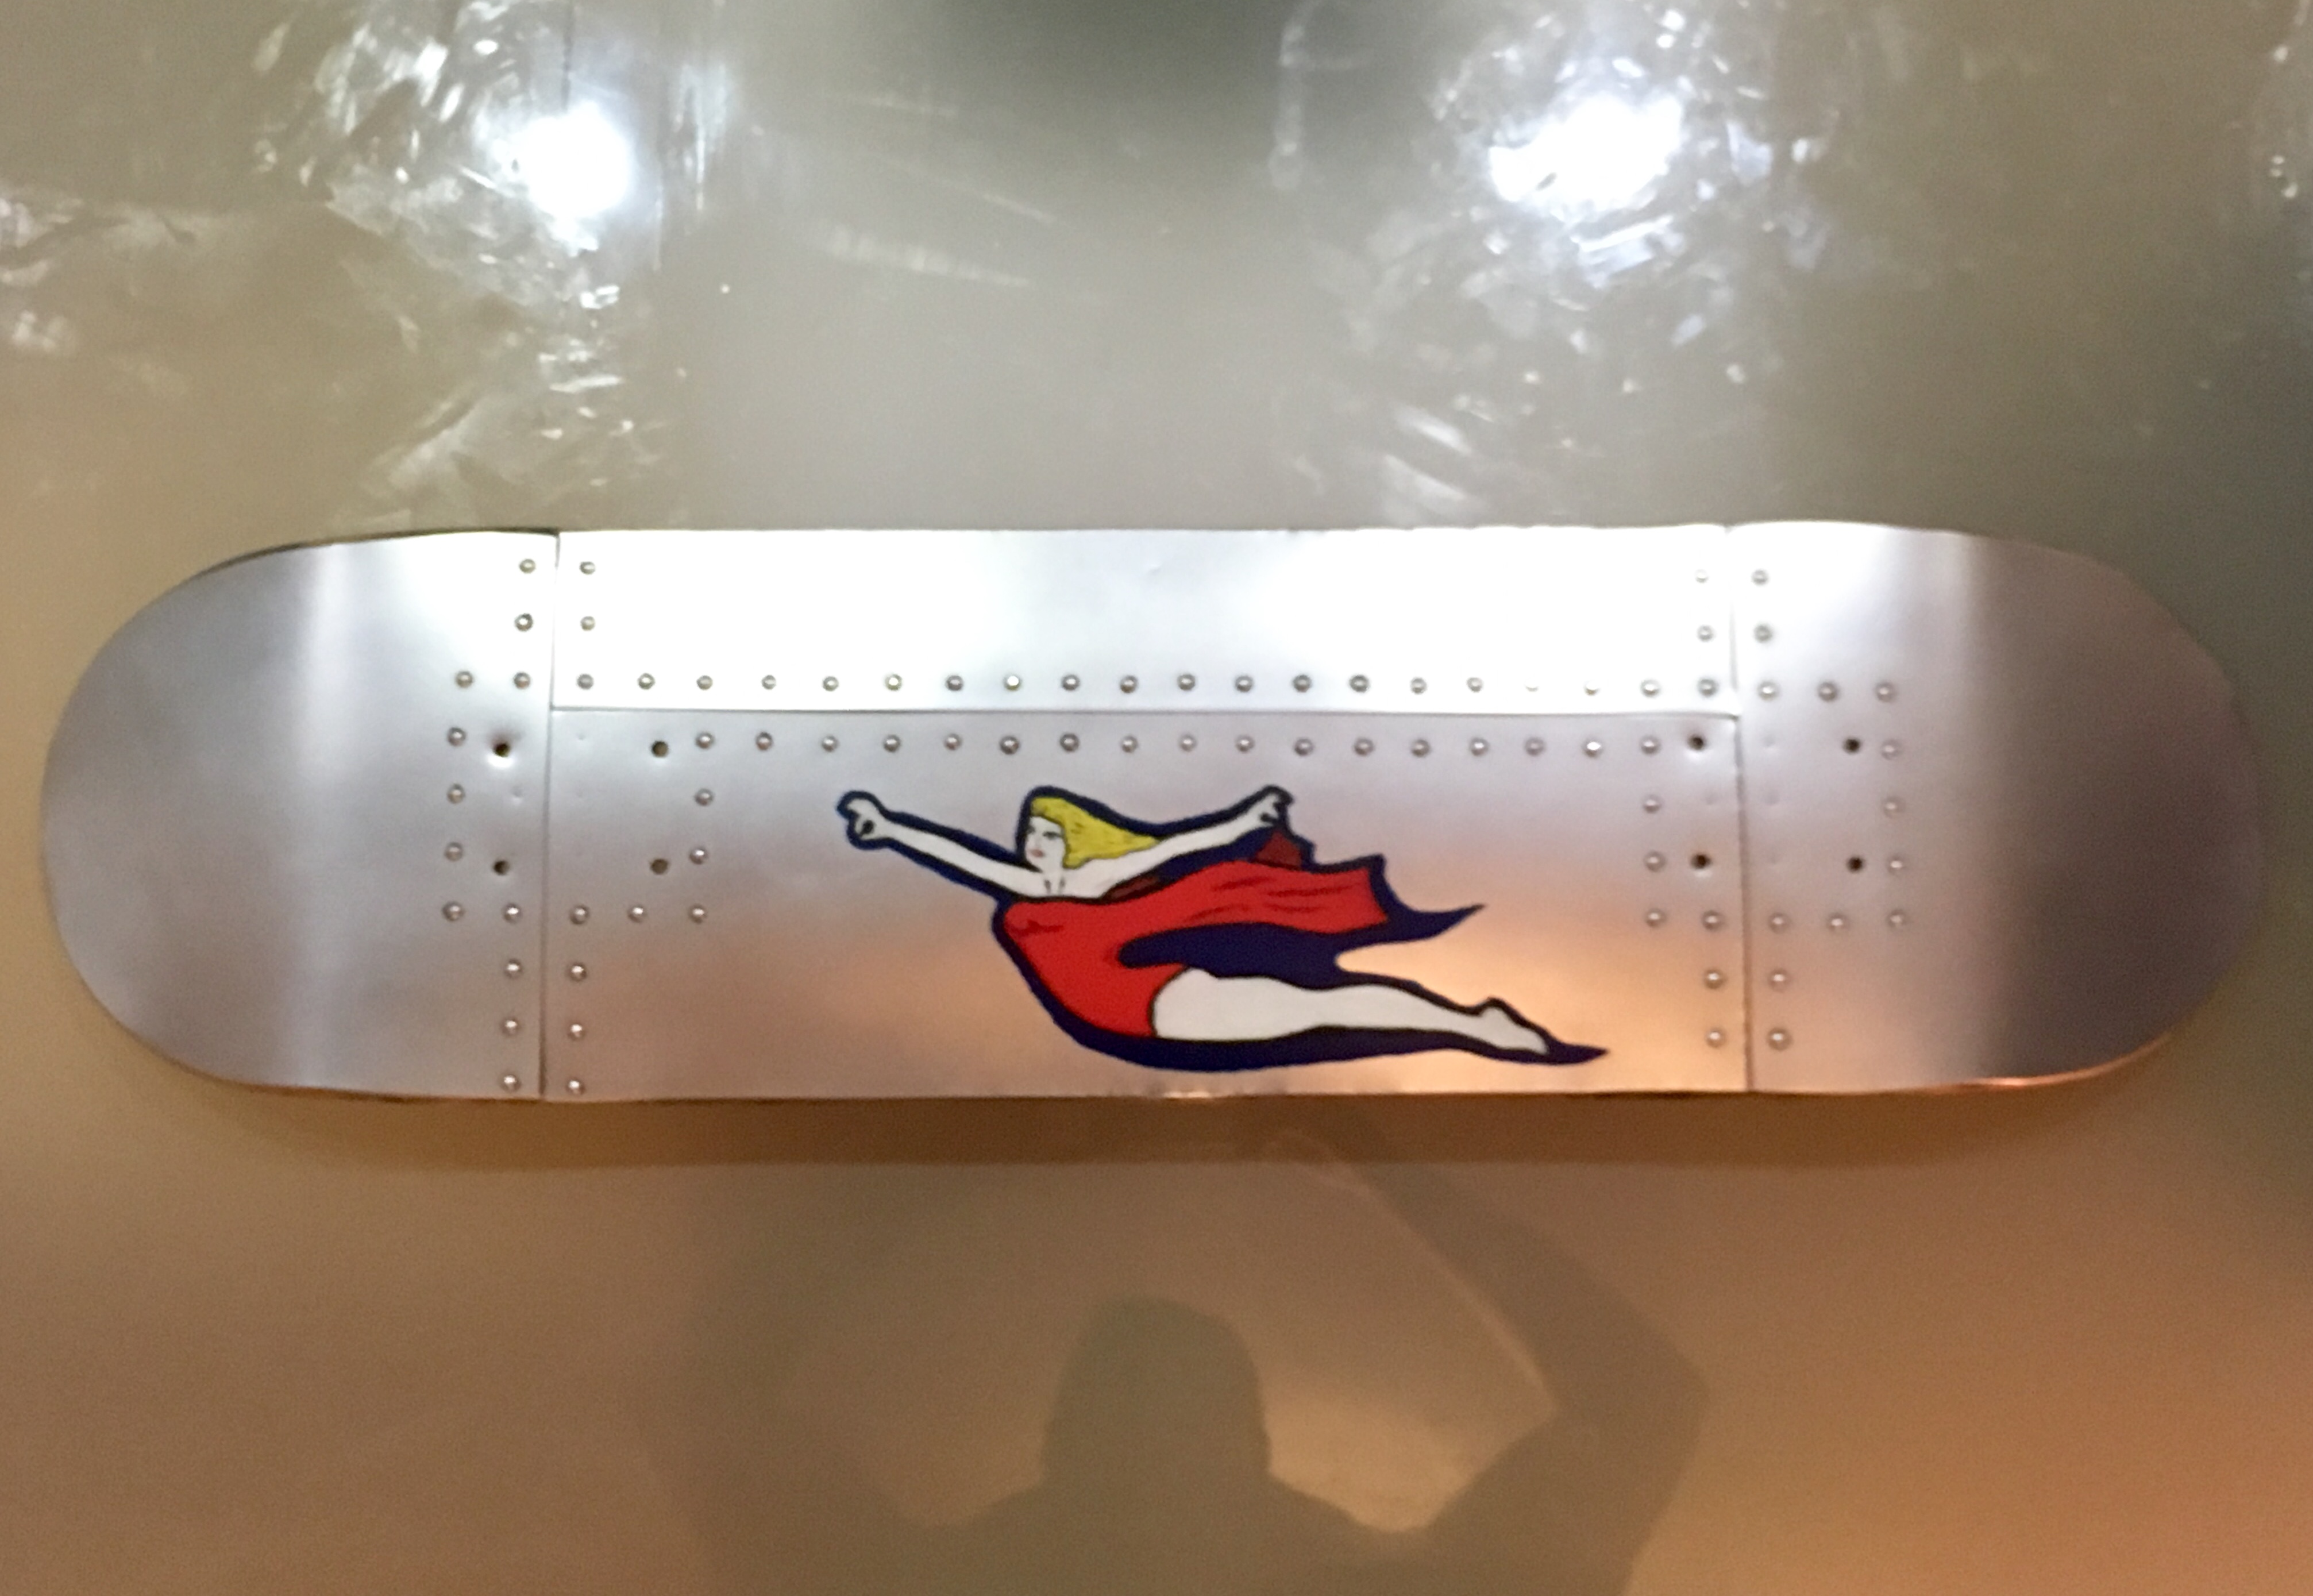
Hacked an old skateboard deck i had a bit, love aircraft engineering and styles and i had this idea a while ago.
Call it the Flight Deck in a double pun because why not?
Process below.
-
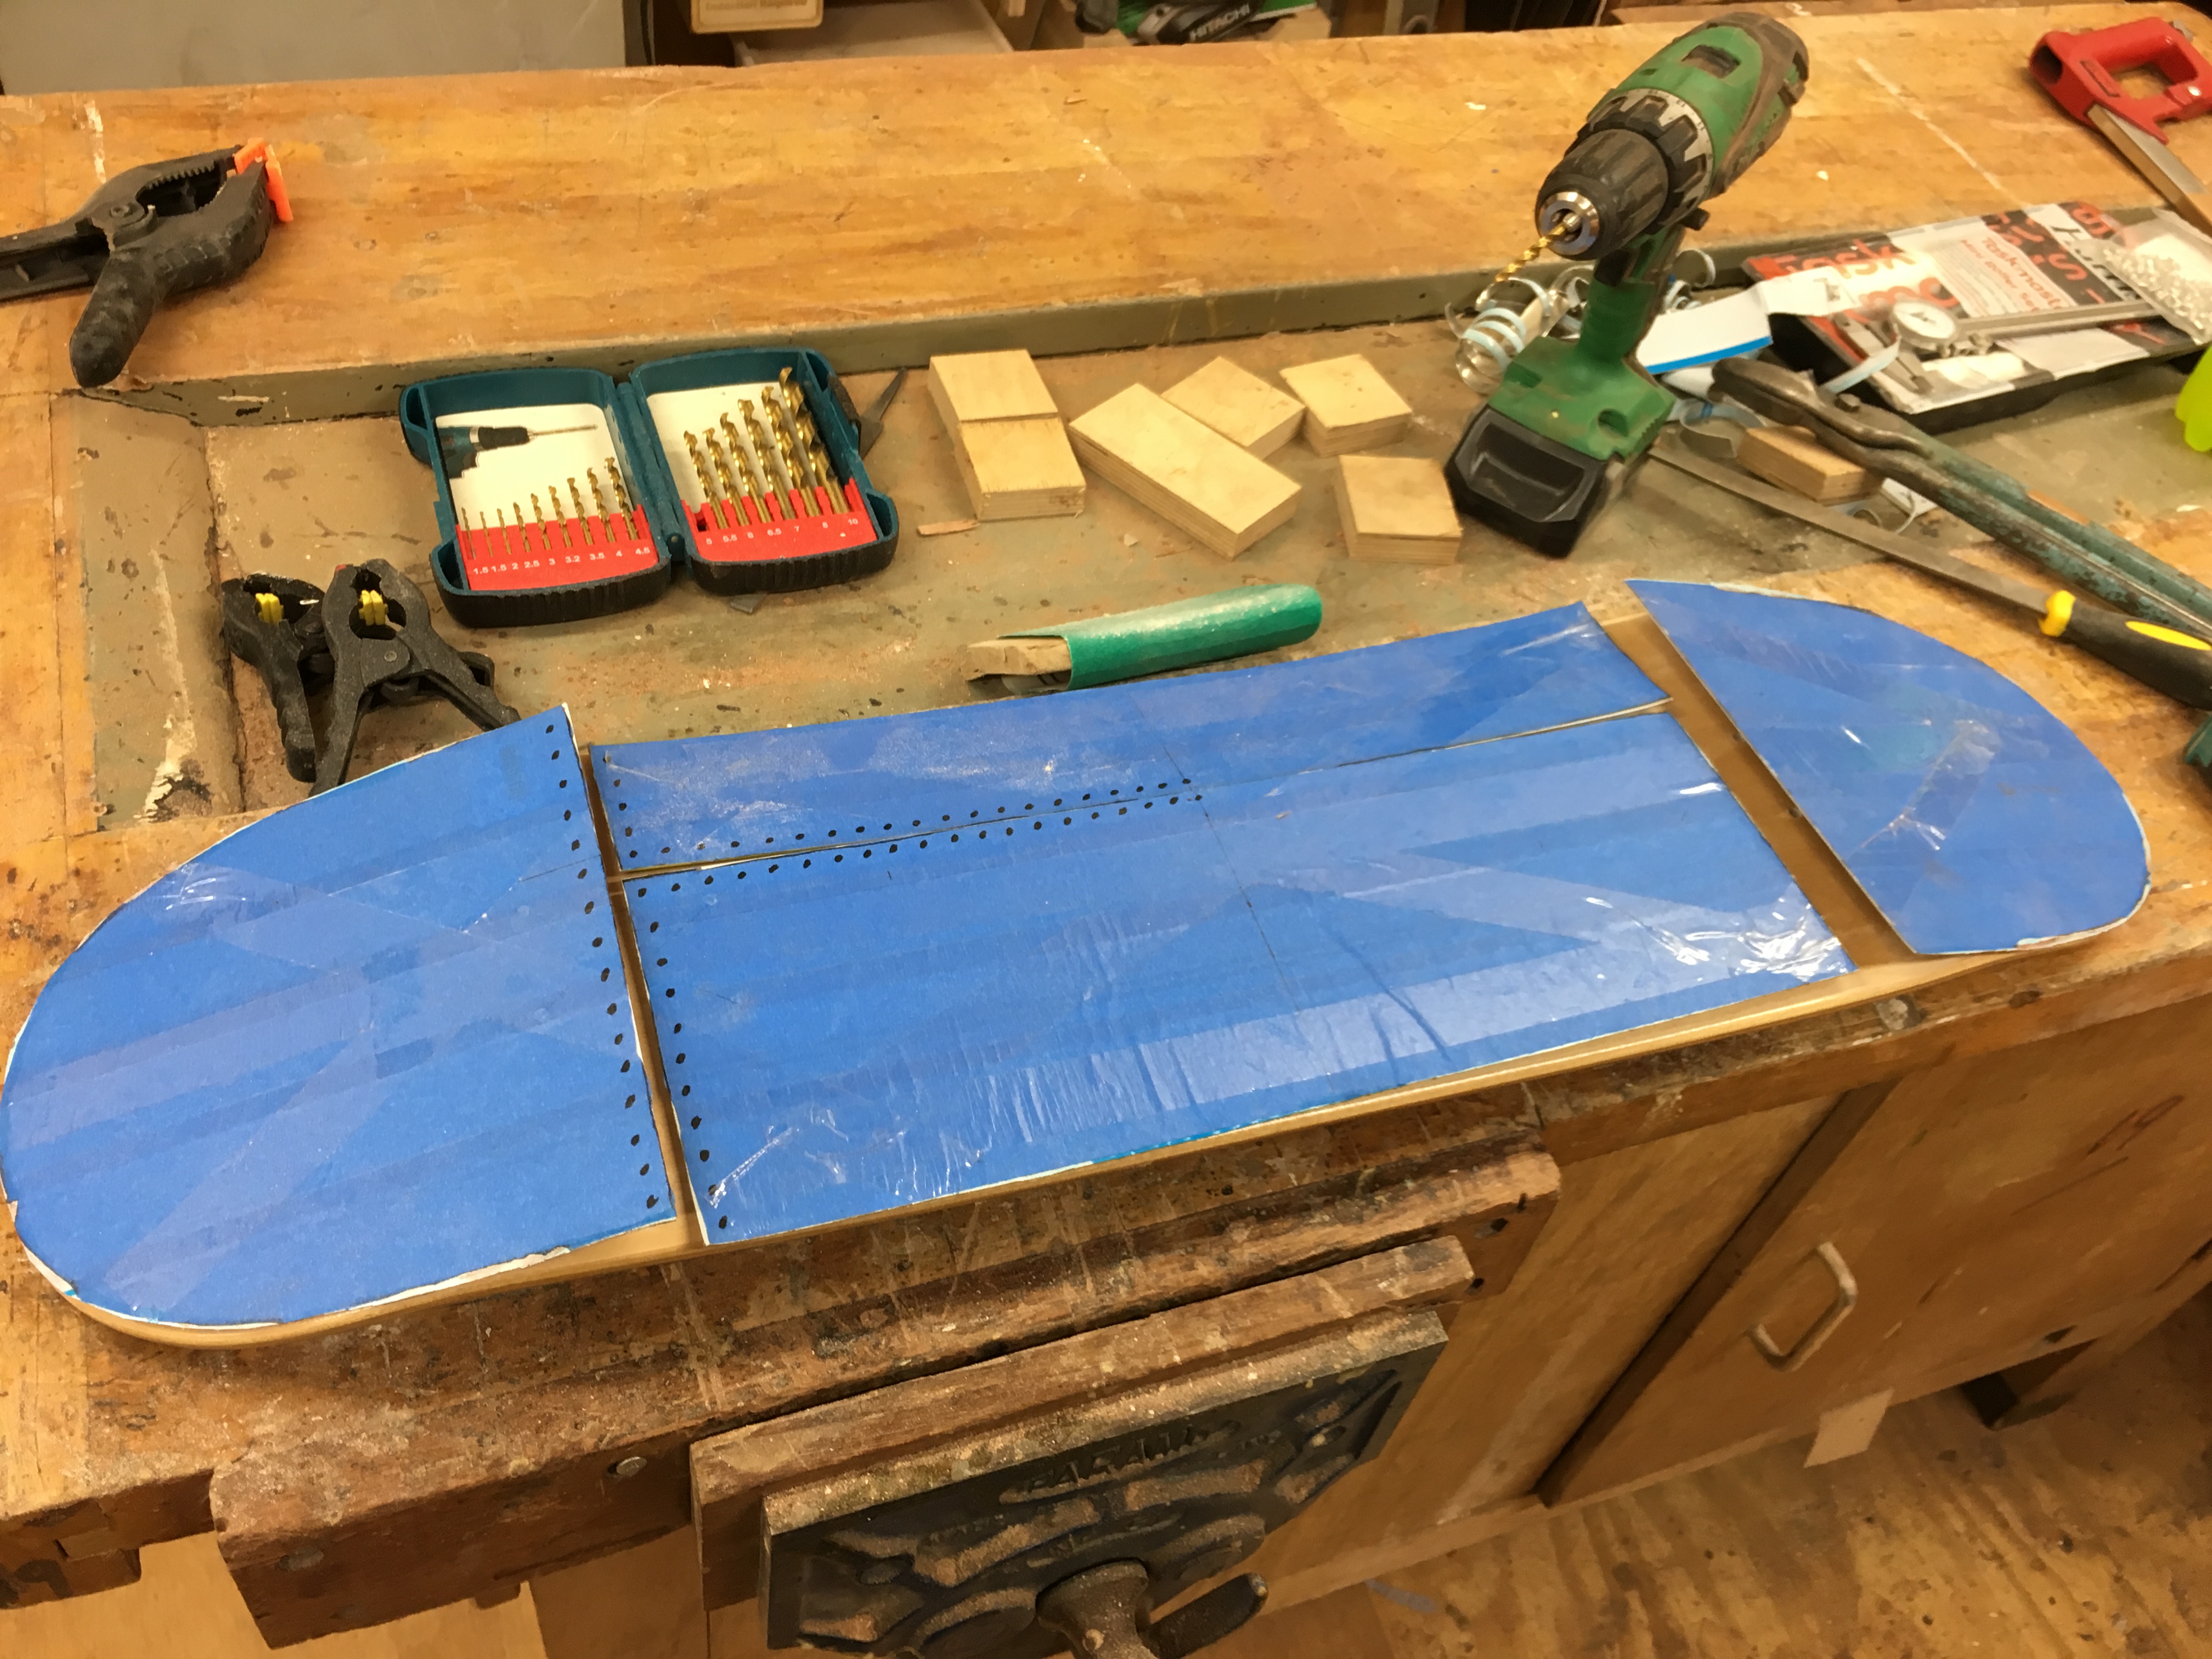
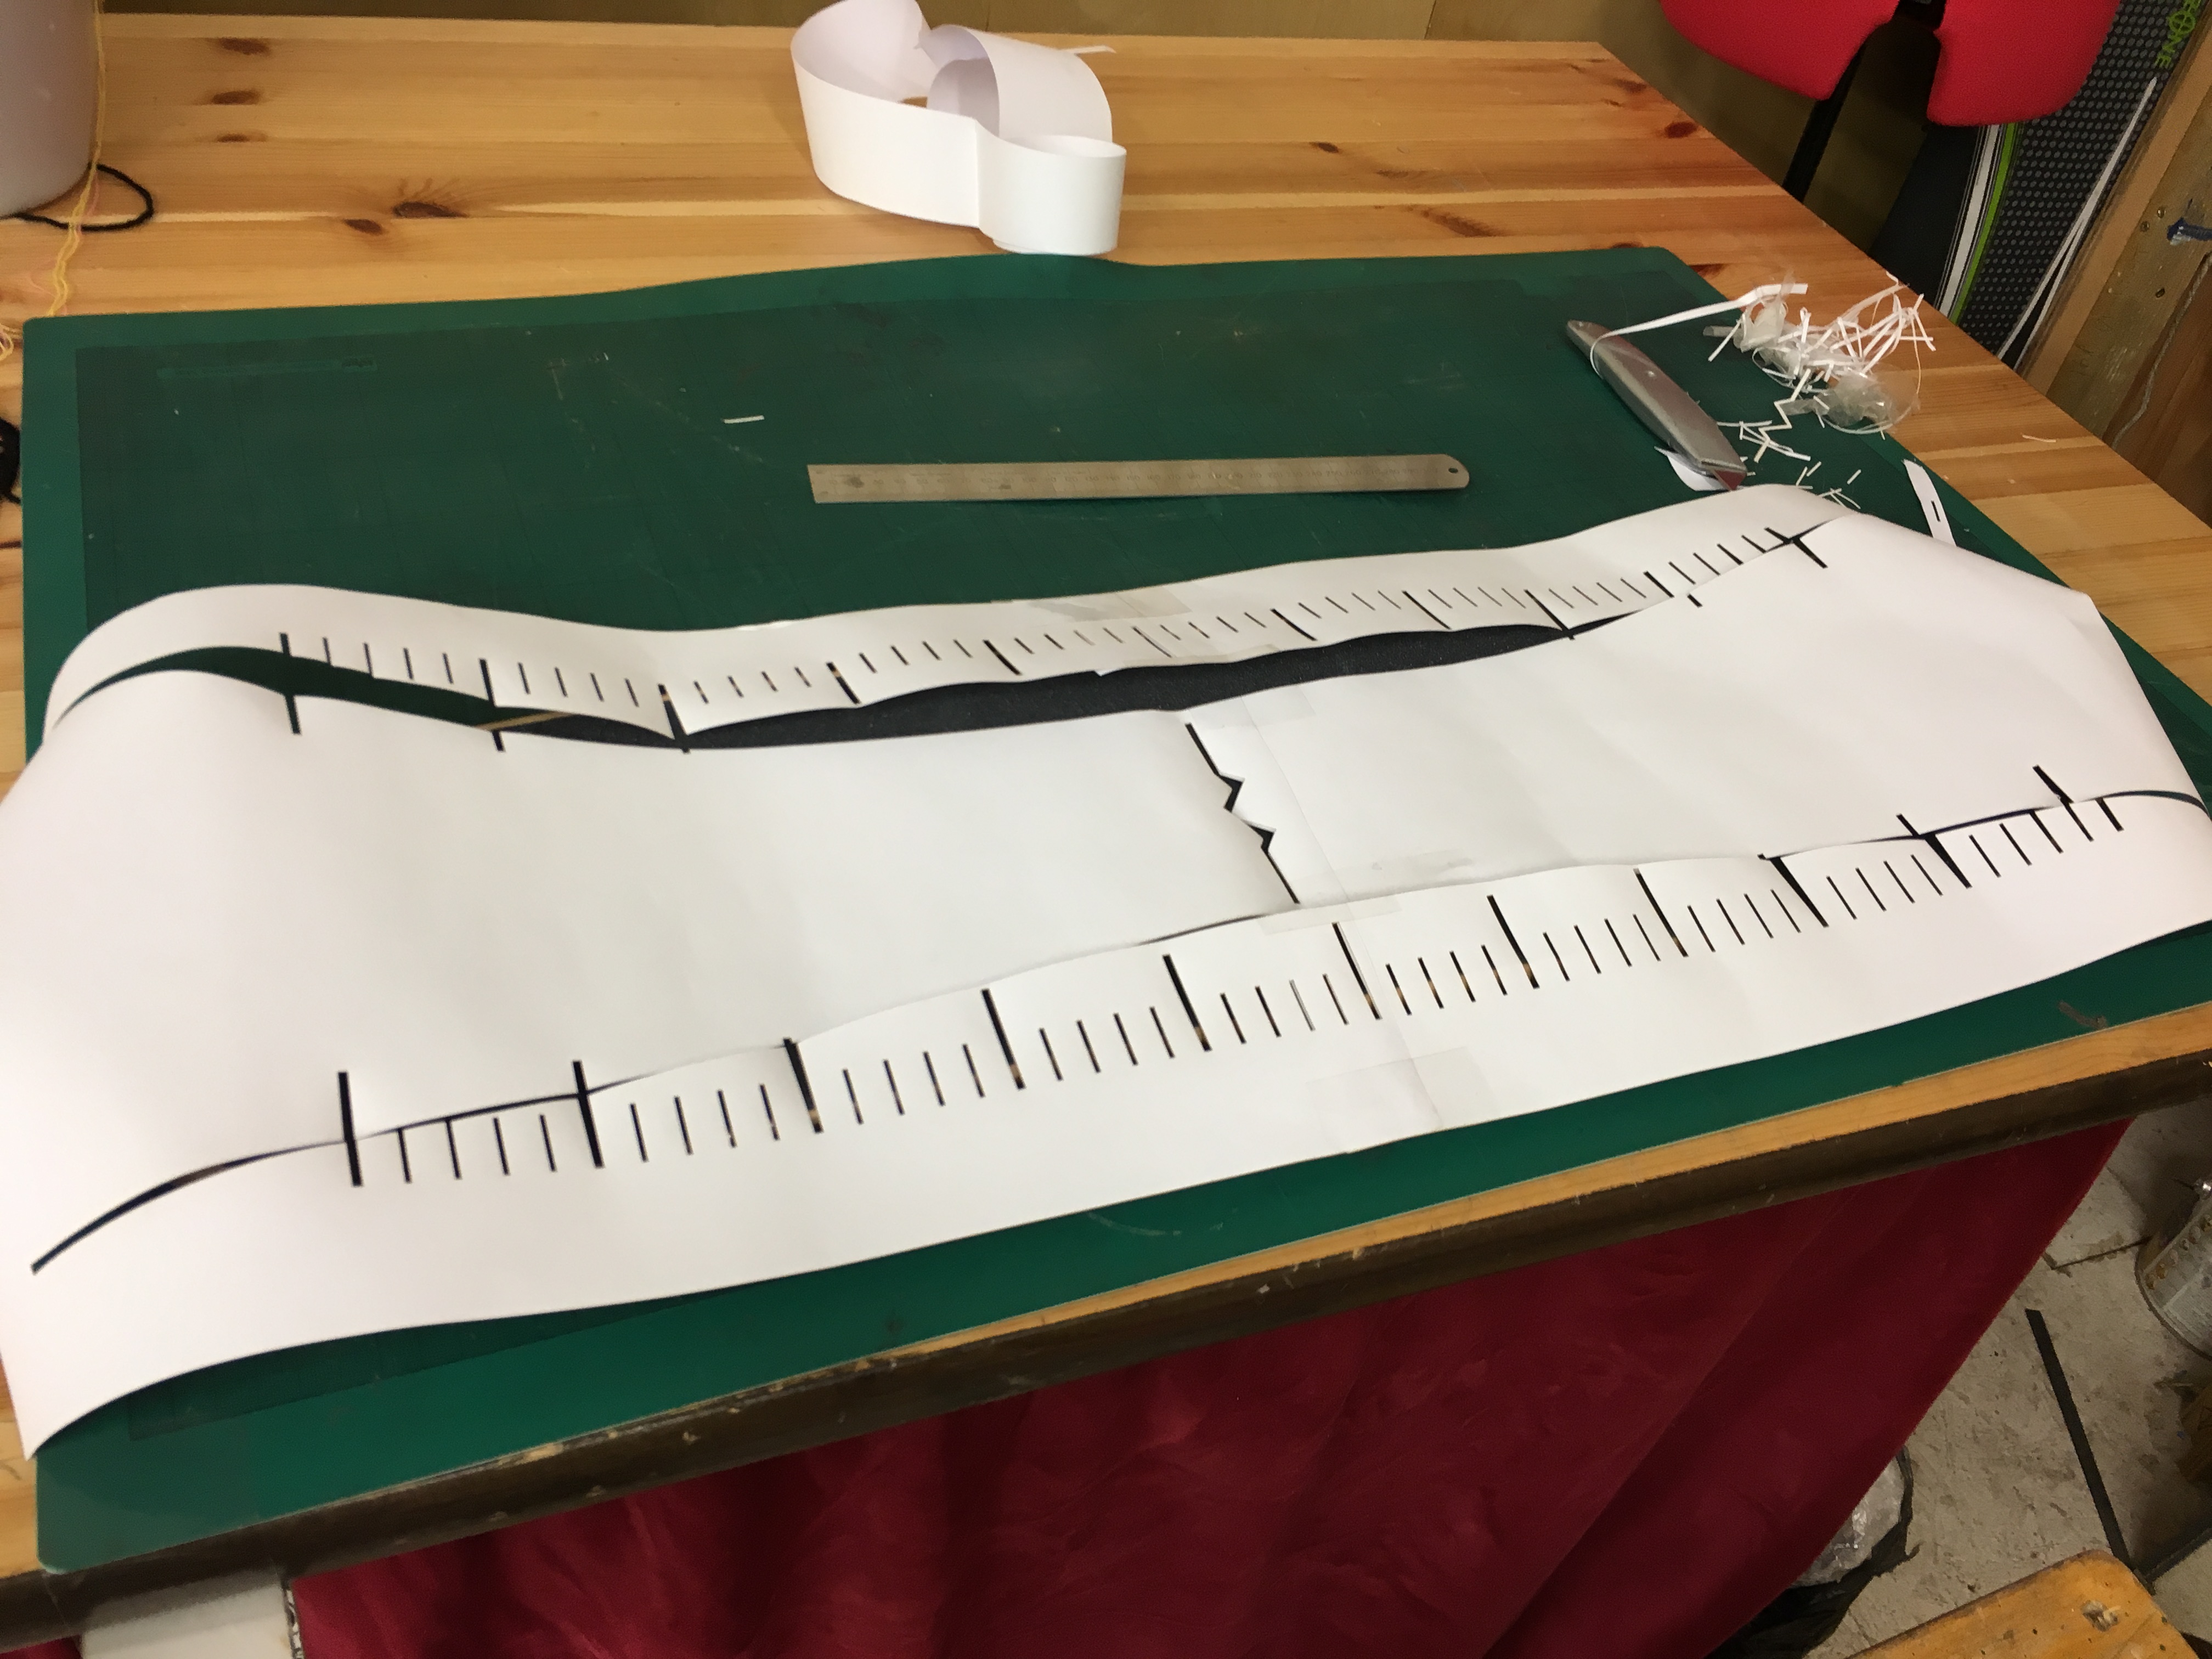
Tape up undersize and cut to size, apply to metal and cut metal to size for underside dimensions. Can also sketch basic design here to get an idea on final result.
-
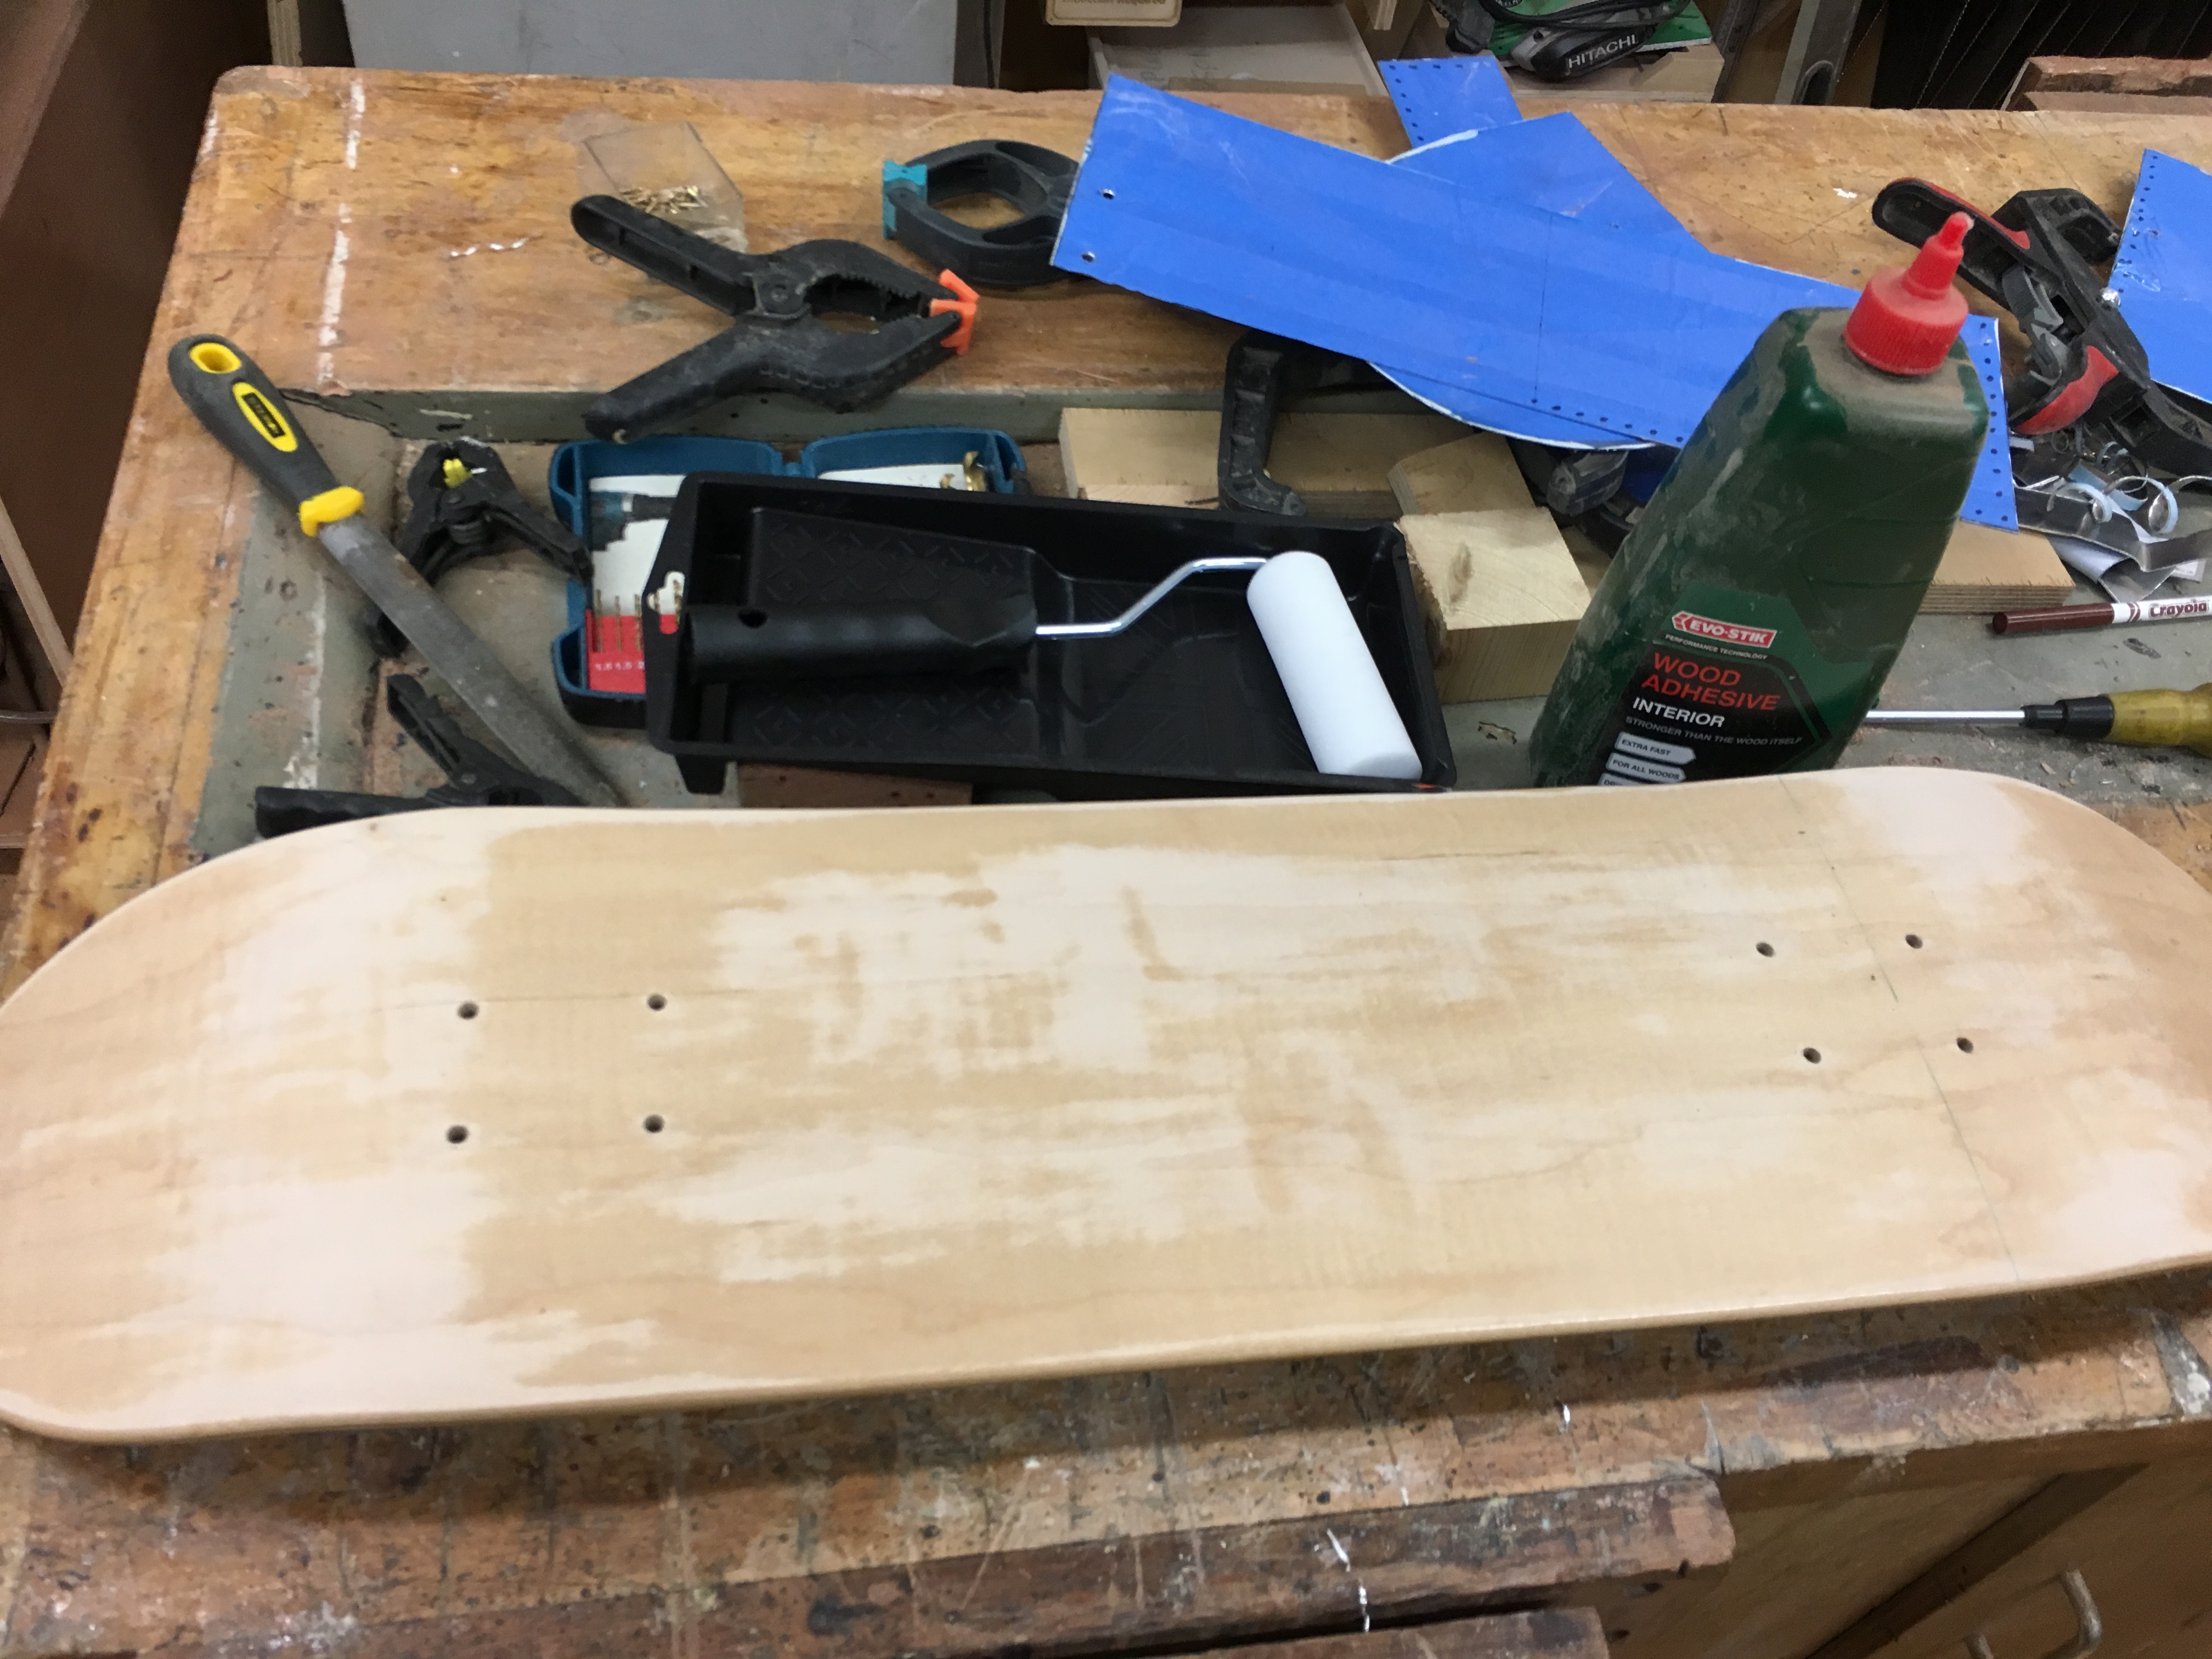
Prep wood for glueing by removing existing varnish with sandpaper.
-
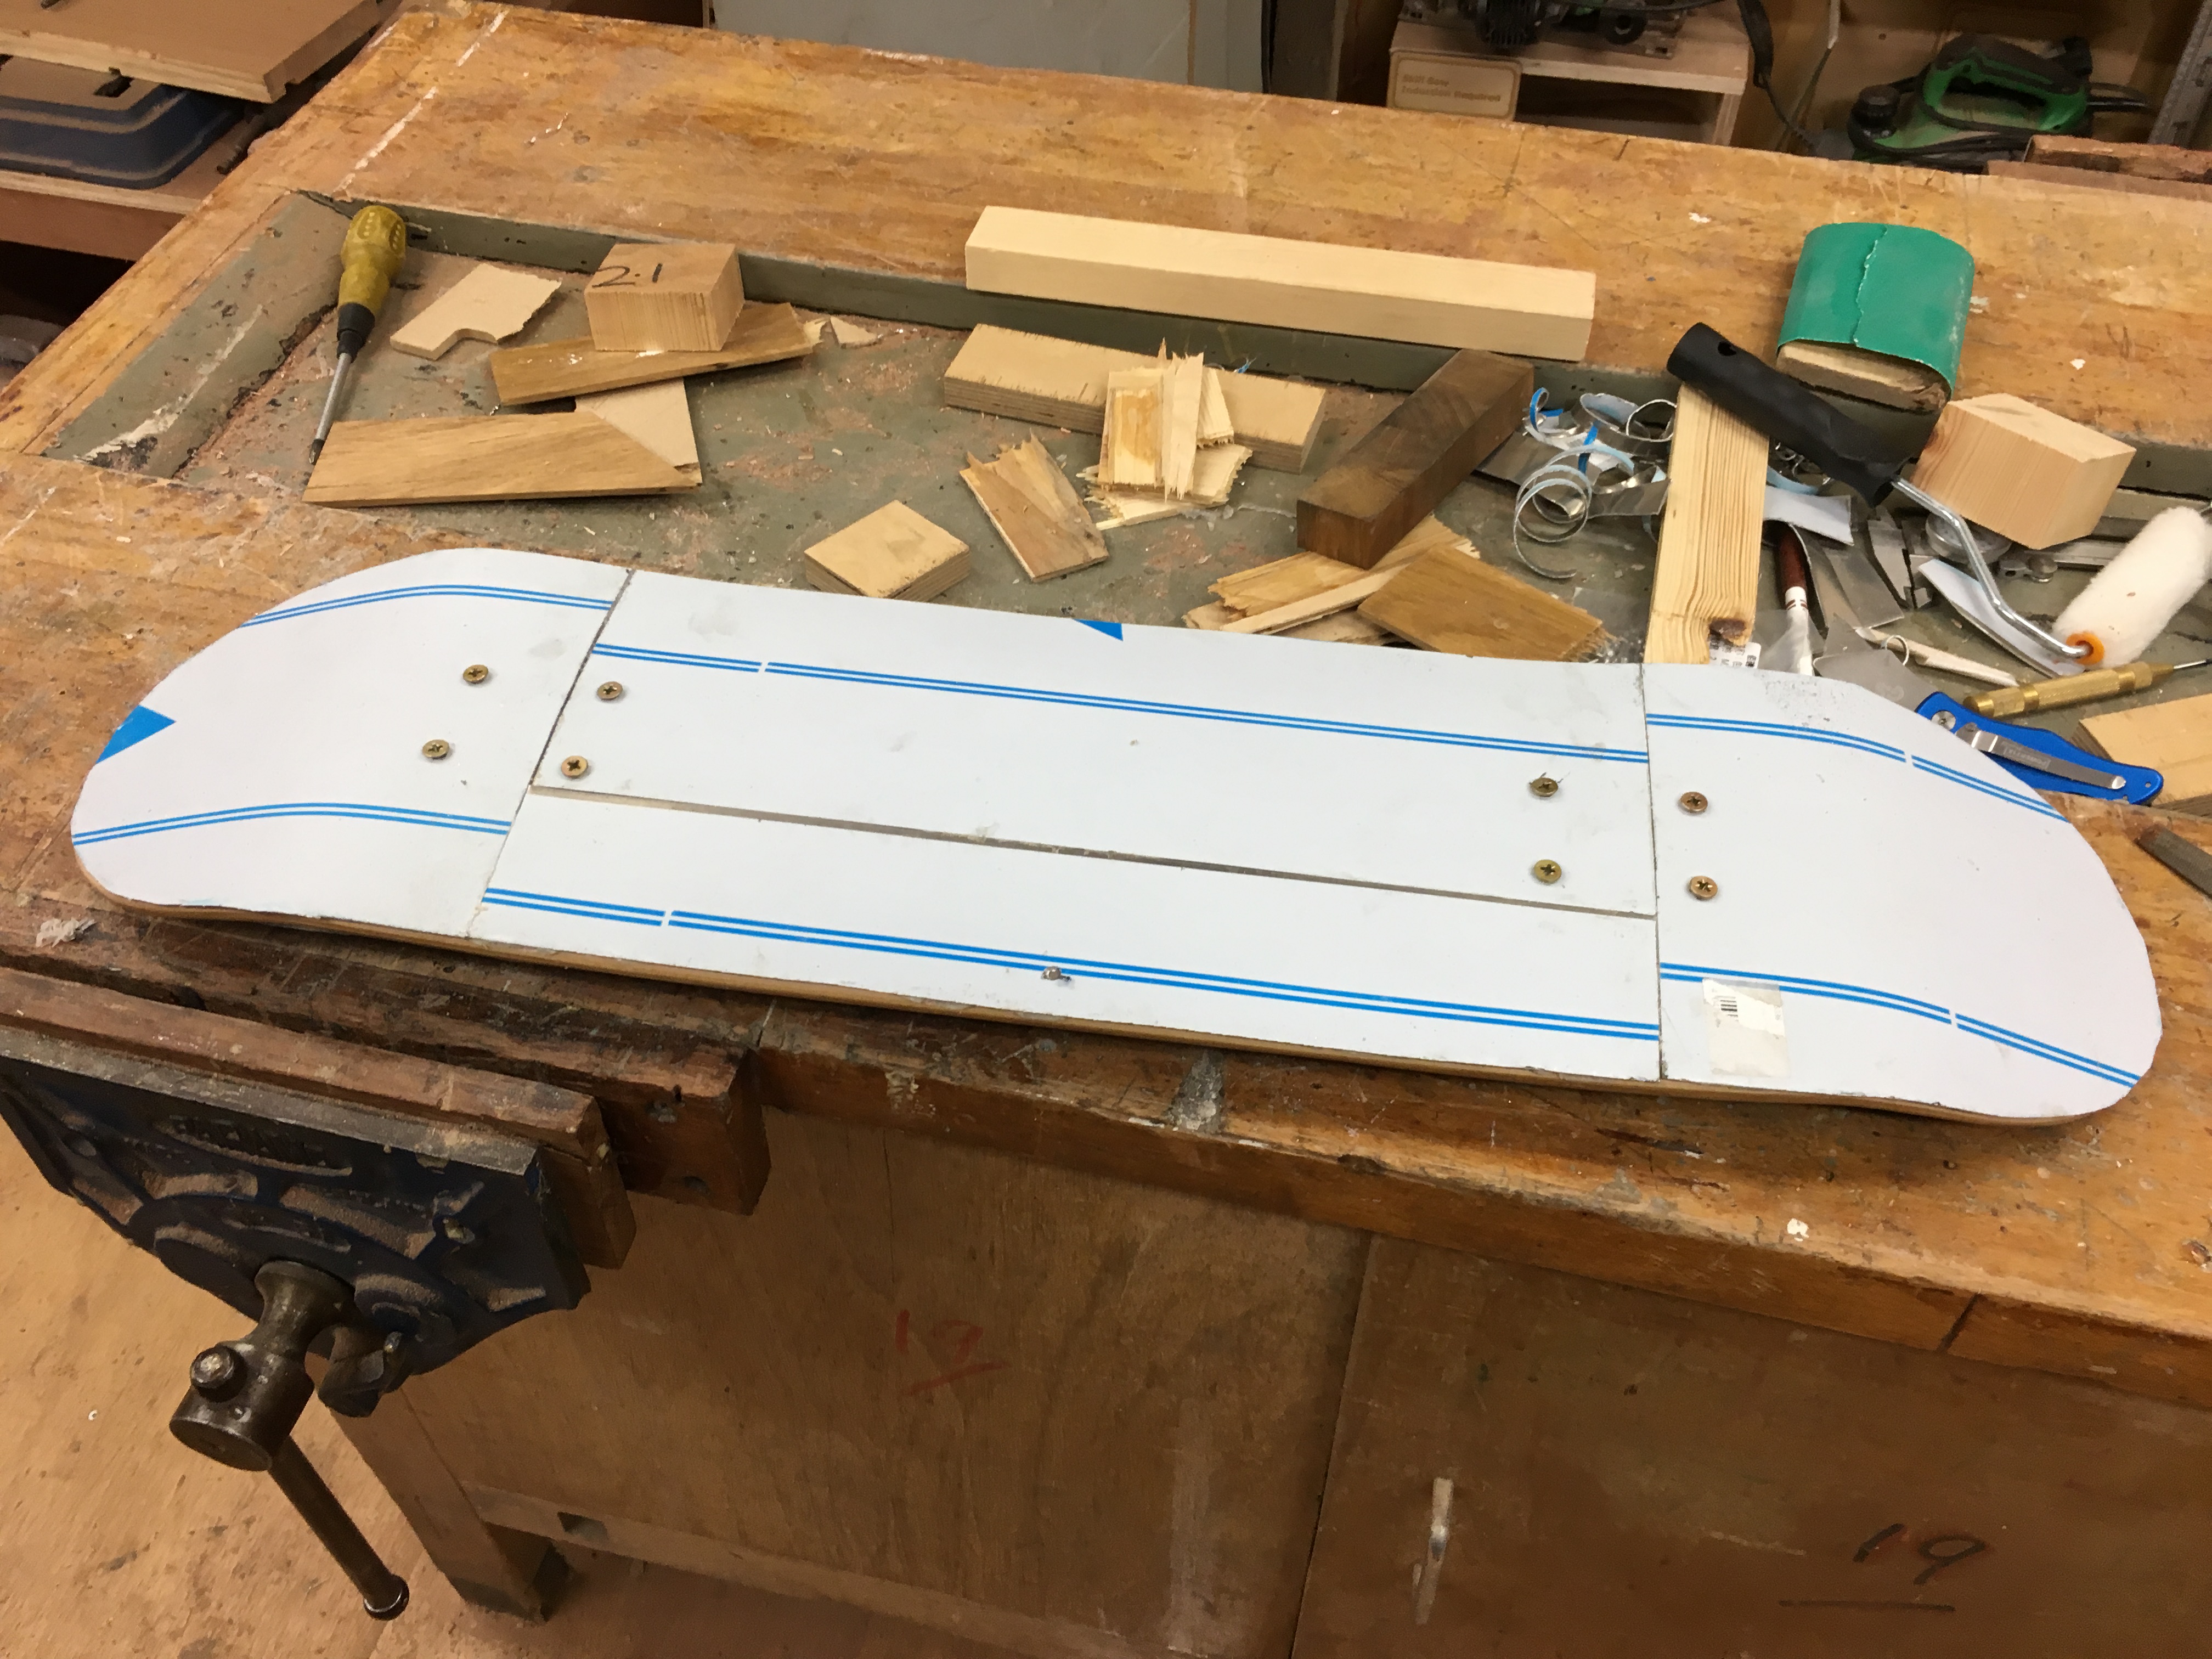
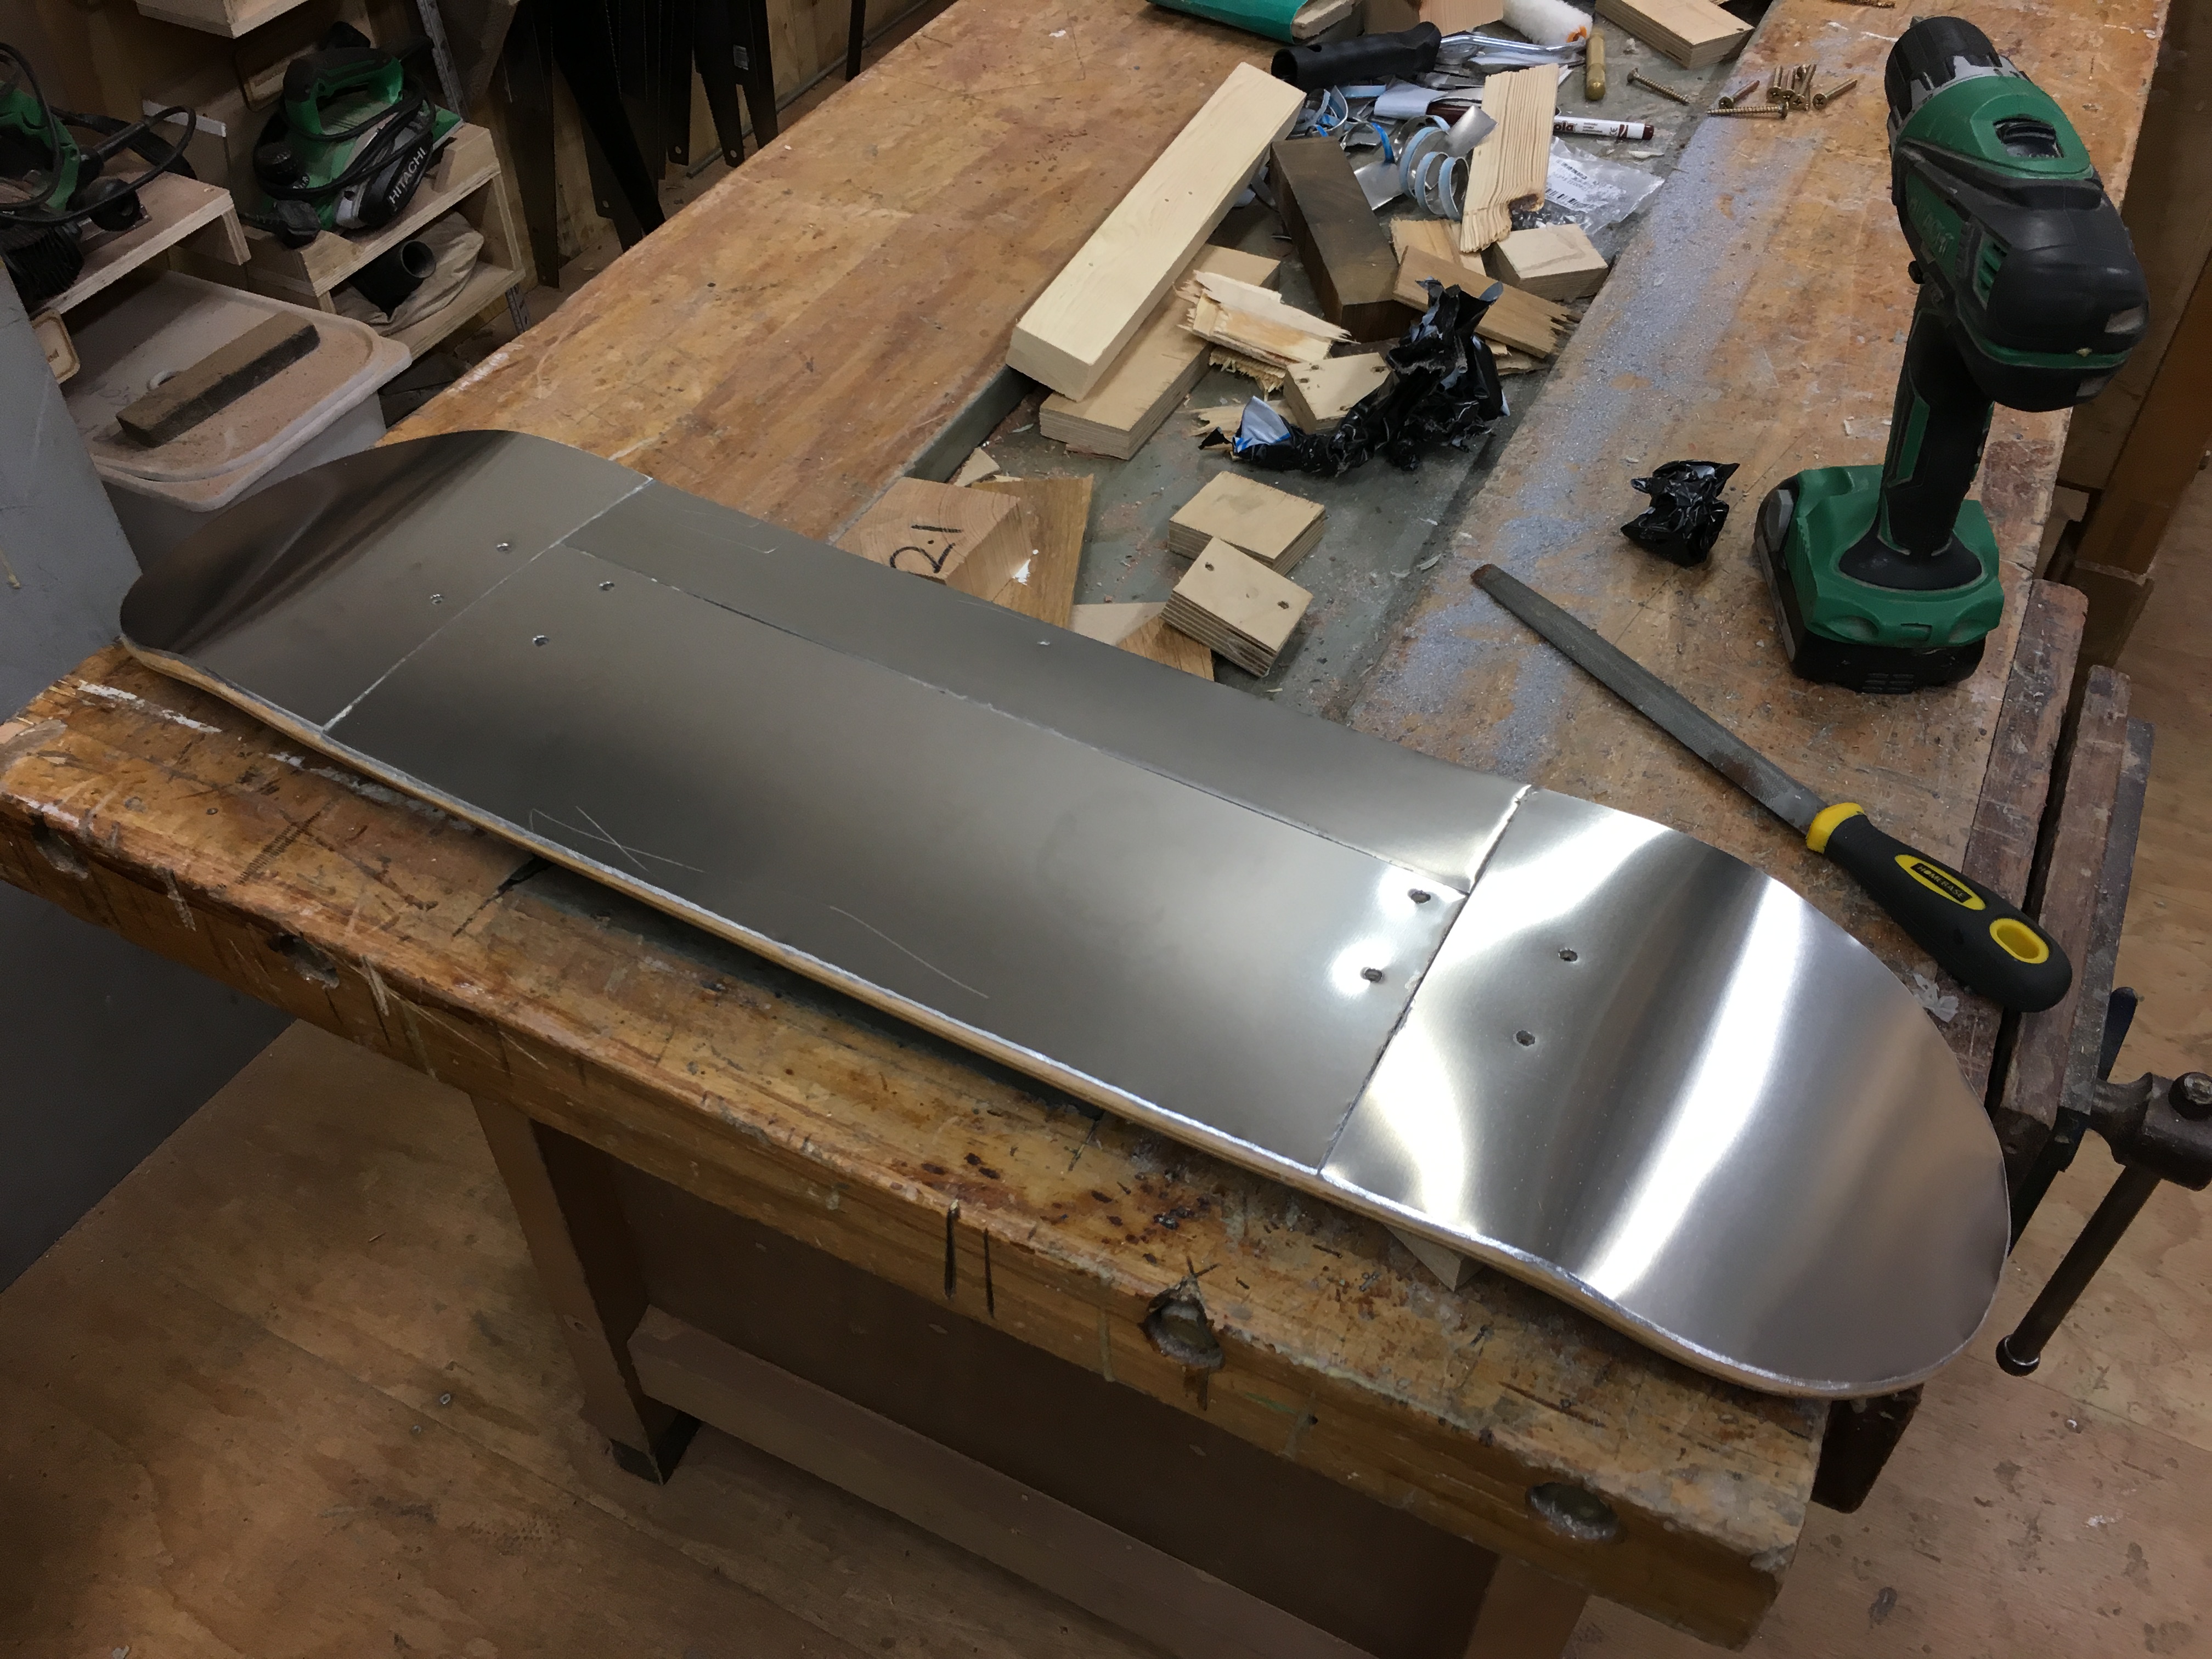
Align metal parts in dry run
-
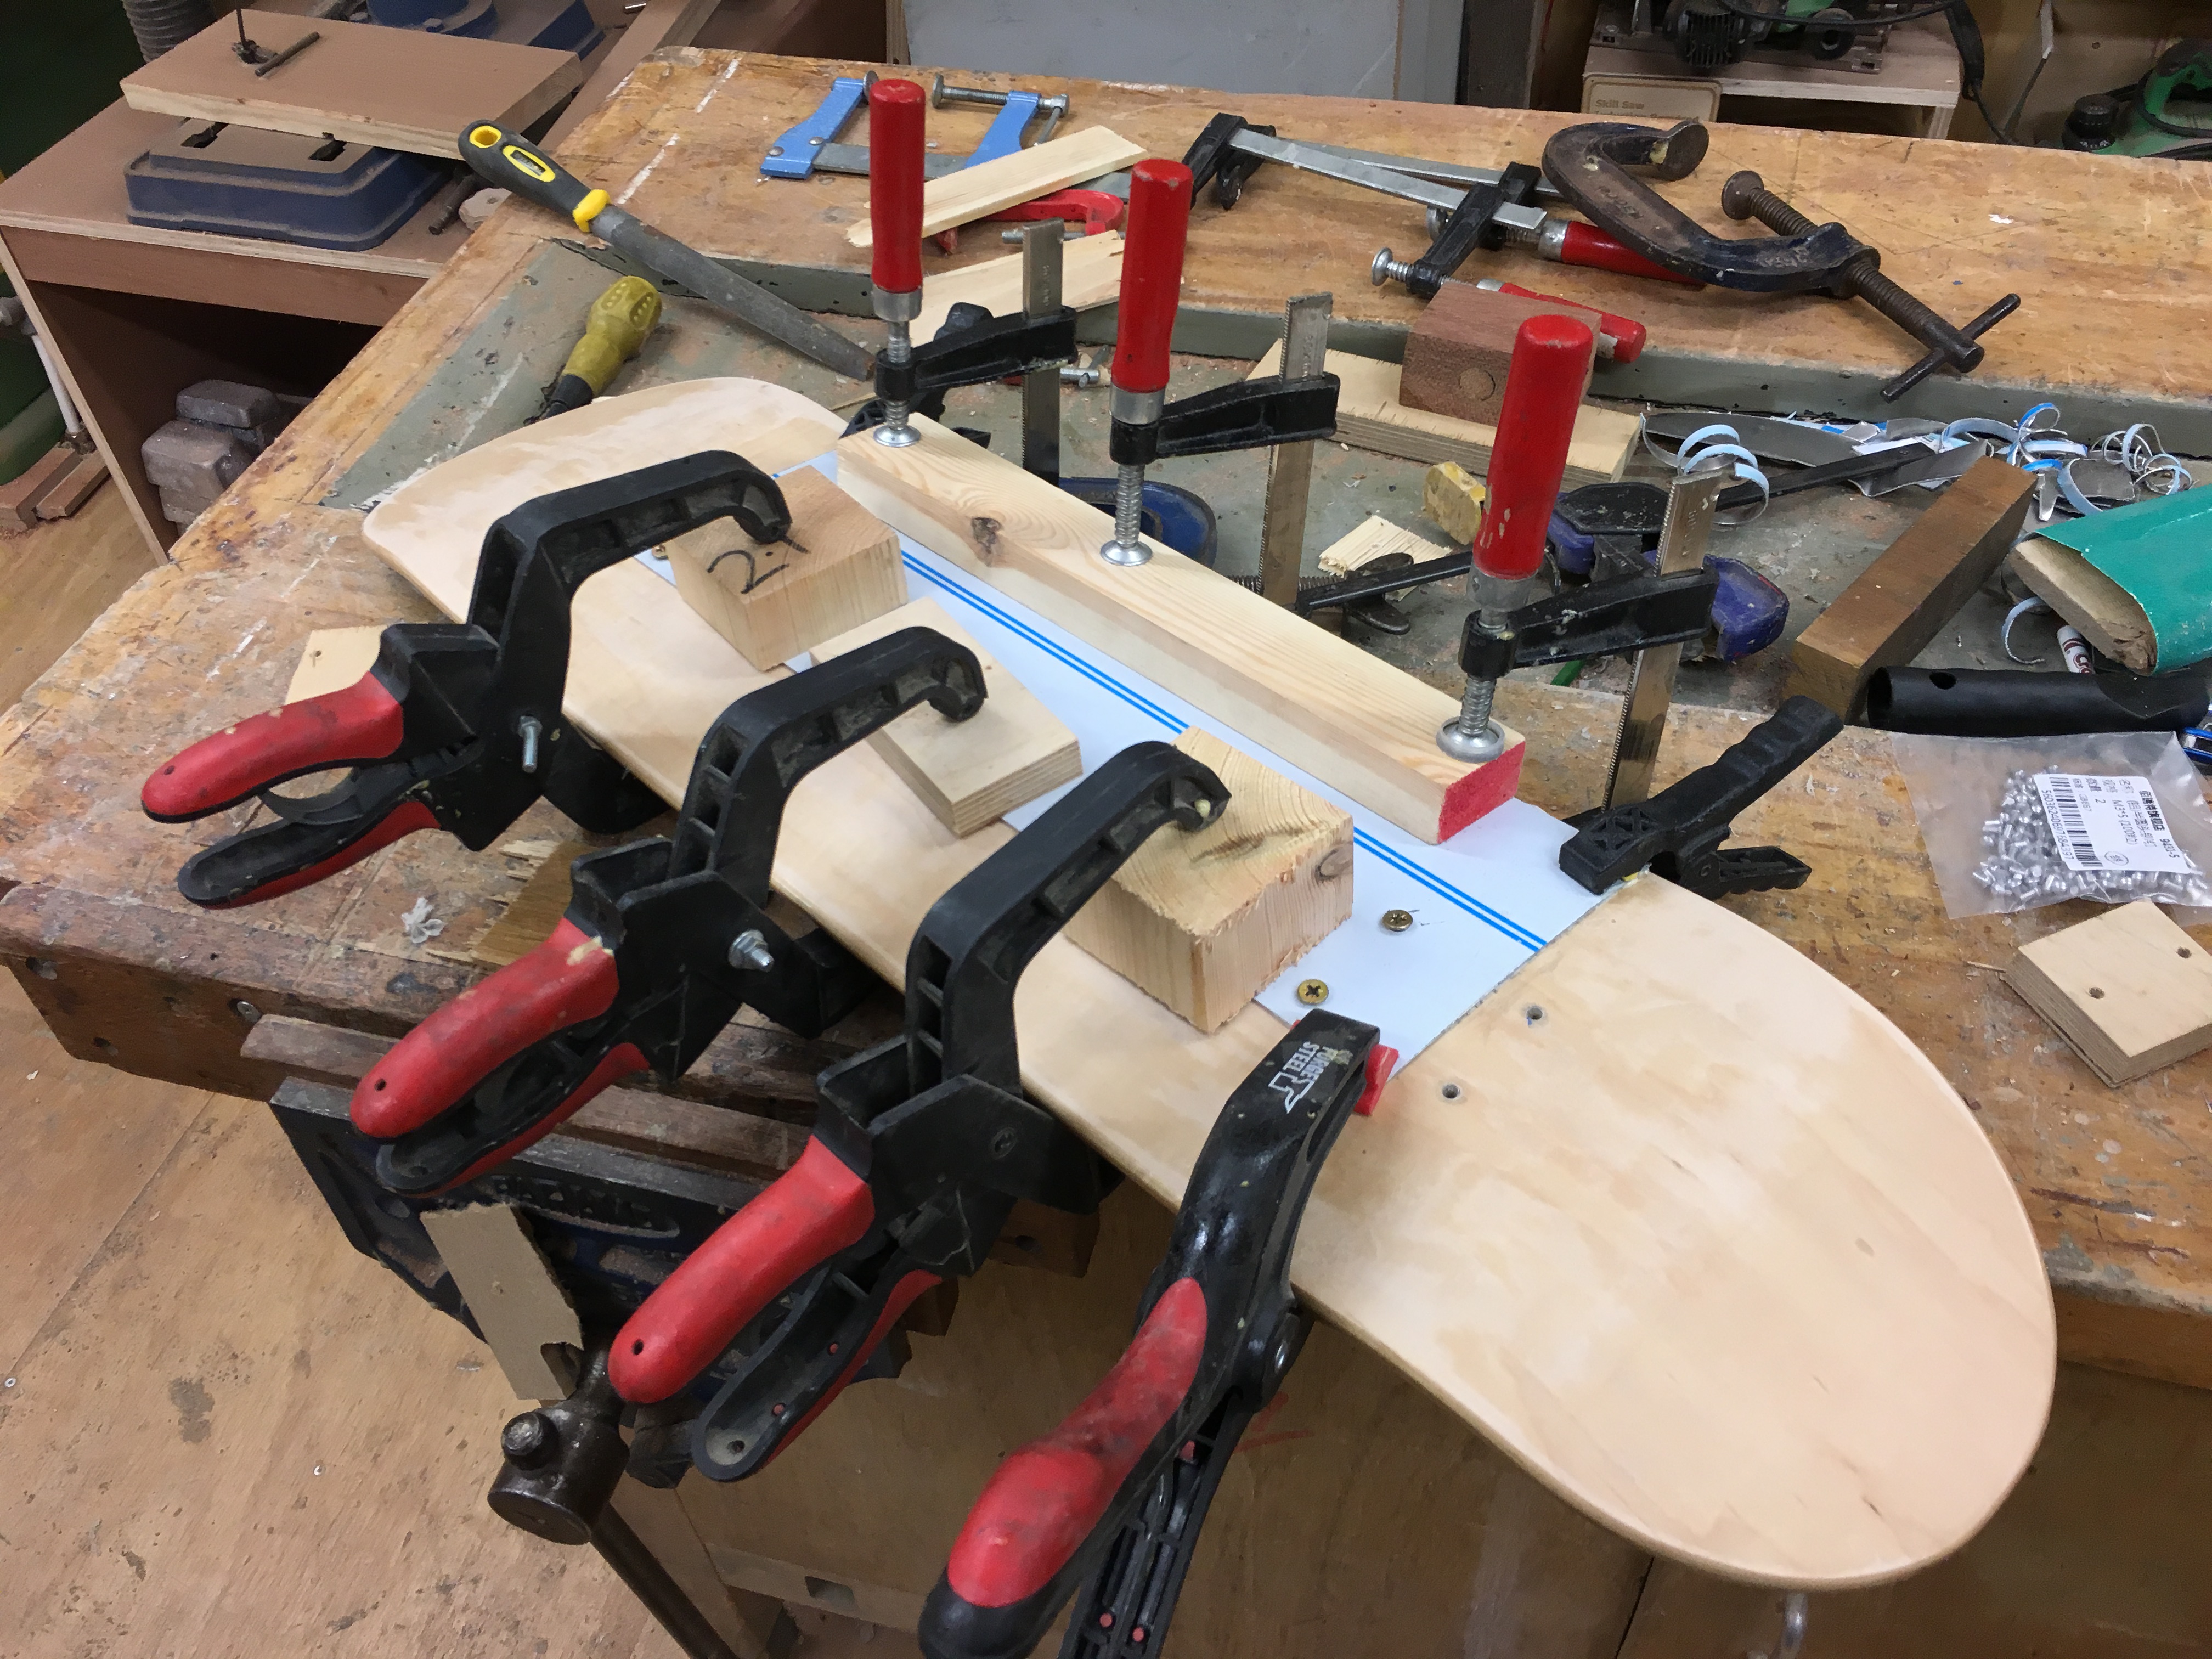
Glue parts with PVA Glue. Find out that doesn’t work and re-glue with correct glue. (thanks @joeatkin2)
-
File down edges and overhangs, scrape off excess glue.
-
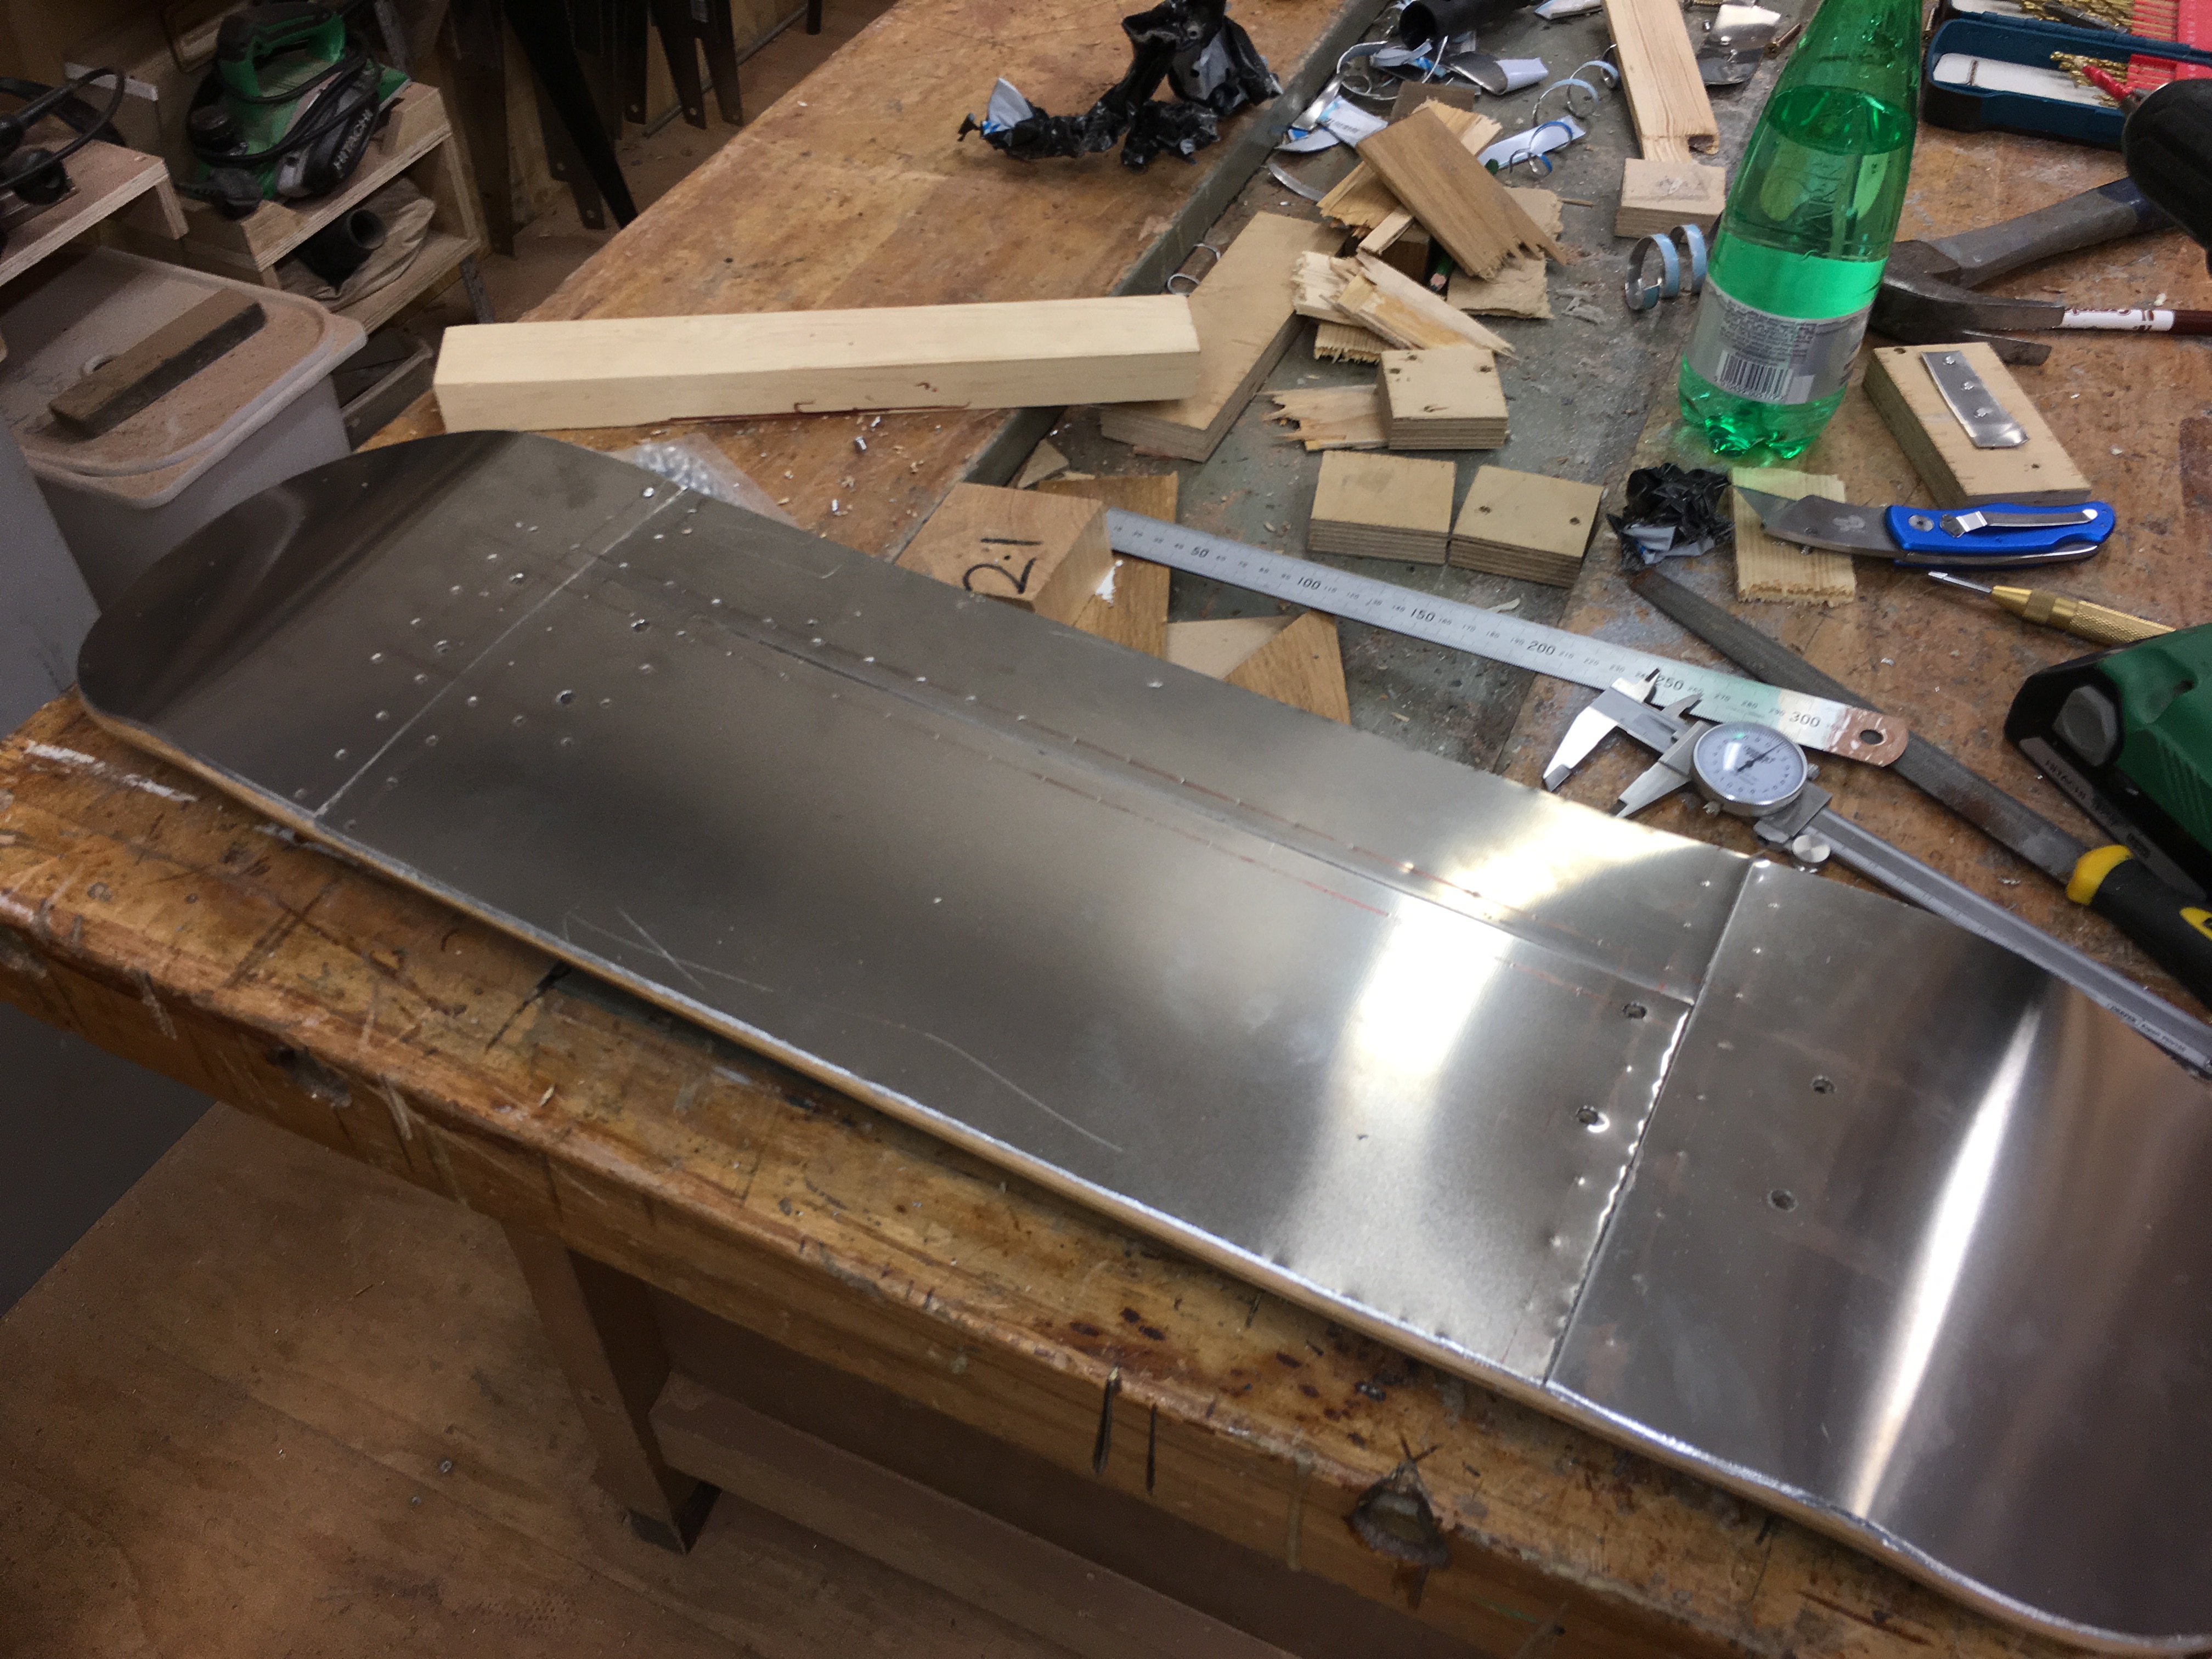
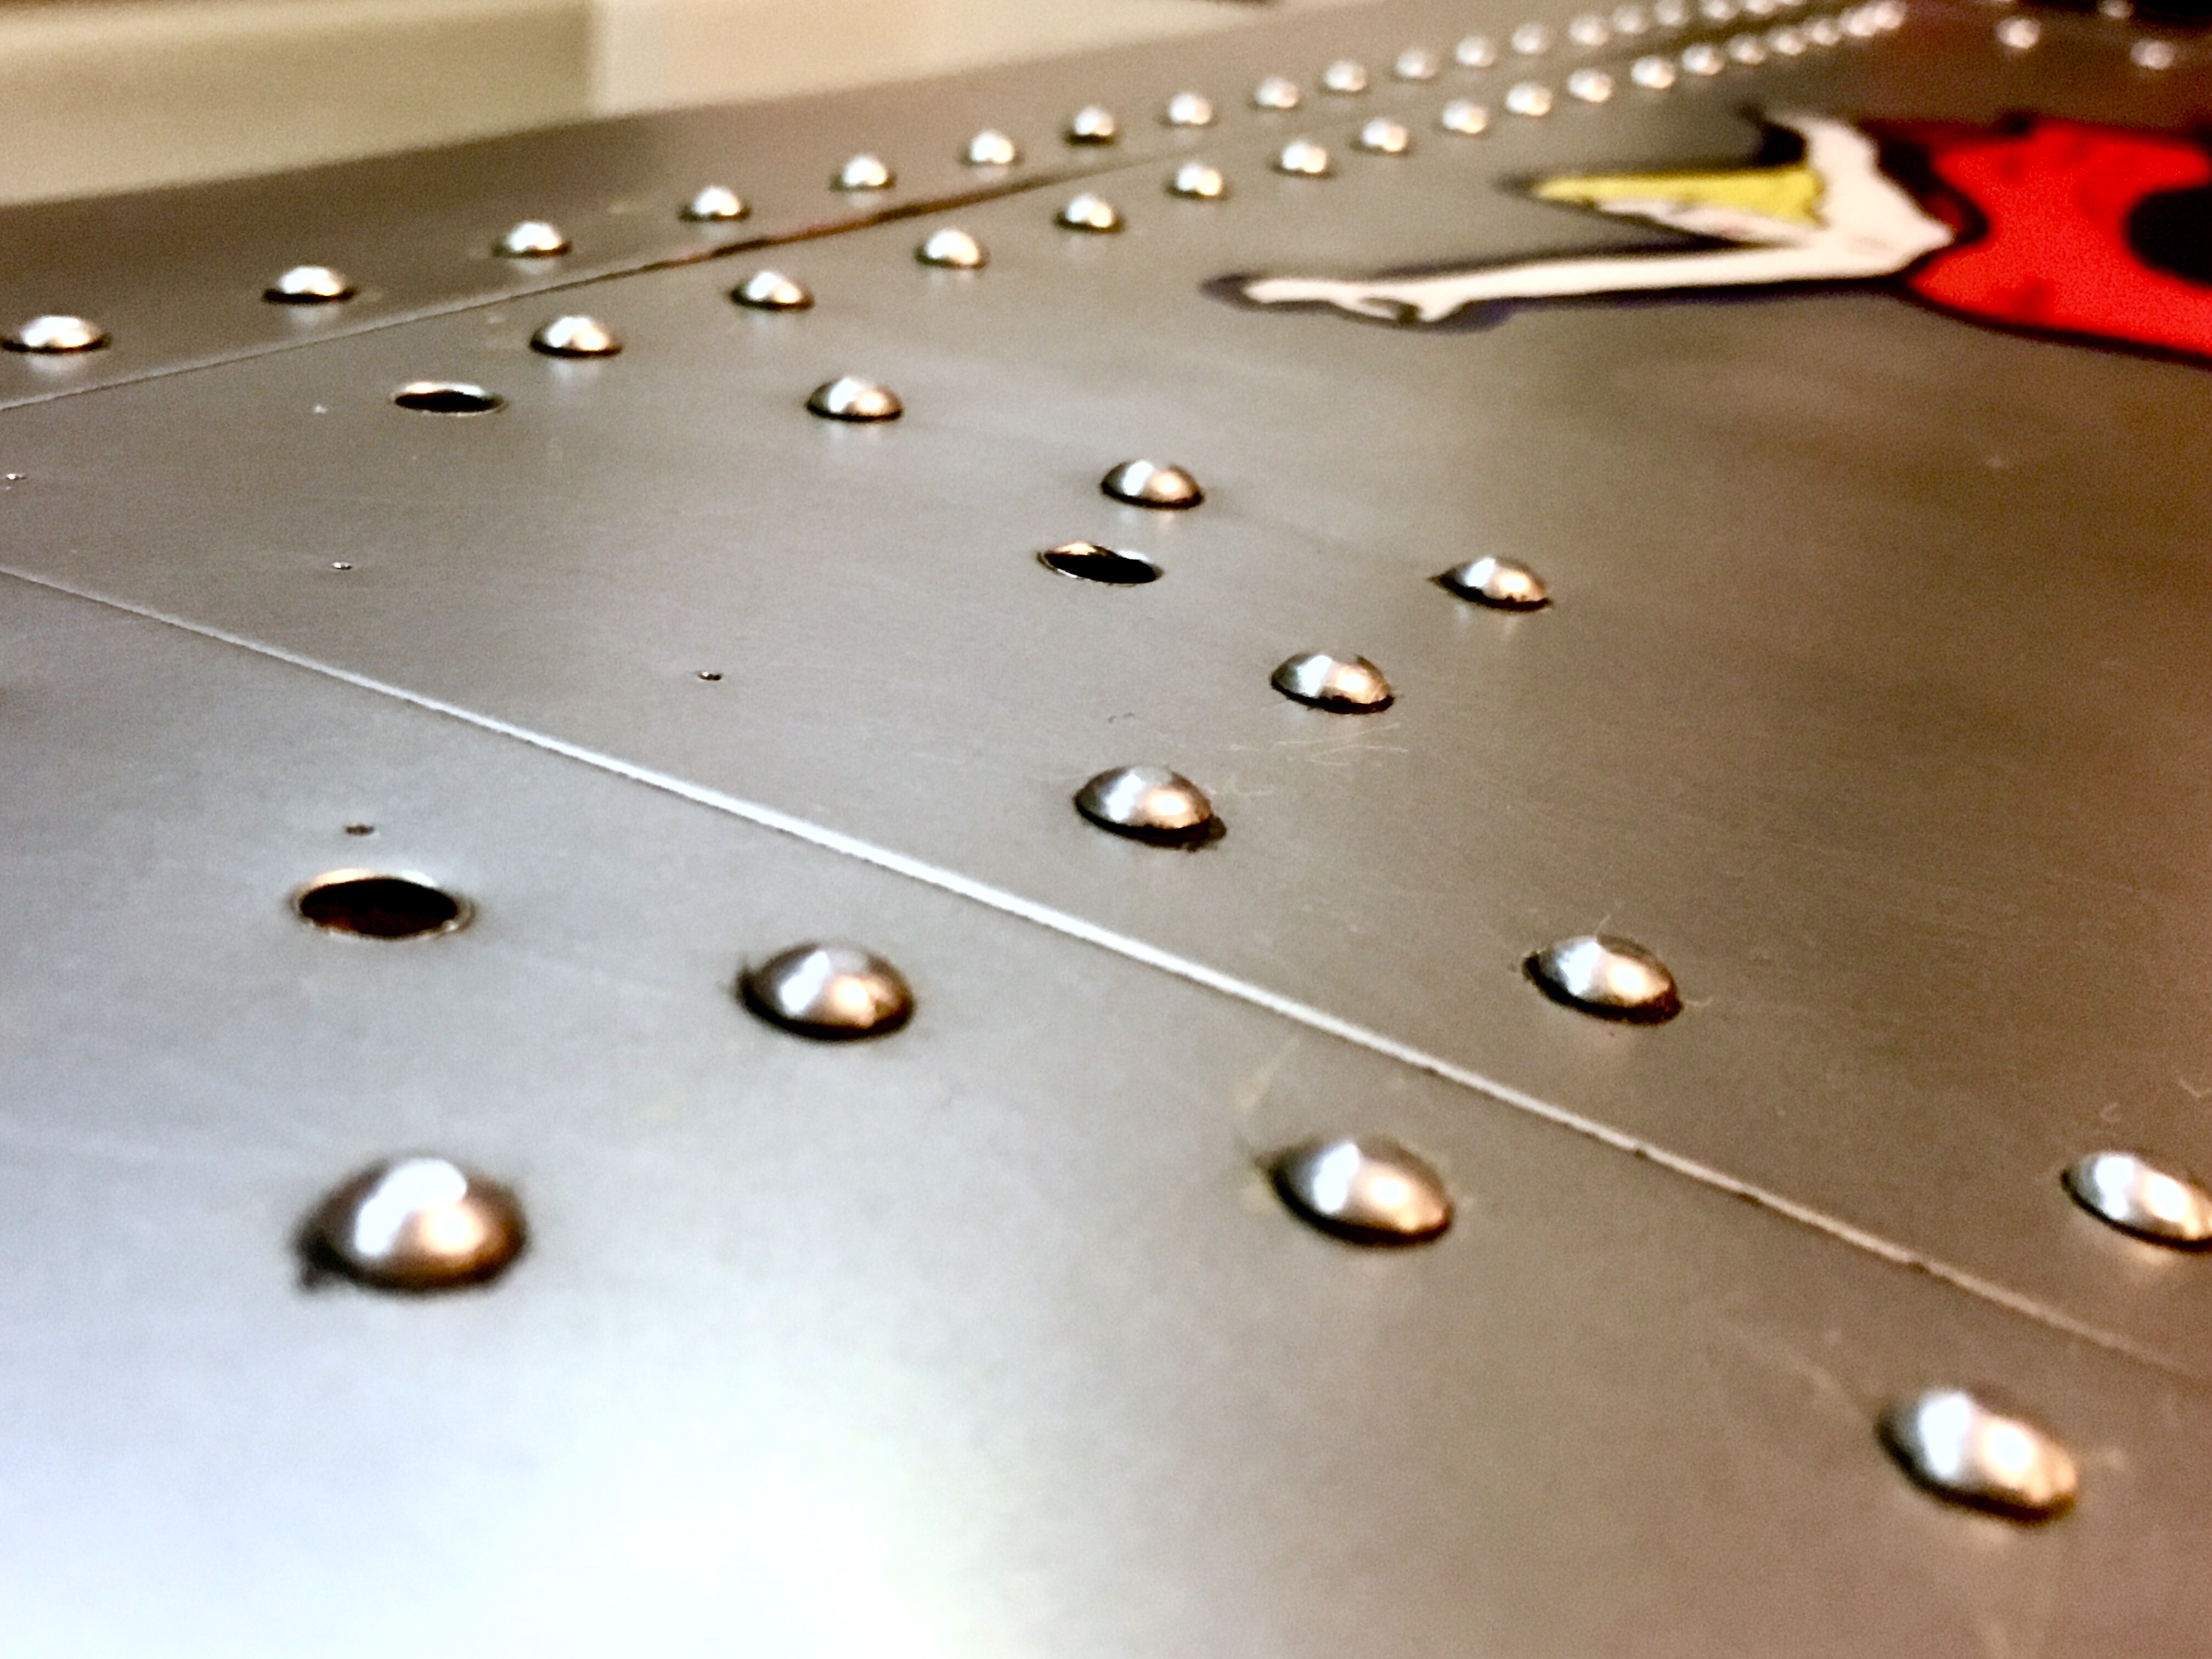
Mark holes for rivets and drill to depth. (notice red tape on drill bit for measured defined depth)
-
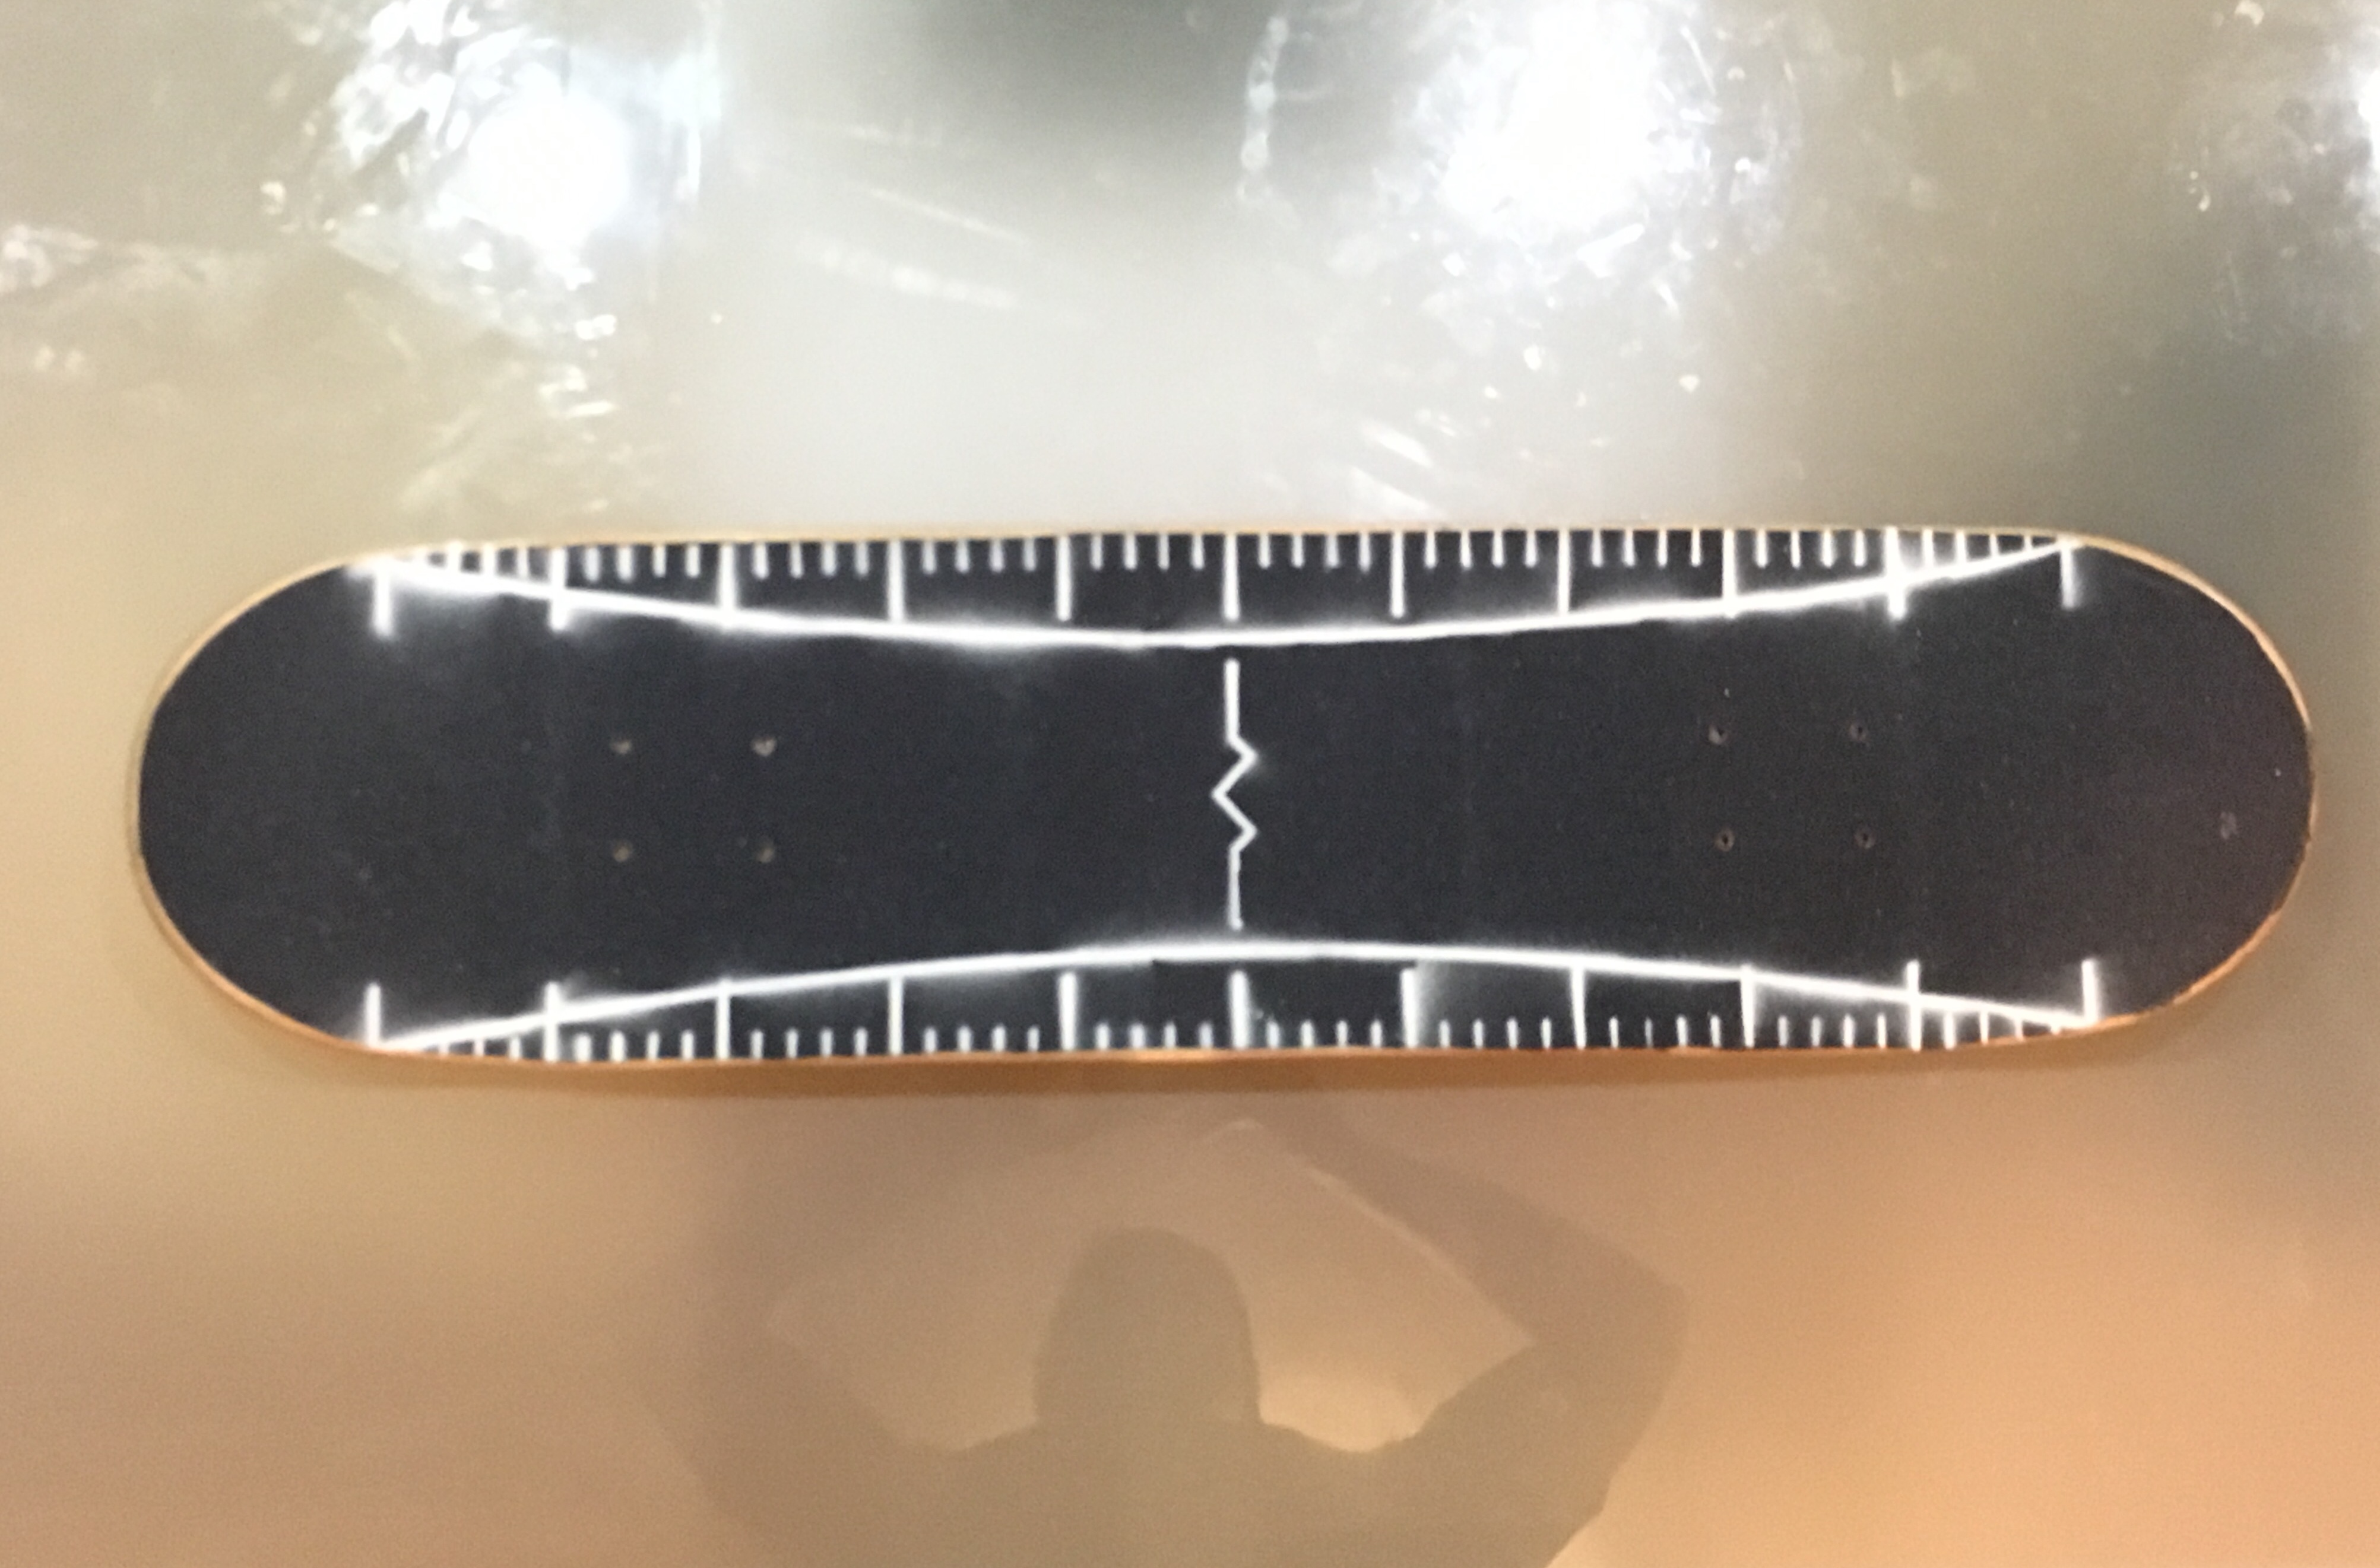
Add rivets - dab of superglue at the end and 1 hit from a hammer. Polish with metal cleaner for clean shiny surface and nice grime detailing around rivets.
-
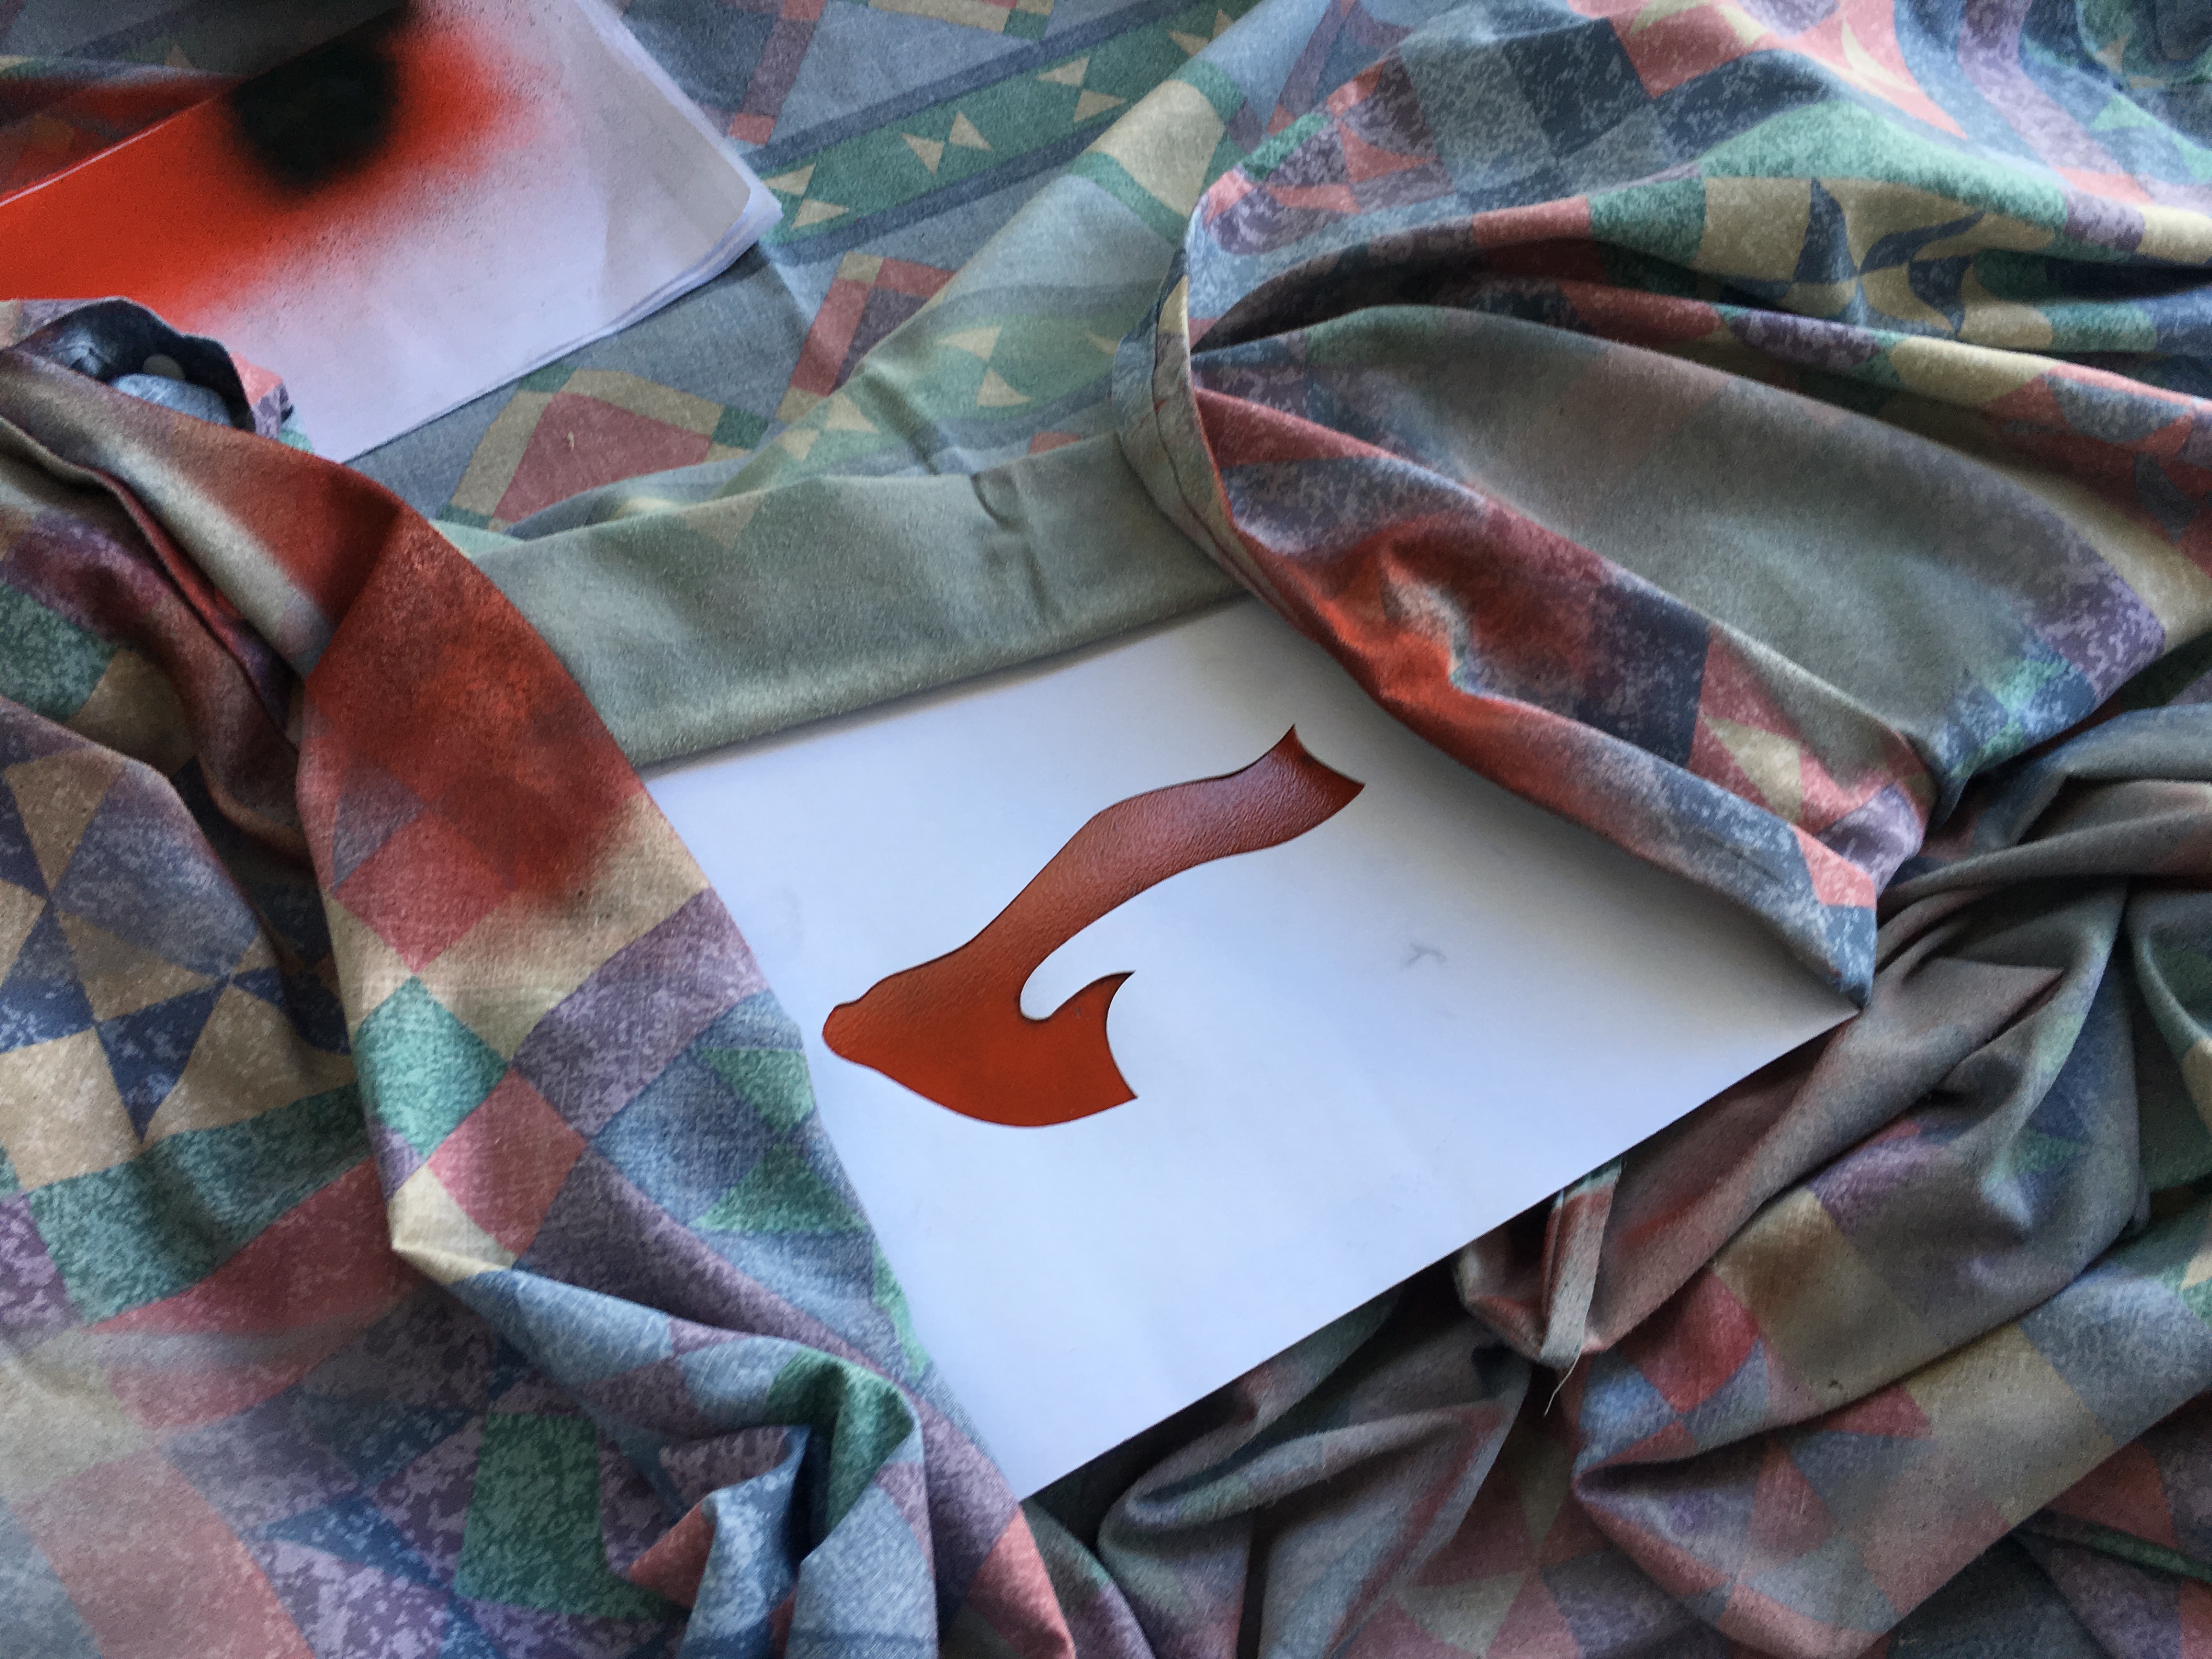
Lasercut stencil and tape in middle because its too big for the cutter.


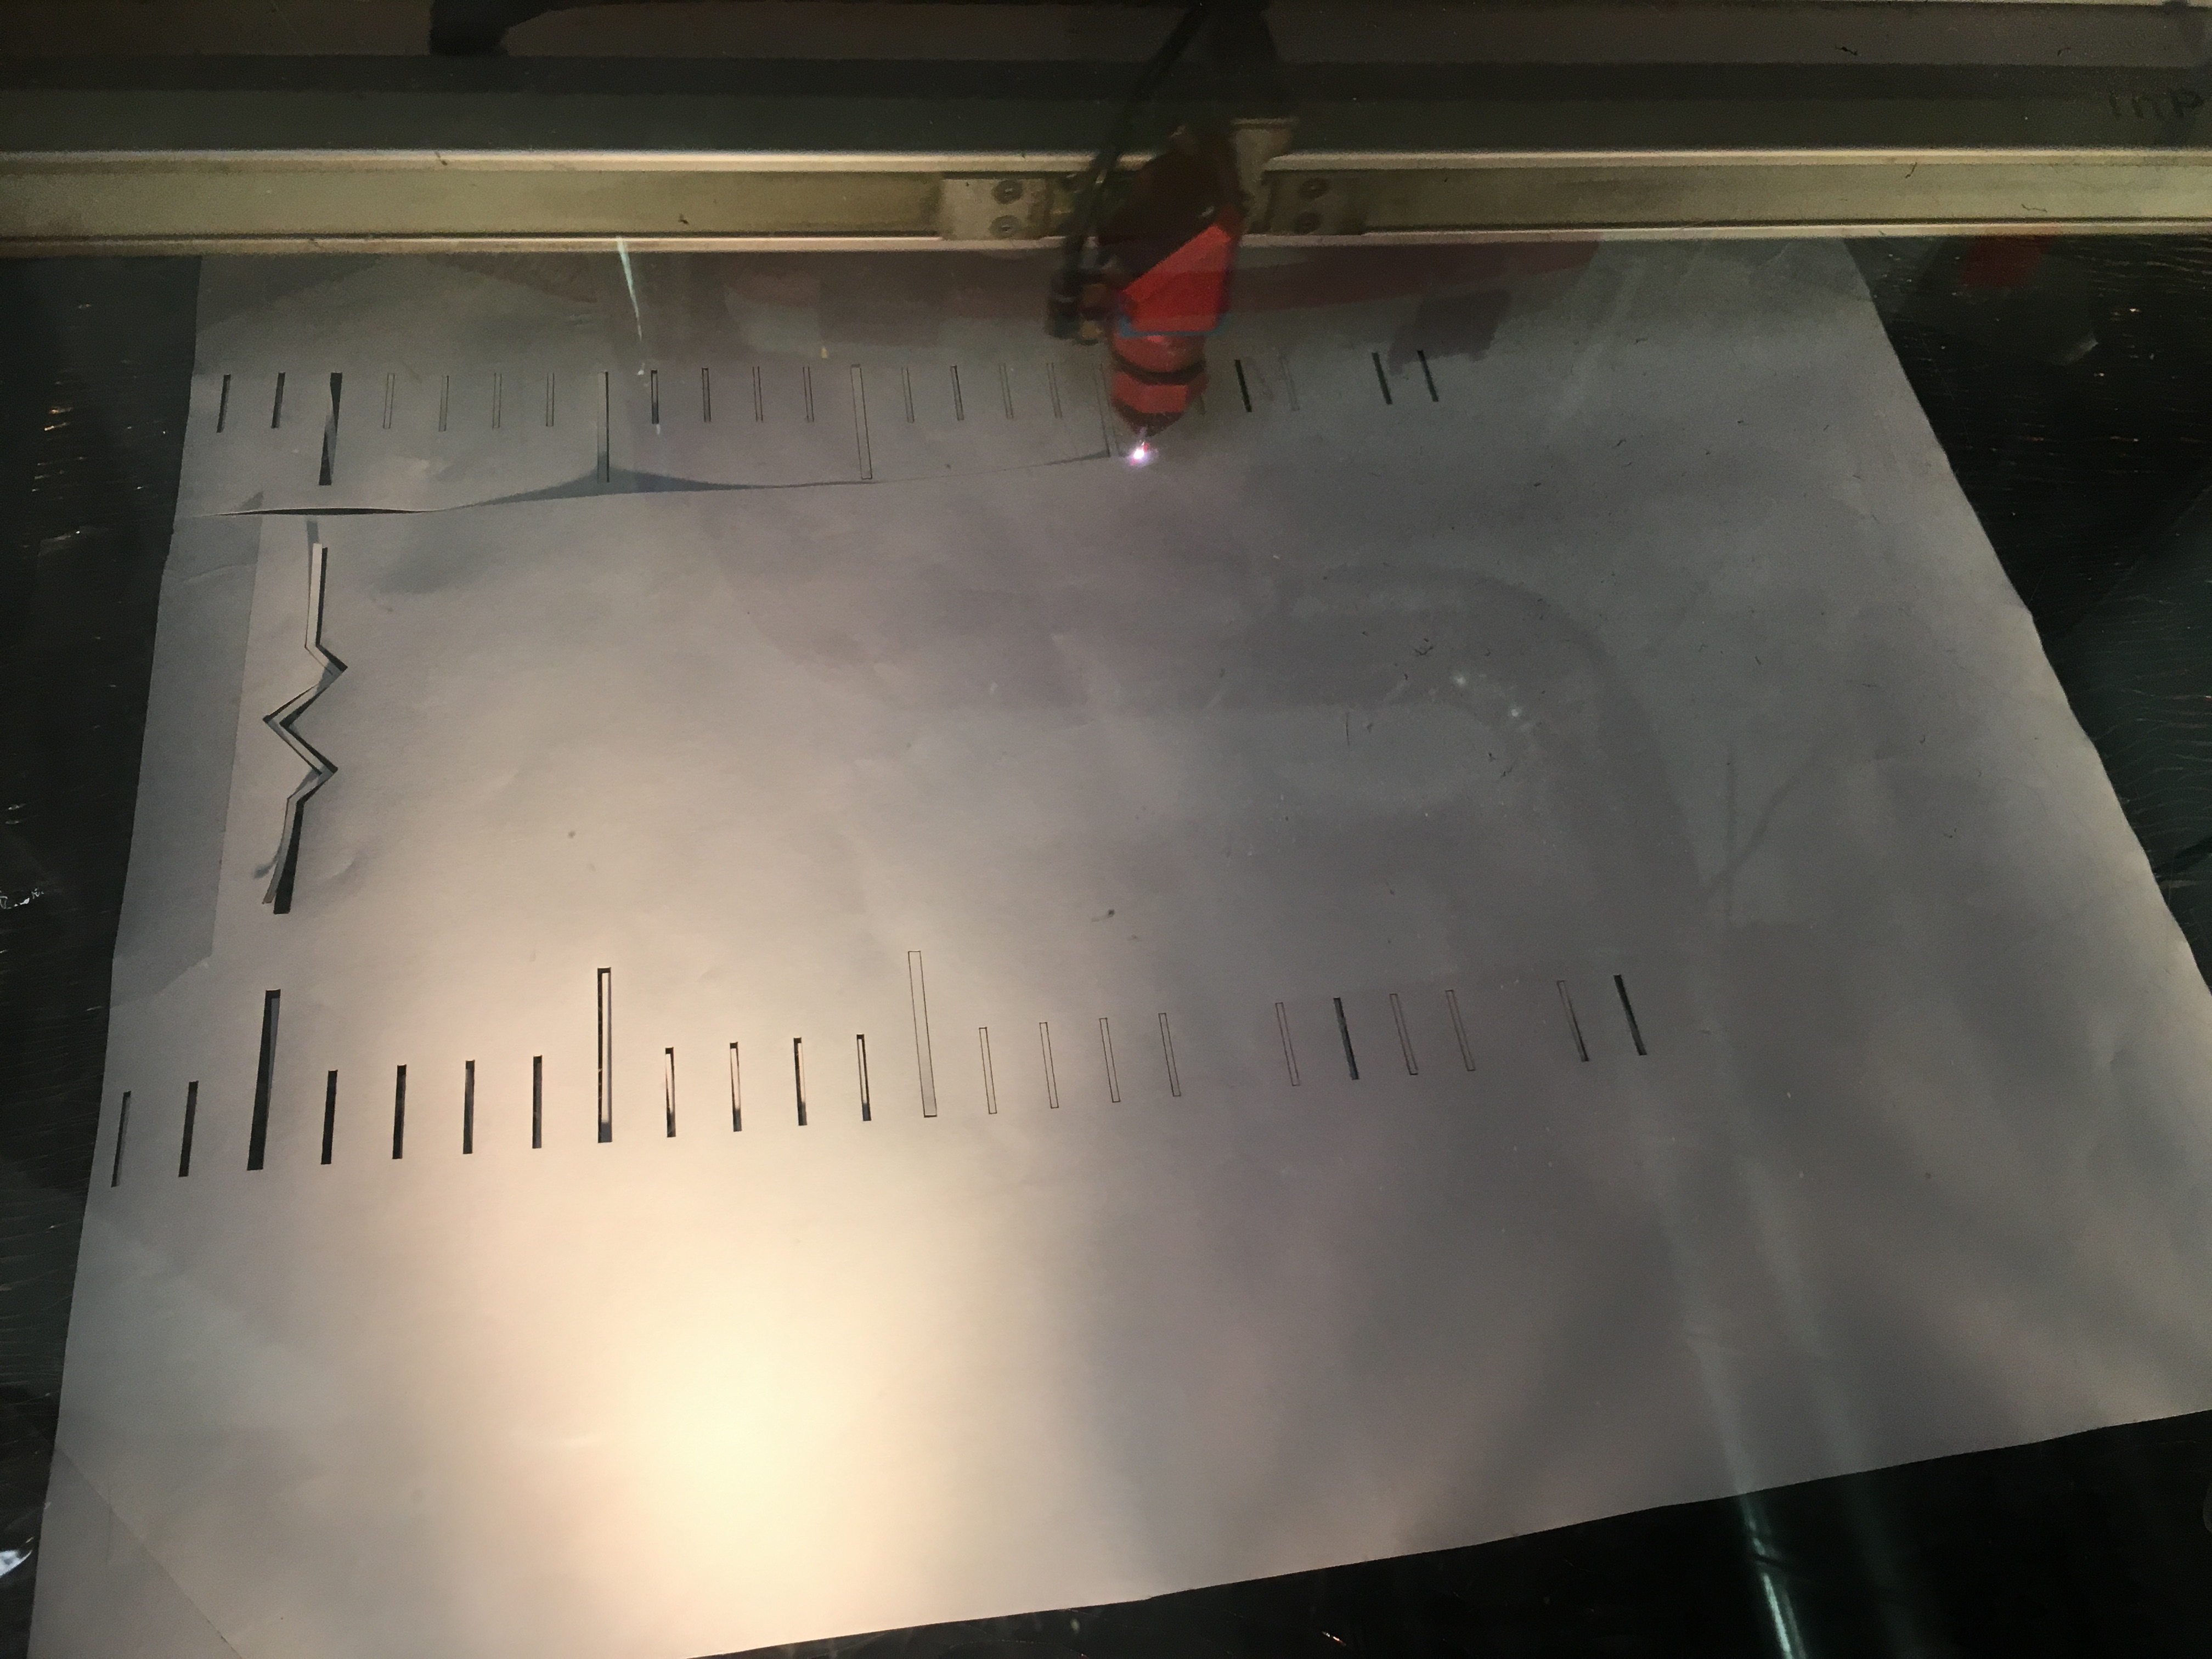
9.Spray stencils.
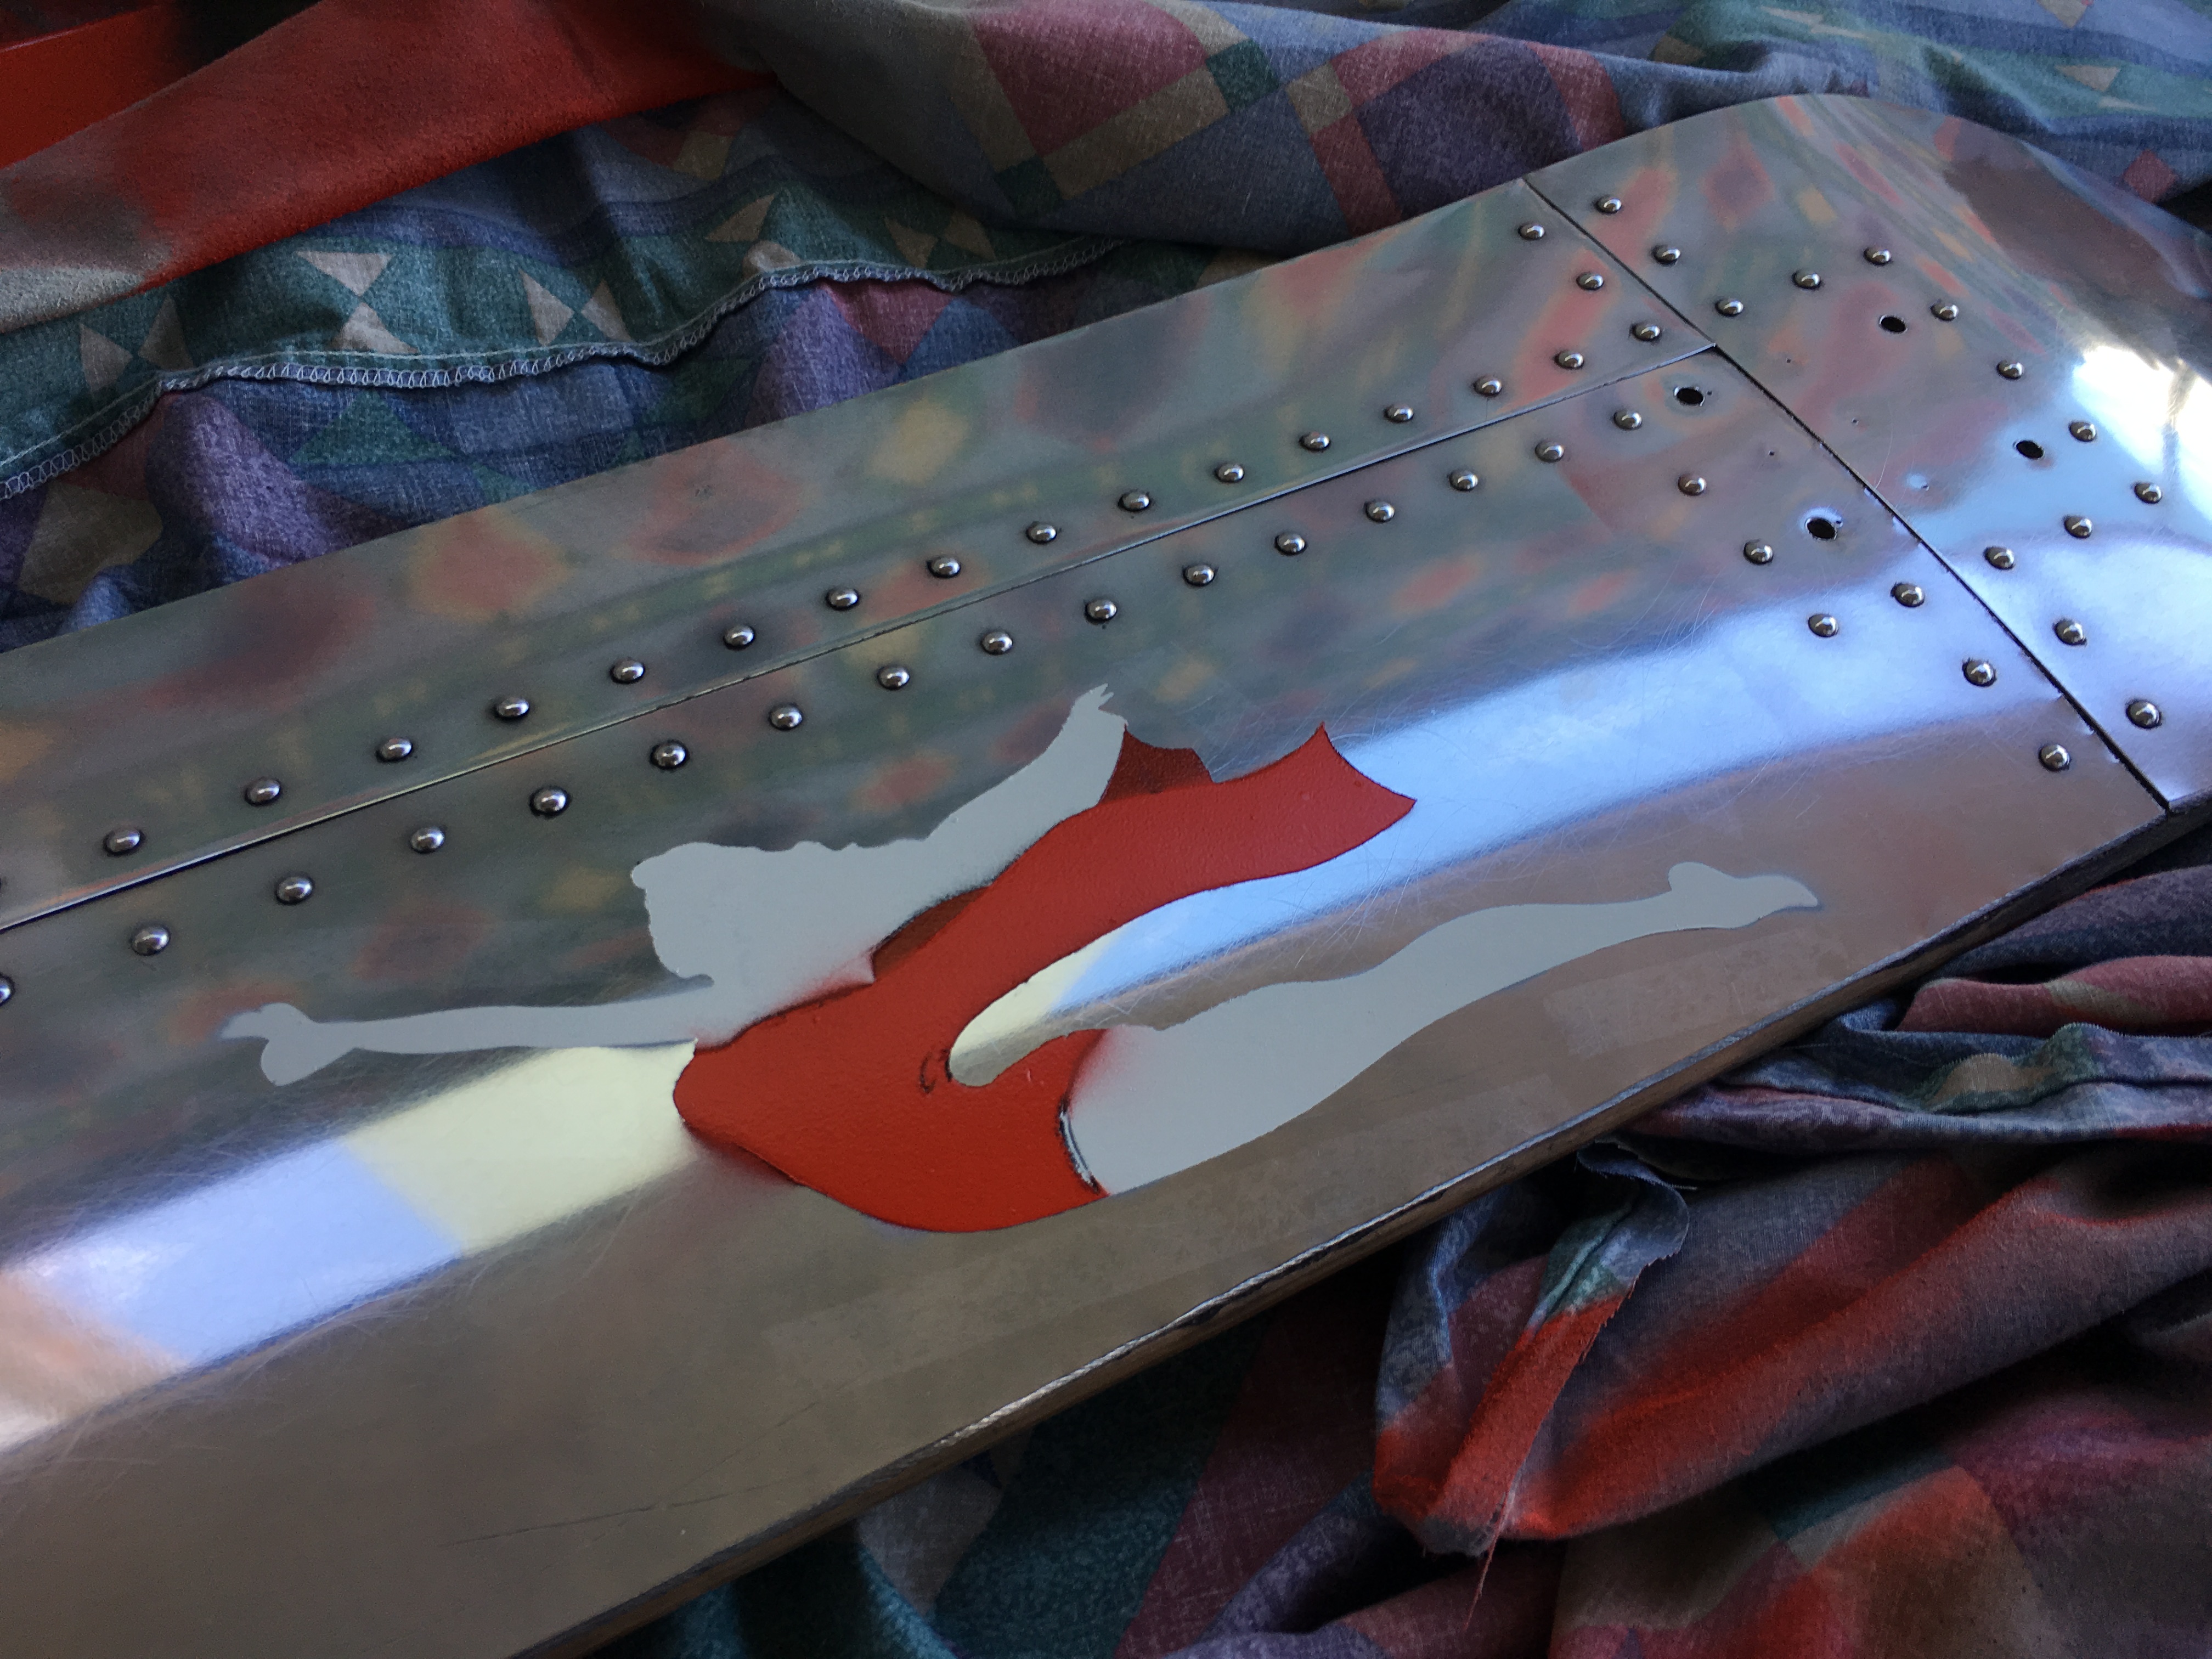
- Tidy up stencils and add detailing with paint. Add clear-coat to protect surface from oxidisation.
*redoing this project again I would spray the grip tape before adding it onto the skateboard. The curve of the rolled paper and curve of the deck meant that some of the spray got underneath and didn’t provide a crisp finish despite other tapes holding it down.
I would also go for a better clear coat. The metal underneath is mirror shiny however the clear-coat has added a frosted look to it, dulling the finish. 
That said i’m pretty happy with it but i know doing this again the areas I can improve on and do faster.