
Notice
- This machine should not be operated without induction.
- This tool should not be used while alone in the space - lone working rule.
Hand Held Routers
Condition Notes
Second hand, good condition.
Maintainers
Risk Assessment
Hand Held Router Risk Assessment
Induction and Training
Assessment
click/tap to expand
What to do ahead of time
The expectation ahead of an assessment is that you have thoroughly read through the material on this page, and are comfortable demonstrating your ability to safely use the tool. If necessary, watch the videos at the bottom of the page. Please be considerate of your inductor’s time.
What to bring
Something acceptable to rout.
What will be covered
You will demonstrate to the inductor that you can safely use the tool by doing the following:
- Prepare the area - area clear and clean, clamp your workpiece
- examine the bit
- Remove and inspect the collet and clean if necessary
- Change the bit correctly, inserted to the proper depth
- Set the depth stop
- Set the speed
- Describe which direction you should be moving the router (push cut) in a few scenarios (inside edge, outside edge, etc.)
- Connect and use extraction
- Use a follow bit to cut a profile into the edge of a board (or substitute with a project specific task)
- Safe stopping of the router (don’t leave it to wind down on its side)
- Make depth adjustments and additional passes as necessary
- Clean up
The inductor will assess your ability to safely do the above. Feel free to ask questions during the assessment. If the inductor is not confident in your safe operation of the tool, you will be asked to practice with supervision and demonstrate:
- A push cut – Adjust speed (with and without guide)
- A climb cut – Adjust speed (with and without guide)
- A plunge cut
- Set the fence and make a groove cut
- Use a guided bearing bit to follow a smooth edge
Intermediate Induction Waiting List - We are moving away from inductions and towards the assessment format above.
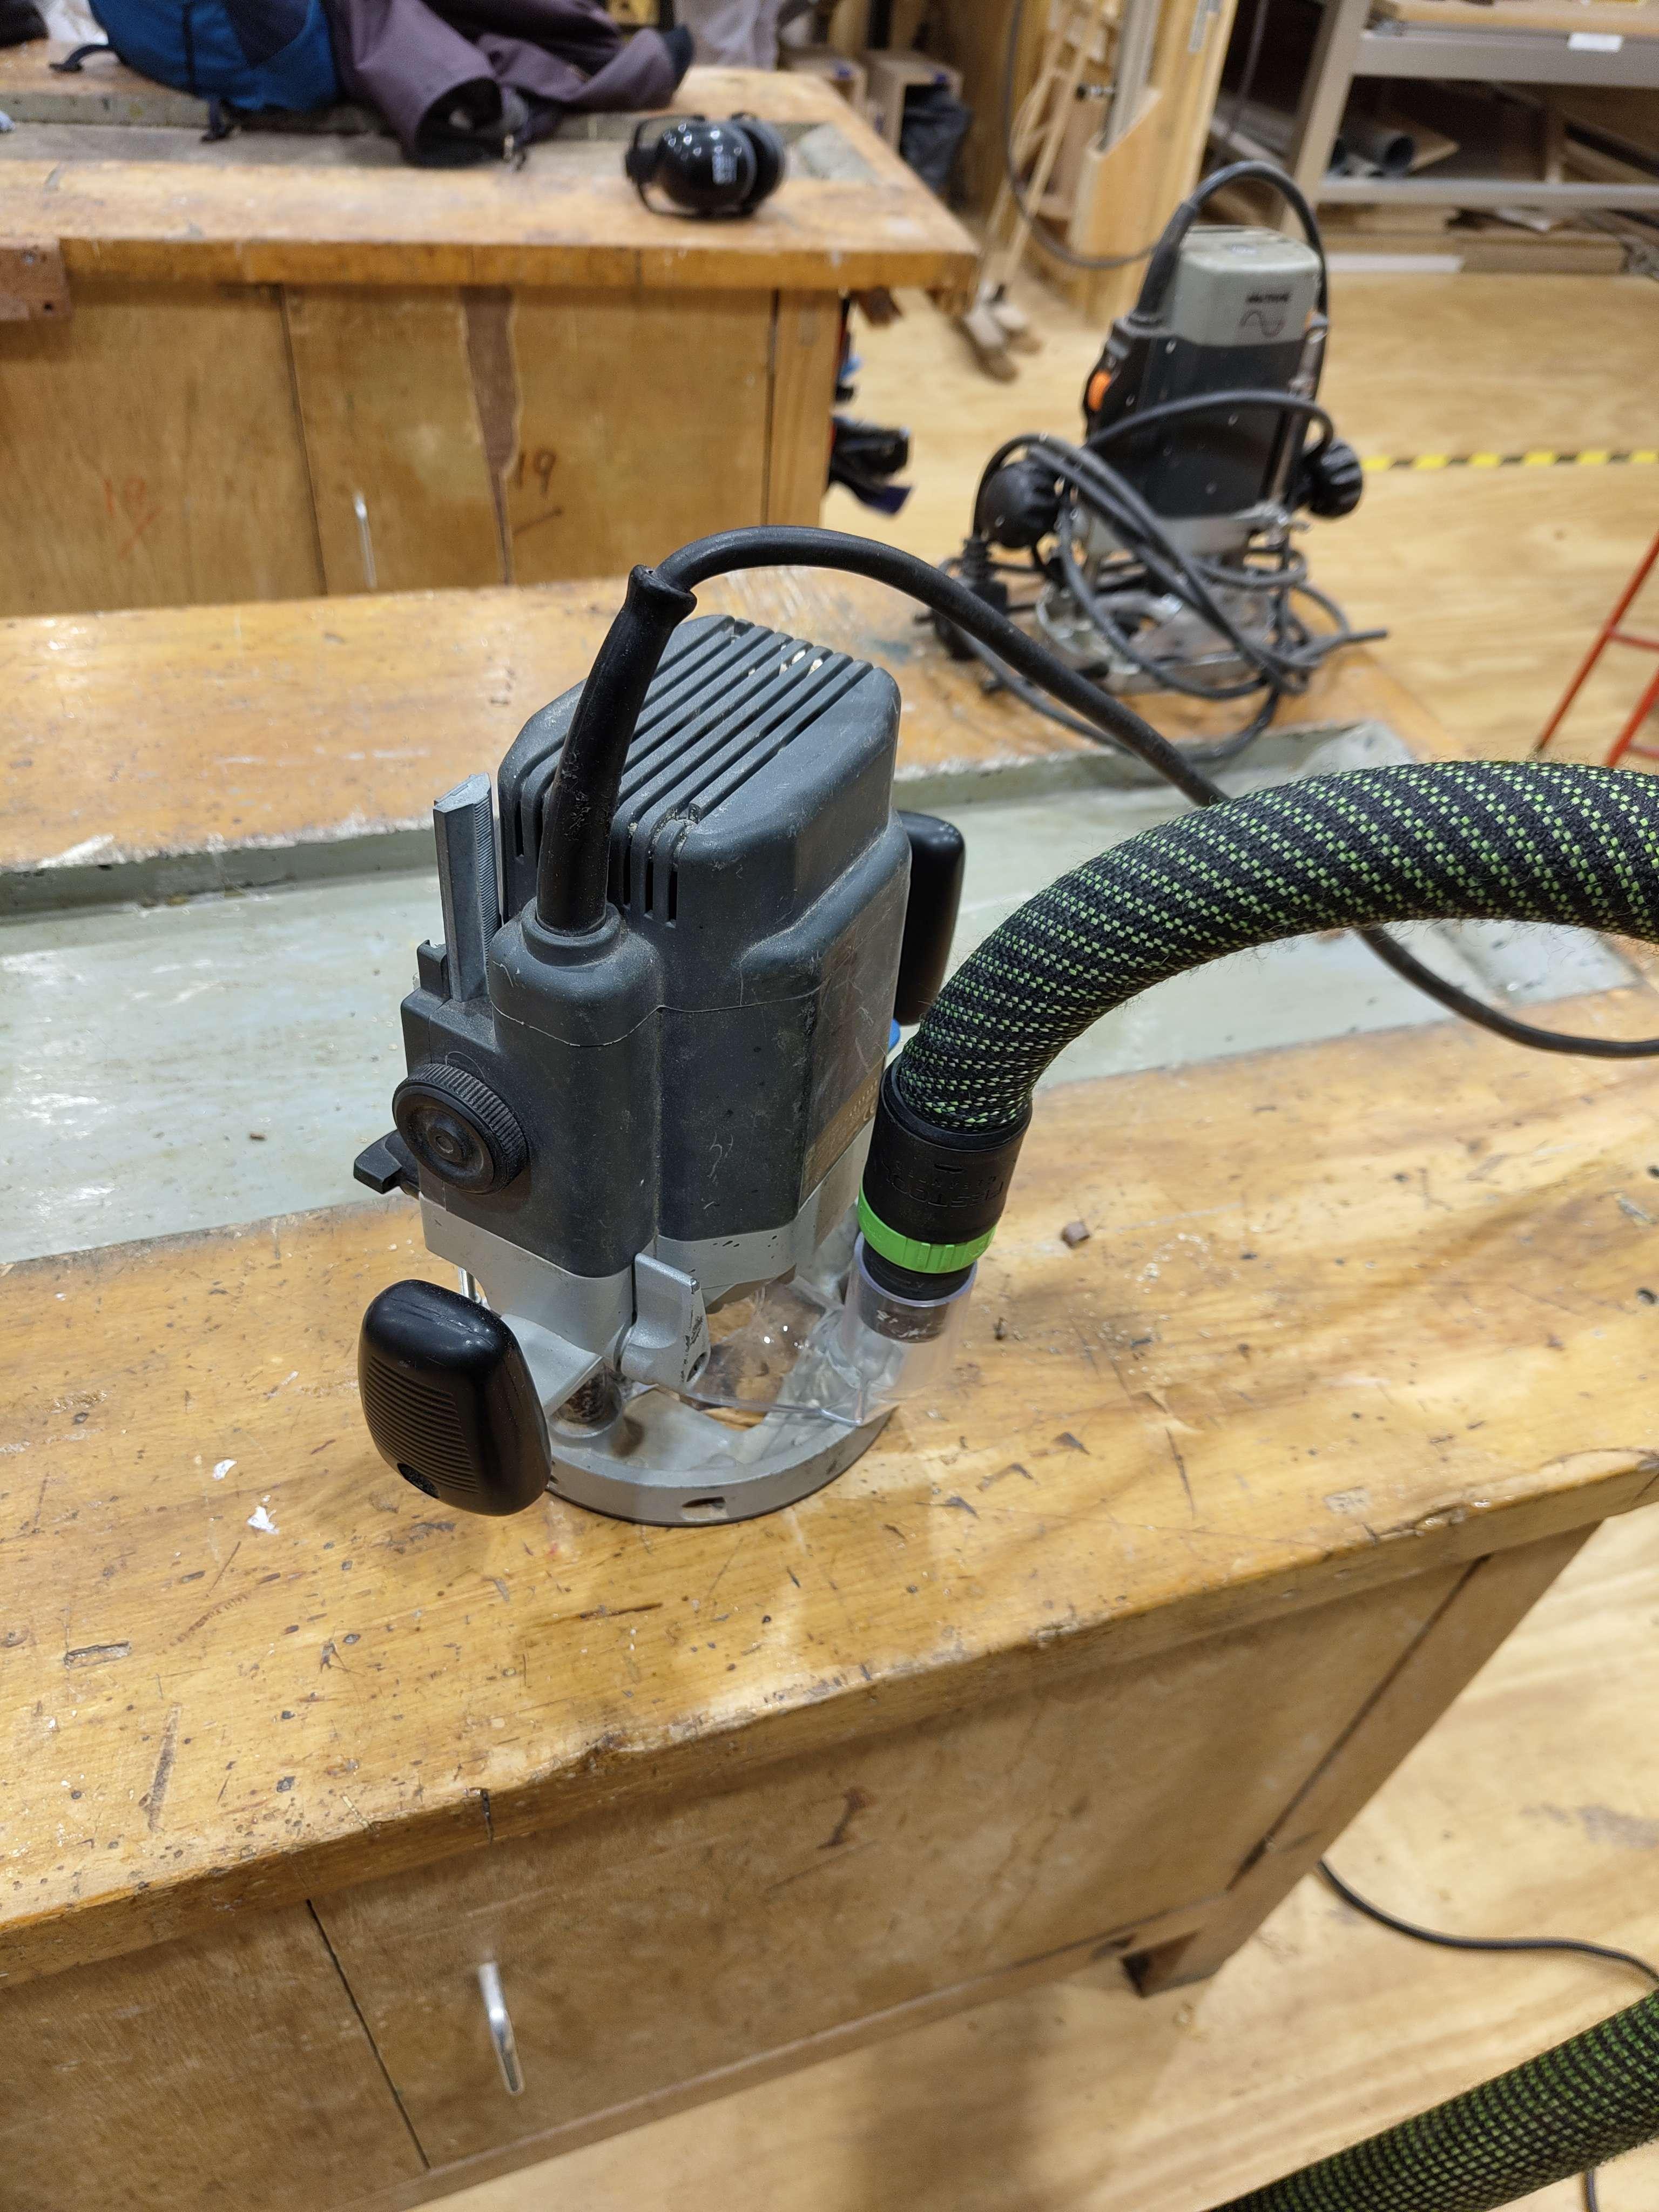
Our Routers:

What the Router does:
click/tap to expand
The router has many uses, owing to its many bits. This flexibility offers many advantages, speed and accuracy being two of them.
Apart from freehand cutting, the router also makes use of a fence to guide the cutters along the surface. Another use for a router is with custom jigs – these jigs can be made to facilitate a wide variety of uses, from cutting circles to hollowing out bowls.
PPE & Safety Review:
All of these rules must be obeyed at all times. A failure to comply may result in a ban.
- Users will be required to prove in an assessment they can operate the machine safely
- Learn the routers application and limitations as well as the specific hazards unique to it
- WEAR PROPER APPAREL. Do not wear loose clothing, gloves, neckties, rings, bracelets or other jewellery which may get caught in moving parts of the cutters
- WEAR PROTECTIVE HAIR COVERING to contain long hair.
- WEAR SAFETY GLASSES for cuts that create a lot of dust/chips
- WEAR FACE MASK OR DUST MASK
- MAKE ALL bit changes with the router UNPLUGGED
- SECURELY LOCK ALL ADJUSTABLE PARTS so they can’t loosen while cutting. This will prevent distraction from cutting and damaging your work
- ALWAYS KEEP HANDS AND FINGERS AWAY from the router bit when power is on
- DO NOT OVERREACH. Keep proper footing and balance
- SECURE the work piece prior to cutting
- ALWAYS FULLY STOP the tool before placing it onto a surface
- DO NOT cut deeper than the machine can handle
- DO NOT TOUCH HOT router bit after use
- NEVER LEAVE A TOOL UNATTENDED. Turn the power off and do not leave until it comes to a complete stop
- ISOLATE all power supplies before maintenance, cleaning and repairs
- Defects are reported to @woodtechs to ensure all items are repaired or replaced
- DO NOT DROP THE ROUTER
- DO NOT CUT METALS (Aluminium, brass, diebond etc.)
- Cutting MDF and Plywood dulls blades quicker than most other woods. Check cutters after use and if dull, alert a @woodtech
- Check for defects in the wood before cutting, such as knots. It’s advised to go slowly through knotted areas to avoid the wood being kicked back
- Check all “reclaimed” timber for nails before using the router as this will cause dangerous kick-back if the cutter meets a nail/screw
- All routers MUST be used with on tool extraction.
Anatomy of the tool
click/tap to expand
Power Switches – These are located close to the handles. It ensures you can turn the router on and off with both hands on the machine. Ensure the routers power button is turned off before placing it onto a work surface. NEVER use the wall outlet to turn off the routers power.
Depth Stops / Depth Gauge – The depth stops serve two purposes:
-
The first allows you to set the maximum depth for a groove, allowing you to make a few shallower passes before reaching full depth,
-
The second is to use all three depths for plunge cuts, allowing you to take less material out per pass.
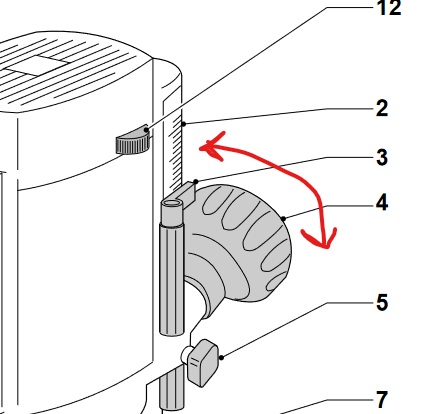
Plunge Lock – The plunge lock is used to lock off the router depth. This means you cannot increase or decrease the depth without first unlocking it.
Base – The base is set at 90º to the router it. It holds the dust extraction and fence in place. Guides can be fixed to the base with bolts, for use with jigs. When using bolts, these must be a flat countersunk M4 thread to allow your jig to bolt to the existing router base.
Fence – The fence is used to guide the router along a flat surface, giving you a groove or profile parallel to an edge. When cutting, the fence is pulled against the workpiece, ensuring a clean smooth parallel cut.
Spindle Lock – Spindle lock is used to lock out the spindle for changing the bits.
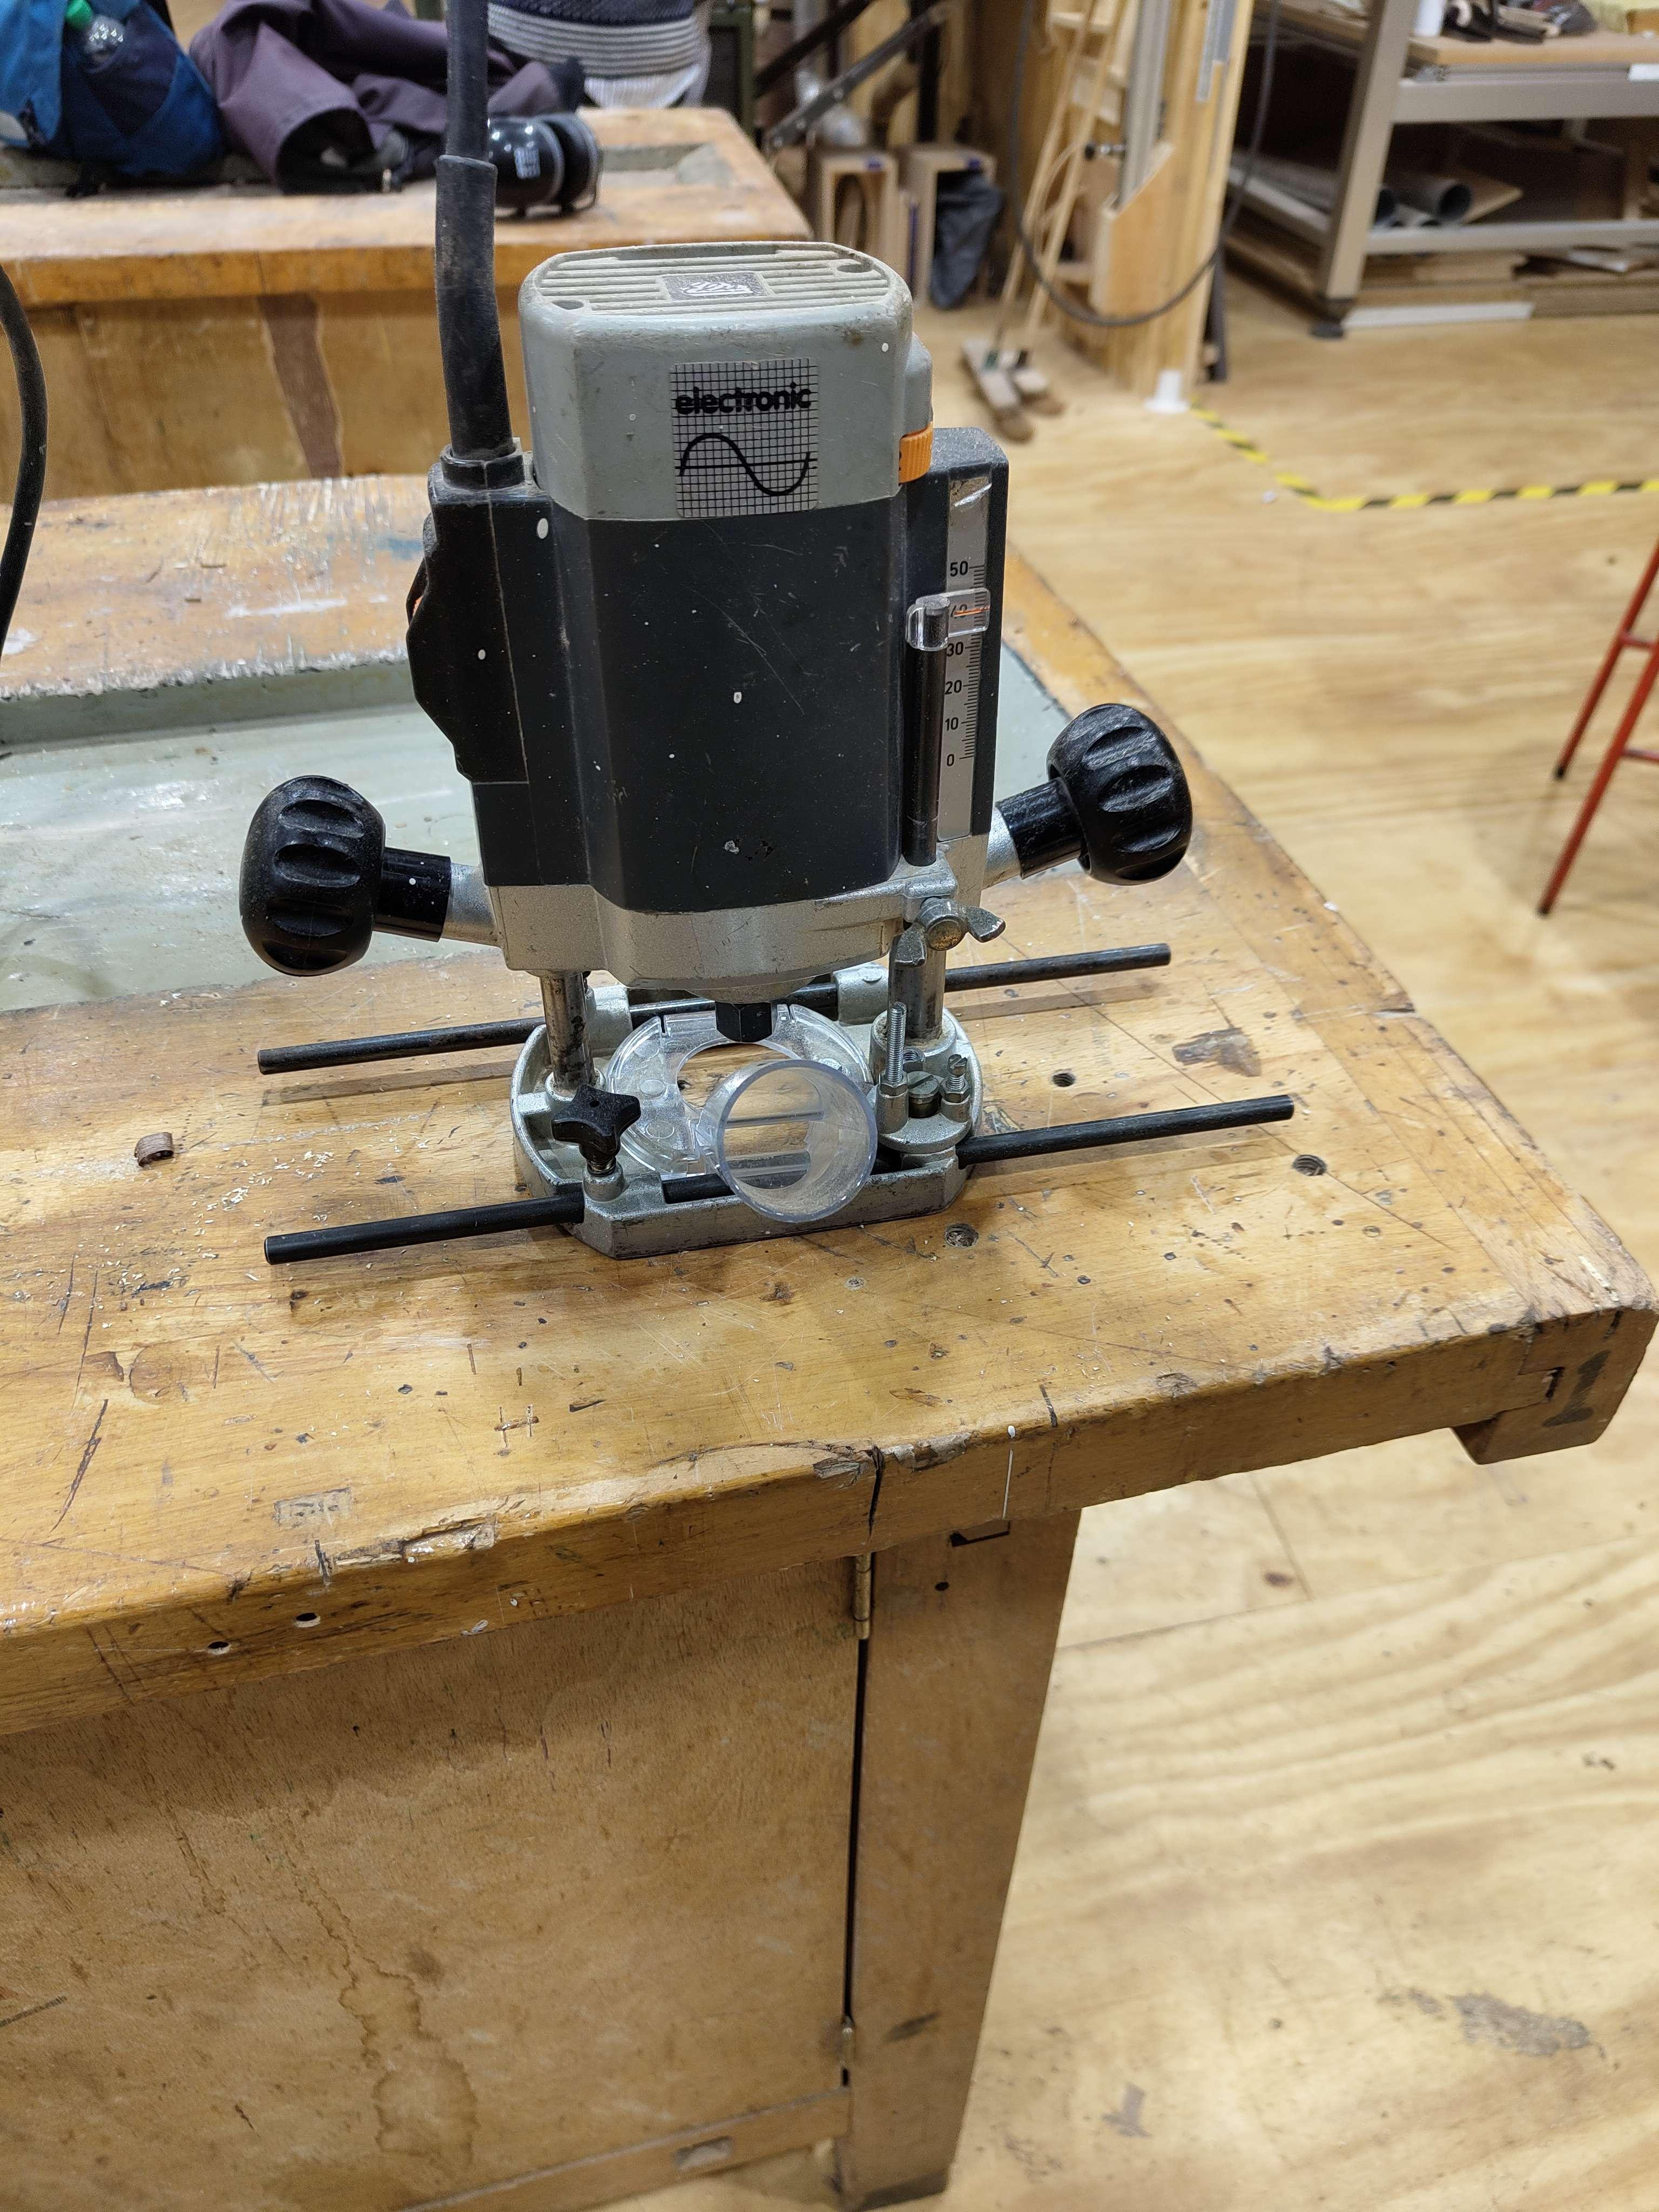
Handles – Our ELU MOF177 ½” has fixed handles with a separate plunge lock, while the ELU MOF96 ¼” has the plunge lock integrated into the handles. This means you twist the handles to loosen and tight the plunge lock, again ensuring both hands never leave the router during operation.
Dust Extraction - All our routers are fitted with dust extraction and must be used at all times. If you need to remove the dust extraction, you must have another person holding the vacuum collecting the dust as the cut progresses. This is for the safety of yourself and the other members that are in the space.
Dust Extraction – Our routers are equipped with aftermarket dust extraction. This must never be removed as it catches fine dust and chips from entering the air. It also blocks access to the cutter during operation. Ensure the router is plugged into the dust extraction take-off and the hose is securely fitted onto the router machine. DO NOT run the routers without the dust extraction present.
Speed Control – Both our routers have variable speed controls. These are located on the top of the router. 1 being slowest, while 5/6 fastest. The rule is, the smaller the diameter of the bit, the faster the speed, the large the diameter, the slower the speed. Use the below as a guide to setting speed:
ROUTER SPEED SETTINGS:
click/tap to expand
-
1/4" Elu MOF 96/02 Speeds:
1 = 8 000rpm | 2 = 9 500rpm | 3 = 11 500rpm | 4 = 16 000rpm | 5 = 19 500rpm | 6 = 22 500 | 7 = 24 000rpm -
1/2" Elu MOF 177E Type 4 Speeds:
1 = 8 000rpm | 2 = 12 000rpm | 3 = 16 000 rpm | 4 = 18 000rpm | 5 = 20 000rpm
| ROUTER BIT SPEED GUIDE | |
|---|---|
| Diameter of Bit | Maximum RPM |
| 1 - 25mm (1 inch or less) | 24 000 |
| 25 – 50mm (1-2 inch) | 18 000 |
| 50 – 65mm (2-2½” inch)* | 16 000 |
| 65 – 75mm (3 inch)* | 12 000 lower |
*These sizes should ideally be used on the router table and not used with the handheld router. Some exceptions apply but speak to a @woodtech if you’re unsure.
**The slower the speed, the slower the feed rate.
General Risks
click/tap to expand
See the risk assessment as well: Hand Held Router Risk Assessment
-
Kickback - Always hold the router firmly as the router can kick. kickback occurs when a router bit becomes stuck in the material or encounters an obstruction (know/nail/screw etc.), and struggles to continue cutting. As a result, the bit will then try and spin the material it’s stuck in, or, if the material is secured, transfer the energy back to the router, which can turn in the user’s hands.
-
Dislodged bits - If a bit isn’t fastened securely into the collet, it can slip out as you’re cutting. A tell-tale sign is your depth getting deeper with each pass. If this happens, stop the router immediately and refasten the collet.
-
Broken bits– Much like kickback, except the bit breaks, while also kicking back. Follow the same guidelines as kickback.
-
Hitting metal – Make sure your wood is free from metal before attempting to make a cut. Use the metal finder on the door. *Please do not check for metal above the vice… You’ll be trying to find something that’s not there.
-
Cable management – Make sure you’re aware of the cable while cutting. It can get entangled within the cutter if you’re not careful. Also, make sure the router can move freely without the cable snagging on a tool or object, which will prevent you operating the tool effectively.
-
Rundown risks – Make sure the router comes to a complete stop before placing it down. Not doing this exposes the cutter to tools, cables and other woodworkers, especially when turning the tool sideways to rundown on the desk.
-
Cutting (Bottom and Side) – This deals with plunge bits and trim bits, see section below for the correct use of bit for your operation.
Setting up the Router
click/tap to expand
Types of bits
There are various router bits serving different purposes. For this induction, we’re looking at the main router bits and their uses, to ensure the correct type of bit is chosen for a cut.
These are: Plunge bits, groove bits, flush trim bits, edge profiles, surfacing and joinery bits.
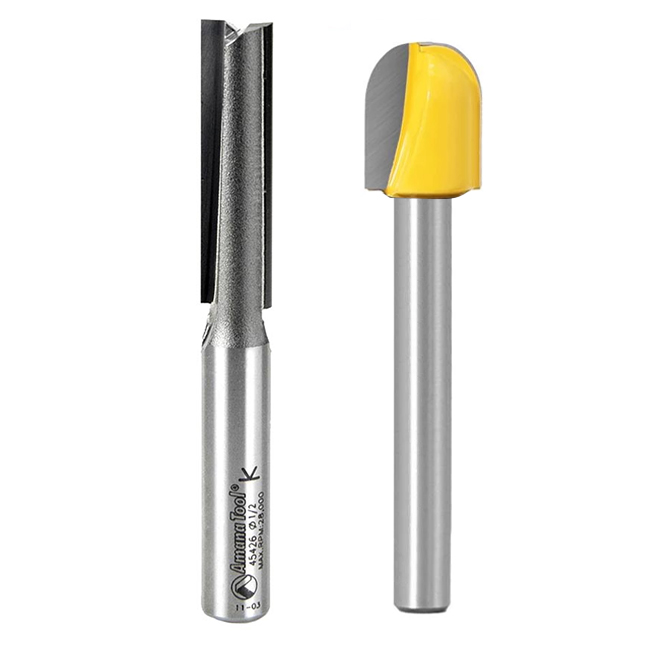
Straight cut bits: Has cutting blades that extend below the bottom of the router bit.
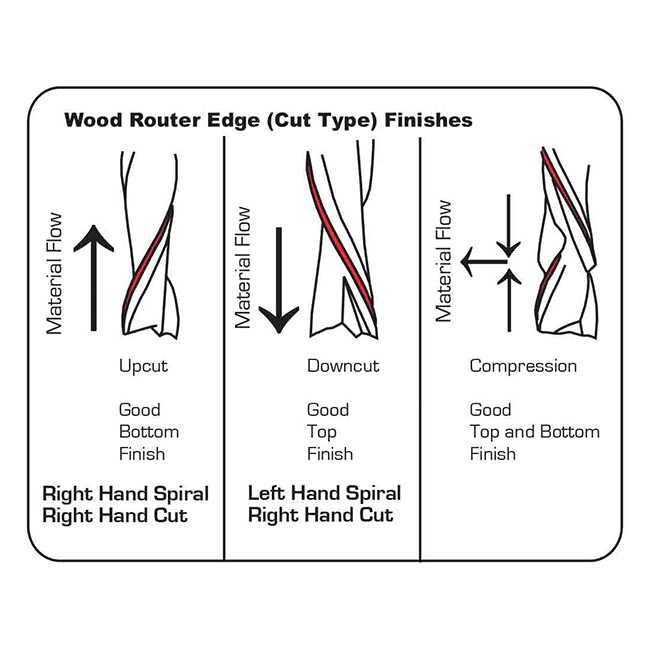
Plunge bits: There are two types of plunge router bits. Spiral bits and plunge bits.
-
Spiral bits - There are three types of spiral cutters, up-cut, down-cut and compression cut. Each of these bits have different uses as shown in the image below. Select the best bit for the type of cut needed. Spiral bits make excellent plunge cutters,
- Plunge bits - these bits have cutters that extend halfway across the bit or extend the full diameter of the cutter. * Some Straight Bits can be used as plunge cutters, provided their cutters match the profile shown below.
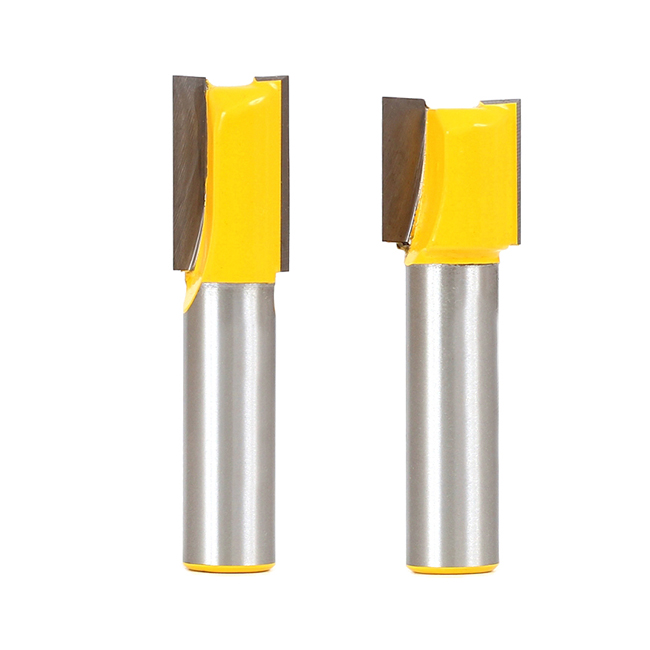
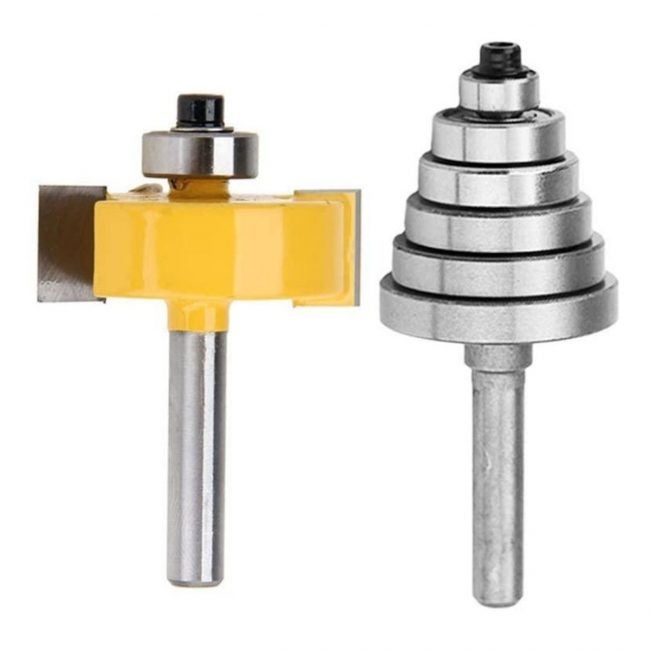
Groove/rabbet bits: These are used primarily for cutting grooves into timber and come in a variety of sizes and shapes. As with all bearing bits, you can change the diameter of the bearing to adjust the depth of cut.
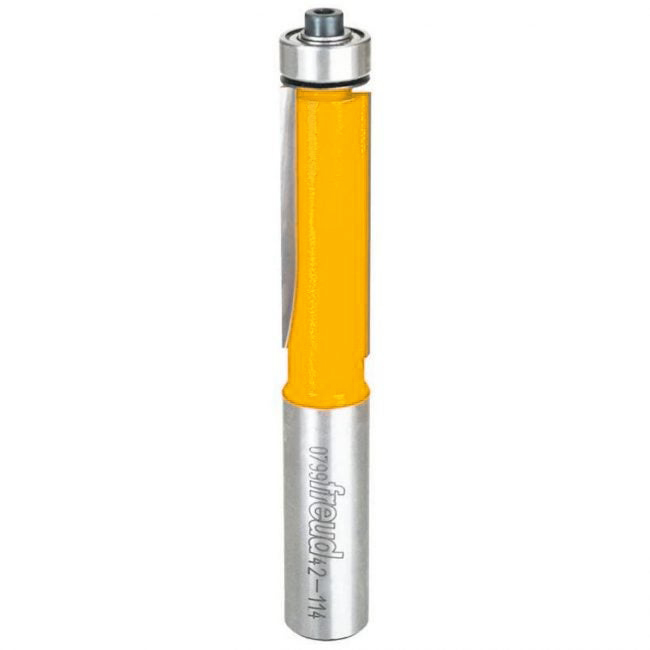
Flush Trim bits: These have bearings or guides the same diameter as the outside of the cutting blades. This allows you to cut along a template or match existing profiles. Older flush trim bits have no bearing and rely on the diameter of the shaft to run along an edge. These bits often lead to burning.
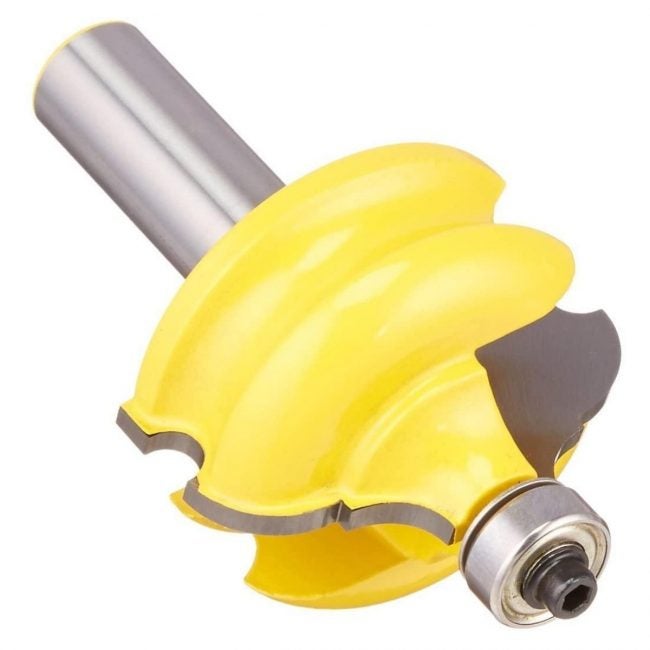
Edge profiles: Similar to Flush trim bits, these have profiles that give your timber a decorative edge. Some have bearings, while others do not.
Surfacing/Flattening bits: These are larger bits used for flattening large slabs of timber. They’re used primarily with a router sled. Because these bits are larger than your typical cutters, care should be taken in choosing the correct spinning speed. Do not use these as plunge cutters.

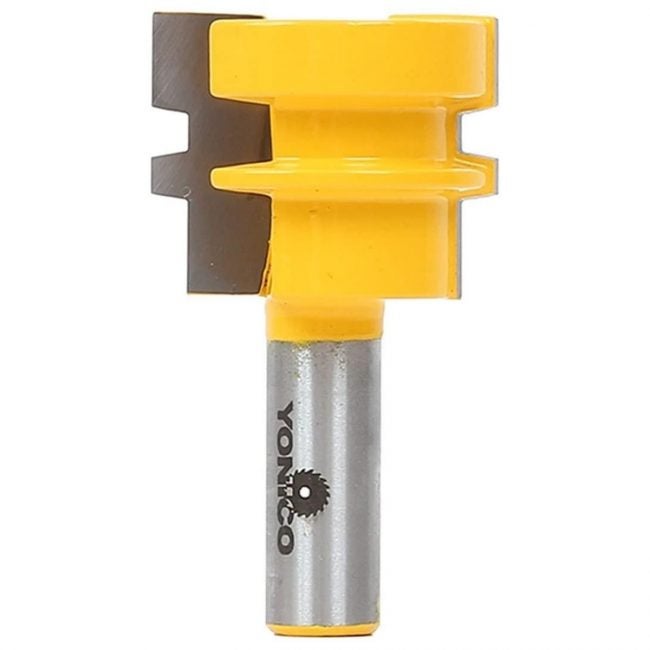
Joinery bits: Used to cut profiles into wood for jointing boards.
Changing Bits
click/tap to expand
-
Isolate the tool power - Unplug it first
-
If changing the bit directly after use, wait a few minutes for the cutter to cool down as they get very hot after use. Dropping them can damage the cutters and the bearings.
-
Lock the spindle using either a spanner or the built-in locking mechanism. Once locked, use the assigned spanner (22mm) to slacken the collet and remove the bit (collet should grab the steel bit). DO NOT oil the collet. If It’s difficult to remove the bit, ensure you have completely loosened the collet.
- Our MOF 177E is fitted with a self-releasing collet, meaning the collet nut will essentially require you to loosen it twice before being able to remove the router bit.
-
Regularly check to see if the collet is clean and clear of dust. If the router collet has scoring on the inside, contact the @woodtechs as the collet needs replacing and will damage the router bits if used. You can clean a dirty collet with an alcohol based solvent. e.g, mineral spirits. DO NOT use an oil to remove a stuck router bit. This will severely damage the router.
-
if removing and re-installing the collets on the Elu routers - they need to pop into the locking nut.
-
Make sure the bit you’re using has all its parts before cutting. If you’re using a bearing bit, make sure the bearing is tightened and its clearance is correct for your application.
-
Insert the correct bit for the machine. Our ELU MOF177 uses a ½” bit, while the ELU MOF96 uses a ¼”. Make sure you DO NOT go past the K mark on the router shank. Anything above the K mark isn’t guaranteed as square.
-
if the bit does not fit easily into the collet, don’t force it. confirm the collet is not dirty or broken.
-
Once you have chosen the desired bit, insert about half the shank into the collet, DO NOT push it all the way in. Tighten to the correct torque by finger tightening plus ¼ turn of a spanner. Don’t insert past the installation mark on the bit.
-
Finally, with the tool away from all surfaces, turn it on to ensure the bit is securely held before taking it to your piece of wood.
** Some router bits have different sized bearings that can be changed depending on the depth of cut needed (See groove/rabbet bits above). To change a bearing, remove the screw holding it to the shaft, change it to the correct size and retighten the screw. DO NOT drop the screw as it’s easily lost. If you notice a missing screw, please alert the @woodtechs who can order new ones.
How to set the Fence
click/tap to expand
The fence is set by sliding the two metal rods through the body of the router. These are locked off using two spring-loaded wingnuts. The fence can be used on either side of the router, depending on the direction of the cut. Always use a fence with a push-cut as the router fence is pulled towards the wood.
How to set the depth stop for plunge cuts
click/tap to expand
Using a depth stop allows you to make controlled passes until you reach the desired depth of cut.
In order to set the depth stop, follow this procedure:
- Set the tool to bottom flush
- drop depth gauge to top of turret
- Lock it down
- Set cursor to 0
- Loosen gauge - set cut of depth wanted
If you are starting the cut within the board, ensure you are using a plunge bit. Starting the cut outside the board allows you to use most of the non-bearing bits with a depth stop.
Making the Cut
click/tap to expand
Follow these steps when it’s time to make your cut
- Ensure you have adhered to the correct PPE procedure
- Ensure dust extraction is ready and in place.
- Check bit size/router speed
- Set depth stops
- Adjust fence. Make sure all nuts are tightened when in use and when not in use.
- Check your piece is secured to an immoveable object
- Watch out for the starting kick – Old routers don’t have soft start
- Be mindful of feed rate
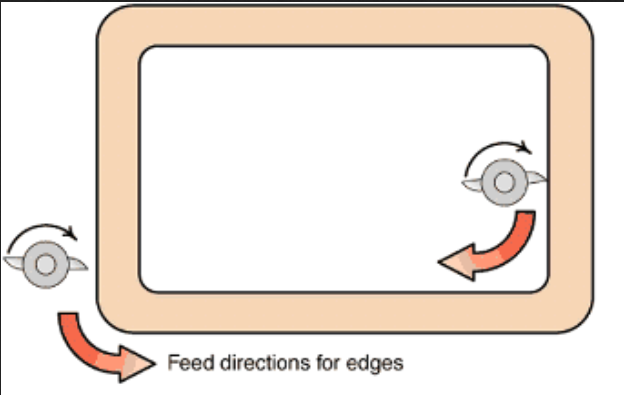
- Direction of cut – Always work from left to right to ensure you’re always push cutting. When you’re cutting internal edges, work from right to left. A quick way to check which direction to cut; make a fist palm down, extend index finger and thumb of your right hand. With your right palm down and your thumb pointing towards the edge, your index finger will point in the direction you need to cut.
- !!! this is extremely important for safe operation of the router. If you do not completely understand this concept, there are videos linked at the bottom of the page to review.
Start away from the material - no contact until router is at full speed - Two hands on the router at all times when starting it and adjusting speed.
Two types of cuts: push-cut and climb cut. (https://www.youtube.com/watch?v=mrE4HyXiwqs)
Push cut – This is the preferred method for routing. It cuts into the wood while pulling the router bit into the workpiece and should be used with a guided bearing or fence. With this cut, the bit is lifting the fibres of the wood which can cause splintering if too deep or aggressive a cut is taken.
Climb cut – This cut pulls the bit out from the wood. Instead of lifting the fibres, it shears the fibres. This cut should only be used for final passes along an edge or to enter/exit a cut, which helps stop blow out.
- Not as controlled as a push cut, cutter can wander and take its own path through the wood. Can be used to stop break-out when starting or exiting a cut. It is inherently more difficult to control the router while climb cutting; ensure you are very stable when climb cutting, only climb cut for a light final pass, or at the start of a cut to prevent tear out.
Very little force is required to cut with a router, if working correctly. Listen to the sound of the machine, you’ll be able to tell if you’re overloading the machine. Common overloading situations are taking too deep a cut, a fast feed rate and blunt cutters.
If you see/smell burning, STOP! Make sure that you haven’t sucked any embers into the extractor. Adjust your feed rate (make faster passes), and make sure you’re using the appropriate spindle speed (slow it down). If you can’t get rid of scorch marks, the bit is likely dull, notify @woodtechs
Once your cut is done:
- Make sure the spindle stops spinning before putting the router down.
- If your cut hasn’t exited the piece of wood, ensure the spindle comes to a complete stop before lifting the router out of the cut. This will avoid damage to your workpiece.
- Dust extraction is turned off
- Sweep the floor if a lot of dust has been created. Sawdust on the floor is a safety hazard.
Template Cutting
click/tap to expand
There are two types of flush trim bits, one that has a bearing on the top or bottom and the other that has a bearing on both sides. Template cutting isn’t limited to flush trim cuts, but this is one of the main uses.
Before cutting with a template make sure:
- The correct router bit is installed
- You adequately fix the template to your piece of timber. This can be done with clamps, double sided tape, screws, or nails. Do not use a template that is held in place by your hand.
- Make sure the bearing will contact your template. Thicker pieces of wood may require multiple passes to get the depth required.
- If using a bottom bearing, ensure the bearing and screw won’t foul anything along the line of the cut
- If using a top bearing, ensure your router bit isn’t fouling the table. Your workpiece should be raised above the bench with a clear space between the bottom of your timber and the bench.
- Follow the same method for checking direction of cut.
Considerations for cutting:
-
In cut - clockwise, out cut - anticlockwise:
-
Depth and feed rate should depend on the cutter. Rule of thumb is 5mm passes. More, shallower passes means a nicer finish, and less risk of burning , tear out, or kickback
-
Pin and single flutes, go gentle or they might break, bigger ones you can go more at a time
-
The motor should not labour - don’t go too slow and burn / smoke the wood - check the cutter and put the fire out
-
If you’re getting burn marks, you’re either moving the router too slow, the speed setting is too fast for the bit, or the cutters are blunt.
Maintenance (woodtechs only)
Checking all parts to ensure they are functional and present
References
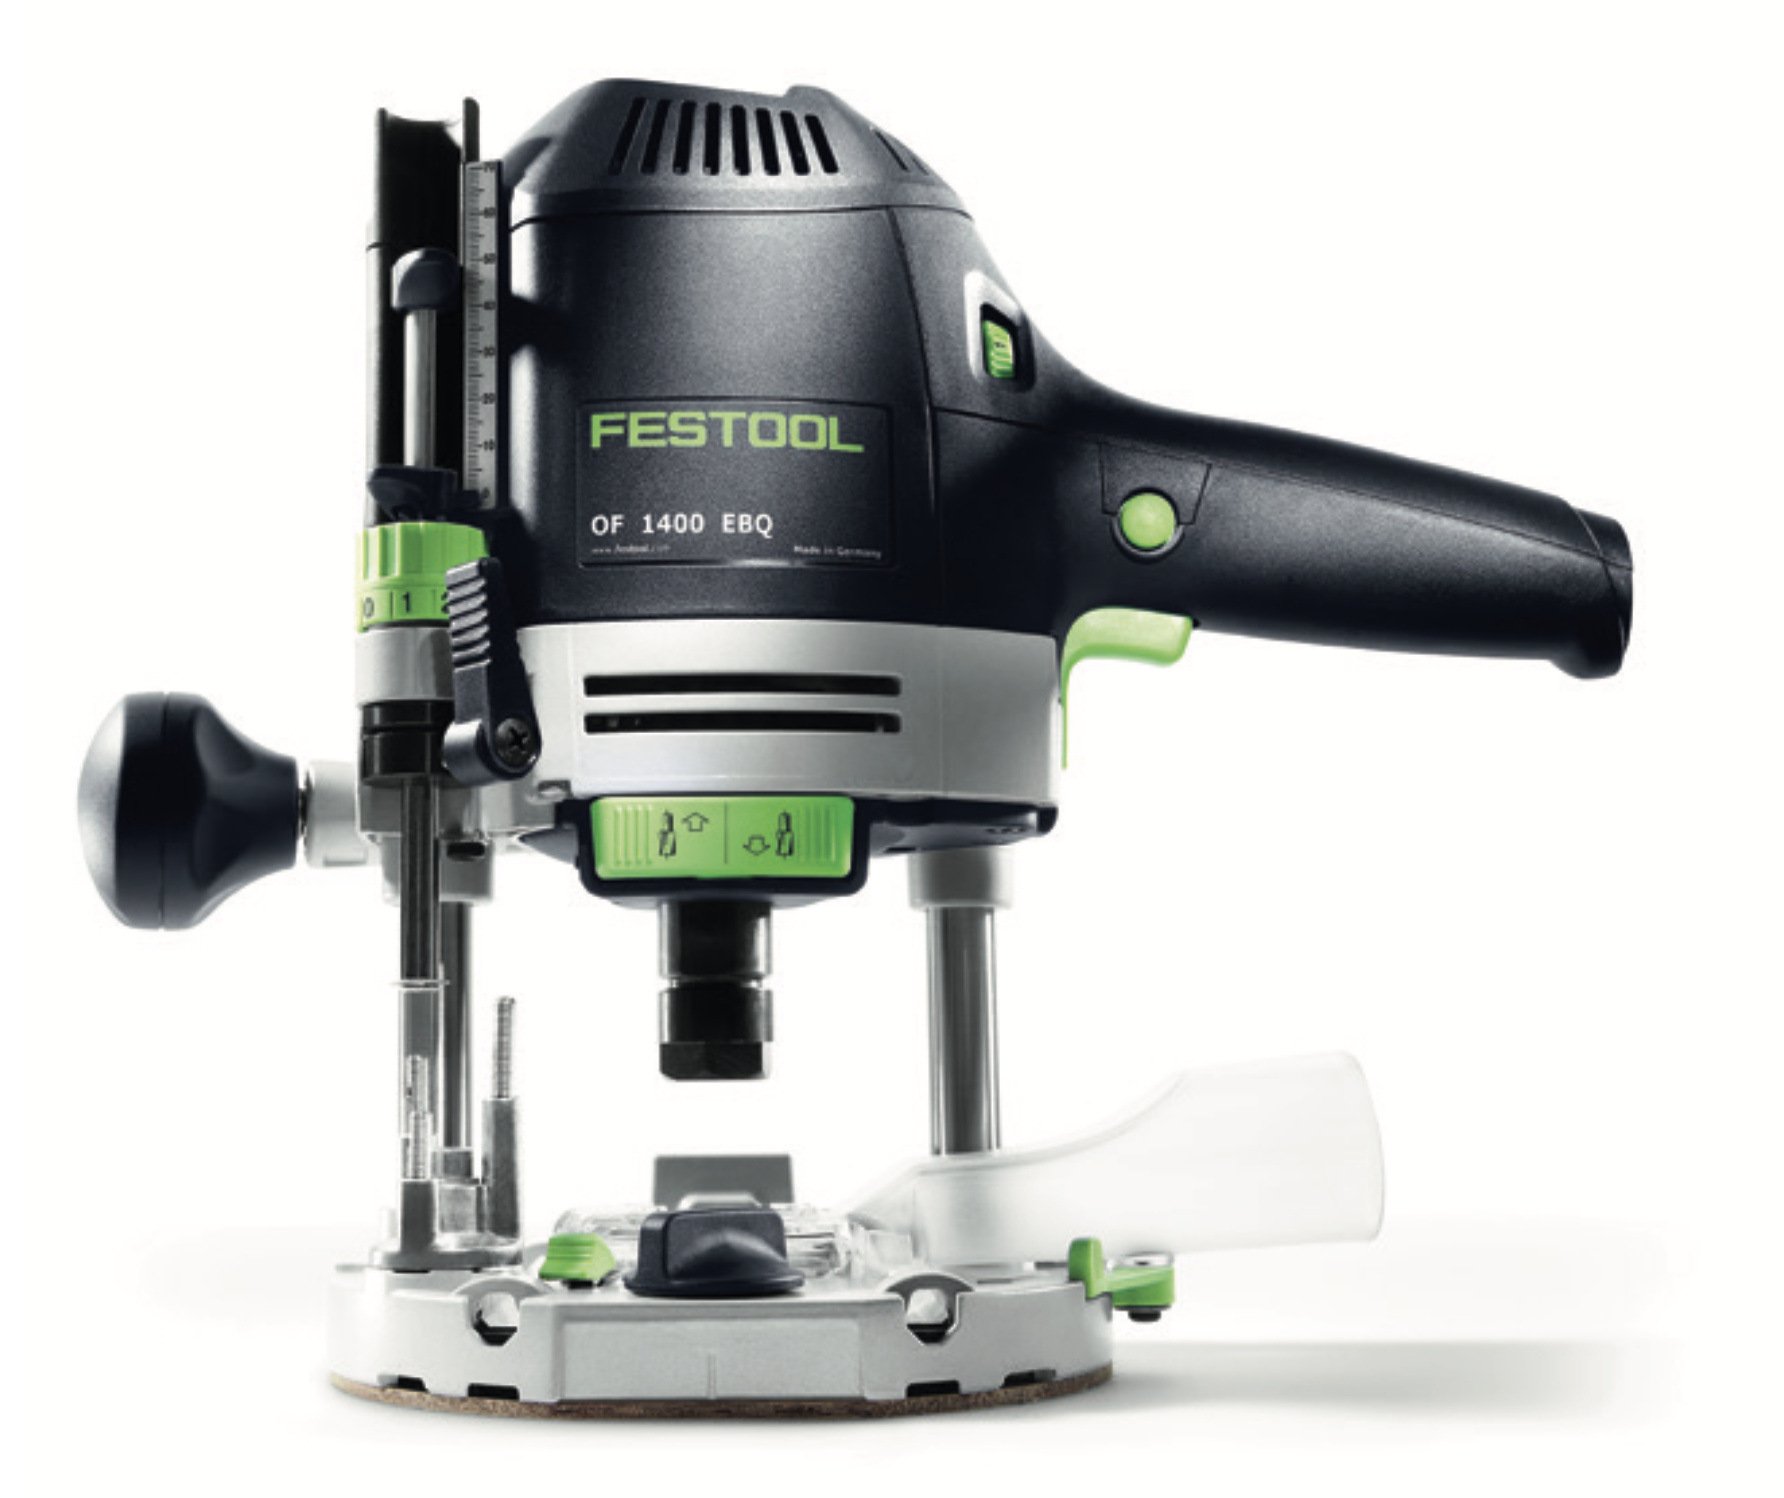
OF 1400 Router Supplemental Manual (2.2 MB)
Original Instructions (532.8 KB)
Videos:
Router Safety - New Brit Workshop - Please watch this. Explains very clearly the direction you want to make a cut in, as well as a practical demonstration of why.
Which way do you cut with a router? Is climb-cutting safe? When and how do you do it?