
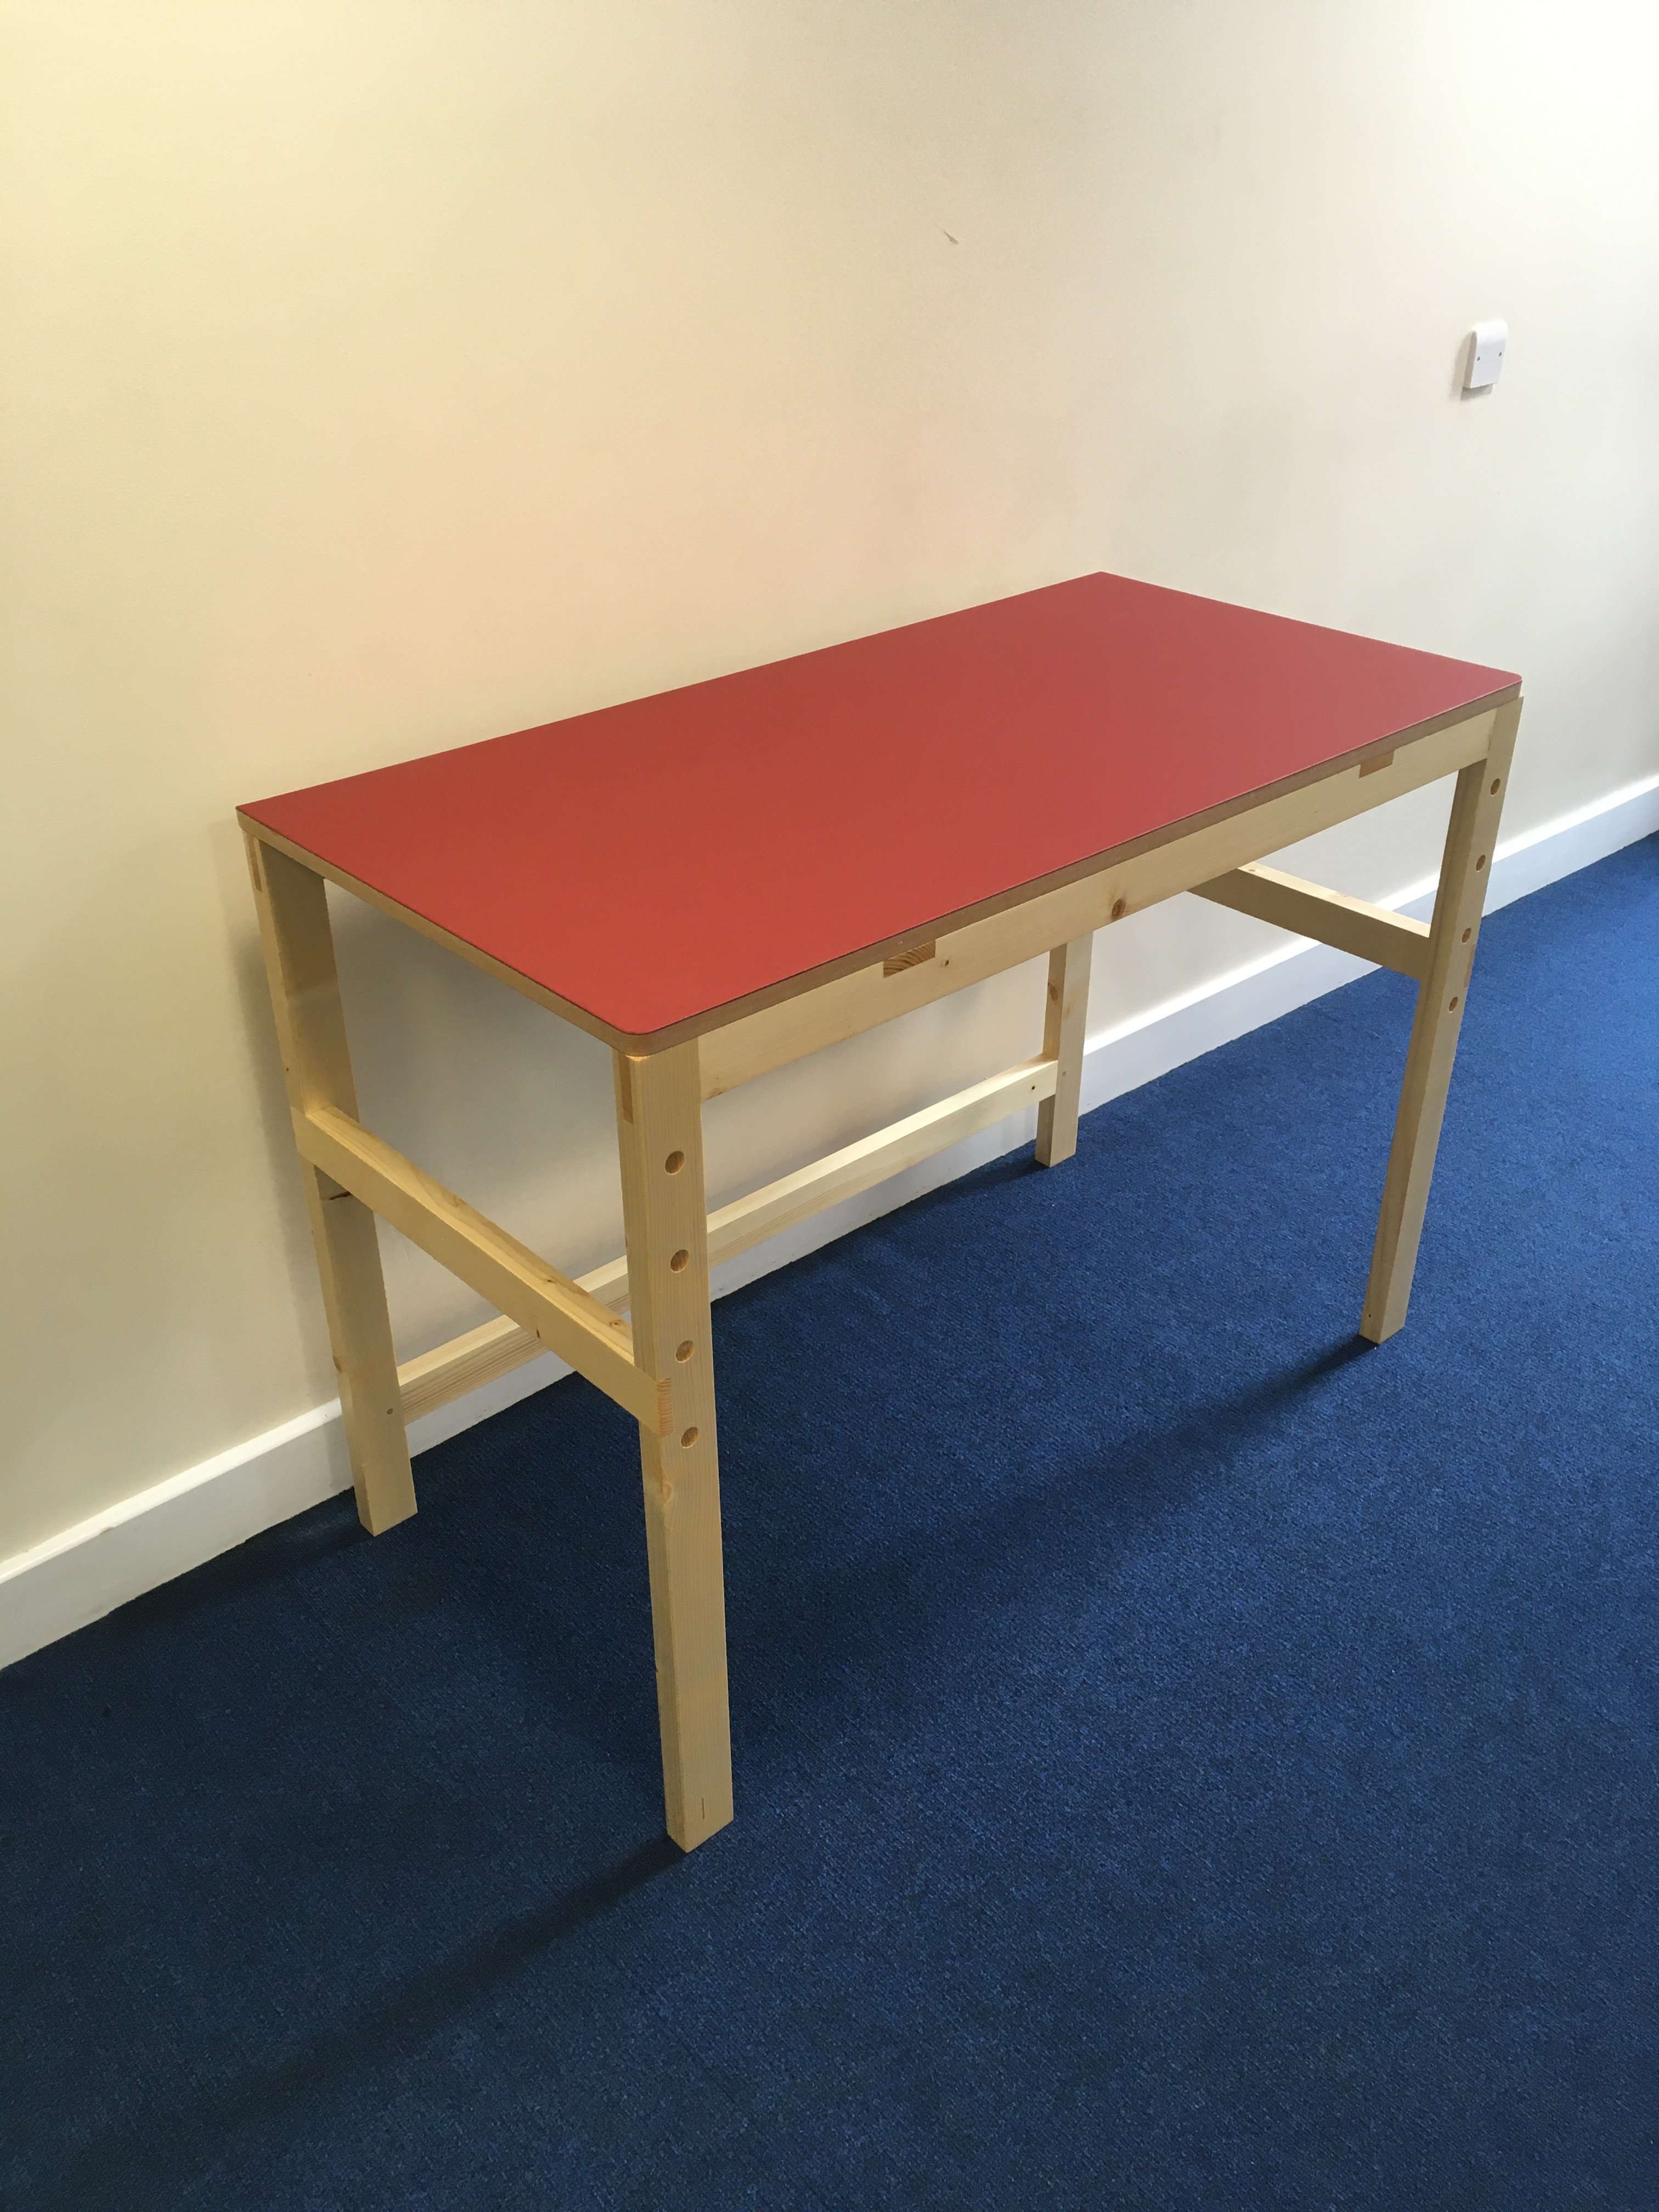
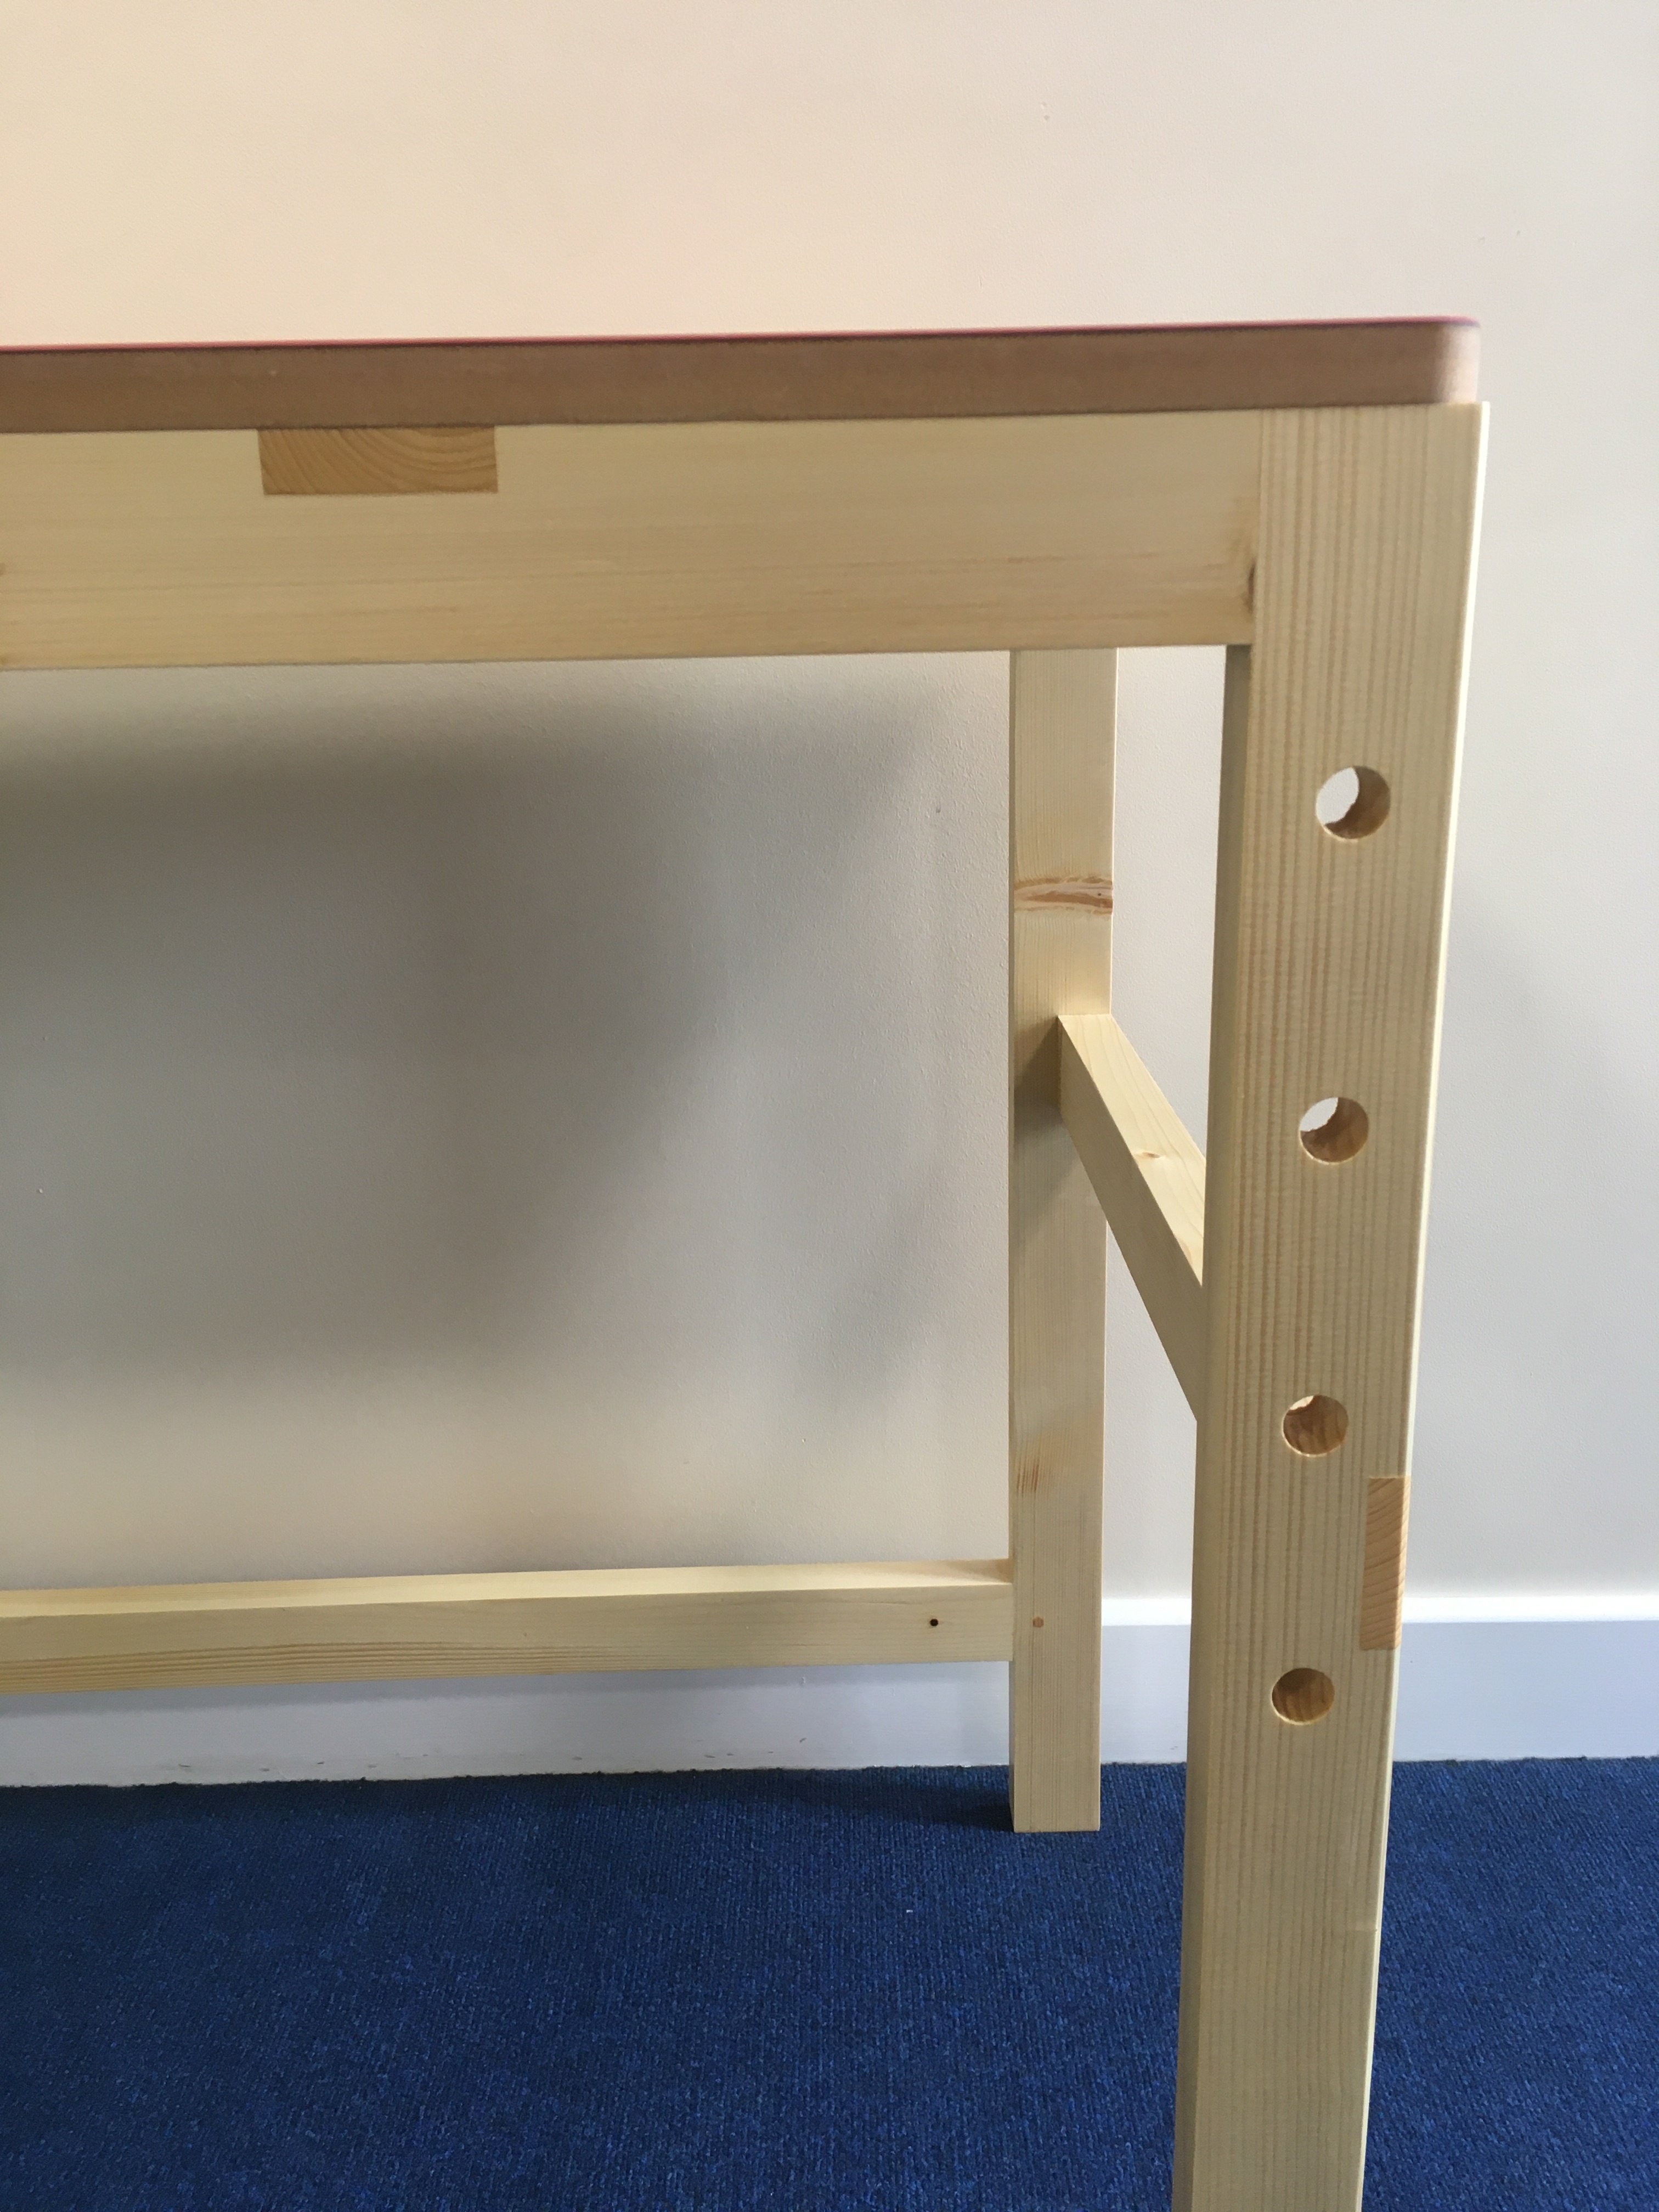
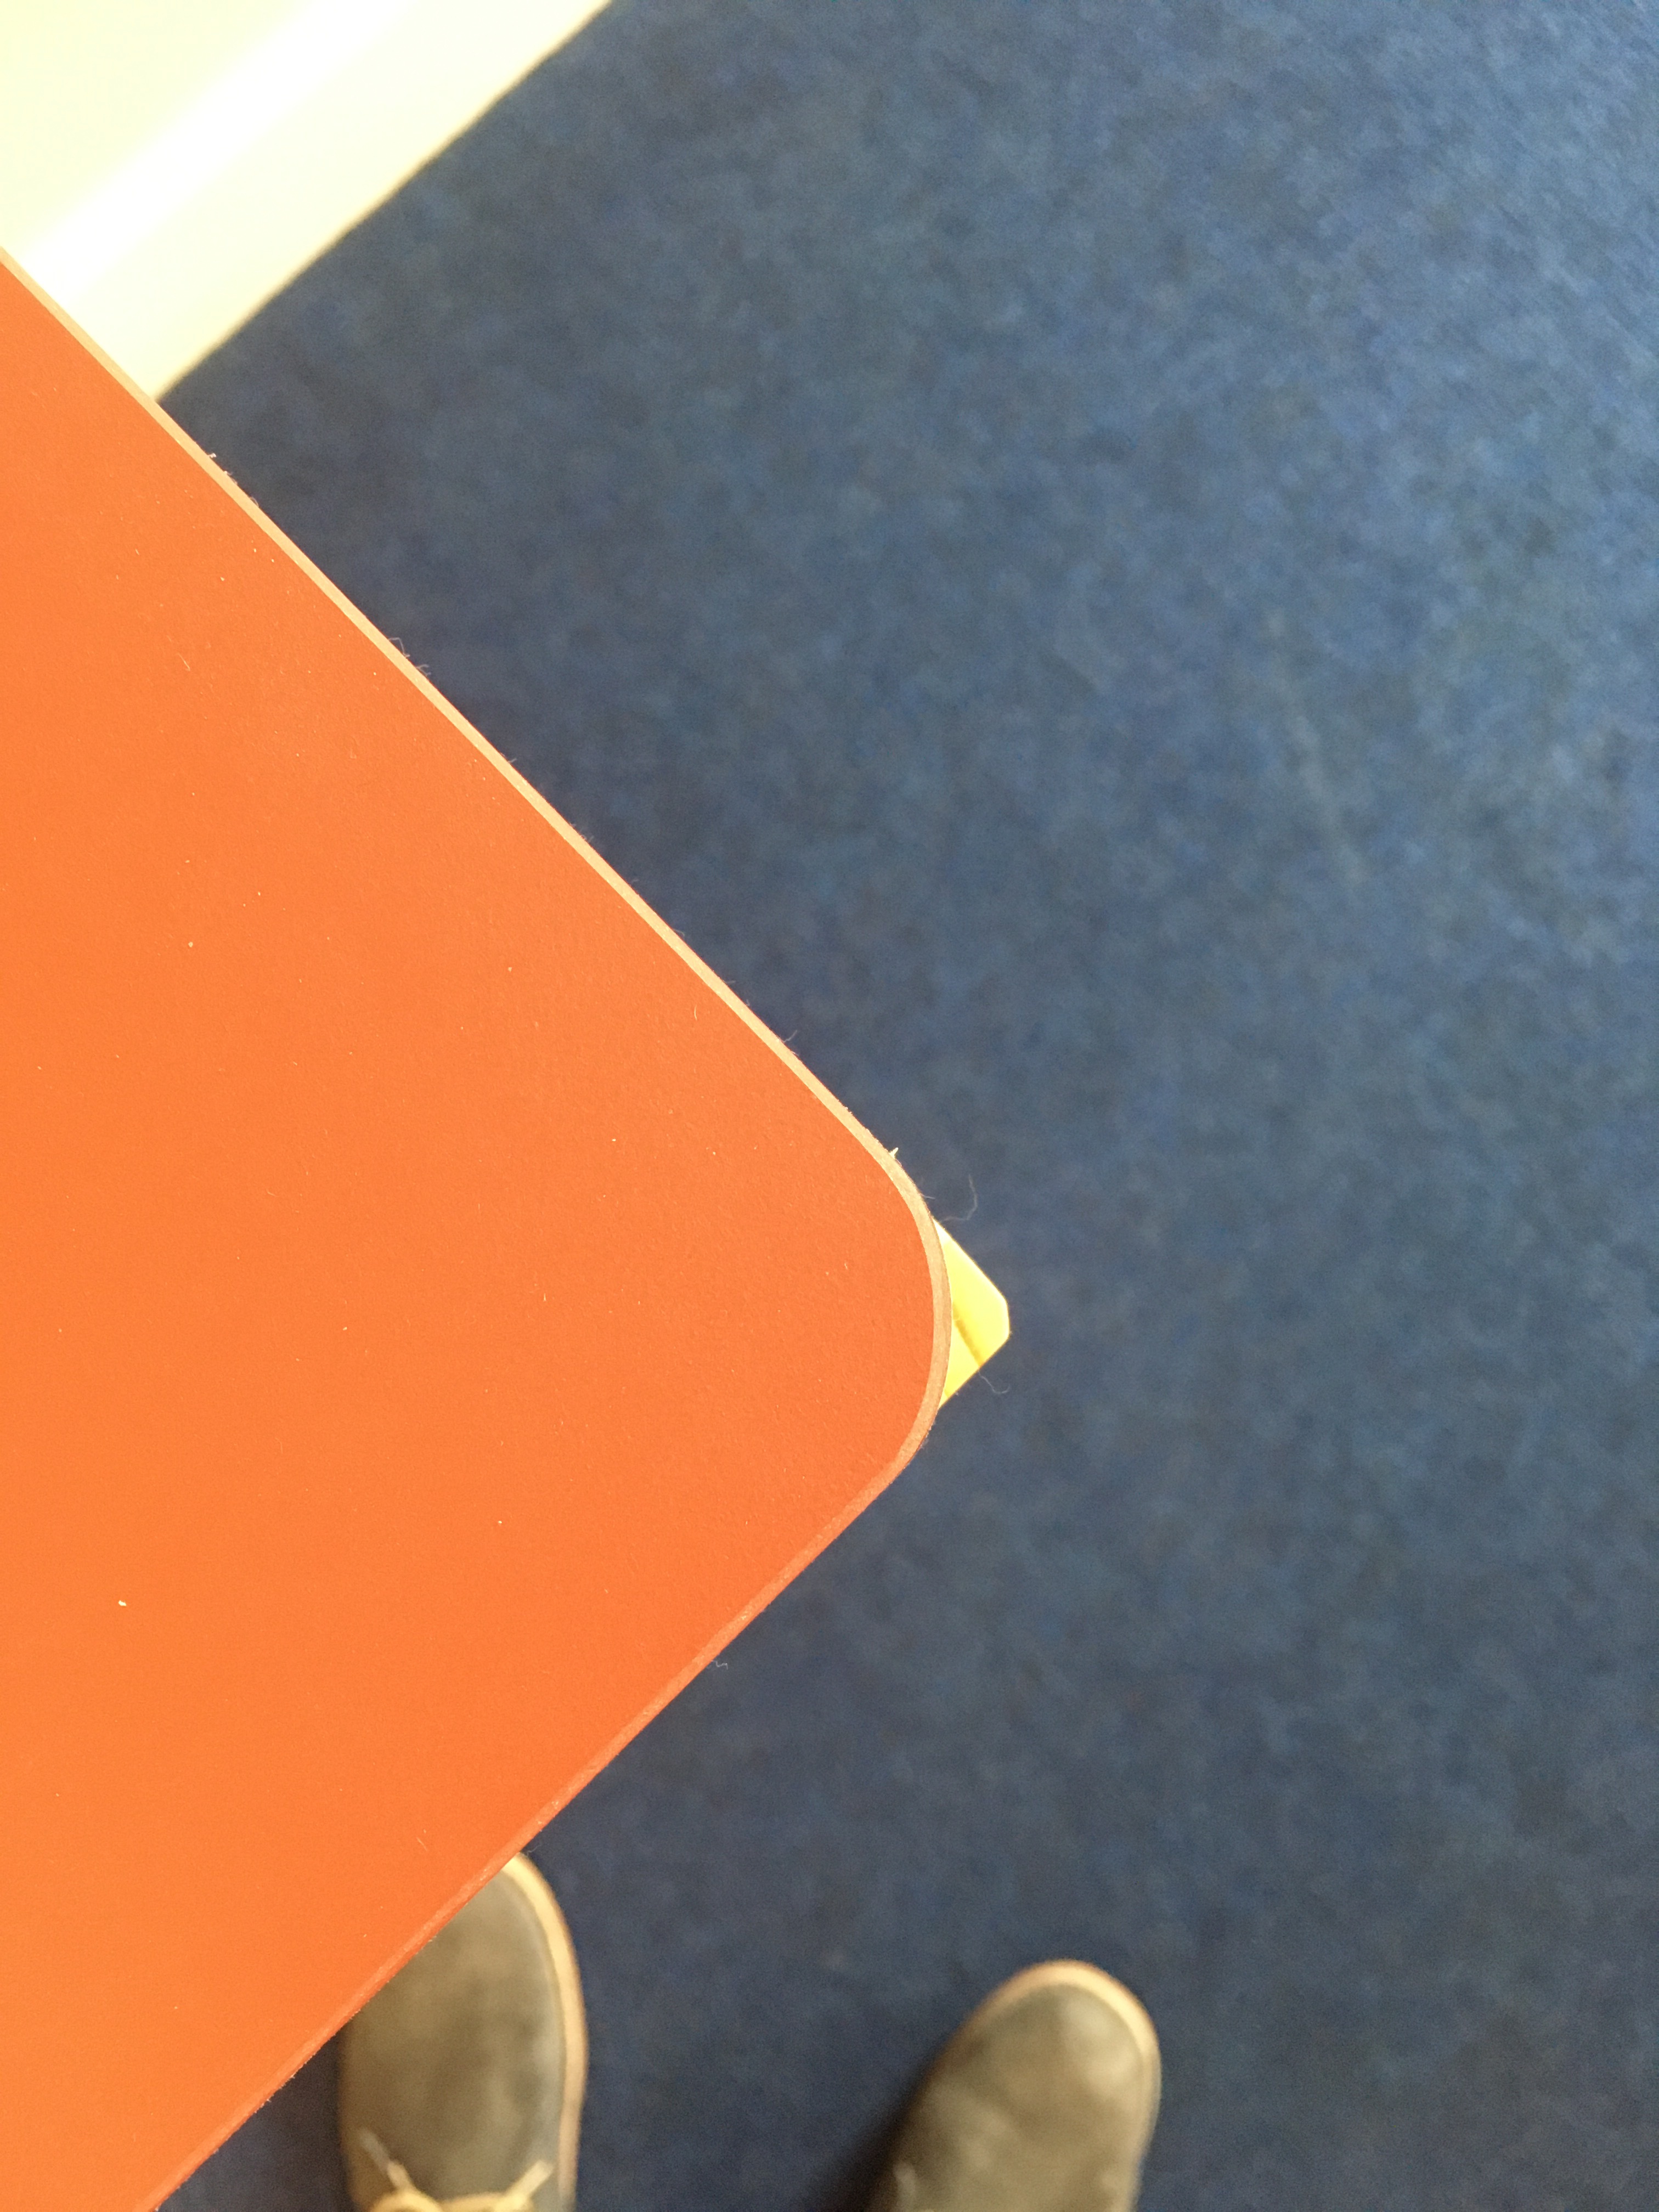
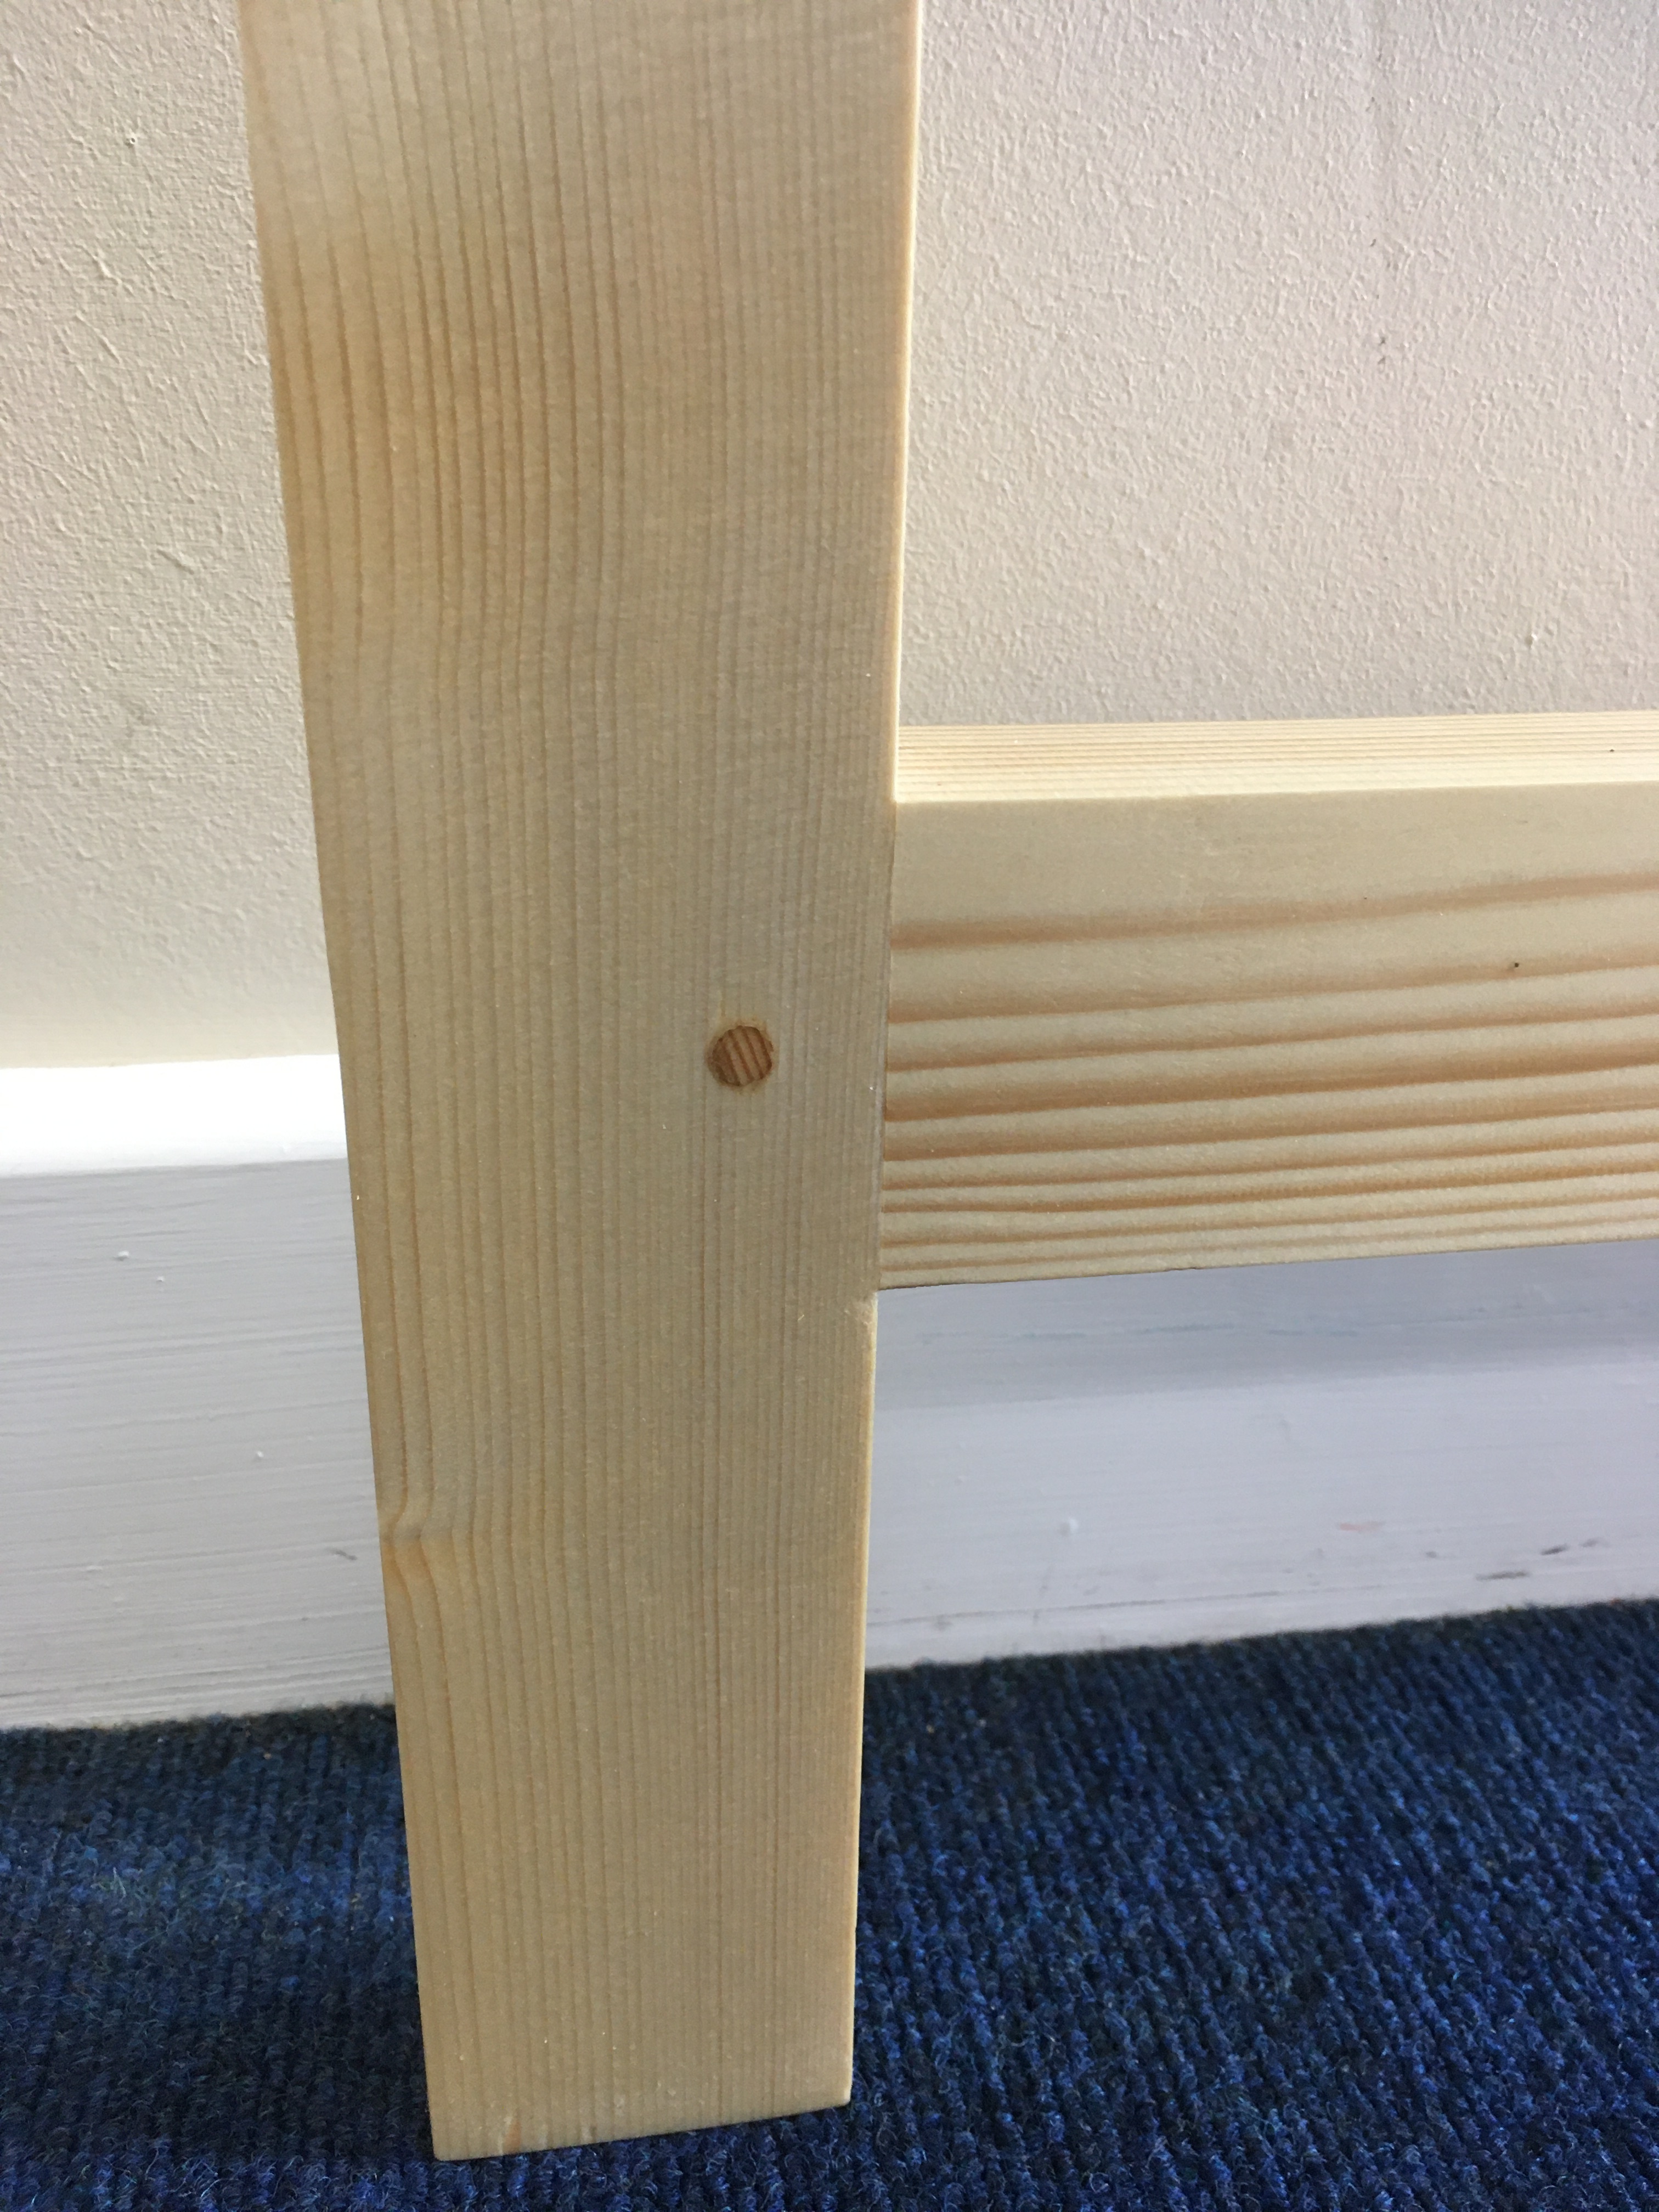
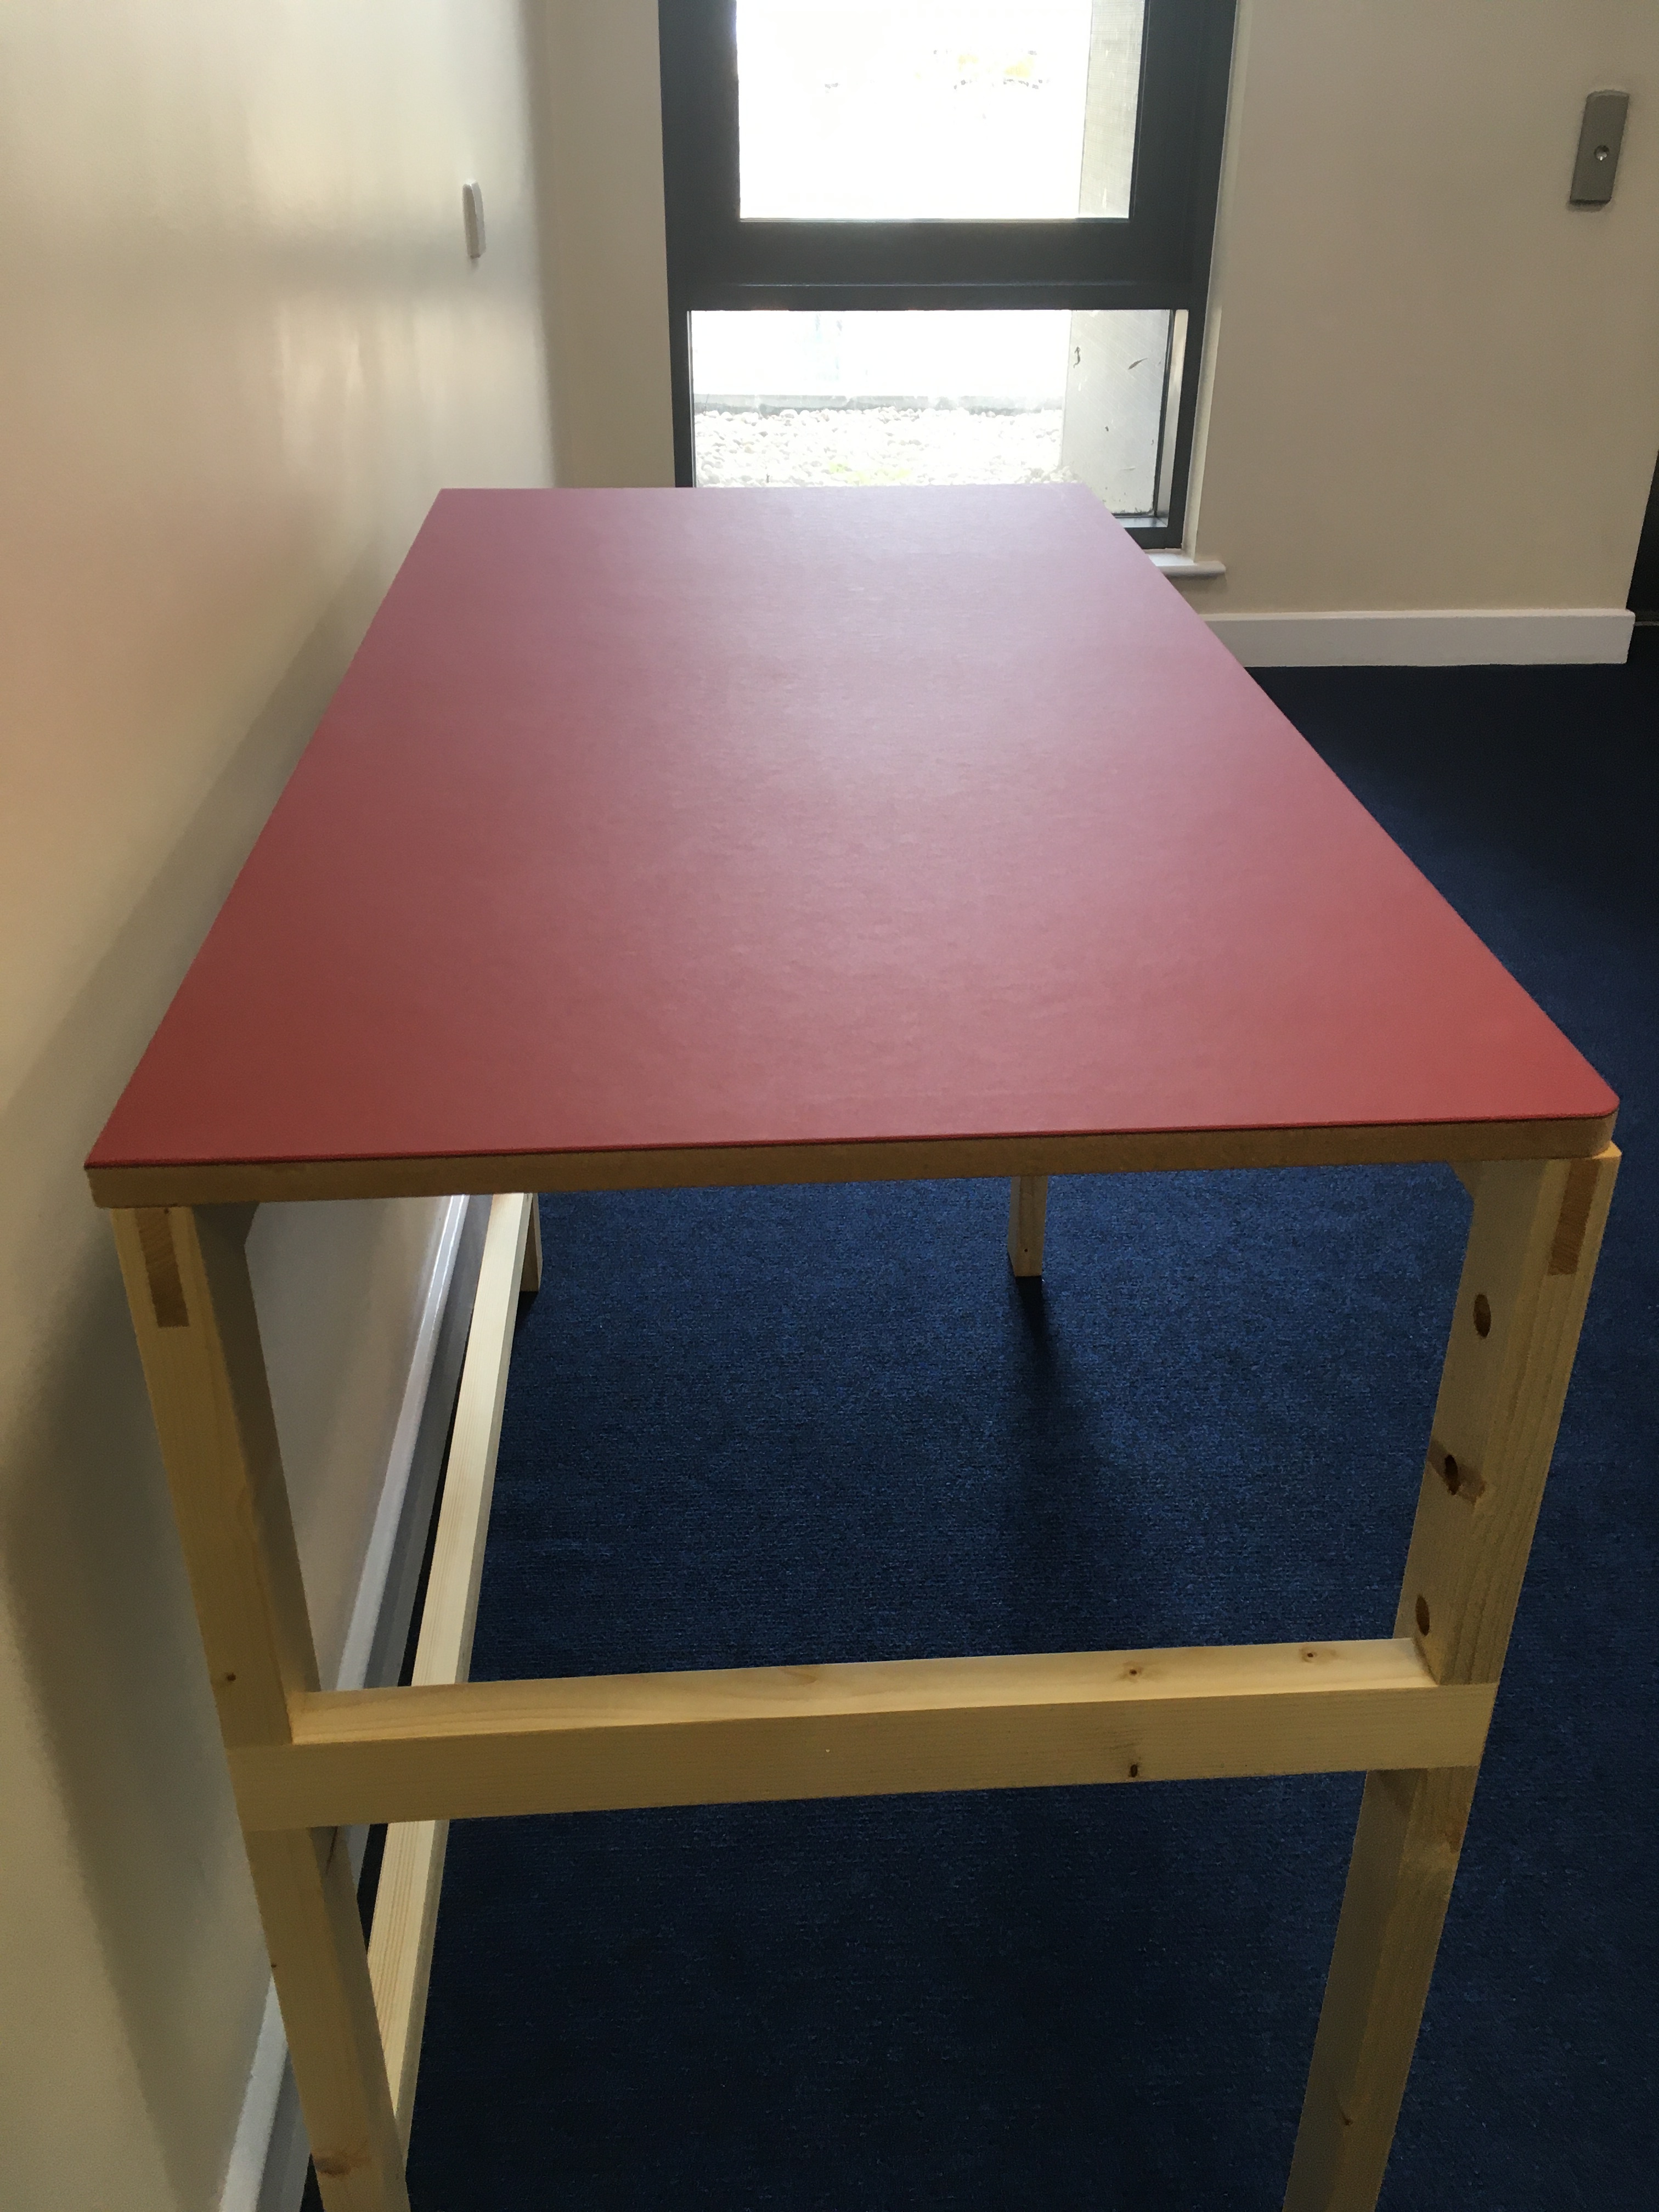
I desperately needed somewhere to put stuff whilst I work in my flat so I decided upon this table. It’s for layouts, detail work, glue ups, finishing, cutting veneers etc; by putting holes in the legs I can easily joint boards. The top is four feet by two feet and it’s covered in forbo desktop vinyl. I wanted it free of obstruction underneath so I could utilise the space. It’s 35 inches high and it is incredible what a difference the extra height makes over a regular table; work is at a more comfortable height, sitting or standing. Whatever you do you should never do what I did and make a piece of furniture from construction grade lumber, ( I have done it several times, never again) I used studs. You will save no money over furniture grade wood, between the wastage, removing the corner radius and the amount of time it takes to get a reasonable finish with no tear out. As well as being the lowest quality timber it’s as soft as tissue and this will also add to the difficulty ( I don’t drive and had to transport the wood several times on a two hour plus bus ride, nightmare with such soft wood). I have finally learned my lesson, I could have bought clear southern yellow pine for the same money I spent on the cls studs; yellow pine is harder and a pleasure to work, cls studs are not a pleasure to work! I reckon I doubled the work load by using studs. I entered this into a competition at Axminster tools and in the rush to get it finished I had no time to do a test with the vinyl. I checked the data sheet and it said to use pva which I did. I was very sceptical about success and pretty much everything went wrong from the first moment. Despite doing a dry run with eight clamps and four sets of cauls, two of my clamps malfunctioned and I thought I had completely ruined 90 quids worth of materials; there was absolutely no squeeze out which I assumed was a bad sign too. It turns out it’s the paper backing absorbing the glue. The black line visible in the photos is the paper/card backing. I expected disaster when I released the clamps and I was extremely surprised to find just one small bubble. I gave it some thought and realised that freshly cured pva can be heat activated. I ironed the bubble flat and then smoothed with a brayer, problem solved. Learning if my design would provide a solid frame could only be known by building the table, I am happy to say it is rock solid. This form can easily be converted into at least two other common pieces of furniture. I really like the visible joinery and the simple aesthetic, I think my love of shaker furniture can be seen in this piece. It looks great, it’s functional and it is going to last a very long time; the top can be replaced, the frame is going nowhere, thanks to the joinery and polymer glue. Interested to hear what other people think.
Assembly table


That is extremely neat
This came out really sharp Giles. Worth all those hours. Why did you round the tabletop corners and not keep them square with the legs? And what was the reason for going with a red vinyl?
Mdf has a habit of breaking on exposed corners, I just liked the round corner too. Same with the red vinyl, it’s practical and I like the look of it, I wanted to use the product and this seemed like a perfect use for it. I like the contrast between the wood and the top.
It’s a lovely piece of furniture. The joints look very smooth and the proportions work with the taller legs.
This is lovely! Simple and elegant lines; beautiful and functional too. You chose a particularly gorgeous colour of vinyl for the top.
Good insight on the choice of wood, too. I’ve used constructional timber in the past, and never really thought too much about the finish, as it wasn’t something I was massively concerned with for the furniture I was making. That said, now you’ve brought this to mind, you’ve got me thinking about this in more detail 
Where do you source the furniture-grade timber from, out of interest?
Also; you said…
Do you mind if I ask how that works? How do the holes help with that - what’s the process?
Cheers - and congrats on a nice piece!
Cheers,
You can put dogs in the holes and then you can clamp either, a length of wood across the whole face of the table or if it’s a short piece of wood, clamp a long length between the two legs with the shorter piece resting on top and clamped to the front rail.
Regarding wood I like Roberts timber at Tottenham Hale. I recently purchased 4 14 foot by 11 1/2 inch by 1 1/2 inch boards of yellow pine for two hundred quid, I cut them down into eight, seven foot pieces. I am building a Nicholson workbench with the yellow pine, I should probably make it my next project. If you have transport English woodlands timber is good, so I am told.
This looks great! I very much agree, the wood/vinyl combo is really pleasing.
Woodworking novice question: are those drawbore tenons on the back legs?
